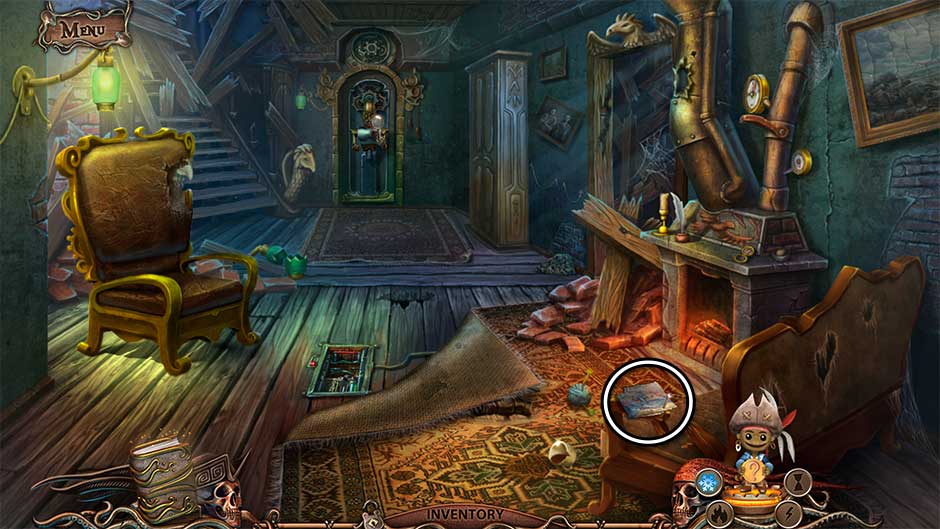
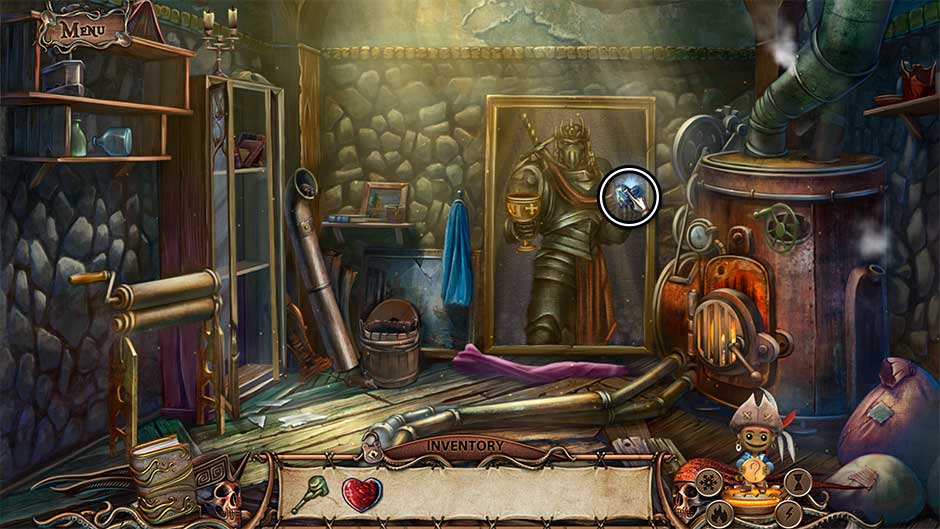
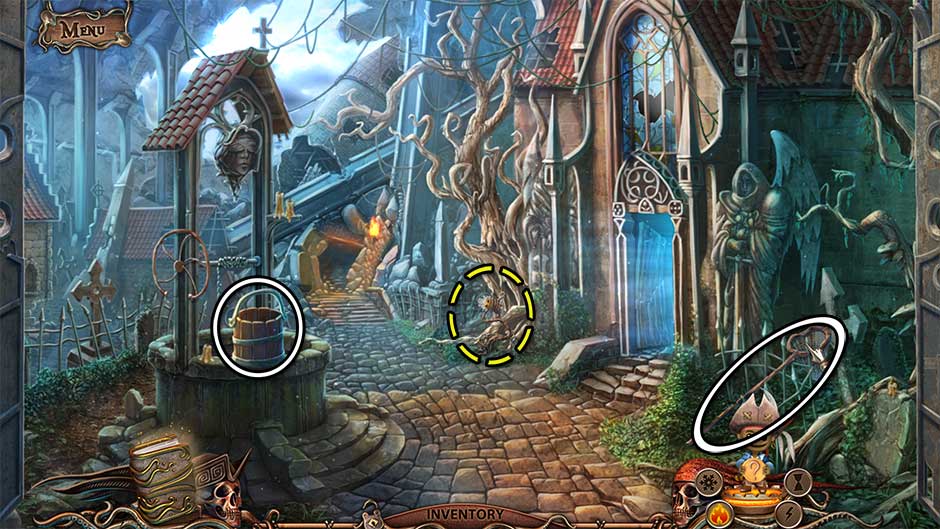
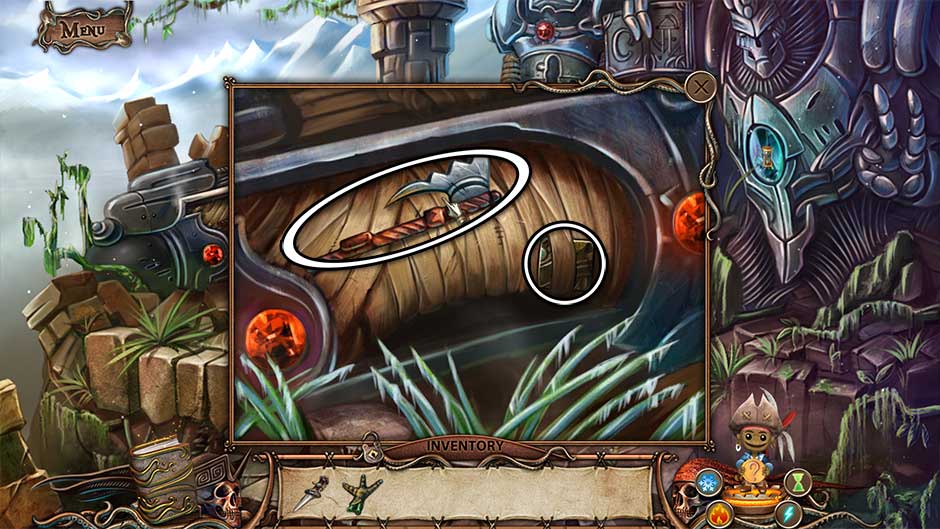
As a famed pirate and corsair, you’ve had many and adventure and seen many a strange thing. But when you embark on a voyage to help find your friend’s son, the journey takes a sinister turn. Embark on an adventure, aided by the mysterious Keepers, to track down and destroy an Ancient Evil once and for all! Our World Keepers – Last Resort walkthrough has all the tips and tricks you need.
Contents
General Tips & Tricks
If you need help getting started, you’ve come to the right place. This section focuses on how to play World Keeper – Last Resort.
- You’ll be able to choose from 3 difficulty modes when starting the game for the first time:
- Regular Mode features Hint and Skip buttons that recharge quickly, all active zones being highlighted, and an additional tutorial.
- Hard Mode features Hint and Skip buttons that recharge slowly. Active zones are highlighted, but there’s no tutorial available.
- Expert Mode features Hint and Skip buttons that recharge very slowly. Active zones are not highlighted and there’s no tutorial.
- Your Journal is located in the lower left corner of your screen. Any clues or important pieces of information you find during the game will be stored here.
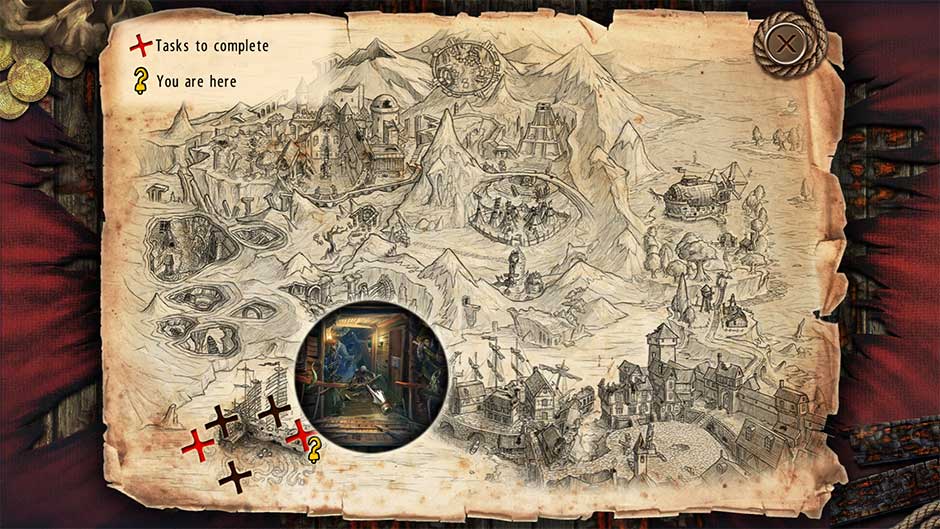
- Once you’ve found the Map, you can use it to view your active goals and quick-travel between locations. To access the Map, click on the Journal, followed by the compass at the top of the Journal. A hook icon will indicate your current location. All locations are marked with an “X”. A red-colored X indicates there are still tasks left to do at that location. To quick-travel, simply select one of the X’s and click on the scene that appears inside the circle.
- The Hint button can be found in the lower right corner of your screen. Once you’ve found the Knowledge Keeper, he will become the caretaker of the Hint button. Click on this any time you need help – whether to find an item or find out where to go next. If the Hint is to travel to another room or location, the Hint will not be spent. However, if a Hint is spent, it will need time to recharge before it can be used again.
- During puzzle, the Hint button will become a Skip button. Once the meter below the button has been filled, click to skip.
- Throughout the game you will recover Keepers – dolls with special abilities. To use a Keeper’s power, select the corresponding icon in the lower right corner of the screen. The Keeper you’ve selected will appear. You can then use your cursor, which will turn into a doll, to indicate where that power should be used.
- Tip: A Keeper often needs a little time before they’ll use their power. Watch them closely. If they’re glowing, they’re getting ready to use that power. If they’re unable to use a power, don’t worry – they’ll let you know!
- Tip: Click and hold during hidden object scenes to drag your screen up and down. It won’t move much, but it may be the little extra you need to find an elusive item.
- Key Items, or Inventory Items are marked in bold in the guide below. Once collected, these items can be found in your inventory, which is located at the bottom of your screen.
- Tip: Click on the lock icon on the inventory bar to lock or unlock your inventory in place!
- Locations are italicized in the guide below. Use these to help yourself navigate our guide with extra ease.
World Keepers – Last Resort Walkthrough
Welcome to the World Keepers – Last Resort Walkthrough! This guide offers step-by-step instructions on how to complete the game from start to finish. If you find yourself struggling with the basics, see our Tips & Tricks section above. For everything else, just dive into the guide below!
Chapter 1: Beginning
Corsair Elizabeth Robinson is embarking on a voyage to help close friend Ethan Brown locate his lost son, Adam. Yet as the seas begin to swell, little do Elizabeth and Ethan know that Adam’s not the only one in trouble..!
Captain’s Cabin
- Click on the tassel in front of the curtains on the right to open them and zoom in on the bed.
- Click on the Key lying on the pillow to add it to your inventory.
- Click on the safe to the right of the door for a closer view.
- Insert the Key into the lock. Click again to turn in the lock. The Key will break.
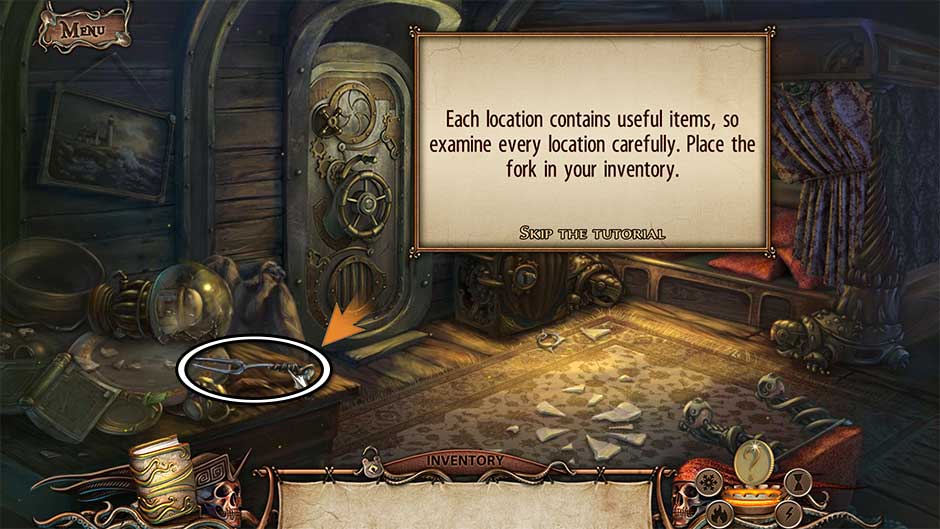
- Collect the Fork sitting on the table on the left.
- Click on the door to open it and proceed forward into the next room.
Passageway
- Open the door at the far end of the passageway and proceed forward to the next location.
Deck
- Examine the crane mechanism on the left.
- Click on the winch to use the crane. It will break before you can remove the broken mast.
- Zoom in on the chest on the right.
- Open the chest and collect the Pliers
- Return to the Captain’s Cabin
Captain’s Cabin
- Take a closer look at the safe again.
- Use the Pliers to remove the broken Key part and open the safe. Collect the Horn and the Winch Handle
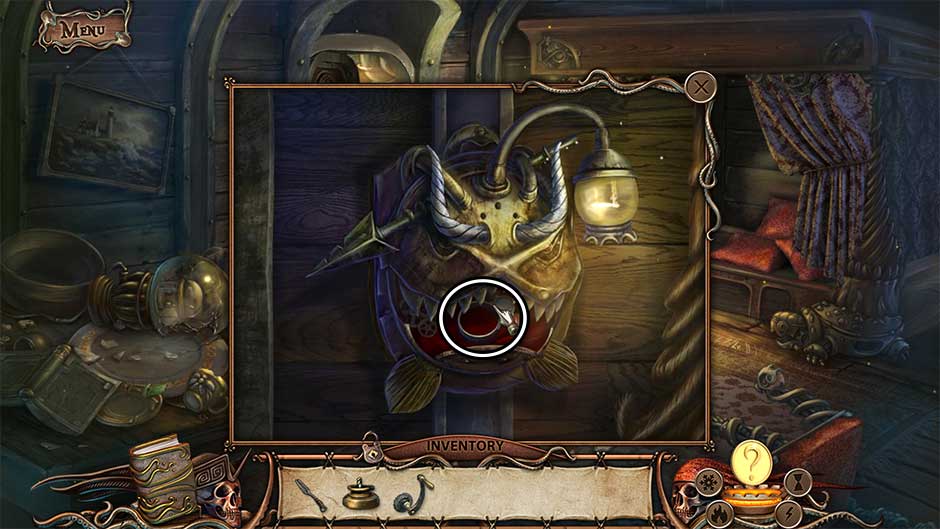
- Examine the angler fish lantern above the safe.
- Insert the Horn into the slot on the fish’s head. Collect the Lens that appears when the fish opens its mouth.
- Return to the Deck.
Deck
- Examine the crane mechanism on the left again.
- Click on the broken winch part to remove it. Replace it with the Winch Handle from your inventory.
- Use the new handle to utilize the crane.
- A rope ladder will appear, allowing you access to the Pirate Ship. Proceed up the rope ladder to the next location.
Pirate Deck
- Examine the lantern sitting on top of the barrel next to the steps.
- Open the lantern casing. You will be returning here later. For now, collect the glass Lantern Part behind the casing.
- Enter through the door on the right.
Flooded Passageway
- Click on the Map in the skeleton’s hand on the right. The Map will be added to your Journal, and will allow you to fast travel between locations. It will also show you where you are, as well as all active areas where tasks still remain to be completed. Click on the Journal, followed by the compass marked “Map” at the top of the screen once open to access it.
- Examine the satchel behind the skeleton in the flooded hallway.
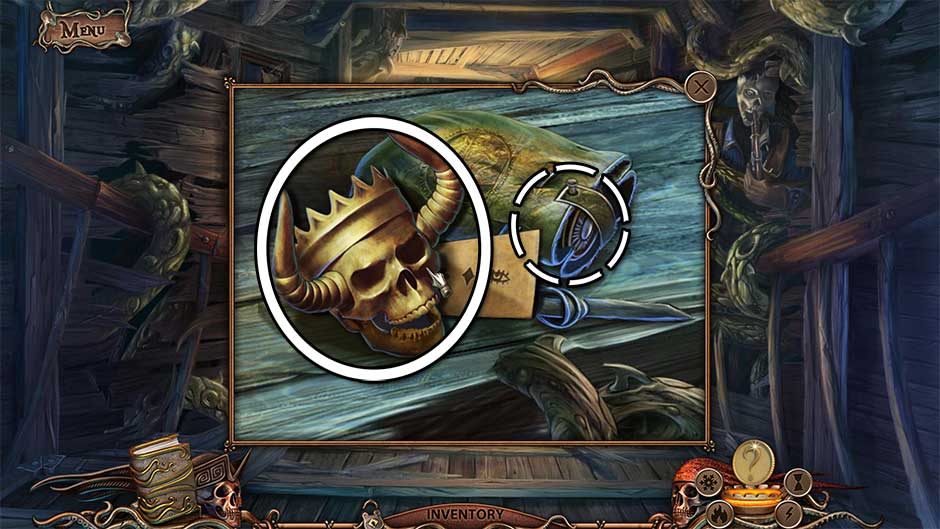
- Click on the Golden Skull and the Roller within the satchel to add them to your inventory. Examine the notecard to add a clue to your Journal.
- Return to the Passageway on your own ship.
Passageway
- Take a closer look at the door on the right.
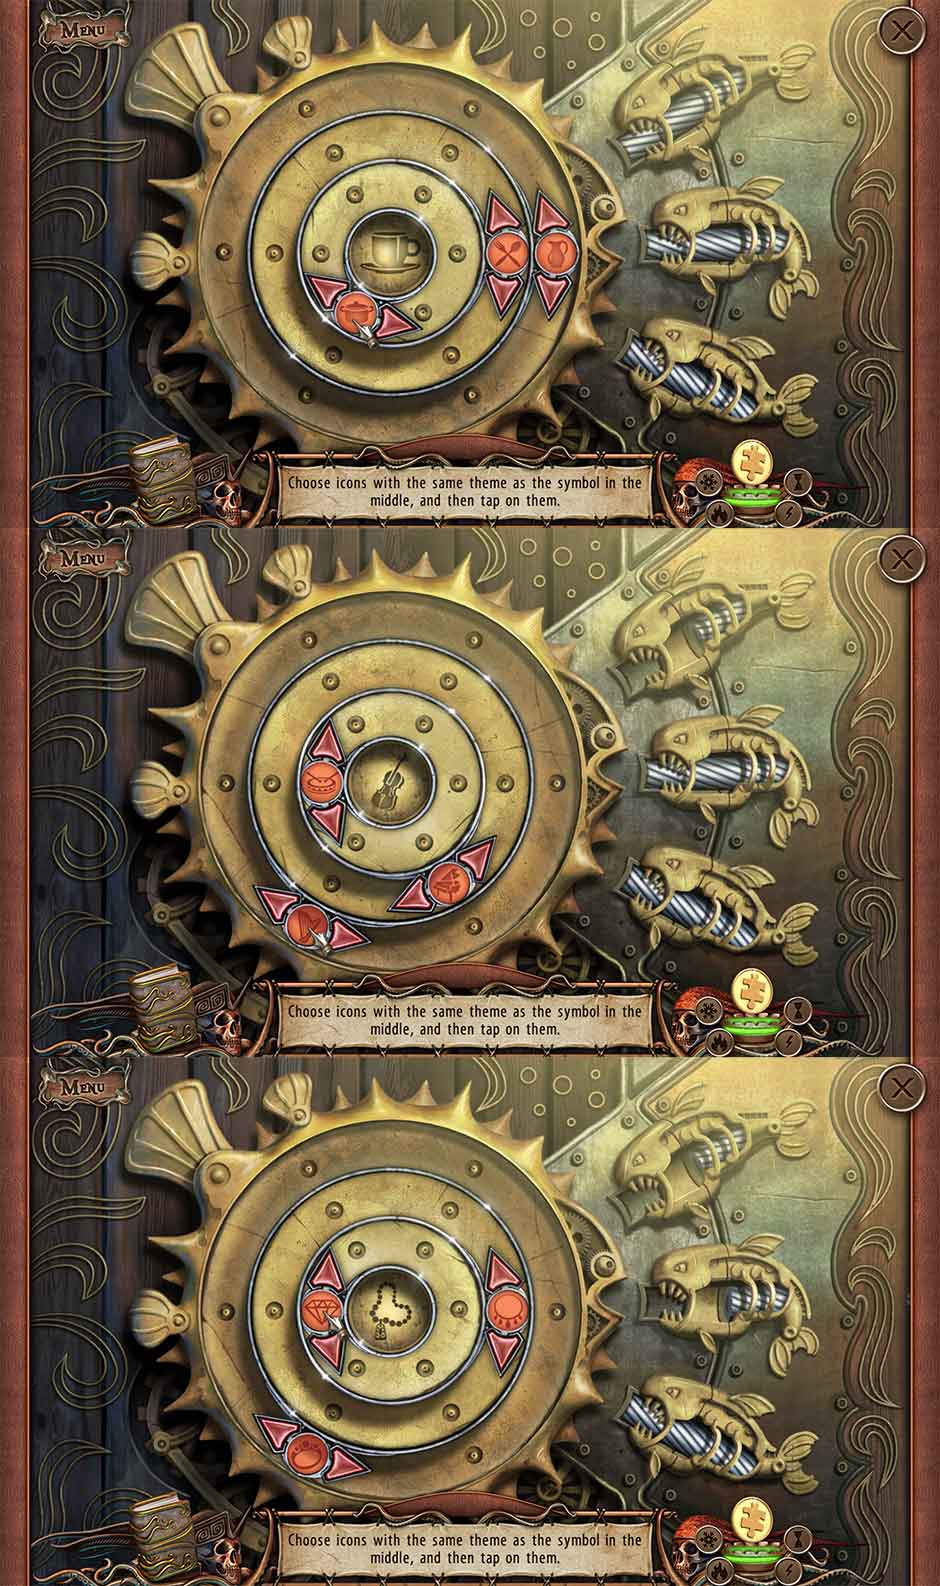
- Place the Lens on the inner ring to trigger a puzzle.
- Choose icons with the same theme as the symbol in the middle, and then tap on them to confirm. Once confirmed, the icon symbol will turn red. Make 3 correct matches to complete the puzzle. Some sample solutions are shown below:
- Upon completing the puzzle, the door will open. Proceed through to the next location.
Ethan’s Cabin
- Click on the chair to turn it around, revealing Ethan’s fate.
- Examine the table at which Ethan is sitting.
- Select the envelope to read its contents, adding additional notes to your Journal.
- Click on the Valve to add it to your inventory.
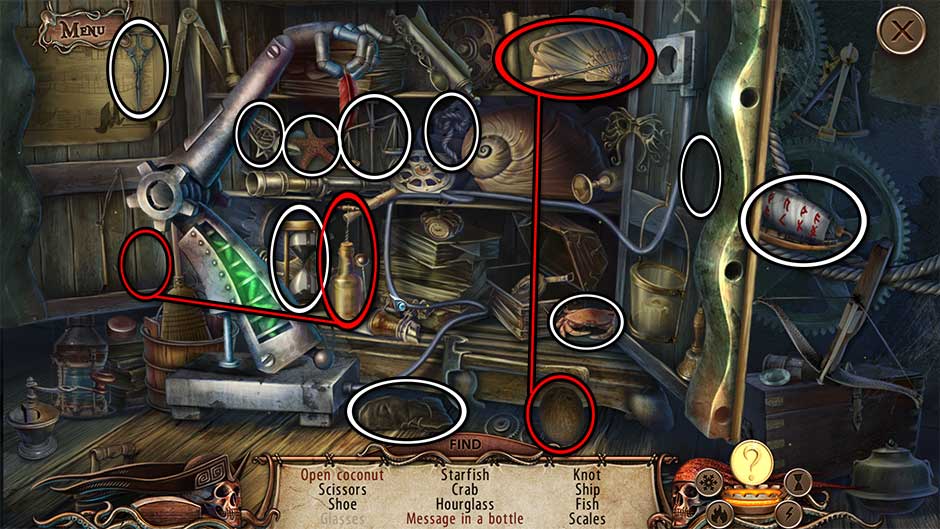
- Click on the cabinet at the back of the room to reveal a hidden object area.
- Find the items listed at the bottom of the screen. Items listed in red require two items be combined in order to result in the item listed. Their locations are shown below.
- Upon completing the hidden object scene, the Ship will be added to your inventory.
- Exit Ethan’s Cabin into the Passageway.
Passageway
- Examine the device on the wall on the left.
- Click on the Lantern Part (2) to add it to your inventory.
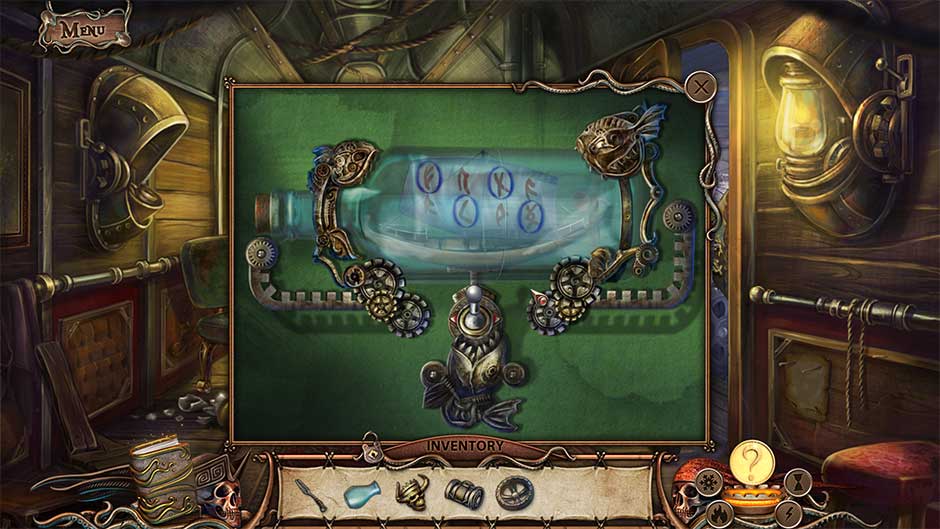
- Zoom in on the bottle mounted on the wall on the right.
- Click on the switch beneath the bottle to open it. Place the Ship on the stand, then flip the switch again. A vital clue will be added to your Journal.
- Enter Ethan’s Cabin again.
Ethan’s Cabin
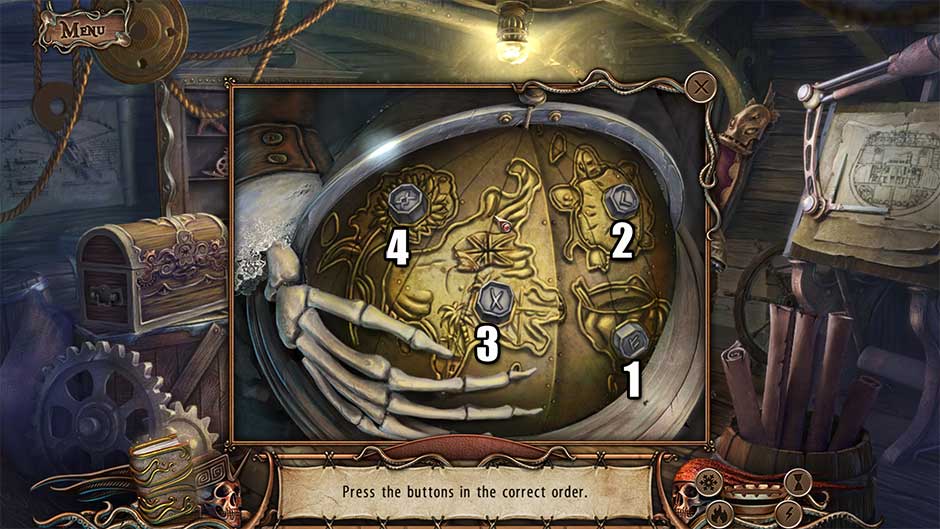
- Take a closer look at the globe in the skeleton’s lap.
- Press the buttons in the correct order to open the globe. Click on the buttons in the order shown in the screenshot below to complete the puzzle.
- Once the globe is open, click on the Mechanical Knife inside to add it to your inventory. You may also choose to look at the note tucked within for an important clue.
- Return to the Deck.
Deck
- Examine the hatch on the floor of the Deck.
- Place the Valve on top of the hatch and click to open it.
- Enter the hatch.
Engine Room
- Take a closer look at the barrel next to the steps ahead.
- Collect the Octopus Key from the top of the barrel.
- Use the Mechanical Knife to open up the top of the barrel.
- Use the Fork to skewer the Fish inside, adding to your inventory.
- The lights will go out. Return to Ethan’s Cabin.
Ethan’s Cabin
- Click on the hidden object area that appears over the cabinet at the back of the room.
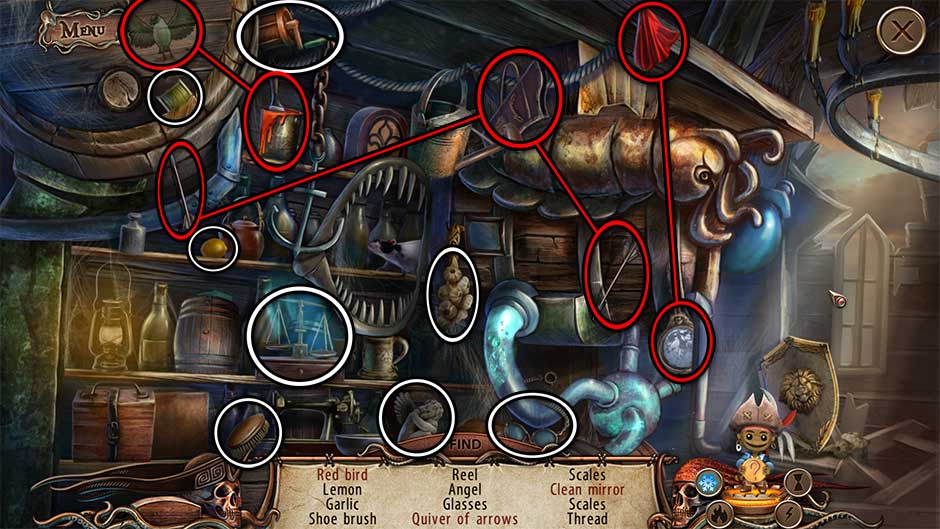
- Find the objects listed at the bottom of your screen. Items listed in red require an additional action to cross off your list. The object locations are shown below.
- Upon completing the hidden object scene, you will acquire the Broom.
- Back in the cabin again, zoom in on the chest on the left.
- Use the Octopus Key to open the chest.
- Collect the Lever inside the chest to add it to your inventory.
- Return to the Pirate Deck.
Pirate Deck
- Take a closer look at the little red crab inside the boat on the left.
- Give the Fish to the crab.
- Collect the Silver Skull and the Ancient Amulet to add them to your inventory.
- Zoom in on the chest in the skeleton’s hands ahead.
- Place the Ancient Amulet in the slot to unlock the chest, then click on it once more to open it.
- Read the letter inside, then collect the Blue Crystal and the Ritual Bowl.
- Enter the Flooded Passageway again.
Flooded Passageway
- Examine the painting hanging on the left wall.
- Use the Broom to sweep away the cobwebs.
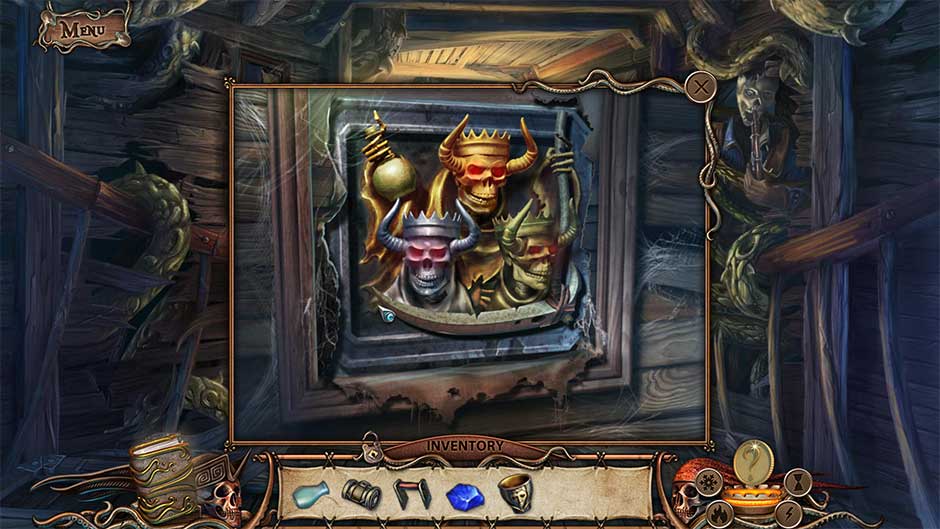
- Place the Golden Skull and the Silver Skull on their respective bodies.
- Cool, you’ve freed the Ice Spirit! Speak with him to learn more. The Ice Spirit can be summoned by clicking the snowflake icon in the lower right corner of the screen.
- Take a closer look at the door on the right.
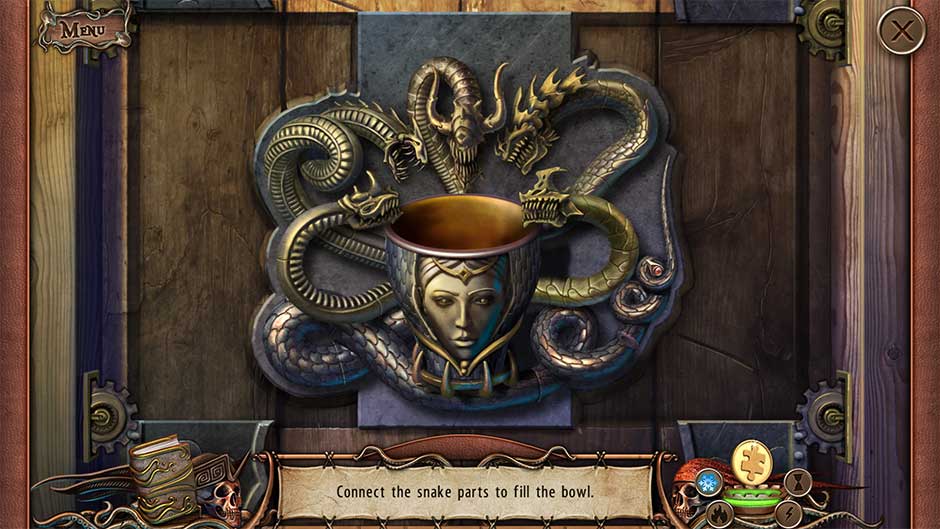
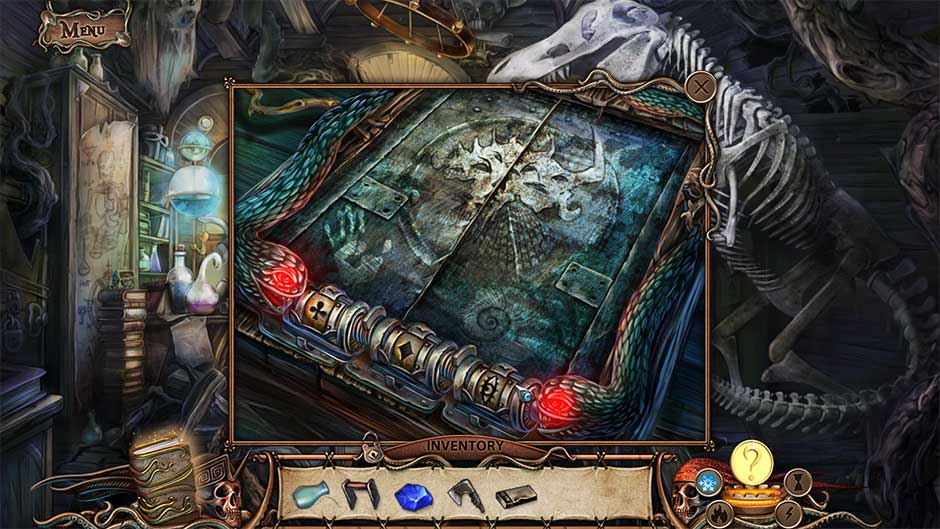
- Place the Ritual Bowl in the slot to trigger a puzzle.
- Connect the snake parts to fill the bowl. Select a piece, then click to place it in its correct location. The completed puzzle solution is pictured below.
- Uh-oh, the skeleton in the center of the passage has been revived! Use the power of the Ice Keeper by clicking on the snowflake icon on the lower right, then click on the skeleton warrior.
- Next, use the power of the Ice Keeper to freeze the tentacles over the door on the right.
- Click on the Axe at the bottom of the screen to add it to your inventory.
- Use the Axe to shatter the frozen tentacles on the right.
- Enter the next room via the door on the right.
Strange Room
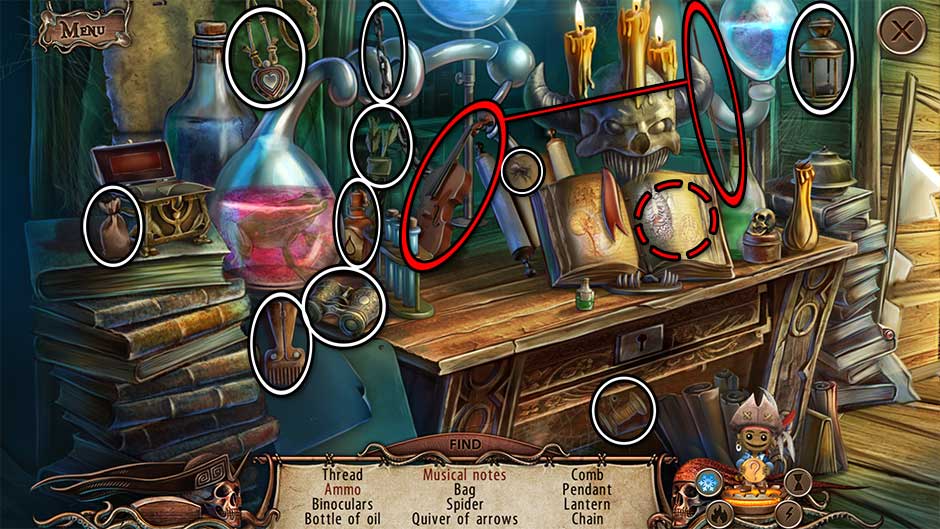
- Click on the hidden object area over the desk on the left.
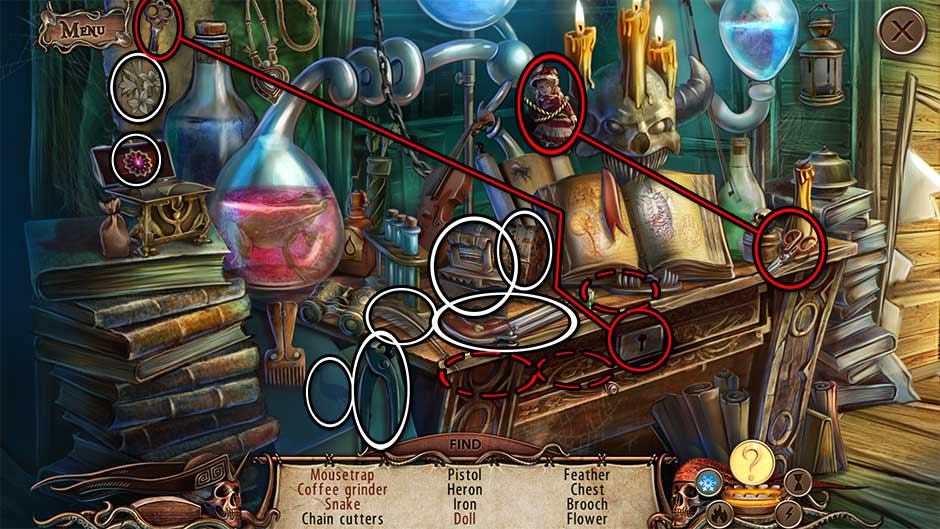
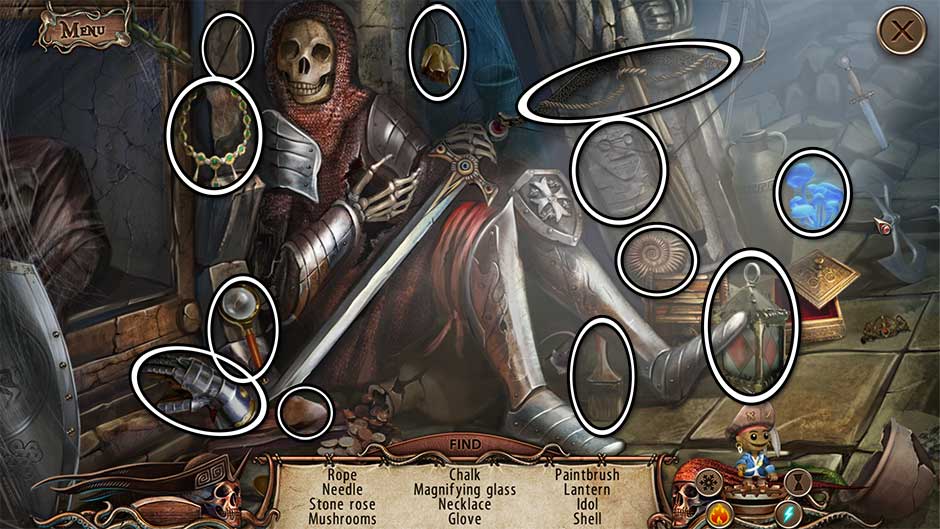
- Find the items listed at the bottom of the screen. Items listed in red need to be combined with another item before they can be crossed off the list. All item locations are shown in the screenshot below.
- Upon finishing the hidden object scene, the Chain Cutters will be added to your inventory.
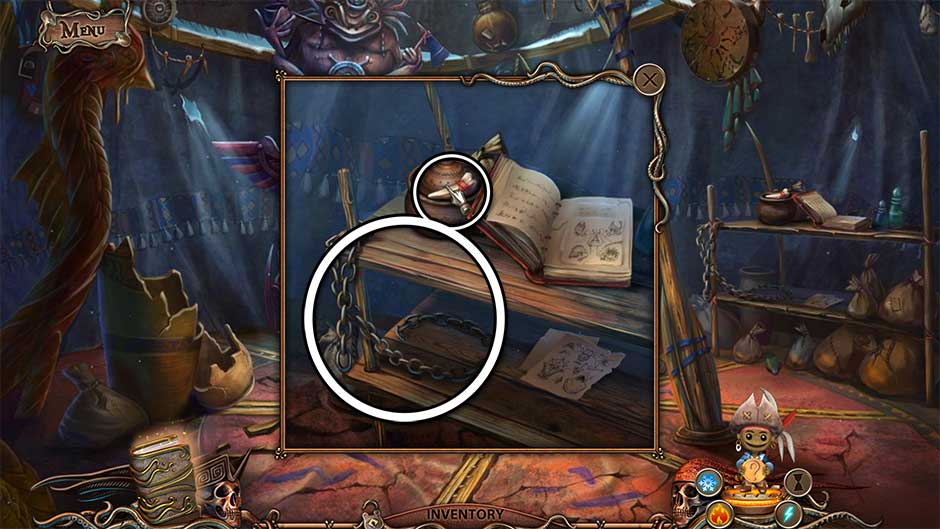
- Zoom in on the mouth of the tyrannosaurus fossil in the upper right corner.
- Use the Chain Cutters to remove the chains.
- Click on the Matches in the dinosaur’s mouth to add them to your inventory.
- Take a closer look at the panel on the floor straight ahead.
- Insert the Roller into the slot on the left. This will trigger a puzzle.
- Turn the rollers to get the correct sequence. Check your journal for a hint. Click on a roller to turn it. The solution is pictured below.
- Zoom in on the chest that appears straight ahead.
- Insert the Blue Crystal into the slot in the center of the chest.
- How enlightening, you’ve freed the Knowledge Keeper! The Knowledge Keeper will be the default Keeper in the lower right corner of your screen. When you’re not sure what to do or where to go next, click on him for a clue!
- A new hidden object area will appear over the desk on the left.
- Locate all the items listed at the bottom of the screen. Items listed in red will require an additional action. Click on the book pages in order to locate the Ammo. All item locations are shown below.
- Upon completing the hidden object scene, the Bottle of Oil will be added to your inventory.
- Return to the Pirate Deck.
Pirate Deck
- A large monster will start attacking the ship! Use the power of the Ice Keeper to freeze the giant tentacle. Break it using the Axe.
- Zoom in on the barrel with the lantern case next to the steps.
- Place the Lantern Part (2) with the wick into the lantern casing first. Use the Matches to light it. Place the final glass Lantern Part into the casing and click to collect the Lantern.
- Head down to the Deck.
Deck
- Use the freezing power of the Ice Keeper again to neutralize the tentacles on deck.
- Shatter the tentacles using the Axe.
- Continue down the hatch into the Engine Room.
Engine Room
- Examine the hook at the top center of the screen.
- Place the Lantern on the hook to illuminate the hold.
- Take a closer look at the gauges on the left in front of the large mechanical creature.
- Click on the lid to open it.
- Pour the Bottle of Oil into the funnel.
- Zoom in on the control panel on the right.
- Attach the Lever to the center dial.
- Click on the Levers on the left and center to switch on the engine.
Chapter 2: Dead Town
You’re off the haunted ship and have landed on the edge of the town Adam mentioned. It’s time to follow his trail and try to find him.
Shore
- Examine the brass lion on the far side of the steps on your right.
- Click on the Pickaxe to add it to your inventory.
- Take a closer look at the boarded-up building ahead.
- Use the Pickaxe to remove the hinges on the window.
- Once the shutter is removed, collect the Harpoon.
- Zoom in on the boat to the left of the shack.
- Retrieve the boat using the Harpoon.
- Click on the Valve inside to add it to your inventory.
- Zoom in on the brass lion on the far side of the steps again.
- Place the Valve on the mechanism and click to activate it.
- Proceed up the steps on the right to the next location.
Town Square
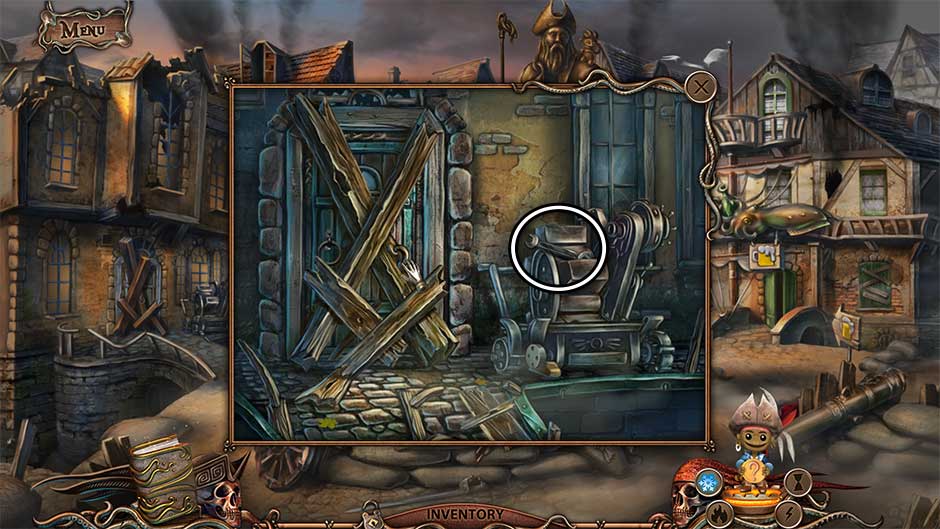
- Take a closer look at the boarded-up door on the left.
- Collect the Wrench sitting on top of the machine.
- Zoom in on the gate in the distance, to the left of the statue.
- Click on the Chain with Hook lying on the ground on the lower left.
- Examine the entrance of the Toy Shop, whose doorway is on fire on the left.
- Take a closer look at the stuffed animal sitting at the top of the steps on the right.
- Click on the Lockpicks to add them to your inventory.
- Enter the Tavern to the right of the statue.
- Take a closer look at the stuffed animal sitting at the top of the steps on the right.
Tavern
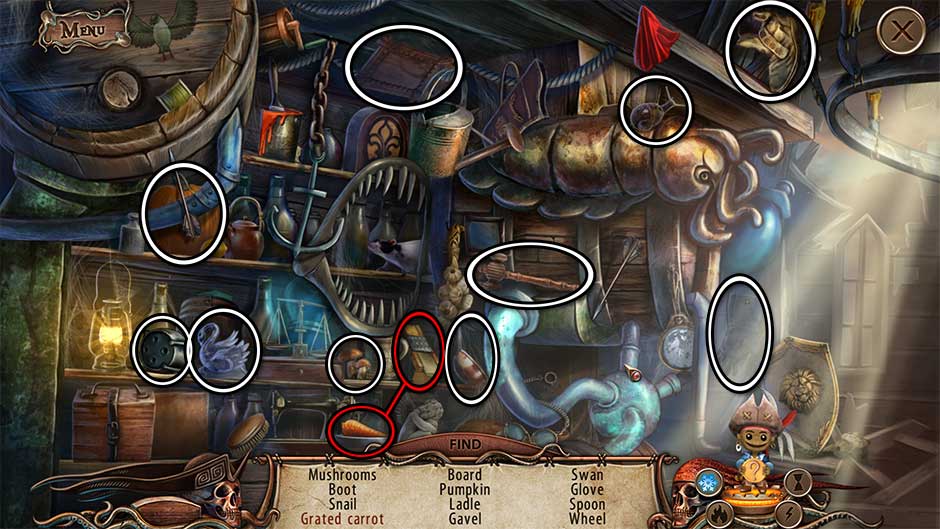
- Click on the hidden object area in the upper left corner.
- Find the objects listed at the bottom of the screen. Items listed in red require an additional action. Item locations are shown in the screenshot below.
- Upon completing the area, the Wheel will be added to your inventory.
- Take a closer look at the locked cupboard beneath the keg on the left.
- Use the Lockpicks to open the lock.
- Click again to open the cabinet and collect the Bucket
- Head back to the Shore.
Shore
- Examine the dock on the left.
- Use the Bucket on the water, then click to collect the Bucket of Water.
- Head back up the steps to the Town Square.
Town Square
- Zoom in on the Toy Shop entrance on the left.
- Use the Bucket of Water to extinguish the flames.
- Click on the door to open it and proceed inside.
Toy Shop
- Zoom in on the puppets hanging on the left above the counter.
- Use the Wrench to remove the Bolts from the top of the Metal Hat. Click on both to add them to your inventory.
- Exit to the Town Square.
Town Square
- Take a closer look at the first blocked doorway on the left.
- Attach the Chain and Hook to the machine.
- Zoom in on the base of the machine.
- Connect the Wheel to the base of the machine, followed by the Bolts.
- Use the Wrench to tighten the Bolts onto the Wheel.
- Click on the chain attached to the machine to remove the debris from the door.
- Enter the doorway that’s now cleared on the left.
Sitting Room
- Click on the arm chair on the left to move it aside, then click on the corner of carpet it sat on top of.
- Take a closer look at the panel revealed beneath the carpet.
- Click on the red switch on the left to open the panel.
- Select the first container inside – it will burst.
- Back in the main area, collect the Instructions sitting on the arm of the chair on the lower right.
- Examine the door at the back of the room.
- Place the Metal Hat into the hands of the robot. The door will open.
- Enter through the doorway at the back of the room.
Workshop
- Take a closer look at the robot suspended straight ahead.
- Use the Ice Keeper on the glowing key by selecting the snowflake on the lower right.
- Click on the Key to add it to your inventory.
- Zoom in on the desk on the left.
- Pick up the Garlic Extract sitting in the upper right corner.
- Take a closer look at the furnace on the right.
- Click on the Bone inside the dish to add it to your inventory.
- Return to the Tavern.
Tavern
- Click on the hidden object area in the upper left corner.
- Find the items listed at the bottom of your screen. Objects listed in red will require an additional action. All item locations are displayed in the screenshot below.
- Once you’ve completed the area, the Reel will be added to your inventory.
- Examine the skeleton lying over the counter on the left.
- Use the Knife to cut the Belt off the corpse.
- Zoom in on the trap toward the right at the back of the Tavern.
- Use the Bone to trigger the trap.
- Click on the Figurine to collect it, followed by the Trap to add it to your inventory.
- Return to the Toy Shop.
Toy Shop
- Zoom in on the cabinet straight ahead.
- Use the Key to open the cabinet.
- Collect the Knife and the Liquid Container inside to add them to your inventory.
- Examine the register on the left.
- Place the Instructions over the paper on the lower right.
- Place the Figurine on the stand to trigger a puzzle.
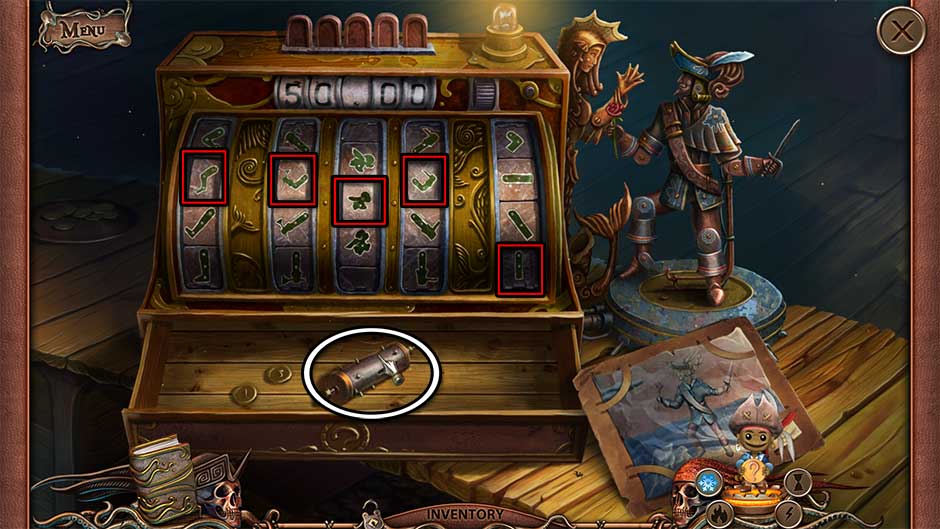
- Use the cash register to change the doll’s pose. The solution is shown below. Upon completing the puzzle, click on the Music Cylinder to add it to your inventory.
- Head back to the Sitting Room.
Sitting Room
- Take a closer look at the panel beneath the corner of the rug.
- Insert the Liquid Container into the slot in the bottom center.
- Flip the red switch inside the top of the compartment.
- Zoom in on the secret compartment revealed in the far right corner of the room.
- Click to add the Rope with Arrow to your inventory.
- Take a closer look at the circular hatch behind the Rope with Arrow you just collected.
- Examine the scroll with directions on the left.
- Insert the Music Cylinder into the slot in the circular panel. The panel will open, revealing the Fire Doll. Click on it to trigger a puzzle.
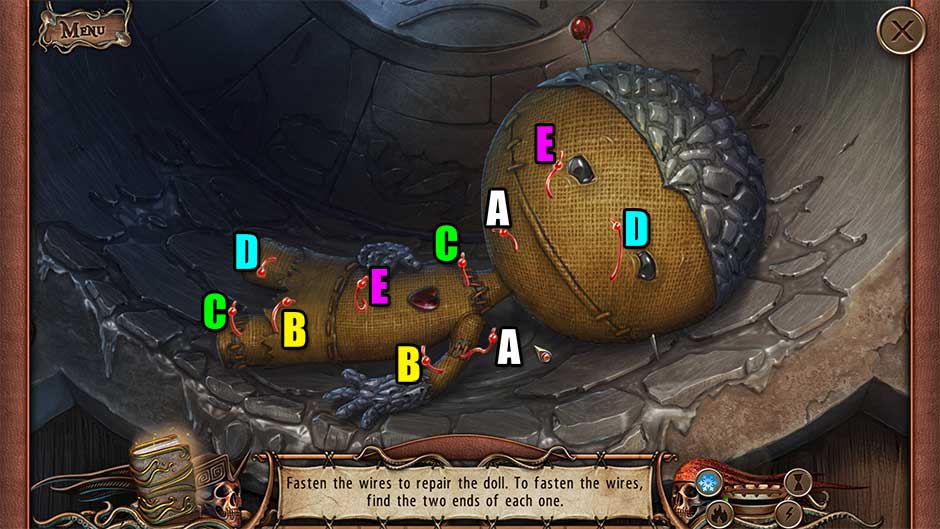
- Fasten the wires to repair the doll. To fasten the wires, find the two ends of each one. Select one end, followed by the other to fasten a wire. Click on the ends of the matching pairs shown below to complete the puzzle.
- Once the puzzle is completed, the Fire Keeper will join your side! The Fire Keeper can be selected by clicking on the flame icon in the lower right corner of the screen.
- In the close-up of the secret compartment, click on the paper on the top shelf for a closer view. Then click on the jarred Heart to add it to your inventory.
- Return to the Toy Shop.
Toy Shop
- Take a closer look at the hole in the floor in which the beast is hiding.
- Place the Trap on the floor in front of the creature.
- Place the Heart within the trap, then add the Garlic Extract.
- Once the monster is gone, zoom in on the trap again.
- Click on the leather satchel to open it, then click on the Saw to add it to your inventory.
- Return to the Workshop via the Sitting Room.
Workshop
- Examine the workbench on the left.
- Attach the Reel and the Rope with Arrow to the Crossbow, then click to add it to your inventory.
- Exit to the Town Square.
Town Square
- Take a closer look at the gate at the back of the square covered in vines.
- Use the Fire Keeper to destroy the vines covering the gate.
- Use the Saw on the bars on the lower right to remove them.
- Proceed through to the next location.
Chapter 3: Old Berth
The mysterious monsters are still trying to stop you! The bridge ahead is destroyed. How are you going to get across now? Well, glad you asked..!
Bridge
- Take a closer look at the base of the water tower on the left.
- Click on the Hose and the Glove to add them to your inventory.
- Zoom in on the ravine ahead.
- Use the Crossbow on the tree to span the gap.
- Back in the main area, use the Belt on the rope spanning the gap, followed by the Glove.
- You will now be able to travel across to the next area.
Dock
- Take a closer look at the dock ahead.
- Select the Fire Keeper and use his flame power on the frozen statue on the right.
- Pick up the Lever lying on the ground on the right.
- Insert the Lever into the bridge mechanism at the base of the left statue.
- Examine the right side of the shack on the right.
- Pick up the Bellows lying on the ground.
- Zoom in on the workbench inside the shack.
- Click on the Wire sitting on the stool beneath the bench.
- Examine the paper lying on the table to view a set of instructions.
- Take a closer look at the pump on the left side of the dock.
- Attach the Hose to the right side of the pump. Use the Wire to fasten it.
- Click on the blue lever on top of the pump to turn it on.
- Collect the Spear Tip the pump brings up and add it to your inventory.
- Examine the statues on either side of the dock again.
- Place the Spear Tip on the end of the stick the left statue is holding.
- Click on the lever beneath the left statue to bring up the missing portion of the dock.
- Proceed across the dock to the ship ahead.
Helm
- Collect the Scoop propped up against the wall on the left.
- Select the Mop propped up to the immediate right of the control panel to add it to your inventory.
- Click on the door at the top of the steps ahead to open it, then take a closer look inside.
- Click on the lever to shut off the power.
- Click on the Wire to add it to your inventory.
- Examine the interior of the cabin on the right.
- Select the Needle and Thread tucked away into the upper left corner in the picture frame to add it to your inventory.
- Read the journal lying on the table.
- Proceed up the steps on the left to the next area.
Ship Side
- Select the Ice Keeper and use the freezing power of ice to freeze the hostile skeleton.
- Click on the Rope on the right to add it to your inventory.
- Go back to the Helm.
Helm
- Examine the inside of the cabin on the right again.
- Tie the Rope to the anchor. Click on the Anchor and Rope to add it to your inventory.
- Backtrack to the Bridge.
Bridge
- Take a closer look at the burning coals on the right.
- Use the Scoop to collect the Coals and add them to your inventory.
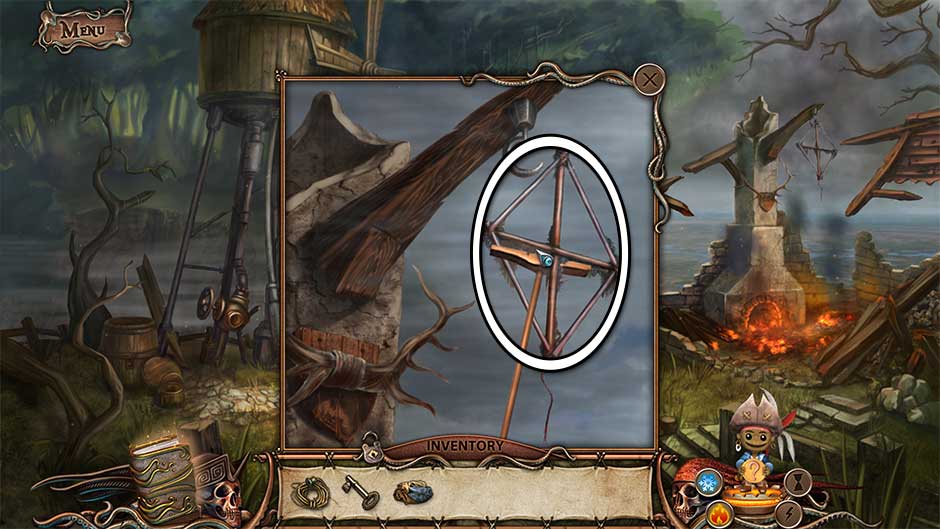
- Examine the broken top of the chimney on the right.
- Use the Mop to retrieve the Kite Frame and add it to your inventory.
- Return to the Dock.
Dock
- Take a closer look at the open-air oven on the right side of the shack.
- Put the Coals into the right slot on the side of the oven.
- Use the Bellows to heat the coals.
- Use the Glove to collect the Tar and add it to your inventory.
- Enter the Ship.
Helm
- Examine the leak above the door at the top of the steps ahead.
- Patch the leak with the Needle and Thread.
- Use the Tar to seal the leak.
- Proceed up the steps on the left.
Ship Side
- Destroy the frozen skeleton using the Anchor and Rope.
- Click on the skeletal remains for a closer view.
- Click on the Key and the Rags to add them to your inventory.
- Go back to the Dock.
Dock
- Examine the workbench inside the shack on the right.
- Place the Kite Frame on the table.
- Attach the Rags and Wire to the frame, then click to add the Kite to your inventory.
- Return to the Ship Side.
Ship Side
- Take a closer look at the device ahead.
- Attach the Kite to the machine.
- Wait a moment for lightning to strike the kite, returning the Power Keeper to life.
- Zoom in on the device again.
- Use the Key on the lock to open it.
- Click on the Power Keeper to talk with him and have him join your side! The Power Keeper can be accessed by clicking on the lightning bolt in the lower right corner of your screen.
- You will be taken back to the Helm.
Helm
- Zoom in on the control panel straight ahead.
- Use the Power Keeper on the control panel.
- Click on the round dial on the panel, followed by the lever on the left to return power to the ship.
Chapter 4: Ice Peaks
The air ship transports you and the dolls to a new snowy location. It’s the settlement the Keepers talked about. But will you be able to find Adam?
Air Ship
- Head toward the Settlement on the right.
Settlement
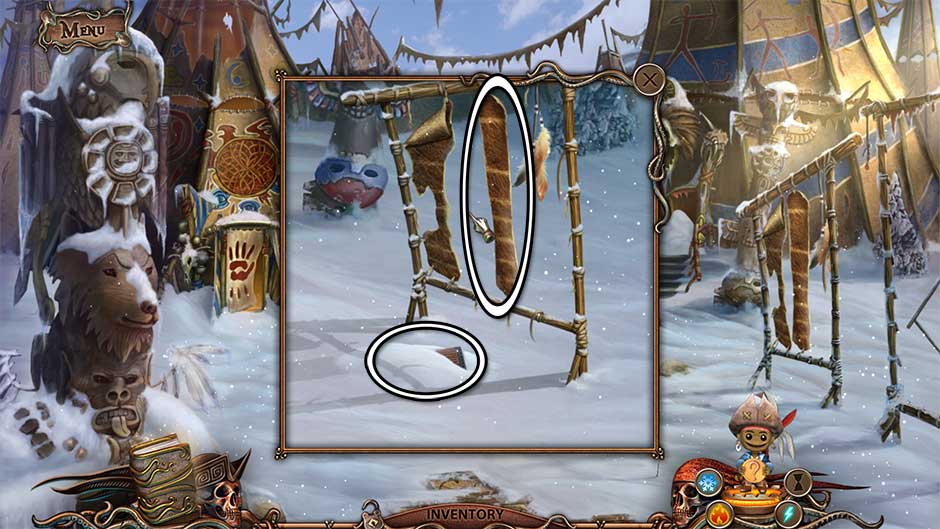
- Click on the Shovel wedged into the snow to the right of the fire pit to add it to your inventory.
- Take a closer look at the fire pit directly in front of you.
- Click on the Sliver of Wood to add it to your inventory.
- Examine the animal pelts hanging from the frame on the right.
- Click on the Pelt to add it to your inventory.
- Use the Shovel to dig up the Buttstock and click to add it to your inventory.
- Zoom in on the hut on the right.
- Use the Shovel to dig out the entrance from under the snow.
- Enter the hut on the right.
Chief’s Hut
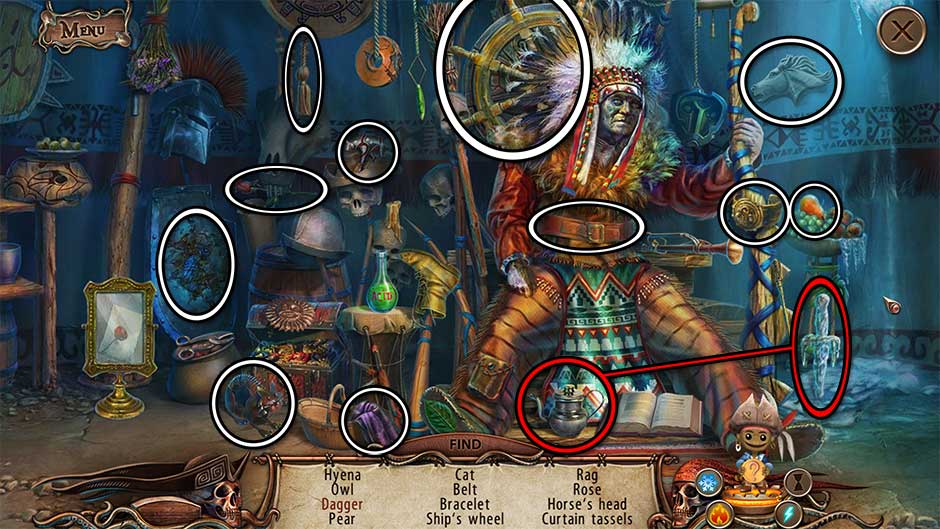
- Click on the area over the chief to trigger a hidden object scene.
- Find the items listed at the bottom of the screen. Objects listed in red will require an additional action to be found. The location of all items are shown in the screenshot below.
- Upon completing the area, the Hyena will be added to your inventory.
- Take a closer look at the table on the left.
- Examine the papers left on the table.
- Click on the Bowstring to add it to your inventory.
- Examine the shelf at the back of the hut on the right.
- Take a closer look at the paper sitting on the shelf.
- Click on the Staff on the second shelf to add it to your inventory.
- Attach the Buttstock to the weapon on the top shelf.
- Exit to the Settlement.
Settlement
- Enter the tent on the left.
Shaman’s Hut
- Zoom in on the frozen fire in the center of the hut.
- Use the power of the Fire Keeper to melt the ice.
- Break the large vase on the left using the Staff, then take a closer look inside.
- Collect the Scope and the Turtle Figurine inside to add them to your inventory.
- Take a closer look at the totem at the back of the room.
- Click on the Ladle hooked over the left arm to collect it.
- Examine the shelf on the right side of the hut.
- Read over the notes on the right side of the shelves.
- Collect the Fang and the Chain to add them to your inventory.
- Return to the Air Ship.
Air Ship
- Take a closer look at the large hand next to the air ship.
- Use the Pelt, followed by the Bowstring on the red crystal.
- Click on the completed Knife to add it to your inventory.
- Zoom in on the passage in the distance, to the left of the totem pole.
- Attach the Chain to the device on the left.
- Once the passageway is cleared, proceed forward to the next location.
Meadow
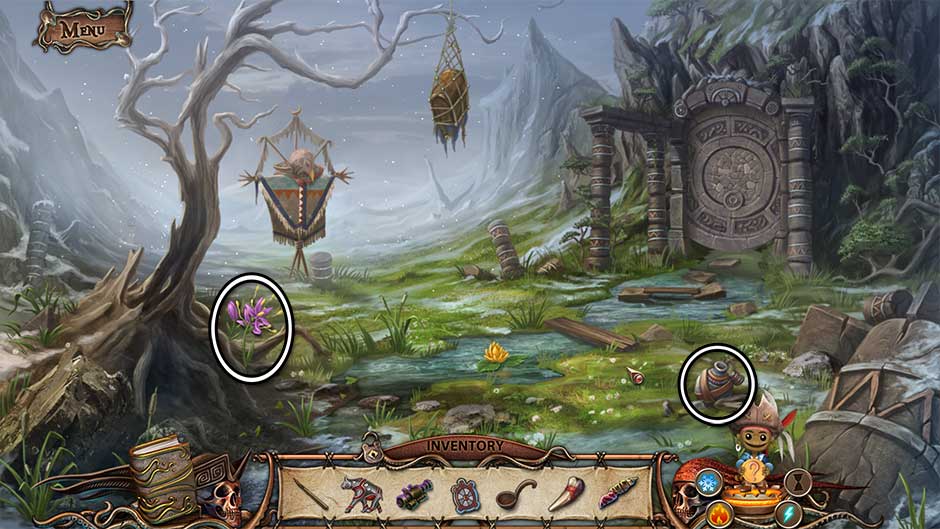
- Click on the Mountain Lily and the Empty Flask to add them to your inventory.
- Take a closer look at the yellow flower straight ahead.
- Collect the Moose Figurine from the water and the Yellow Waterlily as well.
- Use the Empty Flask on the water to obtain the Flask with Water.
- Return to the Shaman’s Hut.
Shaman’s Hut
- Take a closer look at the fire straight ahead.
- Place the Yellow Waterlily, the Mountain Lily, and the Fang into the cauldron.
- Use the Ladle to stir the mixture and acquire the Ladle with Potion.
- Examine the totem at the back of the hut.
- Use the Flask with Water on the bowl the totem holds.
- Return to the Meadow.
Meadow
- Use the Ladle with Potion on the scarecrow on the left. Click on the Cloak of Invisibility to add it to your inventory.
- Return to the Settlement.
Settlement
- Select the Cloak of Invisibility in your inventory. You can now enter the area ahead without being afraid of being seen by monsters.
Altar Ruins
- Examine the broken altar on the left.
- Take a closer look at the piece of paper on the left to view an important clue.
- Click on the Soil on the right to collect it.
- Use the Knife to pry the Bird Figurine out of the display and into your inventory.
- Zoom in on the bird totem on the right.
- Use the Knife to remove the ice stuck to the Boomerang in the eagle’s mouth, then click to add it to your inventory.
- Return to the Meadow.
Meadow
- Select the Boomerang and use it to knock down the chest in the net suspended from the tree.
- Take a closer look at the chest once it falls to the ground.
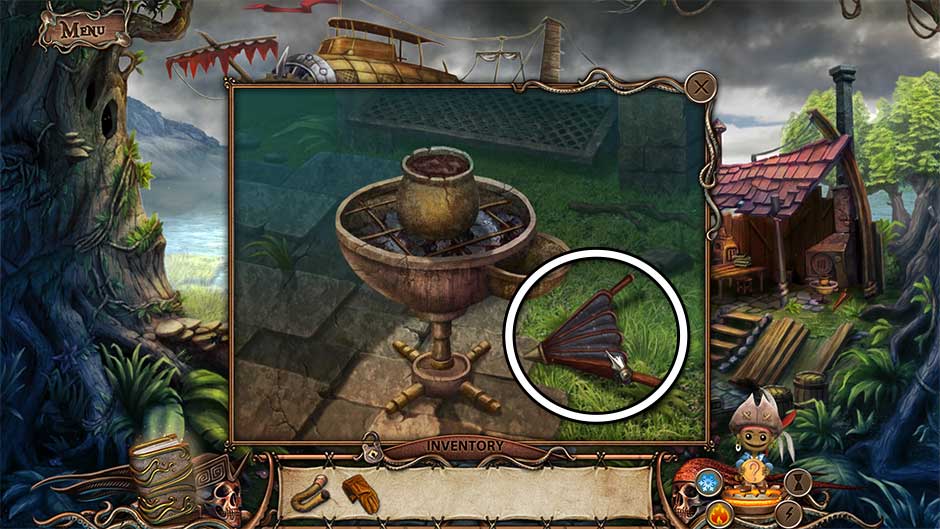
- Click on the Fan to add it to your inventory.
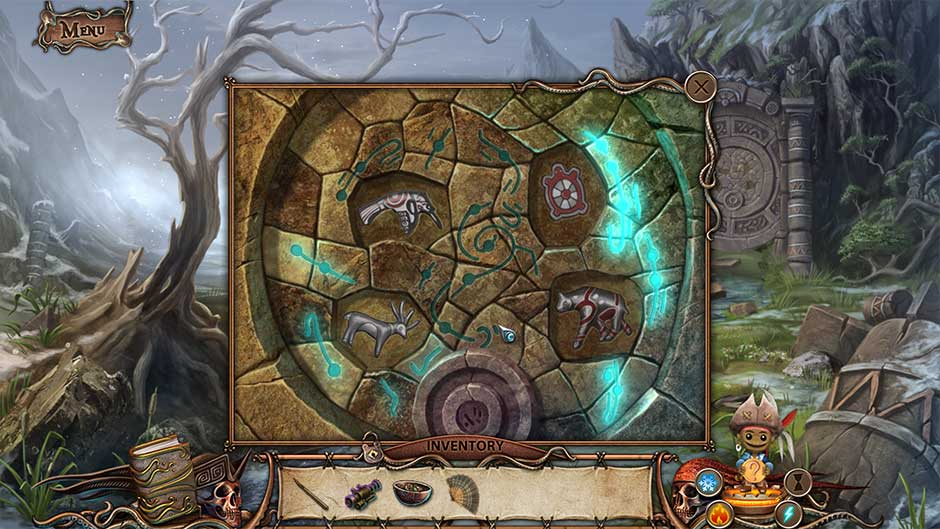
- Examine the round door to the right.
- Place the Hyena, the Moose Figurine, the Bird Figurine, and the Turtle Figurine into their respective slots.
- We’ll be returning here soon. For now, make your way back to the Chief’s Hut.
Chief’s Hut
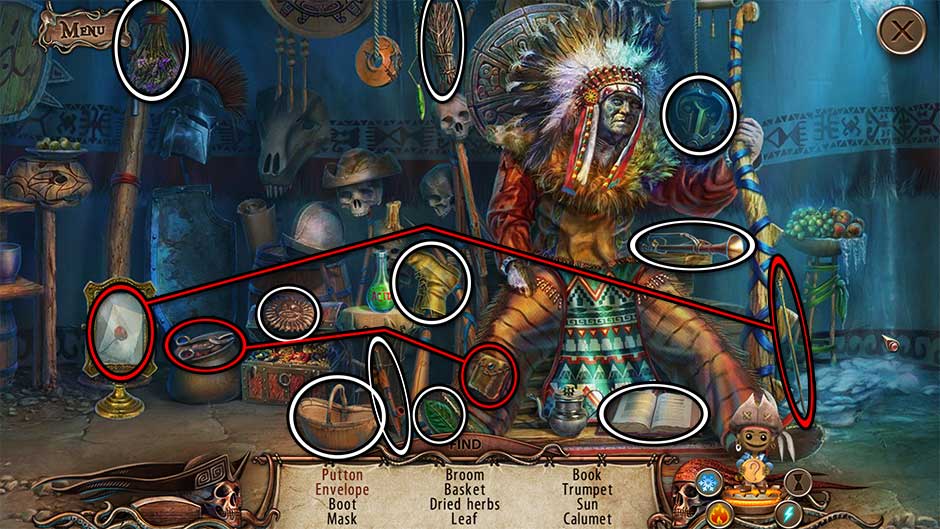
- Click on the hidden object area over the chief.
- Find the objects listed at the bottom of your screen. Items listed in red will require an additional action. All objects listed are shown in the screenshot below.
- Upon completing the area, the Mask will be added to your inventory.
- Examine the shelf to the right of the deceased chief.
- Attach the Scope to the weapon on the top shelf.
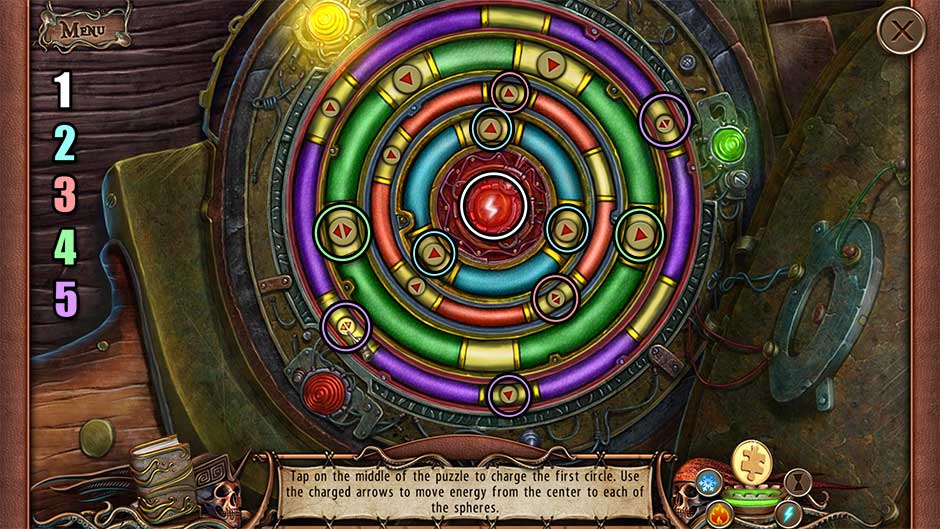
- Click on the round latch on the side of the weapon to reveal a puzzle.
- Tap on the middle of the puzzle to charge the first circle. Use the charged arrows to move energy from the center to each of the spheres. Make sure when clicking on an arrow to move energy, the arrow’s point is facing outward. Click on the outermost arrow when it passes by the red, yellow, and green lights to successfully transfer energy. An example is of the solution is shown below. Refer to the numbers listed on the left side of the screenshot to see in what order you should press buttons. The circled buttons of the corresponding color will show you which you will need to press of that ring in order to move the energy out to the lights in order to solve the puzzle.
- Upon completing the puzzle, click on the Gun to add it to your inventory.
- Zoom in on the totem on the right.
- Place the Soil in the bowl. That’s two totems down!
- Go back to the Altar Ruins.
Altar Ruins
- Take a closer look at the totem on the right.
- Use the Fan on the bowl the eagle holds. Now just one totem left!
- Return to the Air Ship.
Air Ship
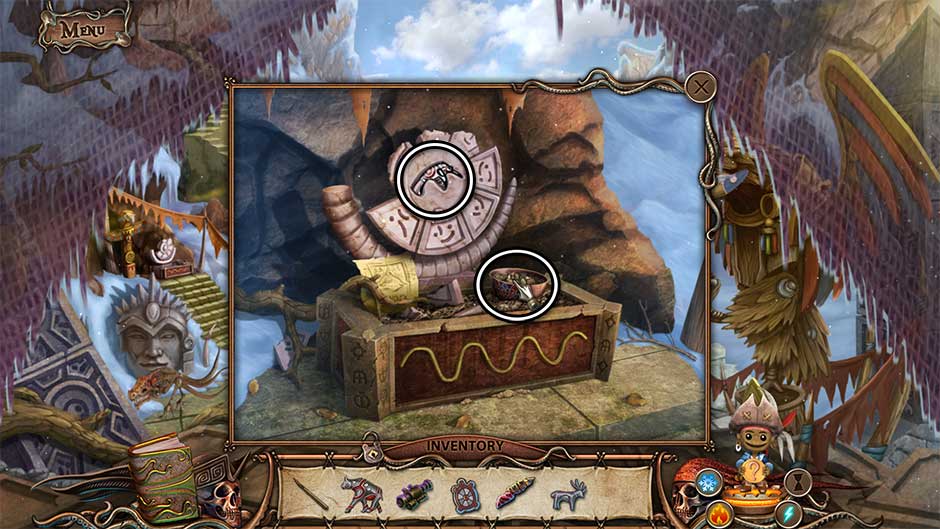
- Zoom in on the totem here.
- Place the Sliver of Wood into the bowl at the base of the totem. Now all the totem spirits are pleased!
- Head to the Meadow.
Meadow
- Zoom in on the opening on the right that was previously blocked by the round door.
- Use the power of the Ice Keeper to freeze the waterfall.
- Use the Gun to shatter the frozen waterfall.
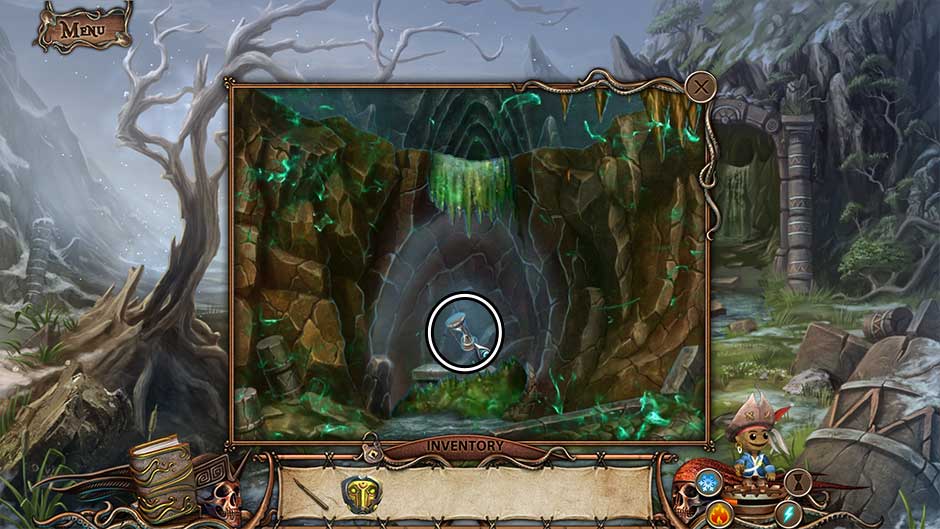
- Click on the unveiled Hourglass to add it to your inventory.
- Return to the Altar Ruins.
Altar Ruins
- Upon entering the area, a giant pyramid which had been hidden by the totem spirits will appear.
- Examine the short stone column at the base of the pyramid steps straight ahead.
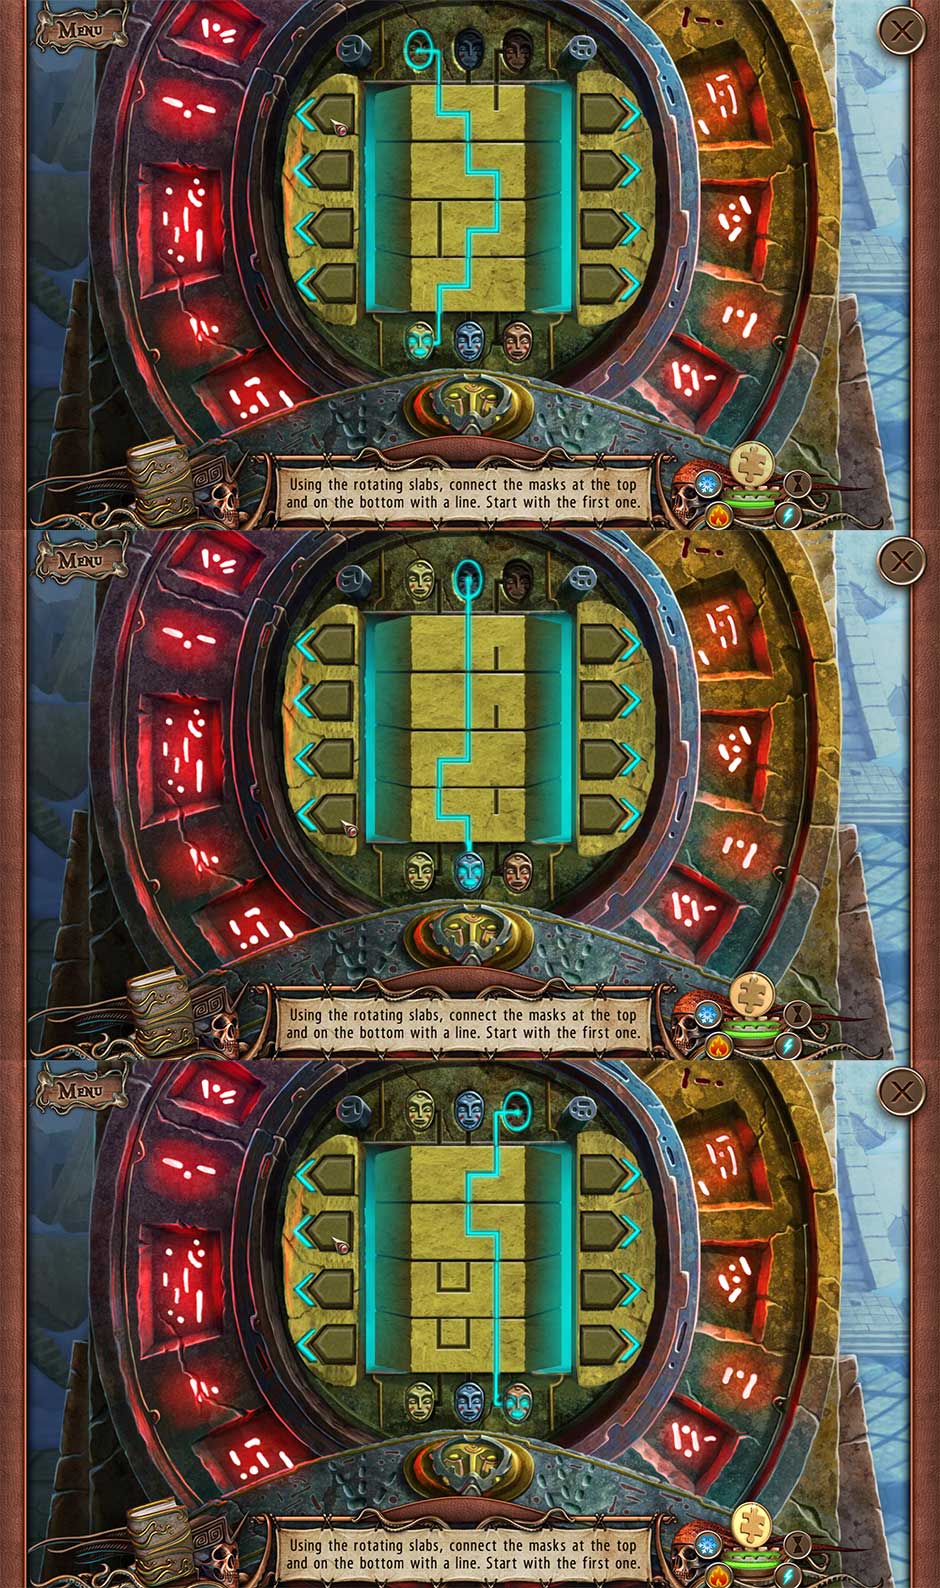
- Place the Mask on the indentation at the bottom of the screen to trigger a puzzle.
- Using the rotating slabs, connect the masks at the top and on the bottom with a line. Start with the first one. The solutions are pictured below.
- Once the puzzle is completed, take a closer look at the top of the pyramid.
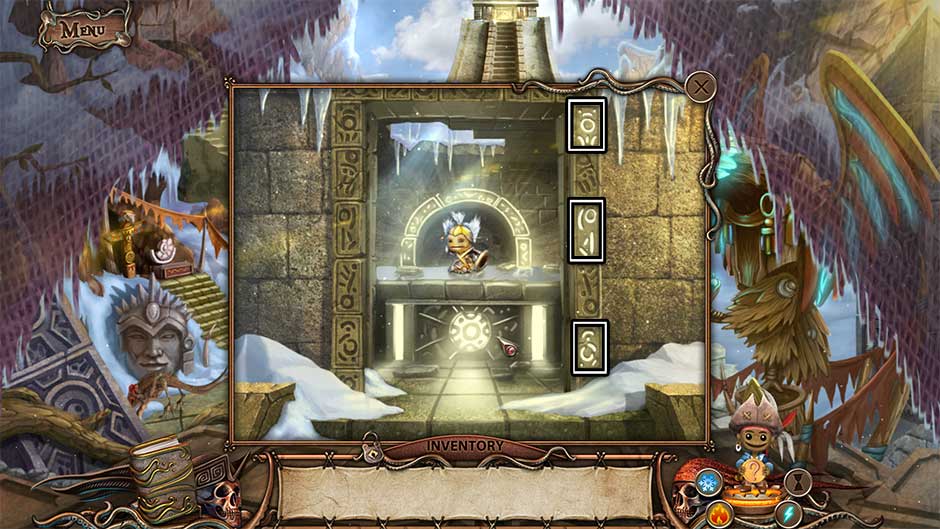
- Open the pyramid by clicking on the slabs with the correct symbols. They are pictured here:
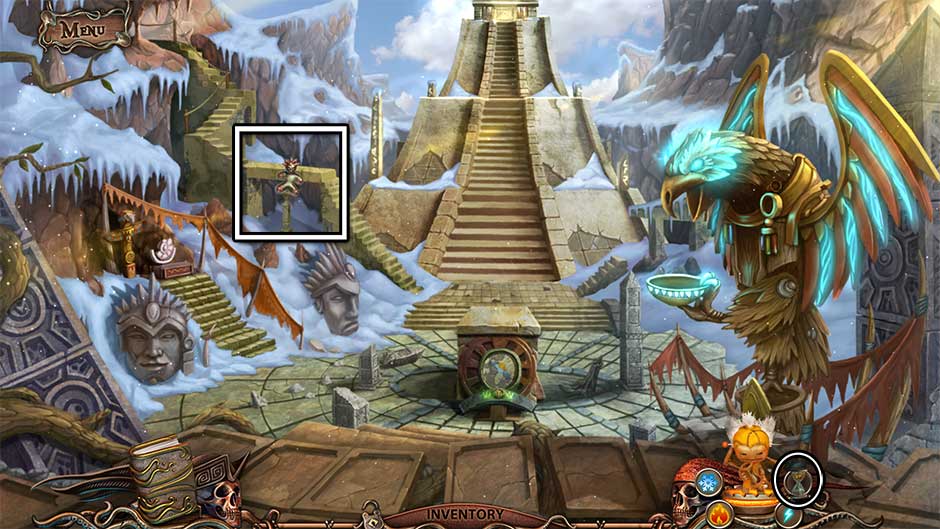
- Use the Hourglass on the Time Keeper to bring him to life. Click on him to have him join you! You can use the powers of the Time Keeper by selecting the hourglass icon in the lower right corner of your screen.
- Select the Time Keeper and use his powers to restore the collapsed bridge on the left.
- Proceed up the steps on the left in the distance to the next location.
Chapter 5: Abandoned Castle
With the powers of all Keepers with you, it’s time to search for Adam in the Abandoned Castle!
Foyer
- Click anywhere ahead, or on Adam himself to speak with him.
- After speaking with Adam, the Evil Spirit will conjure a dark knight to block your path!
- Zoom in on the lantern at the top of the steps on the left.
- Click on the Lantern to add it to your inventory.
- Examine the base of the statue on the left.
- Click on the Helmet sitting at the base of the statue on the left to add it to your inventory.
- Proceed through the doorway up the steps on the right.
Laboratory
- Examine the barrel of acid hanging on the wall on the left.
- Hang the Helmet off the spigot.
- Click on the valve to pour the Acid into the Helmet, then click to add it to your inventory.
- Exit back to the Foyer.
Foyer
- Take a closer look at the pipes in the background, to the right behind the knight.
- Use the Acid on the cracked pipe to cause it to burst.
- Back in the main area, select the Time Keeper and use his powers on the knight. Rust will consume it, neutralizing the threat.
- Zoom in on the knight’s remains.
- Click on the Round Key to add it to your inventory.
- Enter the Laboratory again.
Laboratory
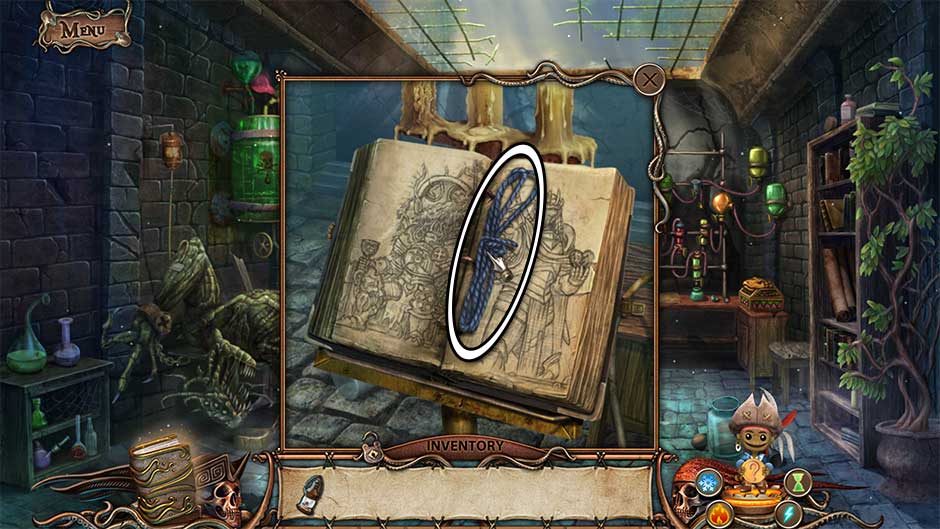
- Examine the book on the stand at the back of the room.
- Insert the Round Key into the slot on the front cover.
- Click on the Fuse inside to add it to your inventory.
- Head back to the Foyer.
Foyer
- Enter through the door straight ahead.
Throne Room
- Proceed through the door on the right.
Boiler Room
- Use the Ice Keeper’s freezing powers to freeze the objects hovering in the air.
- Select the Power Keeper and use his abilities to destroy the hovering objects for good.
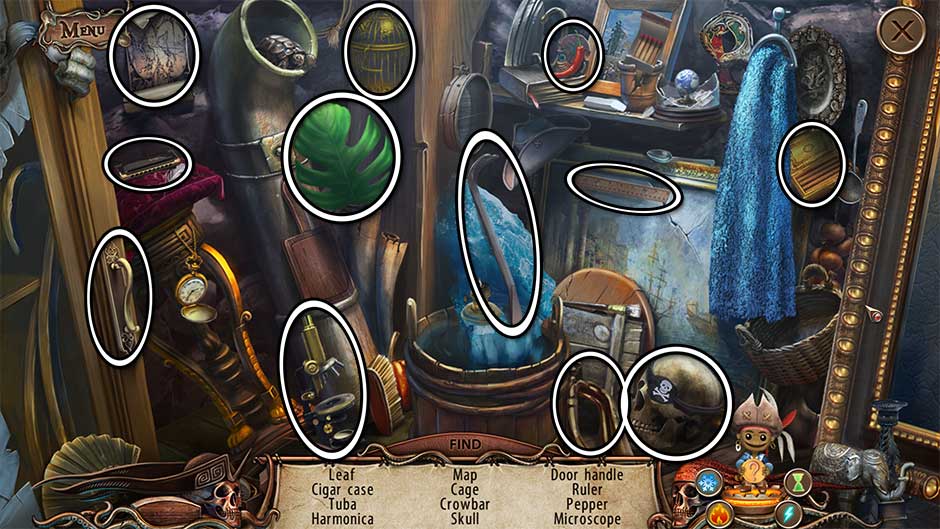
- Click on the hidden object scene that appears in the left corner.
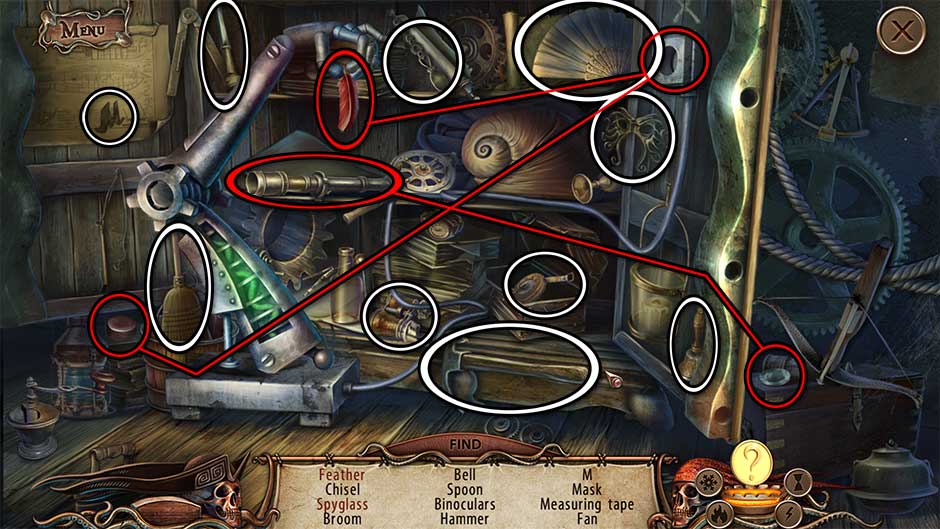
- Find the items listed at the bottom of the screen. All item locations are shown in the screenshot below. Once the area is completed, the Crowbar will be added to your inventory.
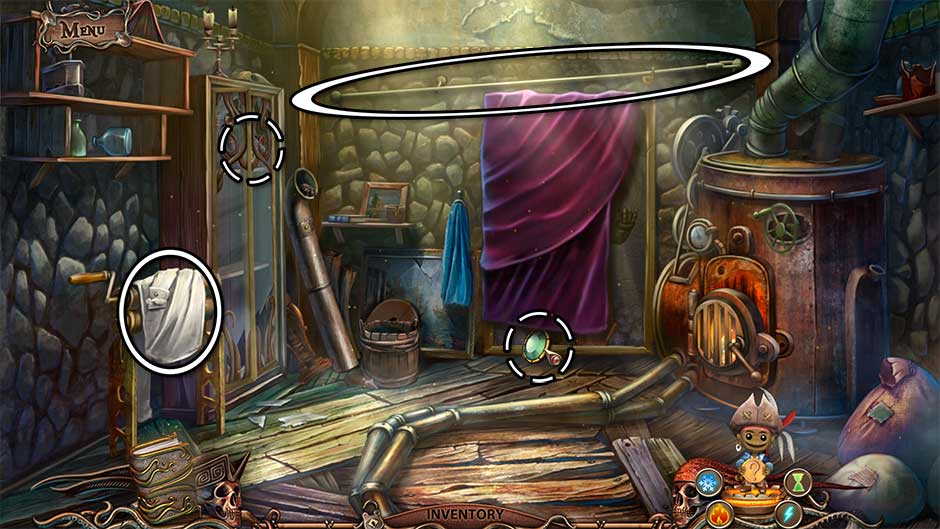
- Back in the main portion of the Boiler Room, click on the Shirt on the left and the Pole hanging on the wall above the painting to add them to your inventory. Open the cabinet on the left and collect the Poison. You will need to click on the sheet covering the painting ahead before collecting the Mirror.
- Exit to the Throne Room.
Throne Room
- Once you’ve re-entered the Throne Room, the passage to the right from which you’ve just emerged will collapse. Close call!
- Zoom in on the rubble from the collapsed doorway on the right.
- Click on the Wood to add it to your inventory.
- Examine the dragon-like paw above the rubble and to the right of the throne.
- Insert the Mirror between the talons.
- After inserting the Mirror into the talons, several symbols will be illuminated.
- For now, return to the Foyer.
Foyer
- Examine the base of the statue on the left again.
- Use the Crowbar on the stones to cause the statue to collapse.
- Zoom in on the rubble created by the broken statue on the floor.
- Click on the small model of Saturn tucked away in the remnants of the statue to add it to your inventory.
- Enter the Laboratory.
Laboratory
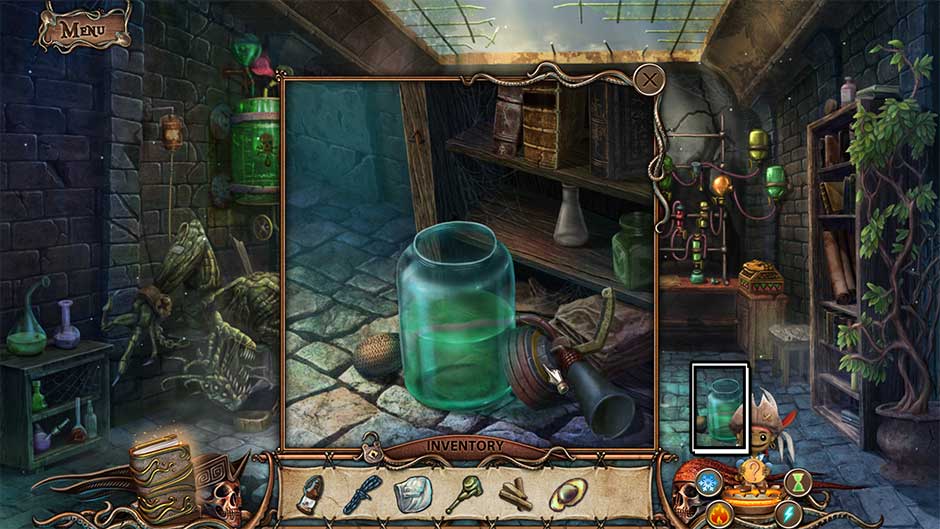
- Zoom in on the jar toward the lower right corner of the screen (just above the hat of the Knowledge Keeper).
- Pour the Poison into the jar.
- Click on the lid to close it and add the Poison Spray Bottle to your inventory.
- Return to the Throne Room.
Throne Room
- Use the Poison Spray Bottle on the plant blocking the door on the left.
- Proceed through the door on the left to the next location.
Conservatory
- Click on the Evil Spirit upon entering the room to view dialogue and a cutscene. Oh no, the Evil Spirit has taken all the Keepers!
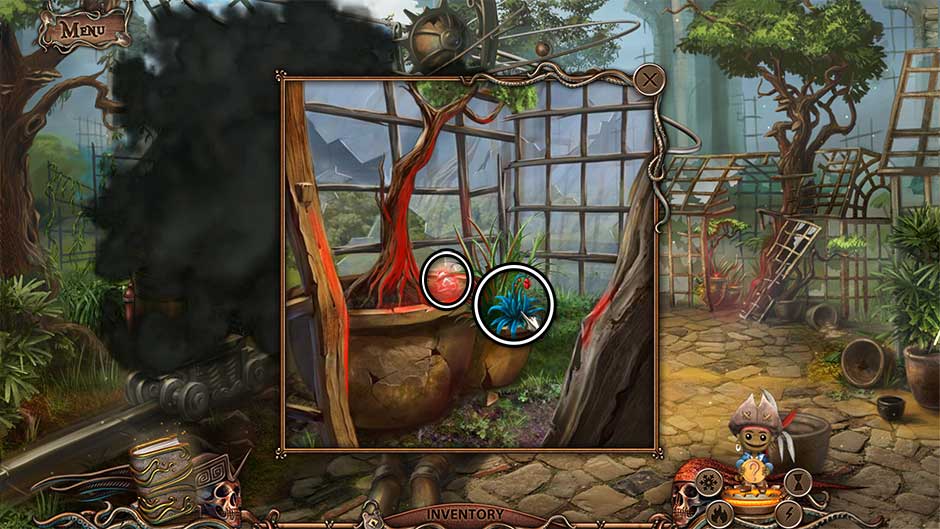
- Zoom in on the broken glass greenhouse on the right.
- Collect the Healing Herb and the Ruby.
- Return to the Foyer.
Foyer
- Use the Healing Herb on Adam, followed by the Shirt as makeshift bandages.
- Speak with Adam.
- Enter the Laboratory.
Laboratory
- Examine the chemistry set in the back corner.
- Insert the Ruby into the empty slot in the snake-head box in the lower right corner.
- Collect the Ancient Artifact inside the box.
- Return to the Conservatory.
Conservatory
- Use the Ancient Artifact against the Evil Spirit.
- The Evil Spirit is gone now, but so are the Keepers!
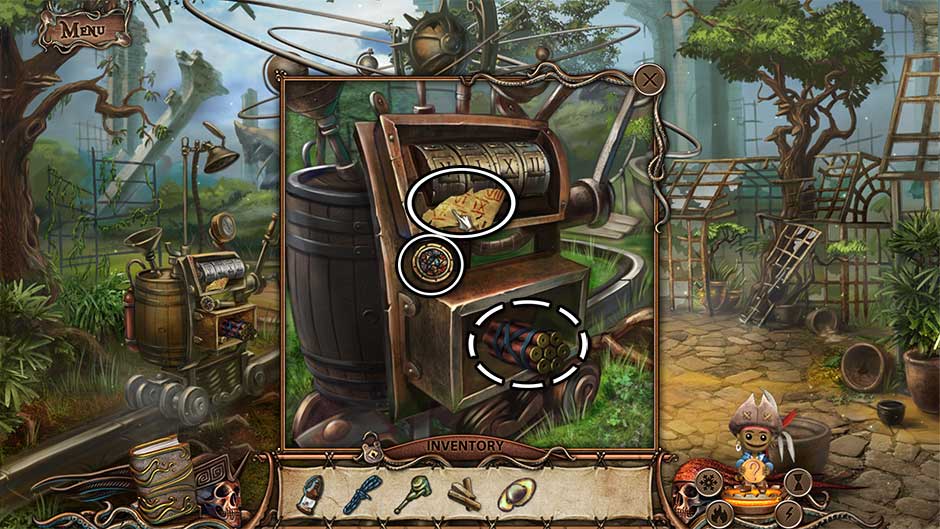
- Take a closer look at the gizmo on the left.
- Click on the Piece of Paper and the Lock Part to add them to your inventory.
- Attach the Fuse to the Dynamite to add it to your inventory.
- Zoom in on the base of the planetary contraption straight ahead.
- Click on the small blue capsule-like Retort just below the circular purple panel.
- Return to the Laboratory.
Laboratory
- Zoom in on the chemistry set at the back of the room.
- Attach the Piece of Paper to the torn half in the upper left corner.
- Place the Retort into the slot above the dial marked “VII”.
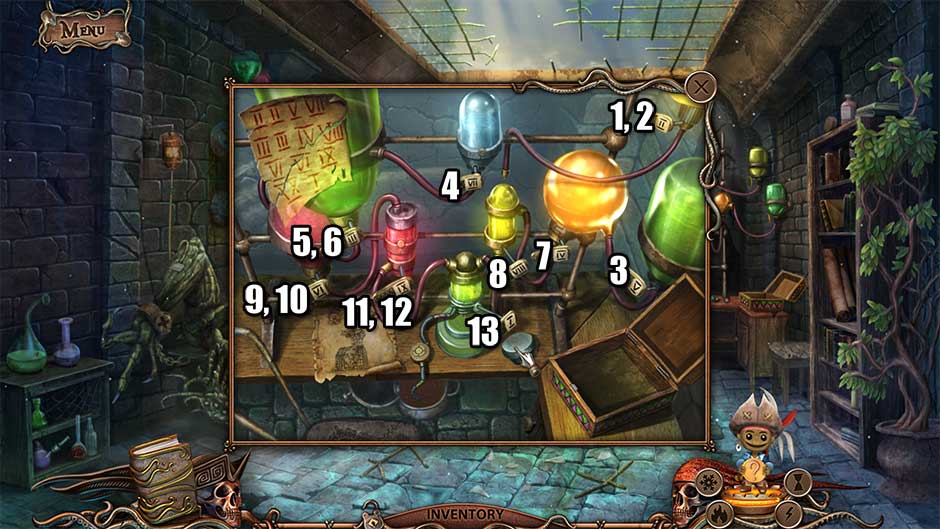
- Click on the dial switches in the order shown in the screenshot below. Do this correctly to create the Growth Elixir. Click on the cap once created to add it to your inventory.
- Make your way back to the Throne Room.
Throne Room
- Zoom in on the castle lord sitting on his throne at the back of the room.
- Insert the Lock Part into the cavity in his chest.
- Click on the Lock Part a second time to trigger a puzzle.
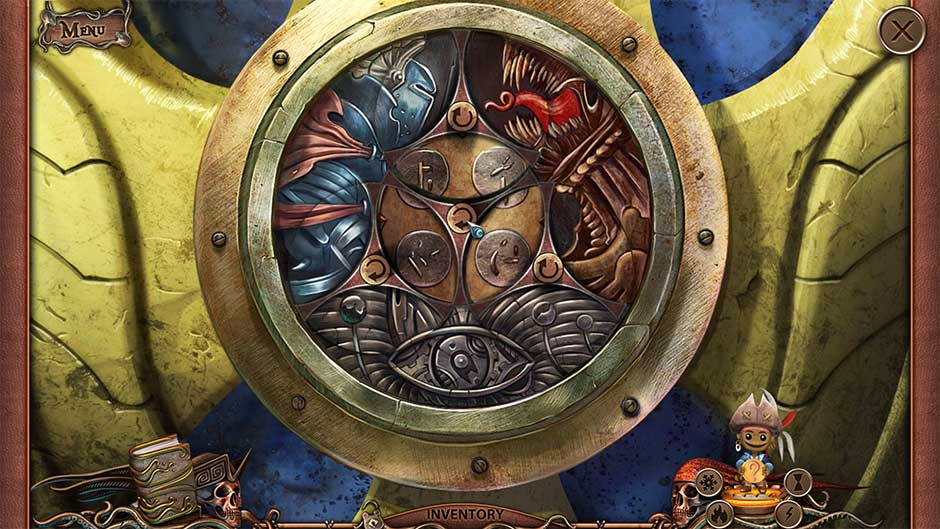
- Restore the image by rotating the circles. Click on the circular arrow buttons to rotate a circle. The goal is to restore and complete the image on the crest. The solution is shown below.
- Upon completing the puzzle, the chest piece of the castle lord’s armor will open. Click on the spiked Fruit with Seeds to add it to your inventory.
- Take a closer look at the rubble in front of the door on the right.
- Place the Dynamite within the mouth of the stone beast.
- Use the Lantern to light the fuse of the Dynamite.
- The Dynamite will explode, allowing you access to the Boiler Room again. Enter through the doorway on the right.
Boiler Room
- Click on the hidden object scene in the left corner.
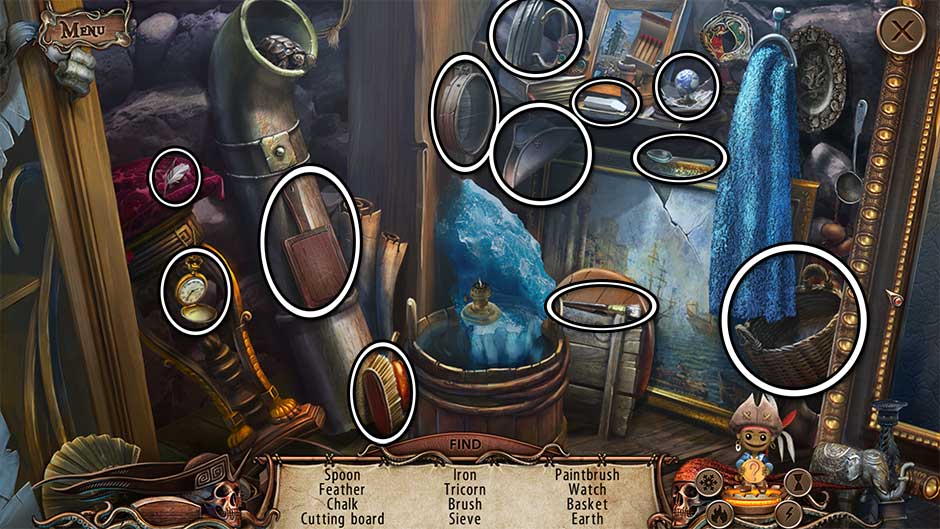
- Find the items listed at the bottom of the screen. Their locations are shown below. Upon completing the area, the Earth will be added to your inventory.
- Take a closer look at the boiler on the right.
- Click on the handle to open the boiler.
- Place the Wood inside the furnace.
- Click on the furnace to close the hatch.
- Click on the green-blue colored valve in the upper right corner of the boiler to restore heat to the pipes.
- Return to the Conservatory.
Conservatory
- Take a closer look at the planetary contraption straight ahead.
- Place the Fruit with Seeds into the hole in the ground.
- Add the Growth Elixir to the hole.
- A platform will grow, allowing access to the upper rings of the planetary device.
- Take a closer look at the planetary contraption again.
- Zoom in on the round, purple dial on the base.
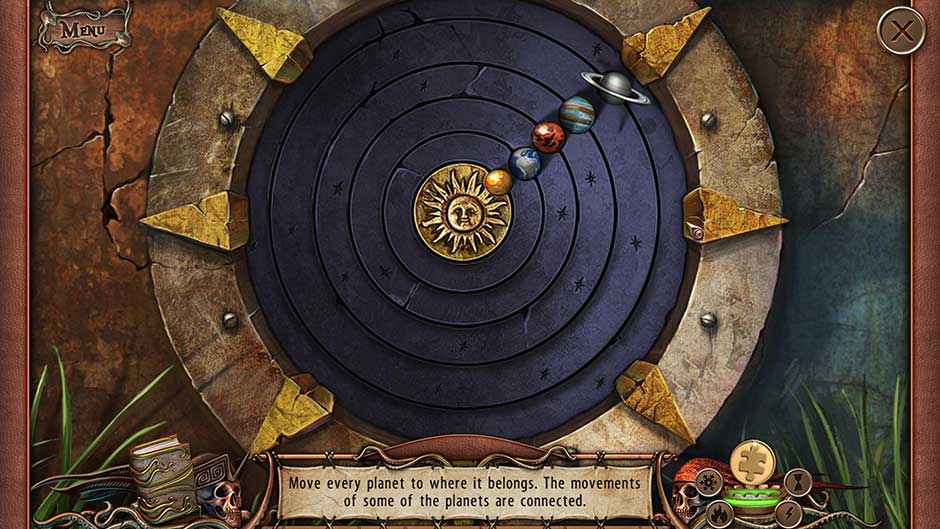
- Place the Earth and Saturn into the slots in the purple rings to trigger a puzzle.
- Move every planet to where it belongs. The movements of some of the planets are connected. The solution is shown below.
- Zoom in on the round, purple dial on the base.
- Upon completing the puzzle, a secret cache will open. Take a closer look at the planets above the wooden platform straight ahead.
- Click on the Red Heart and Piece of Chalice within the cache to add them to your inventory.
- Return to the Throne Room.
Throne Room
- Zoom in on the castle lord sitting on his throne.
- Use the Piece of Chalice to restore the broken chalice on the left.
- Once restored, click on the completed Chalice to add it to your inventory.
- Enter the Boiler Room.
Boiler Room
- Place the Chalice into the hand of the castle lord in the painting straight ahead.
- Click on the Blue Heart that appears in the castle lord’s other hand to add it to your inventory.
- Exit to the Throne Room.
Throne Room
- Take a closer look at the large door toward the left with the skeletal designs.
- Insert the Blue Heart into the slot on the left and the Red Heart into the slot on the right.
- The door will open. Take a closer look inside.
- Click on the Fire Keeper lying on the floor to recover him.
- Zoom in on the open doorway again.
- Click on the interior to travel to the next location.
Chapter 6: Forgotten Souls
The Fire Keeper has been recovered, but what about the other dolls? Can you recover them, too, before it’s too late?
Entrance Gate
- Speak with Adam. He will give you the Magic Blade.
- Click on the gate to open it and enter the underground city.
Well
- Click on the Bucket sitting on the edge of the well on the left.
- Click on the red valve on the left to lower the bucket into the well, then click again to bring it back up.
- Click on the Bucket of Water on the edge of the well to add it to your inventory.
- Collect the Net propped up against the fence on the right.
- Zoom in on the base of the tree straight ahead.
- Use the flame power of the Fire Keeper to free the Power Keeper.
- Click on the Power Keeper to return him to your side.
- Continue further down the path ahead.
Hole
- The Ice Keeper isn’t responsive; it looks like we may be too late. If only the Time Keeper were here to help us…
- Zoom in on the charred chest on the left.
- Use the Bucket of Water to cool the heat and flames on the chest.
- Click to open the chest once cooled.
- Collect the Puzzle Piece and the Saw
- Go back to the Well.
Well
- Enter the Cathedral on the right.
Cathedral
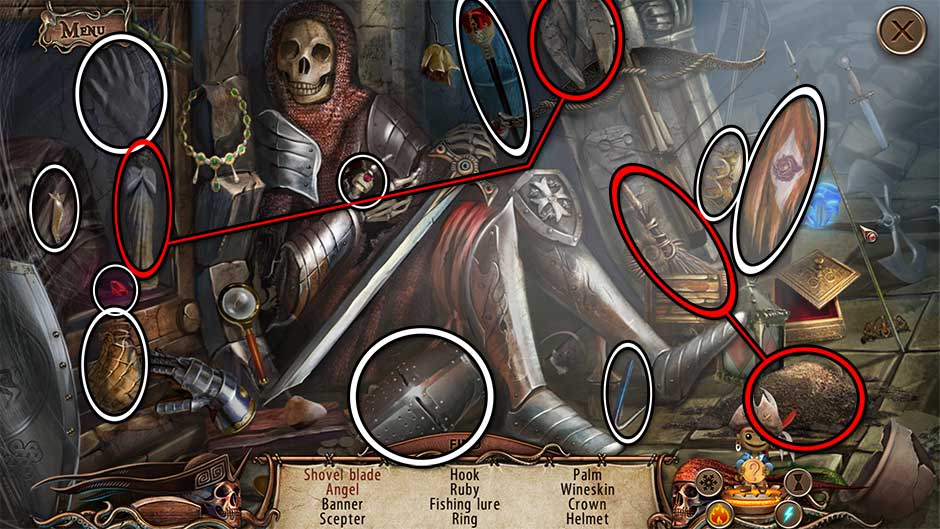
- Click on the hidden object scene over the skeletal knight on the left.
- Find the items listed at the bottom of your screen. Items in red will require an additional action. All item locations are shown in the screenshot below.
- Upon finding all the items, the Shovel Blade will be added to your inventory.
- Take a closer look at the pink water lily on the right.
- Use the Net to retrieve the Gold Coin.
- Examine the coffin propped up straight ahead.
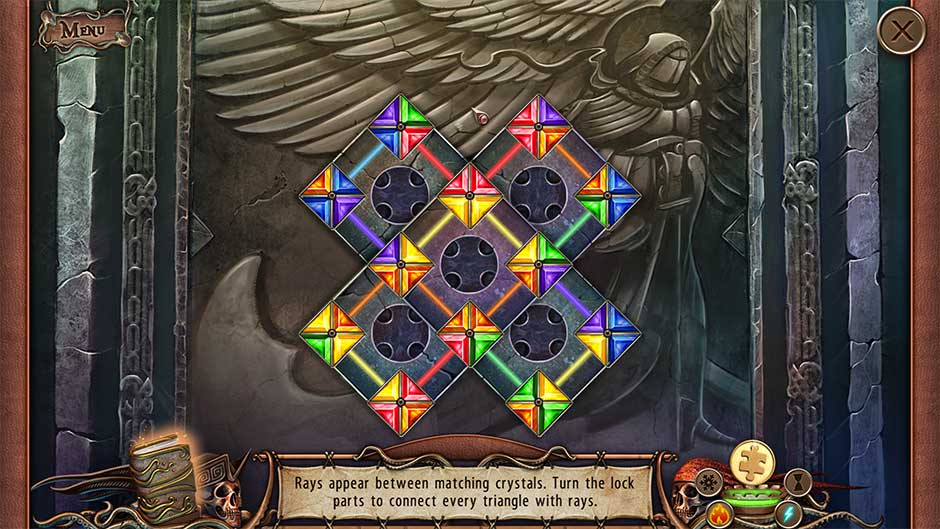
- Insert the Puzzle Piece into the empty slot toward the bottom to trigger a puzzle.
- Rays appear between matching crystals. Turn the lock parts to connect every triangle with rays. The solution is shown below.
- Once the puzzle is completed, the coffin will open, revealing the Time Keeper! But hold on, the Time Keeper isn’t responsive, either…
- Click on the hidden object area that reappears over the skeletal knight on the left.
- Find the items listed at the bottom of the screen. All item locations are shown below. Once the area is completed, you’ll receive the Rope.
- Head back outside.
Well
- A monster will appear and block your path. Deal with it using the Magic Blade!
- Take a closer look at the end of the path leading to the Hole.
- The Hole is now covered in webs.
- Use the Pole to reach the Torch on the upper right and add it to your inventory.
- Use the newly-acquired Torch to burn away the cobwebs.
- Click again to enter the Hole area.
Hole
- Attach the Rope to the extended tree branch over the hole.
- Continue down to the next location.
Underground Grotto
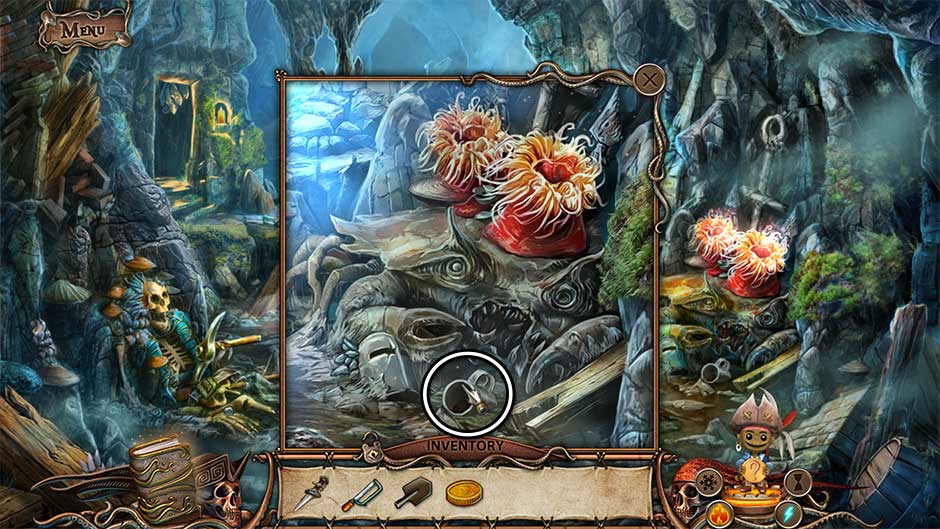
- Zoom in on the red anemones on the right.
- Click on the Mug to add it to your inventory.
- Speak with the hermit in the red robe sitting on the rocky outcrop ahead.
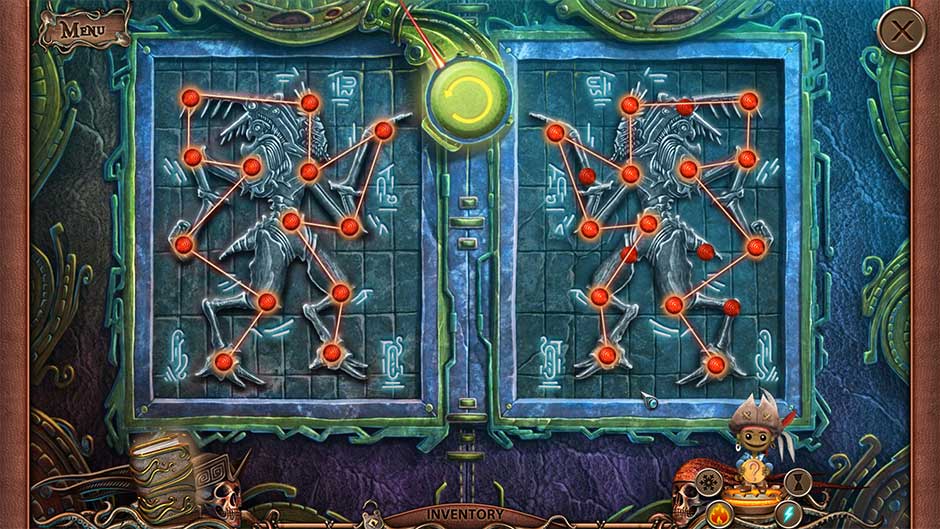
- Give the Gold Coin to the robed figure to trigger a puzzle.
- To restore the constellation, refer to the image on the left side of the screen. Connect the dots in such a way the constellation on the left is mirrored on the right. The solution is shown below.
- Enter the passage on the left.
Hermit’s Home
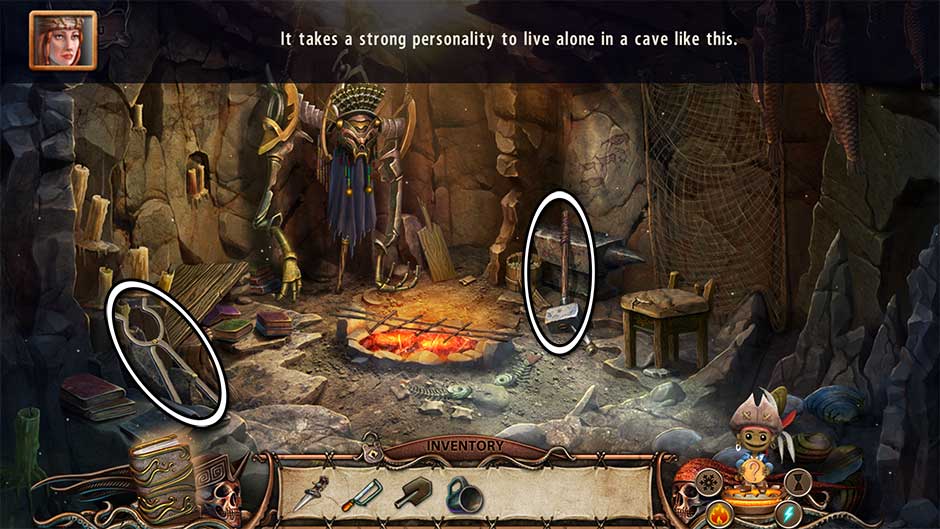
- Click on the Sledgehammer and the Tongs to add them to your inventory.
- Take a closer look at the figure on the other side of the cave.
- Click on the mask to remove it.
- Use the Saw to cut the support staff off its base.
- Attach the Shovel Blade to the left end of the staff.
- Click on the completed Shovel to add it to your inventory.
- Exit to the Underground Grotto.
Underground Grotto
- Use the Sledgehammer to free the Pickaxe from the skeleton on the left.
- Take a closer look at the blue crystals on the wall next to the hermit.
- Use the Pickaxe to remove a Time Crystal from the wall and add it to your inventory.
- After a brief talk with the Knowledge Keeper, return to the Cathedral.
Cathedral
- Use the Time Crystal on the Time Keeper straight ahead, then click on him to recollect him. Just one more Keeper left!
- Zoom in on the tree on the right.
- Use the Mug on the liquid inside the tree hollow to add the Tar to your inventory.
- Make your way back to the Hole.
Hole
- Use the Time Keeper’s powers of time on the Ice Keeper by clicking on the hourglass on the lower right.
- The Ice Keeper doll will be brought back to lift, however now he’s suspended from the top of the screen. Click on him for a closer view.
- Click on the Ice Keeper to save him. He’ll be tucked neatly away in the lower right corner of your screen where he belongs.
- Head back to the Hermit’s Home.
Hermit’s Home
- Zoom in on the fire pit in the center of the room.
- Place the Tar on the grate over the coals to heat it.
- Use the Tongs to retrieve the Hot Tar and add it to your inventory.
- Exit to the Underground Grotto.
Underground Grotto
- Take a closer look at the boat straight ahead.
- Use the Saw to remove the chain from the left side of the boat.
- Pour the Hot Tar over the crack in the bottom of the boat to repair it.
- Place the Shovel inside the boat to use it as a makeshift oar.
- Click on the boat to travel to the final location!
Chapter 7: Shrine
With all the Keepers back in-hand, it’s now time to confront the Ancient Evil once and for all!
Shrine Entrance
- Click on the area straight ahead to enter a brief discussion with the Keepers.
- Examine the circular blockade at the top of the steps on the left.
- Collect the Otherworldly Hand lying at the bottom of the green smear.
- Continue up the steps on the right.
Time Keeper Shrine
- Zoom in on the hot, glowing area on the left.
- Select the Ice Keeper and use his freezing powers to cool the capsule.
- Use the Sledgehammer to break the ice.
- Click on the Ice Axe and the Mosaic Piece revealed to add them to your inventory.
- Take a closer look at the frozen area straight ahead.
- Select the Fire Keeper and use his power of flame to melt the ice.
- Insert the Magic Blade into the indentation revealed.
- Click on the Fire Sword and the Skull to add them to your inventory.
- Go back to the Shrine Entrance.
Shrine Entrance
- Take a closer look at the red shrine figure straight ahead.
- Insert the Fire Sword into the groove in the tablet on the left.
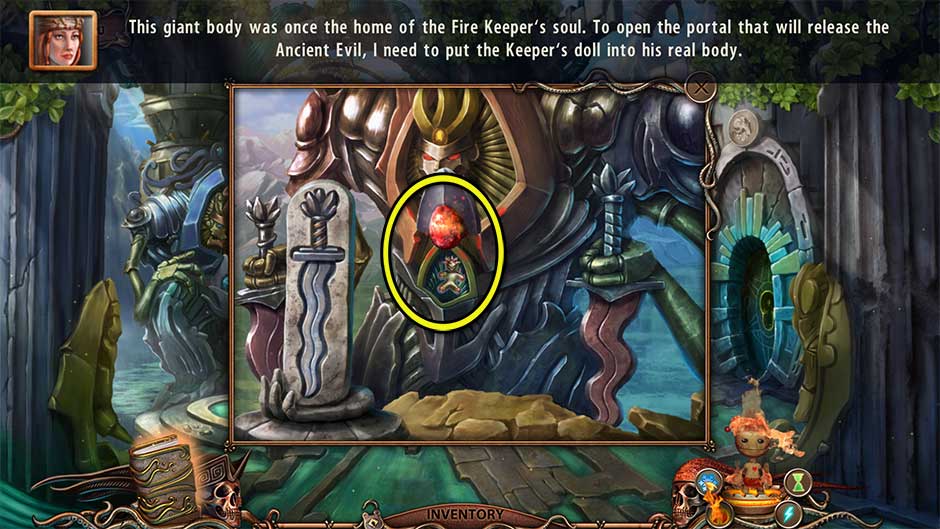
- Select the Fire Keeper, then place him into the slot that appears within his true body. Farewell, Fire Keeper!
- Examine the circular blue door on the right.
- Place the Skull into the slot in the door to reveal a hidden portal.
- Click on the portal to enter the next location.
Ice Keeper Shrine
- Take a closer look at the base of the capsule straight ahead.
- Click once more on the base to zoom in and trigger a puzzle.
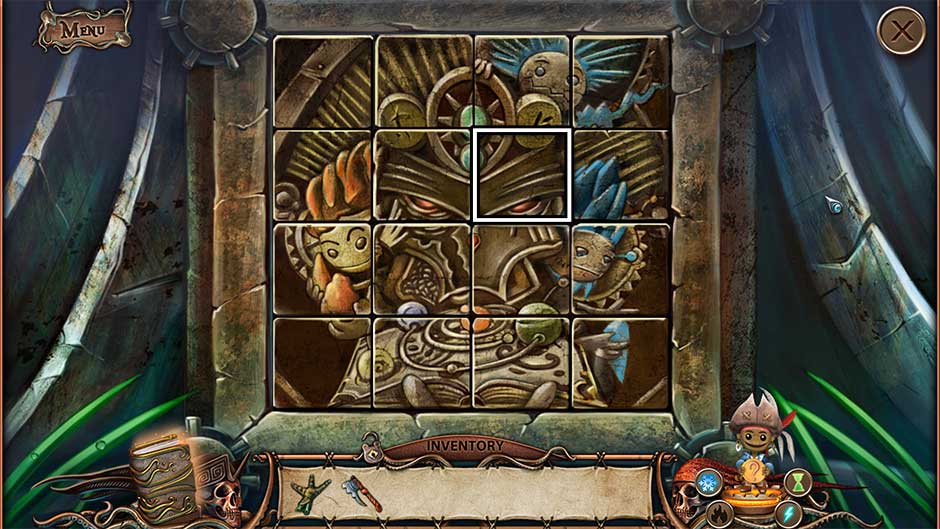
- Using the empty space, move the tiles to assemble the image. Click on a tile next to the empty space to move it into that space. The puzzle solution is shown below.
- Once you’ve aligned the tiles correctly, your inventory will appear again at the bottom of the screen. Insert the Mosaic Piece into the empty slot to complete the puzzle for good.
- Upon completing the puzzle, the capsule will open. Click on the interior for a closer view.
- Collect the Stone Necklace and the Runes from the bandaged interior.
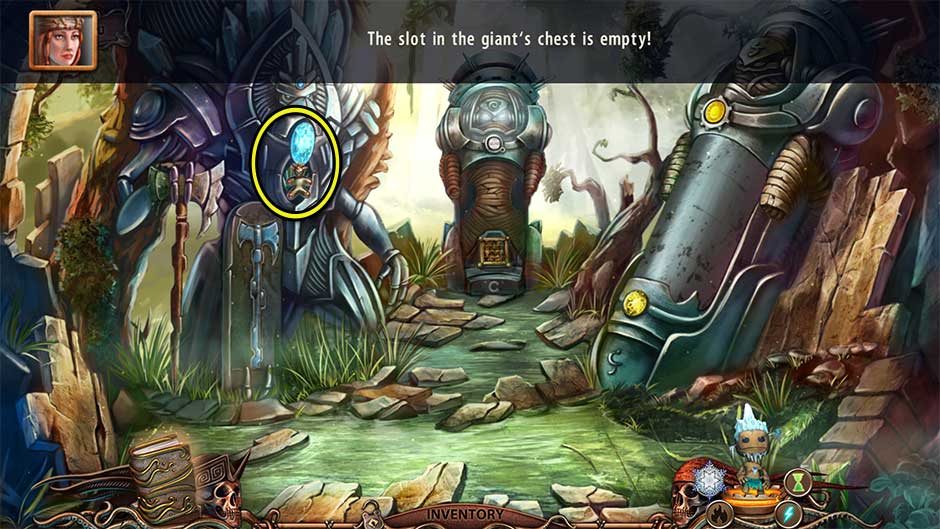
- Insert the Ice Axe into the slot beneath the Ice Keeper’s true body on the left.
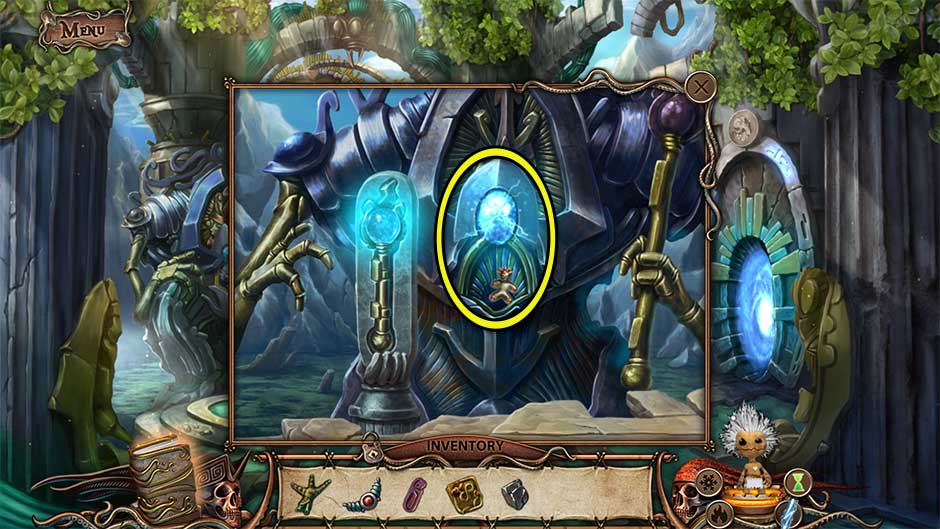
- The slot in the giant’s chest will open. Insert the Ice Keeper into his true body. Stay cool, Ice Keeper!
- Select the Time Keeper and use his powers to open the malfunctioning mechanism with the electricity and yellow crystals on the right.
- Once the capsule on the right is open, take a closer look inside.
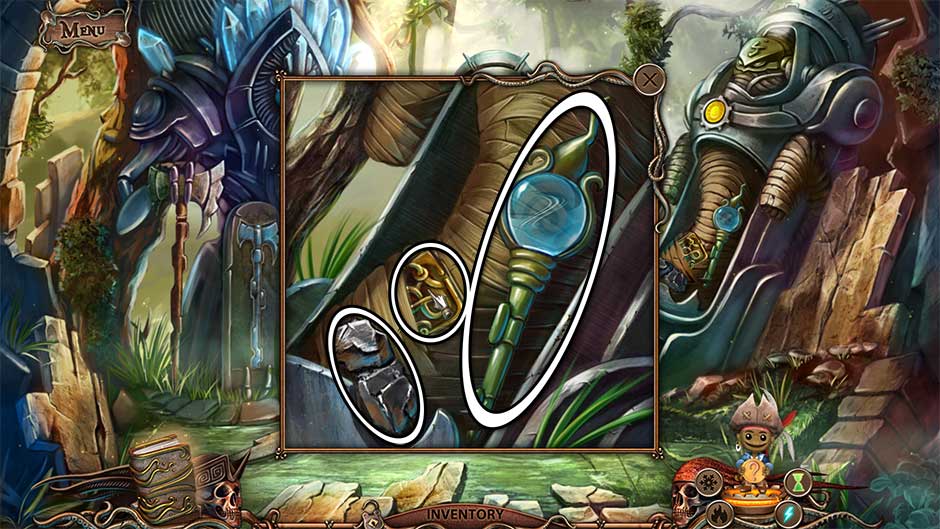
- Pick up the Book of Times, the Lightning Scepter, and the Coal to add them to your inventory.
- Return to the Shrine Entrance.
Shrine Entrance
- Zoom in on the true body of the Power Keeper to the left of the steps.
- Insert the Lightning Scepter into the groove on the left.
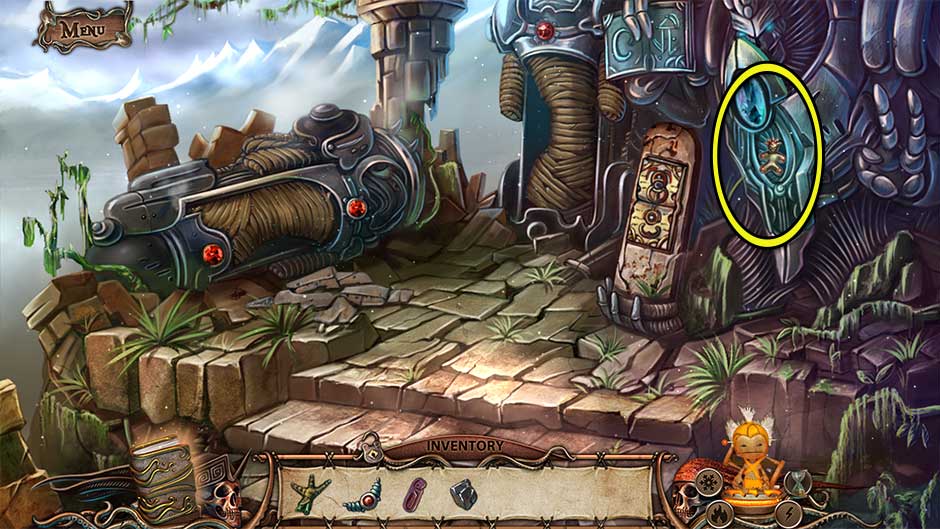
- Once open, select the Power Keeper and tuck him away neatly into the slot in the body’s chest. It’s been an electrifying experience, to say the least.
- Now just one Keeper remains. Head back up the steps on the right.
Time Keeper Shrine
- Insert the Book of Times into the slot in front of the Time Keeper’s true body.
- Select the Time Keeper and place him within the slot that appears in the body on the right. Alas, our timeless team was not meant to last forever.
- Now that all the Keepers are back in their true bodies, it’s time to return to the Shrine Entrance.
Shrine Entrance
- Take a closer look at the circular divot in the ground straight ahead.
- Place the Otherworldly Hand into the slot in the center of the circle. You will open the way to yet another hidden portal!
- Click on the portal to enter the next location.
Library of the Knowledge of Time
- Click anywhere to speak with the Knowledge Keeper.
- Take a closer look at the floating scrolls on the right.
- Click on the ancient scroll. The bottom contains an important clue you’ll need shortly.
- Examine the large circular dial on the left.
- Place the Stone Necklace into the groove on the statue’s neck in the upper right corner to trigger a puzzle.
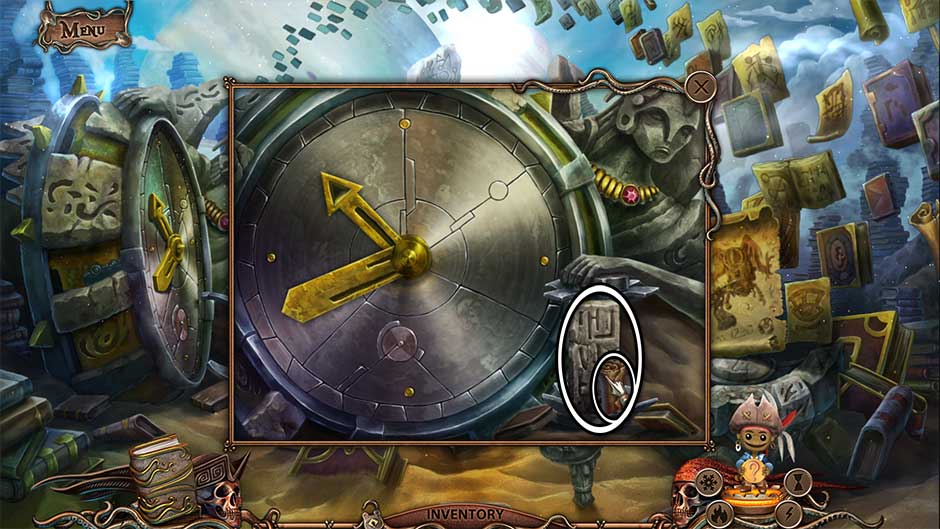
- Set the right time. See your journal for the hint. The hint was the same one you saw just a minute ago on the ancient scroll. The solution is shown below.
TIP! If you find yourself stuck and unable to solve this puzzle, it’s recommended you skip it by clicking on the button in the lower right corner. In some versions of the game, the puzzle solution won’t trigger even when the hands are arranged correctly on the clock, and thus the only way to solve it is to skip it entirely.
- Once you’ve completed the puzzle, click on the Name Scroll and the Runes (2) to add them to your inventory.
- Examine the base of the right hand stone structure ahead.
- Place the Runes (2) into the slot beneath the book.
- Examine the base of the left hand stone structure ahead.
- Place the Runes into the slot beneath the book.
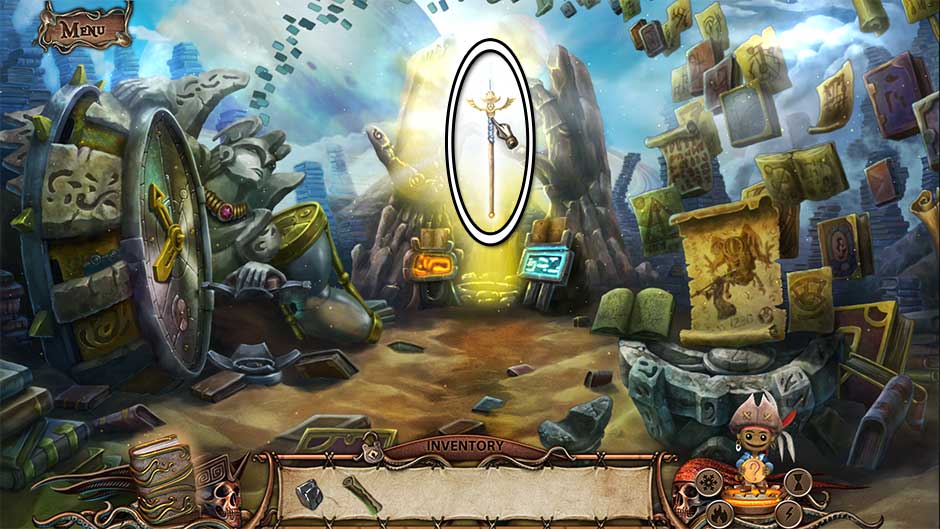
- A weapon will appear in a brilliant light ahead. Click on the left and right glowing tablets to change the features of the weapon. You will want a yellow Holy Spear. Once completed correctly, click on it to add it to your inventory.
- Return to the Shrine Entrance.
Shrine Entrance
- Examine the round marked door at the top of the steps on the left.
- Place the Name Scroll into the square-shaped groove at the top of the close-up.
- Use the Coal on the stone to write the summoning runes.
- The Ancient Evil will appear! Use the Holy Spear to vanquish it once and for all!
Congratulations! You’ve completed the World Keepers – Last Resort Walkthrough!
The World Keepers – Last Resort Walkthrough is meant as a guide and does not contain cheats, hacks, or serials.
The post World Keepers – Last Resort Walkthrough appeared first on GameHouse.
