Quantcast
Channel: Guides – GameHouse
Viewing all 192 articles
Browse latest View live

Save Halloween: City of Witches Walkthrough

$
0
0

The rising of the bloody moon is almost upon us, and it’s up to you to help the witches. Recover the Stone of the Dead from Lucifer and challenge his eight subordinates to haunted games of Match 3, before it’s too late! In need of a guide for your journey? Our Save Halloween: City of Witches walkthrough will provide you with the tips and tricks you need to confront eight demons of the night.

Contents

Getting Started

Here you will find a collection of basic tips and information to help you familiarize yourself with Save Halloween: City of Witches.

  • When starting the game for the first time, you will be able to choose between two difficulties: Timed, and Relaxed. The Timed mode is standard, while the Relaxed mode features no timer.
  • You can change the difficulty at any point by simply ticking Timed on or off in the Map.
  • All items you’ve unlocked can be viewed in “Your Home”. Enter this area to unlock and purchase upgrades.
  • Select a pumpkin lining the path on the Map to select the level you’d like to play.
Save Halloween City of Witches Map

Save Halloween City of Witches Map

Save Halloween: City of Witches Walkthrough

How to Play

Our Save Halloween: City of Witches walkthrough will guide you through the basic mechanics of how to play and how various features work.

  • Swap pieces to match rows of 3 or more. Click on a piece to select it, then click on the piece you would like to swap it with; you can also drag a piece instead of clicking. Pieces can only be moved if there’s a match of 3 or more to be made. Once a match of three or more has been made, those pieces will be removed from the board. Pieces must be swapped with adjacent pieces and cannot be moved diagonally.
  • Some levels feature colored tiles. In order to collect and/or clear these, you will need to make matches of three or more over them. Destroy all the colored tiles to pass a level.
  • Match items over tiles to collect them. Tiles come in both gold and silver variants.
  • Match items or use bonuses around cells with stone or wooden boxes over them in order to clear the field. Some of these blocks may require you to do this multiple times. If you’re not certain, click on the tile to check.
Save Halloween City of Witches Blocked Cells

Save Halloween City of Witches Blocked Cells

  • Levels which contain golden skulls will require you to move the skull to the bottom of the board to collect it. Do this by making matches which drop the skull closer to the bottom.
  • Spider webs will appear over pieces in some levels. To remove a spider web, match a set of three or more pieces next to it. You can also clear spider webs by using bonus items to blow them up.
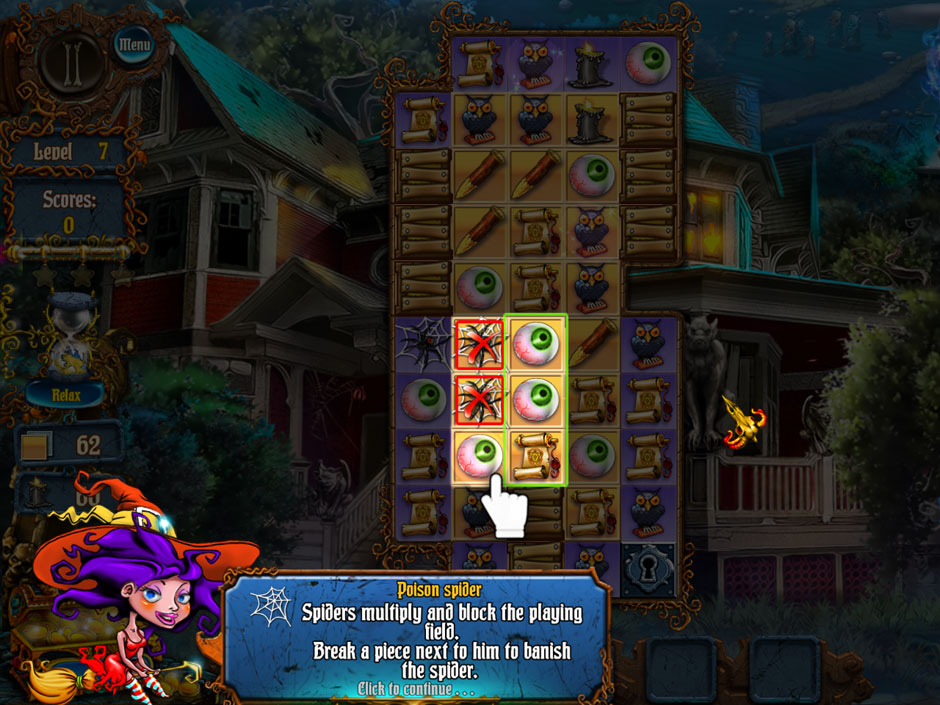
  • Spirits and spiders are capable of blocking cells, as well as multiplying. Match pieces or use bonuses next to them to clear them off the board.
Save Halloween City of Witches Spirits and Spiders Blocking Cells

Save Halloween City of Witches Spirits and Spiders Blocking Cells

  • Keyholes will appear on some levels. Match pieces next to them or use bonuses to blow them up in order to unlock a hidden part of the playing field.
  • Bonuses can be earned and unlocked by completing levels. Charge bonuses by making matches with pieces which show a spark effect over them.
  • Using a bonus will reduce the bonus meter’s charge. Charge the meter by making matches.
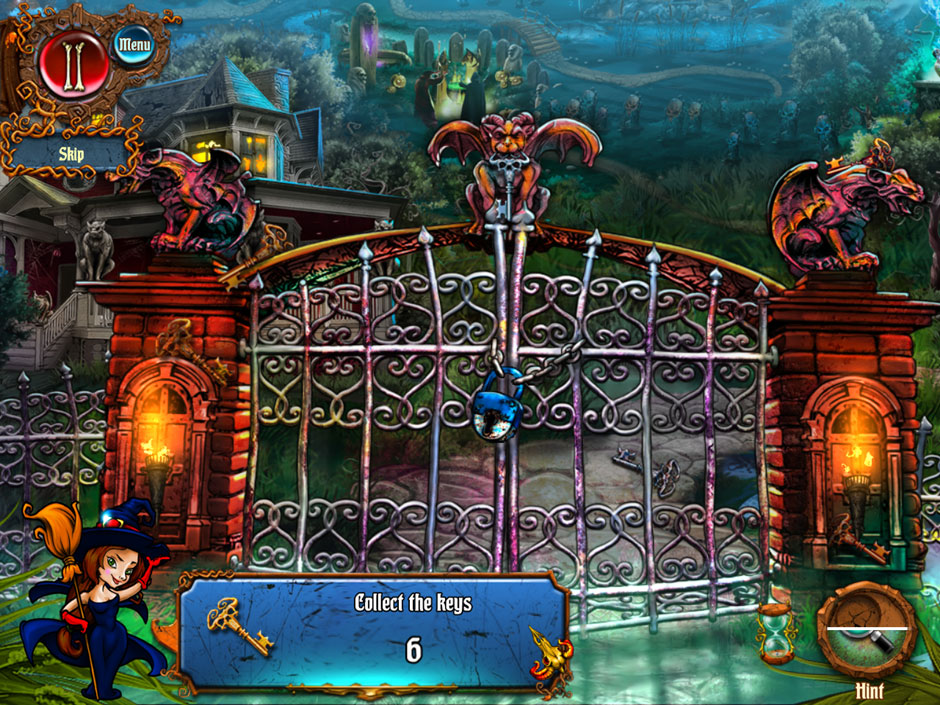
  • Hidden object scenes will appear now and then between levels. Find the items listed at the bottom of the screen in order to progress. If you need a hint, simply click on the Hint button located in the lower left corner of the screen. Hints are unlimited, but require time to recharge.
Save Halloween City of Witches Hidden Object Scene

Save Halloween City of Witches Hidden Object Scene

  • Tasks are unique per level and are shown on the left side of your screen. Your progress will be updated as you play. You will need to complete all of a level’s tasks in order to progress to the next level.
  • Your Home, selectable in the lower right corner of the Map, allows you to view various items you’ve unlocked. From here, you can also purchase upgrades.
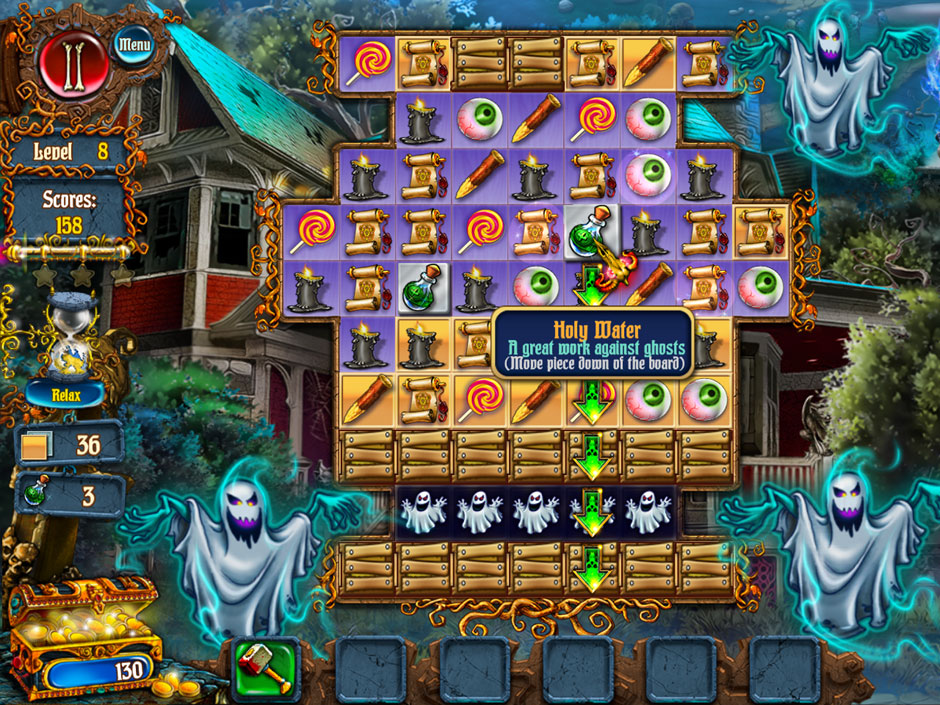
  • You will encounter various bosses as you progress. Each boss presents a unique challenge. However, the goal remains the same for all: drop the items needed to fight them to the bottom of the board. Do this successfully three times to defeat them.
Save Halloween City of Witches Boss Encounter

Save Halloween City of Witches Boss Encounter

Tips & Tricks

The following is a collection of tips and tricks to help guide you through the finer points of Save Halloween: City of Witches:

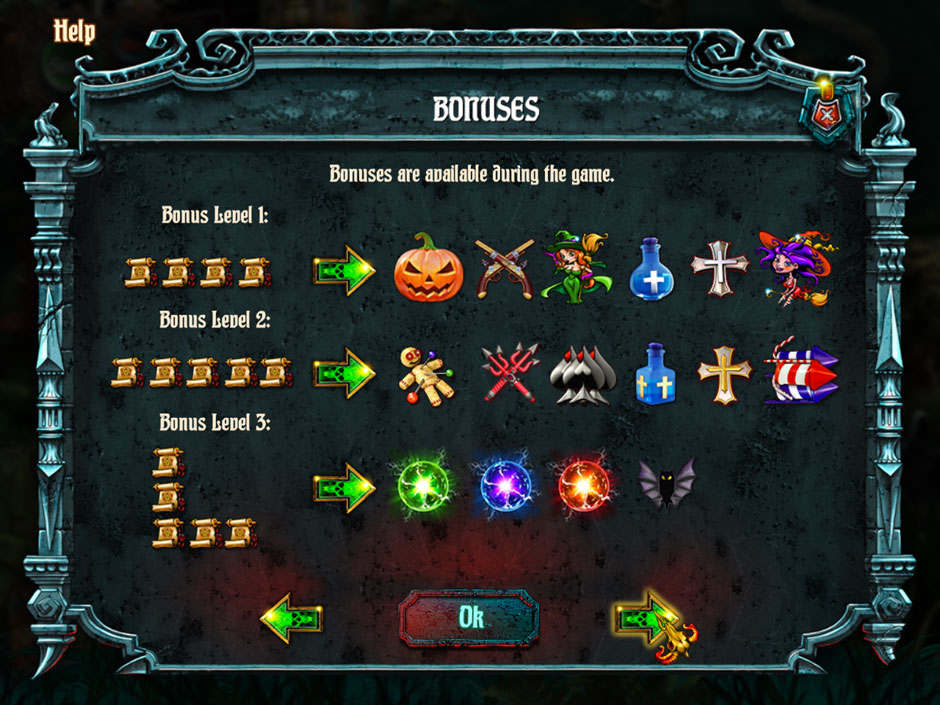
  • There are three types of bonuses available during the game, divided into three levels. Level 1 bonuses require a match of 4 items. Level 2 bonuses require a match of 5 items. Level 3 bonuses require an L, T, or + formation match. Icons of these various bonuses and their associated levels can be seen here:
Save Halloween City of Witches Bonus Levels 1, 2, and 3

Save Halloween City of Witches Bonus Levels 1, 2, and 3

  • In addition to the bonuses shared above, there are also six special types of bonuses which can be unlocked in the “Your Home” area, and activated by clicking them at the bottom of the screen once fully charged. They are:
  1. Hammer- destroys any piece or obstacle
  2. Broom- destroys webs
  3. Shuffle- shuffles pieces on the board to new locations
  4. Collector- collects all the chips of a selected type on the board (Note: does not apply to pieces covered with a web or obstructed in some way)
  5. Candy- adds random bonuses to the board
  6. Dracula- bats destroy obstacles on the board
  • Perform 10 back-to-back match 3’s in a row to trigger Combo Mode. Combo mode features three levels:

-Combo Mode I- Silver crosses will be created for each match on the game board

-Combo Mode II- Gold crosses will be created for each match on the game board

-Combo Mode III- Holy water will be created for each match on the game board

  • Gold is earned by matching pieces, and is displayed in a chest on a lower left. Use gold to purchase upgrades and items for Your Home.
  • Items you’ve earned or unlocked will be shown in an icon at the bottom of your screen at Your Home. You will need to formally buy them before they can be used, however. If you have more than five items unlocked, but have at least five unpurchased upgrades, you will not be able to view the newest ones until the previous ones have been bought and unlocked.
  • If you’re not sure what an item does, simply hover your cursor over it to display an item description.
  • Most items bought from the Your Home screen will provide you with extra in-game bonuses to be used on Match 3 boards. You can preview the effects of these items before making a purchase.
Save Halloween City of Witches Purchase Upgrade Preview

Save Halloween City of Witches Purchase Upgrade Preview

  • To use a bonus item on the board, simply double click it or move it one space over to trigger the effects.
  • Click on gold coins that appear over the cells to collect them right away.

Congratulations, you’ve completed the Save Halloween: City of Witches Walkthrough! Be sure to check our blog for more great tips and tricks!

The Save Halloween: City of Witches walkthrough is meant to guide you through the game’s basics, and does not include serials, hacks, or cheats.

The post Save Halloween: City of Witches Walkthrough appeared first on GameHouse.


Halloween Night Mahjong Walkthrough

$
0
0

Halloween Night Mahjong offers the same game you know and love with a distinctively spooky twist. Get into the holiday spirit with some classic tile matching gameplay. If you’re feeling stuck, our Halloween Night Mahjong Walkthrough is here to help guide you through the basics!

Contents

Halloween Night Mahjong Walkthrough

How to Play Mahjong

Whether you’re a returning champion or Halloween Night Mahjong is your first game, here is a brief explanation on how the game is played:

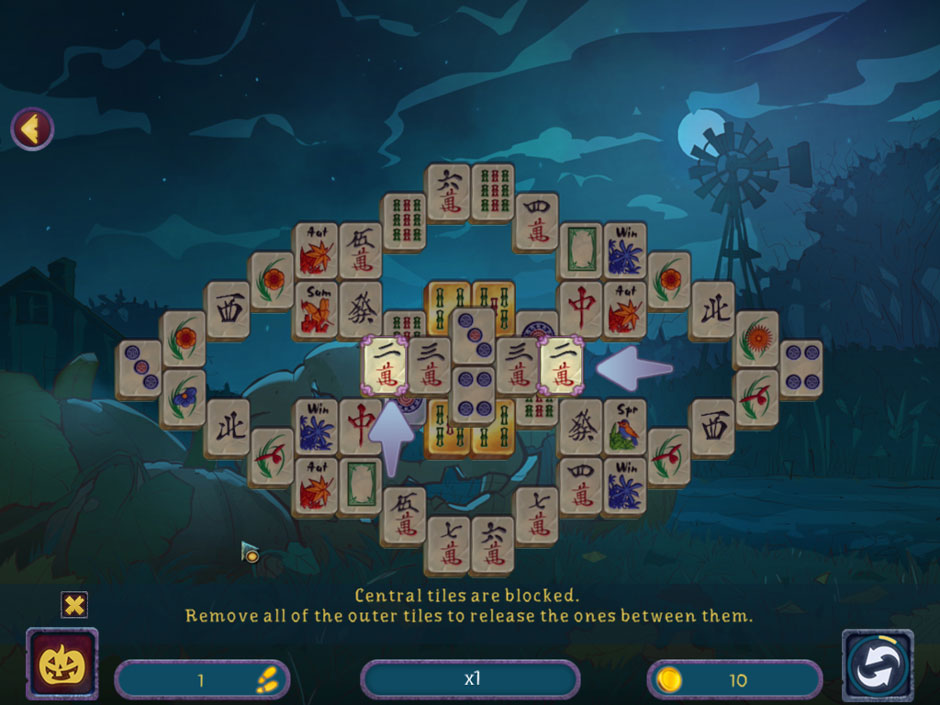
  • Remove pairs of matching tiles from the board. A tile may be removed if there are no other tiles located on top of or on either side of it.
Halloween Night Mahjong Tile Pair

Halloween Night Mahjong Tile Pair

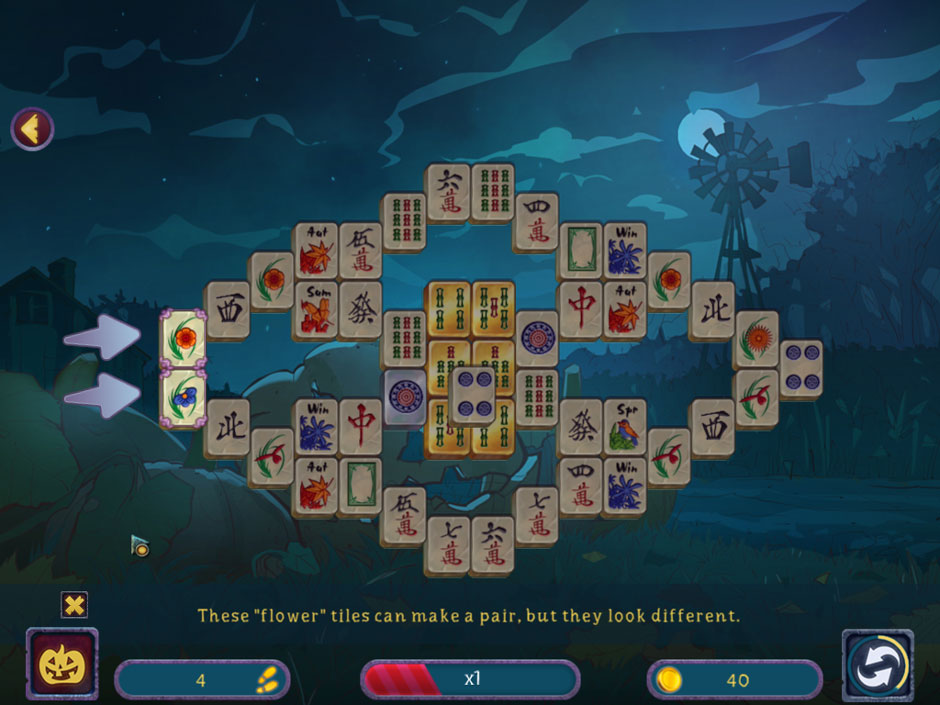
  • “Flower” tiles may look different, but they still belong in the same category and can be matched with each other.
Halloween Night Mahjong Flower Pair

Halloween Night Mahjong Flower Pair

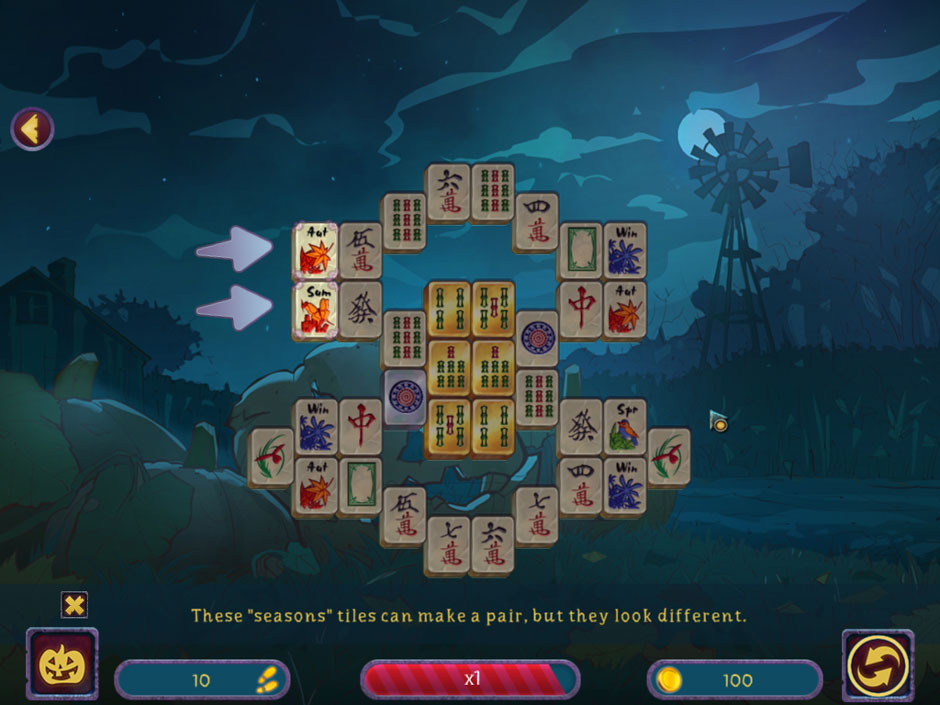
  • “Seasons” tiles may also look different, but like the flowers, they belong in the same category and can be matched with each other.
Halloween Night Mahjong Season Pair

Halloween Night Mahjong Season Pair

  • Points are scored each time you remove a pair of tiles from the game board. The quicker you remove tiles, the higher your score index is, and the more points you will score. Your score index is shown in a meter at the bottom of your screen.
  • Silver tiles, upon being removed from the game board, will instantly restore your chip bonus.
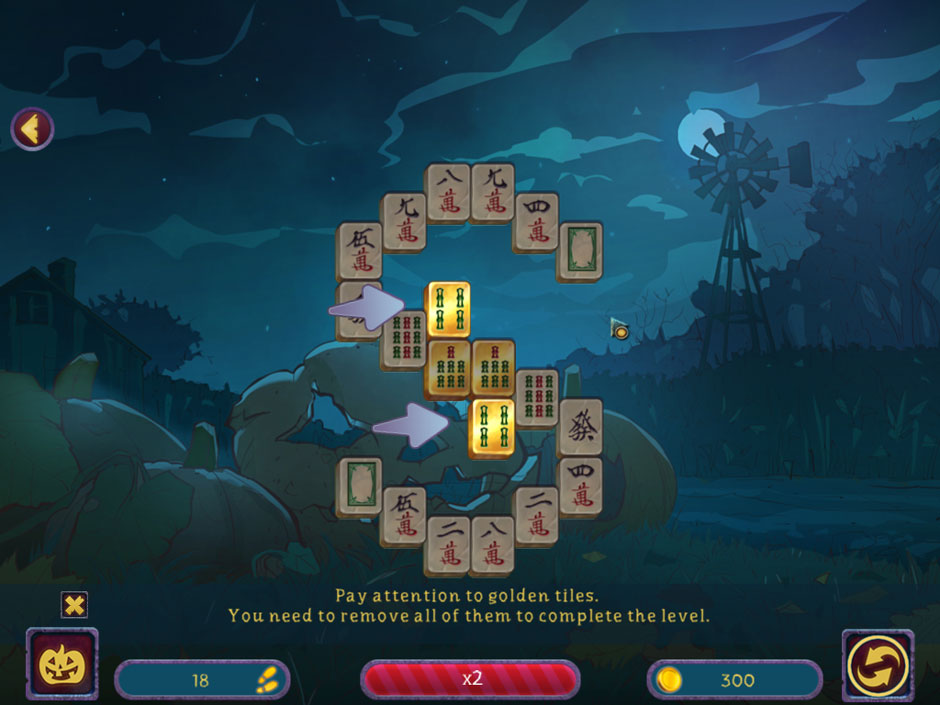
  • Gold tiles act as the main objective for each game board. Remove all of them in order to complete a level and progress.
Halloween Night Mahjong Gold Tiles

Halloween Night Mahjong Gold Tiles

  • The more standard (non-gold) tiles you have remaining on the game board when all the gold tiles are cleared, the higher your score will be.
  • If no more matches can be made on a board, the board will automatically be shuffled for you.

Tips & Tricks

In need of a few extra tips and tricks? Not to worry; the Halloween Night Mahjong Walkthrough has what you need:

  • Select the jack-o’-lantern skill button at the bottom left corner of your screen to shade off blocked tiles. This will help indicate which tiles can and cannot be moved at a glance. You can toggle this skill on and off as needed.
Halloween Night Mahjong Shaded Tiles Button

Halloween Night Mahjong Shaded Tiles Button

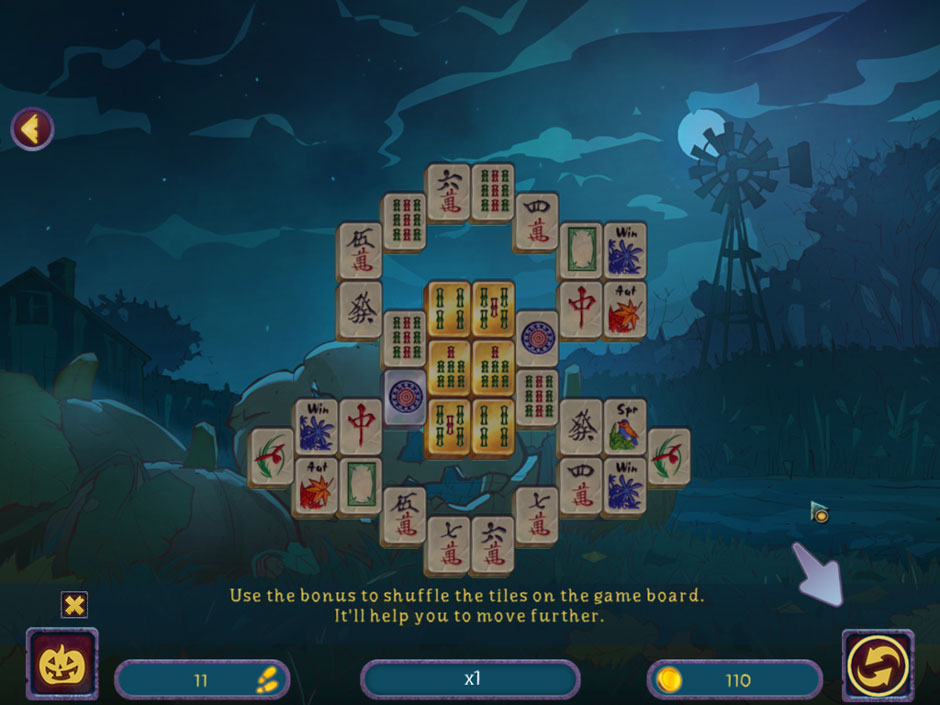
  • The arrows button at the bottom right corner of your screen is your shuffle bonus. Click on this to shuffle all the tiles on the board into new locations. You can use this whenever the bonus meter is filled, but it will take time to recharge. Make tile matches that contain silver tiles in order to instantly restore this bonus.
Halloween Night Mahjong Shuffle Button

Halloween Night Mahjong Shuffle Button

  • Levels are divided into larger sections according to difficulty. The Abandoned Field will be the first of these you can select. Clear all the board levels here to unlock the Novice category, and so forth.
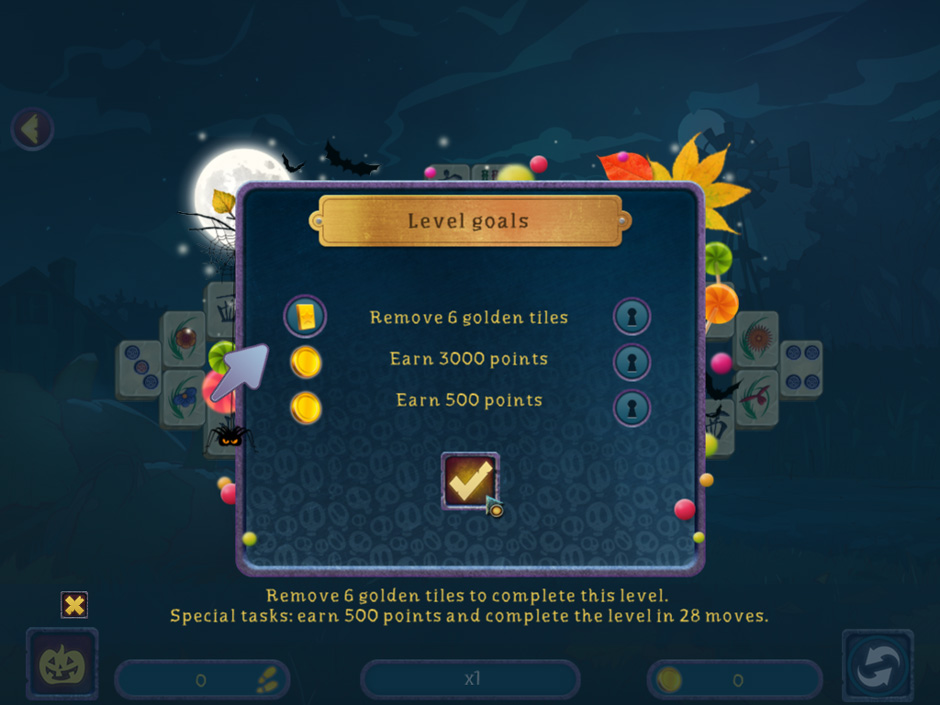
  • When selecting a game board, the level goals will be displayed upon entering. Each level requires you to remove a certain number of gold tiles, but will also have bonus tasks for you to complete. Once a task is completed, the lock icon next to this task will be replaced with a gold key. Goals vary from finding all the gold tiles within a level, to completing the level within a certain amount of time or in a certain number of moves.
Halloween Night Mahjong Level Goals

Halloween Night Mahjong Level Goals

  • You may change the type of tile you would like displayed from the Options menu. You can access the Options menu via the arrow on the upper left of your screen whenever you are on a game board. Tiles come in oriental, numerical, and picture symbol formats.
Halloween Night Mahjong Halloween Symbol Tiles

Halloween Night Mahjong Halloween Symbol Tiles

Congratulations, you’ve completed our quickstart Halloween Night Mahjong Walkthrough! Need any additional help? Be sure to let us know!


The Halloween Night Mahjong Walkthrough is meant to help guide you through the game’s basics and does not contain cheats, hacks, or serials.

The post Halloween Night Mahjong Walkthrough appeared first on GameHouse.

Grave Mania: Undead Fever Walkthrough

$
0
0

When a vicious undead fever flips the business of Funeraria Loca on its head, it’s up to you to put the problems to rest! Join married couple Bonnie and Johnny as they bury their undead troubles in this charming time management title. With our Grave Mania: Undead Fever Walkthrough in your arsenal of zombie-vanquishing needs, you’ll be certain to revive the business!

Contents

Grave Mania: Undead Fever Walkthrough

How to Play

Prepare all the zombies for burial before they wake up! The following steps will guide you through how to play the game.

  • Two difficulties are available: Normal and Relaxed. Relaxed difficulty is a no-sweat timerless mode, whereas Normal mode features zombie burial fun for all!
  • Zombies will enter your establishment and require funeral preparations. Your goal is to sprucen them up and send them on their way before they wake up.
  • Match the zombie’s demand icon with the color of the stations in your establishment.
  • Click and hold to drag zombies to the stations they require. Some zombies may require special services.
Grave Mania Undead Fever Moving Zombies

Grave Mania Undead Fever Moving Zombies

  • Once a zombie has been placed at a station, a new type of demand icon will pop up over its head. Click on the zombie to start this process, whether it’s a simple sprucening or a minigame.
  • Clear a level successfully by earning the goal amount of cash from your zombie clients.
  • Up to 10 tasks can be queued at a time. Right-click at any point to cancel all tasks.
Grave Mania Undead Fever Queuing Tasks

Grave Mania Undead Fever Queuing Tasks

  • Special services are brief minigames that will pop up when a zombie requiring them is selected. The following special services are available:
  1. Formalin Vials Micro-game: Click the FILL button at the bottom of the screen to fill a vial with the correct amount of formalin.
  2. Dress-up Micro-game: Click on the arrows on the left and right to switch outfits on a zombie. Select the one that makes them happy to move on.
  3. Bone Fixing Micro-game: Click on a zombie’s bones to realign them until their entire body matches the silhouette given.
Grave Mania Undead Fever Bone Alignment Minigame

Grave Mania Undead Fever Bone Alignment Minigame

  1. Face Prep Micro-game: Select the correct face accessori(es) as indicated by the outlines on the zombie to complete their desired look.
  2. Feeding Micro-game: Select the type of food the zombie would like to eat.
  3. Casket Cleaning Micro-game: Click on dirt, cobwebs, or other undesirable materials within a casket until it’s clean.
  4. Voodoo Micro-game: Use your cursor- now a spirit detector- to scan a zombie’s body for evil spirits. A bright spot will appear when an evil spirit is detected. Click to free the spirit of the zombie’s body.
  5. Photo Booth Micro-game: Find the items on the zombie’s body using the gray sketches as reference. Once an item is found, take a picture of it.
  • There are a handful of special items that can be used to give you various boosts. They are as follows:
  1. Chamomile- Pauses the Revival Meter for a period of time.
  2. Holy Water- Gives a bonus star to unconscious creatures.
  3. Hypnotic Pill- Use this to knock out all undead creatures wandering around.
  4. Tonic- Use this to cure Bonnie of zombie infections.
  • Side quests will occasionally pop up. Hunt for pests such as mice or skunks that have gotten loose in the shop. Film reels, limbs, or other miscellaneous collectibles may surface, too. Locate all of them to earn bonus cash! Additionally, you may need to protect a rare and precious food supply, or important townsfolk from the undead invasion.
  • Some stations may break down, become dirty, or require repairs before they can be used again. Click on these stations to fix them up and restore them to working order.
  • You can upgrade or purchase additional stations prior to starting a level. Click on a station silhouette with a purchase tag to unlock it with cash. Items with green arrows can be upgraded.
Grave Mania Undead Fever Purchasing Upgrades

Grave Mania Undead Fever Purchasing Upgrades

Graveyard

Once Bonnie’s shift in the shop is done, it’s Johnny’s turn to put the zombies to rest! Complete the graveyard minigames, outlined below:

  • Art of Whack- Smack all the zombies trying to escape with your shovel by clicking on them. Once whacked properly, click and drag them back to an empty grave and bury them.
  • Dead Man-whacking- Prevent zombies from escaping their graves by clicking on them. Whack them with your shovel in the order shown at the top of the screen for the highest scores.
Grave Mania Undead Fever Dead ManWhacking Minigame

Grave Mania Undead Fever Dead ManWhacking Minigame

  • Tombstone Defense A- Point and click to shoot the zombies attempting to escape the graveyard.
  • Tombstone Defense B- Shoot the zombies, but not Bonnie! Punishment awaits if you accidentally make her angry.
  • Happily Buried A- Follow the zombie burial guide and solve the puzzle. You may place only one zombie into a grave at a time.
  • Happily Buried B- Find the correct burial arrangement that will prevent the zombies from tearing each other apart.
  • Occasionally a zombie will drop a power-up item that will aid you in your tasks. Collect them when you find them!

Zombies & Monsters

Always know your customers! The following list covers exactly what type of threats and/or clients await you in Grave Mania: Undead Fever:

  • Farmers- The first victims of the undead fever, they are relatively harmless zombies.
  • Actresses- Short-tempered superstars, these zombies always get what they want.
  • Comedians- All about the spotlight, these troublemaker zombies will wake up surrounding zombies when they rise again.
  • Sheriffs- Capable of infecting Bonnie, these zombies are short-tempered, as well as capable of shooting and biting at the same time.
  • Soldiers- Formerly the protective sort, now these zombies strike fear into everyone.
  • Mariachis- These zombies will provide small tips, and are also capable of attacking Bonnie whenever the chance arises.
  • Mad Scientists- Capable of attacking Bonnie and simultaneously waking the dead, these zombies are one of Bonnie’s most notorious customers.
  • Werewolves- Known for their brute strength, it’s best to send these clients on their way before they can hurt Bonnie.
  • Vampires- If woken, vampires will give Bonnie a very difficult time, so it’s best to keep these nocturnal creatures asleep.
  • Banshees- Immediate escape artists which are incapable of being contained once they attack. Beware!

Tips & Tricks

Here are a handful of additional Grave Mania: Undead Fever tips and tricks to stem the infection:

  • Always keep your customers happy to earn extra cash. A zombie’s satisfaction level is shown via the stars floating over their head.
  • Zombies with more stars floating over their heads will leave bigger tips!
  • Zombies will become more restless the more agitated they are.
  • Zombies will wake up if you leave them for too long. In case this happens, click on them to knock them back out and prevent them from escaping!
Grave Mania Undead Fever Loose Zombie

Grave Mania Undead Fever Loose Zombie

  • Icons floating over a zombie which show Bonnie’s face indicate that you can expect a minigame.
  • The time management portion of the game will effectively pause when a minigame is triggered, so don’t worry about rushing.
  • Tasks that have been queued for Bonnie prior to a minigame will remain queued once the minigame is finished.
  • Hire a zombie butler to give yourself an extra set of helping hands. They will especially come in handy when stations need to be prepped.
  • In the event Bonnie becomes infected, quickly grab a tonic from the Tonic Machine!

Congratulations, you’ve completed our Grave Mania: Undead Fever Walkthrough! Now sleep tight and don’t let the zombies bite!

Our Grave Mania: Undead Fever Walkthrough is meant as a guide and does not contain cheats, hacks, or serials.

The post Grave Mania: Undead Fever Walkthrough appeared first on GameHouse.

Queen’s Garden Halloween Walkthrough

$
0
0

All Hallow’s Eve is upon us, and the royal court is eager to celebrate! Help the Queen and her loyal assistant Jack decorate the palace garden in time for the Halloween celebrations. Customize your garden, and unlock delightfully eerie new items to place within it. If you need a few design pointers or a Match-3 gameplay guide, our Queen’s Garden Walkthrough is here to offer the tips and tricks you need.

Contents

Getting Started

Whether you’re just starting Queen’s Garden Halloween or need a refresher, these are the basics you need to know when playing:

There are three game modes you can choose from:

  1. Timed: Complete the level before the time expires.
  2. Relaxed: Play without a time limit for a more relaxed experience.
  3. Piece of Cake: Play without a time limit and disable weed growth for extreme relaxation.

You can change the game mode at any time via the Options menu.

  • Your current Level is displayed at the top of the screen. The Level reflects the current Match-3 puzzle you’re on.
  • Your Experience is shown in a blue meter at the upper left corner of your screen. Experience is represented by a blue skull in the game, and can be earned via completing Match-3 puzzles, as well as customizing your garden.
  • Your currencies are shown in the upper right corner of your screen. Currency comes in two forms, Gold and Gems. Both can be used to purchase various items for your garden and are earned by completing Match-3 puzzles.
  • Click “Play” in the lower right corner of your screen to instantly be taken directly to the next Match-3 puzzle.

Queen’s Garden Halloween Walkthrough

How to Play

Queen’s Garden Halloween is divided into two main types of gameplay. The first is type is Match-3 puzzles. The second type is Garden building and customization. Here you’ll find a guide for each:

Match-3

Earn Experience and currency to spend in the Store by playing through Match-3 puzzles. This section contains a complete overview of this part of the game.

  • Make a match or combination of at least 3 tokens in order to remove them from the game board.
  • Your current goal is displayed in the upper left corner of the screen. Goals vary per puzzle and must be completed in order to finish the level and gain rewards.
  • Create combinations of 4 tokens to generate Power Ups. Create additional combinations with Power Ups to eliminate rows or columns. Arrows on either side of a Power Up will indicate in which direction a Power Up will work.
Queens Garden Halloween 4 Combo Power Up

Queens Garden Halloween 4 Combo Power Up

  • Make a combination with 5 or more tokens in order to general a bomb. Swap a bomb with any token, or simply click on it twice, to cause it to explode and clear tokens in the immediate vicinity off the board.
Queens Garden Halloween 5 Combo Bomb

Queens Garden Halloween 5 Combo Bomb

  • Token combinations made both vertically and horizontally at the same time will generate a Bat. Swap the Bat with an adjacent token of your choice to have bats swarm the board, removing all tokens of that type.
Queens Garden Halloween Bat Boost

Queens Garden Halloween Bat Boost

  • Create a match over Green Tiles to remove them.
  • Pink Tiles are much like Green Tiles, except you will need to make an additional match over them to remove them from the board. Pink Tiles which have had a match made over them will turn into Green Tiles.
Queens Garden Halloween Pink and Green Tiles

Queens Garden Halloween Pink and Green Tiles

  • Make a match of 3 or more tokens adjacent to wooden boxes in order to break them. This also applies to earth tiles, stones, and gravestones. Wood boxes require one match, earth tiles require two, and tombstones require four.
  • Candy will appear on some boards. When you see this delicious rotating treat, make token matches beneath it to bring it down to the bottom of the board. Once it reaches the bottom of the board, it can be collected.
  • Tokens covered by chains require a match to be made with them in order to break their chains apart. Some chains will need two match combinations in order to break them and release the token. Matches do not need to be made at the same time.
Queens Garden Halloween Chained Tokens

Queens Garden Halloween Chained Tokens

  • Weeds will be invading some of the boards you play. Make adjacent matches to remove them. Be extra careful, as weeds will grow and spread with each move you make.
  • Upon completing a level, you will earn a level bonus. Level bonuses come in the form of Gold, Experience, or Gems.
  • Gems can be earned by breaking apart earth tiles which contain them. Gems are pink in color, and when earned, can be spent in the garden store.
Queens Garden Halloween Earth Tiles with Gems

Queens Garden Halloween Earth Tiles with Gems

The Garden

The garden is your own personal take on a spooky botanical splendor. Customize it to your heart’s content!

  • Click on the red button in the lower left corner of your screen to access the garden Store.
  • From the Store, you can purchase various items to decorate your garden. Items come in three categories: Garden Plants, Man-made, and Halloween.
Queens Garden Halloween Store

Queens Garden Halloween Store

  • Click on a plant card to view additional information on an item within the store. If you like it, select Buy. Some items can only be bought with certain currencies, e.g. Gems.
Queens Garden Halloween Store Purchase Preview

Queens Garden Halloween Store Purchase Preview

  • Once you’ve purchased an item from the Store, click and hold to drag it to the location in which you’d like to place it in your garden.
  • Click on the green check mark to confirm the purchase of your item.
  • Rotate items in your garden by selecting them, then clicking on the yellow swap button. Rotating items is free.
  • Select an item, then the red Remove button to remove it from your garden. Removing items has a cost.
  • Click on the orange icon above the Store to open the path building menu. Click on a square where you’d like to build a path. If you’d like to remove an existing path or pond, select the hammer icon within the menu, then the plot which you would like to remove.
Queens Garden Halloween Building Paths

Queens Garden Halloween Building Paths

  • You can zoom in or out of your garden by using the meter on the left, or by scrolling your mouse wheel.
Queens Garden Halloween Garden

Queens Garden Halloween Garden

Tips & Tricks

Looking for a few extra tips and tricks to help you make the Queen’s Garden Halloween even more ravishing? Look no further!

  • Quick hop between gardens by selecting the leafy icon on the lower right. Gardens will be numbered and can be unlocked by leveling up. Level requirements are displayed in locks over these gardens.
  • Click on the sun and moon icon toward the lower left corner of your screen to display your garden during the day or at night according to your preference.
  • To quickly purchase an additional item you already have on display in your garden, simply select an existing one (e.g. If you want to purchase a pumpkin, select a pumpkin in your garden) and click the green check mark to instantly purchase another. You will immediately enter the editing mode and do not have to visit the Store directly.
  • Click on the eye icon on the left side of your screen while viewing your garden to remove the game’s interface for an even nicer view.

Congratulations, you’ve completed our Queen’s Garden Halloween Walkthrough! Be sure to check our blog for more helpful tips and tricks for other great titles.


The Queen’s Garden Halloween Walkthrough is meant as a guide and does not contain cheats, hacks, or serials.

The post Queen’s Garden Halloween Walkthrough appeared first on GameHouse.

Halloween Stories: Mahjong Walkthrough

$
0
0

The wedding of Prince Jack and Princess Adele was all going according to plan, until the fair bride-to-be was taken! Follow the journey of Prince Jack in Halloween Stories: Mahjong as he seeks to save his fair maiden. Guide the prince through numerous holiday-themed Mahjong puzzles, and let us guide you in our Halloween Stories Mahjong Walkthrough!

Contents

Halloween Stories: Mahjong Walkthrough

How to Play

Whether you’re new to Halloween Stories: Mahjong or simply need a refresher, the following section is dedicated to covering all the essentials of the game.

  • The Map acts as the hub for all your game activities and follows the journey of the hero. From here you can play, or replay, any level you have unlocked. Simply select the number indicating a level, click the large red Play button in the lower right corner of the screen.
Halloween Stories Mahjong Map

Halloween Stories Mahjong Map

  • Once a level has been selected, you will be taken to a Mahjong puzzle screen. The level’s unique objectives will be displayed. Click the check mark once you’re ready to play.
  • The goal of Mahjong is to match pairs of tiles with each other. Tiles must have the same number and/or theme on them, and cannot be matched unless at least one side is not blocked by another tile. Tiles also cannot be matched if they have tiles on top of them.

There are three types of Mahjong puzzles you will encounter:
1. Jewelry- Remove all the tiles from the board (standard Mahjong gameplay) and collect a large number of coins in doing so. Jewelry tiles will appear in this game mode.

Halloween Stories Mahjong Jewelry

Halloween Stories Mahjong Jewelry

2. Collections- Along with traditional tile collecting, you can also fill the collections shown at the bottom of the screen. Each collection gives you 100 points. Three specific tiles are shown per collection at the bottom of the screen. When you collect tile pairs of the same type as the ones displayed, it goes toward filling these collections.

Halloween Stories Mahjong Collections

Halloween Stories Mahjong Collections

3. Chains- In addition to collecting tiles in the traditional way, you can also collect them in chains during these levels. Tiles of any suit can continue a chain as long as the number displayed is equal to, or one higher, than the last pair of tiles collected. Each chain may not contain more than 10 tiles. A pair of tiles that doesn’t meet these requirements will break the chain, and you’ll have to start over.

Halloween Stories Mahjong Chains

Halloween Stories Mahjong Chains

  • By default, three types of bonuses are available for you to use, located in the lower right corner of your screen:
  1. Shuffle- Click on this button to shuffle the tiles displayed. Shuffles are limited per level, but will be restocked without having to purchase them once a new level is selected.
  2. Search Pair- Click the magnifying lens to have the board indicate a matchable pair for you.
  3. Undo- Click the curved arrow button to undo your last move.
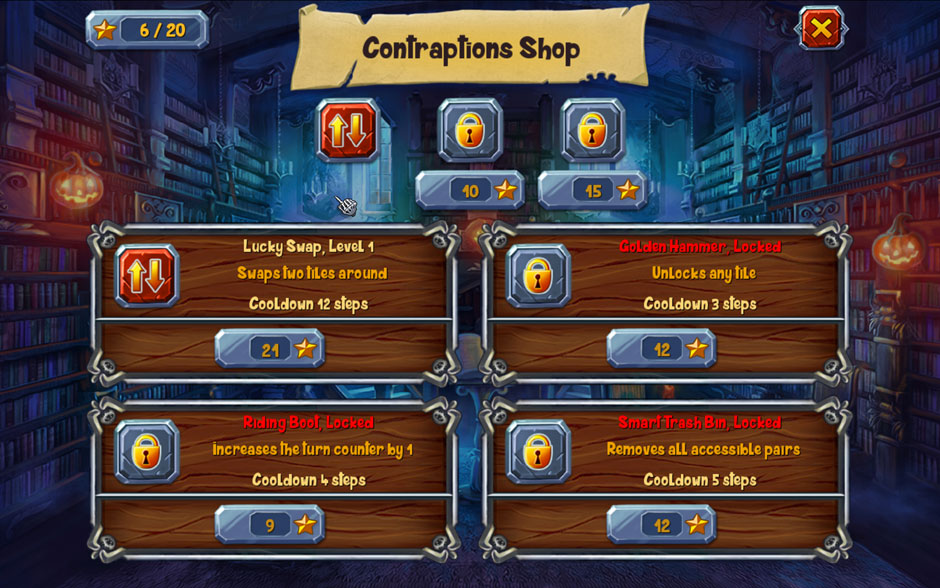
  • There are additional bonuses you can purchase in the Contraption Shop. They are:
  1. Lucky Swap- Swap the position of two tiles of your choosing on the board.
  2. Riding Boot- Increases the turn counter by 1.
  3. Golden Hammer- Unlocks any tile.
  4. Smart Trash Bin- Removes all accessible pairs.
  • The Contraptions Shop is located in the lower left corner of the map. From here, you can purchase or upgrade bonuses. Bonuses, and their required slots, can be unlocked with stars earned from completing Mahjong puzzles.
Halloween Stories Mahjong Contraptions Shop

Halloween Stories Mahjong Contraptions Shop

  • The Library is located next to the Play button in the lower left corner of the map. You can (re)watch any comics you’ve unlocked here.
  • Settings can be accessed at any time via the title screen, or the “X” in a puzzle screen.

Tips & Tricks

In need of a few extra tips and tricks to help you along the way? A handful of just this sort of thing can be found here:

  • Once you’ve purchased a bonus from the Contraptions Shop, it can be used over and over in Mahjong puzzles. Bonuses you’ve purchased can be found in the lower left corner of the puzzle screens.
  • Normal tiles bring in 10 coins, silver tiles bring in 15, and gold tiles bring in 20. Jewelry tiles, or jewel tiles, bring in 50 coins and can be matched with each other regardless of color.
  • You can access custom tile sets via the Settings menu. There are nine sets to choose from. Selecting a new set will apply it instantly to your board.
Halloween Stories Mahjong Tile Sets

Halloween Stories Mahjong Tile Sets

  • When quickly making match pairs, especially in Chains levels, be careful- if you make matches too quickly, or before the other pieces have cleared the board, it may not select the tile. Take one extra second and you should always be fine.

Congratulations, you’ve completed our quickstart Halloween Stories: Mahjong Walkthrough! Need any additional help? Be sure to let us know!

The Halloween Stories: Mahjong Walkthrough is meant to help guide you through the game’s basics and does not contain cheats, hacks, or serials.

The post Halloween Stories: Mahjong Walkthrough appeared first on GameHouse.

Holiday Jigsaw Halloween 3 Walkthrough

$
0
0

Whether you’re searching out ideas for upcoming Halloween celebrations or simply looking for a unique and personal puzzle game, you’ve come to the right place. With over 500 images to choose from and a puzzle customization option, there’s something for every puzzle enthusiast here. Our Holiday Jigsaw Halloween 3 Walkthrough will guide you through the essentials and teach you how to create your own spooky jigsaws, too.

Contents

Holiday Jigsaw Halloween 3 Walkthrough

How to Play

The following section of our Holiday Jigsaw Halloween 3 guide will help familiarize you with the game and how it works.

Puzzle Select Screen

  • Upon opening the game, you will immediately be taken to the puzzle select screen. You can select from five categories here: Costumes, Treat, Decoration, Family, and Autumn.
Holiday Jigsaw Halloween 3 Puzzle Select

Holiday Jigsaw Halloween 3 Puzzle Select

  • Click on the arrows at the bottom of the book pages to toggle through the puzzles available in each category.
  • A small indicator with a number, followed by a puzzle piece icon, indicates how many pieces each puzzle is by default.
  • High scores can be viewed via the button to the left of the Play button in the puzzle select screen. The puzzle, score, number of pieces, and time taken will be shown.
  • Trophies can be viewed by clicking on the trophy icon at the bottom of your screen during puzzle select. Hover your cursor over a trophy to view the requirements needed to unlock it.
Holiday Jigsaw Halloween 3 Trophies

Holiday Jigsaw Halloween 3 Trophies

  • Once you’ve selected a puzzle, click on the large Play button at the bottom of the screen.

Puzzles

  • While in a puzzle, move and place pieces with your left mouse click. Right-click to rotate pieces.
  • Click on the eye icon at the bottom of your screen to toggle an image of the completed puzzle for reference. You can select the size of this image in the upper left corner, or exit by clicking on the X in the upper right.
Holiday Jigsaw Halloween 3 Reference Image

Holiday Jigsaw Halloween 3 Reference Image

  • Click on the Ghost icon at the bottom of your screen to bring up a semi-transparent version of the puzzle you’re working on in the middle of your screen. You can toggle this feature on and off by clicking the same icon.
  • Select the Magnifying glass at the bottom of the screen to zoom in on any section of the puzzle.
Holiday Jigsaw Halloween 3 Magnifying Glass Zoom

Holiday Jigsaw Halloween 3 Magnifying Glass Zoom

  • Clicking the Border icon at the bottom of the screen will temporarily display border-only pieces.
  • Select the Hint button, designated by a “?”, to have the game show two pieces which can be connected to each other.
  • Select the Sort button to have the game auto-sort puzzle pieces for you.
  • Access your Settings by clicking on the gear icon at the bottom of the screen.
  • Once you’ve completed a puzzle, your score, and any applicable trophies, will be shown.
Holiday Jigsaw Halloween 3 Completed Puzzle

Holiday Jigsaw Halloween 3 Completed Puzzle

Tips & Tricks

Tips, tricks, and puzzle customization for Holiday Jigsaw Halloween 3 can all be found here!

  • In the upper left corner of your screen during puzzles, you’ll find a small box icon. This pocket will allow you to store puzzle pieces here in order to create more space in your puzzle area. This is especially useful during large puzzles.
Holiday Jigsaw Halloween 3 Pocket Storage

Holiday Jigsaw Halloween 3 Pocket Storage

  • If a puzzle is difficult to see against its background, or you simply prefer a different color, click on the Settings button and select a different background color.
Holiday Jigsaw Halloween 3 Background Color

Holiday Jigsaw Halloween 3 Background Color

  • If you select the Ghost, or puzzle outline, it will only be used for your visual reference. Placing pieces in their correct locations over this outline will not cause the pieces to “snap” into place.
  • Left-click and hold to select large groups of pieces at a time. This can be especially useful when moving pieces or large sections of the puzzle.
Holiday Jigsaw Halloween 3 Click and Drag Select

Holiday Jigsaw Halloween 3 Click and Drag Select

  • Want to create your own puzzles? In the puzzle select screen, click on a puzzle you’d like to customize, then click Modify, indicated by the scissors icon. From here, you can choose the type of cut puzzle pieces have, whether or not the pieces can be rotated, and the number of pieces the puzzle should have. Cancel or confirm to alter the puzzle or keep it the same.
Holiday Jigsaw Halloween 3 Puzzle Customization

Holiday Jigsaw Halloween 3 Puzzle Customization

Congratulations, you’ve completed our quickstart Holiday Jigsaw Halloween 3 Walkthrough! Need any additional help? Be sure to let us know!

The Holiday Jigsaw Halloween 3 Walkthrough is meant to help guide you through the game’s basics and does not contain cheats, hacks, or serials.


The post Holiday Jigsaw Halloween 3 Walkthrough appeared first on GameHouse.

Peter and Wendy in Neverland Walkthrough

$
0
0

It’s off to Neverland once again! Join Peter and Wendy as they return to the mystical island and confront the evil Captain Hook. Gather treasure, hidden objects, and find Lost Boys. If you’re in need of additional guidance, our Peter and Wendy in Neverland Walkthrough will take you second star to the right and straight on ‘til morning.

Contents

General Tips & Tricks

This section is dedicated to the game’s basics, as well as tips and tricks to help you keep clear of Captain Hook’s traps.

  • Multiple profiles are available for you to play. Each profile will display the owner’s name, as well as their current progress and time spent. If a profile has completed the game, you may choose to replay it.
  • Click on the Extras menu to gain access to the story summaries, pirate treasure collected, and an additional options menu.
  • The goal of the game is to find hidden objects listed at the bottom of the screen. All objects are circled in the guide below.
  • Some objects will require the help of Peter’s dagger to locate. To use Peter’s dagger, click on Peter in the lower left corner of the screen, then click on the object you’d like him to use the dagger on. Objects that require the use of Peter’s dagger will sparkle, so keep a sharp eye out.
  • Click on the magnifying lens in the lower right corner of the screen to obtain a hint from Tinker Bell. Hints are unlimited, but require time to recharge.
  • Hints are not available during puzzles or scenes in which you must locate pirate treasure.
  • Wendy will pop up and warn you about click penalties if you click around too quickly without locating any objects.
  • Click on the arrows in the upper left corner of the screen to zoom in to a hidden object scene. Simply click and scroll to view the area in this zoomed format. Click on the button again to exit back to normal view.
  • If any object can be interacted with outside of a standard hidden object area, the cursor will turn into a green gloved hand instead of a normal hand. Use this trick to help you figure out where you should use items next.
  • There are five Lost Boys hidden throughout the game. Their locations are shown in the guide below and each is outlined with a square.

Peter and Wendy in Neverland Walkthrough

Introduction: Kensington Gardens

Once the home of Peter Pan, Wendy makes a nostalgic visit to the park.

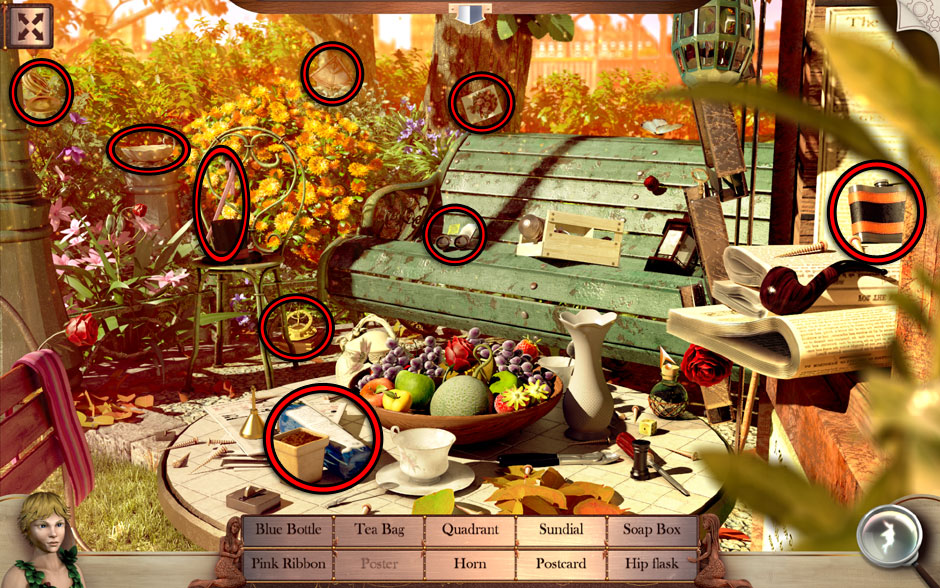
        • Find the objects listed at the bottom of the screen. Their locations have been circled for you in the screenshot below.
Peter and Wendy in Neverland Kensington Gardens

Peter and Wendy in Neverland Kensington Gardens

        • Once you’ve helped Wendy locate all the lost objects in the park, help her gather roses for her mother. Their locations are shown below.
Peter and Wendy in Neverland Rose Locations

Peter and Wendy in Neverland Rose Locations

        • Upon gathering all the roses, place them in the vase on the table.
Peter and Wendy in Neverland Roses in the Vase

Peter and Wendy in Neverland Roses in the Vase

Chapter I: Peter Breaks Through

Wendy has grown up, but child-at-heart Peter Pan refuses. Wendy reminisces about her mysterious friend.

        • Find the objects listed at the bottom of the screen. Their locations are shown below.
Peter and Wendy in Neverland Messy Bedroom

Peter and Wendy in Neverland Messy Bedroom

        • Help Wendy gather proof of Peter’s visits by collecting the leaves and his shoe.
Peter and Wendy in Neverland Proof of Peter

Peter and Wendy in Neverland Proof of Peter

        • Once you’ve gathered proof of Peter’s visits, place the proof on the clothespins hanging in the window, just above the telescope.

Chapter II: The Shadow

Michael’s misplaced his medicine, and his father is angry with him. Help him find the medicine and take it before turning in for the night.

        • Find the objects listed at the bottom of the screen. Their locations are circled for you in the screenshot below.
Peter and Wendy in Neverland Bathroom

Peter and Wendy in Neverland Bathroom

Chapter III: Come Away, Come Away!

Peter and Tinker Bell have returned from Neverland, but Peter’s lost his shadow and Tinkerbell has gone missing. Help Wendy set things straight again.

        • Find the objects listed at the bottom of the screen. Their locations are shown below.
Peter and Wendy in Neverland The Shadow

Peter and Wendy in Neverland The Shadow

        • Once you’ve gathered all the objects, help Wendy gather the supplies needed to sew Peter and his shadow back together.
Peter and Wendy in Neverland Sewing Supplies

Peter and Wendy in Neverland Sewing Supplies

        • A sound is coming from the dresser. Help Wendy clear objects around it. Their locations are shown below.
Peter and Wendy in Neverland Dresser Objects

Peter and Wendy in Neverland Dresser Objects

        • The dresser handle is broken. Help Wendy improvise a solution by gathering objects around the area and using them to gain access to the top drawer.
Peter and Wendy in Neverland Improvised Drawer Handle

Peter and Wendy in Neverland Improvised Drawer Handle

        • Tinker Bell is trapped in the drawer and needs your help to get out. Remove objects from the center pile and place them to the side, starting with objects at the top of the pile that aren’t overlapped by anything else. Clear all these things away in order to free Tinker Bell.
Peter and Wendy in Neverland Free Tinker Bell

Peter and Wendy in Neverland Free Tinker Bell

Chapter IV: The Flight

Off to Neverland!

        • Find the locations marked on the island map. Each is shown below.
Peter and Wendy in Neverland Map of Neverland

Peter and Wendy in Neverland Map of Neverland

Chapter V: The Island Come True

Peter and Wendy have landed on the island, but the Lost Boys are hiding due to all the pirates lurking about.

        • Find the objects listed at the bottom of the screen. The Lost Boy (1 of 5) is outlined with a square in the screenshot below.
Peter and Wendy in Neverland Island Dock and Lost Boy 1 of 5

Peter and Wendy in Neverland Island Dock and Lost Boy 1 of 5

        • Ten pirate coins are scattered throughout the area. Find them to add them to Peter’s treasure trove.
Peter and Wendy in Neverland Dock Coin Locations

Peter and Wendy in Neverland Dock Coin Locations

Chapter VI: The Little House

Now that Peter and Wendy are back in Neverland, they will need to build a shelter to hide them away from all the pirates.

        • Locate the objects listed at the bottom of the screen. Their locations are shown below.
Peter and Wendy in Neverland Tree Object Locations

Peter and Wendy in Neverland Tree Object Locations

        • Ten feathers from a very rare bird are also scattered around the area. Collect all ten, shown in the screenshot below.
Peter and Wendy in Neverland Feather Locations

Peter and Wendy in Neverland Feather Locations

        • Wendy needs to locate materials to build a shelter. Gather the materials shown in the screenshot below.
Peter and Wendy in Neverland Shelter Materials

Peter and Wendy in Neverland Shelter Materials

        • Build a shelter for the night using the materials gathered.
Peter and Wendy in Neverland Built Shelter

Peter and Wendy in Neverland Built Shelter

Chapter VII: The Home under the Ground

Peter decides it’s safer to take shelter from the pirates underground.

        • Help Wendy clean the messy house by locating the objects listed at the bottom of the screen. The Lost Boy (2 of 5) is hidden away behind the large globe and outlined with a square in the screenshot below.
Peter and Wendy in Neverland Den Housework and Lost Boy 2 of 5

Peter and Wendy in Neverland Den Housework and Lost Boy 2 of 5

        • There’s more than pots and pans scattered around this house. Locate the ten pirate coins hidden throughout the room.
Peter and Wendy in Neverland Den Coin Locations

Peter and Wendy in Neverland Den Coin Locations

Chapter VIII: The Mermaid’s Lagoon

Peter and Wendy make their way to the Mermaid’s Lagoon. Wendy is concerned about the remaining Lost Boys, but Peter doesn’t seem to be worried.

        • Find the objects listed at the bottom of the screen. Their locations are shown below.
Peter and Wendy in Neverland Mermaid Lagoon Objects

Peter and Wendy in Neverland Mermaid Lagoon Objects

        • The beach is home to more than just mermaids. Locate the ten precious stones scattered throughout the area.
Peter and Wendy in Neverland Lagoon Gem Locations

Peter and Wendy in Neverland Lagoon Gem Locations

Chapter IX: The Never Bird

Some of the Lost Boys are still missing, but Peter suggests they return to the safety of their underground home for the night.

        • Locate the objects listed at the bottom of the screen. Their locations are shown below.
Peter and Wendy in Neverland Underground Home Objects

Peter and Wendy in Neverland Underground Home Objects

        • Ten pirate pearls are scattered throughout the room. Their locations are shown below.
Peter and Wendy in Neverland Underground Home Pearl Locations

Peter and Wendy in Neverland Underground Home Pearl Locations

Chapter X: The Happy Home

Peter and Wendy agree to continue their search the next day, and prepare for a warm meal and a good night’s sleep.

        • Prepare a meal for the Lost Boys by serving slices of bread, fruit, and a glass of water for everyone.
Peter and Wendy in Neverland Dinner

Peter and Wendy in Neverland Dinner

        • Once dinner has been served, help Wendy locate the missing storybook pages. Their locations are shown below.
Peter and Wendy in Neverland Storybook Pages

Peter and Wendy in Neverland Storybook Pages

        • There’s no notion of order in this home! Help Wendy find the ten pieces of treasure Peter left scattered throughout the room. Their locations are shown below.
Peter and Wendy in Neverland Storytime Scattered Treasure

Peter and Wendy in Neverland Storytime Scattered Treasure

        • One more page is missing from the storybook. Remove objects at the top of the pile in the drawer until you find the page inside, then click on it to collect it.

Chapter XI: Wendy’s Story

Peter doesn’t usually stay for the entirety of Wendy’s stories, but tonight is different…

        • Find the objects listed at the bottom of the screen. Their locations are shown below.
Peter and Wendy in Neverland Nostalgic Objects

Peter and Wendy in Neverland Nostalgic Objects

        • Yet more pirate treasure is scattered throughout the area. The locations of the ten pieces area shown below.
Peter and Wendy in Neverland Storytime Treasure

Peter and Wendy in Neverland Storytime Treasure

Chapter XII: The Pirate Ship

The Lost Boys aren’t the only ones who are missing. Now Peter and Wendy have been captured by pirates, too!

        • Find the objects listed at the bottom of the screen. The Lost Boy (3 of 5) is hiding behind the barrel on the left.
Peter and Wendy in Neverland Pirate Ship and Lost Boy 3 of 5

Peter and Wendy in Neverland Pirate Ship and Lost Boy 3 of 5

        • Take this opportunity to gather ten more pieces of pirate treasure. Their locations are shown below.
Peter and Wendy in Neverland Pirate Ship Coin Locations

Peter and Wendy in Neverland Pirate Ship Coin Locations

Chapter XIII: “Hook or Me This Time”

It’s time for Peter to fight Captain Hook!

        • Locate the objects listed at the bottom of the screen. Their locations are shown below. The Lost Boy (4 of 5) is also here and outlined with a square in the screenshot below.
Peter and Wendy in Neverland Pirate Fight Objects and Lost Boy 4 of 5

Peter and Wendy in Neverland Pirate Fight Objects and Lost Boy 4 of 5

        • While the Captain is distracted, gather ten more pieces of pirate gold.
Peter and Wendy in Neverland Pirate Ship Coin Locations

Peter and Wendy in Neverland Pirate Ship Coin Locations

Chapter XIV: The Return Home/h2>

With Captain Hook defeated for good, it’s time for Wendy and Peter to return home.

  • Locate the objects Wendy needs to make Peter a beautiful coat. Their locations are shown below.
Peter and Wendy in Neverland Cabin Object Locations

Peter and Wendy in Neverland Cabin Object Locations

  • Wendy also decides she would like to make some tea for the journey home. Follow the instructions lying on the table.
Peter and Wendy in Neverland Tea Instructions

Peter and Wendy in Neverland Tea Instructions

  • The final Lost Boy (5 of 5) is also hiding here. His location is shown below.
Peter and Wendy in Neverland Lost Boy 5 of 5

Peter and Wendy in Neverland Lost Boy 5 of 5

  • Now that they’ve returned home, help Wendy gather objects that will make the bedroom feel more welcoming. Their locations are shown below.
Peter and Wendy in Neverland Return Home Object Locations

Peter and Wendy in Neverland Return Home Object Locations

Congratulations! You’ve completed the Peter and Wendy in Neverland Walkthrough! Be sure to check our blog for even more tips and tricks.

Our Peter and Wendy in Neverland walkthrough is meant as a guide and does not contain cheats, hacks, or serials.

The post Peter and Wendy in Neverland Walkthrough appeared first on GameHouse.

Forgotten Tales: Day of the Dead Walkthrough

$
0
0

Manuel and Maria were excited newlyweds-to-be, until an evil soul kidnapped the bride! Join Manuel on a journey through the land of the dead to rescue his bride. Encounter multiple colorful souls during your solitaire-rich journey, and help them uncover things they’ve lost, too. Perhaps, just perhaps, they might be willing to help! If not, our Forgotten Tales: Day of the Dead Walkthrough will provide you with all the tips and tricks you need.

Contents

Forgotten Tales: Day of the Dead Walkthrough

How to Play

Forgotten Tales: Day of the Dead is a solitaire card game. Journey through the land of the dead, clearing various chapters and helping multiple comical characters along the way. If you’re not sure how to play, our guide will help put you on the right track.

Solitaire

If you’re not familiar with how to play solitaire, or simply need a reminder, then this section is for you. Additional explanations covering the game’s unique cards can also be found here.

  • Click on cards higher or lower than the card displayed at the bottom of the screen/at the top of your card pile to remove them from the center of the screen. Card order is as follows: Ace, Two, Three, Four, Five, Six, Seven, Eight, Nine, Ten, Jack, Queen, King, Ace
  • The goal is to remove all the cards from the screen without running out of cards from your deck.
  • You can only remove top cards; if a card is covered by another card, you must first remove the card covering it.
  • Cards displaying their backs on the main playing field will remain hidden until you remove the card covering them.
  • You can unlock various boosters by progressing through the game’s levels. Once you’ve unlocked a booster, you may use coins you’ve earned to purchase additional ones as needed. The booster types are as follows:
  1. Undo- Click on this booster to undo your last move if you made a mistake.
  2. Extra Cards- If you’ve run out of cards, this booster will give you five extra cards and allow you to keep playing.
  3. Sword of Justice- Remove a playable card of your choice from the field. You can use the Sword of Justice to remove Bombs or Rockets, too.
  4. Joker- Lets you play any card on the field. Great for large combos!
  5. Keyslot Booster- Use this to unlock your second slot of cards.
  • If you run out of boosters, click on the purple + icon underneath Shop to purchase more.
  • Various other special non-booster cards will show up during the game. Some of them are as follows:
  1. Bomb- Click on the Bomb to clear cards surrounding its immediate area.
  2. Locks and Keys- Some cards will have locks that need to be opened before they can be matched or played. Find key cards and use these on the locks to remove them.
  3. Rocket- The Rocket will clear any and all playable cards in its way. The direction a Rocket is facing indicates in which direction it will go once clicked.
Forgotten Tales Day of the Dead Rocket Cards

Forgotten Tales Day of the Dead Rocket Cards

  • Your score is visible in the upper right corner of your screen. The meter behind it will indicate how large your combo currently is.
  • Tasks you will need to complete are listed in the upper left corner of your screen. Click on the skeleton here to view tasks.
Forgotten Tales Day of the Dead Tasks Skeleton

Forgotten Tales Day of the Dead Tasks Skeleton

  • There are three rounds per level. Clear all three rounds without running out of cards to progress to the next level!

Levels and the Journal

When entering the map and level select from the main menu, you’ll notice a journal located in the lower right corner of your screen. Your journal will keep track of various lists for you.

  • Ingredients are one of the key things your journal keeps track of. Ingredients are rewarded upon completing levels. Collect them all!
  • Chapter tasks are also listed here, past the ingredients section. Any tasks unique to the chapter you are currently playing will be displayed here.
Forgotten Tales Day of the Dead Journal Lists

Forgotten Tales Day of the Dead Journal Lists

  • Levels are divided by chapter. Click on a numbered tombstone to play that level. The number of Golden Skulls over a tombstone will indicate your previous scores.
Forgotten Tales Day of the Dead Level Select

Forgotten Tales Day of the Dead Level Select

  • You will encounter various characters during your journey, whom have also lost valuables. Help them find their precious belongings!

Tips & Tricks

The following section sheds light on a handful of tips and tricks you should be sure to take with you during your journey to the land of the dead.

  • Some levels will feature special tasks in addition to removing cards from the field. For example, you may encounter cards which are on fire, and cannot be played. Remove cards covered in water to douse the flames!
Forgotten Tales Day of the Dead Water and Fire Cards

Forgotten Tales Day of the Dead Water and Fire Cards

  • Improve your score by making large combos. Combos are made when you match cards in quick succession. If you create a high enough combo, you can earn a Golden Skull. Each Golden Skull will reward you with a bonus 100 golden coins.
Forgotten Tales Day of the Dead Golden Skulls

Forgotten Tales Day of the Dead Golden Skulls

  • Cards which display a coin on them can be clicked to immediately be removed, adding gold to your current amount.
  • Coins you earn during levels can be used to purchase boosters.
  • Special cards, such as Bombs and Rockets, can effect each other. A Rocket can take out a Bomb just as a Bomb can take out a Rocket.
  • Keep an eye on card patterns. For example: If you have a 3 at the top of your deck, and can choose to select either a 2 or a 4 from the field, try to recall cards you may have already seen or played. If you, for example, already saw multiple 4’s or 5’s go by, it’s probably a better idea to match it with the 2.
  • You can customize the setup of your cards by going to Options in the Main Menu, then selecting “Card Setup”. Choose the option that’s right for you!
Forgotten Tales Day of the Dead Card Setup

Forgotten Tales Day of the Dead Card Setup

Congratulations, you’ve completed our quickstart Forgotten Tales: Day of the Dead Walkthrough! Need any additional help? Be sure to let us know!

The Forgotten Tales: Day of the Dead Walkthrough is meant to help guide you through the game’s basics and does not contain cheats, hacks, or serials.

The post Forgotten Tales: Day of the Dead Walkthrough appeared first on GameHouse.


Haunted Halls: Fears From Childhood Walkthrough

$
0
0

The “Haunted Halls” games are known for their creepy, atmospheric artwork and haunting stories. If a good Halloween tale is what you want, then you have definitely chosen the right game. “Haunted Halls: Fears from Childhood” will place you up against the evil Blackmore. With Tim, a young boy and your sole ally, you must travel the haunted passages of Blackmore’s domain to free trapped children.

Contents

General Tips and Tricks

A few tips and tricks never go amiss. The rules of “Haunted Halls” are fairly easy to remember, but sometimes a simple mechanic will be looked over. While playing, remember the following:

  • The eye is your friend. He can zoom in if needed.
  • Many objects will be added automatically to your inventory.
  • It is not necessary to complete hidden object puzzles. Make sure you find and take the item if it is indicated in the guide.
  • The Hint button must recharge between uses.
  • You can always use the strategy guide button for extra help.
  • Paths and doors may be blocked off or hidden at first.

Haunted Halls: Fears from Childhood Walkthrough

Chapter 1: The Metro

You will be in a broken metro tunnel surrounded by an eerie cosmos. Advancing forward will bring you into the midst of terrors unknown, and this is your last chance to turn back before it is too late.

  • Click on the ghostly girl.
  • Take the pickaxe on the top right.
  • Take the suction cup on the bottom left.
  • Zoom in on the pipe near the center left.
    • The pick will break the pipe.
    • Place the suction cup on the pipe.
  • Travel to the distant door and place the suction cup on the door.
  • Travel through the door.
  • Select the television and listen to Blackmore.
  • Select the ground and take the tile.
  • Select the table and take the tile.
  • Select the cabinet to open a hidden object puzzle!

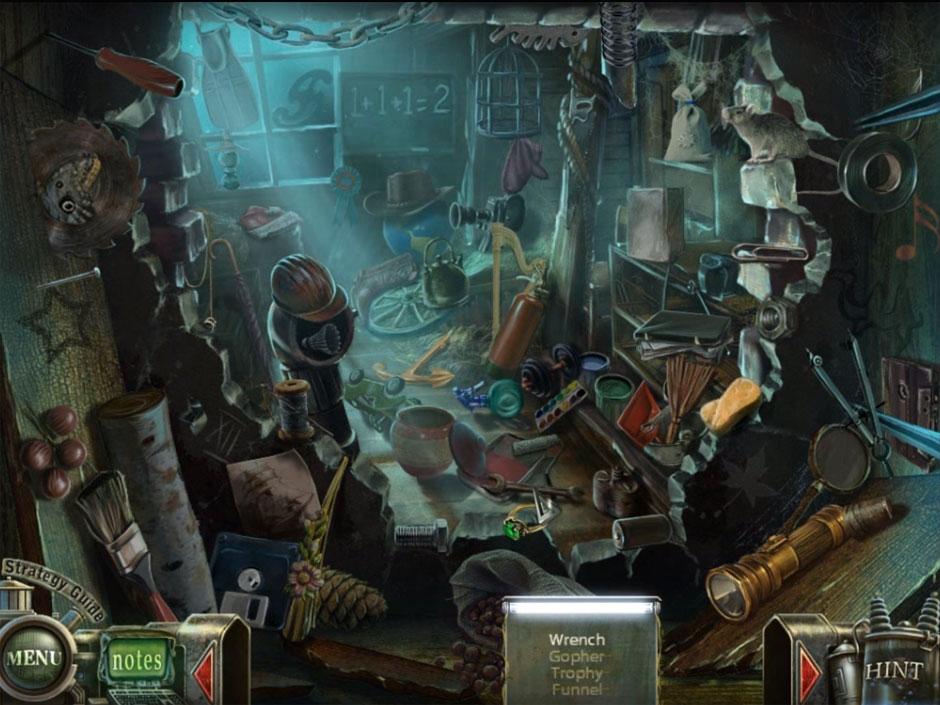
The puzzle requires you to find numerous hidden objects within the scene. Only a few of them are tricky. However, if you get stuck, refer to our solutions image.

Haunted Halls Fears from Childhood Wrench Location

Haunted Halls Fears from Childhood Wrench Location

  • Take the lighter to the pipe and take the smoking pipe.
  • Select the pot and take the gopher.

Go to the escalator on the right and select the lever.

  • Take the fishing rod to the right of the bridge.
  • Select the ground and take the lever.
  • Select the birdbath and take the tile.
  • Select the cave and begin a new puzzle!

The object is to move the stalactites and stalagmites into place. Right-click to rotate them, and click and drag to drop them into the correct place.

Haunted Halls Fears from Childhood Stalactites Puzzle

Haunted Halls Fears from Childhood Stalactites Puzzle

  • Take the escalator lever when the puzzle is complete.

Travel down once.

  • Select the left escalator and place the escalator lever.
    • Pull the lever.
  • Select the ground and take the broken bottle.
  • Select the box on the ledge and a tentacle will take the package.
  • Select the right wall.
    • Use the fishing rod to grab the fallen package.
  • Open the package with the broken bottle.
  • Take the tile and the book far below.
  • Select the crane device.
    • Place the lever in the slot.
      • Pull the lever for the scaffolding to rise.
  • Select the scaffolding.
    • Take the squeegee and tile.
  • Select the satellite dish.
    • The wrench can be used on the four nuts. Take the antenna.

Travel down twice.

  • Select the pipe.
    • Place the squeegee on the water and take the wet squeegee.

Travel forward once.

  • Select the escalator on the right.
  • Select the wall on the right side.
  • Take the pick and hammer the stones.
  • Select the mica, and use the wet squeegee on the mica three times.
  • On the lower left corner, hammer the stones twice.
    • Take the tile.

Travel down once.

  • Select the back door. Place all seven tiles to begin a new puzzle!

The puzzle can be completed by clicking the tiles to generate an image of the five missing children. Refer to our solution for the correct placement of each tile.

Haunted Halls Fears from Childhood Child Tiles Puzzle Solution

Haunted Halls Fears from Childhood Child Tiles Puzzle Solution

Travel through the door.

  • Select the door in the lower right corner.
    • Place the book on the door.

Travel through the door and into the next area.

Chapter 2: Boy in the Tree

The next area is the forest. The forest is dark, misty, and full of creepy turns. Stick close to the guide to avoid getting lost.

  • Complete the hidden object puzzle.
  • The nippers are beneath several leaves on the left side of the screen.
  • The worm is beneath another pile of leaves on the lower right.
  • Make sure you get the hose!

Travel down the road.

  • Take the branch.

Travel left once.

  • Select the hollow tree and take the key.
  • Select the door to the cottage.
    • Use the key on the door.

Travel inside the cottage.

  • Open the stove and complete the hidden object puzzle!
  • Place the mustache on the bust.
    • Take the mustached man.
  • Place the flask on the snake.
    • Take the poison.
  • Make sure you get the pitcher!
  • Take the chair leg.

Travel down.

  • Select the barrel.
    • Place the hose in the barrel hole.
  • Place the pitcher at the base of the hose for fuel.

Return to the cabin.

  • Select the chainsaw on the ground and take the screw.
  • Place the fuel in the chainsaw.

Travel down twice and right once.

  • Select the mushrooms on the left side to start a puzzle!

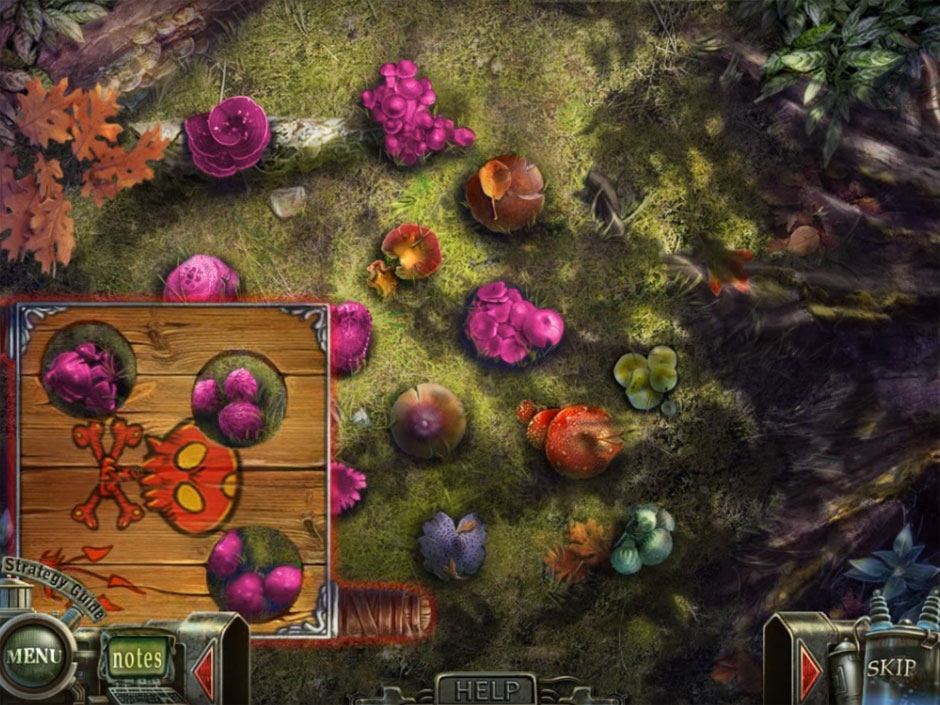
The object of the puzzle is to line up a board on top of three mushrooms until each of them are highlighted except for one.

  • Grab the board to the right.
  • Place the board so that three mushrooms are always in the holes.
    • Select the board to light up the mushrooms.
    • Right click the board to make it rotate.
  • Use our solution image if you need help!
    • Make sure you grab the final mushroom!
Haunted Halls Fears from Childhood Mushroom Puzzle

Haunted Halls Fears from Childhood Mushroom Puzzle

  • The chainsaw will cut the tree on the road.
  • Take the log.

Travel forward once.

  • Select the left bushes.
    • Move the leaves and take the hazelnut.

Travel down twice.

  • Play the hidden object puzzle.
  • Take the magnifier after moving the log.
  • Take the handgun from the holster.

Travel left and to the cabin.

  • Play the hidden object puzzle.
  • Open the envelope with the dagger.
  • The gavel will break the piggybank.
    • Take the coin.

Travel down once.

  • Select the squirrel.
    • Take the claw.
  • Give the squirrel the hazelnut and take the marble.

Travel down once.

  • Select the hollow in the tree.
    • Place the marble in the hollow to begin a new puzzle!
  • The object is to knock all marbles off the board except for one.
    • Refer to our solution image if you need help!
  • Grab the apple.
Haunted Halls Fears from Childhood Marbles Puzzle

Haunted Halls Fears from Childhood Marbles Puzzle

  • Select the porcupine.
    • Give him both the mushroom and apple.
    • Take the claw.

Travel right once.

  • Select the tree house.
    • Place the chair leg, branch, and bone in the ladder.
  • Take the ladder once it falls.

Travel to the cabin.

  • Select the bar.
    • Place the claws on the bear’s paws.
  • Take the light bulb.
  • Place the log on the ground.
  • Select the lamp and place the light bulb.
  • Select the closet and remove the torch.

Travel down once.

  • Select the gasoline barrel.
  • Drop the torch into the barrel and take the fuel-soaked torch.

Travel down once and right once.

  • Select the tree stump.
    • Place the magnifier against the stump.
    • Hold down the magnifying light and use it around the flaming edges.
  • Place the torch into the fire and take the burning torch.

Travel forward once.

  • Place the burning torch on the pile of leaves.
  • Place the ladder against the tree.
  • Speak with the boy.
  • Take the book.

Travel down three times.

  • Select the lower left door.
  • Place the book on the door.

Travel through the door.

Chapter 3: Girl in the Toy Store

The toy store is an eerie place filled with haunted childhood memories. Never let your guard down while searching through the disturbing collection of toys.

  • Finish the hidden object puzzle.
  • Place the brush on the ball.
    • Take the green ball.
  • Place the screwdriver on the screw.
    • Take the screw.
  • Once finished, select the cake near the wall and begin a new puzzle!

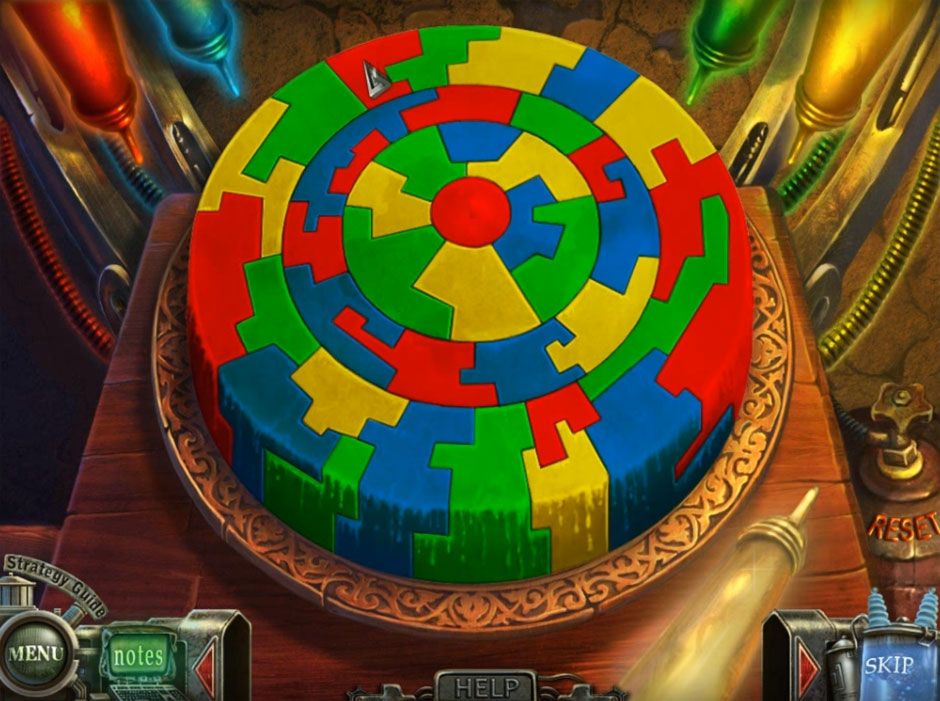
The goal is to paint the cake’s sections so that no connecting sections are the same color.

Haunted Halls Fears from Childhood Cake Sections Puzzle Solution

Haunted Halls Fears from Childhood Cake Sections Puzzle Solution

  • Use the tube of paint by clicking it and applying the desired color to the cake section you wish to paint.
  • When finished, take the cake.
  • Select the cabinet and take the saber.

Travel through the far door.

  • Select the model castle and take the ramrod from the wizard.
  • Select the dollhouse in the right corner to begin a new puzzle!
  • The object of the puzzle is to drag and drop the different people into their correct room.
    >>>Haunted Halls Fears from Childhood Doll House Puzzle.jpg
    Once finished, take the doll.

Travel through the back door.

  • Select the shelf on the upper right side.
    • Take the tin soldier.
  • Select the robot on the podium.
    • The wrench will remove the nut on top of the robot’s head.

Travel through the back door.

  • Finish the hidden object puzzle.
  • Turn the book page.
    • Take the lion.
  • Make sure you get the scissors!
  • Select the open book on the left side.
    • Note the equations if you wish.
  • Select the bookcase in the back left.
    • Open the book, use the scissors to take the metal segment.

Travel through the back door.

  • Select the teddy bear.
    • Take the eye patch.
  • Select the doll.
    • Take the pipe.
  • Take the parrot.
  • Drop the cake in front of the dolphin.
    • Take the hat.

Travel down twice.

  • Select the soldiers on the right side.
    • Drop the ramrod near the soldier on the left.
    • Drop the pipe near the soldier on the right.
      • The soldiers will fire!
  • Select the tank on the left.
    • Take the cannonball.

Travel down once.

  • Select the crane.
    • Use the scissors on the rope and take the hook.

Travel down once.

  • Finish the hidden object puzzle.
    • Select the clock weights to take the XII.
    • Use the spoon on the egg to take the chick.
    • Make sure you get the angel!
  • Select the cash register.
    • The combination is 7283.
      • Enter C if you need to start over.
    • Select the handle to open the register.
    • Take the coin.
  • Select the table.
    • Place the doll in the empty chair.
    • Select the table beneath the doll’s hand.
      • Take the ring.

Travel through the back door.

  • Select the castle in the upper right corner.
    • Place the angel on the left side.
    • Take the holy water.
  • Select the castle in the upper left corner.
    • Drop the holy water on the demon.
    • Take the sulfur.

Travel down until you reach the library.

  • Finish the hidden object puzzle.
    • Take the pelican and French horn.
    • Make sure you get the bomb!

Travel down once.

  • Select the castle near the top left.
    • Place the eye patch, hook, metal segment, parrot, pirate hat, and saber on the pirate.
    • Drop the bomb near the pirate when the soldier arrives.
  • Take the plate.

Travel through the back door.

  • Select the book on the display podium and zoom in.
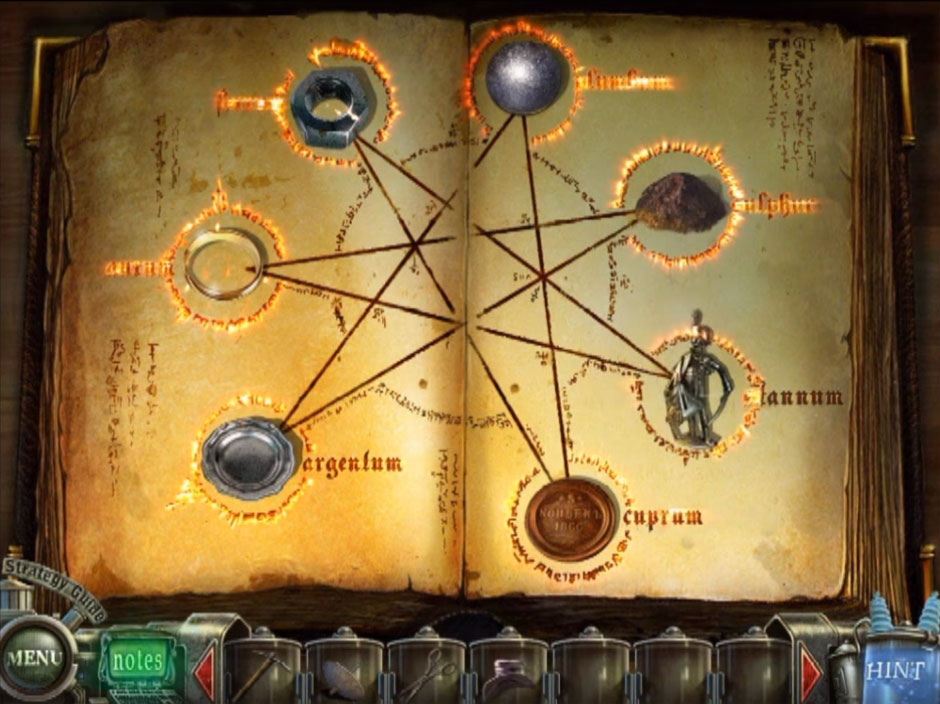
    • In a clockwise motion from the top right: drop the cannonball, sulfur, tin soldier, coin, plate, ring, and nut.
Haunted Halls Fears from Childhood Materials Item Puzzle

Haunted Halls Fears from Childhood Materials Item Puzzle

  • Take the staff from the center.

Travel down twice.

  • Select the castle on the left.
    • Select the wizard.
      • Drop the hat and staff onto the wizard.
    • Take the emblem when the dragon leaves.

Travel back to the party room.

  • Select the machine.
    • Place the emblem in the coin slot.
      • Click the red button to activate a new puzzle!

To solve the puzzle, you must match the lights inside the machine with the lights that are displayed on the left grid. Entering a solution requires you to use the arrow keys. To test a solution, press the large, red button at the top right of the left grid. When a light turns blue, you have found the correct solution.

The four arrows, from top left to right, are labeled: W, X. From bottom left to right: Y, Z.

  • To solve square A: Y twice, Z twice.
  • B: Y twice, Z once, Y once.
  • C: Z three times.
  • D: Z twice, X once.
  • Take the book and broken mirror.
Haunted Halls Fears from Childhood Light Matching Puzzle

Haunted Halls Fears from Childhood Light Matching Puzzle

Travel out of the toy store.

  • Select the second story door on the right side.
  • Place the book on the door.

Travel through the new door.

Chapter 4: Boy in the Bedroom

The bedroom is plagued by the tentacles of the evil Blackmore. Rescuing the stranded boy will be no easy task.

  • Take the paint can.
  • Select the cabinet’s top.
    • Use the scissors on the cord.
    • Take the electrical cord.
  • Select the underside of the bed to look beneath it.
    • Place the cord in the outlet.
    • Select the baseball to fill the hole.
    • Take the jam jar.
  • Leave the bed.
  • Select the window in the center.
  • Finish the hidden object puzzle.
    • Take the doll from the open box.
    • Take the bird from the sack.
    • Make sure you get the shovel!

Travel down once. Travel through the window on the left.

  • Finish the hidden object puzzle.
    • Select the frozen flower and take the rose.
    • Select the bird and take the crocodile eye.
    • Make sure you get the tongs!
  • The shovel will unearth the bowling ball from the mound of snow beneath the snowman.
  • The pick will break the icicle on the upper right.
  • Use the pick again on the fallen icicle to take the puzzle piece.

Travel down once and through the final window.

  • Select the idol to begin a new puzzle!

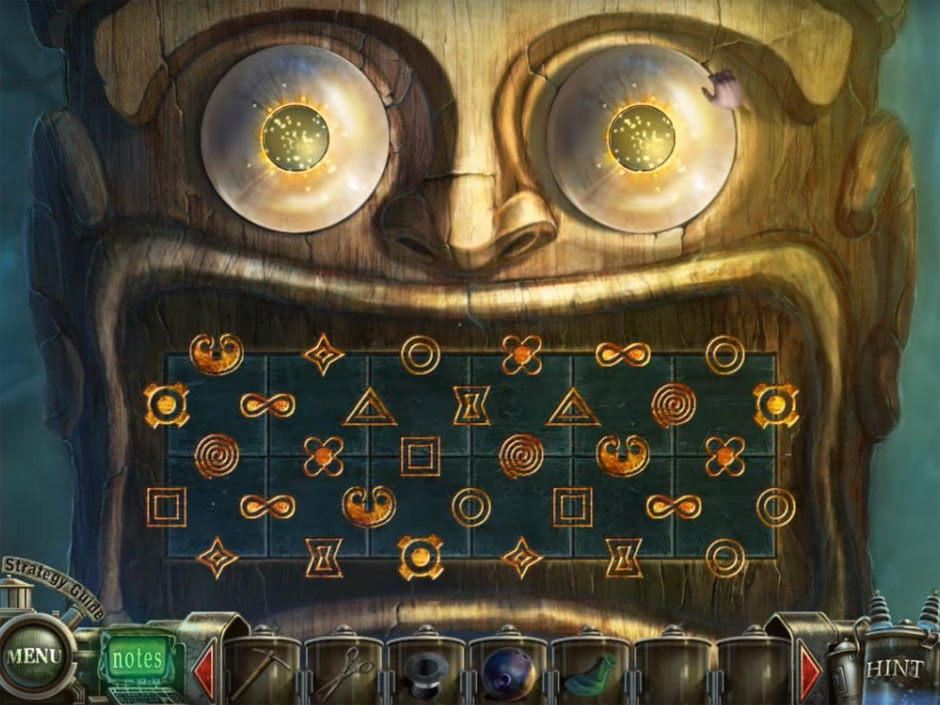
The goal of the puzzle is to align the teeth in the correct order

Haunted Halls Fears from Childhood Teeth Tile Puzzle

Haunted Halls Fears from Childhood Teeth Tile Puzzle

  • Use right click to rotate teeth.
  • When the puzzle is complete, take the eyes.
  • Take the axe.
  • On the ground is the flask.
  • Select the salamander and grab it.
  • Drop the axe near the venus flytrap and let them eat it.
  • Drop the jam jar in the lower left corner.
  • Select the beehive and it will drop.
  • Select the beehive again.
    • Drop the paint can on it as well as the eyes.

Travel back to the window with the desert scene.

  • Drop the flask over the tornado and take the bottle tornado.
  • Drop the antenna on the building and place the broken mirror next to it.
  • Select the antenna to begin a new puzzle!

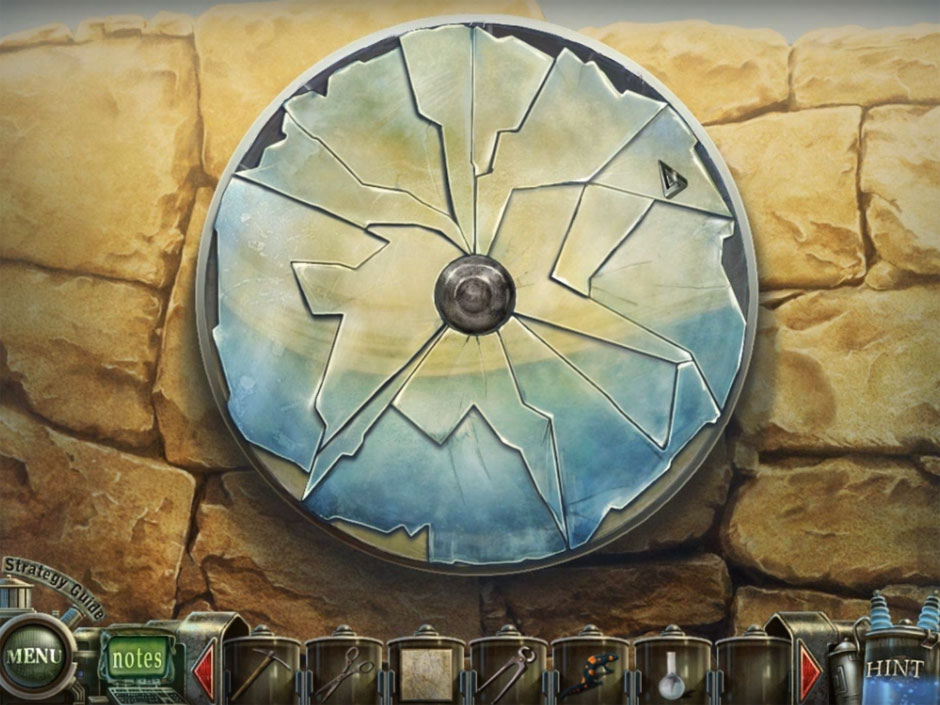
The goal of the puzzle is to arrange the mirror shards in the correct order. Right click the shards to rotate them.

Haunted Halls Fears from Childhood Mirror Shards Puzzle Solution

Haunted Halls Fears from Childhood Mirror Shards Puzzle Solution

  • When finished, drop the salamander on the rock.
  • Grab the fiery lizard with the tongs.

Travel to the window with the winter scene.

  • Drop the fiery lizard on the snowman.
  • Take the three gallon hat.
  • Place the bottle tornado on top of the chunk of ice.
  • Select the ice statue of Blackmore.
    • Use the pick on his teeth.
    • Select the broken ice.
      • Click the ice until you acquire the puzzle piece.
  • Select the box.
    • Drop two puzzle pieces on it to begin a new puzzle!

The goal of the puzzle is to fit every piece inside the box.

Haunted Halls Fears from Childhood Lamp Box Tile Puzzle

Haunted Halls Fears from Childhood Lamp Box Tile Puzzle

  • Right click pieces to rotate them.
  • When finished, grab the lamp.
  • Finish the hidden object puzzle.
  • Select the leaf to find the pine cone.
  • Select the fan and take the ballerina.
  • Make sure you get the wings!

Travel to the window that overlooks the desert.

  • Finish the hidden object puzzle.
  • Inside the basket are the snakes.
  • Select the wall to find the hieroglyph.
  • Make sure you get the balloon!
  • Select the genie lamp.
    • Drop the lamp beside it.
  • Select the genie lamp a second time.
    • Select the lamp on the left.

Travel to the window that overlooks the tropical forest.

  • Select the hive and drop the wings on it.

Travel beneath the bed.

  • Drop the bowling ball.
    • Select the bowling ball to fill the final hole.
  • Take the shoelace.
  • Drop the balloon on the bicycle pump.
    • Tie the shoelace onto the balloon.
    • Select the pump.

Travel out from beneath the bed.

  • Take the book.

Travel down twice.

  • Finish the hidden object challenge.
    • Drop the sponge on the chalkboard.
    • Take the 1 + 1 equation.
    • Drop the nail onto the XIII.
    • Take the XIII.
    • Make sure you get the lamp!

Travel down once.

  • Finish the hidden object challenge.
    • Select the box to find the clown.
    • Drop the brush on the die and take the six dots.
    • Use the hammer to break the clock.
      • Take the gears.
    • Make sure you get the water pipe!
  • Select the leaky pipe.
    • Place the three gallon hat beneath the pipe to get a hat with water.

Travel forward twice.

  • Select the middle left door.
    • Place the book on the door.

Travel through the door.

Chapter 5: Girl in the Graveyard

The graveyard is riddled with old growth and spooky architecture. Around every corner is a new terror, so take a few deep breaths before continuing forward into the darkness.

  • The pick can be used to break the large stone on the left.
    • Take the stone.
  • Select the top of the gate.
    • Click the keys.
  • Take the keys on the ground.
  • Drop the hat with water near the right gate.
    • Select the right gate’s lock and place the keys inside.
    • Select the keys and travel through the gate.
  • Place the stone on the left steps.
  • Open the gate to begin a hidden object challenge.
    • Select the banana to reveal the peeled banana.
    • Select the lamp to find the lit lamp.
    • Make sure you get the insulating tape!
  • Select the stick near the distant graves.
    • Take the tow.
  • Lift the grate and look inside.
    • Place the water pipe over the leak.
  • Place the tow and insulating tape on top of the pipe.
  • Select the valve to activate the fountain.
  • Select the fountain.
    • Select the paper boat and take the instructions.

Travel left once.

  • Select the open grave to begin a new puzzle!
  • Assemble the skeleton by placing the bones inside the coffin.
  • Take the shield.
  • Look at the statues in the back.
    • Select and take the spear.
  • Take the shield on the ground near the mirror.
  • Finish the hidden object puzzle.
    • Select the box to find the mask.
    • Slice the melon with the knife to get the sliced melon.
    • Select the artificial knee to find the gem.
    • Make sure you get the fan!

Travel down once and left once.

  • Select the grave on the right.
    • Drop the fan to remove the leaves.
  • The shield can be removed with the spear.
  • Select the mausoleum.
    • Place the spear where you found it.
    • Place the three shields where they belong.

Go forward once.

  • Select the back wall.
    • Place the instructions on the wall to begin a new puzzle!

Travel down three times.

  • Finish the hidden object puzzle.
    • Select the paper to find the photo.
    • Make sure you get the conductor!

Travel right once.

  • Finish the hidden object puzzle.
    • Select the accordion to find the music.
    • Select the bottle to find the bubbles.
    • Make sure you get the iron ball!

Travel back to the beginning of the mausoleum.

  • Select the back wall.
    • Place the lamp, iron ball, and conductor to finally begin the puzzle.

The puzzle requires that the lights be selected in the appropriate order.

Haunted Halls Fears from Childhood Light Puzzle Solution

Haunted Halls Fears from Childhood Light Puzzle Solution

  • Refer to our image for the solution.
  • Select the lock.
    • Break the lock with the pick.

Travel down twice and right once.

  • Break the skeleton hands on the grave with the pick three times.
  • Take the book.

Travel down three times.

  • Select the top right door.
  • Place the book on the door.

Travel through the door.

Chapter 6: Boy in the Museum

The museum is twisted, overgrown, and full of old artifacts that are as haunting as Blackmore himself. Tread carefully, but don’t keep your hands to yourself!

  • Complete the hidden object puzzle.
    • Place the lipstick on the heart to find the heart with arrow.
    • Strike the fly with the flyswatter to find the dead fly.
    • Make sure you get the chalice!
  • Select the small statue to the right of the stairs.
    • Take the lira.
  • Select the door on the right side.
    • Take the lightning.

Travel through the archway on the left.

  • Complete the hidden object puzzle.
    • Drop the head on the body to find the doll.
    • Drop the charcoal on the ball to find the black ball.
    • Make sure you get the saw!
  • Grab the rope.
  • Select the barrel.
    • Open the barrel and grab the fish.
  • Select the rock.
    • Place the fish on the rock.
      • Select the seagull.
        • Take the wings.
  • Select the Vikings.
    • Saw off the horn from the helmet with the saw.

Travel through the back door.

  • Select the shields to the right to begin a new puzzle!

The object is to place the shields in their correct locations by dropping them where the horizontal and vertical symbols meet.

Haunted Halls Fears from Childhood Shield Placement Puzzle

Haunted Halls Fears from Childhood Shield Placement Puzzle

  • Grab the shield when the puzzle is complete.
  • Select the knight helmet at the top right.
    • Take the crown.
  • Select the arena in the distance.
    • Drop the shield on the knight to the left.
    • Take the sword.

Travel down twice and right once.

  • Select the cavemen.
    • Take the bow.

Travel right once.

  • Select the statues in the distance.
    • Take the hammer and trident from the gladiators.

Travel down twice.

  • Finish the hidden object puzzle.
    • Drop the pencil on the paper to find tic-tac-toe.
    • Select the spool to find the needle.
    • Make sure you take the shield!

Travel through the archway on the left.

  • Finish the hidden object puzzle.
    • Select the box to find the button.
    • Drop the water bowl on the coals to find boiling water.
    • Make sure you grab the bolt!

Travel through the back door.

  • Select the crossbowman.
    • Drop the bolt into the crossbow.
  • Select the apple on the floor.

Travel back twice, travel through the archway on the right, and travel right once more.

  • Select the wall on the right to find a new puzzle!

The goal of the puzzle is to move the spokes until the lasers no longer cross one another.

Haunted Halls Fears from Childhood Laser Beam Puzzle

Haunted Halls Fears from Childhood Laser Beam Puzzle

Another puzzle will appear after the first.

The goal is to place objects next to the correct figures. Clicking on a figure will reveal a brief description, which you can use to match them to an object.

Haunted Halls Fears from Childhood Figure Items Puzzle

Haunted Halls Fears from Childhood Figure Items Puzzle

  • Beginning at the noon position, and continuing clockwise, place the: lightning, chalice, apple, sword, bow, lira, trident, crown, wings, horn, hammer, and shield.
  • Grab the helmet!
  • Drop the helmet on the statue of the Roman lancer.

Travel down once.

  • Drop the rope onto the spear.

Travel down twice. Travel through the door on the upper left side.

Chapter 7: The Lair of Dr. Blackmore

Blackmore’s home is a series of impossibly constructed spaces that reveal his twisted origins and motivations. Convoluted and full of alien technology, his home will require your utmost attention to travel through unscathed.

  • Select the large building in the back.
    • Take the board.
  • Select the octopus and grab it.
  • Select the large building once more.
    • Place the octopus on the door.

Travel through the door.

  • Select the bottom of the steps in the right corner.
    • Grab the skeleton.

Travel through the center door.

  • Select the carpet.
    • Take the key.
  • Select the chest.
    • Place the key in the chest lock.
      • Open the chest and grab the monsters.

Travel through the left door.

  • Finish the hidden object puzzle.
    • Drop the cheese on the grater to find grated cheese.
    • Place the knife on the wood to find the square.
    • Make sure you grab the pin!

Leave the room and travel through the door on the right.

  • Select the grate.
  • The pin will unlock a hidden object challenge inside the grate.
    • Select the box to find the mouse toy.
    • Select the matchbox to find the last match.
    • Make sure you grab the drawer handle!

Travel back to the bedroom.

  • Finish the hidden object challenge.
    • Select the cocoon to find the butterfly.
    • Break the bucket with the hammer to find the lizard.
    • Make sure you grab the octopus!
  • Select the drawer.
    • Drop the drawer handle on the drawer.
    • Open the drawer.
      • Take the dinosaur.

Travel down once and into the door on the right.

  • Finish the hidden object puzzle.
    • The plane will fly with the propeller.
      • Grab the fixed plane.
    • Make sure you grab the wolf!
  • Beginning with the left side, drop the items in order on the mirrors: wolf, octopus, monsters, skeleton, and dinosaur.
  • Grab the toy that appears.

Travel down once and through the door on the left.

  • Select the device on the left side.
    • Drop the toy on the lower left slot to begin a new puzzle!

The goal is to simply match the wires. However, you must match them three times.

  • In the first puzzle, you may simply swap pieces easily. Match them to our solution image.
Haunted Halls Fears from Childhood Toy Puzzle Part 1

Haunted Halls Fears from Childhood Toy Puzzle Part 1

  • In the second puzzle, you must use arrow keys to move the pieces.
    • Vertical arrows are listed A, B, C, D, and E.
    • Horizontal arrows are listed F, G, H, I, and J.
      • To complete the puzzle, follow this guide: B once, E three times, I twice, C once, J twice, B once, F once, B four times, E once, J twice, E four times, J once, E three times, J six times, E four times, J once, G three times, E four times, G twice, E once, F four times, E four times, and F once.
Haunted Halls Fears from Childhood Toy Puzzle Part 2

Haunted Halls Fears from Childhood Toy Puzzle Part 2

  • The final puzzle is much more complicated. Four tiles are turned at once.
    • To solve the final puzzle, follow this order: B three times, C twice, D three times, H twice, G once, D three times, L three times, J twice, K once, and J twice.
Haunted Halls Fears from Childhood Toy Puzzle Part 3

Haunted Halls Fears from Childhood Toy Puzzle Part 3

Well done! Tim will lead you back to the lab.

Congratulations, you have finished the game! If you enjoyed this guide, check out our guide for Halloween Stories: Mahjong.


The post Haunted Halls: Fears From Childhood Walkthrough appeared first on GameHouse.

Where Angels Cry – Tears of the Fallen Walkthrough

$
0
0

Your assignment is to travel to Spain in secret to investigate rumors that Inquisitor Augustine has gone mad. Disguised as a Templar Knight and with no support you travel to the village of Portonero. Arm yourself. The road is long and dangerous. It’s the thirteenth century, your only resources are your horse, investigation and survival skills, and objects you pickup along the way.

The Cardinal has asked you to investigate the going-ons of one Inquisitor Augustine. The Village of Portonero is under siege from the Inquisitor – he thinks everyone is a witch and is out hunting witches. He has been especially ruthless against the Sheriff’s wife’s family. In reality, sounds more like Augustine has lost his mind. People are very afraid. Nonetheless, you have been tasked with reining him in. All in secret and with the utmost discretion – of course!

From now on you are on your own. I pray for your safe return my friend.

The Where Angels Cry – Tears of the Fallen walkthrough is organized in five parts: The first, involves general tips and observations or rather the nuts and bolts of the game. The second through fifth parts are details on each of the game’s four chapters: The Cardinal’s Mission, Portonero Village, The Dungeons, and The Wolf Queen. Enjoy your quest! Each chapter contains hidden object puzzles, mini-games, and a combiner.

Contents

General Tips & Tricks

After entering your screen name, you choose your video, audio, and gameplay settings. Your decision points are as follows:

  • Video Settings: Full-screen or custom cursor
  • Audio Settings: Master Audio, Music, Effects, and Speech Volume
  • Gameplay Settings: Auto-continue dialogues and show location names

Next, you determine your difficulty setting: novice, adventure, challenge and custom. All settings can be changed before, during, or after chapter play. Once you have selected your settings you are ready to play.

Tips:

  • The map allows you to quickly jump and visit locations.
  • Place multiple items in a combiner to complete a task or create a new item.
  • The Hand Icon appears over items that you can pick up.
  • The Magnifying Glass Icon means you can examine an object more closely.
  • The Hint Button points you to an object you are unable to find.
  • Objects with sparkles around them mean that you should look at it more closely.
  • Important information about your investigation is stored in the Journal. You can refer to it at any time by clicking on the Journal Icon.
  • Each chapter assigns you tasks to complete in order to complete it and proceed to the next chapter. Some tasks carryover to the next chapter. There is a window at the bottom of the scene that tells you what tasks remain outstanding.
  • All hidden object puzzles will provide you with a list of items to search. As you find them, the items disappear from your list.
  • The game narrator prompts you. In addition to filling-in background information he does tell you what you should do. There are also written instructions. Review them for clarity to complete scenes.

Where Angels Cry – Tears of the Fallen Walkthrough

Chapter 1: The Cardinal’s Mission

The game opens up in the halls of the Cardinal’s Monastery. The Cardinal has sent you on a mission to Spain to investigate Inquisitor Augustine. After receiving the assignment, your first task is to collect equipment. To enter the Equipment Room collect the Burning Candle and Maltese Cross.

In this chapter you will explore the following scenes: the Monastery Hall, the Equipment Room, the Portonero Village Gate, the Path, the Sheriff’s Cabin, and the Wolf’s Den. Throughout play, you will be asked to return to scenes you have already visited. In this chapter you will return to the Village Gate when prompted.

There are two mini-games in this section. The first is found on the door from the hall leading to the Equipment Room and involves arranging Maltese crosses on a grid according to the guide.

Where Angels Cry - Tears of the Fallen puzzle 1

Where Angels Cry – Tears of the Fallen puzzle 1

The second is found behind the deer’s head in the Sheriff’s Cabin and involves arranging wooden puzzle pieces. The pieces are the same size but they are either in the wrong place, in the wrong orientation, or both problems are present.

Where Angels Cry - Tears of the Fallen puzzle 2

Where Angels Cry – Tears of the Fallen puzzle 2

The Cardinal’s Mission contains three hidden object puzzles. The first hidden object puzzle is found in the Equipment Room by the alcove. The objective of the puzzle is to find the key to open the chest in the alcove. You receive the Rock and Dagger. The second puzzle is found on the wall shelf behind the deer’s head in the Sheriff’s Cabin. The objective of the puzzle is to find the Dog Whistle contained in the locked box. One box contains the key; the other the Dog Whistle. The third puzzle is found in the Wolf’s Den. The objective of the puzzle is to obtain the Bone. Use the Bone to prop open the skull head. Once you open the skull head you will be able to take the Uncertified Permission.

When you reach the village of Portonero you are met with an unfriendly gruff guard who disregards the Cardinal’s permission and demands you obtain the Sheriff’s permission in order to enter Portonero. You find the Sheriff but it’s too late. The Sheriff has been killed by the wolf. You agree to find his wife Dolores and advise her of his death. In order to move on to the next chapter and enter Portonero, you will need to present the guard at the Portonero Village gate with the Sheriff’s permission letter.

There are two combiners in this section. You will be asked to place items you collect during play on a circular ring with the outline of the object visible to you. In this chapter the combiner is located by the knight’s equipment in the Equipment Room. Move your cursor to where the tunic, helm, sword and shield are displayed and the circular ring appears. Place the items in it and the task or puzzle is completed. The Key Items are: the Helm, Shield, Gloves, Tunic, Boots, and Cardinal’s Permission. The other combiner is formed when you place the Wax Stick and Sealing Ring.

Chapter 2: Portonero Village

When you enter Portonero Village you meet Inquisitor Augustine who challenges you to a fight. You block the attacks. Inquisitor Augustine cuts and runs. Ramon notices your injuries, invites you into his home, and gives you supplies to cure your wounds. He provides you with herbs to apply to your wound. Next, you are off to find Dolores and tell her of the Sheriff’s death. Dolores, while sad about her husband’s death, has a new problem. Her son Diego has been kidnapped by Brother Celio and is currently being held in the swamp. She requests your help in rescuing her son. The chapter ends when you find the door that contains the secret passage that leads to the dungeons below the church.

There are many scenes in Portonero Village and you will be asked to explore them multiple times. Remember to use the map – much faster – to zip in and out of the scenes. Sometimes you will only return to a scene to pick up one item. You will explore the following scenes: the Village Square, Ramon’s House, the Basement in the Sheriff’s Cabin, Dolores’ House, Jokin’s House, the Path, the Front of the Church, Brother Ramon’s Chamber, the Inside of the Church, and the Altar in the Church. You will also revisit the Wolf’s Den and the Inside of the Sheriff’s Cabin. There are two searching places in the Sheriff’s Cabin: the interior and the basement.

There are four hidden object puzzles. The first hidden object puzzle is found in the rubbish in front of Dolores’ House. The object of the puzzle is to obtain Raw Meat. The second puzzle is found on the kitchen counter in Jokin’s House. Once complete, you receive a Bowl. The third puzzle is found on a shelf in the bookcase contained in Brother Ramon’s Chamber. Once complete, you receive the Crossbow part. The fifth puzzle is in Jokin’s House on the kitchen counter. Once complete, you receive a Sweeper. The sixth puzzle is found in Dolores’ House. The objective of the puzzle is to receive the Shears.

Six mini-games are contained in this chapter. The first is the fight with Inquisitor Augustine.

Where Angels Cry - Tears of the Fallen puzzle 3

Where Angels Cry – Tears of the Fallen puzzle 3

The second mini-game is found in Ramon’s House. There is a box on the shelf. You have to arrange metal inlays on wooden boxes for three separate puzzles. When you place the correct piece in the right direction on the inlay, the image changes color and you hear a clicking sound.

Where Angels Cry - Tears of the Fallen puzzle 4

Where Angels Cry – Tears of the Fallen puzzle 4

The third mini-game is found in Jokin’s House. You have to arrange figurines in a particular order. Before you complete this puzzle you have to get the missing figurine in the Sheriff’s basement. Pay close attention to the instructions. It tells you which feature to compare among the figurines to create the desired pattern.

Where Angels Cry - Tears of the Fallen puzzle 5

Where Angels Cry – Tears of the Fallen puzzle 5

The fourth mini-game is found in the Church Interior when turning the wheel. A board appears with pendant jewelry. Your task is to arrange the pendant jewelry in a certain order to solve the puzzle.

Where Angels Cry - Tears of the Fallen puzzle 6

Where Angels Cry – Tears of the Fallen puzzle 6

The fifth mini-game is found in the Church Interior in the Church Ship. This mini-game involves using the Mirror you collected in prior scenes to create a light pattern. The sixth mini-game is found in the altar contained in the Church Interior. In this game, you have to solve a puzzle. Once solved, the altar door will open.

Where Angels Cry - Tears of the Fallen puzzle 7

Where Angels Cry – Tears of the Fallen puzzle 7

Lastly, look for eight combiners. Remember, in combiners you will be asked to place objects you have already found into a circular ring to complete the task or obtain a new object. If you find that you do not have one of the items requested, you must retrace your steps and look for the missing items. Pay attention to sparkles.

If you are stuck, use your Hint. The first combiner is found in the Wolf’s Den and involves items to heal your dog bite and sword fight wounds and injuries – Bandage, Healing Herbs, and Water.The second combiner is found in Dolores’ House by the column next to the pig. Combine the String, Honey, and Cloth. Get a Sticky Stick. The third combiner is found in the Basement in the Sheriff’s Cabin. Place the Iron Dove and Iron Wings to open the book and obtain the Locked House Spare Key. The fourth combiner is found in Ramon’s House. Place the Ladle and Bowl to make Warm Soup.The fifth combiner is found in the Church Interior. Use the Wooden Wedge and Iron Wedge to turn the mechanism. The sixth combiner is found in Ramon’s House to the right of the fireplace. Place the Sweeper and Wire. The seventh combiner is found in the Basement of the Sheriff’s cabin. Place the Crossbow Part, Oil and Crossbow Trigger to receive the Crossbow. The eighth and final combiner is found in the Watch Tower in the Wolf’s Den scene. Place the Rope, Ladder, and Hook.

Chapter 3: The Dungeons

The entrance to the dungeon is found on the altar in the Church Interior. When you gain entry you meet Ignacio, the dungeon keeper. Ignacio has a problem. He has lost his rare coins and asks you to help him find them. If you find them, Ignacio will allow you to search the dungeon and will provide valuable tips. To find the rare coins you will need to solve a series of puzzles in the form of a hidden object puzzles, mini-games, and the combiner. Once in the dungeon you are looking for a key to open the dungeon door along with other objects. Once you find the key, the next step is to confront Celio in the swamps.

You visit the following scenes in this part: the Village Gate, the Dungeon, the Basement in the Sheriff’s Cabin, Ramon’s House, Ramon’s Chamber and the Wolf’s Den. You revisit multiple rooms.

There are two hidden object puzzles. The first hidden object puzzle is found in Ramon’s Chamber. After successful completion, you will receive a Bone Coin. The second puzzle is found in the Dungeon. Once complete, you will receive a Bow.

Five mini-games are contained in this section. The first mini-game is found on the gate in the Village Gate. You will be asked to solve three separate puzzles.

Where Angels Cry - Tears of the Fallen puzzle 8

Where Angels Cry – Tears of the Fallen puzzle 8

The second mini-game is found in the Dungeon on the skull dagger. You will be asked to solve one puzzle.

Where Angels Cry - Tears of the Fallen puzzle 9

Where Angels Cry – Tears of the Fallen puzzle 9

The third mini-game is found in the Basement in the Sheriff’s Cabin on the wall. You will be asked to solve one puzzle.

Where Angels Cry - Tears of the Fallen puzzle 10

Where Angels Cry – Tears of the Fallen puzzle 10

The fourth mini-game is found in Ramon’s Chamber when you open the door. You will be asked to solve one puzzle.

Where Angels Cry - Tears of the Fallen puzzle 11

Where Angels Cry – Tears of the Fallen puzzle 11

The fifth mini-game is found in the Dungeon. You will be asked to solve one puzzle. All solutions are random.

Where Angels Cry - Tears of the Fallen puzzle 12

Where Angels Cry – Tears of the Fallen puzzle 12

This chapter contains four combiners. The first combiner is in Ramon’s House. Place the Wooden Jar and Chisel. The second is in cart in front of the church. Place the Rims, Nails, Bolt, and Axis. The last is in the Wolf’s Den. Place one Arrow and Bow.

Where Angels Cry - Tears of the Fallen puzzle 13

Where Angels Cry – Tears of the Fallen puzzle 13

Chapter 4: The Wolf Queen

The final chapter opens with a delivery of stones to Dolores’ House. While there, you notice that there is a statute and according to your map, something is under it. When you move it, you are met with an arrow shot by Brother Celio. As you repair the boat, the action starts. A family secret is discovered. There is a connection between Dolores and Brother Celio. Diego is reunited with Dolores. The Wolf Queen is found and identified. Inquisitor Augustine battles you to the death and he dies.

You visit the following scenes in this part of the game: Dolores’ House, the Swamp, Celio’s Hut, the Dungeon, the Tombs, the Altar, the Passage, the Lake, the Demon Tree, the Abandoned Chapel, and the Underground.

You will be asked to complete three hidden object puzzles. The first puzzle is found while you are repairing the row boat. The objective of the puzzle is to obtain a Paddle. The second puzzle is found in Celio’s Hut. The objective of the puzzle is to receive the Emerald. The third puzzle is found inside the Chapel. The objective of the puzzle is to obtain the Iron Pot.

Where Angels Cry - Tears of the Fallen puzzle 14

Where Angels Cry – Tears of the Fallen puzzle 14

This section contains six mini-games. Each mini-game will task you with a puzzle to solve. The mini-games are found in the following scenes: Celio’s Hut (2), the Passage, the Chapel Inside, the Demon Tree, and the Underground (2). The solutions to the mini-games are random.


There is only one combiner in the Dungeons. Place the Burning Arrow and Stinky Root.

Where Angels Cry - Tears of the Fallen - Augustine

Where Angels Cry – Tears of the Fallen – Augustine

Congratulations! You’ve completed our Where Angels Cry – Tears of the Fallen Walkthrough! For more great tips and tricks, visit our blog!

Delicious – Emily’s Hopes and Fears Walkthrough

Big City Adventure – Shanghai Walkthrough

Building the Great Wall of China 2 Walkthrough

The Where Angels Cry – Tears of the Fallen Walkthrough is meant as a guide and does not contain cheats, hacks or serials.


The post Where Angels Cry – Tears of the Fallen Walkthrough appeared first on GameHouse.

Weeping Skies Walkthrough

$
0
0

Use this handy Weeping Skies walkthrough to guide your way through the challenging levels of mystery, intrigue, problem solving, and hidden objects. Imagine yourself in the center of a dangerous criminal case of kidnapping to save the life of your ailing father. Investigating the puzzling evidence of this fairy tale involved crime takes you around this mysterious city collecting clues and hidden objects while mystery evoking music plays in the background. Explore every level of this addictive puzzle game in order to solve the crime of Puss-n-Boots missing wife to save your father before his time runs out.

Use your natural detective abilities, your common sense, and your keen eye to spot the clues and put them to use in the 39 different locations that you will visit. Within these locations there are 19 hidden object challenges and 13 exciting mini-games that you will encounter in this hidden puzzle game. Attention to detail and object recognition is essential for success when searching for clues and supplies. Each clue and tool is needed to progress through the different areas of the map to thwart the villain and save your father from certain doom.

Contents

General Tips

  • Every puzzle has a solution somewhere in the level.
  • Not every area on every level has hidden objects or mini games.
  • Characters offer valuable clues and advice.
  • It may be necessary to revisit previous rooms to attain the needed tool or object to complete the challenge.
  • Utilize the clue option if you are stuck on a specific clue or level.
  • Before starting your game, select your desired skill level from the options menu.

Weeping Skies Walkthrough

Prologue

Weeping Skies - Prologue

Weeping Skies – Prologue

Collect the writing journal from the desk. Collect the magnifying glass and use it to investigate the room. It is a valuable tool that will show you where the next clue or item is located. This will help you find the feather pen to create entries in the journal. These entries contain vital information, tips and tricks, and helpful hints. The door exiting the room is stuck and it is up to you to find the oil can to get out. Checking out the file cabinet will open a mini-game of hidden objects.

In this hidden picture game, you not only have to find the object but it may be necessary to find more than one element in order to collect an item. For example, you will need to find glasses in this hidden bonus game. But before you can cross the glasses off of the list, you must find the two lenses and place them into the glasses, then select the glasses to remove them from the list. Completion of this mini game will uncover the oil can which will automatically be added to your item collection list at the bottom of the screen. Select and use the oil to open the door and exit the room. This will lead to the outside where you will take your car to the apartment where the crime took place and your investigation begins.

Hidden objects: The map is under the papers on the message board that is on the wall next to the file cabinet and the pen is in the back left corner of the room.
Mini game: The mini game is located in the file cabinet and reveals the oil can for the door handle.

Part 1

Weeping Skies - The Parlor Room

Weeping Skies – The Parlor Room

Collect: A map, diary, pen, door handle, crow bar, magnet, phoenix, saber, elixir, signets, ransom note, bird, bed sheets, and a painting fragment.
Hidden objects: The door handle is on top of green box and the ransom note and signet are inside green box on wall.
Mini game: The game is located within the pile of debris on the floor. Another mini game appears when you remove the police tape.

Weeping Skies - Storage Room

Weeping Skies – Storage Room

Collect: A magnet, the phoenix, a saber, ransom note, signet, hockey stick,
Hidden objects: The saber is in the plant in the back corner and the elixir for plant and a bed sheet are inside of the mannequin’s chest, and there is a bird in the upper left corner.
Mini game: The mini game is the picture on the back right hand side of the wall and rewards a lock pick.

Weeping Skies - Murder Scene

Weeping Skies – Murder Scene

Collect: A painting fragment, a briefcase, and a boomerang.
Hidden objects: The painting fragment is under the cabinet, the briefcase is under couch..
Mini game: The mini game is located on the wall behind the open cabinet and will reveal a boomerang.

Part 2

Courtyard

Weeping Skies - Courtyard

Weeping Skies – Courtyard

Collect: A lit candle, termite jar, sword fragment, weatherometer, puzzle pieces, jaw bone, cat’s eye jewel, telescope pieces, a cane, and a comb.
Hidden objects: candle, sword fragment, weatherometer, Sherlock Steel figure,

Alley Area

Weeping Skies - Alley Area

Weeping Skies – Alley Area

Collect: A puzzle piece, a telescope piece, a cat’s eye jewel, a machete, and an ultraviolet light.
Hidden objects: Object is a puzzle piece from the grate in the back right, a telescope piece from the sewer grate, .
Mini game: Hidden underground, where the magnet opens the panel, is the reward of a cat’s eye jewel on your first visit, and an ultraviolet lamp on the second.

Rapunzel’s Bar

Weeping Skies - Rapunzels Bar

Weeping Skies – Rapunzels Bar

Collect: A hair comb, a telescope piece, and a puzzle piece.
Hidden objects: There is a cane and telescope fragment inside of the guitar case, and a telescope fragment near the dirty dishes. A puzzle piece, telescope piece, and comb are located on the fire escape outside.
Mini game: The game is activated when you go through the door to the attic.

Rapunzel’s Attic

Weeping Skies - Rapunzels Attic

Weeping Skies – Rapunzels Attic

Collect: A wrecking bar and a file.
Hidden objects: The wrecking bar is above the cabinet and the file is in the cat’s belly.
Mini game: This is found in the mini theater, in the lower right, where you dress the Steel character to earn red paint and a lens.

Part 3

Rapunzel’s Bar

Weeping Skies - Rapunzels Bar

Weeping Skies – Rapunzels Bar

Collect: An ice giant, cellar key, crescent moon, coffee beans, cup of coffee, the tunnel key, and a dagger.

Rapunzel’s Cellar

Weeping Skies - Rapunzel Cellar

Weeping Skies – Rapunzel Cellar

Collect: The coffee kettle of water, electrical tape, a crescent moon, a fairy shield, and a painting fragment.
Hidden objects: The crescent moon, ice dragon, and painting fragment are located in the barrel and the skeleton areas.
Mini game: Hidden behind a curtain on the left, this game will reward a sun. On the second visit to here you will receive electrical tape.

Rapunzel’s Attic

Weeping Skies - Rapunzel Attic

Weeping Skies – Rapunzel Attic

Collect: A fairy sword and blue paint.
Hidden objects: A fairy sword and blue paint are behind the painting.
Mini game: The painting is the mini game.

Tunnel Room

Weeping Skies - Tunnel Room

Weeping Skies – Tunnel Room

Collect: The hammer, a light bulb, a note, rubber gloves, a pencil, a broom, light bulbs, robot eye, and a valve.
Hidden objects: The rubber gloves and pencil are located behind the brick wall. The light bulb is located in the metal cabinet to the right. The robot eye is hidden in leaves outside of the broken tunnel wall. Use the UV light to read the hidden code above the window.

Part 4

Underground Lair

Weeping Skies - Underground Lair

Weeping Skies – Underground Lair

Collect: Light bulbs, an ax, a slingshot, fairy dust, silver mushroom, and a door knocker.
Hidden objects: The light bulb and ax are behind the locked safe. The fairy dust and a silver mushroom are in the locked box on the table.
Mini game: Breaking open the vase with the hammer will enact a hidden object game. Another puzzle can be found in the corner of the room.

Tunnel Room

Weeping Skies - Tunnel Room

Weeping Skies – Tunnel Room

Collect: A light bulb, a pliers, a metal rose, and a robot heart.
Hidden objects: There is a light bulb inside of the machine in the middle of the room. Break away the boards on the right hand wall to earn a pliers.
Mini game: Is located in the electrified blue glowing area.

Courtyard

Weeping Skies - Courtyard

Weeping Skies – Courtyard

Return to the area of the courtyard where the robot is located and give him his heart and his lens. This will allow you to cross the bridge and head up the hill.

Cassandra’s Outside

Weeping Skies - Cassandra's Outside

Weeping Skies – Cassandra’s Outside

Collect: A crystal shoe, ruby earrings, a casket key, silver mushroom, a doorknob.
Hidden objects: The crystal shoe is in the carriage. The statue has the earrings. The casket key is hidden behind the dry grass by the ladder.

Cassandra’s House

Weeping Skies - Cassandra's House

Weeping Skies – Cassandra’s House

Collect: A mystical sickle, two silver mushrooms, herbal tincture, a partial shard, and a strange key.
Hidden objects: The herbal tincture is behind the porcelain statue.
Mini game: The mini game is activated when the ingredients are mixed together. A second game is activated when the shard of glass is retrieved.

Part 5

Cassandra’s Outside

Weeping Skies Part 5.1 - Cassandra's Outside - Receiving Knob

Weeping Skies Part 5.1 – Cassandra’s Outside – Receiving Knob

Collect: A doorknob.
Hidden objects: The monkey has the doorknob.

Backyard Court

Weeping Skies Part 5.2 - Backyard Court

Weeping Skies Part 5.2 – Backyard Court

Collect: Taurus ring, wire cutters, and a bucket of water.
Hidden objects: There is a coin hidden in the bushes.

Main Cellar Door

Weeping Skies Part 5.3 - Main Cellar Door

Weeping Skies Part 5.3 – Main Cellar Door

Collect: A basket, a rope, a housemaid’s card, glass cutter, pendant half, acid, and Rufus’s pistol.
Hidden objects: The glass cutter can be found by placing the slipper on the foot in the top left. The pendant is in the well. Rufus’s pistol is in the pile of papers above the chair.
Mini game: Cut the chains off of the door to enter the mini game and open another area.

Side Cellar Door

Weeping Skies Part 5.4 - Side Cellar Door

Weeping Skies Part 5.4 – Side Cellar Door

Collect: A crown, a pipe, a harpoon, and a focusing crystal.
Hidden objects: The valve and a vital and mysterious note are in the washing machine.
Mini games: Place the ring on one of the fingers of the robot hands to enact a game. Put the crown on the front of the boiler for another puzzle game.

The Major’s Room

Weeping Skies Part 5.5 - Majors' Room

Weeping Skies Part 5.5 – Majors’ Room

Collect: Strange keys, paper dragon, pendant half, Rufus’s sword, and a potted vine.
Hidden objects: Cut open the couch near the pot to find Rufus’s sword. There is a key buried in the pot on the arm of the couch.
Mini games: There is a game in the stand-up mirror.

Cassandra’s House

Weeping Skies Part 5.6 - Cassandra's House

Weeping Skies Part 5.6 – Cassandra’s House

Collect: A knife and vine seeds.
Mini games: There is a mini game in the area behind Cassandra.

Hidden Room

Weeping Skies Part 5.7 - Hidden Room

Weeping Skies Part 5.7 – Hidden Room

Collect: A spade, a powerful magic growth spell, frozen meat, .
Hidden objects: There is a skeletal arm in the chained cabinet. The phoenix is needed to get the frozen meat from the freezer. There is a hidden doorway behind the painting.

The Maze

Weeping Skies Part 5.8 - The Maze

Weeping Skies Part 5.8 – The Maze

Use the map and the lighted clues to find your way through the maze in this walkthrough.

Part 6

Outdoor Bungalow

Weeping Skies Part 6.1 - Outdoor Bungalow

Weeping Skies Part 6.1 – Outdoor Bungalow

Collect: A chandelier, a gold bit, and a werewolf.
Hidden objects: The gold bit is under the arm of the statue. The werewolf is in front of the three headed bust.

Hidden Room

Weeping Skies Part 6.2 - Hidden Room Entrance

Weeping Skies Part 6.2 – Hidden Room Entrance

Collect: Frozen meat.
Hidden objects: The meat is in the freezer.

The Maze

Weeping Skies Part 6.3 - The Maze

Weeping Skies Part 6.3 – The Maze

There is a map to help you through the maze.

Graveyard and Mausoleum

Weeping Skies Part 6.4 - Graveyard & Mausoleum Entrance

Weeping Skies Part 6.4 – Graveyard & Mausoleum Entrance

Collect: A diamond, a chisel, a spade, a hammer, a skull, and a fang.
Hidden objects: The spade is in the mausoleum behind the skeletons.
Mini games: This game is hidden behind the brick wall by the exit. There is a mini game behind the large doors in the distance.

Kitchen Entryway

Weeping Skies Part 6.5 - Kitchen Entryway

Weeping Skies Part 6.5 – Kitchen Entryway

Collect: A silk mask, an Emerald, a revealer of the invisible potion, a stepladder, a lifting jack, a ladle, and a fuse.
Hidden objects: The revealer is inside of the bear’s mouth.

Kitchen

Weeping Skies Part 6.6 - Kitchen

Weeping Skies Part 6.6 – Kitchen

Collect: A dream catcher, malachite, dresser handle, and a ruby.
Hidden objects: The dresser handle is in the cooking pot. The ruby and a fuse are in the cupboard on the left.

Part 7

The Graveyard and Mausoleum

Weeping Skies Part 7.1 - The Graveyard and Mausoleum

Weeping Skies Part 7.1 – The Graveyard and Mausoleum

Collect: A book and a tommy bar.
Hidden Objects: The tommy bar and a fuse are inside of the crypt.
Mini game: Return to the hole in the wall for a hidden picture game.

Hidden Room

Weeping Skies Part 7.2 - Entrance Hidden Room (Lounge Room)

Weeping Skies Part 7.2 – Entrance Hidden Room (Lounge Room)

Collect: A pruning shears, fuel can, and a gold bar fragment.
Hidden objects: A loose floor board will reveal a pruning shears and a fuel can.

Kitchen Entryway

Weeping Skies Part 7.3 - Kitchen Entryway

Weeping Skies Part 7.3 – Kitchen Entryway

Collect: A Lotus flower.
Hidden objects: The Lotus flower is in the bowl on the counter.

Kitchen

Weeping Skies Part 7.4 - Kitchen

Weeping Skies Part 7.4 – Kitchen

Collect: A gold bar fragment and a yellow bird.
Hidden objects: The gold bar is in the dumb waiter.
Mini games: The hidden puzzle is in the corner on the right.

Library

Weeping Skies Part 7.5 - Library

Weeping Skies Part 7.5 – Library

Collect: Gold bars, a drawer handle, a screwdriver, and glasses.
Hidden objects: There is a gold bar behind the ornate circle in the upper left. There is another bar behind the books on the top right.

Sticky’s Room

Weeping Skies Part 7.6 - Sticky's Room

Weeping Skies Part 7.6 – Sticky’s Room

Collect: A top hat, a green bird, an informational note, a red bird, a blue bird, a platinum shield, and a deli arm.
Hidden objects: The blue bird is in the fur coats. The platinum shield is in the cabinet.
Mini game: Put the birds on the posts on the left side of the room.

Part 8

Wicked Stairway

Weeping Skies Part 8.1 - Wicked Stairway

Weeping Skies Part 8.1 – Wicked Stairway

Collect: A saw, a tusk, a hammer, a bucket, and a wing.

Sticky’s Room
Collect: A statue head.

Courtyard and Shed

Weeping Skies Part 8.3 - Courtyard and Shed

Weeping Skies Part 8.3 – Courtyard and Shed

Collect: An onyx cat, a bucket bottom, a poison squeezer, a coin, spider venom, and a poison recipe.
Hidden objects: The bucket bottom is inside of the metal statue. The little girl has the coin. The recipe is inside of the telephone.
Mini game: This game is hidden behind the spider webs.

Outdoor Seating Area
Collect: A stone ear, a wrench, a sofa leg, a broken wing, screw nuts, and a tiara.
Hidden objects: The sofa leg is behind the vines. The screw nut is in the telephone and the sofa. There is a screw nut inside of the statue’s locket.

Library
Collect: A seal.
Hidden objects: The seal is inside of the gargoyle.

Balcony
Collect: A corkscrew, a seal, a barn key, a pass, an agaric berry, and an empty flask.
Hidden objects: The agaric berry is in the plant.
Mini game: The mini game is on the door of the building.

Elixir Room

Weeping Skies - Elixer Room

Weeping Skies – Elixer Room

Collect: Plant poison, and a spider venom flask.

Part 9

Elixir Room

Weeping Skies Part 9.1 - Elixer Room

Weeping Skies Part 9.1 – Elixer Room

Collect: The deadly poison.
Mini game: The mini game is in the panel on the floor.

Shed

Collect: A salt shaker.

Arboreum

Weeping Skies Part 9 Arboreum - Laboratory

Weeping Skies Part 9 Arboreum – Laboratory

Collect: An Electronic Panel.

Prison Cell
Collect: A halbard, a glass shard, a file, a stone key,
Hidden objects: The glass shard is in the cabinet. The file is under the matress.

Sitting Room

Collect: A pistol, a golden horn, a bunch of keys,
Hidden objects: The pistol is under the pillow on the couch. The keys are in the art piece on the table.

Transport Room
Collect: A hammer and a fire ax.
Hidden objects: The fire ax is behind the glass on the right.
Mini game: The mini game is activated when the demon is unlocked.

Stone Bridge
Collect: A rope and the confession of the mysterious man in the black cloak.

Congratulations! You’ve completed our Weeping Skies Walkthrough! For more great tips and tricks, visit our blog!

Delicious – Emily’s Hopes and Fears Walkthrough

Big City Adventure – Shanghai Walkthrough

Building the Great Wall of China 2 Walkthrough

The Weeping Skies Walkthrough is meant as a guide and does not contain cheats, hacks, or serials.


The post Weeping Skies Walkthrough appeared first on GameHouse.

Grim Facade – Sinister Obsession Walkthrough

$
0
0

As an investigator, you are called to a vineyard of a wealthy family. The maid has found a mysterious diary for you. When you open the diary, you find information about three murders of women. Your job is to use the diary to find the murderer. Is it one person? Two people? In Grim Facade – Sinister Obsession walkthrough, you will learn the tips and tricks to make your way through the house. By collecting the clues, you will find the murderer.

Contents

General Tips & Tricks

Cursors and Hints
You will have three different cursors throughout the game. When you are just moving around, your cursor will be a red arrow. You will have an opera glass option. This will show you areas you need to concentrate on. Once you land on an object, your arrow will turn into a hand icon. It will only change to the hand when it is an object you need. In order to gain hints, you will need to find lady’s fans. The more you find, the more chances of hints you will have.

Levels of Difficulty
You can choose between three levels. You can change back and forth with the difficulty throughout the game. First, you can play in the hard mode. This mode will have your hint bar and the skip bar load slowly. It will also not allow your active areas to be highlighted and you won’t have the help of the black bar. In the advanced level, you will have the active areas not highlighted for your help. Finally, there is the casual level. With this level, you will be able to access your hint and skip bars faster. All the active areas will be highlighted to aide you.

Puzzles
Throughout the game, you will have opportunities to play mini games to receive vital pieces or just coins. With each level, you will have multiple instances to play these games. If they are too challenging, you can skip over them.

Grim Facade – Sinister Obsession Walkthrough

Chapter One: Near Conti Villa

Once the game starts, you will be outside the villa. Meet the Lady sitting under the tree. She will give you a Notebook which will help your investigation. On the phone booth, you will find your first Fan. Make sure you grab it. Go to your right and go to the Base of the Statue. You will take both the Note and the Glove. Go back to the phone booth and use the glove to get around the glass. On the window, pick up the Blue Shell. On the phone, remove the two screws to go into a mini game.

Grim Facade Sinister Obsession - Near Conti Villa

Grim Facade Sinister Obsession – Near Conti Villa

Go back to the statue. There will be a Crate under the tree. Take the Sharp Glass you found at the window and cut the Rope around the box. When you open the box, take theTool Kit. Walk down towards the gate and use the Tool Kit on the birdhouse. You will find a Postal Emblem. Take it and go to the Control Box.

You will put the Gate Handle in and go through the gate. You will find the Gate Handle in the Mailbox. To access the Mailbox, put the Postal Emblem on the box. Once you go through the gate, go to the Bench. You will see a Purse to open. In it, you will find a Coin. Take it.

Go to the Shed. You will need to find 12 Hammers scattered around the shed. Don’t forget to click on the Book found on the Shelf. It contains one of your Hammers. Once you find all of the clues, you will have a Hammer in your inventory. Once you get theHammer, go outside. Pick up the Scarf on the Bench. You will need to click on it Four times and collect the Coin that falls out of the Scarf.

Go to the Scarecrow and put its Scarf around its neck while putting its Hat on its head. Put the Gloves on the Hands to complete the look. Once you have done that, turn theHandle on the bottom of the scarecrow. This will turn it around. Put the Corset on the scarecrow and the Scarf that you have in the inventory. Finish the look with the Crownwhile putting her Gloves on her hands.

Grim Facade Sinister Obsession - Female Scarecrow

Grim Facade Sinister Obsession – Female Scarecrow

After completing the female scarecrow, the head will topple over. You will need to zoom into the hat. You will need to grab the Honey Dipper and the Coin. Go back to the Benchand dip the Dipper into the Honey. Put it in your inventory.

Walk down the road. Locate the Barrel on the right side of the screen and break it with aHammer. Collect the Red Shell. Go to the Gun and load it with both the Blue and Red Shells. Fire the Gun and then click on the Dog. It will have a Key you need to open theGate.

You will have another hidden object scene where you need to collect 12 Pieces of Chains. Like the previous challenge, remember to open the Book to take the Chain. Click on theAnvil. Put the Nails in the Chains you find on the anvil. Use a Hammer to finish the chain. It will transform into a Bike Chain and will go into your inventory. Once back on the path, go to the left. You will find the Gate. Use the Key to open the gate and then click on theHorse. This will lead you to another puzzle.

Once you are outside, go inspect the Rose Bush. It will be covered in Bees so use theHoney Dipper. Place it on the Ledge and the bees will disappear. Take the Garden Pruners Half that you find in the bush. Don’t forget to grab the Coin near the honey dipper. To complete this chapter, go into Giovanni’s Store.

Chapter 2: Giovanni’s Store

When you enter the store, talk to Giovanni. Browse the store to see if you can afford items that will aide your investigation. Grab the Handsaw and pay Giovanni. If you have enough coins, buy a Scythe Blade. Go to the left after the purchases and play the hidden objects game. You will need to grab the 2 Fans, a Hammer, and a Jar. You need to collectTermites so use the Jar. Put the Termites on the Wood. Take the Screwdriver. To put out the Trash Fire, you will need the Fire Extinguisher.

Grim Facade Sinister Obsession - Giovanni's store

Grim Facade Sinister Obsession – Giovanni’s store

You will need to use the Screwdriver to release the Extinguisher. Once the fire is out, take the Shovel. In the sand on the lower right side of the screen is an Axe. Use theShovel to remove the sand. Next, you need to remove the plank with the Axe and take the pair of Pliers you find. Use the Pliers to get the Hook from under the wire. Locate theHelmet and Steps with the hook. To get past the Snake, you need to use the Helmet. Take the Stairs. Finally, take the Ladder and go outside.

You will be at the Gate of the villa. Look at the Sign and collect the Candy Machine Token. Go to the right, touch the Dog and the Dog will walk to the Window. Follow the Dog by going through the Door. Before going to the Door, get the Coin from the window. Use your Handsaw to open the door.

Once you are in the Barn, zoom in on the Dog. Take the Wig underneath and the Coinyou find. Click on the Basket, take the Coin and the Handle for your Scythe. You will find another Coin on the Table next to the other Half of the Pruners. Put the two pieces together and put it back into your inventory. Go back to Giovanni’s store.

Before going into the store, use your Candy Token on the candy machine. It will release aGreen Ball. Go to the Pinball Machine located in the store. Use your Green Ball to activate the puzzle.

Using 6 Coins, buy the Wine Bottle and take it to the Barn. Locate the Wine Press and put the Bottle into it to activate the puzzle. To beat the level, move all the Grapes to theirCorresponding Color. Once complete, take the Full Wine Bottle and pour into the hole in the ground. You will find a Cat Brush. Walk out of the barn and locate the Barrel. On the top of the barrel, use the Wrench to open. You will have to play another hidden object game.

Grim Facade Sinister Obsession - Grapes

Grim Facade Sinister Obsession – Grapes

Once you receive the Jukebox Button, you will go back to the store. Go to the Juke Box, add the Button and take the Code from the suitcase. Go back outside, look towards theBalcony, cut the Rope and click on the Suitcase. Put the code in and remove all the items. Be sure to take the Tap Handle.

Walk back to the Barrel and put the Tap Handle into the tap at the bottom of the barrel. Use the Wrench on top of the barrel, take the Coin and the Note. Go to the gate, remove the Bolt, and go through. You will need the Wrench again.

Look at the Boat, pick up the Stone and Coins. Go to the left side of the water and put theStone Piece down in the water. You will find another Coin and Red Ball. Go up on the Pierand collect the Coin. Locate the Bicycle and fix it with your Chain and Pedal. After the bicycle is complete, inspect the Sack. There will be a Fire Hose you will need to collect.

Go back to the Pinball Game in the store. Once you finish the game, you receive anotherCoin. Go back to the entrance of the villa. Attach the Fire Hose to the Hydrant, turn theValve on and use the Water to open the gate. Once the gate is open, enter the area. Cut the Hedges with your Garden Pruners to find the Apple Cubes. Next, focus on the Cat. In order to get the Theater Piece, you will need to use your Cat Brush.

Grim Facade Sinister Obsession - Pinball machine

Grim Facade Sinister Obsession – Pinball machine

You will need to play a hidden objects game where you find 12 Balls. To create One Ball, click on the Statue’s Knee. You can create one of the balls by using the GlassPaper,Pencil and Scissors. Pump up the Balloon and receive the Blue Ball. This will take you to the final puzzle of this chapter.

Chapter 3: Conti’s Villa

Before you go inside, you need to put the Light Bulb in the Lamp near the door. Once inside, talk to the Man who will send you to a hidden object game. Put 3 Sticks into theFireplace. Go towards the Candle, take a Stick from the fireplace to light it, and take aNail next to it. Next to the fireplace, inspect a Loose Brick with the Crowbar. Grab theClamps, take the Magnifying Glass and inspect the Mantle.

Grimm Facade Sinister Obsession - Conti's Villa

Grimm Facade Sinister Obsession – Conti’s Villa

You need to find the Code. Locate the Lock, enter the Code and take the Gloves. Take thePliers out of the fireplace with the Gloves. Place the Pliers into the Bucket. Locate theArrow, take the Pliers and move it.

Move away from the fireplace. Go to the Egg on the table. Open it. You will find a GoldenArrow. Move up the stairs until you are blocked by a Cupboard. Go to the right. You need to put the Broken Arrow on the target. Take the Candle it gives you. Find the Feather and place it on the Peacock. Go to the door on the right. Enter the kitchen, take the EmptyKettle, and put the Candles on the Stove. Melt the Wax Seal. Take the Fish Food andTongs out of the cupboard. Go to the Fish Bowl. Add the Food and locate the FaucetHandle.

Go back into the kitchen to the sink. Place the Kettle in and with the Faucet Handle, turn on the Water. Go back to the stove and put the Kettle on the hot stove. Once the water is boiling, take the Kettle off and keep it. Find the Frozen Door, use the Boiling Water to thaw the door.

Go into the Freezer. Find the Crate and grab the Scalpel. Find the Circuit Part on the ground near the Hair Dryer. Go towards the Power Box, grab the Knife Switch andPower Cord. Open the Power Box. Add the Circuit.

Grim Facade Sinister Obsession - Freezer

Grim Facade Sinister Obsession – Freezer

Go back to the Grate, use the Knife Switch to open so you can get the Pin. Combine thePower Cord and Hair Dryer. To activate the Dryer, left click on your mouse and hold it. Grab the Sand Bag and go back to the kitchen. Locate the Lemon and cut it open with theScalpel. Put Lemon in your inventory.

Return to the fireplace. Take out the Oranges from the Bowl, move the bowl and grab theCross. Place the Cross into the slot on the left side of the fireplace. Grab the Screwdriver. Use your Saw to take a Patch. Look at the Shield, remove its Screws and grab the Handle.

Grim Facade Sinister Obsession - Fireplace

Grim Facade Sinister Obsession – Fireplace

Find the Ladle and place it in the Resin. Pull the Ladle out with a scoop of Pitch. Go to theBucket, put the Patch on it and fill the Bucket with the Ladle and Pitch. Find the Juicer, put the Handle on it, and put the Oranges on it. Fill the Bucket with Orange Juice. Find the First Spoke.

Go back outside and go to the Gate. Take the Sandbag out and place it on the wires. Proceed through the gate. Find the Basket located on the lower left side. Locate yourApple Cube and place it in the bucket to start a puzzle.

Look at the Cart, add the Spokes and grab the Wheel. Fix the Cart. Find the Trash Can Lidand cover the Trash Can. Locate the Glass Cutter. Walk over to the Lock. Place the Pininto the lock and go into the Garage.

Chapter 4: Mario’s Garage

Locate the Burner. Put the Metal Objects next to the car tire on the burner to melt. UseTongs to remove the Mold. Locate your Water and cool down the new Mold. Go to theWork Table and pick up the Glass Cutter. Place it in the Holder and start a new puzzle. Place the Tools in the right positions in order to obtain the Multi-Tool. Investigate the Car. Cut the Window with the MutliTool. Enter the car.

Find Mario’s Photo in the visor. Grab the Rags in the glove compartment. Pop the Hoodwith the Lever on the right side of the Steering Wheel. Before leaving the car, pull on theWindshield Wiper. Take the Photo you find on the Work Station. Using the Lemon Juice, wet the Rag. Use the Rag to clean your Oil Can. Put it in your inventory. Look at theEngine. Place the Oil Can on the engine to fill it.

Grim Facade Sinister Obsession - Mario's garage

Grim Facade Sinister Obsession – Mario’s garage

Proceed to the back of the car. Pour the Oil onto the Vise. Gain a Hubcap Piece by turning the Vice Handle. Activate the hubcap puzzle. Obtain the Grate Handle from the trunk.

Head back to the villa and go to the left. Place the Grate Handle on the Mechanism. Proceed through the Mechanism, go to the Table and pick up the Radio. Find your SharpGlass by going to the Partition. Find the Potted Plant and click on the Vines to tie them up. Take the Mouse off the picture. Go down the stairs and look at the Globe.

Place the Mouse on the ground. On the globe you will have a Radio Solution. Take it. Go back, unroll the Carpet. Place the Radio on the carpet and tune it to the right station that you found on the Solution. Once you do that, remove both the Snake and the Radio.

Grim Facade Sinister Obsession - Radio solution

Grim Facade Sinister Obsession – Radio solution

Go to the stairs and go down to the Piano Hall. Find the Dart on the piano. Locate thePicture Frames on the wall. Place Mario’s Photo on the wall and locate anotherScrewdriver. Go to the Railing and remove the Screws.

Obtain the Wooden Stick. Go back to the Globe Room and pick up the Hand that goes on the Wooden Stick. Stroke the Blinds four times with the Hand and obtain the SecondCord. Return to the Piano Hall.

Go back to the window and place the Cords on the Blinds. Find the Safe Code and theSafe. Take Luigi’s Photo out of the Safe and take the 5 Gold Coins. Put Luigi’s Photo on the wall in the Piano Room. Grab the Room Key.

Return to Giovanni’s and play the Pinball Game. Buy the Chainsaw from him. Go to theBlocked Staircase in the villa and use the Chainsaw on the Cupboard. Go upstairs.

Chapter 5: Luigi’s Room

In the room, gather all the Brooches. There should be 12. Go back to the Staircase and place the Dart on the Yarn. It will turn into a Drumstick and go to the door. Take theRoom Key and unlock the door. Go to the Table in the room and put the Box Brooch on top of it. Collect your Chain Extension. Place the Drum Stick on the Drum, located the mirror, and hit the Drum with the Stick 2 Times.

Grim Facade Sinister Obsession - collect all the brooches

Grim Facade Sinister Obsession – collect all the brooches

Pick up the Pole once it falls. Enter the door right next to the Warrior. Open a Drawer in that room to activate the puzzle. After defeating the puzzle, you will collect the paint. In the next drawer, play the hidden object game. You will receive a Brush as a reward. Go out the back of the room, and see the Stairs. A Grenade on the stairs will activate a hidden object game. Put the Mirror on the Railing. Click the Palette and add the Oiler,Brush, and Paints to start the next puzzle.

Grim Facade Sinister Obsession - puzzle

Grim Facade Sinister Obsession – puzzle

Once you have finished the puzzle, angle the Telescope to wear the light reflects on theMask. Take the Mask and go down the stairs. Place the Mask on the Mask Wall to start another puzzle. You will receive a Medicine Token at the end.

Keep walking and play the next hidden object game. Collect all 12 Clippers. Make sure you open all of the drawers and look behind the curtains. Go back outside and use theClippers to cut the Wire. Go upstairs and combine the Pole with the Fruit Picker.

Be sure to check on the Dog as it looks hurt. Go down stairs back to the rooms. Turn on the light by putting the Chain Extension on the lamp. Get the Zipper Pull by using theFruit Picker on the lamp. In Luigi’s closet, you will find First Aid Equipment. Use theZipper Pull to open the zipper on the jacket. Go back to the drawer and play the hidden object game to get Matches. Head back to the Tower and help the Dog. Go back down towards the room and open the door to Francesco’s Room.

Chapter 6: Francesco’s Room

Begin with the hidden object game. You will receive a Spade Tile. Go towards the Desk, pick up the Photo, and then go into the Curtains. You will see the lab, go to the First AidKit and pick out the Medicine Chest Token. Match up the Blades to win the puzzle. Grab the Sharp Knife, go to the Stretcher, and locate the Bandage. Use the Sharp Knife to cut the Bandage and find the Control Box. Go to the bed, open the Mattress and grab thePlunger.

Grim Facade Sinister Obsession - Match the blades

Grim Facade Sinister Obsession – Match the blades

Find the door to the right and go in. Go to the tub, put the Plunger on the Drain and grab the Magnet. Find the Photo Scrolls and attach the Control Box on the Cable. Once it is attached, push the Button 3 times. You will receive a Stencil. Head back to the lab, find the Robe, and put the Magnet on the Pocket. Move it up until the Battery comes out.

Grim Facade Sinister Obsession - plunger on the drain

Grim Facade Sinister Obsession – plunger on the drain

Go back and start a puzzle at the Flasks. Finish the puzzle and take the Water Cleaner. Head into the piano hall to put Francesco’s Photo in a frame and grab Two Corks. Head back to Luigi’s room, examine a Desk, open the Book and then place the Stencil on the book. You will find a Solution. Return to Francesco’s room and go into his lab. Go to the sink, place the Corks in the Sink and collect the Toilet Paper Roller Knob.

Return to the bathroom, put the Roller Knob on the holder and spin until you see theMedicine Labels. Head back to the lab and look at the Bottles. Place the Medicine Labelson them. Take the Iodine and return to the tower. Tend to the dog’s Wound with theIodine and take the Photo. Head back to Francesco’s room and find the Whistle. Head outside. Find the Debris, use the Whistle, and the dogs will remove all the debris. Finally, follow the Dog.

Chapter 7: The Finale

Look at the Pots, find your Water Cleaner and clean the Pots. Pick up the Thimble with the Clear Water. Head towards the door, place the Spade Tile and the Solution on the door. Use the solution to open the door and enter Maria’s room. Go to the Dresser, look in the Open Drawer, and place the Thimble with the Hoop. Take the Sewing Kit and walk towards the bed. Use the Sewing Kit on the Linens before you take them. Go to the left.

Grim Facade Sinister Obsession - Maria's room

Grim Facade Sinister Obsession – Maria’s room

Walk towards the nest and find the Shovel. Use the Shovel on the ground to find a Worm. Give the Worms to the Chicks in the nest. Feed the Chicks the Clear Water and then take both the Chicks and the Carriage Return Handle. Find a Cage and put the Chicks in there.

Go into the pigeon house and locate the Typewriter. Place the Carriage Return Handleon it. Find and push the right buttons until it clicks. You will be rewarded with a Piston. Go to the table and find the Invisible Letter. Place the Linen on the top wall. At the top of the ladder, find the Silver Desk Key.

Grim Facade Sinister Obsession - Typewriter

Grim Facade Sinister Obsession – Typewriter

Return to Maria’s room, locate the Ironing Board, and put the Invisible Letter on it. Run the Iron of the paper to find the solution. Go to the hatch, use the Code on it and enter. Go to the shelf and take the Laundry Pin. Get out of the hatch and return to the pigeon house. Use the Laundry Pin on the Belt on top of the Ladder and retrieve the GeneratorBelt.

Head into the generator room. Put the Piston on the generator, and replace the Belt. Head into the wine cellar and find the Manhole Cover. This will lead into a puzzle. Move the Spheres into the color sections to solve. Once completed, take the Jack Part. Find theGoblet, grab the Second Jack Part, and walk away. Locate the Box, place the Jack Partsand create a Jack. Head forward to the catacombs.

Place the jack on the Right Coffin to retrieve the Iron Desk Key. Next grab the Ladderfrom the Center Coffin. Finally get the Net from the Left Coffin. Head farther in. Place theLadder on the Center Barrel, go up and search the top of the barrel. Remove cover and get the Wardrobe Handle Part with the Net.

Go back to Maria’s room. Go to the Wardrobe, open with the Wardrobe Handle Part. Open the Wardrobe and get the Gold Desk Key. Go to the Desk and put the Keys into the 3 Keyholes.

Grim Facade Sinister Obsession - 3 desk keys

Grim Facade Sinister Obsession – 3 desk keys

Congratulations! You have found all the clues to find the murderer. You have unlocked the extras section of the main menu. Through the Grim Facade – Sinister Obsession walkthrough hopefully you have learned vital hints and tricks to beat the game.
Be sure to visit our blog for more great tips and tricks!


The Grim Facade – Sinister Obsession walkthrough is meant as a guide and does not contain cheats, hacks, or serials.

The post Grim Facade – Sinister Obsession Walkthrough appeared first on GameHouse.

Fabulous – Angela’s Sweet Revenge Walkthrough

$
0
0

Angela needs your help. She moved to New York after a quick Las Vegas wedding to her longtime love, Jimmy, and now she is trying to break into the world of fashion. However, her boss, Yum-Mee, is making her job difficult while her husband is keeping secrets. What secrets will Angela uncover? Will she succeed in fashion? Help Angela uncover the secrets with clues from both Jimmy and Yum-Lee, while trying to make it in the fashion world.

If you have played the Delicious-Emily franchise, you will know Angela. She appears in almost every game. Unlike her sister, her passion is fashion. Create and sell fashion in Fabulous – Angela’s Sweet Revenge, a mini-game from the Delicious-Emily franchise. If you have just an hour, you can help Angela uncover the secrets. Learn the tips and tricks of the game with this Angela’s Sweet Revenge walkthrough.

Contents

General Tips & Tricks

Main Menu

Since this is a mini-game, the main menu is very simple. Before you are directed to the menu, you will need to put your name in to create your game. You can save up to six games at once. This will take you to the main menu. If you need to change your settings, just click the button in the top left corner of the menu. There you will be able to change your volume, screen, and difficulty settings. If you need more information about who Angela is, you can find out more about her by clicking the “Who is Angela?” button. If you want to see the other games associated with Angela’s Sweet Revenge, there is a button for that as well.

Levels of Difficulty

The levels of difficulty are beginner, normal, or expert. If you are looking for a relaxing game, pick beginner. You will have less customers, and they’ll be are patient and tip well. The normal difficulty will allow you to have more customers at once, and their patience will be short. If you want more of a challenge, you should pick expert. This level will have a faster pace because your customers will not have any patience, and there will be multiple customers to serve at once. Each difficulty level will have variant waves of customers. Depending on your other tasks, these waves will challenge you to keep up with the orders while maintaining the shop.

Bonus

There is only one bonus you can find on each of the levels: a mouse. This mouse is featured in all the Delicious franchise games. It will be hidden in a random spot in each game, and in this particular game, on one of Angela’s workdays. If you find him, click on him to get a bonus. If you don’t spot him the first time, keep looking, because he actually will not show up until you finish the level or workday. If you play the game more than once, you will never find the mouse in the same spot for each level. He usually shows up within the first quarter of the level. His locations vary from right next to the sewing machine to right under the disco ball (once you have unpacked it).

Before the Game Starts

You will be shown an introductory scene. Here, you will meet Angela who is crying in her apartment. She has hurt her foot, and her friends come to visit. When they ask her how she got the injury, this starts a flashback of the past four days, which starts the game. If you do not want the backstory, you can simply press skip.

Fabulous – Angela’s Sweet Revenge Walkthrough

Day One

Before each day, you will have a cut scene. This will give you the chance to see the story as it is unfolding. The first day you meet both Jimmy and Yum-Mee. Jimmy says he has a surprise for Angela at the end of the day. Before he leaves, he drops his phone on the ground. When Angela calls him back, he is in a rush to grab the phone before she looks at it. This starts the suspicions for Angela. Before the game starts, you must select a dress for Angela to make.

There will be three dresses to choose from, so choose wisely. Place the chosen dress on the mannequin on the center island to show it off. The layout of the store is simple, and you only need to maintain both the dressing rooms and the center island. The rest of the objects will autofill. If you need to, you can use the tutorial to learn how to effectively navigate the store while dealing with customers. After you are all set up, the game will begin.

Fabolous - Angela's Sweet Revenge - The Dress

Fabolous – Angela’s Sweet Revenge – The Dress

Before the customers come in, add at least two more dresses to your stock. This will help when things get busy. Keep restocking the items when there is a slow moment in the workday. It will keep your customers from waiting for you to create the outfit. If a customer goes straight for the counter, they will want an accessory. If they are near the clothes, they will want to try on the clothes. Give the first customer the bracelet she wants then click the register. This will complete the transaction. On the first day, you will be able to find the mouse easily because the game will point it out. This happens with all levels of difficulty.

When a customer tries on clothes, they will leave the fitting room a mess. Clean the room as soon as you can, but deal with the customer trying on the clothes first, and make sure you ring up their purchase or ‘check them out’ before moving on. That way you will receive a bigger reward. When you have a customer buying an accessory while another one is trying on clothes, check them both out at the same time to obtain a chain bonus. If you are waiting for the customer in the fitting room to finish, stock the dresses or clean the other fitting room to maintain your chances of completing the chain bonus.

Fabolous - Angela's Sweet Revenge - Messy Fitting Room

Fabolous – Angela’s Sweet Revenge – Messy Fitting Room

If you are fast enough, your customers will have a heart pop up next to them. This will increase your bonus and show their patience level. Always, assist the customers waiting for clothes, but do not forget to ring up the person buying the accessories at the same time. That way you will finish the day with both a chain bonus.

Fabolous - Angela's Sweet Revenge - Chain Bonus

Fabolous – Angela’s Sweet Revenge – Chain Bonus

Once you finish the level, you will see Jimmy’s surprise: his new car roof. Before Angela has time to really react, Yum-Mee asks Jimmy for a ride home which Jimmy agrees to. Angela is furious because she does not understand why Jimmy would want to do that. He explains that he will try to convince Yum-Mee to give Angela a raise. She finally agrees and the two leave in Jimmy’s car. You will meet a concerned policeman before Angela’s ‘bad vs good’ side conversation with herself occurs, then you will move on to the next level.

Fabolous - Angela's Sweet Revenge - Jimmy's Surprise

Fabolous – Angela’s Sweet Revenge – Jimmy’s Surprise

Day Two

Now that you have the hang of the game, you will start day two. On this day, you will pick a top for Angela to create. Like the previous level or day, you have three choices. Once you choose, you see Angela talking to Sally about the Jimmy situation. Sally suggests that you check Jimmy’s phone, but you cannot just take the phone. You end up spilling coffee on him in order to get his phone. While he is in the dressing room, Angela takes his pants and slips the phone out of his pocket. He leaves without his phone. This will lead to a mini-game that will last throughout the day. You will have to check the phone every time to see the text messages coming in on it. It will take checking the phone four times to win the mini-game.

Fabolous - Angela's Sweet Revenge - Jimmy's Phone

Fabolous – Angela’s Sweet Revenge – Jimmy’s Phone

Help the first two customers by filling their orders and completing a chain bonus. Clean the fitting rooms after helping the first three customers. The phone will chime at that point. Grab it before the timer runs out, and read the text, then help the next customers. Both of these customers will want to try on clothes. Fulfill both of the orders at checkout to gain the chain bonus again. Grab the phone for the next text, Each text will expose the possible relationship between Yum-Mee and Jimmy. Look out for the mouse.

Earn extra points by finishing the orders correctly. Pick up the phone a third time to discover another text from Yum-Mee. Then assist the customers before cleaning the fitting rooms. Assist the two women at the counter before answering the phone for the last time. This means that you have officially finished and won the mini-game. Help the last customers before the next cut scene begins. Don’t forget to finish up by cleaning the fitting rooms.

Fabolous - Angela's Sweet Revenge - Assisting The Customers

Fabolous – Angela’s Sweet Revenge – Assisting The Customers

In the cut scene, Sally returns to find out what happened with the phone. Angela says that something is going on. Sally tries to make her feel better by saying how it is not like he is taking her “all the way home.” Just then, Jimmy’s phone buzzes and Yum-Mee thanks him for taking her “all the way home.” This upsets Angela. She has another internal struggle before realizing she needs to investigate it. Cut back to Angela with her friends to continue the flashback before heading on to the next level.

Fabolous - Angela's Sweet Revenge - Angela And Her Friends

Fabolous – Angela’s Sweet Revenge – Angela And Her Friends

Day Three

On this day, there will be a new mini-game you need to play where Yum-Mee has asked Angela to unpack the decorations for an event that is happening at the shop. She can go back and forth between helping customers and the tasks of unpacking. Each task has to be completed in order to win. If you have to stop in the middle of the task, it will save your progress until you come back to that task. Pick a skirt, from three choices, for Angela to create before the day begins. It will be the last design for the game. Don’t forget to find the mouse.

Fabolous - Angela's Sweet Revenge - Tasks Day Three

Fabolous – Angela’s Sweet Revenge – Tasks Day Three

When the day begins, stock up on the fashion before your first customer orders. Do not leave the customers waiting too long. It is best to stock up on 3 of everything so you can finish your other tasks. You will also have a new shirt that you will need to combine with a belt. This will create an item that will be popular on this day. You will have more customers wanting to try on clothes, so you will need to keep the fitting rooms clean. This will keep the customers’ patience up. Start unpacking the box next to the register first to help save time. This way, you can go back to the box while your next customer orders.

Remember to clean the fitting rooms before checking out the customer. Once the box next to the cash register is fully unpacked, move to the box next to the window. Complete the order of the customer at the counter and complete a chain checkout. Help the woman looking for a shirt before going back to unpacking the box. You will have a rush of customers, so unpack as much as you can, because you must complete the orders before doing anything else.

After you finish the box next to the window, go to the center island to finish the task of unpacking. The final box can be unpacked while you wait for customers. Finish the level to see the next cut scene.

Fabolous - Angela's Sweet Revenge - Unpacking The Center Island Box

Fabolous – Angela’s Sweet Revenge – Unpacking The Center Island Box

You find out that Jimmy didn’t go home the night before after his poker game. When Angela confronts him about it, he claims he stayed with his friends because of the late hour. Angela asks why he didn’t call and he said he lost his phone. Before he leaves, he tells her that he is going to be playing poker again that night prompting Angela to send a text from his phone. The reply from the number she texts upsets her, and she vows revenge. Her good side tries to persuade her to not take revenge, but she doesn’t listen. She calls Sally to plan the next day.


Day Four

Before the final level, you see a new Angela. She is in her “revenge outfit” and cancels Yum-Mee’s stylist. This level also features Angela helping Yum-Mee get ready for the event. She will take one of the fitting rooms, so you will need to clean the other room as fast as possible to keep your customers satisfied. You will also have the task of handing Yum-Mee the products that Sally is bringing for her. This is also a mini-game, which consists of six tasks of bringing Yum-Mee the products she needs before the timer on the request runs out. Touching the product will stop the timer so that you can get it to her. Jimmy arrives before the start of the day and leaves his car parked on the sidewalk. Angela puts birdseed all over the car while Jimmy sits in the back of the store.

Start the day by stocking up on the fashion. You will have a new product for your shirt/belt combination. Add the fur trimmed collar for a touch of elegance. On this day, you will sell more clothes than accessories, so be sure to check customers out together to activate the chain bonus. Also, keep the fitting room clean for each shopper. You do not want a line, as some customer’s patience will wear thin quickly.

Fabolous - Angela's Sweet Revenge - Day Four

Fabolous – Angela’s Sweet Revenge – Day Four

Give Yum-Mee her second product then clean the fitting room. Stock the fashion while you wait for more customers, and look for the mouse. You will need to continually stock because the signature looks will be in high demand. Give Yum-Mee her third product before cleaning the fitting room again. You will probably have gained a line so clean the fitting room right after each current customer leaves. Keep your line moving while assisting Yum-Mee. Get her last three products, and keep on top of customer requests to finish the level and see how the revenge plot turned out.

The products that Angela gives Yum-Mee cause some major issues for her. Jimmy comes out to a less than pretty new roof on his car. Angela confronts both Jimmy, and he begs her forgiveness while the police officer arrives. Angela gets angry and hurts her ankle. Yum-Mee runs off in shame while Jimmy receives a parking ticket. The police officer takes Angela home while Jimmy is in shock.

Fabolous - Angela's Sweet Revenge - The Revenge

Fabolous – Angela’s Sweet Revenge – The Revenge

After you have finished helping the last client, the game is finished. Good Job! You have helped Angela with her revenge plot, and through the use of time management, you have effectively helped Angela manage the shop while getting revenge. Before the end of the game, you will go back to Angela crying on the couch. Her friends are trying to be supportive and saying that things will get better. Angela tells her friends that she is crying because she ruined a pair of heels, but that’s not all! Enjoy the cut scene with a surprise twist at the end!


Congratulations! You’ve completed Fabulous – Angela’s Sweet Revenge! For more great tips and tricks, visit our blog!


Delicious – Emily’s Hopes and Fears Walkthrough

Big City Adventure – Shanghai Walkthrough

Building the Great Wall of China 2 Walkthrough


The Fabulous – Angela’s Sweet Revenge walkthrough is meant as a guide and does not contain cheats, hacks, or serials.

The post Fabulous – Angela’s Sweet Revenge Walkthrough appeared first on GameHouse.

Incredible Dracula – Chasing Love Walkthrough

$
0
0

This is a Walkthrough for the game Incredible Dracula – Chasing Love. Below is a guide designed to familiarize players with the game dynamics. There is also a list of Tips and Tricks to help players develop an effective strategy, and a basic level guide. These features will save you time while you play.

Incredible Dracula – Chasing Love is a hilarious, point-and-click time management game. Dracula has accidentally acquired an overly persistent lover and must flee from map to map, trying to escape her affections.

Contents

The Basics

You play the game as that lovable scamp, Dracula. The great thing about this is that Dracula only completes major actions himself, otherwise he’s content to sit at the level base and order his Zombie Butler Rufus, and other thralls, to do all the heavy lifting.

Each map has a base, usually the zombie mobile, from which you deploy your minions. The surrounding area is scattered with resources and obstacles. By clicking on a resource, you send your zombie butler out to collect it and bring it back. You stockpile these items and use them to complete tasks, build buildings, and clear obstacles. Move your curser over an obstacle or object to see how much it will cost.

Incredible Dracula - Chasing Love - Map

Incredible Dracula – Chasing Love – Map

You can also use resources to construct buildings. These supply a steady stream of resources so that you never risk running out of supplies.

Buildings that can be constructed include:
BloodDonalds: Produces Food
SawMill: Produces Wood
StoneMine: Produces Stone
Forge: Tools
Bank: Gold
Market: Trade Resources
The Lab: Builds Frankenstein, a powerful minion that drives away other monsters.

All the buildings can be upgraded. The zombie mobile can also be upgraded, giving you additional workers with each upgrade.

Resources break down into 5 basic types. These are Food, Wood, Stone, Tools, and Gold.

Below the resource bar is a blue bar. This is your allotted time. The blue bar decreases steadily, and once it reaches the limit you’ll find yourself caught by the princess. So you have to gather as many resources as you need to complete each map’s objective before the time runs out. This takes considerable skill and strategy as you advance and the levels become increasingly more intricate.

General Tips & Tricks

The next section contains a list of handy strategies to help you make your way through the game:

1: Try to upgrade your zombie mobile first. The benefit of even 1 extra worker is immense, allowing you to save time by completing multiple tasks at once. After all, if you’re one zombie is building something, he has to stay put until it is completed. This means he’s not gathering resources for that period of time. In a game where time is finite, standing still is a big mistake.

2: Construct buildings as soon as you can. Especially on higher levels, there may not be enough resources laying around on the map to complete the objectives. If you use them all upYou’re stuck if you use them all up, so be sure to establish a steady supply.

3. Decide your first move early. Don’t spend all your time going straight at the objective. Chances are good that once you clear the path there will still be some kind of object or obstacle in the way. Instead, decide which resources you’re going to need most to get to that first step and focus all your efforts there. When it’s done you can move on to the next.

4. Keep an eye on your helpers. If one of your minions doesn’t have a task assigned, he will disappear into the zombie mobile and sit there. Make sure that doesn’t happen. Know the exact number of thralls you have available and check to be sure they’re all bust.

Incredible Dracula – Chasing Love Walkthrough

There are 45 Levels in this game. Each level has a unique own layout and objective, listed below.

Level 1: Get the Key.


Incredible Dracula - Chasing Love - Level 1 - Gather The Resources On The Road

Incredible Dracula – Chasing Love – Level 1 – Gather The Resources On The Road

Level 2: Construct the Flight Potion.

Level 3: Build a BloodDonald’s and clear the road to the Exit.

Level 4: Give the Axe and the Soup to the Father Troll. He will build a bridge across.

Level 5: Build a Ladder and repair all of the Scarecrows.


Incredible Dracula - Chasing Love - Level 5 - Build a Ladder

Incredible Dracula – Chasing Love – Level 5 – Build a Ladder

Level 6: Make the Flying Potion and repair the Trampoline.

Level 7: Give the Teddy Bear to the Ghost and repair the Broken Fence.

Level 8: Repair the DamAquarius’s House, and all the Scarecrows.


Incredible Dracula - Chasing Love - Level 8 - Repair The Dam

Incredible Dracula – Chasing Love – Level 8 – Repair The Dam

Level 9: Gather Mushrooms and drive away the Hypno-Toads.

Level 10: Save the Wild Willow from insects.

Level 11: Make the Strength Potion and repair the Witches House.

Level 12: Make the Strength Potion and push the Big Stone, rescuing Death.

Level 13: Chase off the Ghosts and repair the Farm.

Level 14: Build a Beauty Salon and have Dracula change his clothes.


Incredible Dracula - Chasing Love - Level 14 - Build a Beautysalon

Incredible Dracula – Chasing Love – Level 14 – Build a Beautysalon

Level 15: Build a Pipe Plant to escape.

Level 16: Repair both the Stable and the Ferry.

Level 17: Get the Ring by opening various cells.

Level 18: Plug the Fireman’s Hose into the fountain.

Level 19: Build a Rubber Plant and repair the Trampoline.

Level 20: Construct both a Barn and a Lab.


Incredible Dracula - Chasing Love - Level 20 - Construct a Barn and a Lab

Incredible Dracula – Chasing Love – Level 20 – Construct a Barn and a Lab

Level 21: Destroy the Guard Towers, repair the Trampoline, and build a Flying Potion.

Level 22: Rebuild the Candy Factory.

Level 23: Put all the Gremlins into a boat and then get a Key to open their cave.


Incredible Dracula - Chasing Love - Level 23 - Open The Cave

Incredible Dracula – Chasing Love – Level 23 – Open The Cave

Level 24: Repair the Master’s House and reforge the Shield to confront the Dragon.


Incredible Dracula - Chasing Love - Level 24 - Confront The Dragon

Incredible Dracula – Chasing Love – Level 24 – Confront The Dragon

Level 25: Return the Children to their parents.

Level 26: Repair a Laval Mill.

Level 27: Gather the Farm Equipment and build a Temple.

Level 28: Collect 50 units of Stone.

Level 29: Repair the Castle and the Castle Bridge so you can talk to the Troll King.


Incredible Dracula - Chasing Love - Level 29 - The Troll King

Incredible Dracula – Chasing Love – Level 29 – The Troll King

Level 30: Repair the Magicians Tower and craft a Generator.

Level 31: Earn the Key to enter Grannies House.

Level 32: Fix all Scarecrows and gather 40 Stones.

Level 33: Repair the Portal.

Level 34: Rescue the Prince.


Incredible Dracula - Chasing Love - Level 34 - Rescue The Prince

Incredible Dracula – Chasing Love – Level 34 – Rescue The Prince

Level 35: Repair the Palace, build a Generator, and repair the Funicular.

Level 36: Chase away Jakhar and destroy the Pump.

Level 37: Return Scorpions.

Level 38: Get an Answer from the Mermaid and tell it to the Octopus.


Incredible Dracula - Chasing Love - Level 38 - Get an Answer From The Mermaid

Incredible Dracula – Chasing Love – Level 38 – Get an Answer From The Mermaid

Level 39: Fix every house and repair the Altar.

Level 40: Build a Hat Factory so you can build a Hat for the Chief.

Level 41: Get a Cannonball and sink the Pirates.


Incredible Dracula - Chasing Love - Level 41 - Sink The Pirates

Incredible Dracula – Chasing Love – Level 41 – Sink The Pirates

Level 42: Get a ticket by trading Ice Cream for it.

Level 43: Repair the Amusement Park and purchase a boat ride.

Level 44: Fix the Catapult.

Level 45: Reach and defeat the True Giant.


Incredible Dracula - Chasing Love - Level 45 - Defeat The True Giant

Incredible Dracula – Chasing Love – Level 45 – Defeat The True Giant

Congratulations! You’ve completed our Incredible Dracula – Chasing Love Walkthrough! For more great tips and tricks, visit our blog!

Delicious – Emily’s Hopes and Fears Walkthrough

Big City Adventure – Shanghai Walkthrough

Building the Great Wall of China 2 Walkthrough

The Incredible Dracula – Chasing Love Walkthrough is meant as a guide and does not contain cheats, hacks, or serials.

The post Incredible Dracula – Chasing Love Walkthrough appeared first on GameHouse.

Heart’s Medicine – Season One Walkthrough

$
0
0

Heart’s Medicine – Season One Walkthrough

Heart’s Medicine is a fun, engaging time management casual game. If you’ve started playing this game, some tips and tricks might come in handy, so you’re probably looking for a Heart’s Medicine walkthrough. In this game, you play the main character Allison Heart, who just started her residency at a hospital. The object of the game is to tend to the patients’ needs and fulfill the duties of your job in an efficient way. Hearts Medicine combines casual gaming with medical drama. You can pick from the three difficulty levels this game offers to suit your taste. Here’s a Heart’s Medicine – Season One walkthrough featuring tips and tricks to help you get the most out of this game.

Contents

General Tips & Tricks

Your job is to direct the patients around the room and attend to them as quickly as possible. When the bubble comes up indicating it’s time for the patient to move spots, click on the patient and then on the place indicated by the bubble. Moving a patient is a simple formula to remember: click on the patient, then on the destination.

If a patient gets im-patient (ha, ha) the hearts hovering above them will deplete. You don’t want to let the hearts run out, so attend to the patients’ needs as quickly as you can. Be efficient and quick and you’ll get a higher score at the end of the shift. You accumulate points called “hearts” that you can use to upgrade things around the room. If you see a guinea pig or other objects hiding around the room, click on it to get extra points. After you complete a shift, the next one will be unlocked. After the first shift, you should have a pretty good understanding of the object and demands of the game.

After you’ve examined and treated a patient, the patient will then want to go to the checkout counter. It’s okay to let a queue form at the counter while you treat other patients, which will be continuing to come in. When you have time, click on the computer to attend to the queue of patients. After this, they’ll leave and you can move on to the next patients. Checking out a lot of patients at one time gives you a bonus.

One more thing you need to pay attention to is the supply of hospital gowns. As more patients change into them, the supply will deplete. If the supply is low, click on the stack of gowns to replenish them. Other stations will come up in the room as you level up through the shifts, such as a water cooler. Pay attention to these things too. Over time, more furniture will be added to the room as well.

Heart’s Medicine – Season One Walkthrough

The game begins with a small introductory mini-game. You, Allison Heart, are a bystander witnessing a motorcycle accident. A doctor is on site treating the victim of the crash. He solicits your help in treating the man on the ground. What you have to do is find and click on the items that the doctor requests. You end up helping to save the man’s life and the doctor tells you you have a natural medical talent. This is what inspires you to become a doctor. The game then flashes forward to 6 years later.

DIAGNOSIS ROOM

Diagnosis Shift 1
This is your first shift. It takes place in the diagnosis room. You will move around the room, and the doctor stays over by the computer.

The patients on this level come in complaining of sore spots on their bodies. What you have to do is quickly and efficiently examine them. When a patient is at the examination table, a bubble will come up with a magnifying glass. Click on the patient to start the examination. A window will come up where you need to thoroughly examine the body part at hand. Don’t miss any spots. You’ll find things like fishing lures embedded in their skin.

Diagnosis Shift 2
Patients will come in a bit more quickly than last time. An extra challenge is presented during this shift that makes it more difficult than the first. An angry patient storms into the room to yell at the doctor about vaccines. In his rage, the patient throws the plate of cookies that Allison brought it at the beginning of the shift all over the floor. It’s your task to pick up all of these cookies while also keeping your patients happy and moving efficiently.

Heart’s Medicine – Season 1 - Diagnosis Shift 2

Heart’s Medicine – Season 1 – Diagnosis Shift 2

Diagnosis Shift 3
A new examination activity comes up during this shift in which you take the patient’s blood pressure. Instructions will come up onto the screen to help you. It basically tells you to click on the pump to squeeze it until the light turns green. After that, watch for the needle twitches and memorize the number, color, and/or image that it twitches on. After you’re done taking the patient’s blood pressure, you have to select the number/color/image that the needle twitched on.

During this shift, a patient will come in with a bad-looking leg. Your character calls the doctor over to look at it. The doctor says the patient has a nasty staph infection that should have been treated 2 weeks ago. The doctor delegates the duty of treating this infection to you. Some simple instructions will come up on the screen telling you how to do the simple mouse motions that will allow you to treat and bandage the patient’s leg.

Diagnosis Shift 4
At the beginning of this shift, the doctor and his ex-wife have a small argument that ends in papers being scattered all over the floor. You need to pick up the papers  while also attending to the patients that are already starting to come in.

Heart’s Medicine – Season 1 - Diagnosis Shift 4

Heart’s Medicine – Season 1 – Diagnosis Shift 4

Diagnosis Shift 5
In Shift 5, the man with the staph infection from the third shift comes in again in direct need of medical attention. Instructions will come up on the screen telling you how to treat him, because he keeps having seizures. You’ll have to do this periodically while also juggling the other patients. At the end of the shift, the doctor has a heart attack and collapses, and then the shift ends.

THE LAB

The Lab Shift 1
Once you’ve worked your way through the diagnosis shifts, the laboratory shifts should be a piece of cake. The basic principle is the same. Attend to patients’ needs as the bubbles indicate. In the lab, you’ll be taking blood samples, distributing medications, setting bones, and analyzing things. Just look to the bubbles and instructions on the screen for guidance in case you need help, but you probably won’t.

A new kind of task that comes up is setting bones. When you send a patient to the x-ray machine, a screen pops up displaying an image of their bones. What you have to do is drag and drop the fragments of bone into their original place. Do this quickly!

The Lab Shift 2
The extra challenge that pops up in this shift is that a hippy-dippy doctor drops his totem beads all over the floor  while talking to Allison about her aura. He then laments the fact that his chakras are all out of alignment. Your task is to pick up all the fallen beads off the floor while still attending to the patients in a timely manner.

At the end of this shift, the female lab doctor invites Allison out for drinks after work to try and meet men.

Heart’s Medicine – Season 1 - Lab Shift 2

Heart’s Medicine – Season 1 – Lab Shift 2

The Lab Shift 3
During shift 3, you’re introduced to a new task that involves locating the correct cell in a petri dish. At the bottom of the window that will come up, it tells you the number of cores, the color, and the appearance of the cell wall. Find the cell in the petri dish that matches all of those requirements. You may have to find multiple cells of the same type. The game will guide you if you are confused.

At the end of this shift, music comes on and everyone starts dancing. Your job is then to copy the dance moves of Robert, the old man. Memorize the order that the steps appear in and repeat them. This shouldn’t be too difficult. Afterward, Ruth, the lab doctor, confides to Allison that she misses her ex-husband very much. Then everyone goes home.

The Lab Shift 4
At the beginning of this shift, Ruth’s son tries to get coffee out of the coffee dispenser in the lab, but ends up spilling it all over the floor. You have to clean up all the spilled coffee while also attending to patients. When you’ve finished cleaning it up, Ruth’s son asks you for a raincheck on that coffee and the two of you to meet up after the shift.

The Lab Shift 5
This shift doesn’t present any new challenges in terms of tasks. However, at the end of the shift, Robert comes in with presents for all the doctors. Your task is to distribute the correct presents to the correct doctors. However, this is made more difficult by the fact that the bubbles over the doctors indicate what they DON’T want. You’ll have to figure out by trial and error exactly what belongs to who.

Allison finds out that this celebration is actually due to the fact that Robert is terminally ill and will die soon, and wants his last days to be joyful. However, Allison finds it wrong to celebrate death, and storms out of the room.

PEDIATRIC WARD

Pediatrics Shift 1
The doctor in the pediatric room is named Connor, who spends a lot of time standing around playing with his cell phone. At the beginning of this shift, there is a tense conversation between Allison and Connor.

As with all the previous rooms, send patients to the stations that the bubbles indicate. You’ll have to bandage wounds by dragging and dropping pieces of bandage into the right place.

During this shift, two children start to fight over a toy. It ends up breaking and the pieces fly all over the room. You’ll have to pick up all the pieces  will still efficiently tending to your patients’ needs. Once you’ve picked them all up, Connor shows the child how to transform that particular action figure into a tank.

At the end of shift 1, there’s another unfriendly conversation between Allison and Connor.

Heart’s Medicine – Season 1 - Pediatrics Shift 1

Heart’s Medicine – Season 1 – Pediatrics Shift 1

Pediatrics Shift 2
This shift starts off with Daniel, Ruth’s son, bringing in flowers for Allison. Connor gets irritated and demands that he take the flowers out of the pediatric ward. Daniel and Allison arrange a dinner date and Daniel leaves.

During shift 2, a little girl comes in with her family, complaining of nausea. You have to run some tests on her while also dealing with the other patients. You don’t find anything and she leaves to go get an x-ray.

At the end of the shift, Connor and Allison have a short conversation and then leave.

Pediatrics Shift 3
At the beginning of this shift, Connor starts having a ball fight with some children. Allison joins in. You’ll have to hit Connor with a ball. This is a very easy mini-task. It will repeat, and you’ll have to hit Connor with a ball more times during the shift while also taking care of the children.

A new job comes up during this shift, which is removing foreign objects from a child’s throat. This is a simple task. Just click on the object and drag it out of the mouth. Similar to this, you also will come across a task that asks you to remove a foreign object from the child’s ear or nose. The same basic principles apply.

Pediatrics Shift 4
This shift starts with Connor asking Allison to meet up for some beers after work. She declines because she’s seeing Daniel. Connor gets upset by this.

The same little girl that came in earlier makes a reappearance. You have to examine her stomach and administer ipecac. You do this using the mouse motions that the screen will show you. Do this while also quickly attending to other patients.

When the shift is done, Connor tells Allison that he thinks the little girl is being deliberately poisoned by one of her parents.

Pediatrics Shift 5
The little girl comes in again at the beginning of shift 5. While Connor talks to her patients outside, the little girl stands around and you have to talk to her when the bubble with the clipboard comes up. You’ll have to pick which thing you want to say to her. At the end of the shift it was determined that no one made the little girl drink any poison.

PLASTICS WARD

Plastics Shift 1
Robin is the plastic surgeon at this hospital. You meet her at the beginning of your first plastics shift. Send the patients around to the stations as needed. When the scar/tattoo removal task comes up, what you have to do is trace the line with your mouse. This is a fairly simple job, but you have to do it before the time runs out.

A little while into the shift, Connor comes into the room and asks Allison to come over tonight. She declines. Connor tries to make her talk about it in the middle of her shift, but she refuses to talk since she’s busy. Connor gets offended and leaves. It’s revealed after he leaves that Robin and Connor used to be in a relationship.

At the counter, a bubble will come up and if you click on it it allows you to take a little quiz. When you’ve finished all of your questions, it will tell you what your ideal boyfriend would be like.

Plastics Shift 2
At the beginning of plastics shift 2, a woman and her daughter come in. The daughter will be getting a nose job for cosmetic reasons. You have to do pre-op work with the daughter while also juggling the other patients that are coming in.

Allison doesn’t like the fact that the girl was getting a nose job when she didn’t need one. Robin and Allison discuss this matter at the end of the shift, then go home.

Plastics Shift 3
During shift 3, the actual rhinoplasty takes place. Your task is to complete the surgery while attending to the other patients as well. The surgery is done with mouse motions that will be indicated on the screen.

Plastics Shift 4
Daniel, in an attempt to make a romantic gesture, strews rose petals all around the room. You’ll have to clean them all up  while still attending to the needs of your patients.

A simple task involving selecting colors in the right order appears during this shift. The screen that comes up will explain to you how to do this, but it will be easy to figure out.

Heart’s Medicine – Season 1 - Plastics Shift 4

Heart’s Medicine – Season 1 – Plastics Shift 4

Plastics Shift 5
At the beginning of plastics shift 5, the nose job girl comes in again for her follow-up. She is experiencing heavier bleeding than normal, which is determined to be caused by the diet pills she takes. She is dehydrated, so you have to send her to get water every little while while you also attend to the other patients.

There’s a small altercation at the end of the shift where Allison accuses the mother of coercing her daughter into getting a nose job, which isn’t true.

PRENATAL UNIT

Prenatal Shift 1
During your first shift, you meet Chance, the prenatal doctor. You should have met this doctor before, he’s the one that spilled beads all over the floor earlier. At the beginning of this shift Chance tells you that there are peppermint odor vaporizers hidden around the room. You have to find all of them  while still efficiently attending to your patients.

A new activity is presented during this shift where you show a patient how to do a yoga move. To move yourself into the yoga pose, click on a body part until it’s in the right position that’s shown. Do this for all of the body parts until you get the pose right. Other than this new activity, not much happens during the first prenatal shift. The other stations in the prenatal ward are very much like those in previous levels and are just as easy to do. However, pay attention to the level of diapers. The diapers are kept in the upper left-hand corner. Don’t let them deplete too much.

Heart’s Medicine – Season 1 - Prenatal Shift 1

Heart’s Medicine – Season 1 – Prenatal Shift 1

Prenatal Shift 2
At the end of this shift, a woman comes into the hospital in labor. Chance determines that the baby’s umbilical cord is wrapped around its neck, and you have to deliver the baby immediately. This is done by following the mouse gestures indicated on the screen. You’ve done the same kinds of mouse gestures lots of times before, so this shouldn’t be too challenging. Six hours later, the baby is born.

Prenatal Shift 3
At the beginning of prenatal shift 3, Chance gives you a personality quiz to fill out. Answer the questions when the bubble comes up, but don’t neglect the patients.

A new task appears during this shift, which is finding the heartbeat of a fetus. To do this, simply scan the ultrasound until you find the heart.

Prenatal Shift 4
The new flu station has been set up, but you have to make the final preparations. You have to do this while also attending to the patients that are coming in. Other than this, there aren’t any new challenges during shift 4.

Prenatal Shift 5
There’s a small cut scene at the beginning of this shift, where John gets angry because there aren’t enough vaccines to go around and he is chosen to be the one member of staff who doesn’t receive a vaccine.

During this shift, some patients will come in with flu symptoms. You can recognize them by the way they shiver. You need to treat their flu as soon as possible after they come in, to make sure the flu doesn’t spread to other patients.

At the end of this shift, the news comes that John has been in an accident. At the scene of the car accident, John is laying on the ground. The others say it’s too late, but Allison gives him emergency medical attention and he comes back into consciousness. Later, John announces he’s retiring from the hospital and that Allison will have a job once she finishes her residency. The two of them hug and the game has ended.

Congratulations! You’ve completed our Heart’s Medicine – Season One Walkthrough! For more great tips and tricks, visit our blog!


The Heart’s Medicine – Season One Walkthrough is meant as a guide and does not contain cheats, hacks, or serials.

The post Heart’s Medicine – Season One Walkthrough appeared first on GameHouse.


Grim Tales – The Wishes Walkthrough

$
0
0

Grim Tales – The Wishes is a hidden object game where you collect items to unlock the clues that allow you to solve a mystery. Your nephew is in danger because a deadly bargain has been made. It’s up to you to figure it out and restore order. This Grim Tales – The Wishes walkthrough is meant to help you enhance your play, to kick start a chapter, or help you clear a scene when stuck.

Contents

General Tips & Tricks


Settings and Controls
You are able to customize your sound settings, like music, effects, environment, and voice volume and video settings like gamma, special effects, full screen, wide screen and custom cursor.

There are buttons to enhance play: INFO provides puzzle instructions; MAP allows you to jump locations instantly; and HINT rechargeable guide that points you in the right direction.

If you move your cursor to the bottom of the screen, you will be able to access your inventory and see the items you have collected.

Levels
There are three levels of play: casual, advanced, and hardcore mode.

Hidden Objects and Puzzles
Throughout this Grim Tales – The Wishes walkthrough , I will use HOP to signify a hidden object puzzle. You are provided with a list and you click on the item to eliminate it from your list. At the conclusion of the puzzle you obtain an item. Please note you may have to use the items in the puzzle before you clear it.

Puzzles can be skipped, so don’t fret if you cannot solve them.

Grim Tales – The Wishes Walkthrough

Chapter 1: Wishes

In the first part of the game you explore rooms in the house. They are: the entrance, Luisa’s room, fireplace room, Brandon’s room, Brandon’s closet, the secret passage, shelter, tree house, swamp, swamp house, demon house, and demon’s living room.
At the front door, examine the window. Take the Coat of Arms and the Magnet. Place theCoat of Arms on the front door lock. When you enter the house take the Light Bulb andGray Paint.

Grim Tales - The Wishes - The house

Grim Tales – The Wishes – The house

Use the Magnet to get a Key through the crack on the floor.

Luisa’s room is up the stairs on the right. Inspect the basket to access the first HOP. You obtain Red Paint.

Use the Key on the left door. Take the Fire Box Key. Return to the house entrance. Use the Fire Box Key on the fire box and take Ax. Return to the second floor. Use the Ax on the left door.

Inspect the window and take the Scarf. Return to hall and go right. Inspect the chair and take the Flint. Next, inspect the table and take the Green Paint. Use the Flint on theCandle and take the Candle. Use Candle under the chair. Move cloth and take Bowl of Milk and Bullet. Inspect fireplace.

Use Scarf on the scoop handle and take the Scoop. Inspect the fireplace. Use the Scoop to get Scoop with Sand. Give the cat the Bowl of Milk and take Fluffy. Use the Scoop with Sand on the fire in the fireplace. Take the Coal. Go to Brandon’s room.

Use the Coal on the puppet and get a Stained-Glass Piece and place it on the trunk to trigger the first puzzle. You can skip or solve. Take the Door Handle.

Place the Door Handle on the closet door. Move the clothes to access the second HOP. The paperclip is inside the coin purse. You obtain a Knife.

Grim Tales - The Wishes - Collect All The Items

Grim Tales – The Wishes – Collect All The Items

Use the Knife on the puppet. Both the puppet and map now appear on lower right hand of screen. Return to Luisa’s room. Straighten the picture and use the Knife on the fallen picture. Take the Bee. Return to Brandon’s closet. Place the Bee on the floor to start a puzzle. The solution is R, UL, L, UL, L, DL, DR, R, UL, UR, R, DL, L, DL, R, DL, R, DL, L, DR, R, DR, and R. (R=Right, U=Upper, L=Left, D=Down).
Use Fluffy on the rats. Use the Flint on the oil trough. Enter the secret passage.

Grim Tales – The Wishes - Bee Puzzle

Grim Tales – The Wishes – Bee Puzzle

Take the Pipe Wrench. Return to house entrance.
Turn the Valve on the pipe. Place the Hose on the glass tube and take the Sword Medallion. Return to Luisa’s room.
Place the Sword Medallion on the box and take the Ball. Place the Ball on the box under the bed. Select numbers 593.

Take the Handgun combine with the Bullet and get the Loaded Handgun. Return to the secret passage and take the Battery. Go to the shelter on the left.
Take the Hexagonal Wrench. Inspecting the windmill starts the third HOP. You obtain a Locomotive.

Use the Knife on the bamboo to get the Bamboo. Climb up into the tree house.

Take the Tongs, Funnel and Paintbrush. Inspect the rocking horse to start the fourth HOP. You obtain a Gas Can. Go to the swamp.

Use the Tongs on the log and take the Chain and Chainsaw. Use the Chainsaw on the tree. Go to the swamp house. At the window, use the Flint on the leaf pile. Go to the demon house. Take the Crystal Ball and inspect the hutch to start the fifth HOP. You obtain a Crown. Return to the fireplace room.

Place the Locomotive on the train and Battery on the railroad control. Inspect the hole in the wall, take the Sun Medallion. Return to the shelter. Place the Red Paint, Green Paint, Gray Paint, Paintbrush, and Crown on the children’s book to begin the third puzzle. Paint the picture. Move items to find hidden characters. Take the Child’s Drawing. Go to the demon’s living room.

Grim Tales – The Wishes - Painting Puzzle Solution

Grim Tales – The Wishes – Painting Puzzle Solution

Inspect the frames and place the Sun Medallion in the slot to start the third puzzle. Rotate the rings until they are in the correct order. You obtain Puzzle Blocks. Return to Brandon’s room.

Move the carpet and place the Puzzle Blocks on the area under the carpet to start the fourth puzzle. Place identical cubes together. Take the Quill. Return to the demon’s living room.

Inspect the Child’s Drawing in the frame and use the Quill on the Child’s Drawing.

Grim Tales - The Wishes - Child's Drawing

Grim Tales – The Wishes – Child’s Drawing

Chapter 2: Antidote

In this section, game play takes you to the boat dock, boathouse, fishing pier, forest, hall of the house, attic, gap in the road, the ambulance, and the ambulance interior.

Return to the house entrance. Take the Thread and Rag. Use Fluffy on the cat jar. Inspect the Glass, Shard, and Coin.

Inspect the table to take the 2nd Coin. Use the Glass Shard on the handbag. Open the handbag to begin first HOP. You obtain a House Key. Go into the house.
Grim Tales – The Wishes – First Hidden Object Place Handbag
Use the House Key on the lock on the door. Go towards the boat dock. At the boat, take the 3rd Coin and the Steering Wheel. At the motor, take the Crucible. Use the Steering Wheel on the boathouse door to enter the boathouse.
At the boathouse, take the Empty Bucket, File, Grain, and Crab Amulet. Go to the fishing pier.

Inspect the chest. Place the Crab Amulet on the shackle lock to open the chest and take the Lead Plummets. Return to the house. Place the Crucible and Lead Plummets on the stove and take the Lead.

Place the 3 Coins on the casket to start the first puzzle. Arrange coins in order and take the Ax. Return to the boat dock. To obtain a Bucket with Water, use the Empty Bucket on the boat.
Opening the cabinet starts the second HOP. You obtain an Arrow, once you get a butterfly, use the key on the safe, open the coin purse, and get a domino. Go to the Forest.

Use the Bucket with Water on the fire and Lead on the clay. Take the Shark and Forked Stick. Go to the hall of the house.

Place the Shark on the hatch lock and go to the attic.
To get the Stockpot, use Fluffy and take the Stockpot. Take the Handle and place it on the refrigerator to commence the second puzzle. The Solution: 3, 2, and 4. To get the clue, wipe the refrigerator with the Rag. Take the Juicer and Frozen Meat.

Cook the Frozen Meat on the furnace and get Cooked Meat. Return to the fishing pier.

Make Lemon Juice by adding lemon slice to Juicer. Return to the forest.

Place the StockpotForked Stick, Thread, and Grain on the clearing. Knock over the Stockpot and take the Dragon Amulet and place it on the tree lock.

Use the Ax on the demon’s root. Start the third HOP by inspecting the tree hollow. You obtain a Screwdriver. Return to the attic.
Place the Lemon Juice on the medicine chest, take the Yellow Vial, and return to the boat dock. Use the Screwdriver on the motor and take the Cord. Placing the cord on the engine parts starts a puzzle. Pull the cord when complete.

Give the Cooked Meat to the crocodile. Take the Green Vial and Wooden Coin. Return to the attic. Place the Wooden Coin to trigger the third puzzle. When finished, take the Valve. Go to the gap in the road.

Look in the ditch. Place the Valve on the pipe and take the Wheel. Return to the boathouse. Place the Wheel on the wheelbarrow and take the Wheelbarrow on the boat to take the Boat. Return to the gap in the road.

Place the Boat in the ditch and get a Wheelbarrow. Return to the boat dock. Use the Wheelbarrow on the boat and take the Boat. Return to the gap in the road and place the Boat in the ditch.

Use Fluffy on the branch and get a Medallion. Return to the forest. Use the Medallion on the tortoise to begin a puzzle. Take the Bow and combine with the Arrow to receive a Charged Bow. Return to the house entrance.

Use the Charged Bow on the target and take the Acorns at the downspout. Return to the forest.

Use the Acorns on the anthill and take the Leaf Amulet. Go to the ambulance. Place the Leaf Amulet on the case and take the Syringe Needle.


Grim Tales - The Wishes - Ambulance

Grim Tales – The Wishes – Ambulance

Inside the ambulance, use the Syringe Needle on the glove compartment and take the Scissors. Return to the fishing pier. Inspect the chest and use the Scissors to get the Fishnet.

In the attic, place the Fishnet on the tennis racket and take the Scoop Net.

Return to the ambulance use the Scoop Net on the stream and get a Caduceus Key which you will place on the medicine chest in the ambulance to access the fourth HOP. You obtain a Pink Vial when you move the mask to access the scalpel.

Return to the house entrance and open the medicine chest. Place the Yellow Vial, Green Vial, and Pink Vial in the injector to make the Antidote that you will use on Luisa’s leg.

Grim Tales - The Wishes - The Antidote

Grim Tales – The Wishes – The Antidote

Chapter 3: The Second Wish

In this section you are taken to the backyard and playground.
Take the Lavender and Brandon and return to Brandon’s room. Hang the Lavender on the Chandelier and place Brandon in the bed. Take the Horse to the kitchen and place it on the door lock to access the backyard.

Look at the pipe to take the Zipper Pull. Inspect the table to launch the first HOP. Get a screw nut, peeled nut, and binoculars to obtain a Totem.

At the hobbyhorse in the playground, place the Zipper Pull on the zipper and take the Glass. Back in Brandon’s room, place the Totem in the left corner and take the Dove in the right corner.

At the waterfall in the swamp, remove the broken glass and place it on the sensor twice to obtain a Sensor. Use the cup to get a flower. Take the Glass Ball.

In the backyard, place the Magnet in the birdbath, the Sensor, on the pipe, turn the valve and get the 2nd Fish. Place the 2nd Fish on the hatch in shelter and do down it. Open and take the Cylinder in the case. The first puzzle begins when you place the Cylinder on Pinocchio.

Grim Tales - The Wishes - Pinocchio

Grim Tales – The Wishes – Pinocchio

Once solved, you get the Handle. Next, place the Handle on the latch.

In the workshop, take the Pliers and use them on the wire in the shelter basement to get Sponges and Wire. At the workshop, twist Wire with Pliers to take the Rope to add to the curtains in the house entrance. Inspecting the couch at the tree house starts second HOP. You obtain a Totem that you place in the right corner in Brandon’s room. Take the Medallion on the floor and use Sponge to clean up Oil. Take Toggle from electric box in the kitchen to waterfall to get a spring once you combine it with the Fuse.

You receive the 2nd Medallion when you solve the third puzzle triggered by placing ball in the football field. Place 2nd Medallion on doll; use the Oil on the latch to flip it and take the Diamond. You will use the Diamond to cut through the glass door.

Obtain a Totem after you complete the third HOP, which begins when you inspect the washing machine.

In Brandon’s room place the Totem on the floor and take the Metal Rose. You will find the following items in the highlighter room: kitchen (Citric Acid); swamp house (figure); and demon’s house (alcohol).

Go to the workshop and place Metal Rose on the mixer. Place the Powder, Flower, Citric Acid, and Alcohol in the container to start the fourth puzzle. Take the Cogwheel and Solvent and go to the shelter.

Grim Tales - The Wishes - Sorvent Puzzle

Grim Tales – The Wishes – Sorvent Puzzle

Examine the hollow in the forest thicket to access the fourth HOP. Get a striking match and pencil to obtain a Turtle Button. Place the Turtle Button in the center of picture in the tree house to begin a puzzle. Use Solvent and Quill to complete the picture.

Grim Tales - The Wishes - Fourth Puzzle

Grim Tales – The Wishes – Fourth Puzzle

Chapter 4: Siberia

You will explore the landing, forest well, lumberjack’s camp, the Shaman’s house, the Shaman’s attic, and the icy room.

Take the Crosspiece, Snowshoes, Saw, and Bulb in the landing. Similarly at the forest well take Part of Totem, Branches, and Ice Ax. Inspect the Ice Ax to begin first HOP. You obtain a Gas Can.

Next, take the 2nd Part of Totem, Torchy, Ladder, Winch, Bandage, Fish, Battery, and Camera. At the forest well use the Camera to trigger the first puzzle. Go down the well take the Electrical Tape and enter the Lumberjack’s Camp where you will take the 3rd Part of Totem and Fish Oil.

Grim Tales - The Wishes - Lizard

Grim Tales – The Wishes – Lizard

Examining the debris in the lumberjack’s camp starts the second HOP. You gain a Bear. Take the Leaf, Hummingbird, and Powder. At the Shaman’s hose take the Powder. Place the Leaf on the chest with the herbs to begin the second puzzle.

Grim Tales - The Wishes - Second Puzzle

Grim Tales – The Wishes – Second Puzzle

Take the Mandrake. Upstairs, take the Eagle and Hay. Examining the icy niche starts the third HOP. You obtain a Thistle. In the icy room, place the Hay, Flint, Mandrake, Thistle ,and Powder on the fire. Take the Bas-Relief.

In the Shaman’s attic placing the Bas-Relief on the altar, triggers the third puzzle. Take the Tuning Fork. In the icy room take the Rope, Star, and Medallion. Opening chest in landing triggers the fourth HOP. You obtain a Stretcher. Take the Glass, Tube, and Gray.

Grim Tales - The Wishes - Puzzle Shaman's Attic

Grim Tales – The Wishes – Puzzle Shaman’s Attic

Inspect and place the Glass Tube on the balloon motor to start the third puzzle. The solution is: 3-36, 45-13, 36-16, 25-23, 47-49, 7-12, 13-46, and 49-11.

Chapter 5: Reunited

The last chapter takes you to the following scenes: the forest edge, the asylum, the demon’s living room, the house in the crystal ball, and basement.

You obtain the Eagle Medallion at the forest edge. Next go to the waterfall and take the Chalk. Inspect the pile on the left and the first HOP begins. You obtain a Moon Symbol. The tunnel leads to the asylum. Take the Steps, Crystal, and Moonstone. The 2nd Crystal is found on the second floor of the demon’s house.

Use the Diamond to take the Sun. Inspecting tub launches the second HOP. You obtain a Door Handle. In the attic, take the Ruby, Plug, Reading Lamp, Captain, and Pump Handle. Place Pump Handle in backyard on pump and take Pump to the waterfall.

The first puzzle begins when you place the Moonstone on the left atlas. Take the 4th and 5th Crystal. The second puzzle begins when you place the Emerald on the right atlas. You obtain the 1st Piece of Chart and you take the 2nd Piece of Chart.

Grim Tales - The Wishes Totem

Grim Tales – The Wishes Totem

Back at the house, take the Handle and Belt. Inspecting the pile on the left triggers the third HOP. You obtain the Moon. Take the 3rd Piece of Chart. Place the 3 Pieces of Chart in the house in the crystal ball and the third puzzle begins. Take the Scheme and Device.
The fourth HOP begins when you inspect boxes in Brandon’s room. You obtain an Anchor. At the playground, take the PirateEnsign, Rusty Nippers, Soap, Sharp Nippers, and Wind Medallion.

Grim Tales - The Wishes - Puzzle

Inspecting furnace door triggers the first HOP. You obtain a Forged Rose. In demon’s living room take the demon’s Ring by using soap on the demon’s hand. Use the ring on the demon’s hand. Use the Ring on the trunk in the attic to take the Crystal Ball. Use the Cystal Ball to Capture Demon. In room with totems, place Captured Demon on the pedestal. The final puzzle is found in the asylum. Use the Ring to trigger the puzzle.

Congratulations! You’ve completed our Grim Tales – The Wishes Walkthrough! For more great tips and tricks, visit our blog!

The Grim Tales – The Wishes Walkthrough is meant as a guide and does not contain cheats, hacks, or serials.

The post Grim Tales – The Wishes Walkthrough appeared first on GameHouse.

Haunted Legends – The Bronze Horseman Walkthrough

$
0
0

Haunted Legends – The Bronze Horseman Walkthrough

Welcome to our Haunted Legends – The Bronze Horseman walkthrough! The Bronze Horseman is an ancient legend who has come to life in a flooded town. The townspeople are missing, and many believe black magic is the cause. You play a detective who must solve the many problems of the town. We will guide you through the game with tips and tricks, solutions to puzzles, and locations for the game’s many hidden objects.

Contents

General Tips & Tricks

To help you through the game, we have a few tips and tricks. If you become stuck, then refer back here for some help with Haunted Legends – The Bronze Horseman.

– Hidden object challenges are marked with sparkles.
– Inventory items are capitalized in our guide.
– Use the hint button during hidden object challenges.
– You will need 24 crystals by the end of the game. Make sure you get them all!
– You can zoom in on an object when the magnifying glass appears.
– All notes will be added to your diary.

Haunted Legends – The Bronze Horseman Walkthrough

Chapter 1

You will be welcomed to a town in peril by a worried father who has lost his son. The town is beset by rains and floods, and the townsfolk fear the coming of a legend known as the Bronze Horseman.

– Select the chair and take the crystal. Afterwards, select the note and read it carefully. Take the Wrench from the chair and zoom out.
– Knock the picture frame off the right wall. Select the wall safe to find a piece of Stained Glass.
– Select the shoe beneath the tree on the left. Take the Safe Key and Stained Glass.
– Select the stained glass window and drop both pieces of Stained Glass into place. The window will open.

Go through the window.

– Select the hidden door to the left. Use the Wrench to loosen the screws around the door. Take the Lever and Safe Key.

Travel forward once.

– Select the shirt that the goblin dropped. Take the Spring and read the note in the pocket.
– Select and read the plaque on the statue in the center of the plaza.

Travel back once.

– Select the lock to the left of the gate. Use the Spring on the lock to open it up.

Travel right once.

– Speak with the girl. She will give you another Safe Key.
– Take the blue crystal on the shelf to the left. Afterwards, select the red blanket on the floor to begin a hidden object challenge.
— Pour the glue on the vase to find the broken vase. Select the cheese twice. The Safe Handle will be added to your inventory.

Travel back twice.

– Begin the hidden object challenge! The first Mosaic Fragment is in the book. Take Africa from the globe, and make sure to get the duckling in the egg. Lastly, take the crab from the scroll. The Mosaic Fragment will appear in your inventory.

– Select the safe, which was behind the picture frame that was knocked to the floor. Place the three keys and Safe Handle into position. Turn the handle to find a Chisel and a note.

Travel forward once and right once.
– Select the far wall. Use the chisel on the strange brick in the center of the wall. You will find the Strange Key!
– Select the red blanket again to begin another hidden object challenge.
— Use the chalk to find the horseman drawing. The match will start the lamp flame. The Gaff Hook will be automatically added to your inventory.

Travel back once and forward once.

– Watch the horseman leave the podium and crash into the barricade. Follow him! Use the Gaff Hook to clear the wood.

Travel over the barricade.

– Select the area of road near the red crystal. Take the Horseshoe and the crystal.
– Select the bulletin board and pull the newspaper page free. Beneath the page is a crude map.

Travel forward once.

– Select the goblin and watch him run away. There is a Hidden Object challenge to the left.
— Select the metal cup to melt the chocolate and get hot chocolate. The bracelet is in the jewelry box on the top left. The Slats will be added to your inventory.

Travel back twice.

– To the right of the statue is a grassy area and tree. Select the space between the grass and tree to begin a new puzzle!

The object of the puzzle is to create a bridge across the stones using the Slats in your inventory. Mix and match the slats to complete the puzzle.

Haunted Legends - The Bronze Puzzle 1

Haunted Legends – The Bronze Puzzle 1

Travel right once.

Chapter 2

You have managed to release the Bronze Horseman! The townspeople are nowhere to be found, and a strange goblin has fled from your sight. The mysteries of the village continue to grow while you make your way down the dark cobblestone streets. Don’t stray far from our guide, or you may lose your way.

– Select the shelf with the blue crystal on the left. Use the chisel to wedge the crystal free. Make sure you get the Hammer.
– Select the gate to the right. Use the Chisel and the Hammer on the padlock to bust it open.

Travel right once.

– Select the hiding girl to the left and listen to her plea. Select the tilted carousel to begin another hidden object challenge!
— Move the unlit candle onto the flame to find the burning Candle. Tear the cloth to find the sword. Select the horse to find the candies. Select the horse head to find the carrot. The Candle will be added to your inventory.

Travel back twice, to the left once, and forward once.

– In the bottom right corner of the screen is a stone shelf. Take the green crystal and set the candle on the shelf. Watch the wax melt. Release the chains to find a Cannon Ball.

Travel down twice and right twice.

– Drop the Cannon Ball on the seesaw. Select the bag that fell and take the Fire Canister and crystal that are inside it.
– Return to the askew carousel for another hidden object challenge. Unlock the wooden door to find the Puzzle Piece, which will be added to your inventory.

Travel back once.

– Take the Knife from the wooden branch near the back left side of the alley. Read the note that was pinned to the branch.

Travel right once.

– Select the shack and place the Strange Key on the lock after clicking the button. The door will open. Select the little girl. Take the Ice Canister on the right side of the room.

Make your way back to the tower.

– You will encounter a new hidden object challenge in the tower. Use the knife on the watermelon to get the watermelon seeds. The brush will paint the garlic red. You will acquire the Flint and Steel in your inventory.
– Select the door to the tower on the right. You will begin your next puzzle!

The puzzle requires you to combine elements to create new ones. By pairing two items together, you can create additional items. Place fire and ice canisters on the left. Drop the fire on the ice to create water. Fire and wood create ash. Ash and water create earth. Continue to pair the items until they are all unlocked. Steam and metal will most likely be your final combination.

Haunted Legends - The Bronze Puzzle 2

Haunted Legends – The Bronze Puzzle 2

Travel into the tall tower.

Chapter 3

The tower and its mysteries await you. Phantoms, floods, and spirits plague the streets outside, but you must unravel the mysteries of the tower.

– Select the goblin and watch him run away. Grab the red crystal from the bench as well as the Lever. Next, zoom in on the strange machine on the right.
— Drop all three levers onto the machine. Your diary has notes for how to activate the levers. Select the red, green, and blue lever. Once they are finished moving, select the red and green lever again.

Travel up once.

– Begin the hidden object challenge! Select the piece of wood to find the coin. The mask is beneath the cloth. The Mug will be placed in your inventory.
– Select the unlit torch on the wall. Use the Flint and Steel to light the torch. Grab the Ladder from the wall.

Travel down twice and enter the plaza.

– Place the Ladder on the statue, and travel up the Ladder to find the Key and the Bronze Nail.

Return to the tower and travel to the top room.

– Select the door and use the key to unlock it. Travel through the door to find a boy being held by the goblin. Select the boy and watch the goblin escape.
– Select the windowsill and take the Wooden Mechanism. Grab the note that was left. Next, open the cabinet to the left of the window and take the two crystals inside.
– Turn to the desk. Use the knife to cut open the sealed pages of the book. Flip the page to find the Strange Recipe.

Travel down four times.

– Select the door on the right side. You can place the Wooden Mechanism in the center to begin a new puzzle!

The goal of the puzzle is to match the color of the smaller circles with the color of the large circle in the middle of the three mechanisms. To do this, grab the smaller circles using the mechanism in the center. All you need to do is drop the smaller circles onto the correct larger circle to finish the puzzle.

Haunted Legends - The Bronze Puzzle 3

Haunted Legends – The Bronze Puzzle 3

– Travel through the newly opened door. Select the glowing item on the distant table edge. When the phantom appears, click him again.
– Select the bar to begin another hidden object challenge. Select the spout to find the pouring wine. Select the bottle to find the pepper. Look at the framed award in the top left to find the seal. The Solvent will appear in your inventory.
– Grab the red crystal on the table to the right. In the back of the room is a Coat of Arms that you can collect by loosening the screws. On the table is a broken crystal. Use the solvent on the shattered brass portion of the crystal to acquire a Puzzle Piece.

Travel to the top room in the tower.

– Begin the hidden object challenge. Select the locket to find the red heart. The Stout Key will be placed in your inventory.

Travel down twice and enter the bar to the right.

– Select the locked door to the left. Use the Stout Key to open the door.
– Take the purple crystal standing on the keg. Select the book on the table and take the Trowel. Pull the lever on the left to open the mechanism on the book. Read the pages at your own peril! Use the trowel on the bag full of hops to get some Hops.

Return to the top level of the tower.

– Use the Coat of Arms on the shield that is hanging on the wall. Take the Puzzle Piece and the note inside the secret compartment.

Travel down until you reach the plaza with the statue. From the plaza, travel right once.

– Zoom in on Garibaldi’s Workshop. Use the three Puzzle Pieces to gain access to a new puzzle!

The goal is to complete the puzzle by moving and flipping individual planks until a bridge across the water forms.

Haunted Legends - The Bronze Puzzle 4

Haunted Legends – The Bronze Puzzle 4

Chapter 4

The mysteries of the strange town have begun to unravel. Ghosts and a strange, dark magic plague the answers that you have sought since stepping into town. The workshop is a challenging adventure that will not end quickly.

– Select the corpse on the floor. Grab the note next to his right hand. Open up his front apron pocket to discover the Magnifier. Zoom out and select the counter space to the left to begin a new hidden object challenge!
— The songbird is in the birdhouse. The picture is beneath the paper. The Wire Cutters will be placed in your inventory.
– In the back right of the room is a machine. Select the lever on the machine to activate a light.

Go forward once.

– Select the door on the left to begin a new hidden object challenge! Select the bottle to find the champagne foam. Drop the knife near the door to find the lightning. The Hexagonal Tile will appear in your inventory.
– Zoom in on the grate above. Use the Wire Cutters on the wires that hold it in place. Open the grate and travel through it to reach the roof.
– Take the fallen Branch near the large hole.

Travel back once.

– Play the hidden object challenge beneath you. Select the soldier to find the trumpeter. You will acquire Planks.

Travel back once.

– Drop the planks over the hole in the roof. Take the small scroll to the left of the opened door. Select the door to travel into the next room.
– Take the green crystal on the floor. Select the bed to begin another hidden object challenge! The flag is in the purse. The Mirror will appear in your inventory.
– Zoom in on the window. Use the branch to pull a Jack towards you so that you can take it.

Travel back to the workshop.

– On the right is a machine with pale light. Select it to begin a new puzzle! The goal of this puzzle is fairly simple. All you need to do is direct the light from the mirrors so that it illuminates the far wall to the left. See our solution if you need help. Afterward, select the back left wall to receive a diagram.

Haunted Legends - The Bronze Puzzle 5

Haunted Legends – The Bronze Puzzle 5

– Play the next hidden object challenge! The drawer contains two random items. You will gain a Set of Pins in your inventory.

Travel forward and up the hole in the ceiling. Travel back once.

– In the distance is a gate that you can zoom in on. Luckily, we know a trick. Use the Jack to pry the gate open.

Travel through the new opening.

– Zoom in on the blue glow to find another crystal. Zoom in on the piano near the back left of the street to find a green crystal.

Travel back twice and enter the door beyond the planks.

– Select the cabinet and drop the Set of Pins on the mechanism to start another puzzle! Refer to the instructions, and configure the puzzle into an outer circle and inner broken circle.. When the puzzle is complete, take the Horse Emblem.

Haunted Legends - The Bronze Puzzle 6

Haunted Legends – The Bronze Puzzle 6

Travel down twice and through the archway on the right.

– Select the piano and use the Horse Emblem on the lock to receive a Forked Key.

Travel down twice and walk back across the planks.

– Complete the hidden object challenge. Select the bell to find the jingle bell. A Palette Knife will be added to your inventory.

Travel down twice.

– Use the forked key on the lock that secures the chest. Take the red crystal, letter, and Handle. Go through the door on the left to begin another hidden object puzzle. Select the chair cushion to find the spring. A Glove will be added to your inventory.

Travel up through the hole once and back once.

– Zoom in on the broken window near the left side of the plaza. Use the Glove to clear the glass. Take the Hexagonal Piece.
– Play the hidden object challenge. Set the leaf aside to find the Caterpillar. The blooming flower is beneath the flower. You will get a Scoop in your inventory.

Travel through the archway.

– Select the chest to begin a new puzzle! Drop the two tiles into the missing slots, and then twist the tiles to complete the image. The final image will look like a horse that is attempting to bite its own tail.

Haunted Legends - The Bronze Puzzle 8

Haunted Legends – The Bronze Puzzle 8

– Take the Ingredient and note.

Return to the workshop.

– Select the diagram you revealed with the mirrors. Use the Palette Knife to peel back the edge of the diagram. Select the mechanism and use the handle to open it up.

Travel down the stairs that appeared.

– Open the top left cabinet door to find a crystal and a note. Use the Scoop on the coals to acquire Coals. Open up the furnace and drop the Coals inside. Pull the lever down to reveal a new puzzle!

The goal is to allow the liquid metal to flow through the valves and into the cast. All you need to do is make sure every valve is facing down and to the left. You will acquire the Tap.

Haunted Legends - The Bronze Puzzle 9

Haunted Legends – The Bronze Puzzle 9

Travel back to the bar and into the room on the left.

– Select the copper gauge and drop the Hops, Strange Recipe, and Ingredient on the table. Make the potion by following the recipe on the top left.
– When the recipe is completed, drop your Mug below the keg. Place the Tap on the barrel and click it. Take the Potion.

Travel down once.

– Deliver the potion to the ghost.
– Complete the hidden object challenge. Drop the coffee beans in the coffee grinder to find ground coffee. Drop the sponge in the water and you will get the wet sponge. Select the calendar and click on Sunday. You will acquire a Handle.

Travel through the door on the right.

– Take the note from the upright table.

Travel forward.

– Grab the cane.

Travel back.

– Zoom in on the basket filled with bags. Use the cane to move the bags. Zoom out. Zoom into the second basket and take the crystal and Fishing Rod.

Travel forward

Zoom in on the lake to the left of the dock. Use the Fishing Rod to grab a Floating Gear. Select the horse mechanism to begin a new puzzle!

The puzzle requires you to match images on the left with those on the right. You can turn both wheels to match the images. The install button will pair the images.
– Here are the solutions:
Wavy lines, boat, paddle.
Pistol, soldier, hat.
Hatchet, mannequin, tree.
Painting pallet, picture, paintbrush.
Wind, windmill, crops.
Wheel, wagon, road.

Haunted Legends - The Bronze Puzzle 10

Haunted Legends – The Bronze Puzzle 10

– Use the handle when the puzzle is complete. Travel into the mayor’s house.

Chapter 5

The mayor seems to be behind at least a portion of the mischief occurring in the city. If absolute power corrupts absolutely, then it is not a stretch to presume he has turned to powers beyond his control. Tread carefully as you progress through his home.

Travel to the right.

– Take the blowtorch before zooming in on the steps. Read and take the note.

Travel left.

– Zoom in on the bushes to the left to find a crystal and Mosaic Fragment.
– Zoom in on the horse’s flank. Drop the nail into the pinhole, and then you can use the Blowtorch to melt the device until it can be opened.
– Inside the horse statue are a series of mechanisms. Click the two levers followed by the door. A new puzzle will appear! The solution is to click the one, two, and four buttons.
**screenshot? 9
Travel through the door.

– Take the Pin on the stone block to the left.

Travel back once.

– Select the lever closest to you and zoom in. Use the Pin to open each latch. Once opened, take the Rough Cloth.

Go through the door again.

– Drop the Rough Cloth over the exposed wires.

Go forward.

– Select the goblin and watch a scene unfold. Click on the mayor. It seems we were mistaken about the mayor’s involvement!
– Play the hidden object challenge in the cabinet to the left. The hammer will break the glass to reveal broken glass. Drop the black ink on the tulip to find black tulip. You will acquire a Wheel in your inventory.

Go forward.

– Take the green crystal on the left. Another hidden object challenge awaits you! The postcard is in the envelope. You can find the handprint by dropping the powder on the mirror. Acid will appear in your inventory.
– Once finished, zoom in on the painting. Use the Palette Knife to cut open the canvas and take the Key Panel.

Travel back.

– Zoom in on the statue in the back of the room. Use the Acid on the statue’s arm to acquire the Spearhead.

Go forward once. Travel through the door to the left.

– Zoom in on the package above you to the right. Use the spearhead to cut open the package and claim the Pin.

Leave the room.

– Play the hidden object challenge. Select the globe to find the snow globe. You will acquire the Screwdriver in your inventory.

– Select the door to the right, and use the two pins to unlock the door.

Travel through the door.

– Select the column in front of you and take the crystal and coal.

Go forward.

– Click on the goblin and watch him disappear. Don’t worry! Our guide will lead you to him again. Take the blue crystal in front of you. Zoom in on the chair. Use the Wheel, the screw on the floor, and the Screwdriver to fix the rolling chair. Select the chair to begin another hidden object challenge!
— The knife will cut the lemon and produce a slice of lemon. Apples will be added to your inventory.

Travel back once.

– Zoom in on the statue of the apple tree on the bannister. Place the Apple where it belongs on the statue to acquire the Glass Triangle.

Travel left twice.

– Select the book on the table and use the Key Panel. Grab the Clue Scroll. Zoom in on the bookshelf above the desk to find a small puzzle! Place the Glass Triangle and Clue Scroll where they belong to start the puzzle.

The goal is to match the sand pattern in the triangles with the pattern in the scroll. To move the sand, rotate the exes between the triangles. From left to right, the exes should be turned in this order: 3, 3, 2, 2, 2, 3.

– After the puzzle, take the Bandages and note from the bookcase.

Travel back twice.

– Give the bandages to the mayor. When he is finished speaking, play the hidden object challenge to the left. Select the fan to receive access to two random items. You will receive the Door Knob.
– Take the diary note from the open window to the left.

Travel forward and to the right twice.

– Begin the hidden object challenge. Select the peanut shell to find the peanuts. The last Mosaic Piece will be added to your inventory.
– Place the Door Knob on the back door before selecting both handles. Travel through the door and select the mosaic. Drop the Mosaic Pieces into the empty spots so that you can finally claim the Handle!

Travel all the way back to the topmost room in the tower.

– Place the Handle on the zip-line and make your way across the expanse.

Chapter 6

You have come at last to the heart of the enemy’s lair. The strange mystery that has unfolded before you will surely meet its end here. Prepare yourself for the very worst and stick close to our guide! Our tips will help your reach the story’s conclusion.

– Immediately begin the hidden object challenge. Bring the two dolls together to find the twins, and drop the pot on the stove. Drop the corn in the pot to find the popcorn. A Horseshoe will be placed in your inventory.
– Zoom in on the far door and drop the Horseshoe to make the door open. Travel through the door and select the lever on the left to find the Fuse. Select the cabinets on the right to find another crystal and a Control Panel. Zoom in on the chair and use the coal on the page to reveal a note!

Travel back once.

– Select the canister on the bench to the left to begin a new puzzle! Drop the Fuse onto the other equipment. Afterwards, all you need to do is place the items as they appear in the diagram beneath the equipment. The final step is to turn the fuel valve. When the puzzle is completed, you will get the Lamp.

Haunted Legends - The Bronze Puzzle 12

Haunted Legends – The Bronze Puzzle 12

– Play the next hidden object challenge! The violin is in the violin case. A Hooked Cable will appear in your inventory.

Go forward once.

– Select the mechanism and drop the Lamp on top of it. Follow the lamp forward down the path. Once in the tunnel, drop the Control Panel on the floor. You will need to hit the levers in the following order: right, left, left, right, right, left.
– Finally! You have reached the goblin. However, he will thwart you once more. Luckily, we have a few tips for bringing him down.
– Begin the next hidden object challenge. Select the fan to reveal two random objects. You will acquire the Round Key.

Travel back once.

– Use the Round Key on the locked drawer to the right to find Freezing Liquid.

Travel forward once.

– Play the next hidden object challenge. Close the eye by selecting it. A Sledgehammer will appear in your inventory.
– Select the well, which is marked by blue light, and use the Hooked Cable to find the Machine Lever.

Travel forward.

– Select the boy in the cage and listen to what he has to say. Drop the Freezing Liquid on the lock before bashing it open with the sledgehammer. Nice work! Speak to the boy again. When he is free, zoom in on the rocks near the top of the room to find the Cross Key.

Travel down.

– Select the desk and use the Cross Key to open the lock. Take the green crystal.

Go forward.

– Select the chair to begin the final puzzle. You must have all of the 24 crystals to begin the puzzle. All of them are included in our guide, so if you followed it closely you will be in excellent shape.

The puzzle requires that you click the levers in a specific order: blue five times, purple five times, red once, green four times, red once, green once, red twice, and green twice.

Haunted Legends - The Bronze Puzzle 13

Haunted Legends – The Bronze Puzzle 13

Congratulations! You have completed the main game! We hope you enjoyed our Haunted Legends – The Bronze Horseman walkthrough. Be sure to check out one of our other guides!

The Haunted Legends – The Bronze Horseman Walkthrough is meant as a guide and does not contain cheats, hacks, or serials.

The post Haunted Legends – The Bronze Horseman Walkthrough appeared first on GameHouse.

Witch Hunters – Stolen Beauty Walkthrough

$
0
0

Beauty is a fleeting thing that everyone knows will eventually give way to the physical signs and effects of aging. But imagine being in the prime of your life and having your beauty stolen away by a devious witch from your grandmother’s past! It is now up to you to travel to your grandmother’s old boarding school to reclaim your youthful looks and free the other women before your time runs out! You can imagine yourself as Angelica, as you head off on your quest to retrieving your looks through a series of puzzles, hidden object games, and other brain twizzlers. This Witch Hunters – Stolen Beauty Walkthrough will aid you on your quest with advice on locations, visual cues, and helpful advice.

Contents

General Tips & Tricks

Game Overview
The object of the game is to return to your grandmother’s childhood boarding school to rescue the captured young women that are under the spell of the evil Madame Flemet while on your own quest to restore your stolen youthful beauty. Power your way through eight levels of brain busting puzzles, hidden object games, and a host of other puzzling situations. Use the on-screen hint button or simply refer to this Witch Hunters – Stolen Beauty walkthrough for ideas, instruction, or guidance when you feel that you are lost or unsure of where to make your next move.

Gameplay Controls
There is no special skill needed to successfully bring the evil head mistress Madame Flemet to justice. All moves can be done with the click of your mouse and the drop-and-drag feature. There are on-screen hints that you can quickly utilize such as:

  • Hint Button-This helpful element can be found in the beginning of the game and is useful when you can not find an object or you do not know where to look next. When you use the hint button, it will turn the young woman on the icon into an old woman. As your hint meter refills, so does the youthfulness of the hint icon.
  • Curser Changes to Hand-When this happens during your investigation of an area, it is an indication that an item can be picked up or moved in some way.
  • Curser Changes to Magnifying Glass-This is an indication that a closer look is necessary. This helper will point out hidden games and objects to uncover.
  • Sparkling Area-When you notice that an area is sparkling, it means that there is some type of interaction available.

These are valuable aids during active play, but for those times when you find yourself really stumped, rely on this walkthrough to help you all of the way to your graduation from this hellish boarding school.

General Tips
This storyline and game is simple to follow if you know a few pieces of inside information about the basics of playing such as:

  • You must collect the Hint Button from the crow at the beginning of the game in order to use it.
  • You must wait for the Hint Button to refill before you can use it again. This is indicated by the youth or age of the woman on the icon.
  • The bar at the bottom of the screen is your inventory; it will hold all of your necessary items until they are needed.
  • Areas that sparkle are hidden object Scenes; take a closer look at these areas to trigger the game.
  • The items that you must find in the Hidden Obstacle games are randomly chosen for each game.
  • Use the menu button to pause, resume, or exit the game. From this menu option, you may also change the screen size, music, and sound.
  • The numbers located in the lower left of the screen indicate the number of Snake Keys that you have collected, and how many are necessary, to complete the collection of 12 and defeat the evil Witch.


Playing Tips and Tricks
When it comes to maneuvering through this game effortlessly, there are a few items that can help make your game a fun, challenging, and entertaining experience. Your game will challenge and entertain if you take these pieces of advice into consideration:

  • Before beginning play, select the player setting that best matches your puzzle solving abilities. The difficulty settings come with three choices.
    • Casual – Easiest of the settings, this will allow quick refill of the hint button, the skip button, and sparkles will indicate needed action by you.
    • Advanced – Medium difficulty level with fewer sparkling hinted areas; the hint and skip buttons reload slower.
    • Expert – This is the hardest level with very slow refilling hints and skips.
  • Utilize the Skip Button if you are having difficulty with a particular puzzle or area. This will allow you to temporarily leave the game for later. Refer back to this walkthrough for the helping hint or clue to solve the puzzle, game, or area that is perplexing you.
  • There is a solution to every puzzle somewhere in the game. Often multiple pieces are necessary to engage hidden games or level advancement.


Walkthrough Witch Hunters – Stolen Beauty

Chapter One: Entrance Exam

Shoo away the Crow to reveal the Hint Button. Find and collect the necessary parts for the statues; the Statue Hand, the Statue Foot, the Statue Face, and a Wreath along with the Hexagon at the base of the right statue. The sign at the upper right holds a Note and a Snake Key. Place the items from your inventory onto the statues where necessary. There is a hidden game behind the Dead Vines on the right.

Click on the Plaque to the left of the statue to reveal a Red Ring. Use the Red Ring and the Blue Ring to open the gate.

Finding all of the items on this hidden object game will award you a Blue Ring for the gate to the school grounds.

Place the two rings into the spaces on the Gate to unlock and enter the School Yard.

Witch Hunters - Stolen beauty - School Yard Gate

Witch Hunters – Stolen beauty – School Yard Gate

Find a Brick on the ground under the tree. Go through the Door in the fence to the right of the school.

Here you will need to collect a Snake Key and a Weight. The Bricks around the Doorway are a succession puzzle.

Place the Brick from your inventory into the missing space. Go to the Front Door of the school.
Collect a Button and a Hexagon. Hang the Weight in the middle of the Chain on the left wall. Pick up the Brick that falls. Move the stone at the bottom left of the Doorway and observe. Return to the Side Door and the Brick puzzle.
Press on the Bricks around the doorway to solve this puzzle.

The pattern for solving this puzzle is A-G-C-B-E-D-F.

Witch Hunters - Stolen beauty - Bricks Puzzle

Witch Hunters – Stolen beauty – Bricks Puzzle

This will open the way into the Garden.

Schooch away the Kitty Cat and collect the Hexagon from the tree directly above that area. Search and find the hidden object game in the rear center of the screen.

Items that are listed on the bottom of the screen need to be located. The green highlighted objects are hidden by other objects and need to be uncovered.

When you have found all of the listed items, you will be rewarded with a Drum. Upon returning to the Garden, put the Drum by the Teddy Bear on the bench. Click the leaf in front of the Teddy Bear to collect a Hexagon and a Button. Collect a Hexagon from the Planter.

Now you may move on to the Gazebo on the left.

Collect the Snake Key and the Hexagon. Look at the Card on the right. Exit to the Fountain.

Pick up the Trowel from the left. Look at the Valve in the center and collect the Hexagon. Return to the Gazebo.

Look at the missing Hexagon pieces in the floor and replace them with the ones in your inventory. This will trigger a mini-game. The puzzle pieces need to be matched on all sides to complete this puzzle.

Witch Hunters - Stolen beauty - Hexagon Puzzle Solution

Witch Hunters – Stolen beauty – Hexagon Puzzle Solution

Follow the pattern on the image for the accurate placement of the Hexagons and collect an Ornament that you can take with you back to the Planter.

Look closely at the Planter to use your Trowel to dig up a Bell.
Return to the School Grounds. Place your Ornament into the space on the side of the Pool.

Look closer at the water to find a hidden object game.

Locate all of the items on the list to earn a Bell Clapper. Return to the Front Door of the school.

Take the Bell Clapper and place it in the Bell. Ring the Bell.

Check out the lock on the door; put the Bell in the missing spot to engage a puzzle. Use the pattern (C- E – B); (B –A- G –D); (D –B –C –G –A); (B –A – B –F –E – D) to move on to the Foyer.

Witch Hunters - Stolen beauty - Doorbell Puzzle

Witch Hunters – Stolen beauty – Doorbell Puzzle

Chapter Two: Mischief and Mayhem

Look at the Note on the right and the Painting on the left.

There is a hidden object game at the far end of the hall. Find all of the listed items to be rewarded a Screwdriver. Go back to the Fountain.

Use the Screwdriver to open the box and collect a Button that you can take with you to the Staircase in the Foyer.

Witch Hunters - Stolen beauty - Box

Witch Hunters – Stolen beauty – Box

Look at the Staircase and the Lock on the door to the right.

Use the Coins from your inventory to trigger a puzzle in the Door Lock. Place them in the correct pattern to gain access to the Classroom. Enter the Classroom and look at the Briefcase to click the Key for the Clock Key, click on the Briefcase to collect the Scoop, and collect the Spyglass from the Desk. Use it to look at the Notebook.

Witch Hunters - Stolen beauty - Door Lock Puzzle Solution

Witch Hunters – Stolen beauty – Door Lock Puzzle Solution

Return to the Foyer. Use the Clock Key to open the front of the Clock.

Collect the Knife and return to the Classroom. Use the Knife to break the seal on the Cabinet Doors.

Return to the Foyer with the Clock Weight. Place the Clock Weight into the Clock. This engages a Mini-game.

Witch Hunters - Stolen beauty - Clock Weight Puzzle

Witch Hunters – Stolen beauty – Clock Weight Puzzle

Follow the pattern to move on to the Dining Room. Retrieve the Nippers from next to the overturned chair. Visit the Curtain to look at the Window. Collect the Pitcher. Use the Spyglass on the Window; use the Nippers to take out the Nails and to get a Coin for the Fountain.

Place the Pitcher into the Fountain and collect the Water Filled Pitcher. Look at the Door Lock on the left to find a puzzle.

Witch Hunters - Stolen beauty - Kitchen Door Puzzle Solution

Witch Hunters – Stolen beauty – Kitchen Door Puzzle Solution

Follow the pattern to unlock the door to the Kitchen. While here, you will need to collect Chalk and an Oil Can by using the Knife from your inventory to open the Cupboard.

Use the Scoop to clean the ashes from the Oven and collect an Ash Filled Scoop. Travel to the Foyer. Return to the door on the left and put the Coin from your inventory into the slot.

Travel back to the Fountain. Use your Oil Can on the Valve to be rewarded a Valve.

Go once again to the Kitchen. Visit the Oven and add the Valve. Visit the Messy Work Area for a hidden object game.
Find all of the objects in this puzzle to collect a Brush.

Back in the Kitchen, look on the Shelf to retrieve a Handle and read the Note.

Return to the Classroom. Look in the Desk. Use the Ash and the Brush from your inventory to reveal the Message.

Visit the Chalkboard to trigger a puzzle.

Use the Chalk to make this pattern: A – B – C- D –E- C – F- G- E- H – I –G-J-K-F- B – L –K – M –J- I- N- M-O- N – H –P – O- L – A – P –D.

Witch Hunters - Stolen beauty - Chalkboard Puzzle Solution

Witch Hunters – Stolen beauty – Chalkboard Puzzle Solution

After completing, collect the Power of Revelation from the lady.

Use the Reveal Power Button to open a Hidden Door in the wall. Travel to the Gazebo. Use your new Power of Revelation to find the Shawl.

Travel to the Fountain. Use the Power of Revelation again to discover the passageway on the Overgrown Path.

Travel onward to the Bridge.

Chapter Three: Kitchen Capers

On your way to the Kitchen, stop to pick up a few items.

You will find Firewood and a Sword Gem here on your way to the Foyer.

Give the Shawl to the woman in the painting and earn a Snake Key.

Find the Dining Room. Use the Reveal Power Button on the Table Setting.

Select the Lid to discover the Slingshot and receive a Plate; there is also a Note with valuable information. Move on to the Kitchen. Use the Firewood in the Oven.

Travel to the Staircase. Use your Stone Gem on the Statue.
Travel up the Stairs and to the left. Look close at the Chain and collect the Pottery Room Key.

Use the Reveal Power on the Door and enter the Classroom. Unlock the Door with the Pottery Room Key.
Enter the Pottery Room. Shoo away the Cat.

Use the Reveal Power Button on the Desk Top to collect the Oven Handle. Click the Sheet to gain a Baker’s Paddle. Pour your Pitcher on the Clay to collect a Snake Key. Move to the Kitchen. Use the Oven Handle from your inventory to gain a Music Box Top.

Witch Hunters - Stolen beauty - Oven

Witch Hunters – Stolen beauty – Oven

Backtrack to the Pottery Room. Peer at the Desk and select the Music Box Top from your inventory. Add it to the Music Box to earn a Ballet Dancer. Visit the Foyer. Look at the Lock on the door and select the Ballet Dancer from your inventory.

Witch Hunters - Stolen beauty - Ballet Dancer

Witch Hunters – Stolen beauty – Ballet Dancer

Turn the Ballet Dancer until the door is unlocked and you can enter the Salon. Play the hidden object game.
Find all items on the list, including the ones in green, which are hidden by other objects.

Earn the Potter’s Wheel for this puzzle. Use your Knife to cut the wood in the Doorway and earn Matches.

Travel to the Classroom. Peer at the Cabinet. Select your Matches to melt the Wax and earn Acid.

Move on to the Pottery Room. Look close at the Table and add the Potter’s Wheel and Clay from your inventory. Select the Clay to create a Clay Bowl. Click the Clay Bowl for an additional spin.

Witch Hunters - Stolen beauty - Clay

Witch Hunters – Stolen beauty – Clay

Use the Baker’s Paddle to lift the Clay Plate. Go back to the Kitchen. Check the Oven and select the Matches from your inventory to light a fire.

Take the Clay Pot and place it in the Oven to earn a Plate. Pour your Acid into the Teapot. Collect Candles when you click the lid.

Travel up the Stairs and to the right. Select your Candles, put them into the Candelabra, and light them with your Matches.

Find all of the Compass Parts. Return to the Hallway and go left. Use your Acid on the Chain to enter the Library.

Look closer at the Desk to collect a Snake Medallion and a Plate.

Travel back to the Pottery Room.

Chapter Four: Plates To Go

Take your Plates and place them on the Shelf to trigger a puzzle.

Witch Hunters - Stolen beauty - Plates Puzzle

Witch Hunters – Stolen beauty – Plates Puzzle

Matching the two rows of Plates will earn you the Freezing Power from the woman.

Witch Hunters - Stolen beauty - Freezing Power

Witch Hunters – Stolen beauty – Freezing Power

Journey to the Kitchen. Visit the Messy Work Station to find a hidden object puzzle.

Locate all of the items on the list to earn a Compass Part. Walk Upstairs and take a left. Check out the Curtain and the Table.
Use the Compass Parts in the inventory to complete the Table. Grab the Pea and the Candle before moving on to the Dining Room. Take the Pea and place it on the Plate with the Slingshot.

Travel on to the Bridge. Select the Crank and remove the stick; use your Oil Can to earn a Feather.

Use your Freezing Power to stop the water. There is a hidden object game in the grass on the right to conquer. To move on to the Shack, find all of the items on the list.

Collect the Feather and journey over the Bridge. Use your Knife to cut the Basket next to the door to earn a Book. Insert your Candle into the Pumpkin. Use your Matches to earn a Snake Key.

Collect the Globe Piece from the Window and travel to the School Grounds. Visit the Fountain for a hidden object challenge.

Find all of the items listed to be rewarded a Pattern Piece and move on to the Shack. Use the Pattern Piece on the Door Lock and spin to solve.

Travel back to the Shack. Enlist your Reveal Power on the Wooden Beam to expose a Ladder.

Collect the Book and travel to the Library. Use your Globe Piece to repair the Globe. Take your Books and place them on the Shelf to trigger a Mini-game.

This image will help you to match the Keys to the correct Books. Move on to the Attic. Check the Bag to collect a Puppet Leg, Three Steps, and Snake Key.

Witch Hunters - Stolen beauty - Books

Witch Hunters – Stolen beauty – Books

Use your Steps on the Ladder. At the Window, scare the Bat away and collec theSagebrush. Solve the hidden object game on the bottom left. Locate all of the items listed.

Earn an Umbrella to take to the Foyer.

Chapter Five: Critter Control

Use your Puppet Leg to repair the Puppet.

Travel to the Shack. Look at the Chest and then use your Sagebrush on the Bee Smoker to earn a Bee Smoker. Use the Bee Smoker and your Knife on the Beehive to collect an Eagle Medallion.

Use your Umbrella to move the Glove and earn a Glove to take to the Foyer. Investigate the hidden object area. Solve the puzzle to move on.

Earn a Globe Piece when you find all of the listed items. Travel to the Library. Insert the Globe Piece into the Globe to be rewarded a Bear Medallion.

Move on to the Pottery Room. Use your Glove to acquire the Stained Glass Piece.

Return to the Stairway. Use your Stained Glass Piece to repair the Glass Door.

Engage the Handle to gain entrance to the Study. Check out the Painting. Use your Power Of Revealing to view the Desk. Use the Medallions to fill in the empty areas and earn Bait.

Put the Bait into the Fish Tank to earn a Piano Key to take to the Salon. Visit the hidden object area. Find all of the items listed.

Collect the Bear Key. Use the Bear Key on the Bear to earn a Crocodile Medallion. Use the Crocodile Medallion on the Desk to collect Letters.

Witch Hunters - Stolen beauty - Bear Key

Witch Hunters – Stolen beauty – Bear Key

Travel to the Shack. Give your Letters to the woman to collect the Power To Tame.

Use the Power To Tame on the Dog. Visit the hidden object area. Search and find all of the listed items.

Earn a Puppet’s Head and move on to the Fountain. Use your Power To Tame on the Lizard.

Find a Feather in the Fountain and then travel to the Foyer. Select the Puppet’s Head to repair the Puppet.

Travel upstairs and to the right. Put your Feathers in the Dreamcatcher.

Move on to the Dormitory. Use the Pover of Revelation to uncover the Curtain.

Select the hidden object area. Click all of the items on the list to earn a Puppet Arm.

Select the Curtain to look at the Mirror.

View the Bed to earn a Puppet Key to take to the Foyer. Select the Puppet Arm to repair the Puppet and view the Lock.

Take the Puppet Upstairs. Put the Puppet in the Vines.

Witch Hunters - Stolen beauty - Puppet Vines

Witch Hunters – Stolen beauty – Puppet Vines

Enter into the Master Suite and then to the Bridge. Visit the hidden object area. Locate all things on the list.

Earn a Hacksaw and take it to the Shack. Take the Hacksaw to the Ladder and use it on the French Horn.

Earn a Newly Crafted Trumpet and travel to the Salon. Visit the Piano and place the Piano Key, Piano Handle, and the Trumpet on top.

Witch Hunters - Stolen beauty - Piano

Witch Hunters – Stolen beauty – Piano

Click the handle for a Mini-game of matching the lit Piano Keys to gain access to the Art Room.
Visit the Woman and then the Curtain. Use your Taming Power on the Cat.
Look at the Art Supplies and use your Knife to crack the Paint.

Pick up the Pearl and move on to the Dormitory. Investigate the Bed. Use your Pearl on the Case Top.

Gain the Eraser and visit the hidden object game. Find all of the items listed.

Earn a Clip and return to the Art Room.

Chapter Six: School Spirit

View the Art Supplies and use your Clip to attain a Broken Pencil.

Travel to the Study. Investigate the Desk and use your Broken Pencil in the Sharpener. This will earn a Pencil.

Return to the Art Room. Select the Pencil and Eraser to erase all mistakes on the Easel. Make corrections with the Pencil.

Witch Hunters - Stolen beauty - Corrections

Witch Hunters – Stolen beauty – Corrections

Receive the Turn Good Powe from the Woman. Move on to the Dormitory. Use the Door Handle to open the Door.

Go out to the Balcony. Use your Taming Power on the Bird and collect a Snake Key, Music Room Key, and a Recipe Part.

Witch Hunters - Stolen beauty - Bird

Witch Hunters – Stolen beauty – Bird

Go back to the Hallway. Select the Music Key to unlock the Door.

Enter the Music Room. Collect the Snake Key from the Light and the Scissors from the Piano.

Enter the Dormitory. Look at the Bed and use your Scissors to take the Peg.

Travel to the Balcony. Use your Scissors on the Chair to remove the Thread.

Witch Hunters - Stolen beauty - Remove The Thread

Witch Hunters – Stolen beauty – Remove The Thread

Cut each section of Thread to collect the Treble Clef and move on to the Music Room. Use your Power of Revelation on the Shelf.

Use the Treble Clef in the Lock to trigger a Mini-puzzle. Arrange the instruments in the indicated specific pattern to earn Sheet Music. Investigate the Harp to collect the Sheet Music and the Peg for the Harp.

Witch Hunters - Stolen beauty - Instruments

Witch Hunters – Stolen beauty – Instruments

Re-visit the inside of the Shack. Select your Scissors to cut away the Scorched Plants.

Exit the Shack. Utilize your Turn Good Power to turn the Bush into a Flower.

Earn the Flower and travel to the Library. Use the Turn Good Power on the Spider on the Desk.

Take the Ornament Piece and return to the Balcony. Select the Ornament Piece and use it on the Gate.

Use your Matches on the Banister to light the Vines.

Attain a Flask and go to the Study. Use your Taming Power on the Snake.

Collect the Corkscrew from the Chest and then move on to the Attic. Use the Corkscrew by the Window and collect a Caterpillar.

Go to the hidden object game. Find all of the listed items.

Earn the Nail Puller and go to the Balcony. Remove Old Boards with your Nail Puller.

Witch Hunters - Stolen beauty - Old Boards

Witch Hunters – Stolen beauty – Old Boards

Journey to the Master Bedroom. Visit the hidden object area.
Search the room for all of the listed items.

Earn a Pedal.

Chapter Seven: Animation Academy

Travel to the Music Room and investigate the Harp.

Use the Pedal on the Harp to collect Animation Power and go to the Balcony. Use your Animation Power on the Lizard on the Banister to earn a Tail.

Witch Hunters - Stolen beauty - Lizard

Witch Hunters – Stolen beauty – Lizard

Return to the Master Bedroom. Use your Animation Power on the Statue. Look at the Table.

Pick up the Bottle Of Fuel. Investigate the Chemist Set in the back.

Use your Recipe Part, Flask, and Bottle Of Fuel on the Science Kit.

Witch Hunters - Stolen beauty - Potion

Witch Hunters – Stolen beauty – Potion

To solve this puzzle, use the correct ingredients. Use your Matches to light the Burner and collect the Potion. Investigate the hidden object area.

Find all of the items on the list to collect the Gryphon.

Travel to the Art Room. Use the Animation Power on the Statue.

Gain a Snake Key and enter into the Secret Passage. Use your Matches to light the Torch.

Travel to the Salon. Place the Statuette on the Table.

Earn a Gryphon and travel to the Front Gate. Visit the hidden object sparkles.

Locate and click all of the items on the list.

Attain a Crowbar. Take a closer look at the Plaque and use your Gryphons to add to the Plaque.

Gain a Cat and view the file before traveling to the Secret Passage. Use your Cat and your Animation Power on the Rodents.

Witch Hunters - Stolen beauty - Book Symbol

Witch Hunters – Stolen beauty – Book Symbol

Select the Crowbar to break the Wall and gain the Book Symbol.

Chapter Eight: Flunking Flemet

Use the Book in your inventory to add to the book on the Chair.

Use your Revelation Power on the page in the Book.

Gain a Snake Key. Check out the hidden object area.

Complete the puzzle. Locate all of the items on the list.

Attain Lightning and head to the School Grounds. Use your Lightning in the Statue’s Hand.

Choose your Animation Power and use it on the Statue. Look at the Tree to earn a Gear. Travel on to the Secret Passage. Use the Gear on the Door.

Use the Snake Keys to open the Floor Lock. View the Portal to transport to the Classroom.

Witch Hunters - Stolen beauty - Laser Eyes

Witch Hunters – Stolen beauty – Laser Eyes

Use the Power Of Revelation on the Picture Frames and line up the Laser Eyes. Take the first of the Portal Stone. Select the Portal Stone and fill the Empty Space to transport to the Pottery Room.

Witch Hunters - Stolen beauty - Pattern

Witch Hunters – Stolen beauty – Pattern

ders

Visit the hidden object area. Search all of the items on the list

Attain the Broom.Use the Broom to clear the Cobwebs.

Select the Chest to gain a Portal Stone. Use the Portal Stone in the Third Portal and view the Fourth Portal to transport to the Art Room.

Witch Hunters - Stolen beauty - Portal Stone Puzzle

Witch Hunters – Stolen beauty – Portal Stone Puzzle

Take the sheets off of the Paintings and use the Turn Good Power on the Canvases. There is a puzzle in the Floor that can be solved by matching items to earn a Portal Stone. Select the Portal Stone to place in the Portal. View the last Portal and be transported to the Music Room.
View the Painting to play a matching game.

Witch Hunters - Stolen beauty - Painting

Witch Hunters – Stolen beauty – Painting

Select the Animation Power for the Musicians and earn the last Portal Stone. Select the Portal Stone and place it in the last Portal.

Witch Hunters - Stolen beauty - Evil Witch

Witch Hunters – Stolen beauty – Evil Witch

Use the Taming Power on the Bird. Use your Turn Good Power and the Animation Power on the Statue. Choose your Freeze Motion Power and the Potion to use on Flemet. Victorious, you are free to exit through the open door as young and beautiful as ever.

It is not too often that you have to battle an evil witch to defend your youth, but when you do, this informational guide will help you to conquer the evil in Witch Hunters – Stolen Beauty. Enlist in this Witch Hunters – Stolen Beauty walkthrough to overcome the perplexing puzzles, mini-games, and other tricky mind testers of this entertaining game. For more great tips and tricks, visit our blog!

Delicious – Emily’s Hopes and Fears Walkthrough

Grim Facade – Sinister Obsession Walkthrough


The Witch Hunters – Stolen Beauty Walkthrough is meant as a guide and does not contain cheats, hacks or serials.

The post Witch Hunters – Stolen Beauty Walkthrough appeared first on GameHouse.

Mayan Prophecies – Ship of Spirits Walkthrough

$
0
0

Imagine yourself a protector of the wild who has apprehended a notorious poacher known as Fedrico Gomez, or “The Harpoon”. While bringing him to justice, your boat is overtaken by a thick fog and you crash into a mysterious ship, losing contact with both your partner and the poacher. Your craft is sinking and it is up to you to find them. Climb aboard this mysterious ship and work your way through ten levels of creative puzzles, mini-games, hidden object challenges, and other hair frazzling situations. Find your partner and finally bring Gomez to justice with the help of this Walkthrough for Mayan Prophecies-Ship of Spirits.

Contents

General Tips & Tricks

Game Overview
You are one of two authorities bringing a notorious poacher to the Coast Guard, when you your boat goes into a thick and mysterious fog where you smash into a ghostly ship. Your partner and the poacher are nowhere to be seen, and now it is up to you to get aboard the creepy ship and make your way through a series of puzzles and games on your way to find them and bring the poacher to justice.

Basic Gameplay
There are ten separate chapters of different puzzles and challenges for you to conquer in order to clear an area, unlock an area, or earn necessary inventory and game extras. Simply use your mouse to click on the desired area and follow the on-screen instruction or refer back to this informational walkthrough.

Achievements
As you progress through the game, you can earn 15 different achievements for such things as:

  • Completing the Ship of Spirits-Skilled Sailor
  • Finish all hidden object games without hints-Eagle Eye
  • Conquer all puzzles with no skips-Sharp Mind
  • Create peace with the Mayan idols-Peacemaker
  • Locate four objects in four seconds in a hidden object challenge-Quick Draw
  • Secure all Mayan artifact pieces-Archaeologist
  • Release the cabin boy-Life Preserver
  • Complete a HOA without mistake clicks-Magic Touch
  • Locate the submarine-Submarine
  • Force the poacher into a trap-Trapper
  • Locate and spot all hummingbirds in the HOA’s-Omithologist
  • Complete the bonus chapter-Land Ho!
  • Free your partner-I Got Your Back
  • Amass all of the Beyond Objects-Explorer
  • Complete and earn all achievements-Ace

General Tips

  • Choose casual, normal, hard, or custom playing level.
  • Use the hint button when stuck or lost; you can also refer to this walkthrough.
  • Sparkling areas indicate a Hidden Object Area (HOA).
  • Some items are hidden under other items and need to be uncovered.

Playing Tips and Tricks

  • The journal has valuable information.
  • The curser will change for different actions:
    • Hand-an item can be picked up.
    • Magnifying Glass-Allows a closer look at items.
    • Pointer-Normal playing conditions.
  • Map-Keep track of where you are, have been, and can go.
  • Inventory-The collected items are stored here.
  • Calendar-Tracks gained collectables and indicates he number of how many remain to be found.
  • Skip-Particularly hard puzzles can be skipped.

Mayan Prophecies – Ship of Spirits Walkthrough

Chapter One: Sink or Swim

Use the Life Ring for the Floating Box to find a Wanted Paper and a Grappling Hook.

Look close at the winch to pick up the Identification Badge, a Broken Flare Gun, and a Winch Handle. Use your Winch Handle on the winch to get to the ship.

Retrieve the Flag from the grate in the floor, read the Note, and look at the Fish.

Visit the Hidden Object area and choose either a HOA or Mahjong game. Find all of the items on the list or complete the game to earn a Golden Token

Catch the Hummingbird after clicking on the Statue. Use the Saw band on the Wood for a Chunk of Wood, join the Spear and Shaft to earn a Spear, use Door Handle on the piece of Wood to collect a Hammer and a Horn, place the Blue Bottle on the Yellow Bottle to create a Green Bottle. Earn a Golden Token.

Use your Golden Token on the door’s puzzle.

Mayan Prophecies - Ship of Spirits - Door Puzzle

Mayan Prophecies – Ship of Spirits – Door Puzzle

Follow the pattern to move on to the next room.

Visit the Knight.

Collect the Tokens and return to the Galley.

View the Ship Puzzle on the floor. Use your Tokens to complete this puzzle.

Mayan Prophecies - Ship of Spirits - Ship Puzzle

Mayan Prophecies – Ship of Spirits – Ship Puzzle

Travel to the Storage Room through the trapdoor.

Check out the Idol to earn a Metal Frog Tongue and Jaguar Totem Key. Pick up the Ancient Map of the ShipCrossbar, and the Fire Symbol.

Return to the Galley.

Use your Crossbar to open the Hatch.

Once open, go up the Stairs.

Pick up the Artifact and the Fire Symbol.

Mayan Prophecies - Ship of Spirits - Actifact and Fire Symbol

Mayan Prophecies – Ship of Spirits – Actifact and Fire Symbol

Go back down the Stairs.

Use the Fire Symbol and collect a Spear and a Note.

Use the Jaguar Totem Key to enact the HOA game.

Find all of the items that are surrounded in red.

The items that are encircled in yellow require more than one action. Items to be gained include: Small UmbrellaRuby Ring, and a Blue Gem. Complete the puzzle for a Cutters. Travel back to the Hold area.

Pick up the Board and use the Cutters on the Gauntlet. Collect the Note and activate the Lantern. Clear away vines in background with the Gauntlet. Find the Mayan Calendar behind the beam of the door.

Enter the Bow section of the ship.

Collect a ScrollWood BeamChisel, and a piece of the Mayan Calendar from the Idol.

Use the Spear on the figurehead, the Chisel on the Coral (four times) to clear the way to the Foredeck.

Retrieve the Ribbon and Funnel from the Skeleton.

Mayan Prophecies - Ship of Spirits - Skeleton

Mayan Prophecies – Ship of Spirits – Skeleton

Remove the cover to the right to reveal a HOA.

Collect all of the items on the list to progress.

Completing this puzzle will earn you the Shackles Key to take back to the Hold.

Choose your Shackles Key to open the Shackles.

Travel back down the Stairs to where the Cobra is guarding the entrance.

Attach the Shackles to the Broken Chain.

Mayan Prophecies - Ship of Spirits - Shackles

Mayan Prophecies – Ship of Spirits – Shackles

Pull the Lever to get rid of the Snake and travel up the Stairs.

Chapter Two: Releasing the Demon

In this area collect the Mayan Calendar piece, the Note, and the Artifact section. Use your Flag to open the Cabinet.

Take notice of the Note and Plate and earn a Wolf Totem Key. Return to the Mayan slab.

Use your Wolf Totem Key on the Slab.

Mayan Prophecies - Ship of Spirits - Wolf Totem Key

Mayan Prophecies – Ship of Spirits – Wolf Totem Key

Collect the Weaving Tools from the Drawer and travel back to the Hold area.

Use your Weaving Tools to fix the Net to earn a Fishing Net.

Exit through the doorway to the Prow.

Catch the Flying Fish with your curser, then place your Fishing Net in the holder.

Collect your bounty and travel up the Ladder.

Use the Wood Beam to hold up the Wooden Trough. Place the Fish on one end and tie the Ribbon to the other.

Capture the Gull and earn Jaguar Teeth. Visit the Hidden Object Area (HOA).

Collect the items listed as well as those that are hidden or have multiple moves.

Finishing this puzzle earns an Earring to take to the Bow by going down the Ladder.

Place the Earring on the Idol to earn a Sword Hilt.

Use the Jaguar Teeth on the Jaguar to collect the Statue. Return to the Armory.

Mayan Prophecies - Ship of Spirits - Jaguar

Mayan Prophecies – Ship of Spirits – Jaguar

Visit the Desk area. Add the Sword Hilt to the Blade to create a Sword.

Journey to the Galley.

Follow the Shooter and take notice of the opening Grate. Use the Statue on the Desk to open it.

Collect the Captain’s Medal and Shield. Attempt the opening and then make a hasty retreat to the Lower Deck.

Look at the Knight and use your Sword and Shield to earn a Calendar piece and the Hawk Totem Key.

Mayan Prophecies - Ship of Spirits - Knight

Mayan Prophecies – Ship of Spirits – Knight

Re-visit the Mayan slab.

Set the Hawk Totem Key in the puzzle to engage play. Move the Chains so that they do not overlap.

Mayan Prophecies - Ship of Spirits - Chains Puzzle

Mayan Prophecies – Ship of Spirits – Chains Puzzle

Pieces will change color when in the correct position, however, there are multiple variations of solutions. Travel to the Sarcophagus at the base of the Stairs.

You have freed the boy, but he has turned into a demon.

Mayan Prophecies - Ship of Spirits - Disc Seal

Mayan Prophecies – Ship of Spirits – Disc Seal

Grab the Disc Seal and head off to the Mayan slab again.

Place the  Disk Seal on the lock of the Totem. Notice the Note on the floor.

Travel through the Doorway to the Elevator.

Pick up the Torch, view the Angel to collect the Empty Bag, and pick up the Button on the left.

Mayan Prophecies - Ship of Spirits - Angel

Mayan Prophecies – Ship of Spirits – Angel

Return to the Hold area.

Light the Torch with the Lantern.

Travel to the Storage room.

Scare away the Octopus with the Lit Torch.

Mayan Prophecies - Ship of Spirits - Octopus

Mayan Prophecies – Ship of Spirits – Octopus

Close the gap with the Board to gain access to the Brig.

Use your Funnel on the Hanging Bottle. Receive a Red Handkerchief from the prisoner Gregory. Collect the Empty Bottle and avoid the Mean Plant.

Use the Metal Frog Tongue on the Mayan object in the back; click on it to drop the object from the ceiling to retrieve a Note. Placing the Seagull in the proper position will begin the next challenge.

Finish this puzzle in ten moves or less to earn the Sailor’s Skull.

Mayan Prophecies - Ship of Spirits - Maze

Mayan Prophecies – Ship of Spirits – Maze

Move on to the Foredeck.

Make a move to initiate the destruction of the Mast. View the Bell and collect the Mayan calendar from the Wood.

Travel to the Armory.

Visit the Wall of Water with the Empty Bottle to create a Bottle With Water.

Check out the Desk to view the Broken Flare Gun and then head to the Brig.

Open the door on the Brig by using the Bottle With Water on the counter-balance and enter the room.

Mayan Prophecies - Ship of Spirits - Bottle With Water

Mayan Prophecies – Ship of Spirits – Bottle With Water

Look at the Skeleton; use the Sailor’s Skull and Red Handkerchief here. Collect the Elevator Lever and move to the Galley.

Visit the HOA scene again. Find all of the listed items to earn Meat.

Travel to the Brig.

Feed your Meat to the hungry plant to earn the King’s Scepter.

Return to the Elevator Room.

Use your Elevator Lever on the Elevator.

Take the Elevator to the Captain’s quarters.

Collect the Firewood from the Fireplace.

Visit the HOA puzzle area.

Chase and catch the Hummingbird after clicking on the Plate. Uncover all of the listed items.

Earn the Captain’s Sword.

Use the Button on the Desk to begin another puzzle. Change the direction of the latches to complete this brain frazzler.

Mayan Prophecies - Ship of Spirits - Brain Frazzler

Mayan Prophecies – Ship of Spirits – Brain Frazzler

Collect the Hacksaw and Fire God Necklace to take with you back to the Armory.

Visit the Broken Flare Gun and use the Hacksaw. Pick up the Gunpowder with the Empty Bag.

Earn a Metal Pipe to take to the Lower Deck.

Use the Fire God Necklace on the Idol and collect the Fire God Statuette.

Mayan Prophecies - Ship of Spirits - Fire God Necklace

Mayan Prophecies – Ship of Spirits – Fire God Necklace

Add Gunpowder to the Bomb and then return to the Captain’s quarters.

Open the compartment on the Desk with the Metal Pipe to earn a Vase Fragment and Handle.

Travel back to the Mayan slab.

Open the Chest with the Handle.

Mayan Prophecies - Ship of Spirits - Handle

Mayan Prophecies – Ship of Spirits – Handle

Travel to the Captain’s bedroom.

Chapter Three: Treasures Galore

Return the Captain’s Sword and the Captain’s Medal to receive a Code.

Collect the Calendar piece from the Bedside Table then travel to the Armory.

Enter the code into the area on the right and earn an Instruction Sheet and a Fuse.

Mayan Prophecies - Ship of Spirits - Code

Mayan Prophecies – Ship of Spirits – Code

Return to the Lower Deck.

Look closer at the Knight and insert the Fuse. Use the Lit Torch to light it.

This will open a HOA challenge.

You will find the Hummingbird in the Statue as you hunt down the items on the list.
Collect the King’s Crest and travel to the Elevator.

Place the King’s Crest and King’s Scepter in the appropriate areas.

This will gain your entry into the Treasure room.

Collect the Scroll, Mold, and Mayan Calendar piece from the Shelf.

Position the Ladder to view the Grate and then travel to the Galley.

Use your Poker to clear the ashes from the Oven for a Mayan Calendar piece.

Mayan Prophecies - Ship of Spirits - Mayan Calendar Piece

Mayan Prophecies – Ship of Spirits – Mayan Calendar Piece

Insert the Mold piece and then move on to the Mayan slab.

Visit the HOA to earn a Shelf Key.

Go to the Treasure room.

Use the Shelf Key to find a Gold BarCrocodile Eye, and Glue.

Put the Crocodile Eye in the Statue to gain a Papyrus ScrollTrumpet, and Golden Cornto take to the Storage room.

Place the Golden Corn with the Idol and collect the Corn God Statuette.

Return to the Galley.

Put the Firewood in the Grate and use the Lit Torch here. Melt the Gold Bar using the Ladle.

Use the Mold to create Goldfish and travel to the Armory.

Put the Goldfish into the Wall of Water and gain a Rain God Statuette.

Return to the Lower Deck.

Visit the HOA and find the listed items.

The Hummingbird is inside of the Gold Box when you click the Statue there.

Earn a Bell Clapper and travel back to the Foredeck.

Use the Bell Clapper with the bell to complete a Bell.

Travel to the Mayan slab.

Use the Bell to open this puzzle to earn a Captain’s Dirk and a Calendar piece.
Follow the pattern: Left, Bottom, Left, Top, Right, Top, Left, Bottom, Left, Bottom, Left, Top, Right, Top, Left, Bottom. Move on to the Captain’s bedroom.

Mayan Prophecies - Ship of Spirits - Mouse

Mayan Prophecies – Ship of Spirits – Mouse

Place the Captain’s Dirk in the Cabinet to open it and earn the Aesculapius Sign and Picture Part.

Journey to the Treasure Room.

Look closely at the Crocodile and add the Picture Part.

Mayan Prophecies - Ship of Spirits - Picture Part

Mayan Prophecies – Ship of Spirits – Picture Part

Go to the Captain’s quarters.

Re-visit the HOA to earn an Iron. The Hummingbird can be found in the Statue behind the Blue Fabric.

Return to the Treasure room.

Flatten the Picture Parts with the Iron to begin the next puzzle. Put the Idols in place to earn a Wind Symbol.

Mayan Prophecies - Ship of Spirits - Idols

Mayan Prophecies – Ship of Spirits – Idols

Go to the Elevator.

Give the Trumpet to the Angel in order to gain the Snake Symbol.

Move on to the Captain’s bedroom.

Go to the Nightstand with the Wind SymbolPapyrus Scroll, and Snake Symbol and place them on the Marble Plate.

Earn a Scroll to take to the Sarcophagus.

Use the Scroll on the Demon.

Mayan Prophecies - Ship of Spirits - Sarcophagus

Mayan Prophecies – Ship of Spirits – Sarcophagus

Go to the HOA challenge next to the boy. Collect all listed items.

The Hummingbird is released by clicking the Plate. Earn a Scroll, a Segment, and a Glass Jar. Go to the Steps.

Chapter Four: Releasing Demons

Retrieve the Calendar Piece from the Door to the right.

Climb the Ladder to the Middle Deck.

Locate and solve the HOA.The Hummingbird is in the Statue. Earn an Aesculapius Sign and return down the Ladder.

Use the Aesculapius Sign on the Door.

Go through the Door.

View the Notes in the Book and the Chair.

Visit the HOA on the left. The Hummingbird is in the Statue. Collect the Stone Dial.

Go back to the Sarcophagus.

Complete the puzzle by turning the dials to match the examples on the door.

Mayan Prophecies - Ship of Spirits - Dials

Mayan Prophecies – Ship of Spirits – Dials

To solve this puzzle click three times on the purple and seven times on the pink. Go through the now open door.

Collect the Boat Hook and use your Statuettes on the Idol.

Mayan Prophecies - Ship of Spirits - Statuettes

Mayan Prophecies – Ship of Spirits – Statuettes

Pick up the Calendar Piece and Yellow Dust and go to the Infirmary.

Zoom in on the item in the back of the room for a puzzle. Start by inserting the Glass Jar and Yellow Dust and then mix the ingredients to create an Antidote.

Mayan Prophecies - Ship of Spirits - Potion Puzzle

Mayan Prophecies – Ship of Spirits – Potion Puzzle

Follow this mixing formula; blue + white, yellow + red, yellow + light blue, blue + orange, green + red, light blue + gray, pink + purple. Earn a Healing Potion and travel to the Sarcophagus.

Use your Healing Potion on the boy.

Mayan Prophecies - Ship of Spirits - Healing Potion

Mayan Prophecies – Ship of Spirits – Healing Potion

Earn the Wind God Amulet.

Travel to the Captain’s quarters and gain a Calendar Piece from the Fireplace with your Poker.

Go to the Middle Deck.

Collect the Calendar Piece and grab the Net with your Boat Hook.

Visit the HOA on the left. Find the listed items to earn Wind God Hand. The Hummingbird is in the Statue.

Travel to the Sentry Room.

Locate and solve the HOA to earn Staples.  The Hummingbird is in the Statue. Go to the Upper Deck when completed.

View the Mast and use your Staples here.

Climb up the Mast.
Look closer at the Idol and insert the Wind God Hand and the Wind God Amulet to start a mini-game.

Mayan Prophecies - Ship of Spirits - Pipes

Mayan Prophecies – Ship of Spirits – Pipes

Link the pipes by directing the Steam. This can be done by clicking the bottom left three times and then the top left twice; collect the Medallion.

After completing the puzzle, zoom back out.

Collect the Wind God Statuette and the Piece of Cloth, taking note of the missing item. Go back to the Portal.

Set the Wind God Statuette to the right of the Portal.

Go to the Sarcophagus.

Give the Medallion to the Boy and earn the Cabin Boy’s Room Key.

Travel back to the Sentry room.

Look close at the Trapdoor and use the Cabin Boy’s Key on the Lock.

Open the Trapdoor and enter the Cabin.

Mayan Prophecies - Ship of Spirits - Cabin

Mayan Prophecies – Ship of Spirits – Cabin

View the Desk to gain a Knife and a Calendar Piece.

Travel to the Upper Deck.

Locate and solve the HOA. Earn a Sewing Needle to take to the Infirmary.

Find another HOA game on the left. The Statue holds the Hummingbird. Collect the Scissors and use your Knife to gain a Calendar Piece. Return to the Upper Deck area.

Use your Knife on the Rope.

Collect a Seahorse Tail and Chalk from the Skeleton. Go back to the Cabin Boys Cabin.

Chapter 5: Elixir Fixer

Put the sewing needles on the Desk to gain Needle and Thread. Notice the Jacket.

Use your Piece of Cloth and Chalk, and Scissors to receive a Jacket to take to the Sarcophagus.

Give the boy his Jacket.

Earn an Artifact Piece and go to the Middle Deck.

Collect the Wrench from the Wheel.

Click on the HOA.  Collect all of the listed items. Earn the Jolly Roger when complete. Journey to the Crow’s Nest.

Use the Jolly Roger on the box to open it and earn a Ruby Cube.

Mayan Prophecies - Ship of Spirits - Jolly Roger

Mayan Prophecies – Ship of Spirits – Jolly Roger

Go back to the Storage Room.

Use the Wrench on the Drawer of the Desk (twice) to open it.

Mayan Prophecies - Ship of Spirits - Desk Drawer

Mayan Prophecies – Ship of Spirits – Desk Drawer

Use the found key to unlock the drawer on the left from the inside. Collect the Sapphire Cube and return to the Armory.

Check out the Metal Plate on the Cabinet. Use the Wrench on the screws.

Earn Part Of Skull to take to the Middle Deck.

Use the Part Of Skull with the Lever. Pull down on the Lever.

Watch him fall and collect the Key To The Brig. Visit the Brig.

Use the Key To The Brig on the Cell Door to release Gregory. Collect the Calendar Piece and Seahorse Upper Body.

Travel to the Sarcophagus.

Visit the HOA on the left. Locate all of the listed items to earn a Seahorse Head. Travel to the Purser’s quarters.

Look at the Cabinet and collect the Calendar piece and Leaf.

View the Window and the Personnel Drawers.

Play the HOA game. The Hummingbird is in the carving. Go to the Crow’s Nest after earning the Jade Snake.

View the Small Casket and add the Jade Snake.

Collect the Seahorse Lower Body take it down the Hall.

Pick up the Calendar Piece from the Shark.

Construct the Seahorse with your parts, starting with the Tail. Earn the Bar Key and head to the Officer’s Dining room.

View the Cabinet at the back of the room.

Use the Bar Key to open it.

Start the HOA game. Collect the 20 hidden Coins.

The Statue holds the Hummingbird. Earn Coins and venture to the Purser’s office.

Re-visit the puzzle in the Window. Use the Coins to activate it.

Mayan Prophecies - Ship of Spirits - Coins Puzzle

Mayan Prophecies – Ship of Spirits – Coins Puzzle

Insert two quarter Coins in the bottom left, ten cent and 2 cent Coins go in the center top, and a quarter and a one cent piece in the bottom right slot and pass through the open Door.

Look at the Idol’s Fan and then the Chest for a puzzle. Construct the combination from the numbers in the books and the portraits in the drawer.

Use the code 1364 to open the chest and earn a Calendar piece and the Emerald Cube before going to the Sentry room.

Place the three Cubes on the Statue to open the next puzzle. Using the Cubes, place the pieces on the Statue to earn the Sacrifice Goddess Statuette and a Calendar piece.

Mayan Prophecies - Ship of Spirits - Cubes

Mayan Prophecies – Ship of Spirits – Cubes

Continue with the HOA game. Look at the HOA area to activate it. Collect the items to earn a Brush.

Travel to the Balcony.

Look at the Plant and use the Scissors to cut away the plant from the Mayan Figure.

Head to the Purser’s office.

Look on the right for a HOA game. Find all of the hidden items, including the Humming bird, which is in the Globe. Earn a Sailor Figure and go to the Officer’s Dining Room.

Use the Mayan Figure and the Sailor Figure on the Game Board for a mini-game.

Click on the area to start the game.

Swap the Mayan figures with the Sailor figure positions.

Mayan Prophecies - Ship of Spirits - Mini Game

Mayan Prophecies – Ship of Spirits – Mini Game

Collect the Acid and the Calendar piece. There are multiple possible solutions to this puzzle.

Chapter 6: Demise of the Demon

Use Acid on the Door in the back to dissolve and collect the Chain.

Move to the next area.

Play the HOA puzzle on the left. Find all of the listed items to earn a Mace Handle.

The Hummingbird is in the Carving. Use the Knife on the Sofa. Collect a Calendar piece and return to the Deck.

Retrieve the Broom from the Roots.

Mayan Prophecies - Ship of Spirits - Roots

Mayan Prophecies – Ship of Spirits – Roots

Return to the Music room. Use the Broom to sweep the Spiked Balls. Head to the Navigation room.

Pick up the Calendar piece, the Note, the Axe and the Hemisphere.

Return to the Deck.

Look closer at the Roots and use the Axe to remove them. Add the Brush to the Palette to earn Paints.

Collect the Calendar piece and travel to the Balcony.

Use your Paints on the Fan in this color pattern:

Mayan Prophecies - Ship of Spirits - Paint The Fan

Mayan Prophecies – Ship of Spirits – Paint The Fan

Earn a Wheel Icon and a Rainbow God Statuette. Go to the Navigation Room.

Use the Wheel Icon on the Trap Door to start a new puzzle.

Re-assemble the Picture and proceed through the Opening.

Mayan Prophecies - Ship of Spirits - Wheel Icon

Mayan Prophecies – Ship of Spirits – Wheel Icon

Collect the Crowbar, a Mirror, and the Calendar piece.

Travel back to the Deck.

Use your Crowbar on the Spiked Ball.

Go to the Music Room.

There is a HOA on the left. Find all of the items. The Hummingbird is hidden inside of the Guitar Case. Collect the two Notes. Collect the Screwdriver and go to the Helm.

On the left, use the Screwdriver to open the hidden Plate.

Mayan Prophecies - Ship of Spirits - Hidden Plate

Mayan Prophecies – Ship of Spirits – Hidden Plate

Collect the Patterned Plate and head to the Upper Deck.

Add the Patterned Plate to the Post.

Collect the Calendar piece and travel to the Officer’s Dining room.

Play the HOA game. Collect all items listed, including the Hummingbird, which is in the Carving in the Drawer.

Earn a FeatherCup of WineDish of Peaches, and Compass Needle. Travel to the Helm.

Insert the Compass Needle in the Broken Compass.
Go to the Navigation room.

Look at the Idol and add the Mace HandleSpiked Ball, and the Chain to the Statue’s Right Hand.

Earn a War God Statuette and travel to the Portal.

Insert the Rainbow God StatuetteWar God StatuetteWind God Statuette, and the Sacrifice Goddess Statuette into their spots.
Collect the Hemisphere from the Jaws and go into the Hallway.

View the Red Doors to the right. Insert the Compass and the Hemispheres to open the Doors.

Go through the Doors.

Pick up the Calendar piece from the Idol, the missing Cog from the window, and use the Mirror in the Cover on the floor.

Mayan Prophecies - Ship of Spirits - Mirrors

Mayan Prophecies – Ship of Spirits – Mirrors

Using the Mirrors on the floor, window, and doorway; left click the floor area twice, the doorway three times, and the window one time. Collect the Death God Statuette and go forward into the room.

Collect the Gear from the right.

Look closer at the Telescope to start a mini-game.

Use the Telescope to find the matching constellation.

Mayan Prophecies - Ship of Spirits - Constellation

Mayan Prophecies – Ship of Spirits – Constellation

Collect the Calendar piece to create a Calendar. Travel to the Engineering room.

Visit the Door and insert two Gear pieces in the upper left. Use the controls on the right to maneuver the pieces and click on them to move them. Move all three pieces so that the Artifacts in the back are revealed.

Mayan Prophecies - Ship of Spirits - Gear Pieces

Mayan Prophecies – Ship of Spirits – Gear Pieces

Upon completing this puzzle, a Portal will open.

Place the Death God Statuette on the Portal, put the Calendar in place, and click on it once.

Mayan Prophecies - Ship of Spirits - Calendar

Mayan Prophecies – Ship of Spirits – Calendar

Select the glowing Artifact on the left for the final puzzle to appear.

Insert all missing pieces to form a complete picture.

Mayan Prophecies - Ship of Spirits - Puzzle Pieces

Mayan Prophecies – Ship of Spirits – Puzzle Pieces

Working from the center outward, the pieces will glow when placed properly.

When all pieces are fit into the puzzle correctly, you have completed your mission.

You have released all of the poor trapped souls, your partner, and the poacher from the ship!

Congratulations! You’ve completed our Mayan Prophecies – Ship of Spirits Walkthrough! For more great tips and tricks, visit our blog!

Witch Hunters – Stolen Beauty

Awakening – The Skyward Castle

The Mayan Prophecies – Ship of Spirits Walkthrough is meant as a guide and does not contain cheats, hacks, or serials.


The post Mayan Prophecies – Ship of Spirits Walkthrough appeared first on GameHouse.
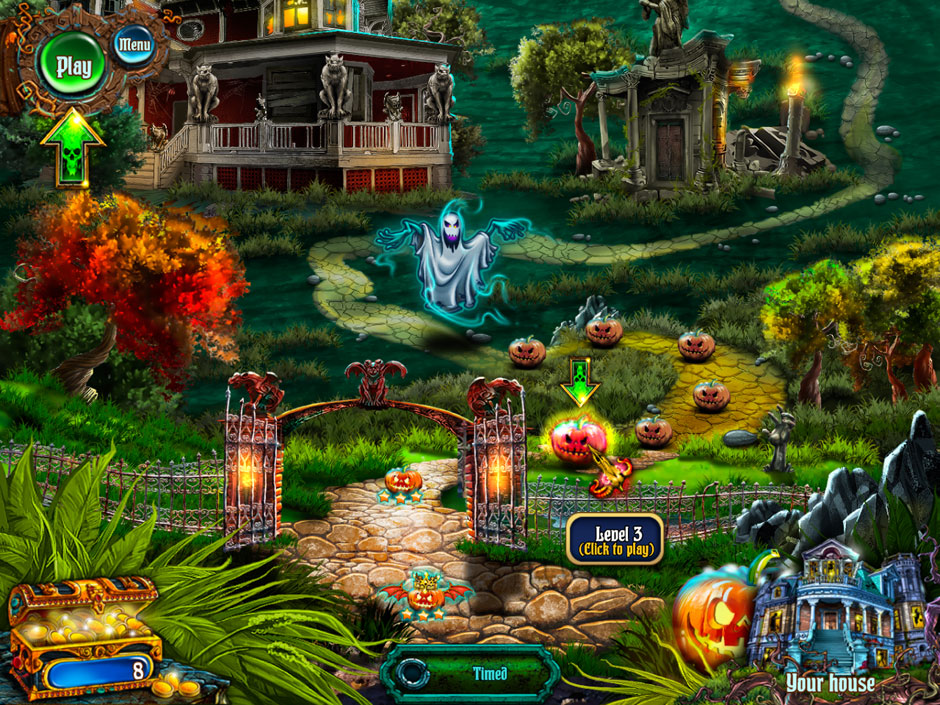
Grim Tales – The Stone Queen Walkthrough

$
0
0

Stoneville is in peril! The evil Stone Queen is terrorizing the town, turning all its residents to stone and ruining what was once a prosperous mining community. Search the city for clues, travel to the underground Stone Castle, encounter ice wolves in an enchanted forest, and save the day!

Grim Tales – The Stone Queen is a hidden-item adventure game. Use your mouse to move from place to place and search the area for helpful items. Complete hidden-object scenes to get important items, and complete challenging puzzles to move forward through the story.

This walkthrough covers the game in its entirety, but is not a straightforward path to the end. There are many other ways to complete the game, and you can do it on your own if you follow the advice in the Tips and Tricks category.

Contents

General Tips & Tricks

Gameplay
The mouse is used for everything in this game. There are four types of cursors:

The Blue Arrow is the standard cursor. It doesn’t mean anything, and it can be changed in the Options menu. It may also show that you can walk in a certain direction.
The Hand with Gears implies that an action can be performed.
The Open Hand shows that an object can be picked up and put into the Inventory.
The Magnifying Glass implies that you can take a closer look at an item or area.

There are several tools available to help you on your quest.

Click the Compass on the bottom right to access the map. This can be used to fast-travel back to a location. However, it is recommended that you walk through each screen, in case you see something you’d missed before.
The Blue Crystals at the bottom left are the Hint button. Click this to show a hint, what to do next or where an item might be. The Hint button recharges slowly and disappears entirely in Hardcore mode.
Sparkling implies that an item or area on screen is important. It disappears entirely on the hardest difficulty.
Your Inventory is at the bottom of the screen. Items you collect throughout the adventure are stored here for later use.

Throughout the game, you will encounter Hidden-Object Scenes. In these scenes, search and collect every item in the list at the bottom. Some objects have multiple steps. For instance, you may need to assemble an item before it can be collected, or you may need to look inside a container.

You will also encounter many puzzles. On all but the hardest difficulty, puzzles can be skipped after a certain amount of time has passed.

Tips and Tricks
This is a hidden-object game. Remember to look absolutely everywhere and collect any item you can find. You will need every single item available to save Stoneville.
There is a great deal of backtracking needed to finish the game. Always remember to return to previous screens and keep and eye out for any subtle changes there. For this reason, it is recommended that you travel screen by screen, instead of using the fast-travel feature on the map.
There is no shame in using the Hint button. It can be a great help when you are stuck. Don’t forget about it.
Be patient and have fun! There is no time-limit and nothing bad will happen if it takes you fifteen or fifty tries to get past a certain puzzle.

Grim Tales – The Stone Queen Walkthrough

Chapter One

After the opening scene, in which you watch a helpless, living woman be turned to solid stone and learn the history of Stoneville and the Stone Queen, your quest begins with you near your unusable car.

At the Stoneville Gate, open the driver’s door and take the Screwdriver from the dashboard. Use it to remove and gather the Screws. You will also need the Coin. Then, check the paper on the ground near the gate and find the Bronze Button with a number 9 on it. Find the brochure and take the Mine Key out of it. Zoom in on the cabinet door and grab the Drill Bit. Now you can use the Mine Key to open the door for the first hidden object scene. Find all the items and claim the Pincers as your reward. You can now use the Pincers to break the chain on the gate and enter the town!

The Town Square is chaotic! That poor uniformed man is made of solid stone! The town is in disrepair. Such a sad scene. Grab the Statue Head Piece and the Battery out of the leather bag, then read the journal and take two Coins from its pages. Find the Oil Can behind the sign on the gas pump, and go back out to the Stoneville Gate.

The stone woman is holding a Flower in her hand, but you can’t get it out! Use the Oil Can to lubricate her stone fingers and take the Flower. Go back to the Square.

Time to save the stone guard. Place the Flower in his chest, and free him from his bonds. When he leaves, you will see a hatch under him. Open it up and take the Stone Lizard. Place the Lizard in his spot on the drilling machine and take the Coin. In the salesman’s stall there is a coin slot. Place all three Coins in the slot and then find all the pairs of items in the pile. There is no pair the to Coat of Arms, so let’s take it! Head back to the Stoneville Gate.

Place the Coat of Arms in its spot on the sign, and a Stone Frog will be revealed to you. Grab it and go back into the Town Square.

Place the Frog in the drilling machine to start a puzzle. The object of this puzzle is to place the four different-colored stars onto the grid so that no beams hit a star of a different color.

Grim Tales - The Stone Queen - Frog Puzzle

Grim Tales – The Stone Queen – Frog Puzzle

In the Town Square, walk forward.

Oh my gosh the path is blocked! You need to drill through that crystal to continue. Take the broken drill bit out of the rock drill and place the good Drill Bit in the machine. Use the rock drill the open a path through the crystal. Head forward to the Hospital Door.

Look at the paper in the window. Grab the Monocle and the Emerald. Have a look at the door. There are three monkey heads. Place the Monocle on the proper monkey head to reveal a Toy Monkey Head, which you should pick up. Go back to the Square.

Grim Tales - The Stone Queen - Monkey Head

Grim Tales – The Stone Queen – Monkey Head

In the vendor’s stall, there is a broken monkey toy. Repair it using the Toy Monkey Head, and take the Spider that appears. Put the Spider on the hatch to start another puzzle.

The object here is to move the spider so that he walks on all strands of the web without repeating any strand. Go to the top-left notch, then follow the edge two places counter-clockwise. Go back up to the top-left notch, then right one, then back to center. Travel left, then counter-clockwise one notch, then back to center. Go right, then to the top-right notch, and then clockwise three notches.

Grim Tales - The Stone Queen - Spider Puzzle

Grim Tales – The Stone Queen – Spider Puzzle

Complete the hidden-object scene under the hatch to receive the Earring. Head back to the Hospital Door.

Put the Earring on the proper monkey head and find a Bronze Button with a number 6 on it. Place the Bronze Buttons on the keypad in the drain to start another puzzle.

For this puzzle, the answer is carved in stone under the grate. Just dial the buttons in the order shown to open the grate and take the Fang.

Grim Tales - The Stone Queen - Keypad

Grim Tales – The Stone Queen – Keypad

Put the Fang on the final monkey head and enter the Hospital Hall.

Talk to the gentleman in the suit and hat, and he will give you a Card. Take the Blue Crystal and the Camera from the man in the crystal and then find the Cross-Shaped Key on the table. You may want to read Brandon’s note and have a look at the photo he is holding before you go back outside.

At the Hospital Door, use the Cross-Shaped Key to open the luggage compartment on the bus and take the Jack and the Gas Can. Back inside.

Use the Jack to raise the bars on the window so you can reach the Scalpel, which you can then use to cut the rope and grab the Oil Lamp. Exit the Hospital.

Use the Scalpel to remove a loose brick and find a Piece of Amulet. Cut open the luggage and take the Funnel. Head back to the Square.

Use the Card to fill up the Gas Can and go on back to your car.

Fill up with gas and place a Brick on the gas pedal. Boom! You smashed your way into the mine!

Place the Oil Lamp on the table, grab the Handsaw, and find all the objects on the trolley to receive the Coil with a Hook. Go to the Square.

Use the Coil to open the shop’s window and find a Piece of Amulet under the television. Go back into the Hospital Hall.

Saw open the medicine chest and take the Sal Ammoniac. Pour that into the bucket and take the Ammonia Rag. Place the two Pieces of Amulet in the card catalog for another puzzle.

This puzzle is randomized, but the main idea is to open continuous blocks of drawers in either rows or columns based on the number that are not crossed out. Take the Stone Flower. Head back to the Mine.

Grim Tales - The Stone Queen - Drawers

Grim Tales – The Stone Queen – Drawers

Free the miner the same way your freed the stone guard, and take his Pickax in thanks. Use it to open the cracked wall. A troll! Oh my! Use the Ammonia Rag to knock him out. Go on to the Castle Gate.

Find the Diamond and the Valve and go back to the Mine.

Use the Valve to open the compartment and take the Amulet. Go back to the Castle Gate.

Use the Amulet on the place where you found the Valve to open the door and take theHeart Key. Go all the way back to the Square.

Use the Heart Key to open the box in the vendor’s stall and take the Stone Queen Emblem and the Relief Jewel. Go back to the Castle Gate.

Install the Stone Queen Emblem and talk to the Goblin. Have him widen the crack to the left of the gate and find the 9 Button. Place the Jewels on the gate and take the 3 Button and the 4 Button, then go back to the Square.

Place the Buttons on the keypad by the television and then press the buttons in the order written above the keypad. Take the Net back to the Castle Gate.

Fish the Jewel out of the water and place it in its slot on the gate. In the puzzle, move the pearls across the board. Place a pearl on a gemstone to open a gate of the same color as the gemstone.

Go into the Castle.

Chapter Two

At the King’s Tomb, have the Goblin destroy the bear so you can get the Sword. Earn the Golden Orb, and then give both items to the king in the sarcophagus in exchange for the Coat of Arms and the Letter. Take the Handle from the painting and then take a picture of it. Use the Coat of Arms on the hidden door to start a puzzle.

In this puzzle, you move your pieces, the Warlock, the Archer, and the Warrior, to the end of the board. Destroy the creatures along the way and take the gold. At least the Warlock has to survive.

Grim Tales - The Stone Queen - Warlock

Grim Tales – The Stone Queen – Warlock

The ferryman will want a Potted Sprout. Get a flower from the flowerbed at the Hospital Door into the Pot and give it to the ferryman so he will take you to Stone City.

In Stone City, place the Three on the mailbox for another puzzle.

Grim Tales - The Stone Queen - Mailbox Puzzle Solution

Grim Tales – The Stone Queen – Mailbox Puzzle Solution

This is a long, hard, randomized puzzle, but it is a lot of fun if you have the endurance. Move the numbers until they are in order. Then, take the Bronze and the Statue Head Piece. Use the Statue Head Pieces to open the basement and complete the hidden-object scene to receive the Rubber Glove.

Once in the Water Tower, the Goblin can tear up the floor, revealing the Bronze and the Fire Cabinet Key. Get the Mallet from the cabinet.

The trader will give you the Chisel for Bronze, the Stem for Silver, and the Wrench for Gold.

Use the Mallet and Chisel to sculpt a Golem’s Hand from the crystal and attach it to his body. Continue forward.

The woman at Stoneville Gate can be saved using the Ruby Flower. She will give you the Ambulance Keys.

On the back of the ambulance is another puzzle. The signs between the numbers are ‘greater than/less than’ symbols. Select two numbers to trade their places, and place them so that every ‘greater than/less than’ is true. Use the Ambulance Keys to open the door. Find $10 in the robe and cut the Key Card out of the pocket. Also grab the Hammer and the Pills. Cut through the window to get the Silver. Open the medical kit with the Key Card and take the Tweezers and Oil.

Grim Tales - The Stone Queen - Ambulance Solution

Grim Tales – The Stone Queen – Ambulance Solution

The mayor can be saved with the Stone Flower, which is earned by returning the Hammer to the blacksmith and placing the Petals and Stem on the anvil.

To repair the king statue’s face, you need to get the Nose from the mole by trading him the Flashlight, the Ears from waking the bat, and the Eye, which is simply found. Place the Photo next to the king statue to start a puzzle. Adjust the statue’s face to match the photo, and it will open up. Take the Scepter and give it to the Golem on the castle door. Head into Stone Castle.

Grim Tales - The Stone Queen - King Statue's Face

Grim Tales – The Stone Queen – King Statue’s Face

Chapter Three

Finally you get to meet the Stone Queen! She stands before you, guarded by two huge stone men. Find the Topaz and the Molecule and then give the Queen the Letter. Take the Letter of Powers and go to the Waterfall.

Find the first Head by the Waterfall, and the second by winning the claw game in the Water Tower. Place the Heads on the Waterfall door to start a puzzle. Moving on head may also move another, and you need to get them all aligned in the center. Try this order: Goat, Cat, Rabbit. Go through the door into the Halfling’s House.

Grim Tales - The Stone Queen - Animal Heads

Grim Tales – The Stone Queen – Animal Heads

Deliver the Letter of Powers, then check in the stove. Read the directions.

Find the Coal in Stone City, and have the Welding Mask repaired by the blacksmith.

Find the Crescent Tile in the Halfling’s house, then use it on the calendar for another puzzle. Change the date to that which is carved on the calendar and then press the green button.

Grim Tales - The Stone Queen - Calender

Grim Tales – The Stone Queen – Calender

Free the stone man in the Carnival Room using the Servant’s Stone and he will give you the Hex Key. Use the new Key to get a Red Light Bulb from the ambulance, and use the Bulb to develop the Photo in the Carnival Room.

(picture of the photo development area would go well here)

The Photo shows the combination to the bus locks. In the Bus Laboratory, mix the Valerian with the Milk and the Pills in the blender.

Grim Tales - The Stone Queen - Locks

Grim Tales – The Stone Queen – Locks

When you have lighted the halfling’s stove and repaired the pump, take the Knowledge Amulet.

The solution to the rune puzzle by the Waterfall is: Tree, ax, man, logs, ship.

Grim Tales - The Stone Queen - Rune Puzzle Solution

Grim Tales – The Stone Queen – Rune Puzzle Solution

The Goblin can open the statue’s head in the Old City.

The bird in the Halfling’s House changes the Ruby Heart to a Crystal, which is put into the statue’s eye in the Old City after you’ve used the Slingshot to scare away the bat.

Take the Rifle Stock to the Carnival Room to start a rifle-building puzzle. Use the flashing hints as a guide for this puzzle. Insert the Ampule, the combined Sleeping Potion and Syringe, into the Rifle.

Shoot the monkey and free the goblin.

Grim Tales - The Stone Queen - Shoot The Monkey

Grim Tales – The Stone Queen – Shoot The Monkey

The Spider Amulet operates a puzzle in the Laboratory. In this puzzle: Look at the numbers on the left, and then press the triangle that lights those three numbers up. This puzzle is randomized, but give it your best.

Grim Tales - The Stone Queen - Laboratory

Grim Tales – The Stone Queen – Laboratory

The octopus puzzle in Old Town requires four Stars. One was found in the spider amulet puzzle, one was in the carousel, one was statue’s mouth, and one was in the halfling’s stove. This puzzle has a clue in the upper right corner. Put the tentacles in order according to the red tentacles in the clue.

Grim Tales - The Stone Queen - Octopus Puzzle

Grim Tales – The Stone Queen – Octopus Puzzle

Once you’ve collected the Pollen in the Test Tube, go back to the Laboratory to make the Healing Potion. The Videotape should help walk you through it. Put the tablet and leaf into the mortar and pestle, use the dropper on the flask, place the funnel in the flask, use the spoon on the mortar and pestle, then stir the flask, then use the pollen on the flask. Give the Healing Potion to Brandon, in the Hospital. Meet him where you got the pollen.

Chapter Four

Take the Fur Coat to the mole in the forest. Find the Bone under the Foliage and give it to the dogs in Stone City. Dig up the Whistle and use it to get rid of the wolf in the forest. The Goblin can get in the den.

Stack Lumber and Foliage under the scarecrow and light him on fire. Get the Palette Knife from the tent. The blacksmith will repair the Bent Saw Blade, which can then be used to repair the Chainsaw. Use the Chainsaw to clear the log from your path.

Use the Palette Knife to clear away the moss on the golem and insert the Queen Amulet. In this puzzle, connect all of the Molecules so that all the connections are used.

Grim Tales - The Stone Queen - Molecules

Grim Tales – The Stone Queen – Molecules

Get the Windup Key and the Gaff from the Square before going back to the Old City. Get the Glove out of the tree, then go to the Forest’s Edge and windup the doll to get the Biker Amulet. In the Forest, use the Palette Knife to pry the Sparkplug from the skull’s mouth. Wear the Glove and pick up the Petal.

Back in the Hospital, use the Biker Amulet to open the pocket and take the Jacket. Go to the Square and find the last Emerald. Use the Glove to get the Petal out of the broken glass, then cover the broken glass with the Jacket. Grab the Net Gun from the excavator.

In the Water Tower, shoot the blue monkey with the Net Gun, then find the last Topaz and the third Petal. The DiamondsTopaz, and Emeralds start a puzzle in the Stone Castle. This puzzle is essentially the same as Candy Crush, simply swap the gemstones to make chains of three or more until the meter fills up.

Grim Tales - The Stone Queen - Gems Puzzle

Grim Tales – The Stone Queen – Gems Puzzle

Equip the Goblin with the Pickax. The Titanium Goblin can break through the wall by the Water Tower.

Find the Plunger and the Nozzle before returning to the Water Tower. Use the plunger to empty the sink and get the Cabin Key. Attach the Nozzle on the Fire Hose and the pick up the Hose. Take the Mug, too.

Use the Palette Knife on the tree at the Forest’s Edge and collect Pitch in the Mug. Go back and attach the Fire Hose to the Firetruck, and plug the hole in the pipe with Pitch. Turn on the valve and open up the truck with the Cabin Key. Repair the wires with Insulating Tape. Look under the hood and place the Sparkplug in the engine. Start up the truck. Start the pipe puzzle on the side of the truck. Swap pipes until they are all connected. Use the Glove to pick up the fourth Petal.

Grim Tales - The Stone Queen - Pipe Puzzle

Grim Tales – The Stone Queen – Pipe Puzzle

Run back to Brandon! Place the four Petals on the stem and then use the Blue Crystal on the flower.

You’ve saved the day! Congratulations, you’ve completed our Grim Tales – The Stone Queen Walkthrough! What a hero!

For more great tips and tricks, visit our blog!

Delicious – Emily’s Hopes and Fears Walkthrough

Big City Adventure – Shanghai Walkthrough

Building the Great Wall of China 2 Walkthrough

This Grim Tales – The Stone Queen Walkthrough is meant as a guide and does not contain cheats, hacks or serials.


The post Grim Tales – The Stone Queen Walkthrough appeared first on GameHouse.
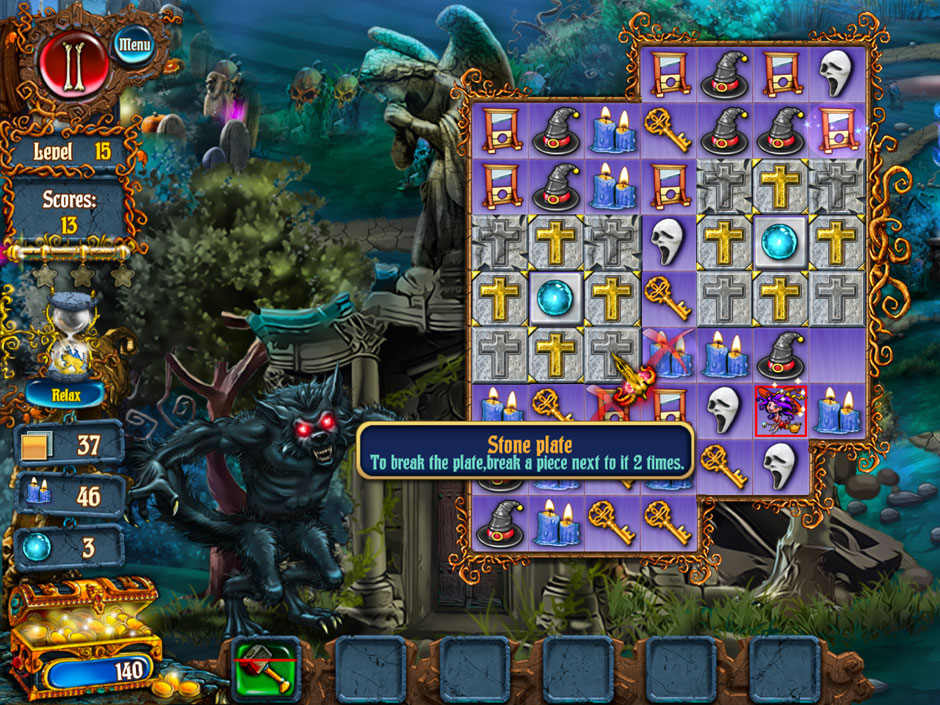
Viewing all 192 articles
Browse latest View live