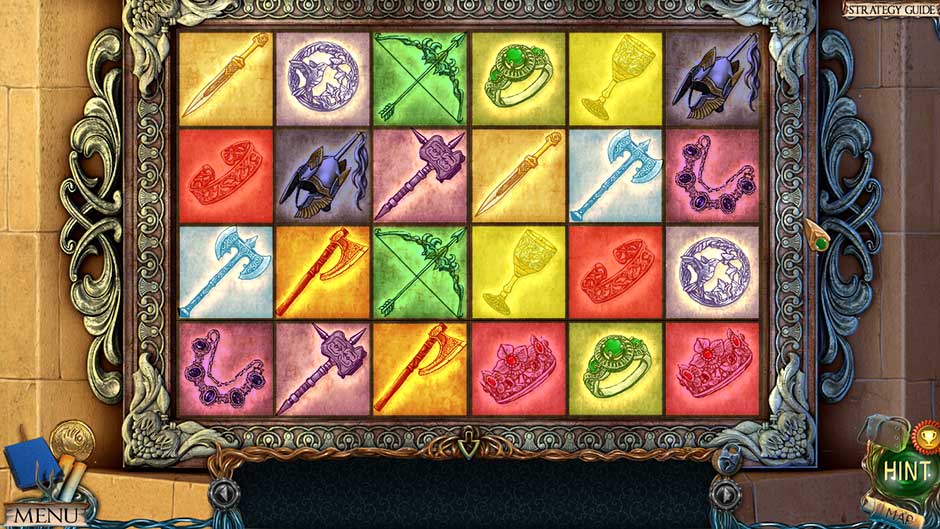
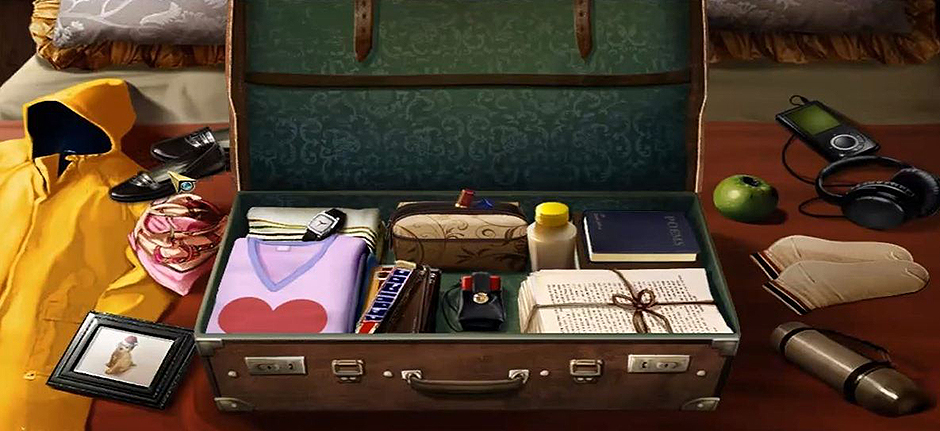
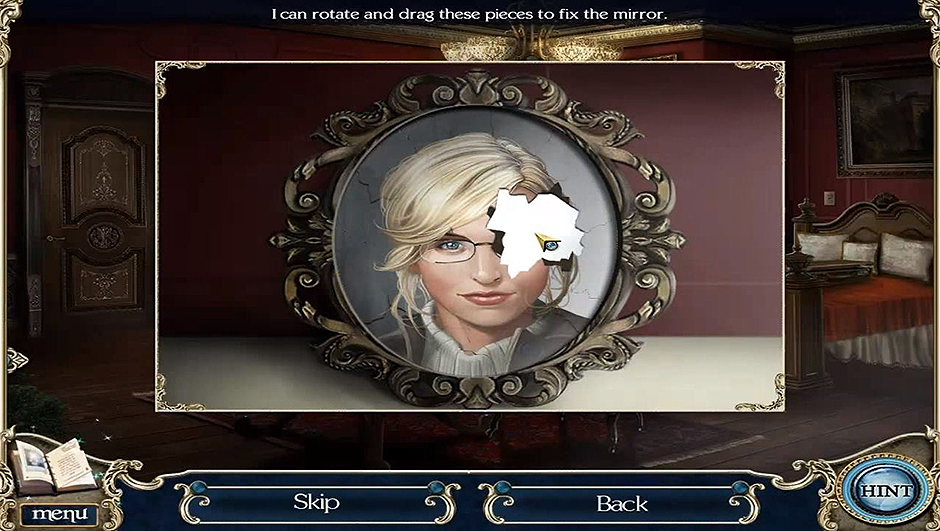
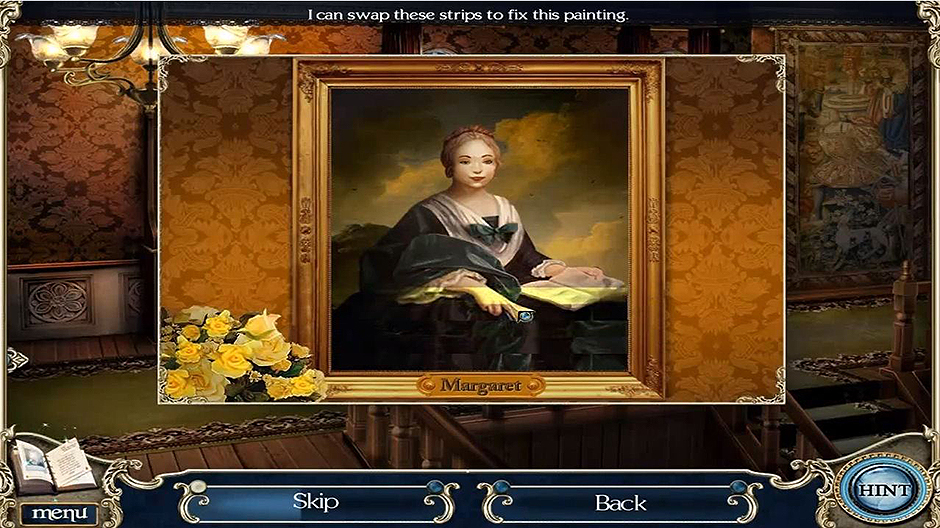
Quantcast
Channel: Guides – GameHouse
Viewing all 192 articles
Browse latest View live

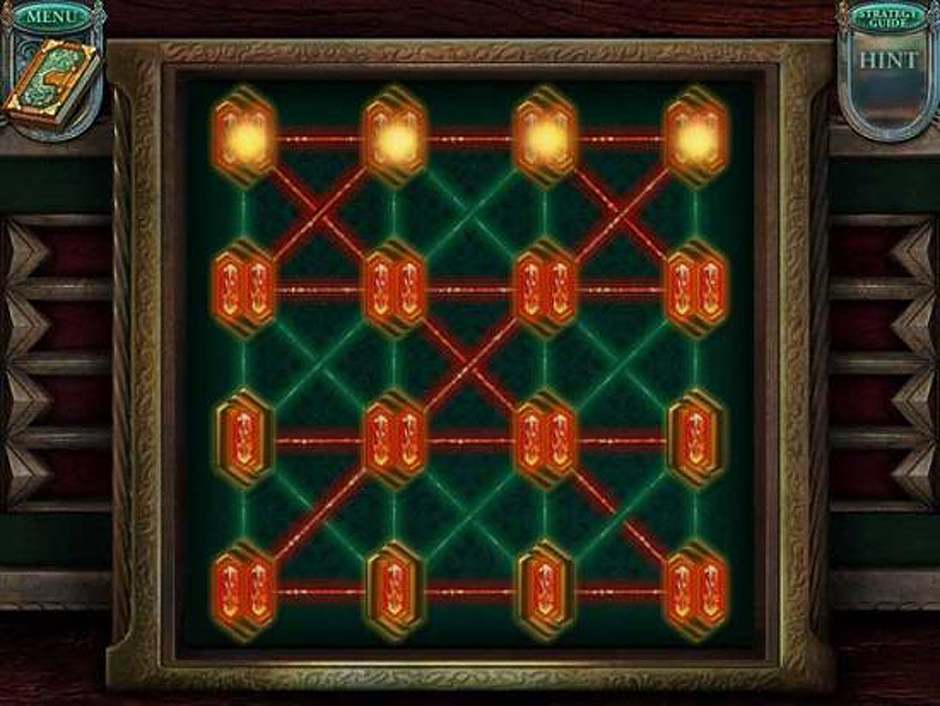
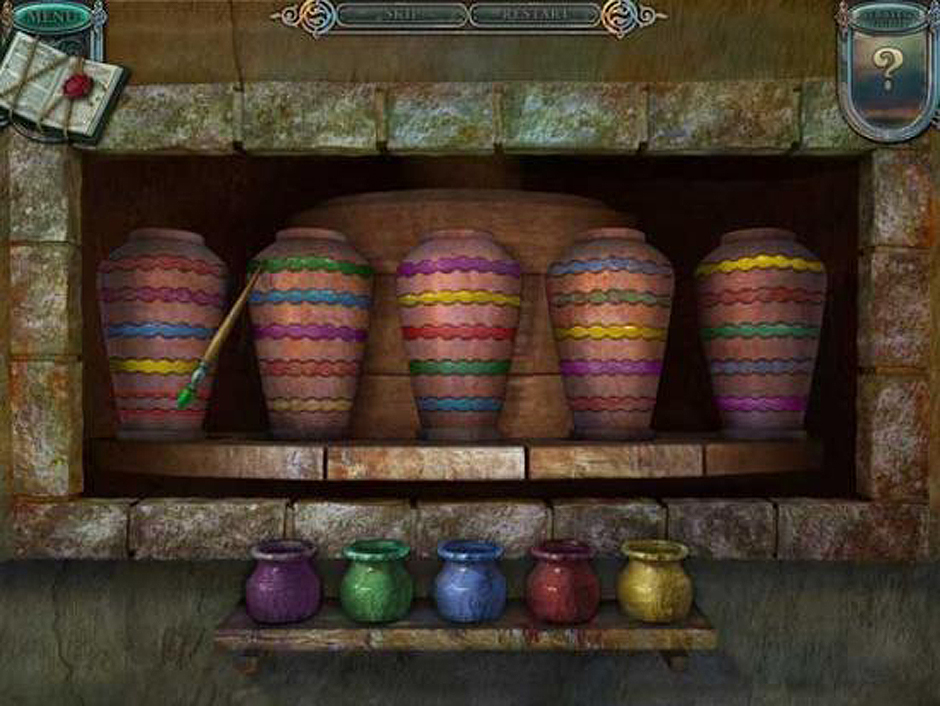
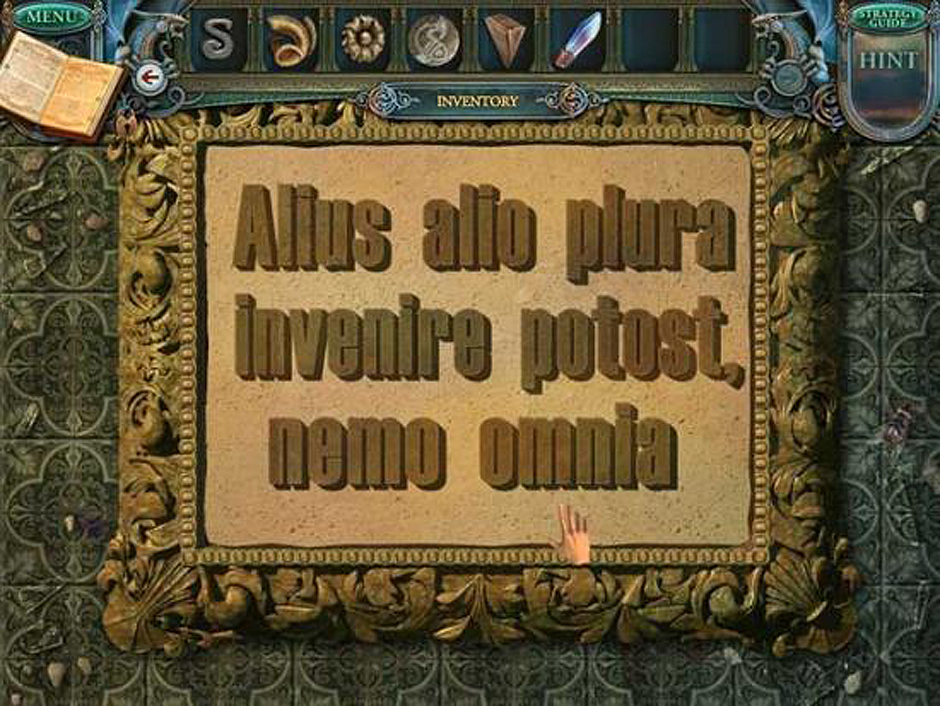
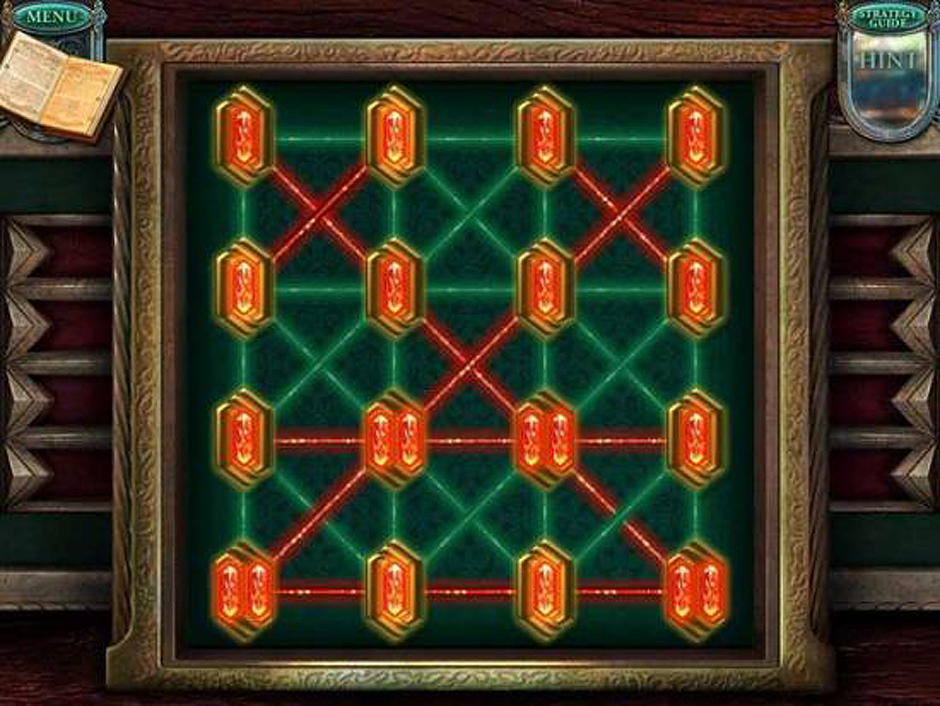
Awakening – The Skyward Castle Walkthrough

$
0
0

When playing Awakening – The Skyward Castle, it is certainly frustrating when you are stuck on a puzzle, perplexed by a mini-game, or if you have lost your way during your quest. This walkthrough of The Awakening – The Skyward Castle will help you uncover the hidden items, games, and winning strategies needed to conquer this highly addictive and fun online puzzle game. Travel through four levels of hidden object games and mini-puzzles, while collecting objects to defeat the magical and ancient evil of Dreadmyre that holds the kingdom hostage from Princess Sophia.

Contents

General Tips & Tricks

Basic Gameplay
The interaction with the game is relatively simple; click on necessary items or key elements in each area until you have reached the ultimate goal of saving Princess Sophia’s kingdom. This is done by solving a series of actions that follow the story line, such as hidden puzzles, multi-puzzles, and item collections. There is a hint icon (represented by the owl) on the screen that you can use throughout the game when you do not know where to go next or simply refer to this easy to follow walkthrough.

General Tips
The following inside list of information will help you to navigate your way through your quest:

  • Cursor Status-When the curser icon changes from an arrow to a hand, the object can be interacted with or picked up. When the magnifying glass appears it will aid you in getting a closer look at the area. This is helpful for retrieving items from hidden areas such as the inside of boxes, items in the distance, and items that are covered by other items.
  • Player Set-up-When beginning the game, select the appropriate level of experience that best fits your ability.
  • Inventory-When an item is collected it is immediately stored in your inventory until needed to clear an area or solve a puzzle.
  • Journal-It is wise to rely on the journal to go over the clues that you have collected to help navigate through some areas.
  • Hints-Use the hint button to point out which direction to go next or which action is necessary to unlock the area or item.
  • Collectables-It is often necessary to collect an item or items during the quest through the area to solve a puzzle or unlock a hidden area.

Playing Tips and Tricks

  • Use the map to find your way if you get lost. It is located on the bottom right, next to your inventory bar.
  • There are no limit to the number of hints that can be given during play, but you must wait for the hint meter to fill up before using again.
  • There is always a solution to every puzzle. Many of these puzzles and mini-games are randomized for optimum entertainment.

Awakening – The Skyward Castle Walkthrough

Part One: Landsong Village

This story begins with Princess Sophia and her unicorn getting caught in a storm and her unicorn has suffered an injured wing. On the opening screen you will need to heal the unicorn by clicking on the Splint. The area near the pile of wood on the right contains a Pocket Dragon for you to collect. It is automatically added to your inventory where you can select it and use it to start the pile of wood on fire.

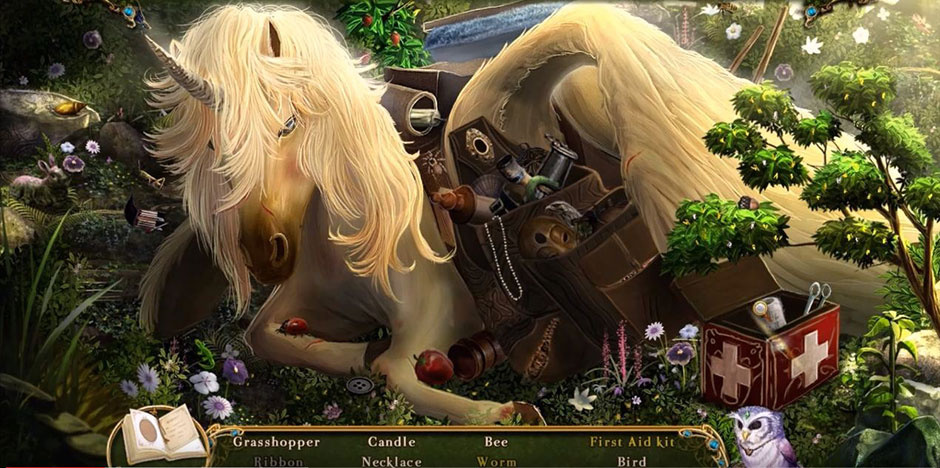
Next, explore the unicorn itself, to open up a hidden object game. You will finish the puzzle when you find the hidden items that are highlighted in yellow on the list. As you collect items, you will notice that some items will immediately be entered into your inventory and others require additional movements or actions. Add the medical items that you find to the first aid kit.

Awakening - The Skyward Castle - Unicorn

Awakening – The Skyward Castle – Unicorn

Select the splint from your inventory and mend the broken wing. Collect the Sunsky flower and bandages. Click on the pathway to start your journey.

As you enter the next area, you catch the villain in the act of turning a young girl to stone.

Click on her and hand her the flower to break the spell. Break off the Goldleaf Branch and use it to uncover a hidden game on the lower left of the screen. Collect the Jeweled Emblems buried here and uncover a hidden puzzle. Use the curser to select the area in the background where the path leads to the stone walkway to progress.

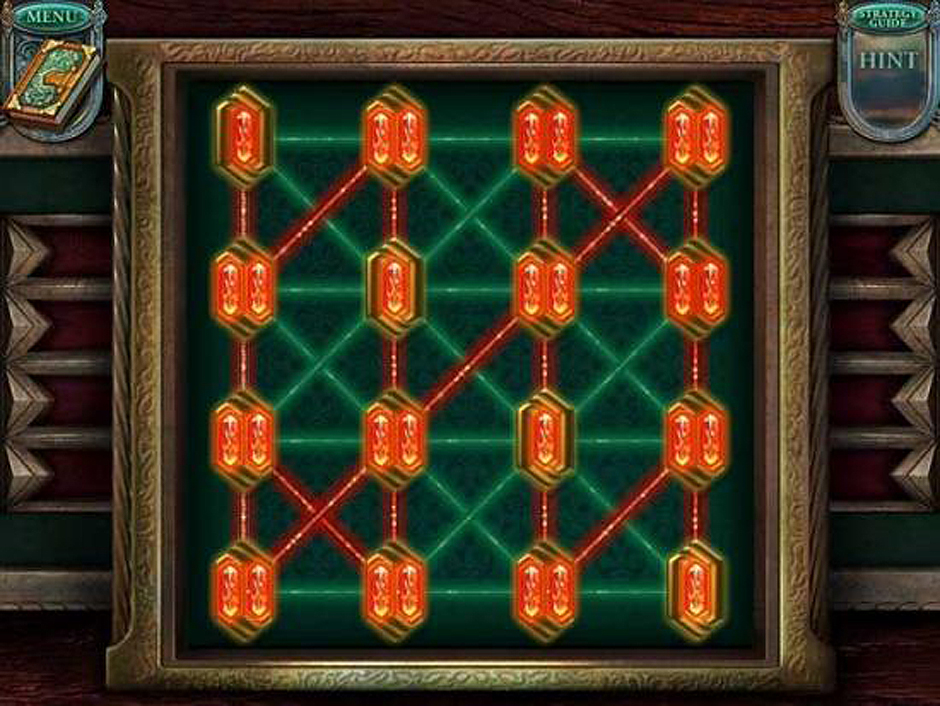
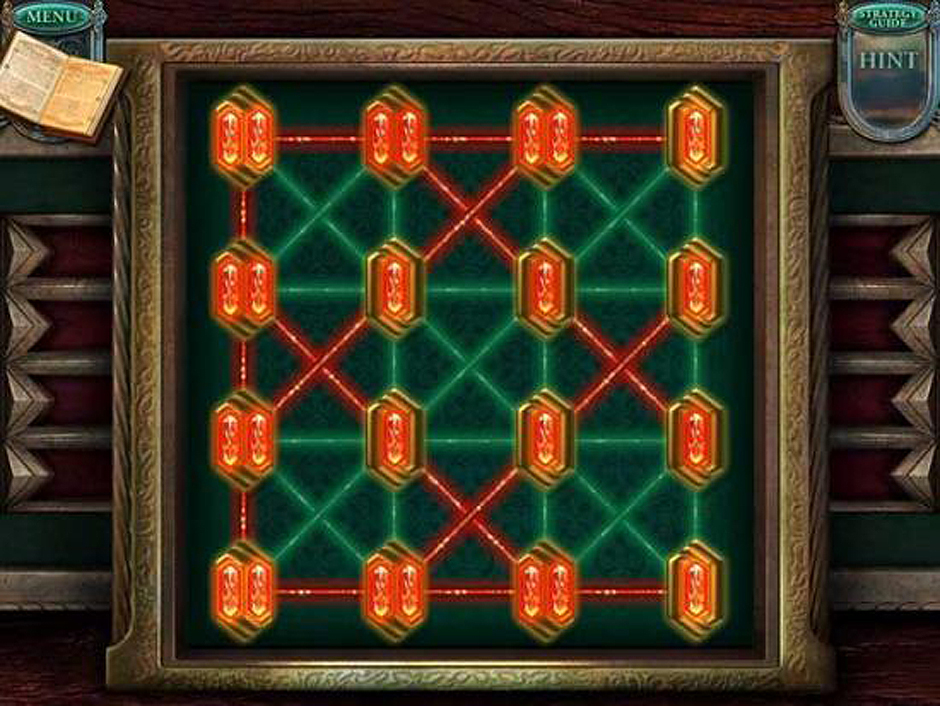
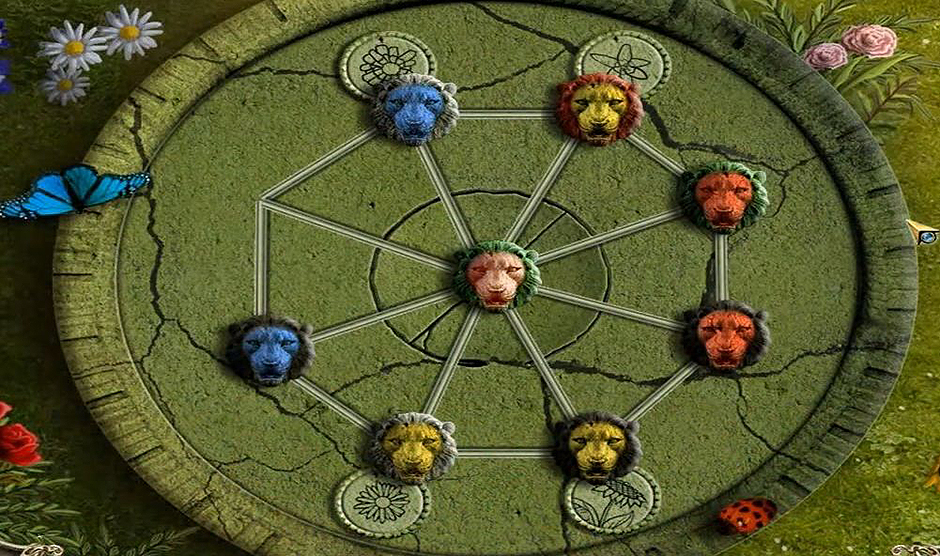
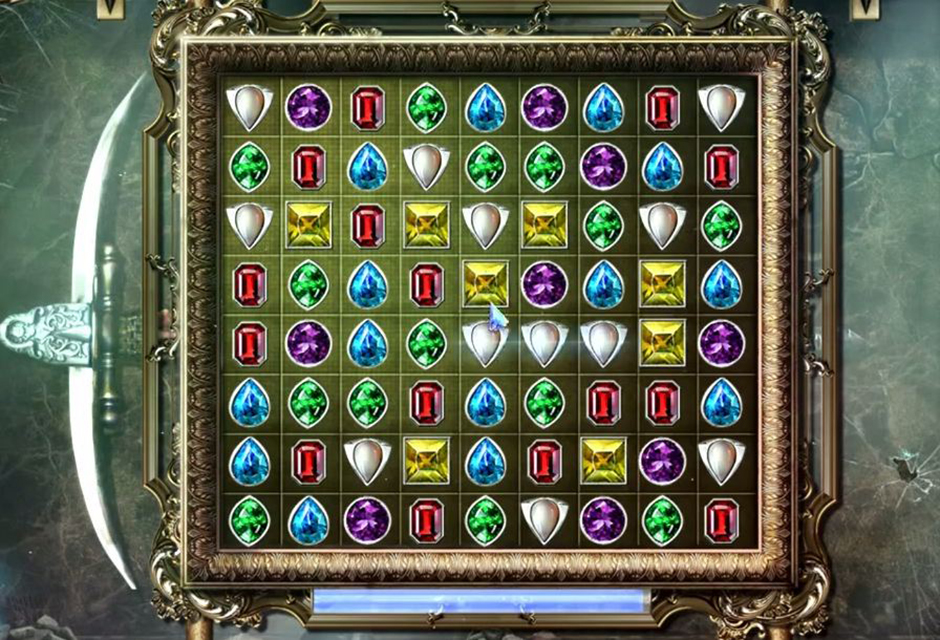
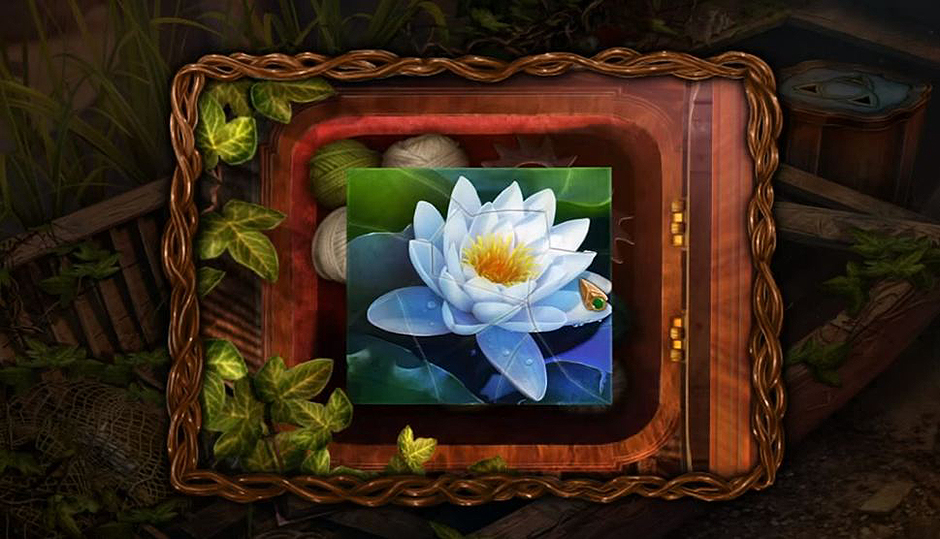
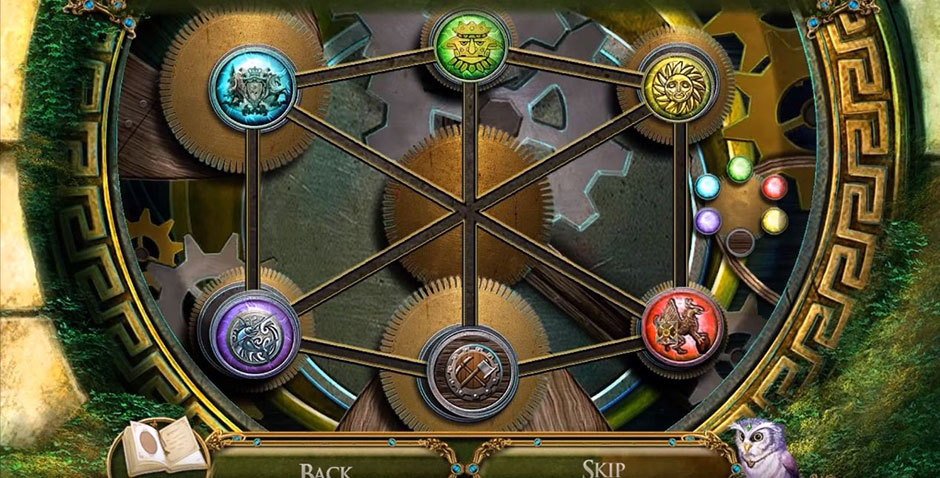
Find a Corkscrew behind the dead vines by utilizing the Pocket Dragon. Click on the right to reveal a jewel game. Match the jewels from your inventory to the small pattern on the right of the puzzle by moving the pieces around.

Awakening - The Skyward Castle - Jeweled Emblems Solution

Awakening – The Skyward Castle – Jeweled Emblems Solution

Solving this puzzle allows entry to two new areas.

In this area you will find a pair of gloves and a slimy pipe. The Goldleaf Branch will be useful in prying this open to reveal Keys. Collect Photos from the stone pillar.

Return to the Crystal Generator area.

Collect the Empty Oil Can and complete the puzzle within the door.

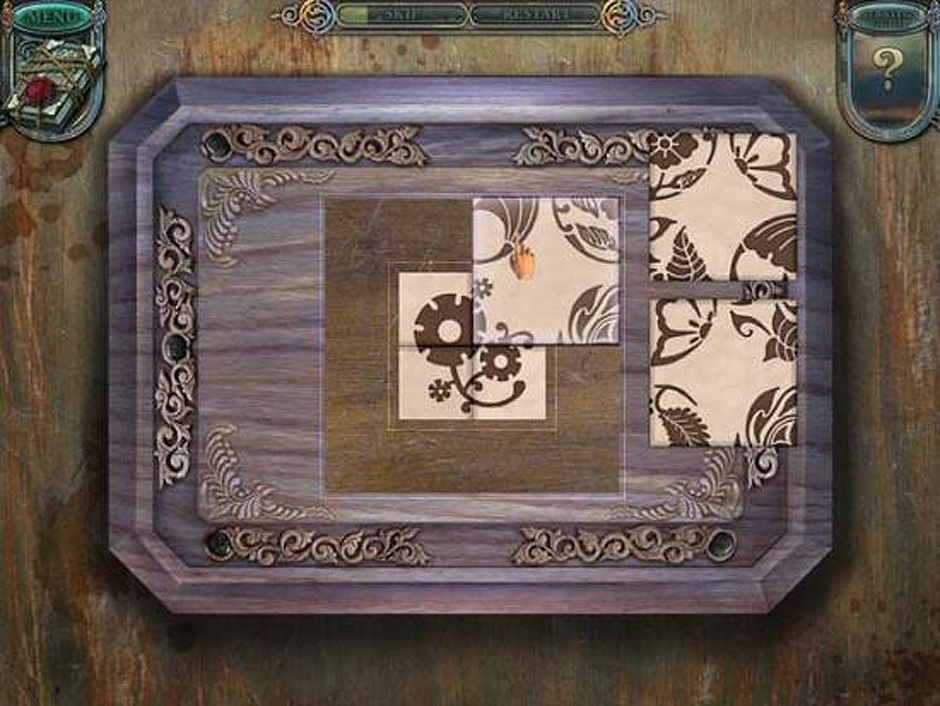
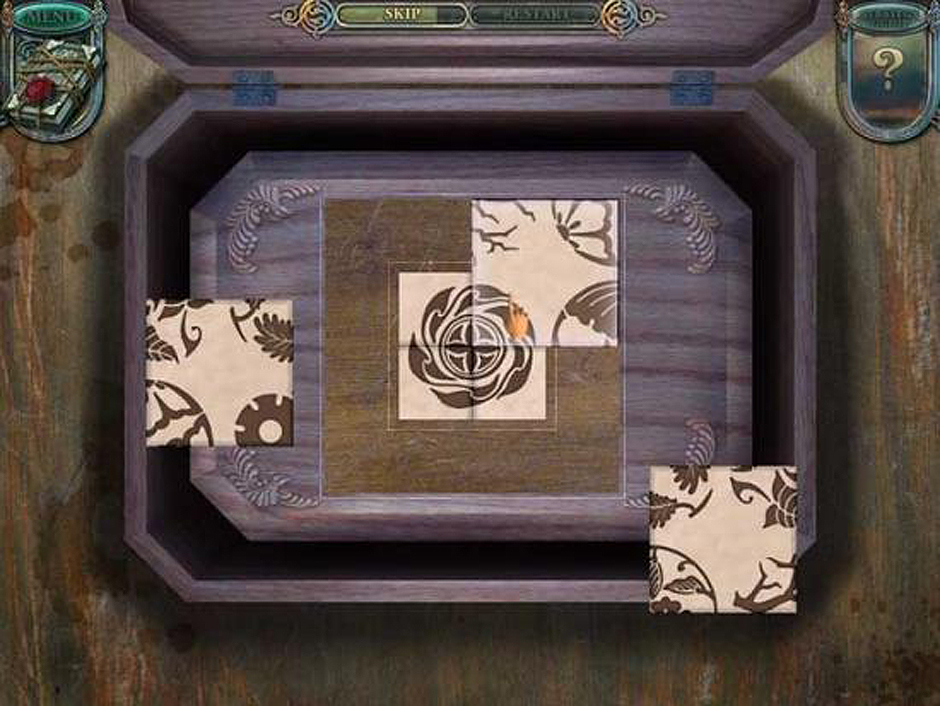
Awakening - The Skyward Castle - Portcullis Pieces Solution

Awakening – The Skyward Castle – Portcullis Pieces Solution

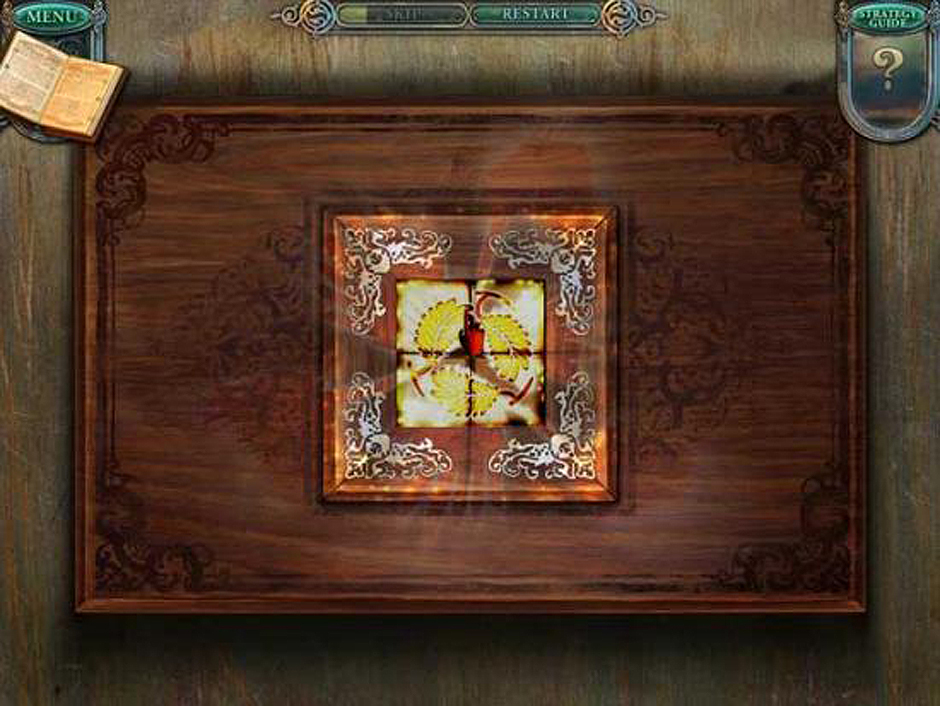
Solving this slider puzzle will open the gate and allow you to enter the next area to be conquered.

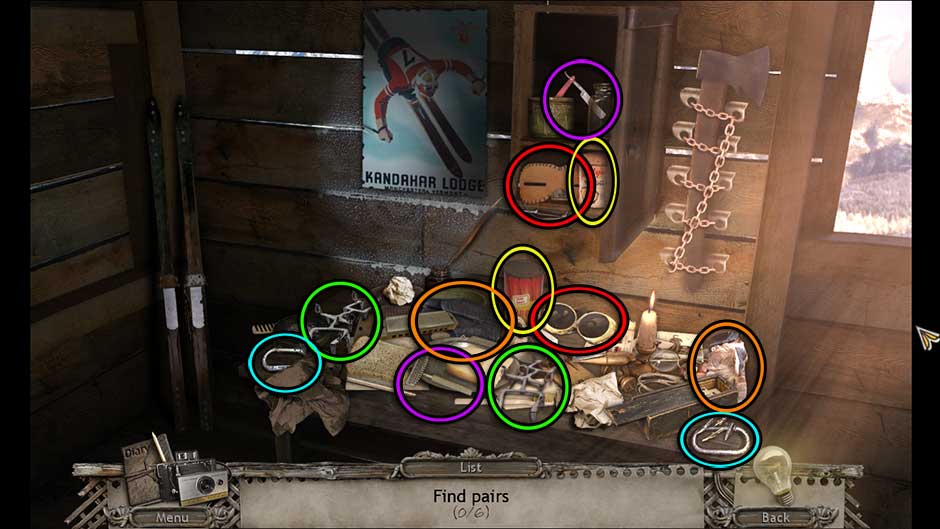
Collect a Quilt Patch and encounter a Rusty Chain. Enter the area of the Enginarium to find Switches and a Crowbar. Use the Key in the upper right to unlock the panel. Collect the Skirting and use the Crowbar on the lower portion of the doorway. Click on the Treasure Box to reveal a Hammer and Nails to repair the wobbly ladder and break the wall to reveal the final Switch for a Crowbar and access to the next area.

Collect the Shovel. Move the cursor to the Oil Drum and select your Corkscrew to take the cork out of the top of the barrel. Use the Oil Can on the pump to earn you a Filled Oil Can.

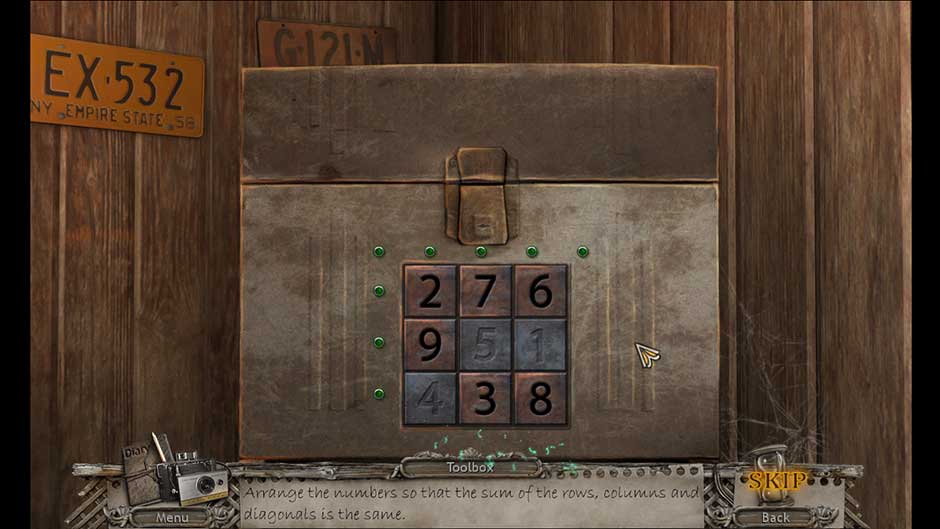
Move the loose panel on the box to reveal a key hole. Use your Keys in the keyhole to reveal a hidden puzzle game. Complete this matching hidden item game to earn yourself a Repair Manual.

Return to the courtyard and oil the Rusty Chain. Travel back to the Ancient Goldleaf area. Return to the area where the mini-puzzle is located; under the tree on the right.

Use the Shovel to uncover thorny brambles. Remove the brambles with the Gloves, open the grate using the Crowbar, use the pocket dragon to burn the dead branches. Collect the quilt patch, machine parts, torn up paper, and a mini jigsaw puzzle to earn a Schematics Page. Return to the Enginarium and place it in the Book.

Awakening - The Skyward Castle - Jigsaw Puzzle

Awakening – The Skyward Castle – Jigsaw Puzzle

Use the Manual to repair the broken control panel by following the instructions.

Click on the square fuse area to reveal another hidden puzzle.

Pull the Lever to pull the floating island to your island. Return to the Fairground Entrance area and remove the debris blocking the path.

You will collect Safety Locks and then take the Chain from your inventory and connect it to the Winch to open a slider puzzle.

Awakening - The Skyward Castle - Slider Puzzle Solution

Awakening – The Skyward Castle – Slider Puzzle Solution

Activate the Winch to raise the wood pile. This will uncover a Lever for your inventory.

Move on to the next area to be explored where you will collect such things as a Clippers and a Bamboo Pole.

In the next area you will find a hidden objects game in the scaffolding.

Completing this puzzle will award you the Clippers to take down the bamboo scaffolding to earn you a Bamboo Pole.

The next place that you will visit is the Weaver’s Hut where you will need to activate the Candle with the Pocket Dragon. Select the rattan basket to play the mini game.

Awakening - The Skyward Castle - Weave Puzzle Solution

Awakening – The Skyward Castle – Weave Puzzle Solution

This will award you Rattan SticksDustpan and Broom, and Rags. Exit to the large statue.

Collect the Quilt Patch, use Clippers to cut the rope and travel back to the Squabbit’s den. Clean up with the Dustpan and Broom to reveal a hidden object challenge.

This will award a Bunch of Carrots to give to the Squabbit; return to the stone boy and use the Squabbit to break the spell. Collect the Quilt Patch and proceed to the Weaver’s hut.

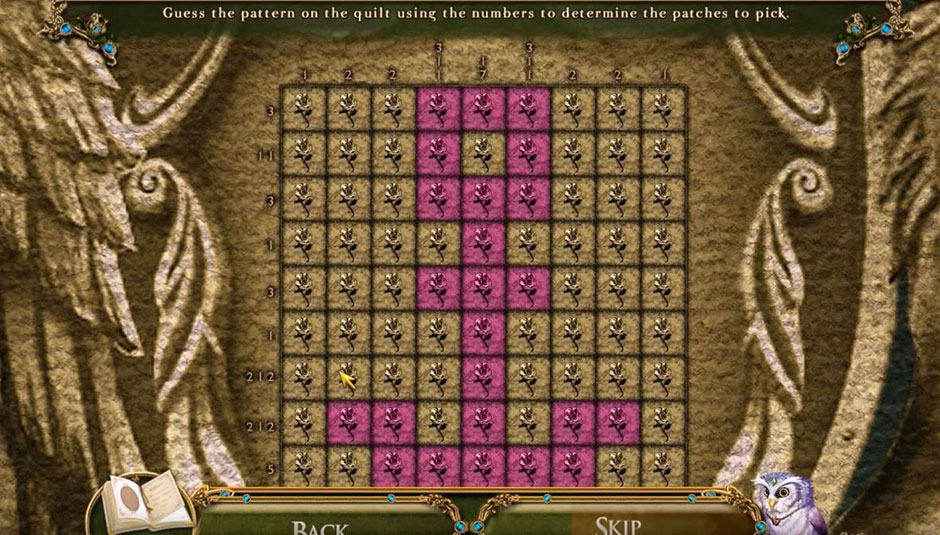
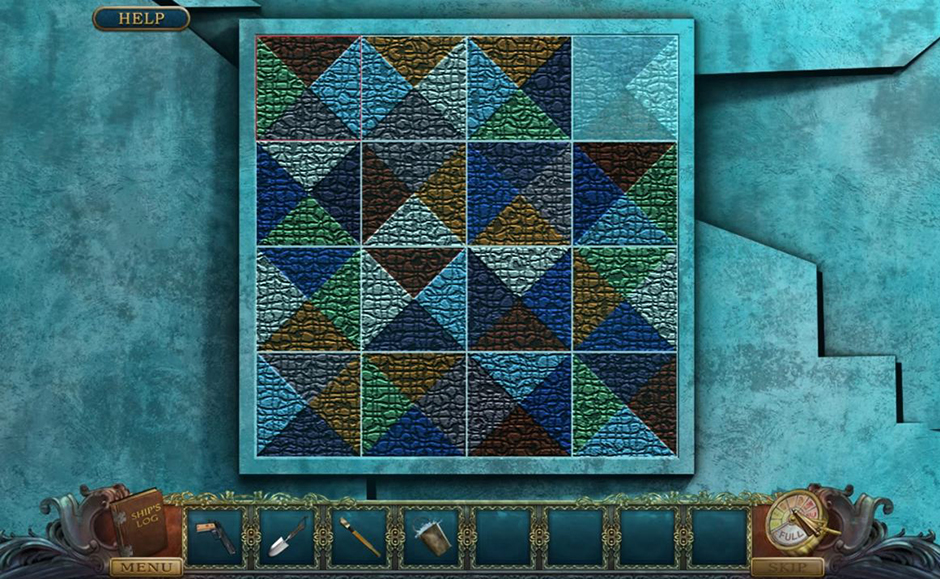
Use the Quilt Patches to complete the mini-game.

Awakening - The Skyward Castle - Magic Quilt Solution

Awakening – The Skyward Castle – Magic Quilt Solution

Collect the Pocket Watch and utilize the map to travel back to the Wingferry area. Use the Pocket Watch on grandpa to receive the Screwdriver. Use the map to travel quickly to the Faire of Stairs.

Use the Screwdriver to get the Lantern Diagram, use the Rags on the cobwebs to create Sticky Rags on a stick. Play the mini game on the statue mechanism.

Awakening - The Skyward Castle - Plug Puzzle Solution

Awakening – The Skyward Castle – Plug Puzzle Solution

Return to the window to collect the Craft Paper. Place the Lantern Diagram, the Craft Paper, and the Rattan Sticks on the worktable. Select one of these items to activate a mini-game.

Awakening - The Skyward Castle - Latern Puzzle Solution

Awakening – The Skyward Castle – Latern Puzzle Solution

Use the Candle to light the Lantern. Go back to the statue and place the Star Lantern in the forehead area and take the crystals back to the Crystal Generator by utilizing the map feature.

Actions in this area include: put Sky Crystal into holder, use Oil Can on three drums, useBamboo Stick on winch, use rope on left winch, collect the Pumice, place Sky Crystal in holder, use Pumice on reflector to reveal a hidden object game.

Select the Crystal for another mini-game.

Return to the Enginarium to complete the Wingferry.

Complete the Wingferry with the Lever and launch into the next area to be conquered.

Part 2: Cloud Court

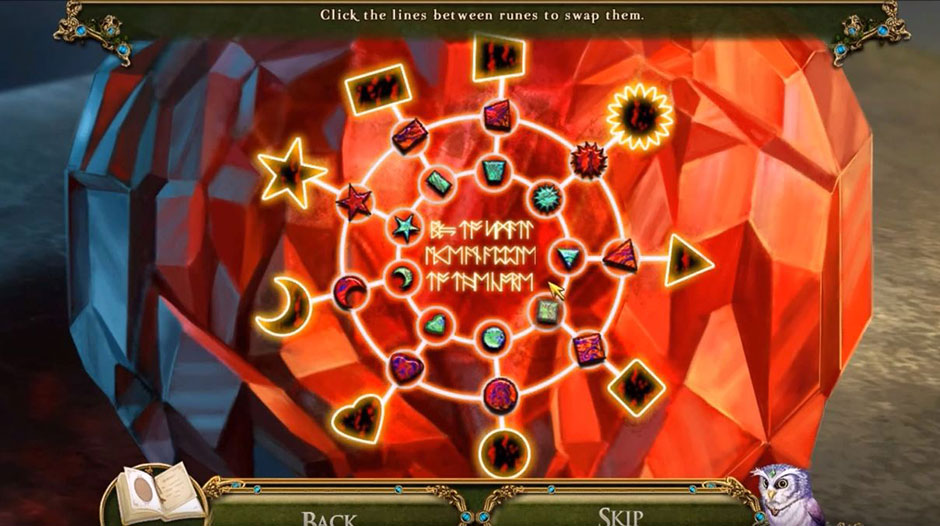
As you enter this area, take note of the unicorn and the gate on your way up the path.

In the barracks entry area go to the Castle bridge and engage the mini-game while noting the barracks gate and the Stone Chest.

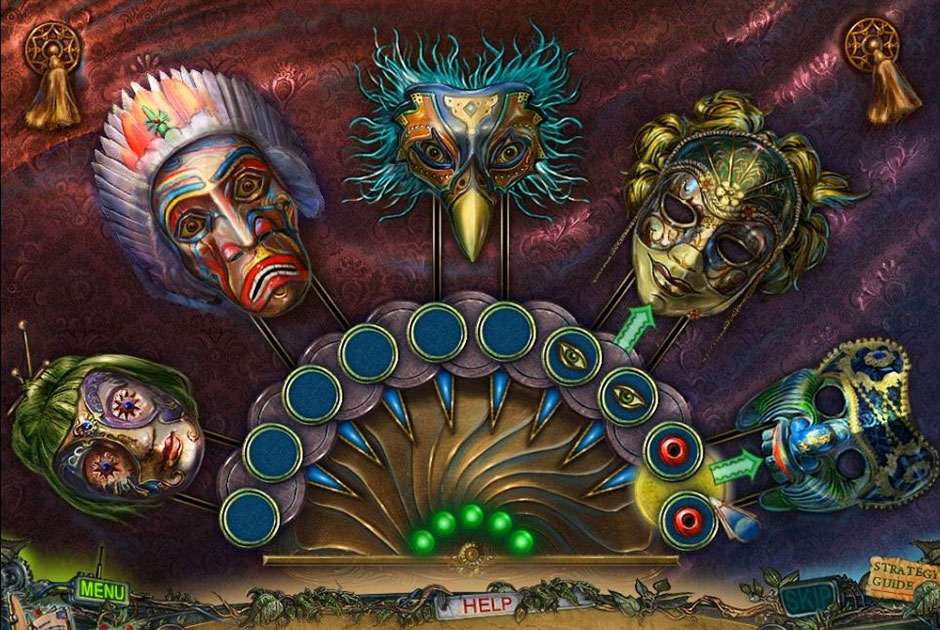
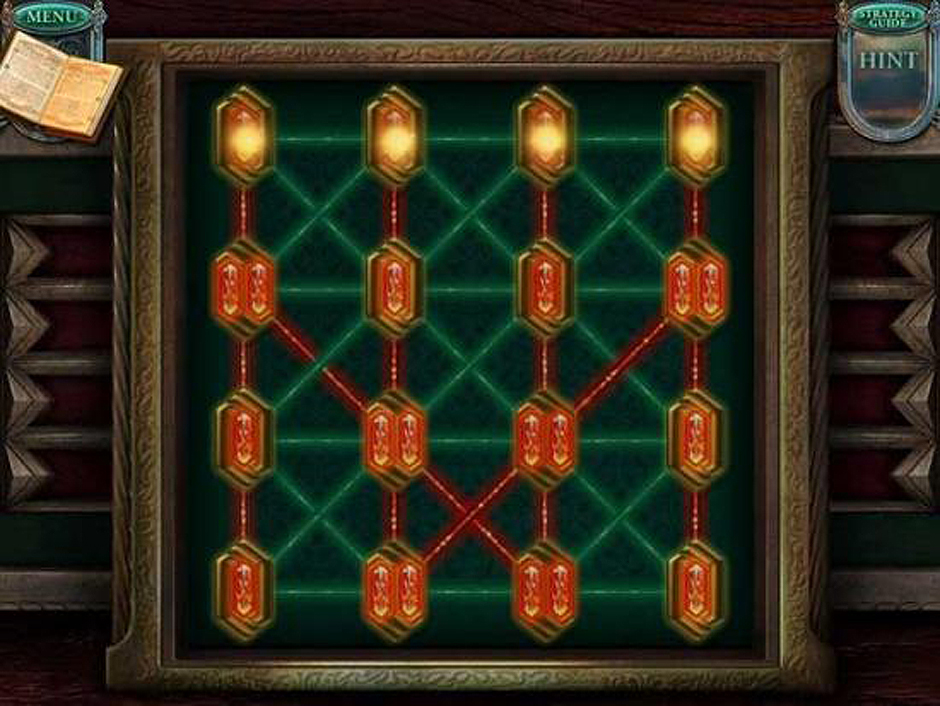
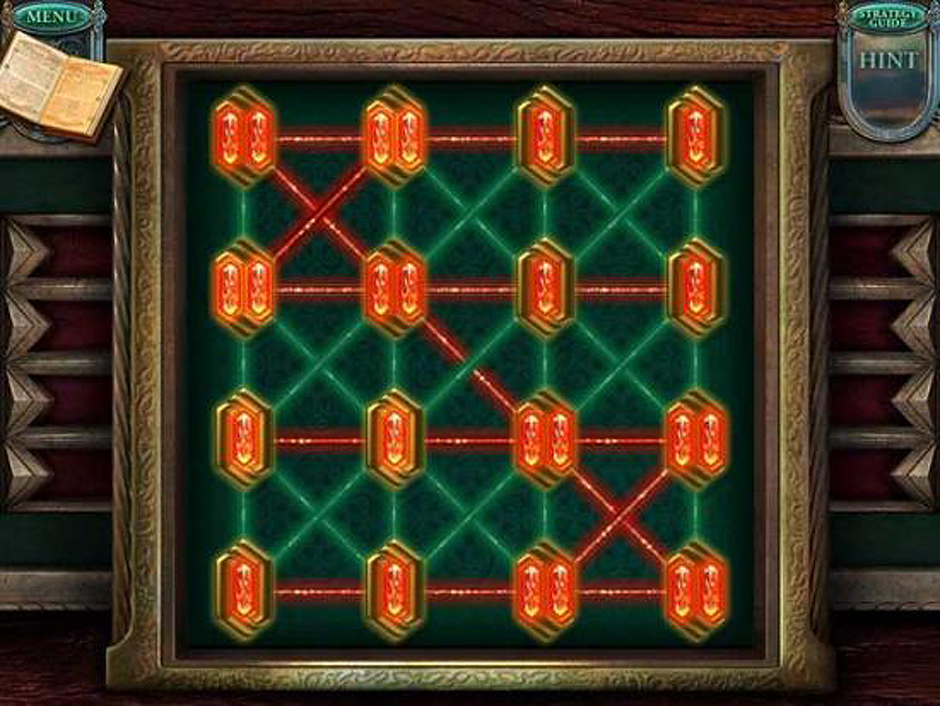
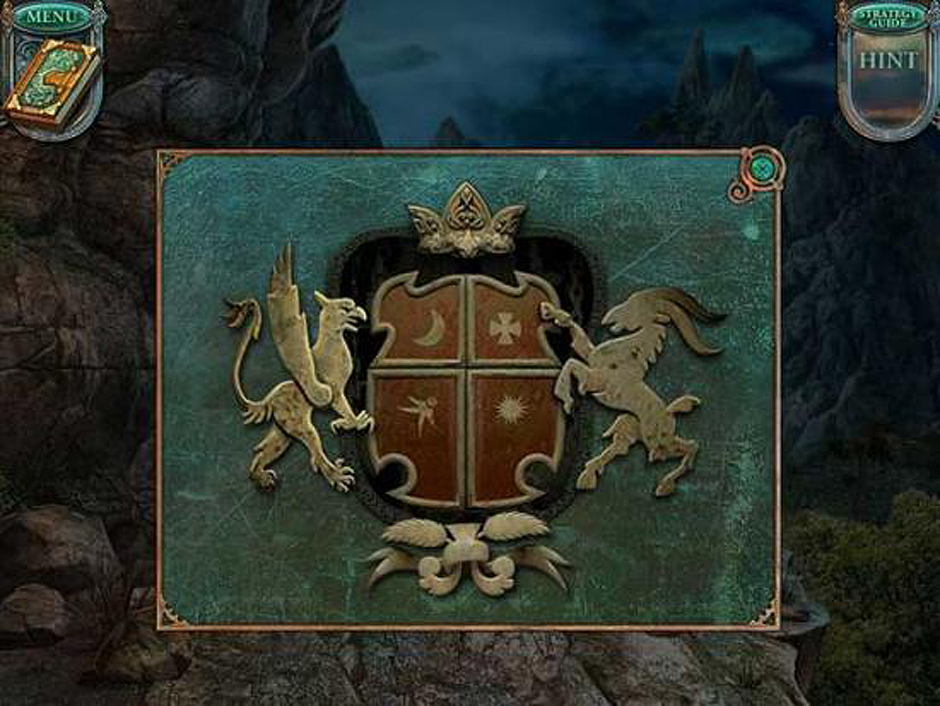
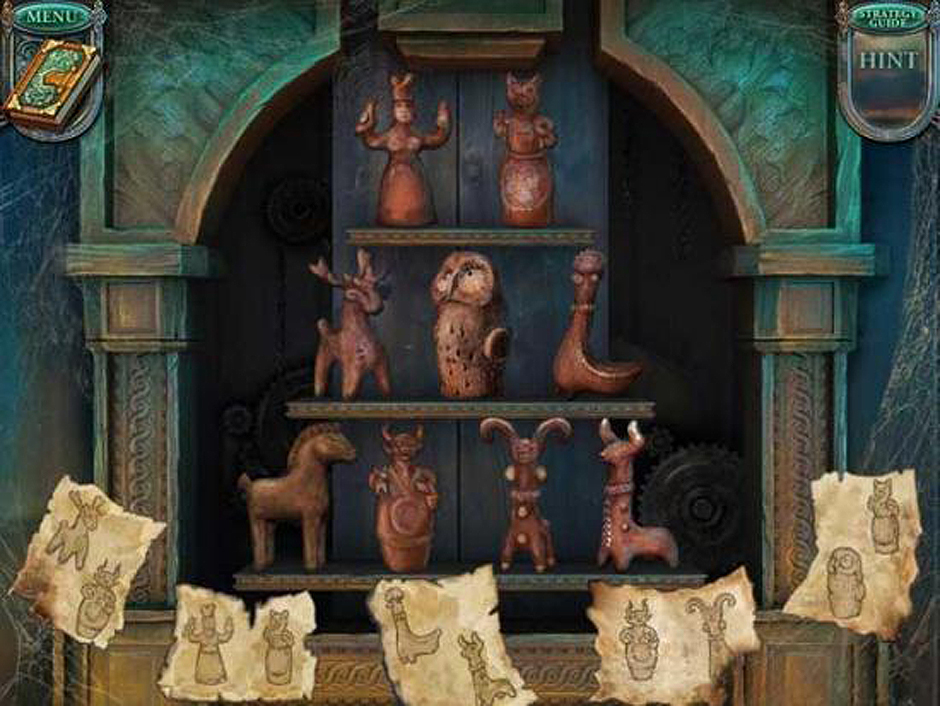
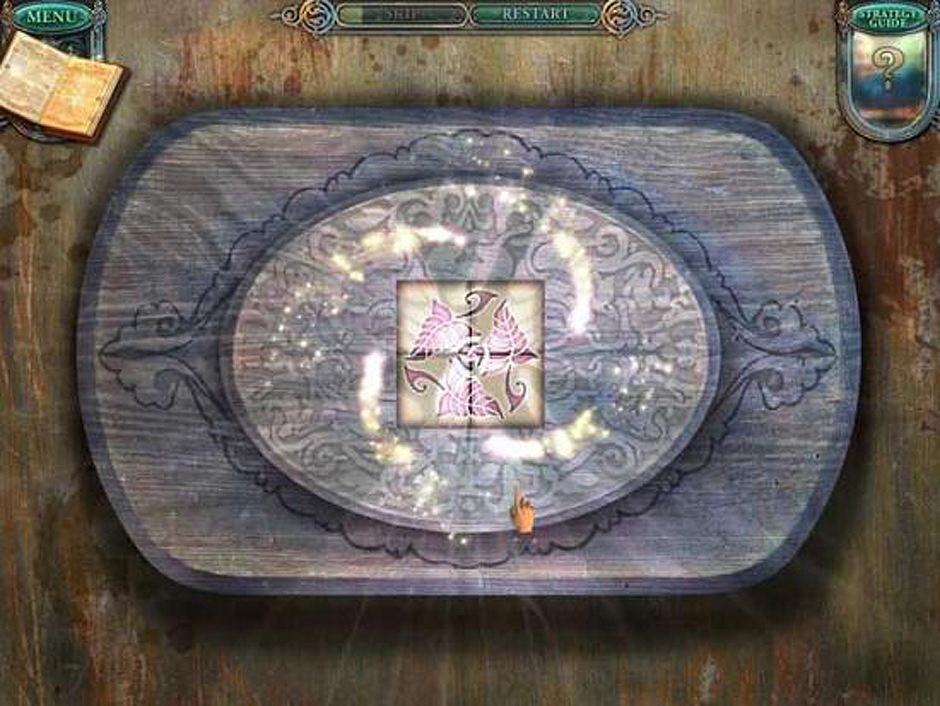
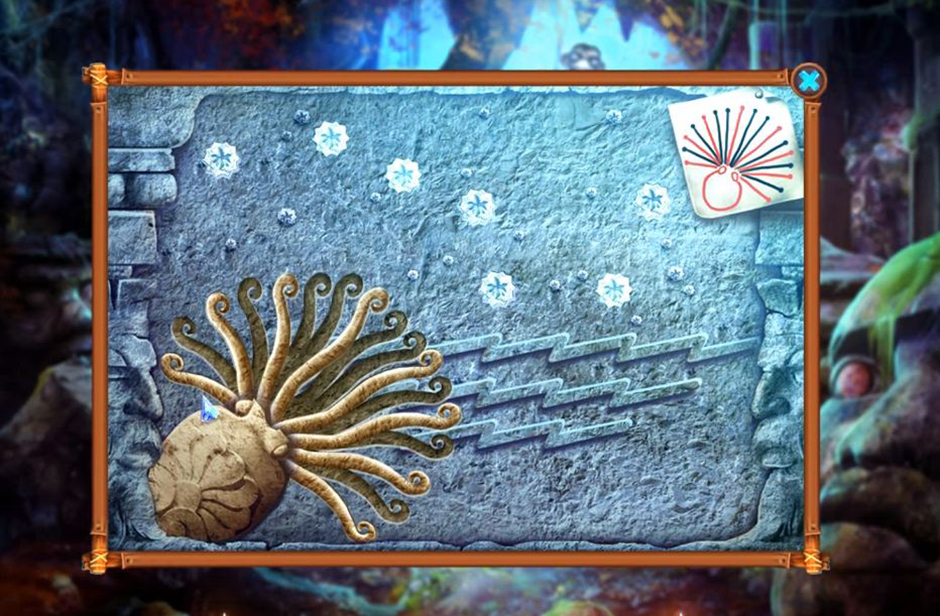
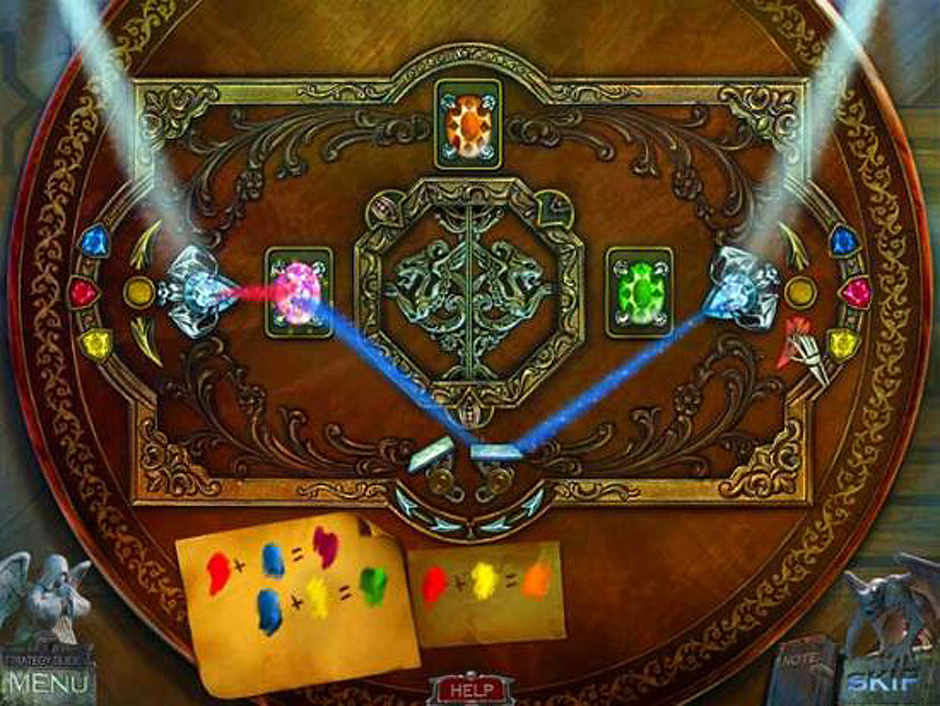
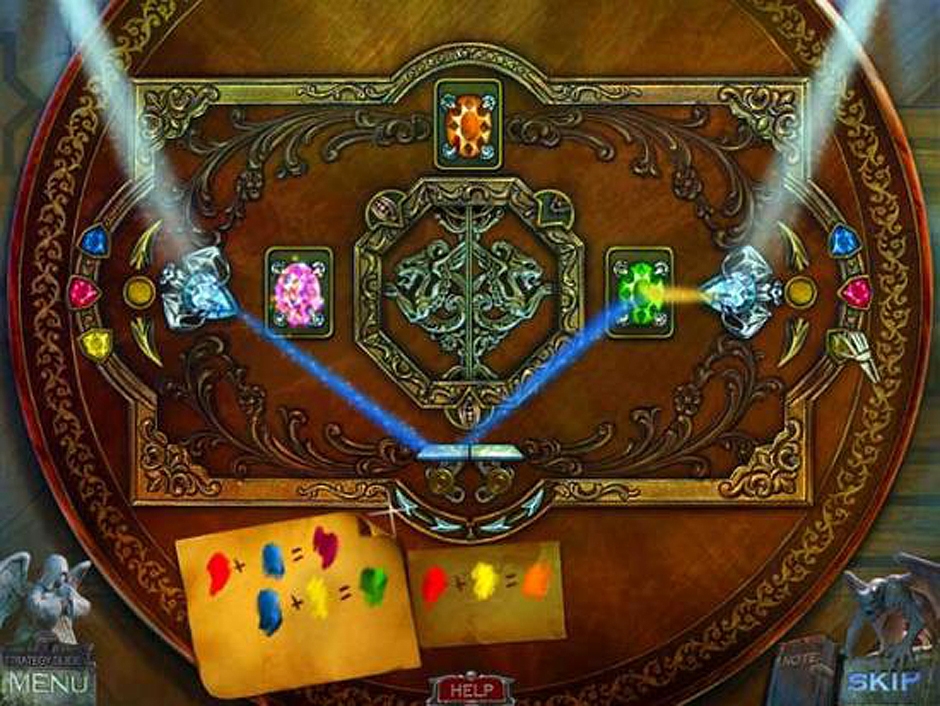
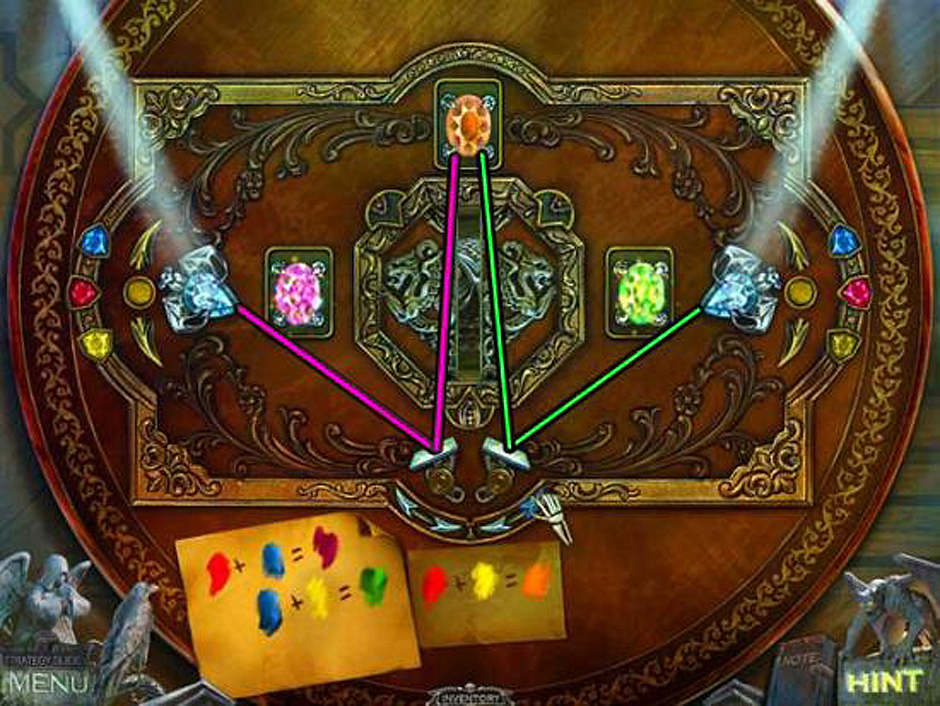
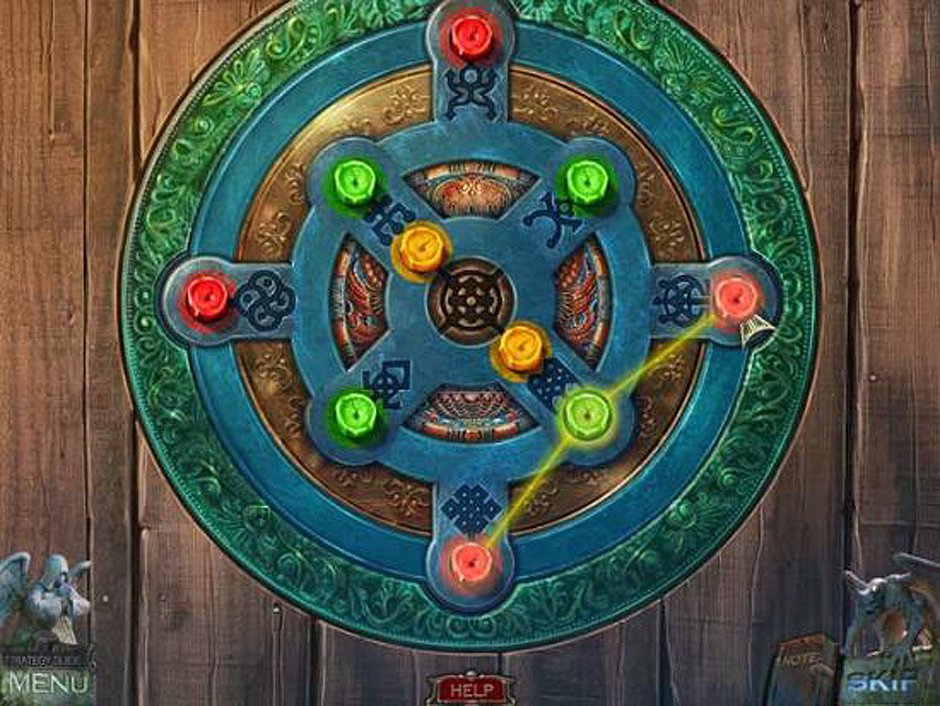
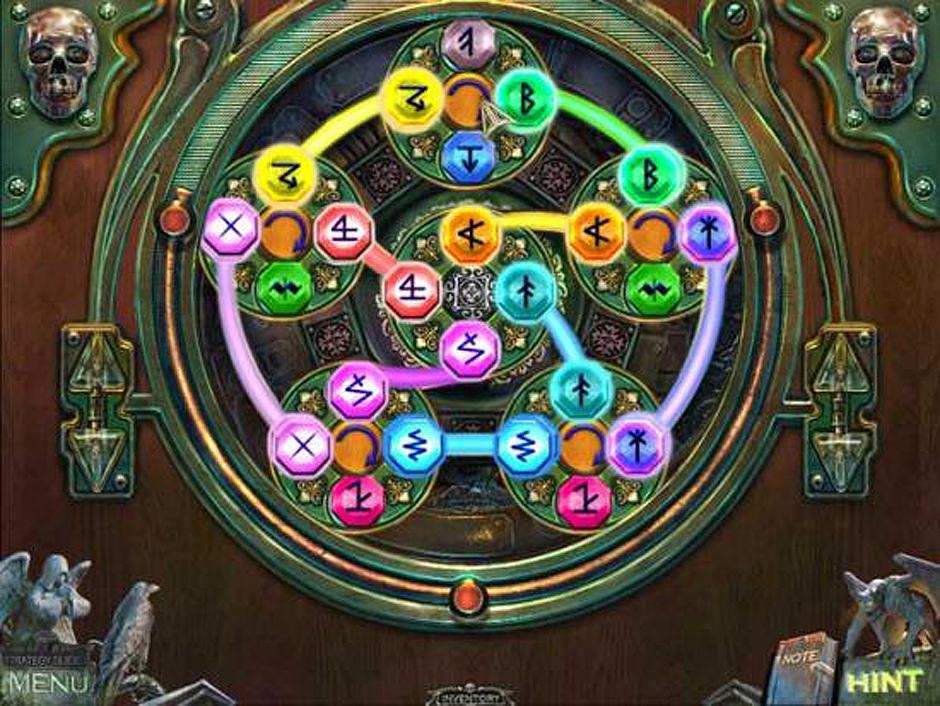
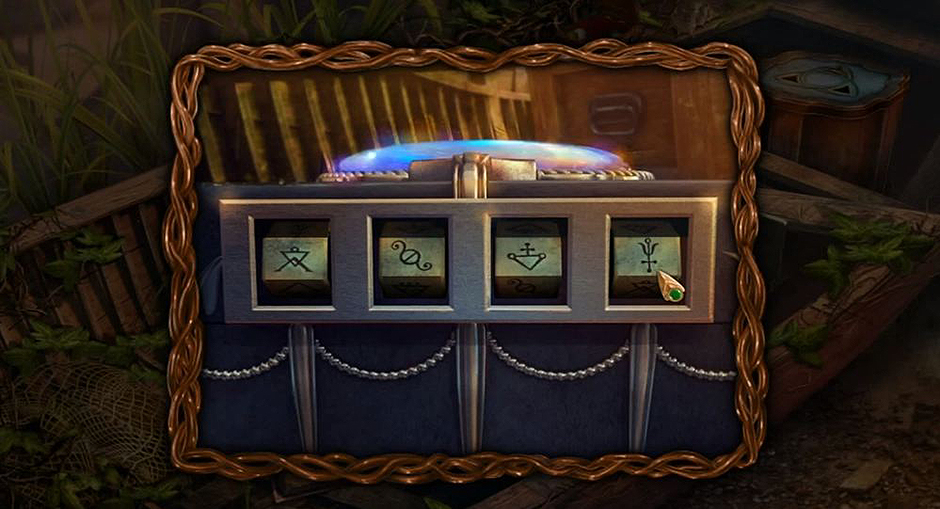
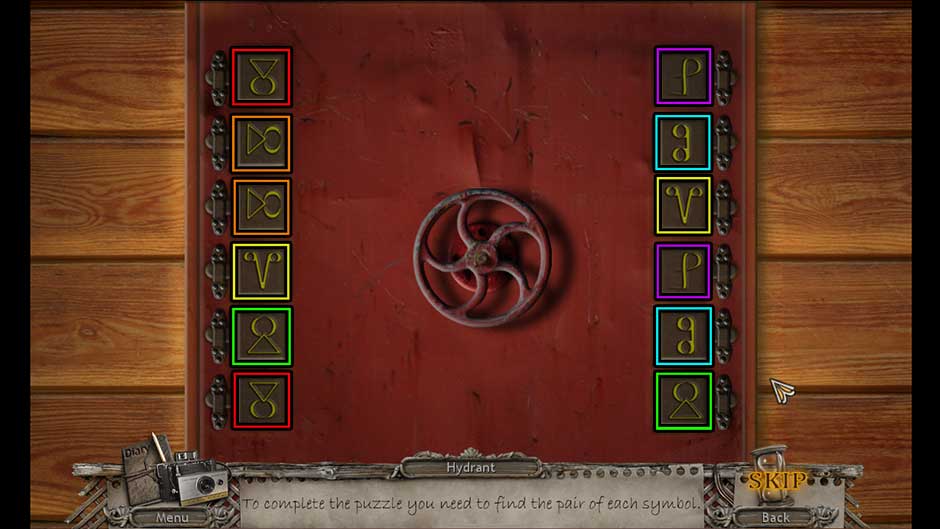
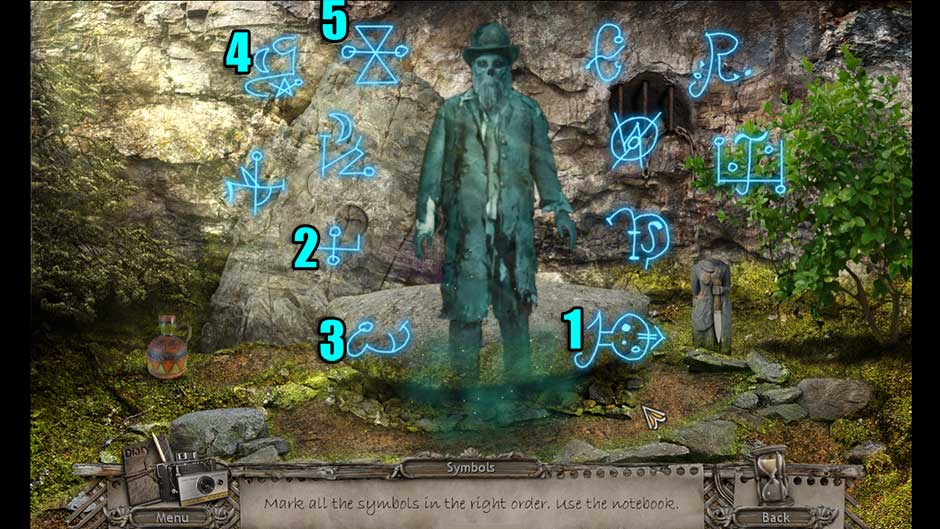
Click on the gate to activate the mini-game where you have to match the symbols to the pattern provided.

Awakening - The Skyward Castle - Symbols Solution

Awakening – The Skyward Castle – Symbols Solution

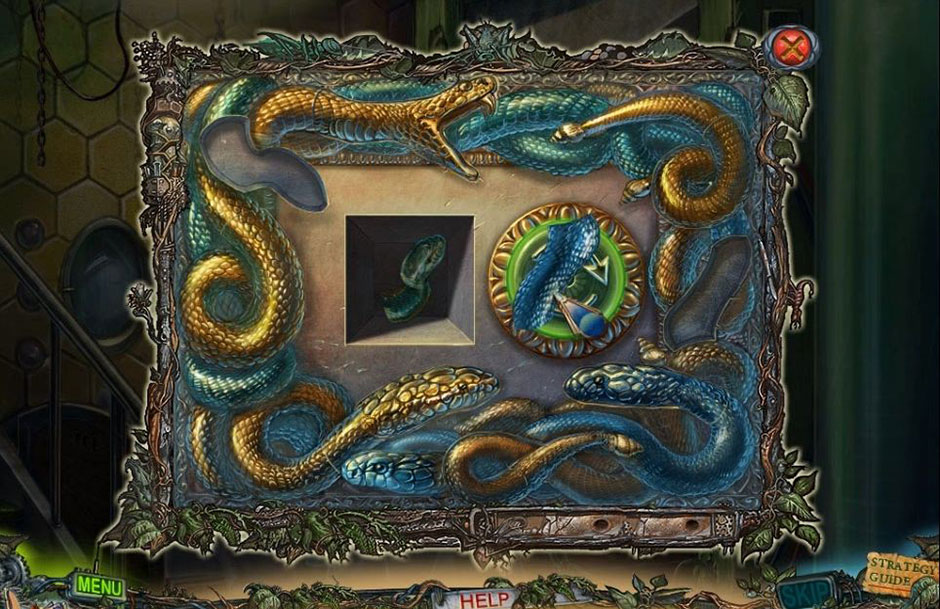
Proceed forward and use the Pocket Dragon on the vines to the right to collect the Old Key and use it on the cabinet to collect the Oak Ring.

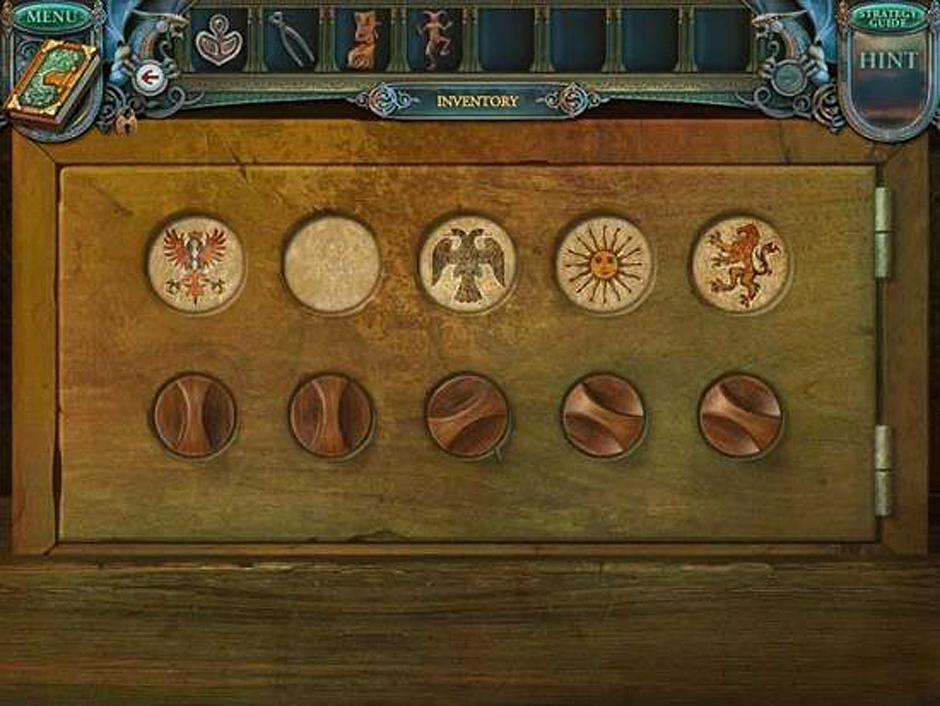
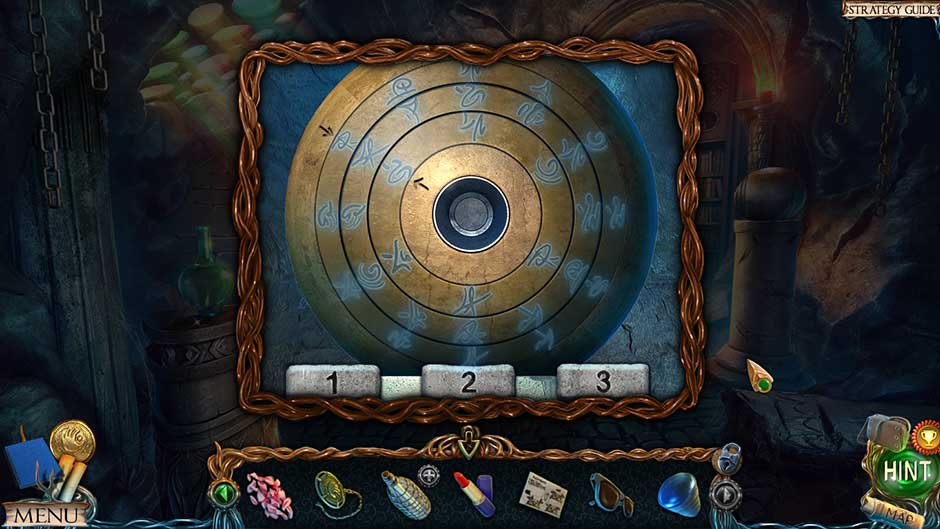
Return to the Castle landing and the Briar gate. Place the Oak Ring on the door to trigger the mini-game to open the next area.

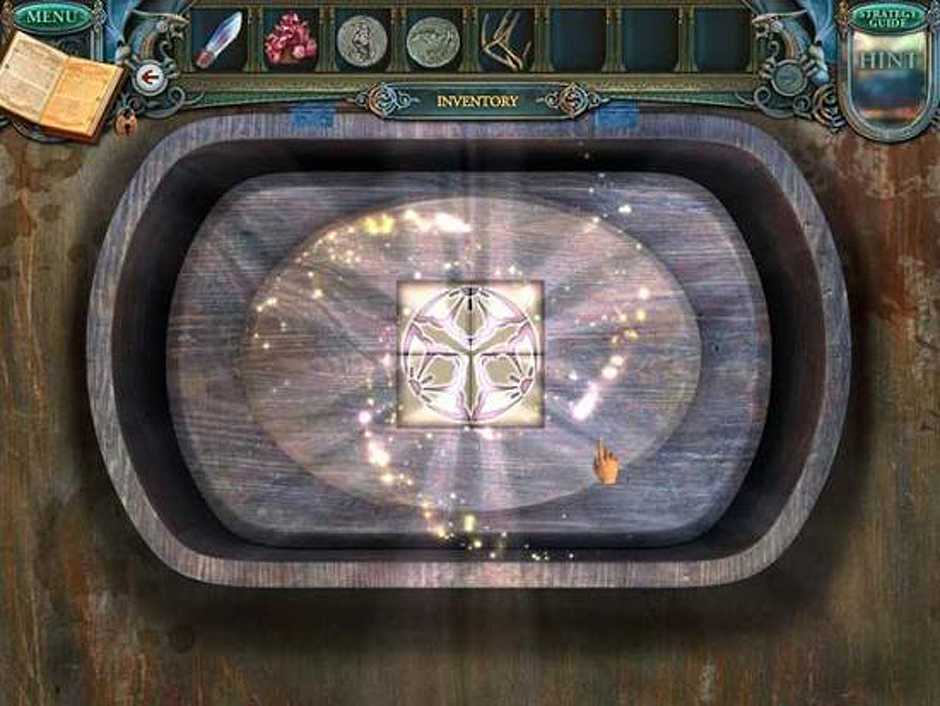
Awakening - The Skyward Castle - Discs Solution

Awakening – The Skyward Castle – Discs Solution

Enter the High gardens and take notice of the items in the area such as the greenhouse, the Crystal Lattice, and the Petrified Faun that is located by the Giant Goldleaf Oak.

Collect GemstonesStone Tablet PieceGreenhouse Key, and Quilt Patch. Use the Greenhouse Key to activate a mini-puzzle.

Awakening - The Skyward Castle - Lock Trigger Solution

Awakening – The Skyward Castle – Lock Trigger Solution

After conquering that mini-game, continue up the path to solve a hidden object game on the garden shed.
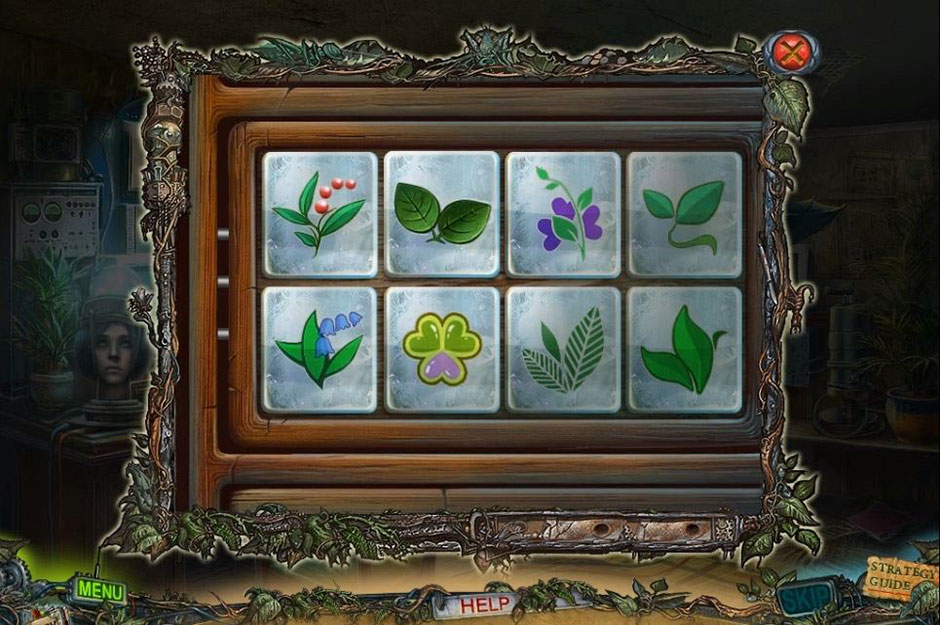
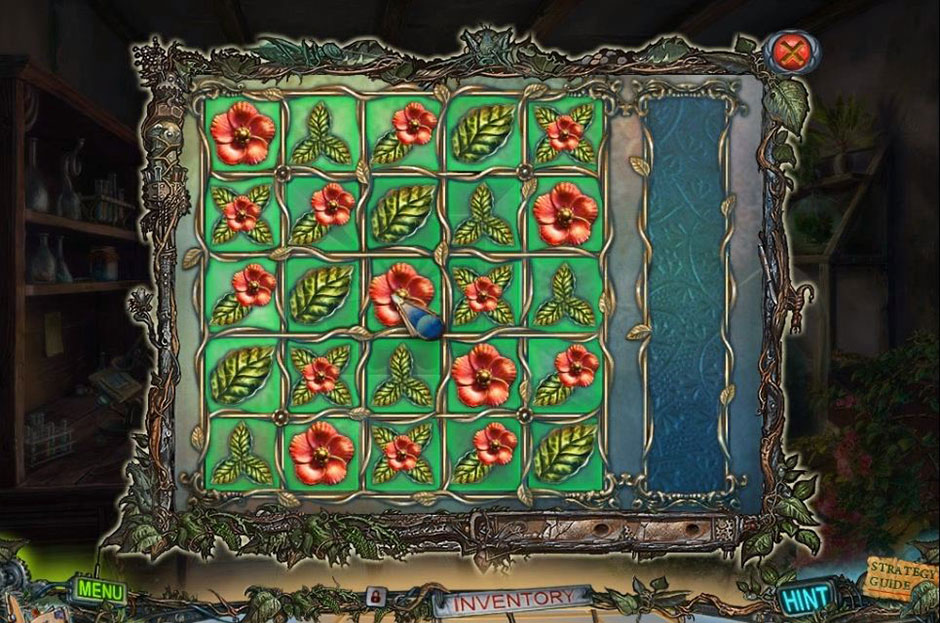
Flip the switches to activate the flowers and match them to the ones indicated to earn aGarden Shears.

Use the Garden Shears to cut the vines and collect the Gemstones from the shed.

Travel to the Crystal Lattice and collect a Gemstone and Stone Tablet. Use the gemstones in the panel to activate a mini-game.

Awakening - The Skyward Castle - Gem stone Solution

Awakening – The Skyward Castle – Gem stone Solution

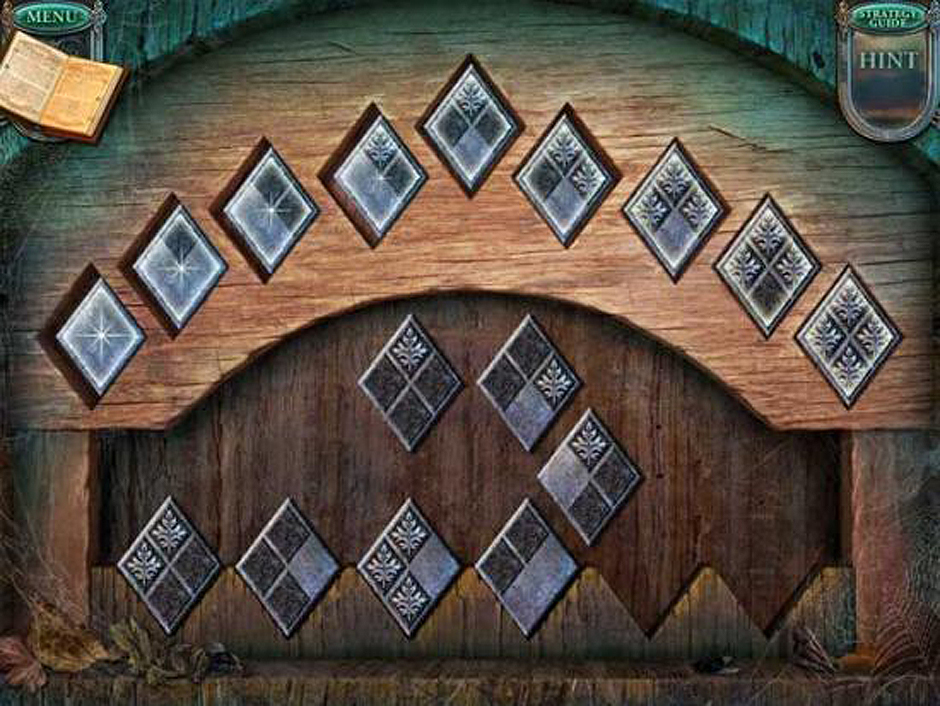
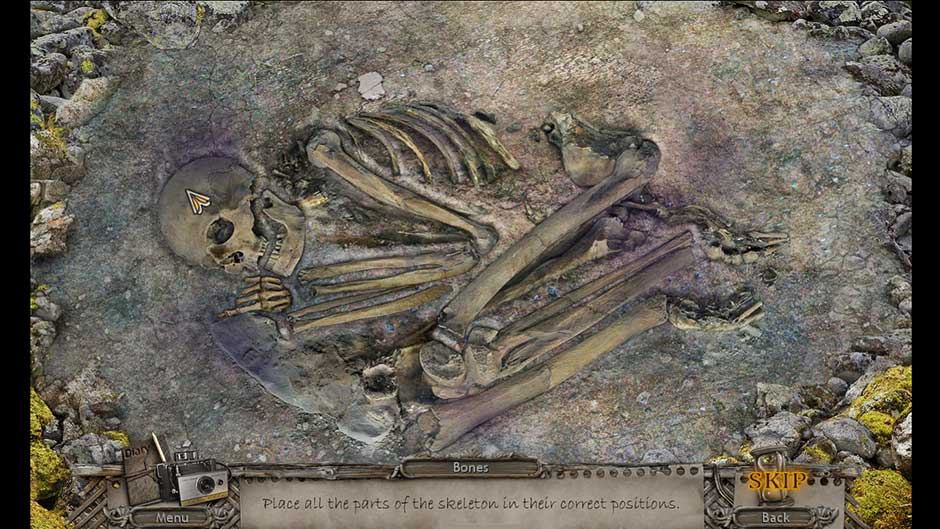
Collect the two Stone Tablets that flank the stairs and travel to the Barracks using the map feature. Go to the stone chest with the tablets to activate a mini-game of changing tiles.

Solving this puzzle will award a Broken Hilt and a Torn Book. Return easily to the Giant Goldleaf Oak with the map.

Give the faun the Torn Book to receive a Scroll of Medicinal Herbs to take to the greenhouse area where you will enter the shed.

Leave the Scroll on the table and take on the mini-game in the egg crate to earn the Cockatrice Egg to give to the faun.

You will then earn the Barracks Pass; use the map to travel back to the Barracks area.

Complete the tile swap puzzle to gain entry to the next area.

Awakening - The Skyward Castle - Tiles Swap Solution

Awakening – The Skyward Castle – Tiles Swap Solution

Enter the courtyard and use the Broken Hllt to gain the Rusty Sword. Use Rusty Sword on door lock to enter the armory.

Clear items from your inventory; put the Handle on the Pump, put the bottle on the shelf, put the tip on the spear, put the metal into the casting pot, place wood under Casting Pot, use Pocket Dragon to light fire, select a vat, put horseshoe in closet, put swords on shield, add riding crop to whip, use tongs with the mold, enact the hammer and gloves with the anvil, and add nails to frame. Earn Incubator Parts and Grease.

Proceed to the courtyard.

Use the Grease on the gears of the ballista. Move the lever to start a mini-game.

Completing this puzzle will gain entry into the windmill.

Awakening - The Skyward Castle - Windmill Puzzle Solution

Awakening – The Skyward Castle – Windmill Puzzle Solution

Here you will use the Rusty Sword to remove boards (strike four times). Enact the Pocket Dragon with the chain and then go through the hole in the floor.

In this next area, you will collect a Sandbag and Soil Conditioners.

Return to the Barracks entryway and use the Sandbag with the hook to get into the Barracks.

Enter the area and collect the Crusty ChainmailSand BucketQuilt Patch, and Soil Conditioners. Solve the hidden object puzzle in the scrap metal pile.

Use the key to open the chest where you will find a helmet, a sword, and remove the cloth cover to collect the Round Whetstone before progressing to the Armory.

Put the Round Whetstone in the stand and then the sword on the stone. Use your mouse in a circular motion to make the wheel go around to earn a Sharp Sword.

Travel back to the windmill and go through the hole in the floor. Use the Sand Bucket to pick up the pile of sand.

Put Chainmail in the bucket and move mouse back and forth to shake. Earn Chainmail and return to the Barracks.

Place the Sharp Sword and Chainmail on the cursed captain to gain information. Select a locker for a mini-game.

This mini-game rewards you Incubator Parts and Soil Conditioner. Approach the faun to receive Medical Notes and Herb Seeds for the shed by the greenhouse.

Enter the shed and put the Soil Conditioners on the table and put the Herb Seeds into the flowering pots to activate a mini-game.

Complete the mini-game by following the formula on the planting pots.

Awakening - The Skyward Castle - FloweringPotsPuzzle

Awakening – The Skyward Castle – FloweringPotsPuzzle

Finishing this planting will earn Herb Saplings.

Activate the incubator by placing in the Herb Saplings.

Complete all three of these twisters to earn the SunbrightSparkleleafDewglint, and Sapphirebud. Move on to the Windmill.

Awakening - The Skyward Castle - Twister Puzzle Solution

Awakening – The Skyward Castle – Twister Puzzle Solution

Check out the Alchemy work station for actions.

The Pocket Dragon will light the burner, put SparkleleafSapphirebudSunbright and Dewglint into dishes. Putting the Medical Notes on the bulletin board enacts a mini-game.

Awakening - The Skyward Castle - Medical Notes

Mix the herbs, put them in the pan, and earn Healing Poultices to take to the castle landing.

Heal the unicorn with the Healing Poultices and select the Aviary from the map’s upper right. Go to the entrance for a mini-game.

Rotate the pieces of this puzzle to gain entry into the Aviary.

Awakening - The Skyward Castle - Falcon Crest Solution

Enter the Aviary and collect Bird Feeders and a hidden object game in the storeroom.

Locate the many items on the list to obtain Incubator Parts and the Handle. Travel to Windmill-Crystal Forge using the map.

Collect the Gaff HookQuilt Patch, and information on the clipboard.

Locate the required items to earn Windmill Spurs for the Gear Room.

Use the Handle to open the box and the Windmill Spurs to open a mini-game.

Connect all of the gears from top to bottom and earn the Broken Bow. Take it with you to the Crystal Lattice.

Earn the Bronze Grapes by utilizing your Gaff Hook. Go to the Giant Goldleaf Oak to use the Bronze Grapes to trigger a mini-game.

Awakening - The Skyward Castle - Grapes Solution

Awakening – The Skyward Castle – Grapes Solution

Earn entry to the Vineyard with this puzzle.

Use the Pocket Dragon on the door. The water pumping controls are the mini-game.

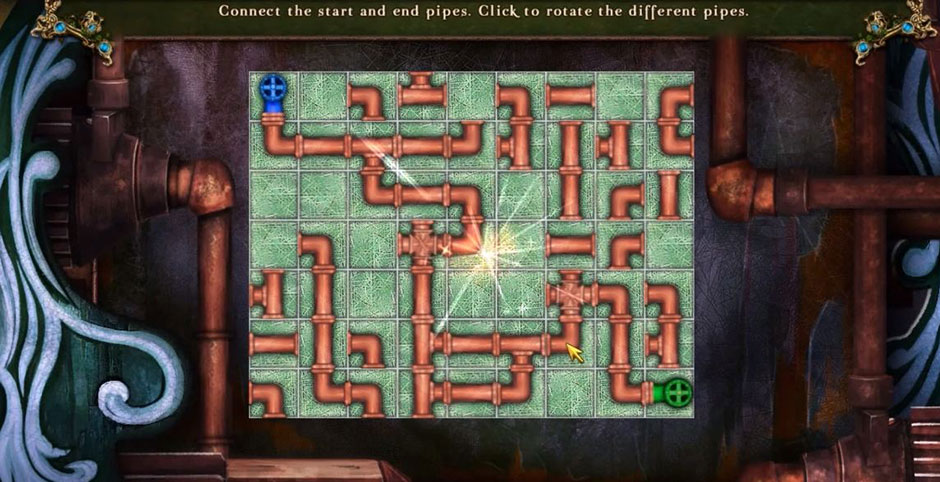
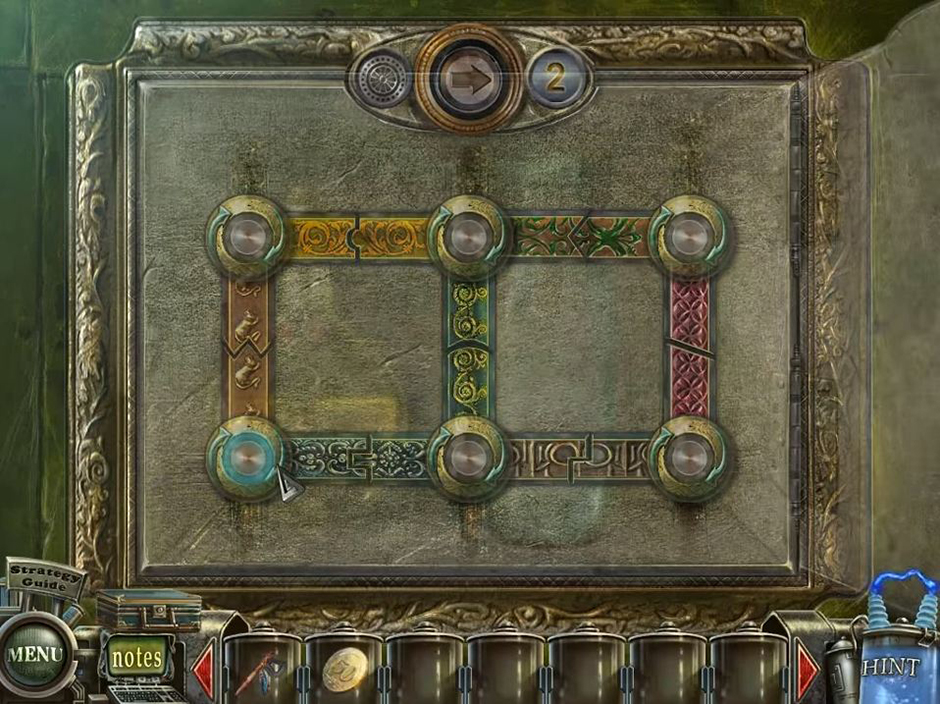
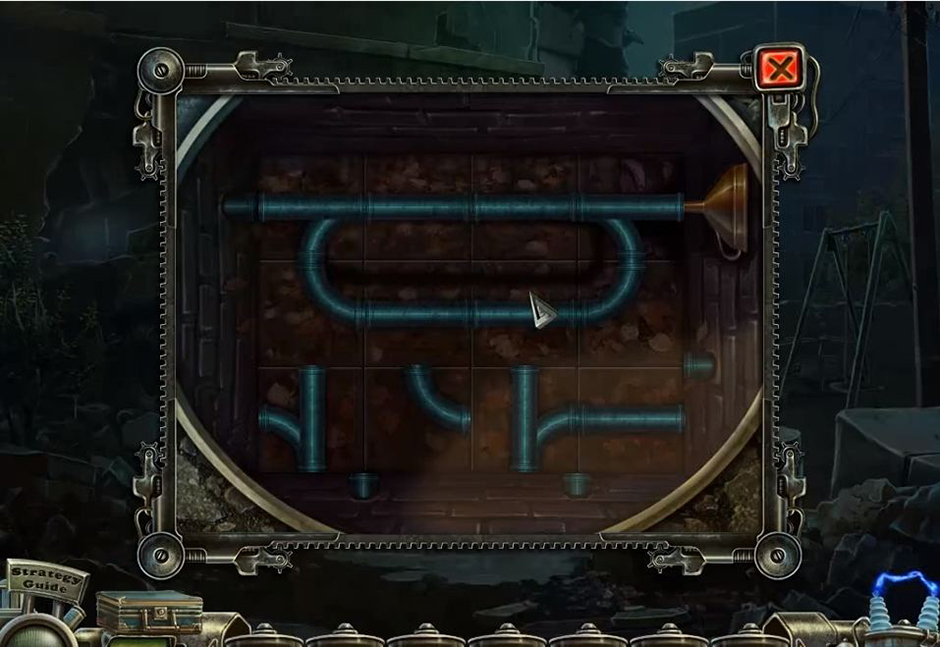
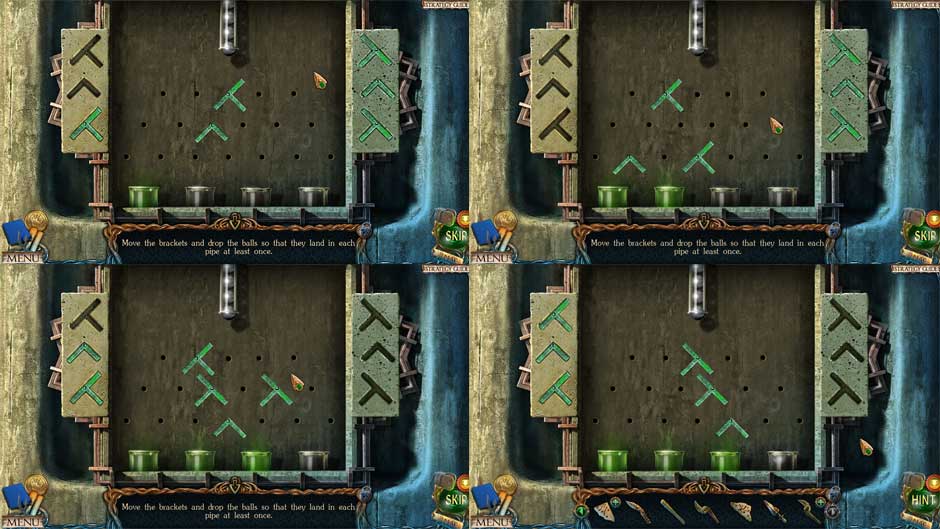
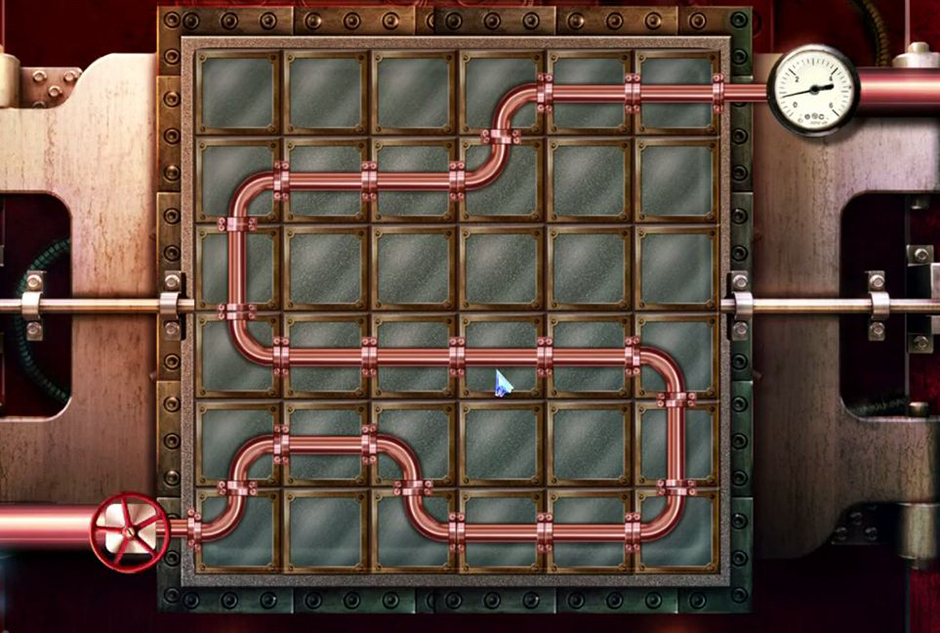
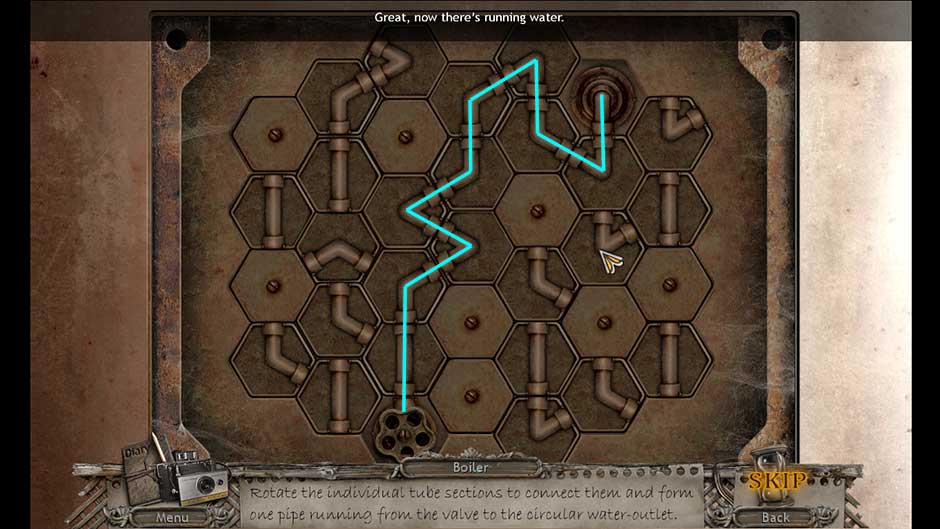
Solve the mini-game by rotating the pipes.

Awakening - The Skyward Castle - Pipes Puzzle Solution

Awakening – The Skyward Castle – Pipes Puzzle Solution

Use the Gaff Hook on the blue key to enact a hidden object puzzle.

Locate all of the items to earn a Weapons Cabinet Key to take back to the Barracks Courtyard weapons cabinet.

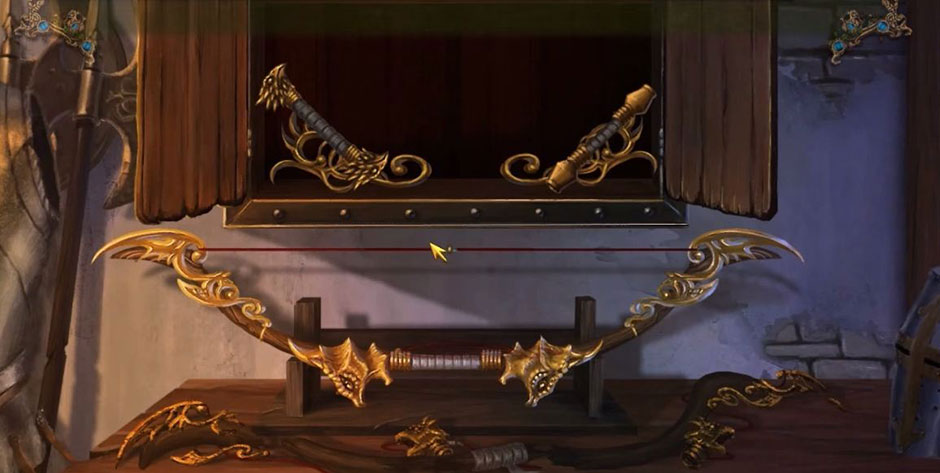
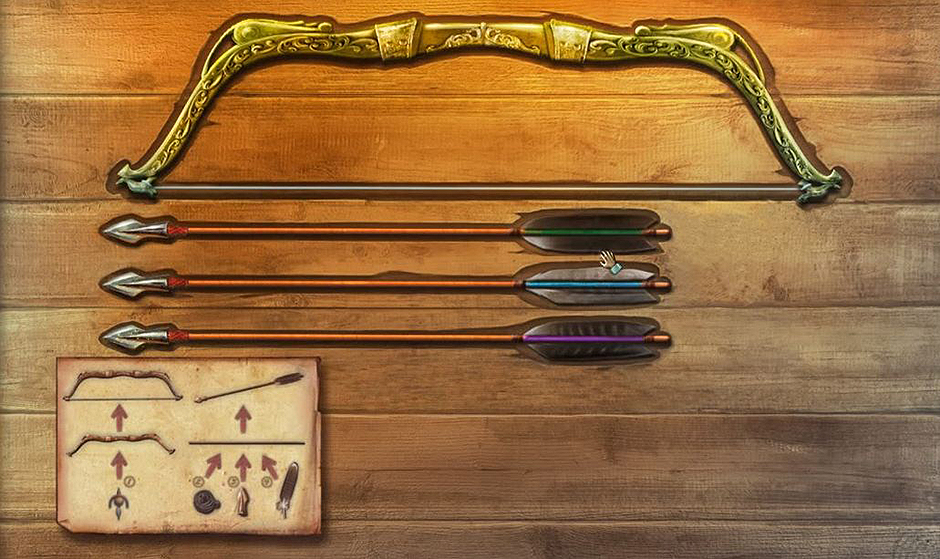
Use the Weapons Cabinet Key to earn Dragon’s Tooth and open the cabinet. Put theBroken Bow on the table, the Goldleaf Branch in the stand, and use the saw on the branch for another mini-game.

Complete this game by drawing pattern lines on the bow.

Use your inventory items to complete this puzzle and earn the Goldleaf Bow.

Awakening - The Skyward Castle - GoldLeaf Bow Solution

Awakening – The Skyward Castle – GoldLeaf Bow Solution

Travel to the Cliffside Caves.

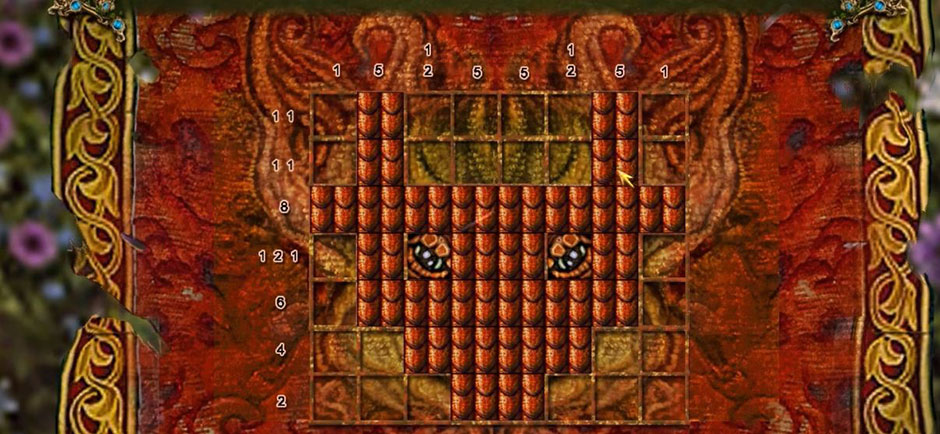
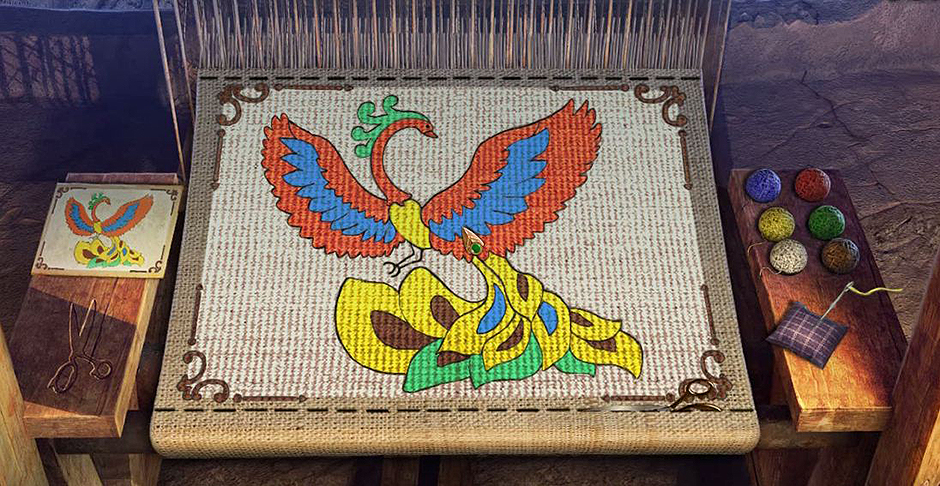
Collect and use the Pocket Dragon on the tapestry, collect the Quilt PatchDragon’s Teeth, and Arrows. Put arrows and bows together to make Bow and Arrows to use on the tapestry for a mini-game.

Awakening - The Skyward Castle - Dragon Tapestry

Awakening – The Skyward Castle – Dragon Tapestry

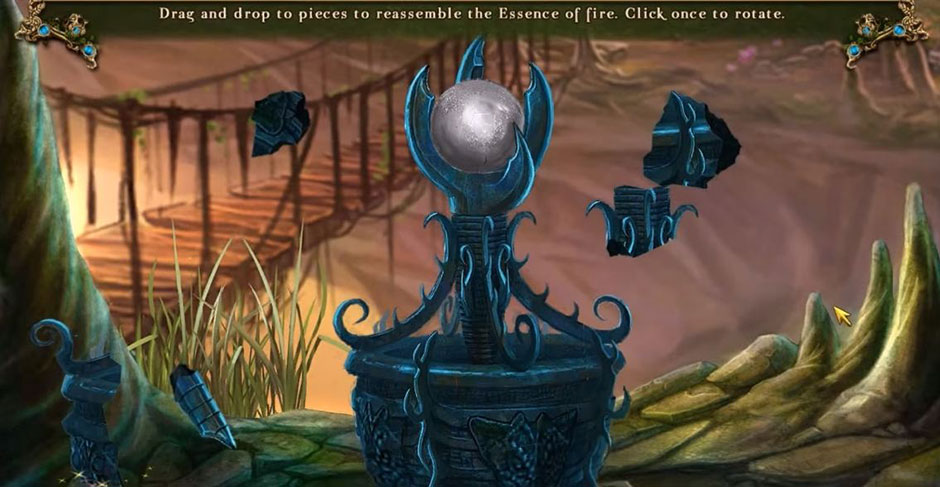
Collect the Dragon’s Tooth and move to the next screen to open a mini-game with the Broken Brazier.

Drag puzzle pieces in place to solve. Use the Pocket Dragon on the corn to earn Popped Sablecorn and Dragon’s Teeth.

Awakening - The Skyward Castle - Essence of Fire Solution

Awakening – The Skyward Castle – Essence of Fire Solution

Go to the petrified dragon and insert the Dragon’s Teeth.

Use the Pocket Dragon on the bulb with the Incubator Parts to begin a mini-game.

Place parts into incubator with the Cockatrice Egg to earn Essence of Fire and Cockatrice Chick.

Collect the Spyglass and then travel to the Windmill alchemy table.

The bulletin board is a hidden object game that will reveal a formula.

The formula in the book holds the key to a mini-game.

Use the Popped Sablecorn with the potion and the Cockatrice Chick on the bowl; exit this screen and the next screen to the big tree.

Hang the Bird Feeder with Popped Sablecorn on the branch. Go to the Castle bridge and hang a Bird Feeder and add Popped Sablecorn in it. Go ahead to hang another feeder on the lamppost and fill it with seed.

Utilize the map to return to the Windmill and Crystal Forge to enact a mini-game using the Essence of Fire.

Awakening - The Skyward Castle - Crystal Solution

Awakening – The Skyward Castle – Crystal Solution

Earn the Ballista Bolt Head and traverse to the Barracks Courtyard.

Use the Spyglass and Ballista Bolt Head on the ballista to spark a mini-game.

Spot and eliminate the 12 targets to advance to Chapter 3.

Part 3- The Skyward Castle

Enter the doors to retrieve an Apron and a Kitchen Knife. Light the Wall Sconce with the Pocket Dragon and take the Torch.

Zoom in on the pillars to reveal a hidden object game.

Click on the Artisan’s Satchel to open it to get the Charcoal and use it and the Paper on the pillars.

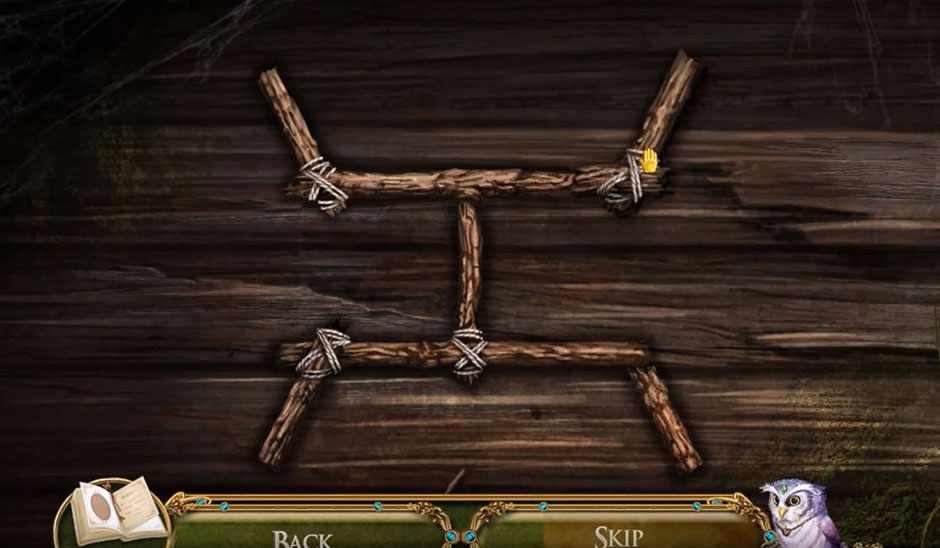
Conquer this puzzle to trigger a simple mini-game and clicking on the wooden plaque holds another mini-game.

Awakening - The Skyward Castle - Wooden Plaque Solution

Awakening – The Skyward Castle – Wooden Plaque Solution

Earn a Cipher Key Fragment for completing these puzzles.

Collect such things as Cipher Key Fragments and a Broken Chair Leg. Use such things as the TorchKitchen Knife, and Bow And Arrows to complete tasks. Zoom on the gate.

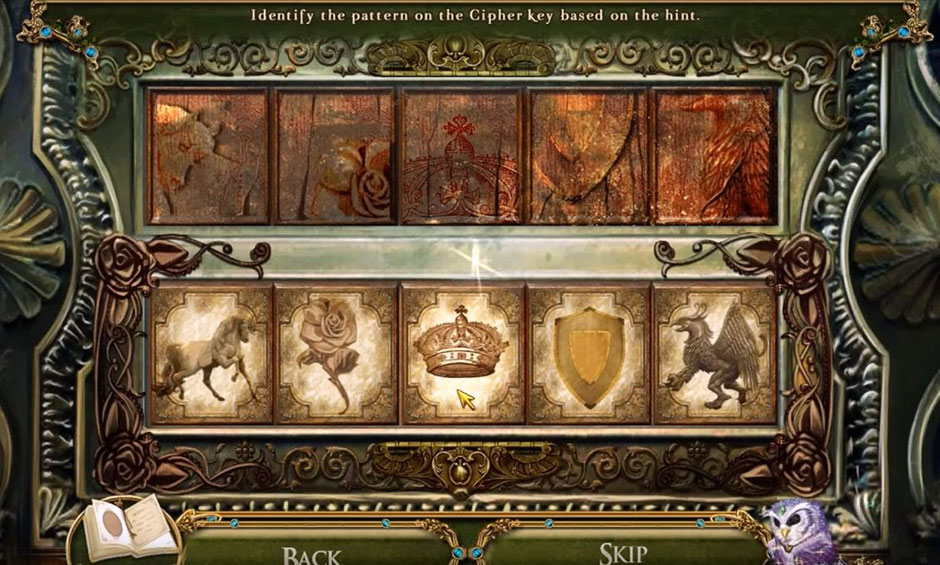
At the gate, collect the Cipher Key Fragment and use the fragments to unlock the door controls and to activate a matching type mini-game.

Awakening - The Skyward Castle - Cipher Key Puzzle

Awakening – The Skyward Castle – Cipher Key Puzzle

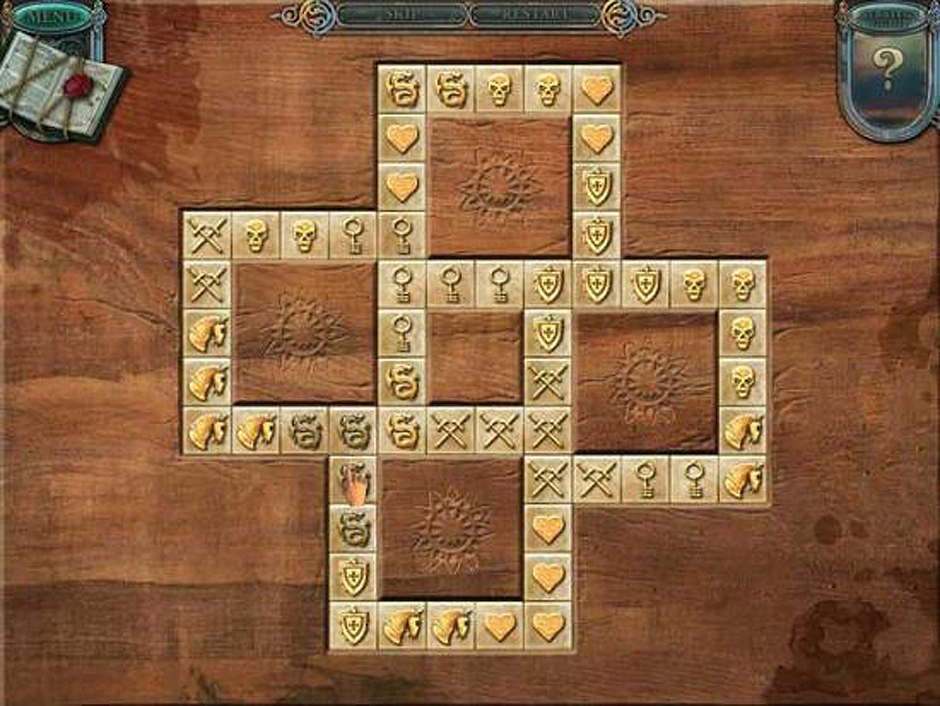
Match these tiles to gain access to the next area.

Zoom in on the sun painting and retrieve the Sun Emblem.

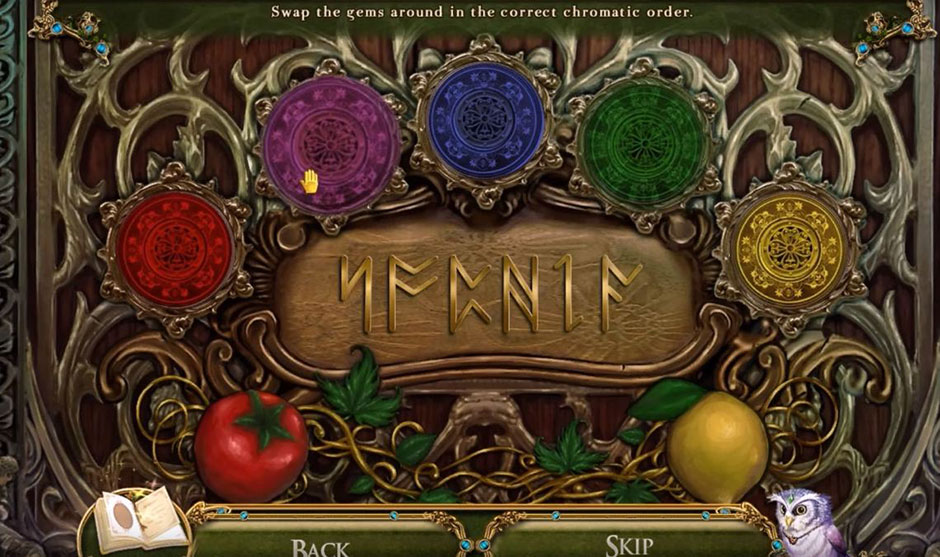
Select the door to the left for a mini-game of arranging colors.

Awakening - The Skyward Castle - Color Solution

Awakening – The Skyward Castle – Color Solution

Solving this puzzle will allow entrance into Sophia’s Bedroom.

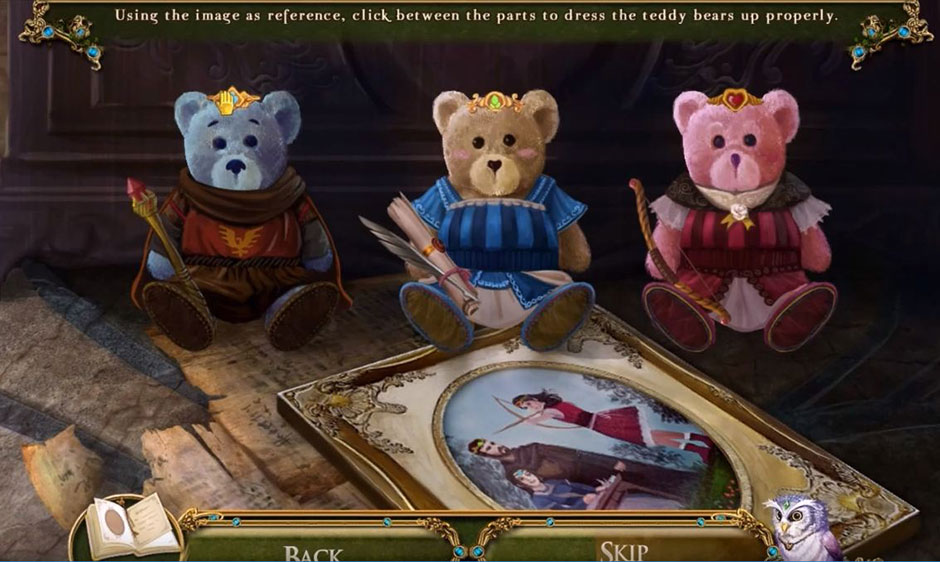
Collect a quilt patch and two Runes. Zoom in on teddy bears for a mini-game.

Dress the teddy bears according to the photos and earn a Runes and the Doorknob.

Awakening - The Skyward Castle - Teddy Bears Solution

Awakening – The Skyward Castle – Teddy Bears Solution

Return to the previous screen. Use the Doorknob on the door at the far end. Click on the handle to enter the Cartographer’s Room.

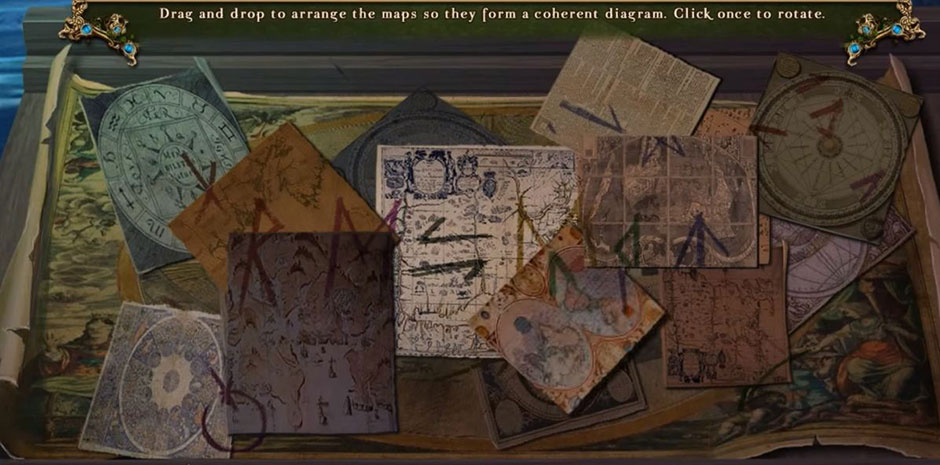
Click on the map in the center to activate a mini-game.

Awakening - The Skyward Castle - Diagram Solution

Awakening – The Skyward Castle – Diagram Solution

Arrange the pieces to form a diagram to recieve the Map Markings and the Loupe.

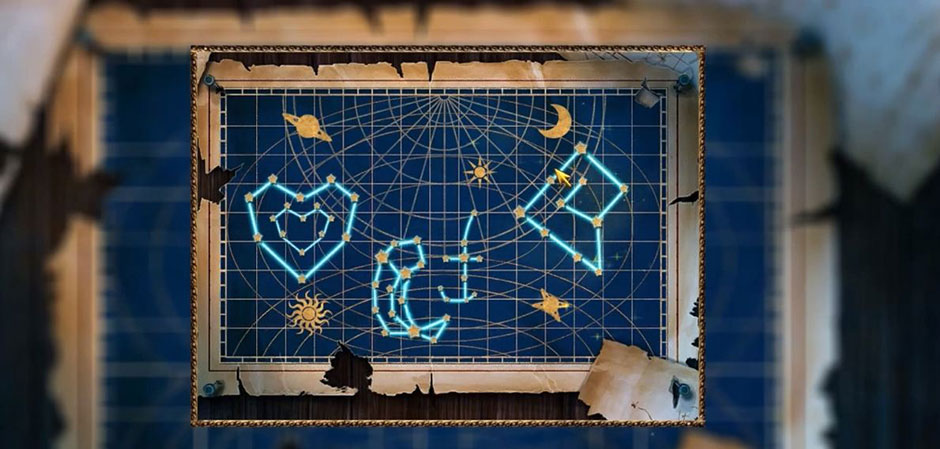
The star map on the far wall begins a mini-game. This game awards Runes.

Awakening - The Skyward Castle - Constellation Solution

Awakening – The Skyward Castle – Constellation Solution

Collect the awarded Runes.

The book display hides a mini-game that awards a Compass Half and Runes from the carved figure before you return to Princess Sophia’s Bedroom.

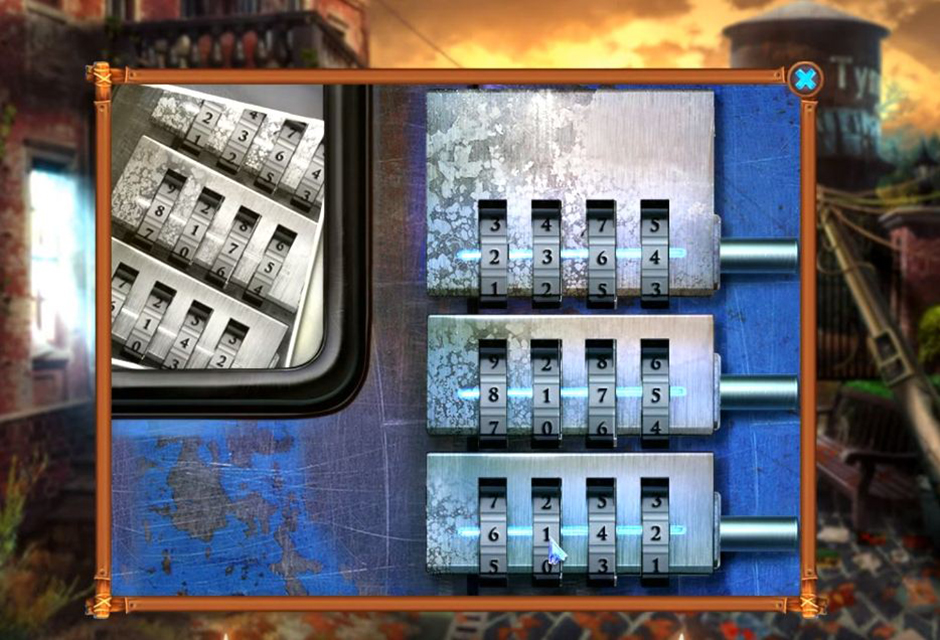
The combination cheat for this puzzle is 1, 2, 6, 3, 5, 2, 3, 4, 5, 6, 1.

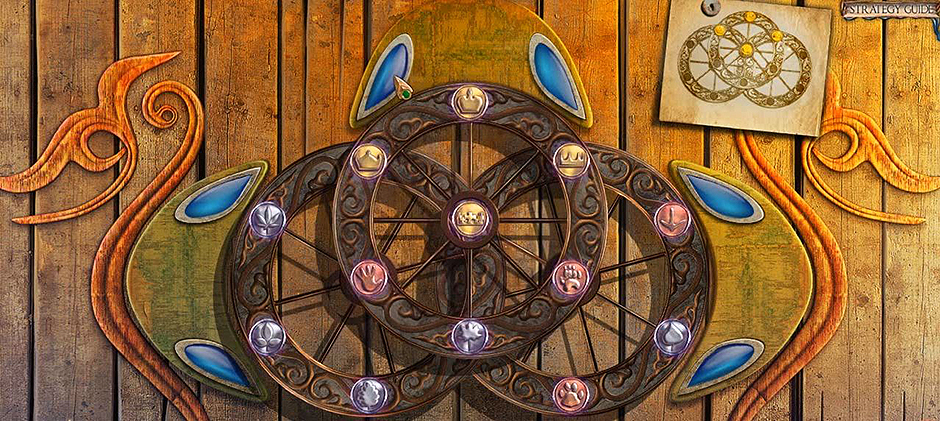
Zoom in on the mirror and use the Runes on the frame. Use the Loupe on the symbol to activate a mini-game.

Rotate the four rings to earn the Silver Star and then return to the main hall.

Use the Silver Star to unlock the door with aid of the key and enter the new area.

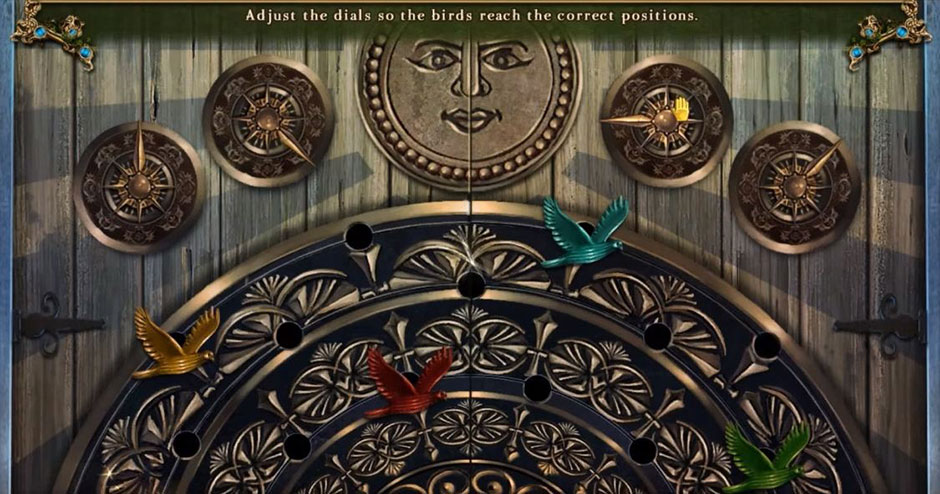
Collect the Constellations to add to your journal and use the Sun Emblem on the door to start a mini-game.

Move the dials to align the bird according to the example.

Awakening - The Skyward Castle - Bird Solution

Awakening – The Skyward Castle – Bird Solution

Travel to the Wizard’s Retreat.

Collect a Quilt Patch and the Wax Tablet.

Zoom on the worktable and use the Pocket Dragon and the Wax Tablet on the mold to create a Wax Mold. Travel to Sophia’s Room with the map.

Go to the balcony and use the Wax Mold and the Pocket Dragon on the Worn Key to acquire a Key Mold. Travel by map to the Wizard’s Retreat.

Zoom in on the Worktable and use the Key Mold to turn the Frostbreath Resin and earn the Liquid Key Mold. The Specimen Case will give you the Frostbreath Key when you use the Liquid Key Mold. Travel by map back to Sophia’s Room.

Zoom in to see the wardrobe and use the Frostbreath Key to open it and enter. Begin a hidden object game by selecting the Dollmaker’s Stand.

Items on the list need to be found and then combined with other items to complete this puzzle.

The actions necessary for this puzzle are multiple and depend on each other.

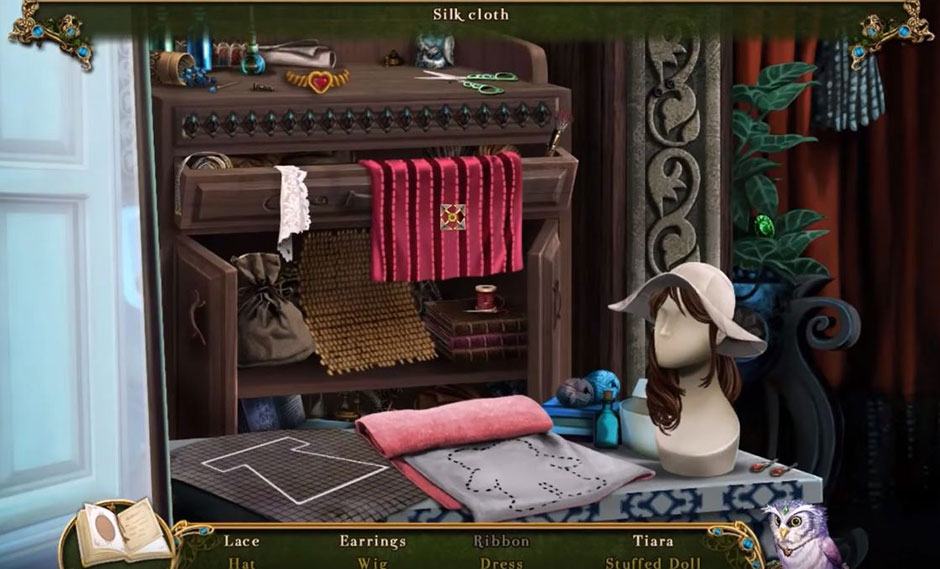
Play a mini-game when you use the Triangle Chalk on the plans, Silk Cloth and Scissors to create a dress.

Collecting the Dress will activate another mini-game.

Awakening - The Skyward Castle - Create The Dress

Awakening – The Skyward Castle – Create The Dress

Dress up this bear to earn a Quilt Patch and Compass Half. This will result in the formation of the Cartographer’s Compass. Use the map to speed to the Wizard’s Retreat.
Bring the cartographer back to life with the Cartographer’s Compass. He will award you the Solar Key. Go back to the long hallway.

Zoom on the Solar Door at the end of the room and utilize the Solar Key by clicking on it.

Move into the room and talk to the puppet on stage and click the Musician’s stand to start a hidden object game.

Finding all of the items on the list is rewarded with Music Sheets.

Use the map to go to the Walk-in Wardrobe.

The book on the bookshelf contains the mini-game and is activated by adding the music sheets.

Go to the puppet stage and use the Music Box on Xim to activate a new mini-game.

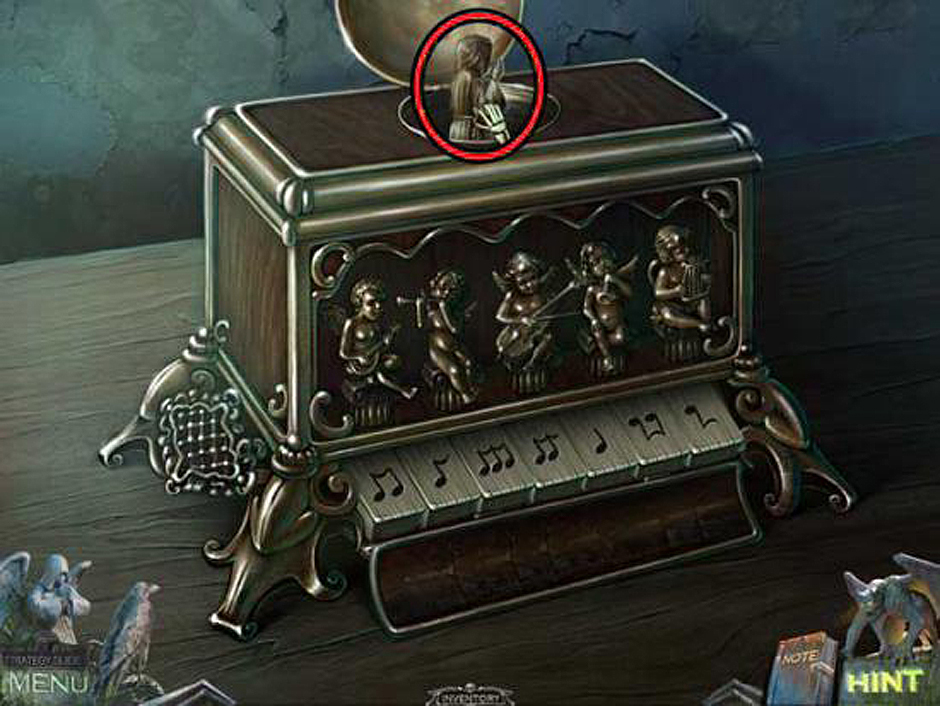
Place the notes correctly on the screen to talk to the puppets and earn Shimmer gems before traveling back to the Wizard’s Retreat.

Activate the mini-game on the Research Room Door with the Shimmer gems.

Change the gems to the desired pattern to be awarded entrance to the Research Room.

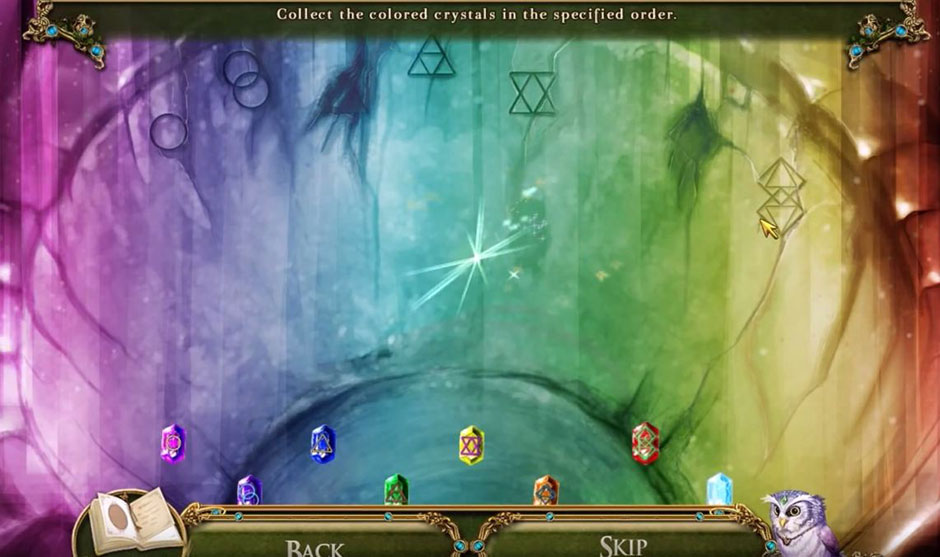
The Crystal Brazier will begin a mini-game in which you have to collect crystals in a specific order: pink, purple, blue, green, yellow, orange, red, white.

Awakening - The Skyward Castle - Crystal Brazier Solution

Awakening – The Skyward Castle – Crystal Brazier Solution

Open the book of Monsters and Mythical Creatures and find the Cloth Sun. Open the book Astrological Events and Phenomena to find the Cloth Moon. Collect these and fast travel to the Solarium. Zoom on the astral banner and collect a Quilt Patch and use the Cloth Sun and the Cloth Moon to complete the banner.

Travel fast back to Sophia’s Bedroom.

Go to the walk-in closet and click the clothes rack to begin a hidden object game.

Find all of the items and use your Key on the Accessories Shelf and the Shoe Horn on the wooden cover.

The Accessories Shelf hides a mini-game that challenges you to get the right color where it belongs.

Completing this puzzle will immediately start a new puzzle when you return to the accessories shelf.

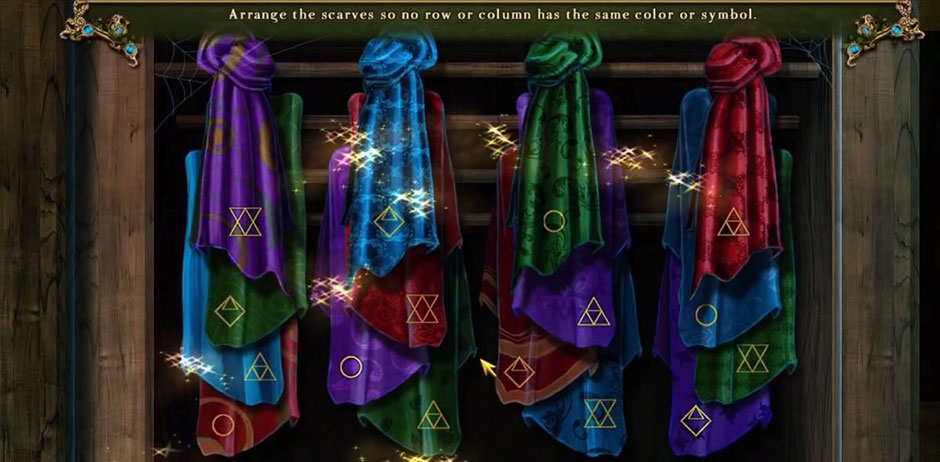
Move the wheels to line up the gloves and be rewarded Gloves. The scarf rack is another mini-game.

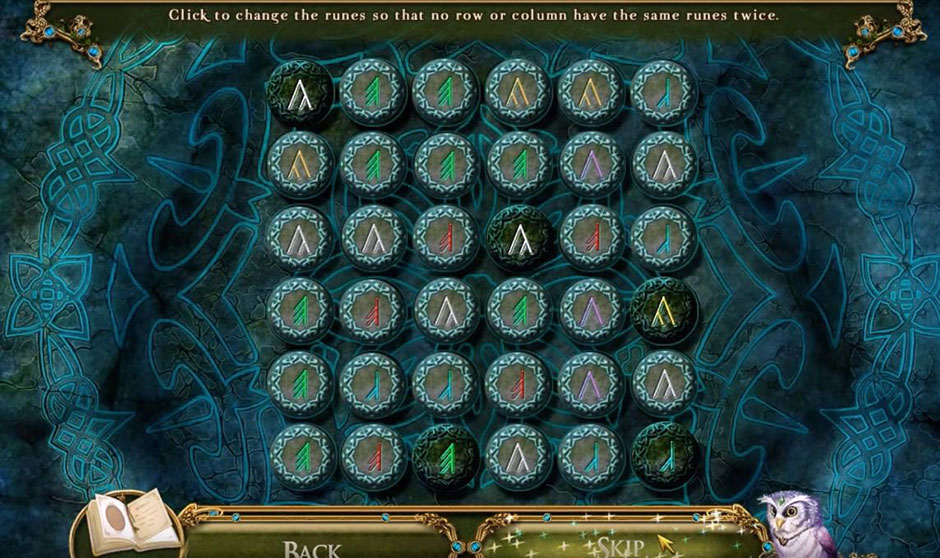
Awakening - The Skyward Castle - Scarf Rack Mini Game

Awakening – The Skyward Castle – Scarf Rack Mini Game

Swap scarves until there are no matches in any row or column. Earn the Padded Glovesand go back to Sophia’s Bedroom. Use the Padded Gloves on the star to receive the Reigning Star. Travel by map to the Research Room and use the Reigning Star on the mural to begin a mini-game.

Corral all lights that are lit up into the center of the screen to gain entrance to the secret chamber.

Collect the Stepladder and the Tesseract Prism and select the fireplace to uncover a hidden object game.

Collect the Fireproof Pouch and use other inventory items to clear the board and return to the research room.

Use the Padded Gloves on the incubator door and the Fireproof Pouch to get a Fire Charm. Return to the Secret Chamber.

Uae the Fire CharmPocket Dragon, and Cauldron to earn a Cauldron of Water and return to the Wizard’s Retreat.

Use the Fire Charm on the freezer, the Broken Chair Leg to dig out the Frost Charm and the Fire Charm.

Travel back to the Cartographer’s Room and use the Stepladder to access the Maintenance Hatch. This is a mini-game location.

Complete this challenging puzzle and then travel to the Rafters.

Awakening - The Skyward Castle - Blocks Puzzle

Awakening – The Skyward Castle – Blocks Puzzle

Exit to the Rafters.

Use the Cauldron of Water, the Broken Chair Leg, the Fire Charm, and Pocket Dragon to complete this area and then move on to the Grand Archway.

Utlize your Frost Charm and Bow and Arrows to earn a Quilt Patch before you move on to Sophia’s Bedroom.

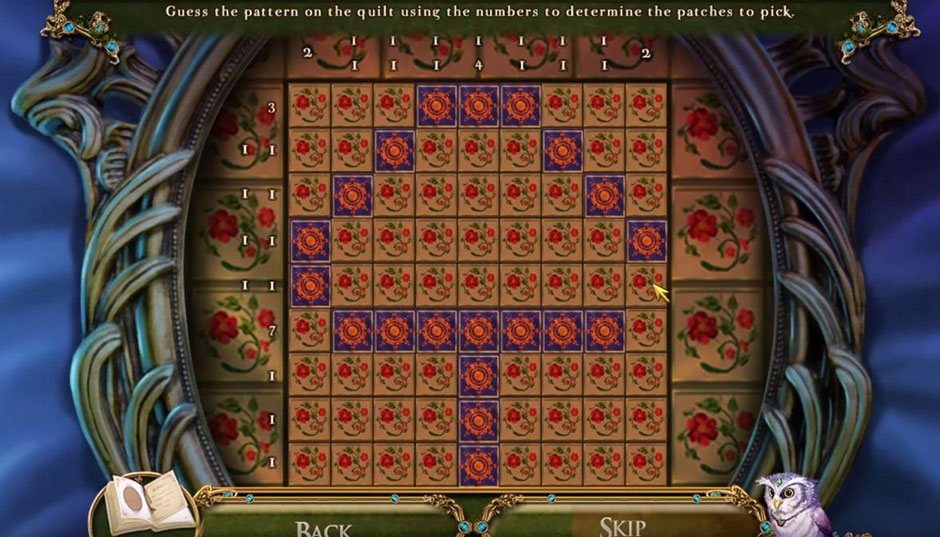
Use the Quilt Patches on the bed to begin a mini-game.

Awakening - The Skyward Castle - Quilt Patch

Awakening – The Skyward Castle – Quilt Patch

Re-create the pattern and earn a Paradise Pendant to take to the Grand Archway.

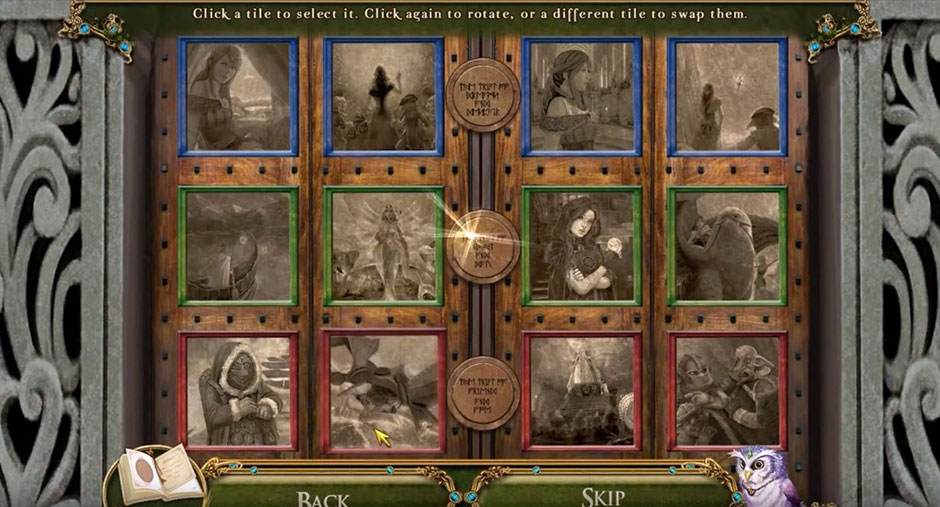
Use the Paradise Pendant to open the doors and start a mini-game.

Awakening - The Skyward Castle - Puzzle Story Solution

Awakening – The Skyward Castle – Puzzle Story Solution

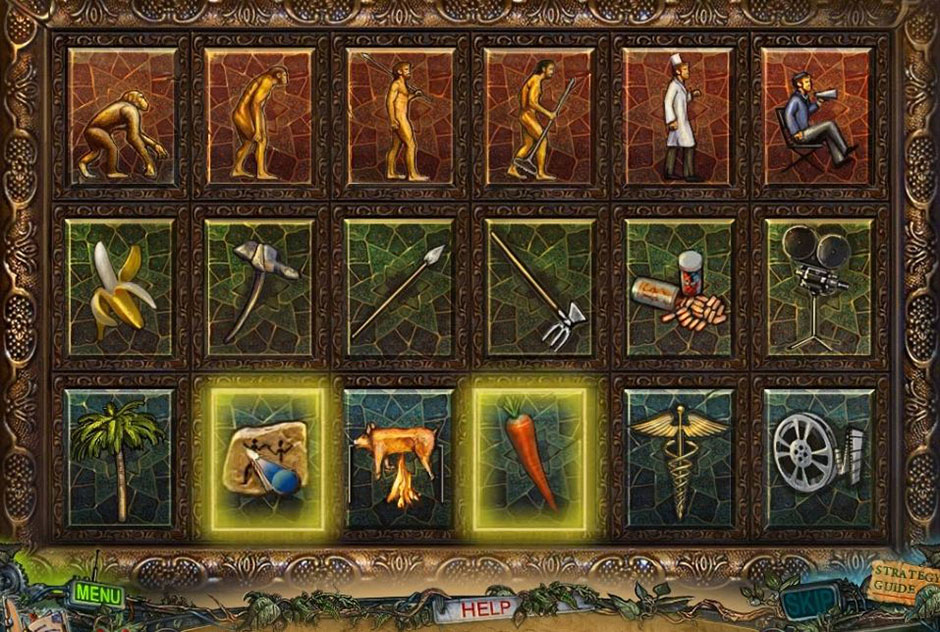
Arrange this puzzle story in order to be granted access to the Throne Room.

Chapter 4: Ascension

Use your Bow And Arrows to hit the crystal tree branch and knock down the Ruby Apple. Go through the open doorway.

Use the Ruby Apple on the pedestal to start a mini-game.

Awakening - The Skyward Castle - Ruby Apple Solution

Awakening – The Skyward Castle – Ruby Apple Solution

Line up the Runes to earn five Sigil Stones. Travel to the Conduit.

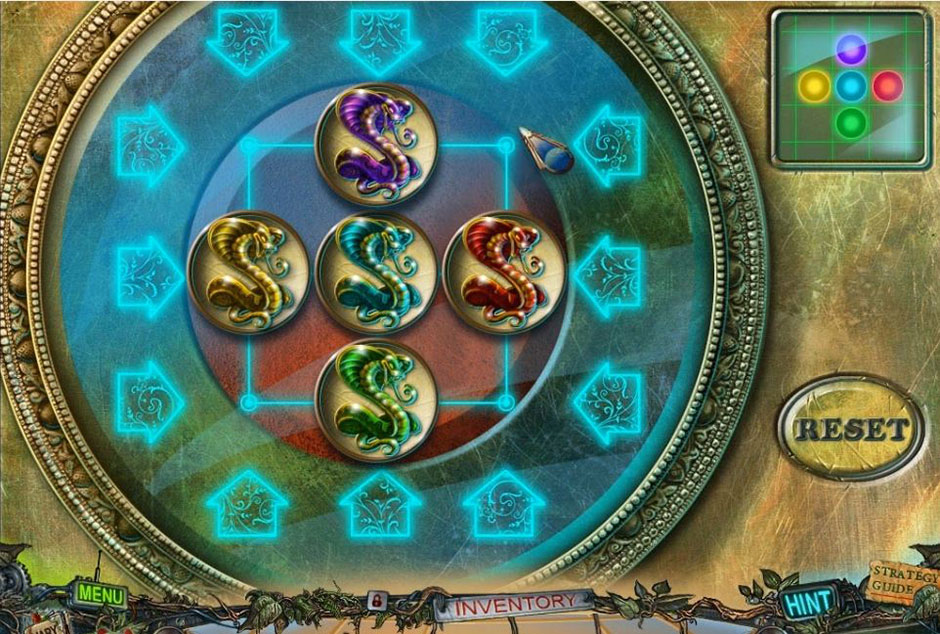
Place the Sigil Stones with alike symbols into the circles to activate a mini-game.

Match the pairs and push the controls forward. Collect the Tuning Fork and use it on the crystal.

Return to the Crystal Tree and use the Tuning Fork to achieve a Tuned Fork.

Use the map to speed to the Navigator’s Cradle.

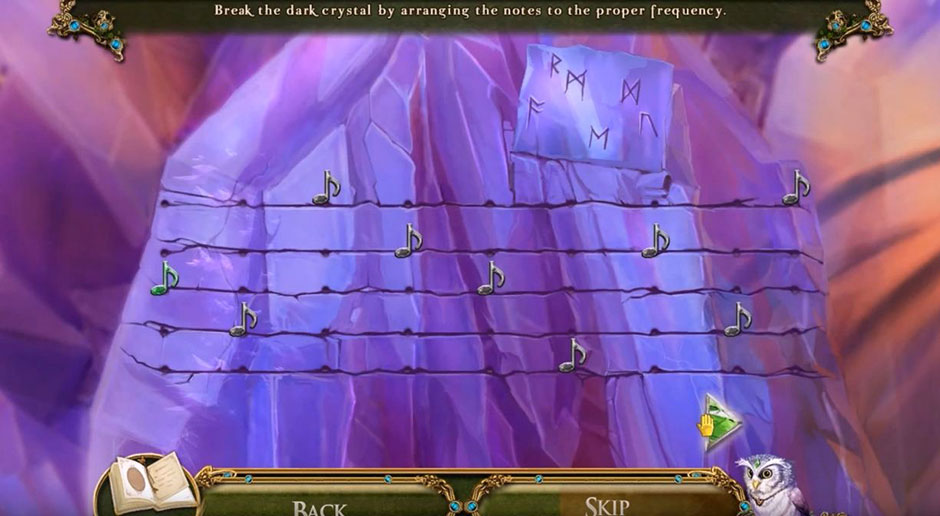
Turn the dark crystal into a mini-game with the Tuned Fork. This will open a mini-game of re-arranging musical notes.

Select the green button for accuracy of your puzzle.

Awakening - The Skyward Castle - Musical Notes

There is a hidden object game in the hammock.

Complete the necessary actions such as: using the bootlace on the talisman, the crowbar on the crate, the knife on the ritual doll, the chalk with a navigator, and take the lid off of the urn. Successfully move the four shells around and you are rewarded the Peg Leg.Travel to the Antechamber.

Use the Peg Leg on the chair.

The skull holds a hidden object search. Find all of the items to be rewarded the Skullface The Talisman.

Travel back to the Navigator’s Cradle area.

Use the Skullface The Talisman to the Navigator to collect the Captain’s Bracelet. Visit the Crystal tree where the Guardian Stone is located for a mini-game.

Use the Captain’s Bracelet to gain access to this random puzzle. This guessing game awards a Tapestry Patch. Leave the area to the left.

The Tapestry Patches can be used to complete a mini-puzzle that awards a Wheel Handle.

Awakening - The Skyward Castle - Tapestry Patches

Awakening – The Skyward Castle – Tapestry Patches

Travel back to the Navigator’s Cradle.

Use the Wheel Handle to open the door and cause the Captain to give you a mini-game.

Untangle all of the strings to gain a Gem Of Giants.

The combinations of O-K, I-M, O-N, and J-I will untangle the red strings. Exit and go left to the cabin.

The Gem Of Giants will open the lock and start a memory mini-game that you must pass to move on.

After the completion of the puzzle, collect the Steel Button from the chest and use it on the purse clasp. The Pocket Dragon will help. There is a hidden obstacle puzzle inside of the coin purse.

Find all of the items and open the hairpin. Move coins to find a “V” and earn a Safety Pin.

Use items such as the Safety Pin to pick the vanity lock and be rewarded a Bent Safety Pin to use on the Grappling Hook. Use the Grappling Hook to get the comb.

Activate the Scissors to achieve the Comb. Try the Comb in the keyhole and then use the Grappling Hook on the comb. There is a mini-game in the keyhole.

This random game requires you to line up the colors within the tumblers.

This puzzle is random so your results may be different than Hx3, Ix4, Lx3, Ix2, Hx4, and Ix3.

In this room, collect the KeyringRope Pulley, and Iron Crown.

Exit the room at the bottom of the screen.

The Captain’s stash needs your Keyring to open it.

Find the Pickaxe in the chest. Hand the Captain the Keyring for a Bottle Of Krug that you can take back with you to the Antechamber.

Go to the toppled statue.

Use the Rope PulleyPickaxePocket Dragon, and the Bottle of Krug on the statue.

Give the statue the Iron Crown and the Reigning Star to create a Princess Crown and earn Emerald Gemleaves. Go to the Crystal Tree.

Place the Princess Crown in the circle to enact a mini-game of changing tiles.

Awakening - The Skyward Castle - Changing Tiles

Awakening – The Skyward Castle – Changing Tiles

Use the Emerald Gem leaves on the branch to obtain the Sigil Orb.

Exit to the right.

Uaing the Sigil Orb on the conduit controls to activate a mini-puzzle.

Trace the figure and press the correct numbered squares and exit at the bottom of the screen.

The mini-game at the end of the hall in the jeweled box to earn the Steering Wheel. Return to the Navigator’s Console.

Put the wheel in the console, talk to Captain and Skullface, and spin the wheel. Use theTesseract Prism on Dreadmyre.

To exit the game and prevail over Dreadmyre, it is necessary to choose the mirror that is different from the others on the screen.
This puzzle is random so individual experiences and answers will vary.

When it comes to life, no one likes a cheater. But when it comes to a series of challenging and mind bending puzzles, games, and hidden objects, it is sometimes necessary to get a few tips and tricks. There are many great walkthroughs, such as The Dreamatorium of Dr. Magnus 2, that are avalilable for gamers to use, and this walkthrough for The Awakening – The Skyward Castle will help you get over the brain teaser or puzzle in this series that has you pulling your own hair out.

Congratulations! You’ve completed our Awakening – The Skyward Castle Walkthrough! For more great tips and tricks, visit our blog!

Delicious – Emily’s Hopes and Fears Walkthrough

Big City Adventure – Shanghai Walkthrough

Building the Great Wall of China 2 Walkthrough

‘The Awakening – The Skyward Castle Walkthrough is meant as a guide and does not contain cheats, hacks or serials.’

The post Awakening – The Skyward Castle Walkthrough appeared first on GameHouse.

Surface – The Noise She Couldn’t Make Walkthrough

$
0
0

In your town, a young woman has been found alongside the road. She is in a coma and all that is known about her is that there was a bloody knife with her. What happened to her? That is exactly what you are going to find out in Surface – The Noise She Couldn’t Make. This hidden object adventure game will take you through the stages of her illness, as you try to figure out what happened to her. In this Surface – The Noise She Couldn’t Make walkthrough, you will find tips and hints for navigating your way through the mystery of ‘The Young Woman’.

Contents

General Tips & Tricks

Surface – The Noise She Couldn’t Make has rules similar to other hidden object games; however, the hidden object scenes and mini-games are not standard. The games and scenes change every time you play them. To help you with your quest, you will have a journal to guide you. This journal contains a map that will help you always find your way, so becoming lost should not be a problem you have to worry about.

You have the choice of three difficulty levels: casual, advanced, and hardcore.

  • Casual works best for beginners. The places you need to go will be highlighted for you.
  • For something more challenging, try the advanced mode. It will still highlight areas you need to go to, but your hint bar will load slowly.
  • If you are truly adventurous, try the hardcore mode. In this mode you will have to complete all the puzzles and there will be no hints.

Surface: The Noise She Couldn’t Make Walkthrough

Chapter One: Fever

Surface - The Noise She Couldn't Make - Chapter One Fever

Surface – The Noise She Couldn’t Make – Chapter One Fever

If you are new to the game, watching the tutorial is the best way to learn how to find the objects. You find ‘The Young Woman’ (Jane’s) first symptom by clicking on her. Go to the dock, grab the Net and obtain the Paper Boat. Head towards the flowers to pick up the Key. Locate the wardrobe and use the Key to open the first hidden object game. Once you find all of the items, you will receive the Magician’s Wand.

Surface - The Noise She Couldn't Make - Magical Wand

Surface – The Noise She Couldn’t Make – Magical Wand

Go to the wrecked ship and take the Sharp Knife from the cannon. Locate the Carrot near the boat. Cut the red cloth with the Sharp Knife, and put the Piece of Cloth into your inventory. Go to the rabbit hole and get the Rabbit by using the Carrot you just found. Go to The Decrepit House.

In The Decrepit House first find the top hat, then put the Rabbit in it, and put the Piece of Cloth over it. Wave the Magician’s Wand over the top hat and pull out the Magician’s Scarves, Head towards the stump, grab the Torch and return to the ship.

Make a Grappling Hook by using the Magician’s Scarves. Grab the Gunpowder from the gargoyle and head to the town gate. Locate the tree and place the Grappling Hook on it. Grab the Bucket of Water, and dump the Bucket of Water on Jane to help reduce her fever. Turn your Torch into a Burning Torch by placing it near where Jane was located. Grab the Hammer, Lever, and Glass Globe before heading back to the ship. Place the Lever on the ladder’s control, pull the lever, and go up the ladder. You will find a Ship’s Wheel. Put it into your inventory. Locate the winch and use the Hammer on it to obtain the Net. Play the hidden object game to earn a Skull, then grab the Compass from the map table, open a shell to grab a Pearl, and head to the globe. Place the Compass on top to find a mini-game. Use bubbles to maneuver your Paper Boat to the apple flags and obtain the Wooden Flag.

Surface - The Noise She Couldn't Make - Mini Game Chapter One

Surface – The Noise She Couldn’t Make – Mini Game Chapter One

Head to the cannon, move the barrel, and grab the Gunpowder. Use the Gunpowder and the Skull to open the barrel. Use your Burning Torch on the end of the cannon to fire it. Give the gargoyle your Wooden Apple to get the Doorbell. Go towards The Decrepit House, put the Doorbell on and ring it. Inside of the house, go to the dollhouse, grab the Mirror Shard from the broken mirror, and grab the Ironing Board Head back to the wrecked ship. Cover the hole in the ship with the Ironing Board and proceed into the ship’s hold. Before looking at the table, tip over the bottle, then grab both the Gear and the Butterfly in a Jar from the table.

Go back to the town gate, place the Butterfly in a Jar near the flowers to get the Medallion Head back to the ship, and place the Medallion on the indentation. Move around the gems until they are in the right positions, then open the chest to release a page of Jane’s memory. Take the second Pearl Go to the dollhouse and locate the cabinet. Put the Gear into the mechanism and take the Spring, then go to the chair, put the Spring in, and lower the chair. Remove the Pin from the doll, take the Mirror Shard, and cut the necklace to receive another Pearl Go back to the town gate. Find Jane’s real name, then go to the door. Put the 3 Pearls on the shelf to enter a mini-game. Use controls to move stars to win the game.

Surface - The Noise She Couldn't Make - Mini Game Skull

Surface – The Noise She Couldn’t Make – Mini Game Skull

Head towards Main Street, locate the carriage wheel and take both the Bride Figurine and the Mailbox Door Walk to the tower gate and take the Star and Statue’s Hat from the lion. Grab the Belt from the gate and get the Scalpel from the stable gate. Go back to the ship, find the toy soldier, and place the Pin to obtain the Windup Key. Place the Windup Key in your inventory. Go back to the dollhouse, find the music box, put the Windup Key into the lock, and grab the Mouse Place the Bride Figurine next to the groom on the wedding cake, and move the couple to the left. Grab the Mechanical Hand, and go back to Main Street.

Locate the carriage wheel and free the Mailbox Flag with the Mechanical Hand Head back to The Decrepit House, and place the Mailbox Flag and Mailbox Door on the mailbox to obtain the package. Open the package, retrieve the Black Paint, and go back to Main Street. Use the Black Paint on the carriage door, enter the carriage, and give the Mouse to the snake. Obtain the Heart before clicking on the couch to play the hidden object game. Once you beat the game, you will receive a Rook.

Surface - The Noise She Couldn't Make - Cage

Surface – The Noise She Couldn’t Make – Cage

Open the burlap cover with your Scalpel and take the Monocle. Place the stomach sign in the right spot before placing the Heart into the now empty spot. Go back to the ship and look for the cage. Take the Knight and replace it with the Rook Go to the tower gate and go to the stable. Put the Knight into the lock to open the stable. Go inside and look toward the ladder. Grab the Boot and Ladder before opening the stall. Replace the rope with the Belt Take the Ship’s Wheel to open the stall, play the hidden object game, and receive a Horseshoe

Return to Main Street, locate the horse’s head, and put the Horseshoe into the indentation you find there. Obtain the Stone Pipe, and put the ladder on the lamppost to retrieve the Good Luck Medallion. Remove the Lamp by pulling the chain and head back to the carriage. Put the Lamp on the counter and retrieve the Camera Head back to the stables, locate the dog house and retrieve the Collar. Put the Camera near the dog house, take a photo of the bone, then put the Picture of a Bone into your inventory.

Head back to the ship and locate the statue. Place the Stone Pipe, Statue’s Hat, and Monocle on it to obtain the Brain. Return to the carriage, find the metal man, put the Brain in the head. Also, place the Picture of a Bone on the sign before zooming in on the mid-section. Start the mini-game, and put together a jigsaw puzzle to take the Defibrillator

Surface - The Noise She Couldn't Make - Jigsaw Puzzle

Surface – The Noise She Couldn’t Make – Jigsaw Puzzle

Head back to the tower gate and place the Defibrillator on the lock to open it. Head towards the throne room, grab the memory page, and remove the pillow to take the Gas Head back to the carriage, replace the broken hydraulics tank with the Gas, and grab the Plunger Go back to the throne room and replace the Plunger near the metal door. Go into the reservoir.

Chapter Two: Respiratory

Surface - The Noise She Couldn't Make - The Reservoir

Surface – The Noise She Couldn’t Make – The Reservoir

Grab the Fishing Rod from the boat. Take the seaweed off the whale and go to the windmill. Grab the Ruby and the Arrow Fletching Walk to the shed, unlatch the door with the Fishing Rod, and take the Oar Retrieve the Bucket with Tar from under the spider near the door. Go to the lake coast, find the statue, and put the Ruby on its belt. Obtain the Weight and proceed to the windmill. Find the gate and put the Weight on the hook. Go into the cave, retrieve the Spray Can from the backpack and continue on. Grab the pool toy, blow it up with the Spray Can, and take the Board Head back to the lake coast.

Place the Board in the boat and pour the Bucket of Tar over it. Put the Oar in the boat and go towards the island. Find the figures to take the rings. Click the trash heap, activate the hidden object game, and earn a Ribbon

Go back to the windmill, tie the twigs together with Ribbon, and take the Broom. Go back to the island. Remove the cobwebs on the figures with the Broom, place the Good Luck Medallion on a figure and go into the Tree of Wishes. Find the frog, take the Crown and the Opener Put the Arrow Fletching on a stick before looking at a painting. Continue on and locate the convertible top. Open it with the Opener and grab the lever.

Go into the car, open the zipper on the bag, and grab the Throwing Star, Screw, and The Clapper Return to the windmill. Retrieve the Key near the window by using the Throwing Star Head back to the lake coast, look for the train, and take the Bell after putting The Clapper on it. Return to the Tree of Wishes. Find the toy train, place the Bell on the ear trumpet and grab the ticket. Take the Lock from the table by using the Key.

Find the train at the lake coast and put the Ticket on the stamper. Pull the lever and go into the train. Locate the case and retrieve the Code Paper. Grab the Wheels from the open bag before starting a hidden object game to obtain Scissors.

Return to the lake coast, find the whale, and put the Wheels on the cart. Go back to the cave and open the backpack with the Scissors. Grab the Button before returning to the train. Put the Button on the case. To open the case, press the left then center button and grab the Ship in a Bottle. Separate the pair to make them into simply a Ship and a Bottle separately. Go back to the car, open the glove box, enter the code from the Code Paper and find the Key. Put the Key on the bracelet near the car’s steering wheel to make a Bracelet Piece. Head back to the train, place the Bracelet Piece on the lid to start a mini-game. Put all the gems into the right outlines to win the game.

Surface - The Noise She Couldn't Make - Gems Mini Game

Surface – The Noise She Couldn’t Make – Gems Mini Game

Grab the memory page from the chest and retrieve the Fork before heading back to the island. Go to the back of the car and use the Lock to remove the chain. Also, take the Key by using the Fork before returning to the windmill. Use the Key on the spider to obtain the Car Key and return to the car. Turn on the car with the Car Key and it will return you to the lake coast. Retrieve the Key from the whale before heading to the windmill. Put the Key into the body of the spider before entering the windmill. Grab the Handle and Matches from the table, read the page near the tank, and take the Drill Bit to activate a hidden object game. After completing the game, you will receive an Old Rag.

Return to the island, find the case and grab the Plaster Head. Create the Drill by combining the Drill and the Drill Bit. Go around to the back of the car, put the Bottle under the dripping fuel, and use the Drill to create a bigger hole. Put the Bottle with Fuel into your inventory before heading back to the cave. Go to the pedestal, put the Plaster Head on it and grab the Tiara. Proceed to the Tree of Wishes. At the Tree of Wishes, place the Tiara on the frog’s head. Wrap the Old Rag around the tip of the arrow, pour the Bottle of Fuel on the arrow, and light it with the Matches. Place the Burning Arrow into your inventory before clicking on the round chest to start the mini-game. Put the Handle near another piece to start the game. Combine items on the board until the board is full and receive the Lantern.

Surface - The Noise She Couldn't Make - Round Chest Mini Game

Surface – The Noise She Couldn’t Make – Round Chest Mini Game

Go to the windmill, combine the bow with the Burning Arrow to make the Longbow. Head to the cave and light the scarecrow on fired with the Longbow. Go to the tent inside the cave, open it, and put the Lantern in the tent. Take the Handkerchief and Gloves. Repair the ax with the Screw and create the Ice Ax. Keep walking until you find the flames. Grab the Wrench with your Gloves, head towards the cave wall and use the Ice Ax. Grab the Chalk. Clean the lens of the telescope with the Handkerchief. Place the Star on the string and use the Chalk to make an outline. This triggers another mini-game where you need to move the caveman to gather his belongings in the fields. You will receive a Stopwatch when you complete the game.

Surface - The Noise She Couldn't Make - Caveman Game

Surface – The Noise She Couldn’t Make – Caveman Game

Head back to the windmill, find the reservoir, then cover and remove the bolts with the Wrench. Go to the control panel and put the Stopwatch on it to activate a mini-game. You will need to place the timers correctly to open the gates for the glass ball to travel. Once the timers are in the correct positions, press the red button

Surface - The Noise She Couldn't Make - Solution Timers Mini Game

Surface – The Noise She Couldn’t Make – Solution Timers Mini Game

Chapter Three: Paralysis

Go to the path leading to Sand River, find the compasses and grab the Magnet. Click on the debris to start the hidden object game where you will receive a Guitar Pick. Go to Sand River, use your Lever to raise the gate, and grab the Magnet from the cactus. Grab the Dropper. and go near the statue to find Jane’s next symptom. Kill the scorpion with your Boot. Collect a Tear using the Dropper, then use it on a plant. Find the drummer and retrieve the Medallion with the Dog. Also, locate the piper and grab the Brush.

Head towards The Oasis, find the soldier, and retrieve the Smoke Bomb. Take the dead flower from the vase and go down the left side of the fork in the road. Scare away the bees by throwing the Smoke Bomb on the flowers and retrieve one Flower. Retrieve the Valve from the well, then head towards the fallen column. Head towards the Hall of Ropes. Find the winch and put the Lever on top before playing a mini-game. You need to use the spool of rope to trace all the lines, but remember, you cannot retrace your path.

Surface - The Noise She Couldn't Make - Hall Of Ropes Mini Game

Grab the Guitar and the Blunt Blade before traveling to the desert. Go to the large rock, sharpen your Blunt Blade into a Sharp Blade and return to the Hall of Ropes. Take the Rope from the box as well as the Rake. Return to The Oasis, put the Flower into the vase near the soldier, and grab the Non-Loaded Musket. Look in the bag to retrieve the Pipe Brush before heading back to the fork in the roads.

Go to the well to clean the pipe with the Pipe Brush. Grab the Form and return to The Oasis. Use the Rake on the beach and put the Form on the sand to make a Sand Fish. Return to Sand River, find the cat, and place the Sand Fish in the bowl to retrieve the Sand Cat. Use your map to return to the Hall of Ropes to scare the birds with the Sand Cat.

Head into the Hall of Birds to get the Screwdriver. Place your Rope on the gears you find in the column’s hole and retrieve both the Iron Ball and the Hypno-Medallion. Locate the box, then clear off the damp with the Screwdriver and retrieve the Three-Eyed Muzzle. Move back to the Hall of Birds, locate the cage and use the Brush. Put the Three-Eyed Muzzle in the last spot. Arrange the line of faces based on the number of eyes they have, receive the Climbing Equipment and the Lighter. Head back to The Oasis and find the back wall. Place the Climbing Equipment on the gear. Head up the rocky slope to the flying machine to grab the Lever. Take the Bellows from the fan, start the hidden object game at the base of the flying machine, and take the Clock Hands.

Go back to The Hall of Birds, locate the tools, use your Lever to open the vice, and retrieve the Tongs. Locate the post base and inflate the air bag with the Bellows. Return to Sand River, place the Clock Hands on the clock and lift the gate. Push the Iron Ball through the opening and grab the Vitruvian Man. Use the Hypno-Medallion to charm the Snake, and use the Snake to retrieve the Prism under the rock before heading back to The Oasis. Remove the nails from the tree with the Tongs and retrieve the Mechanical Egg. Go towards the rocky slope and locate the case on the flying machine. Put the Vitruvian Man on the case and take the Bomb. Push on the bird to activate the mini-game. Use the Mechanical Egg and the Prism in the game. Move the mirrors to get the light to hit the egg to get the Mechanical Bird.

Surface - The Noise She Couldn't Make - Mechanical Bird Game

Surface – The Noise She Couldn’t Make – Mechanical Bird Game

Go back to The Hall of Birds and put the Mechanical Bird on the metal tree. Grab the Flute from the pedestal, return to the statue, and give the Flute to the piper. Give the guitarist the Guitar and Pick before heading to the fork in the road. Locate the fallen column, put the Bomb on it, and light it with the Lighter. Go to The Hall of Rain, locate the drain and grab the Hand by using the Ship. Put the Cart into your inventory before looking at the pipes and retrieving both the Adhesive Tape and the Spade. Go to the rocky slope. Place the Cart with the fan blade and take the Drumsticks and Fan. Locate the dog’s grave, use the Spade to dig a hole and put the Medallion with the Dog on top. Retrieve the Plaster Head from the box and head to The Hall of Wind. Fix the fan with the Fan Blade and fix the glass with the Adhesive Tape to activate the mini-game. Create a pattern with the triangles to compete the puzzle.

Surface - The Noise She Couldn't Make - Triangles Puzzle

Surface – The Noise She Couldn’t Make – Triangles Puzzle

Collect the Bagpipe from the door before returning to Hall of Rain. Fix the column with the Ceramic Head and locate the pipes. To fix the pipes, place the Valve on the stem and turn. Retrieve the Drum from the platform and head back to the statue. Put the Hand on the bagpiper before giving him the Bagpipes and giving the drummer the Drum. Do not forget to give him the Drumsticks as well. Take the Signal Key from the platform and go back to the rocky slope.

Chapter Four: Nightmares

Surface - The Noise She Couldn't Make - Chapter Four Nightmares

Surface – The Noise She Couldn’t Make – Chapter Four Nightmares

Click on the crashed flying machine to activate the hidden object game to earn Sand. Toss the Sand on the fire before going to the tower entrance. Grab the Detergent from the bushes before heading into the throne room and retrieving the Sponge from the ground. Examine the handprint, then take the Valve and head to the tree. Place the Musket on the tree to receive the Bullet. Load the Musket and place the Loaded Musket into your inventory. Clean the horse with the Detergent and the Sponge to receive the Horse-Rider. Go back to the throne room, place the Horse-Rider on the device, and play the mini-game. Move the controls so that all the horses move at the same speed.

Surface - The Noise She Couldn't Make - Horse - Rider Game

Surface – The Noise She Couldn’t Make – Horse – Rider Game

Go into the secret room, retrieve the Plastic Hand from the vanity, and take the dress. Head back into the throne room, place the Plastic Hand on the handprint to collect the Pin. Go to the chest, put the pin on the top, and activate the mini-game. To win the mini-game, move the gems around with the magnets until they are in the correct positions.

Surface - The Noise She Couldn't Make - Magnets Game Solution

Surface – The Noise She Couldn’t Make – Magnets Game Solution

Look in the chest and retrieve the Hook and the Green Gem. Go back to Main Street, locate the window above the ladder, and shoot the lock with the Loaded Musket. Grab the Blue Gem, head to the manhole cover, and place the Valve on it. Move the lid five times to take the Gardening Scissors. Return to the tower entrance, and use the Gardening Scissors to cut the ivy, and obtain both the Peg and Door Knocker.

Head down the dark alley, place the Green Gem and Blue Gem in the eye sockets on the door. To go into the memorial, place the Door Knocker on it and knock on the door. Inside the memorial, go to the gong and retrieve the Elephant Figurine. Return to the secret room, put the Elephant Figurine on the mirror to get the Gong Mallet. Go to the memorial, place the gong on the Hook, and hit it with the Gong Mallet. Find the fountain, grab the Nameplate and proceed down the dark alley. Place the Nameplate on the back gate to activate a mini-game. Unveil the constellation by moving the green glass ball around.


Surface - The Noise She Couldn't Make - Constellation Sollution

Surface – The Noise She Couldn’t Make – Constellation Sollution

Head to the old chapel, grab the Scythe from the mound, and head to the door. Grab the Candle, head to the backyard, and cut the reeds with the Scythe. Remove the Rag and the Dragon Tooth before going to the throne room. Place the Candle on the left statue and put the Dragon Tooth in the mouth. Light the candle, put the Lit Candle in your inventory, and go into the backyard. Place the Lit Candle into the lantern, retrieve the Wheel from the cart, then go back to the old chapel. Find the battering ram, add the Wheel and place the Peg on the wheel.

Find and talk to Liza, take the Stick from the pew, and locate the broken Pitchfork. Replace the Stick and place the Pitchfork in your inventory. Head back to the backyard, go to the cart, move the hay with the Pitchfork, and grab the Forceps. Head into the dark alley, find the birdhouse, and retrieve the Heart-Shaped Badge with the Forceps. Head to the secret room, locate the dress form and place the Heart-Shaped Badge on the slot to retrieve the Needle and Thread. Repair the blanket with the Needle and Thread before placing the Blanket in your inventory. Go back to the chapel and cover the eye with the Blanket. Grab the Lantern and go to the school.

At the school, place the Lantern on the noise, clean the chalkboard with the Rag, and go to the hospital. Take the note from the nurse, go to the hut, and grab both the Mat and the Knob from the door. Drape the Mat over the fence, climb over the fence, and play the hidden object game to receive a Saw.

Locate the well, use your Saw to cut the beam, and retrieve the Well Lid and the Empty Tranquilizer Dart. Head to the front door and use the Well Lid on it. Go into the living room, retrieve the Switch Button from the door, and take the Screwdriver from the stairs. Return to the backyard, remove the screws from the door with the Screwdriver, and grab the Fridge Handle. Go into the living room, put the Fridge Handle on the fridge and open it to receive the Pumpkin. Fill the dart and place the Full Tranquilizer Dart in your inventory. Find the dart gun, load it, and place the Loaded Tranquilizer Dart Gun into your inventory. Place the Pumpkin on the trap and continue up the stairs. Locate the dog and use the Loaded Tranquilizer Dart Gun on it. Grab the Nippers from the trophy bear, activate the hidden object game to win the Shovel.

Go back to the backyard, dig up the mound with the Shovel, and grab the Wire. Head up to Liza’s room and replace the Wire and Switch Button. Replace the Knob on the drawer to retrieve the Hunting Horn. Find the bear downstairs and give it the Hunting Horn. Press the buttons to get one Pearl Go to the key cabinet, use the Nippers to open it and receive both the Snake Head and the Key for Byron’s Letters. Go to the mantle, place the Snake Head on the cane and receive another Pearl. Head back to the well, find the keyhole and use the Key for Byron’s Letters to rescue the dog. Find the last Pearl.

Surface - The Noise She Couldn't Make - Lockpit Solution

Surface – The Noise She Couldn’t Make – Lockpit Solution

Return to Liza’s room, locate the doll, put the Pearls on the necklace, and receive the Lockpick. Go into the living room, find the door, and use the Lockpick to open the last mini-game. Move the forms around to open the lock. Once you solve the puzzle, you have finished the game.

There you have it! You have solved the mystery and helped Jane! Through the use of the tips and tricks within this The Surface – The Noise She Couldn’t Make walkthrough, you have saved Jane and unlocked the mystery of what happened to her.

Be sure to visit our blog for more great tips and tricks!


The Surface – The Noise She Couldn’t Make Walkthrough is meant as a guide and does not contain cheats, hacks, or serials.

The post Surface – The Noise She Couldn’t Make Walkthrough appeared first on GameHouse.
Delicious – Emily’s Taste of Fame Walkthrough

$
0
0

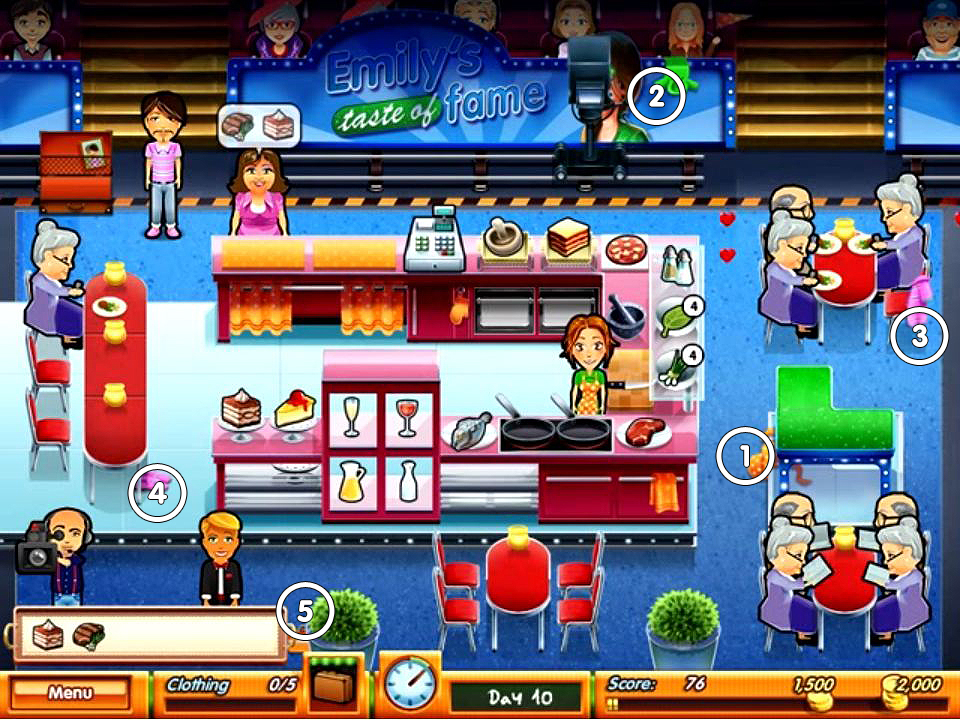
Delicious – Emily’s Taste of Fame is a time management game where you serve several customers at a time while meeting specific challenges each day. There are five primary locations where you show off your multitasking skills. You spend 10 days at each location.

Contents

General Tips & Tricks

  • General Tips and Tricks
    Delicious – Emily’s Taste of Fame Walkthrough
  • Betty’s Drive Thru
  • Mo’s Farm
  • Charles’ Candy Shop
  • The TV Studio
  • Snuggford Fair
  • Mice locations


General Tips and Tricks

When you start your day, make sure products with a number beside them are stocked and filled to their maximum. The small number does not reflect how much can be filled, only the amount on hand.

Customers

There are different levels of patience among customers. Your older and rural customers are more patient, so if you need to get to customers with red faces, do that first. Also, serve drive thru and counter customers before those seated. There are a number of upgrades and options that can help seated customers happy and patient. When the entertainer option becomes available, hire one to keep your customers happy. Happy customers tip better!

Bonus Points

You earn bonus points three ways. Every day you are presented with a new and unique challenge that you must accomplish while serving customers. You really have to adjust your priorities to make sure your customers are being served quickly and accurately.

Winning challenges and keeping customers happy is what it’s all about because you want to make money quickly so you don’t have to work so hard as the game progresses. Reach expert level to earn cash for items located in the shop. Try not to buy anything at Betty’s Drive Thru and save it for later when the challenges are greater.

Another way to earn bonus points is by catching the mouse. He’s quick so you have to be quicker. You have an edge the mouse does not know about. Whenever you hear the squeak, start hunting for the mouse and click him to catch him and earn 100 bonus points.

Most importantly, take care of multiple customers at the same time to receive a combination bonus. Serve your customers at the same time when you can and always try and collect the money at the register when at least two people want to pay.

General Gameplay

Reach expert level by filling the bar to the last star. The bar is located at the bottom of the screen and monitors your progress. If a particular day is overly challenging, go into the menu and change the difficulty level for that day to acquire your expert level. You want to earn as much as you can to go shopping.

Shopping is located in the game menu and contains items to help you earn more without working so hard all the time. Some items help customers mood while others help you prepare menu items faster, meaning you can serve more customers quickly and make better tips.

To make the most of your day, always be positioned in the right place to save time. That place is generally at the registers as it places you closest to food prep and checking customers out. Click the register to return there.

Be aware of all customers, including the drive thru service. Be careful to prepare the food as ordered. Failure to do so not only costs you time, it lowers tips and can sour their mood if they don’t receive their full order. Make sure empty tables are cleaned off too because you don’t want to lose a customer because there is no place to sit.

When dealing with multiple requests, just go to the places you need to by clicking the item or area because Emily will follow advanced instructions and complete them in the order given. To stop this at any time, just click Emily. Once you are about to close or are closed, don’t worry about stocking up or cleaning tables because it will not cause you to lose business.

Delicious – Emily’s Taste of Fame Walkthrough

Betty’s Drive Thru

If you are not familiar with gameplay from previous games in the Delicious franchise, take the tutorial as it does not last too long and you will be a pro before you know it.

Day 1

Today’s Menu

  • Soda
  • Coffee
  • Donut
  • Chips
  • Hamburger – Plain

Challenge of the Day

It’s your first day and that is challenge enough.

The Mouse 

When you hear the squeak, catch the mouse hiding in the middle planter to the left.

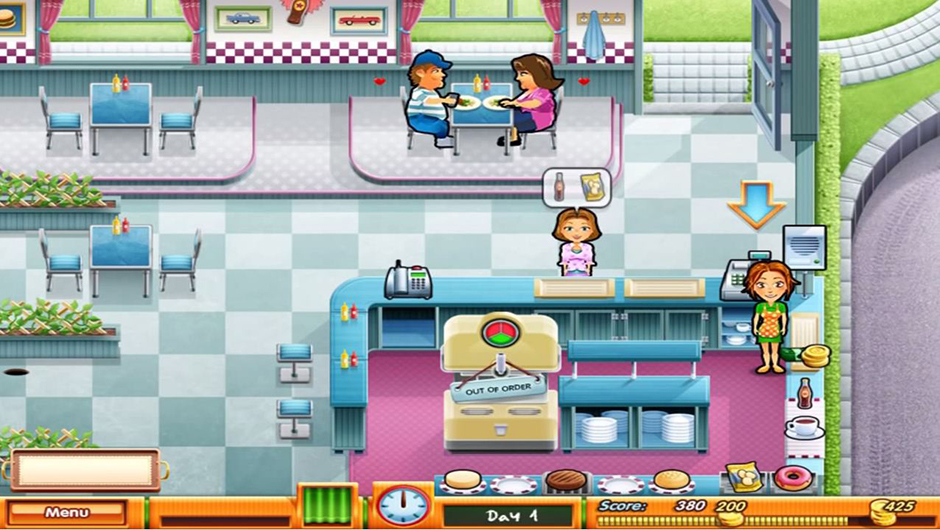
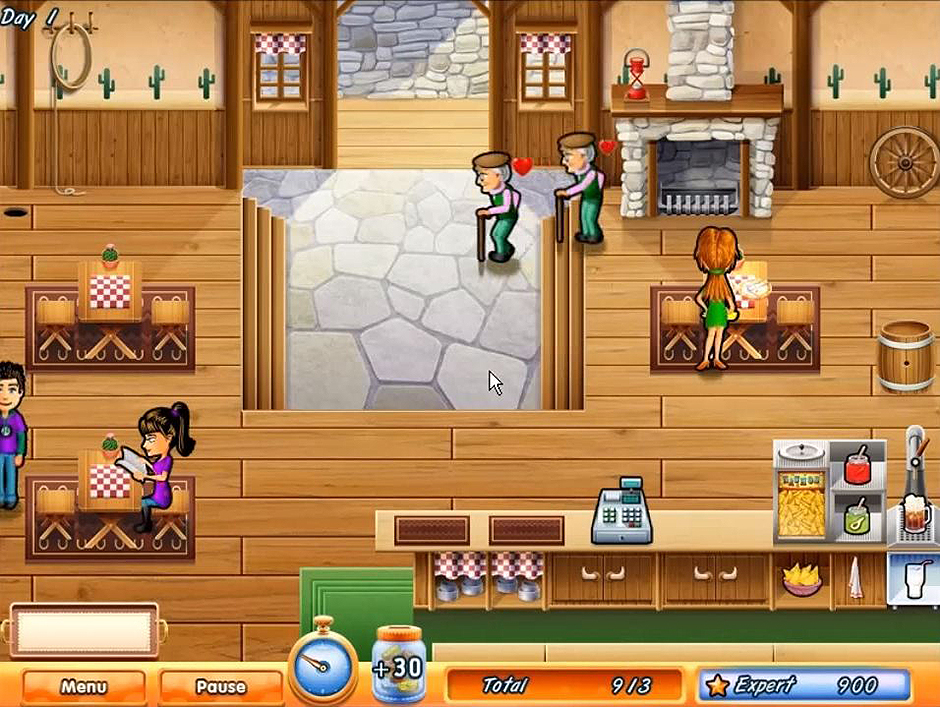
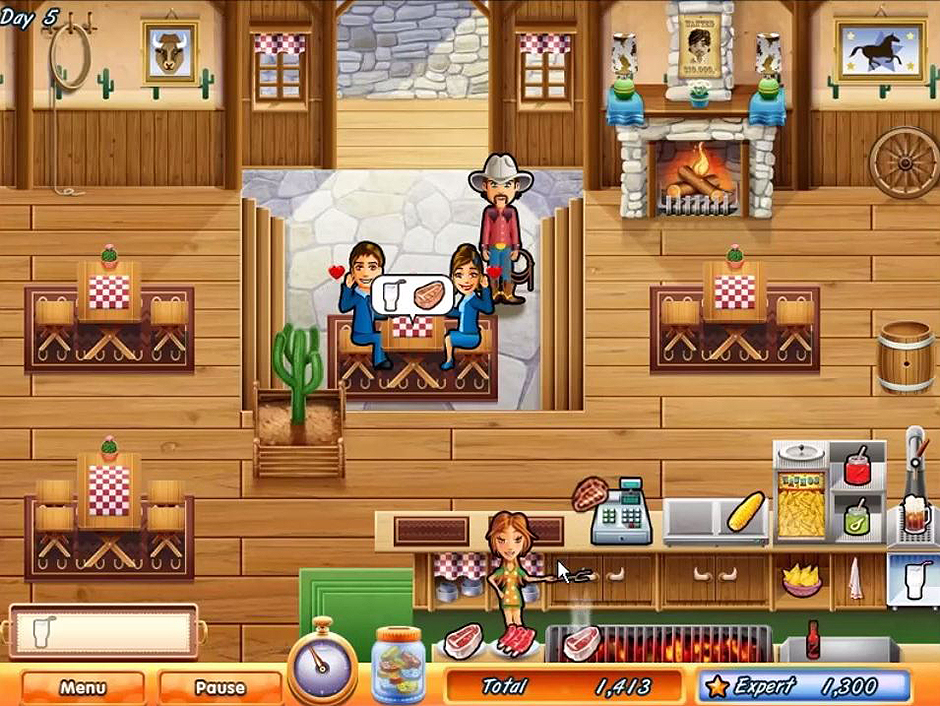
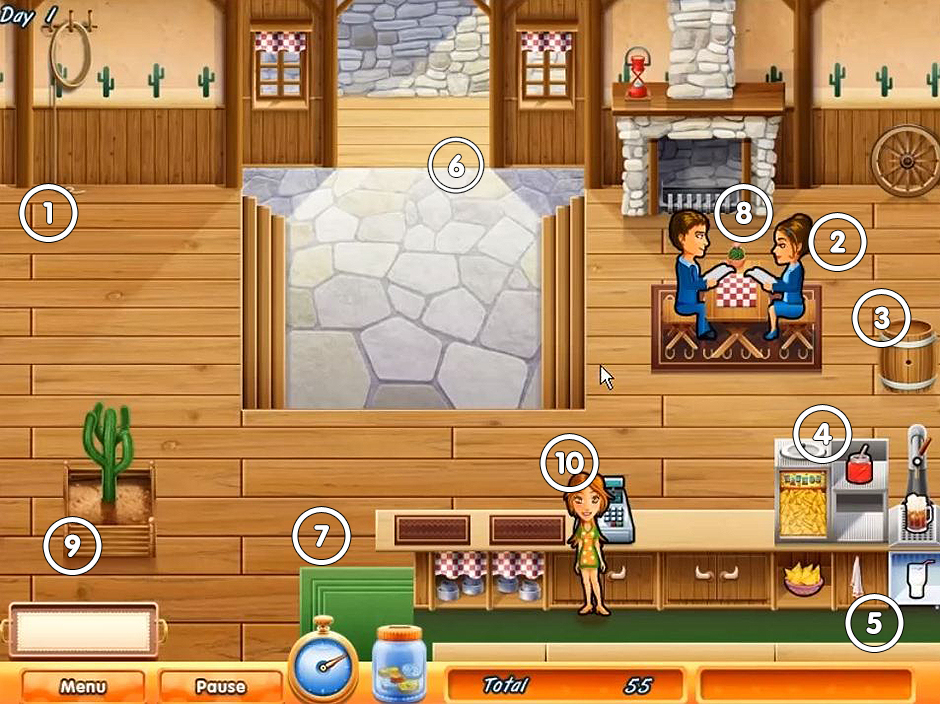
Today is about learning and understanding how things work. Hamburgers take longer to make because you have to click three items instead of one. Tables also take time to clear. A red exclamation point appears above tables that are ready to be cleared. Avoid cleaning tables when you have an order. There is a speaker near the register. This is for drive thru customers. Prepare the order and have it at the window to get a 50 point bonus. Also, don’t let cash sit at the window for too long because it will decrease in value until it is gone or placed in the register.

Delicious - Emily's Taste of Fame - Day 1

Delicious – Emily’s Taste of Fame – Day 1

Day 2

Today’s Menu

New Item: Hamburger – with lettuce and cheese toppings

Challenge of the Day

Francois needs you to receive eight packages that will be delivered by the postman.

The Mouse

When you hear the squeak, catch the mouse hiding above the special task box.

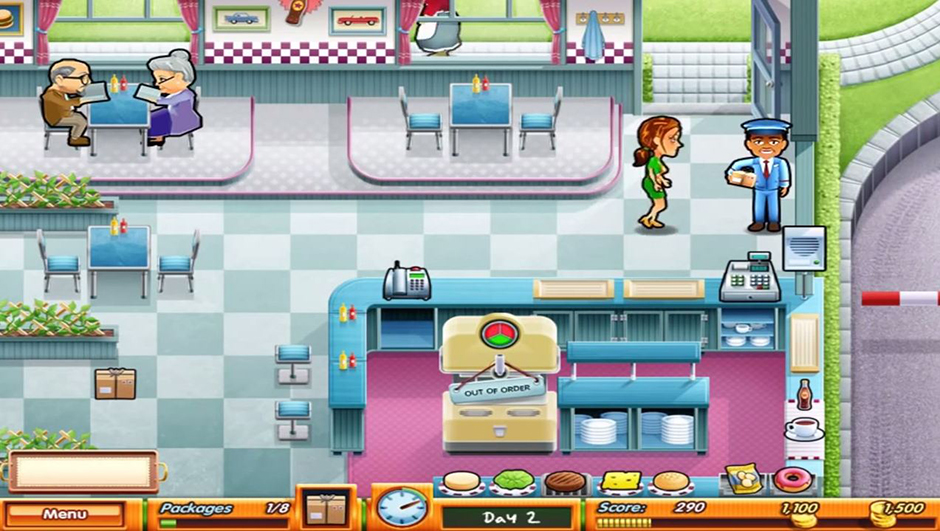
Today you want to be careful to make the burgers as the customer orders them because some will want it plain, or with just cheese or lettuce, and everything. Making the wrong type will cost you time and points. Oh, don’t forget to click the postman and get a package because the postman has some patience but he won’t wait too long.

Delicious - Emily's Taste of Fame - Day 2 The Postman

Delicious – Emily’s Taste of Fame – Day 2 The Postman

Day 3

Today’s Menu

New Item: Waffles and chocolate sauce

Challenge of the Day

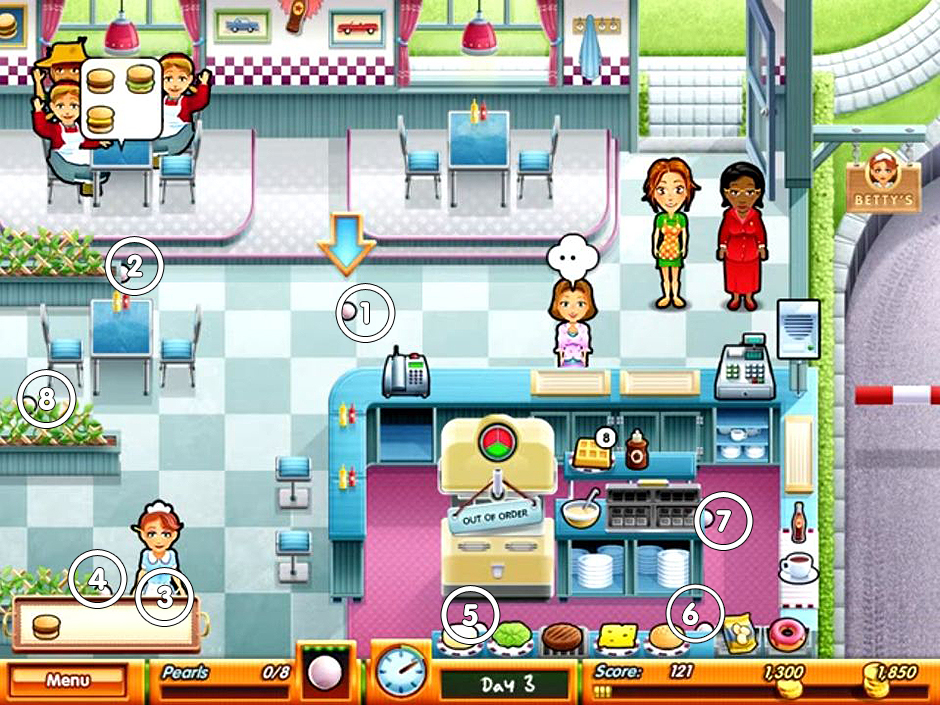
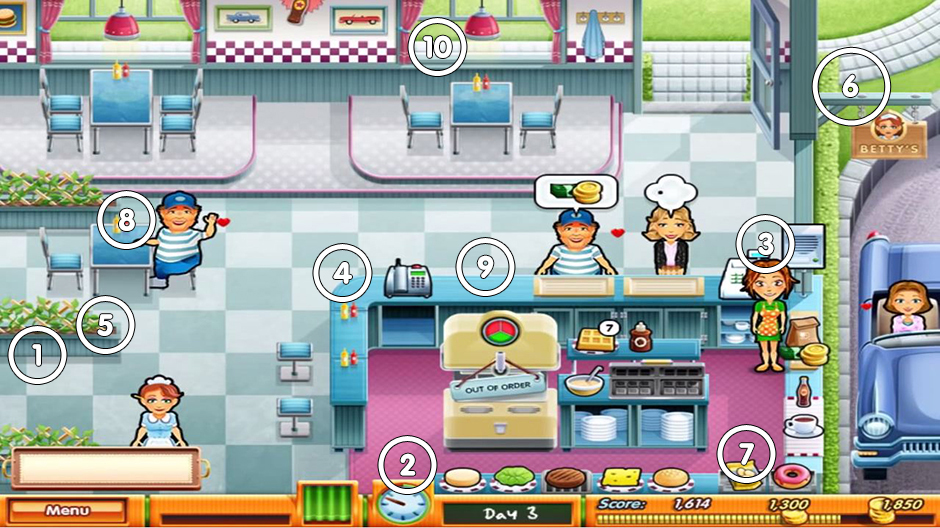
Oh no! A woman has lost eight pearls from her necklace. Since Betty is back she can help clear tables while you recover the pearls.

Delicious - Emily's Taste of Fame - Pearls Locations

Delicious – Emily’s Taste of Fame – Pearls Locations

The Mouse

When you hear the squeak, catch the mouse hiding on top of the register.

Stay on top of things by clicking on the waffle batter and dropping two waffles at a time until you have the maximum of eight.

Day 4

Today’s Menu

New item: Banana Shake

Challenge of the Day

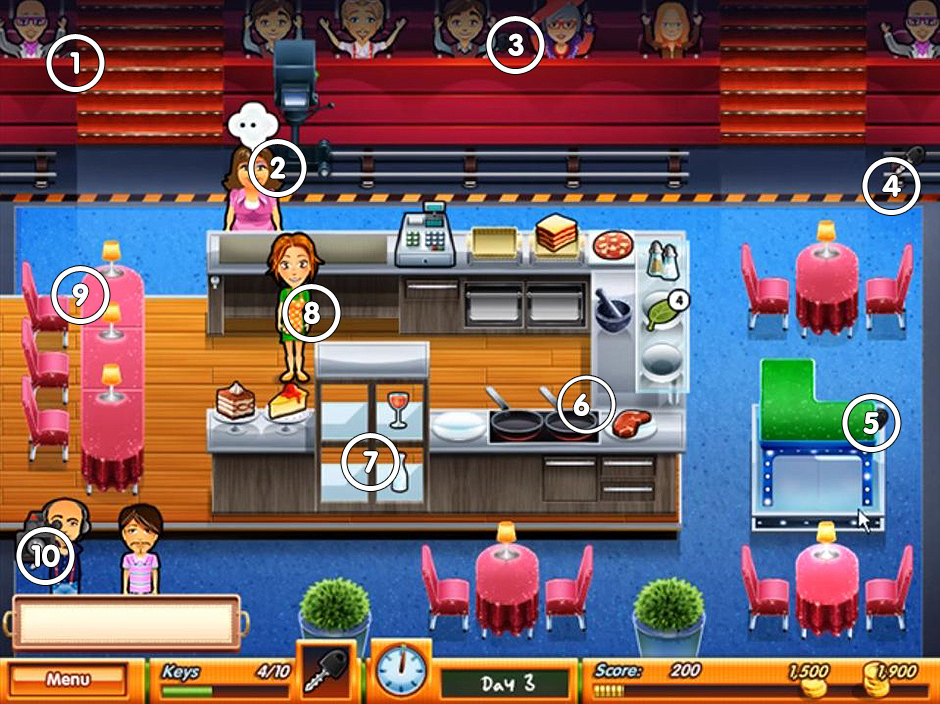
Answer the phone and talk to a studio manager telling you that you missed your screen test and have to do it now. The test? Serve up 20 items called out from the phone while serving customers. Be quick, you only have two and a half minutes.

The Mouse

When you hear the squeak, catch the mouse hiding near his mouse hole. Can’t see it? It’s hard to find at the left corner of the counter where customers order.

Banana shakes are on tap today. Click the banana then the glass. Don’t touch the glass to soon or late, it will be gone and you will have to start over. Wait until the needle is in the green zone. Make sure it’s on the serving tray or your customer will not get their full order.


Day 5

Today’s Menu

New Item: Waffles with whipped cream topping

Challenge of the Day

Betty thinks some neighborhood kids broke into the restaurant, breaking one of the tables that seats four. She tried to fix it but wasn’t able to. Betty will clear the tables so you can fix the table.

The Mouse

When you hear the squeak, catch the mouse hiding in the middle planter again. This time, it’s the right corner and he’s really nestled in there.

You really need to have a gameplan so you don’t lose customers. If two people are sitting at the four person table and four customers come in, they won’t wait and will leave. You also have the whipped cream topping now and you need to make sure you keep your waffles filled up. Concentrate on fixing the table during every spare moment and make more waffles in between getting orders to customers when there are more than one waiting.

Day 6

Today’s Menu

New Item: Strawberry Shake

Challenge of the Day

Francois comes in to let you know that you need media training before appearing on your new show. Francois has the camera and he will be moving around the place to get a good shot. Once he stops moving, strike a pose. If you make him wait too long or you will fail the task. Don’t expect your customers to be impressed either, they want their orders in a timely manner.

The Mouse

Catch the mouse hiding outside this time. He’s out on the lawns upper right corner of the screen by a mouse hole.

Day 7

Challenge of the Day

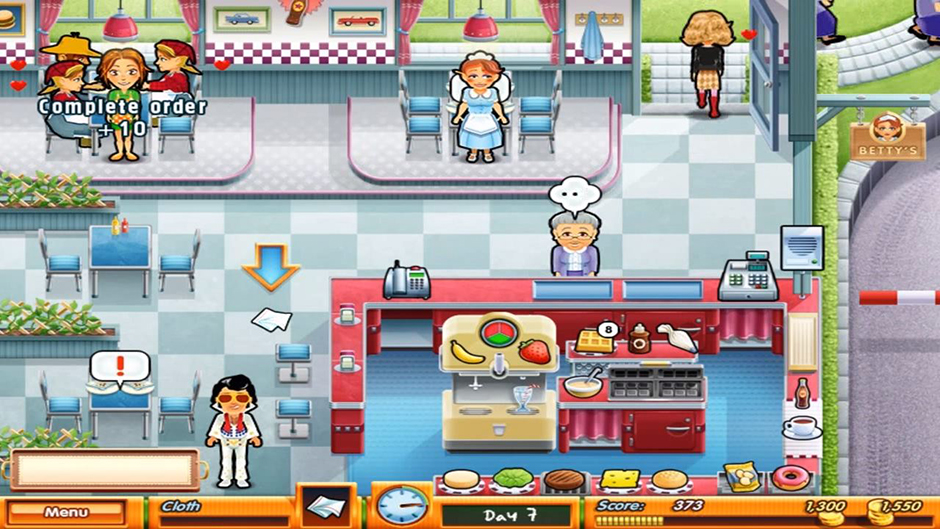
You’re in luck. There’s an Elvis impersonator in town and he’s going to entertain your guests at Betty’s Drive Thru. Seems Betty is mesmerized by the entertainer because she keeps dropping her cleaning cloth and tables won’t get cleaned off unless you help her out. You’ll hear a chime that gives you a heads up to help Betty out. Don’t be surprised if she drops it several times before reaching the table. Keep customers happy by clicking Elvis then the table to send him on his way.

Delicious - Emily's Taste of Fame - Day 7

Delicious – Emily’s Taste of Fame – Day 7

The Mouse

Catch the mouse hiding above the chips on the counter.

Day 8

Challenge of the Day

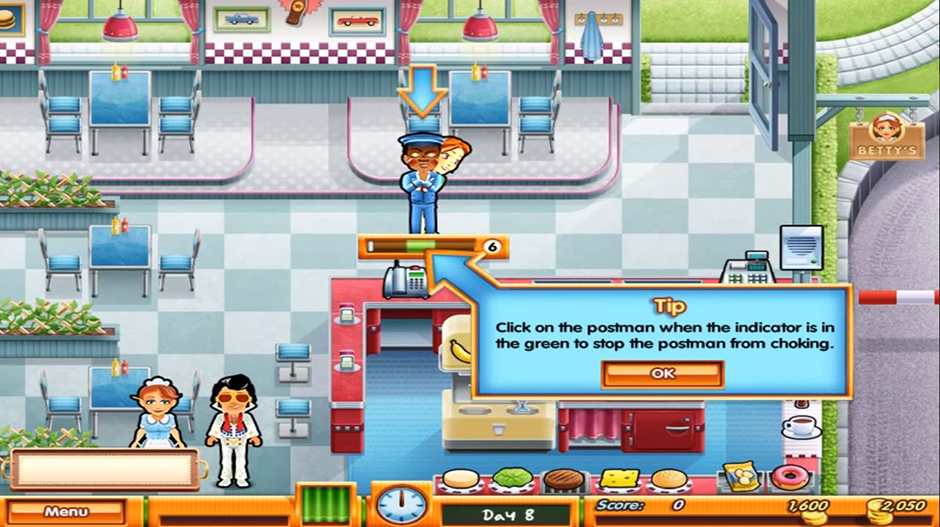
The postman brings in a contract for you to sign and you give him a waffle. He’s choking and you have to save him. Watch the meter so when it falls in the green zone you can click the postman for a total of six times to save his life. Click outside the zone and you’ll be penalized by having another round added. This is worth a 400 point bonus and since you are saving a life, the customers will have to wait.

Delicious - Emily's Taste of Fame - The Postman

Delicious – Emily’s Taste of Fame – The Postman

The Mouse

Catch the mouse hiding at the two person table. He will appear to the left or center and he does not mind if customers are there too.

Day 9

Challenge of the Day

Stay awake. Seems Emily didn’t sleep well last night and she’s falling asleep on the job. Betty gives her some chocolates to help boost her energy and leaves a plate of them on the counter near where customers order. There are enough chocolates to get through her shift so have a chocolate when her energy wanes because you can’t afford to be slow in the restaurant business.

The Mouse

Catch the mouse hiding near the plate of chocolates.

Day 10

Challenge of the Day

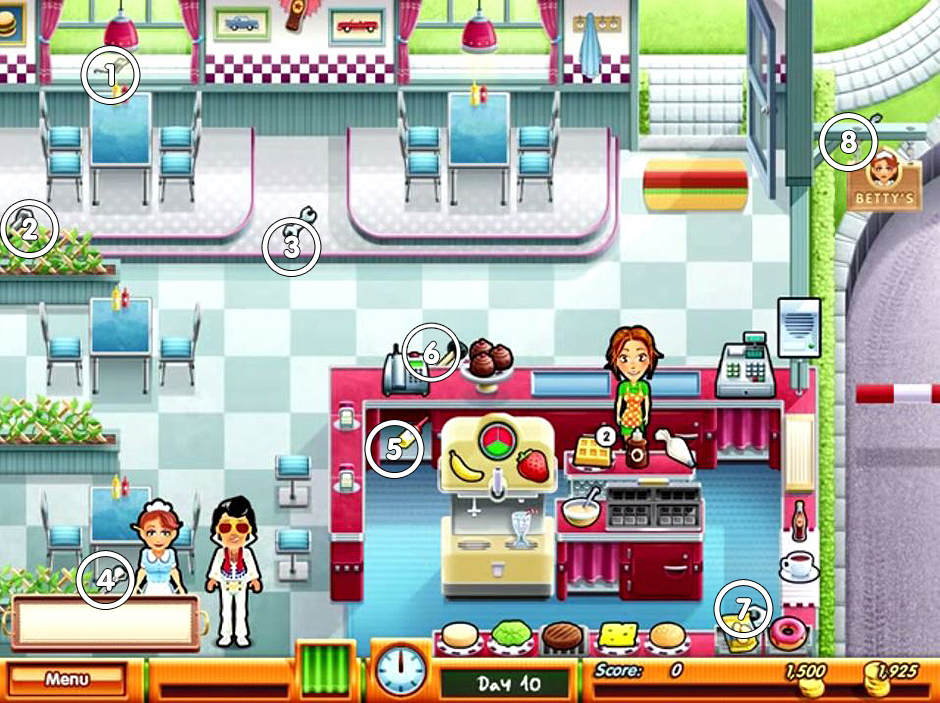
Your cousin Mo arrives to help fix your car so it is your last day at Betty’s Drive Thru before heading back to Mo’s. Mo is not very observant though because his tools are spread all over the floor so you will need to find the tool when he asks for it. He’s also not great for business because he soils the welcome mat with dirt and oil. Customers don’t find this appetizing. Clean off the welcome mat quickly so you can serve all your customers.

Delicious - Emily's Taste of Fame - Tools Locations

Delicious – Emily’s Taste of Fame – Tools Locations

The Mouse

Catch the mouse hiding on the middle windows windowsill.

Chocolates gave you energy when you were tired so what does it do if you aren’t tired? Gain super speed with each chocolate.

Mo’s Farm

Day 1

Today’s Menu

Corn
Bread Loaf
Sliced Bread
Lemonade
Milk, Porridge, and Cheese

Challenge of the Day

None

The Mouse

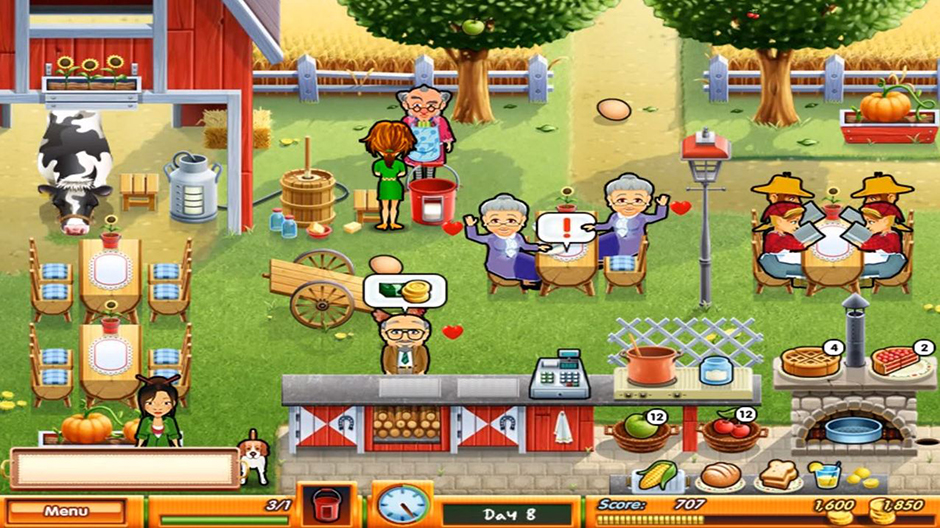
Catch the mouse hiding behind the hay bales on your left.

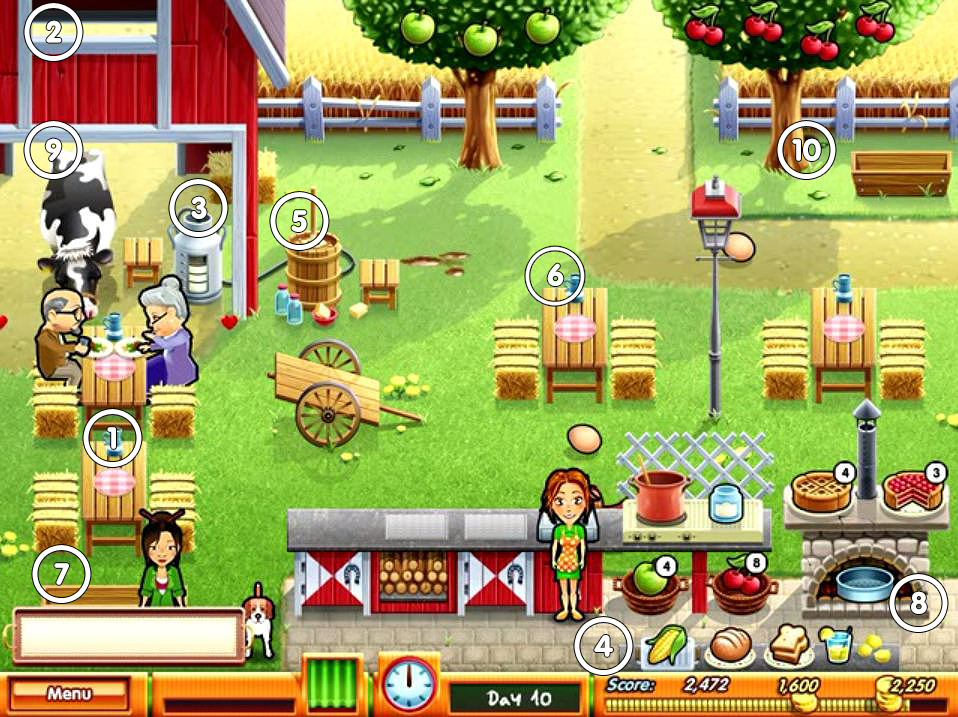
Mo is not much of a farmer and enlists you to help him get things up and running again. The Milk, Porridge, and Cheese is produced when you use the churn next to the milk tank. You have to wait for the item you want to pick it up. They appear in the same order as listed on the menu.

You have to keep the milk tank filled too. The tank holds four portions so you will need to milk the cow to refill it. Use any spare time you have to do this.

Don’t forget to clean the tables because you are on your own now.

Day 2

Today’s Menu

New Item: Eggs

Challenge of the Day

The cow can’t be milked until she is calmed down. Calm her by patting her every spare moment you have until the meter reaches 100%. Thankfully, customers won’t order any dairy products until you get her calm enough to milk.

The Mouse

Catch the mouse hiding in the barns loft, above the cow.

You notice chickens walking around and laying eggs as they go. Just collect an egg when a customer orders one.

Day 3

Today’s Menu

New item: Apples

Challenge of the Day

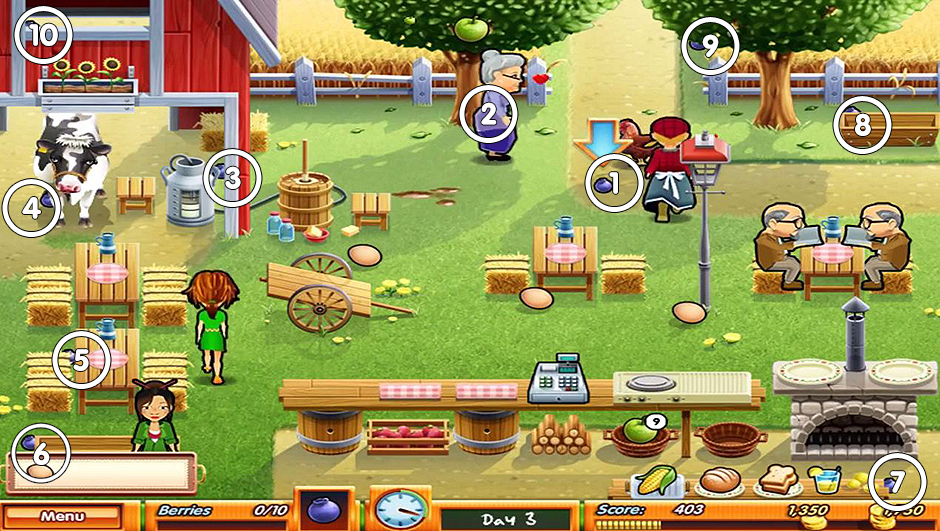
A lady named Tashi comes to the farm looking for Mo. Mo’s not around and you ask her to stick around and help out until he returns. Tashi wants to collect ten blueberries for Mo and asks you to help. They will stand out because of their color.

Delicious - Emily's Taste of Fame - Blueberries Locations

Delicious – Emily’s Taste of Fame – Blueberries Locations

The Mouse

Catch the mouse hiding by the milk canister that seemingly has some new mouse ears.

The apple tree is on the left and it can only hold three apples. Fortunately, the basket holds 12 and is under the counter. When a customer orders one, please provide one from the basket so customers are happy.

Day 4

Today’s Menu

New Item: Apple Jam

Challenge of the Day

It’s birthday party time when a woman brings a group of kids to the farm. Be ready to work super fast because all the kids order at once and you have to get the order to them while taking care of your other customers within two and a half minutes.

The Mouse

Catch the mouse hiding under the register.

It takes two apples to make a jar of apple jam. Click the jar then the basket of apples. After you get the birthday party taken care of spend every spare moment harvesting apples and milking the cow. No one said farm life was easy.

Day 5

Today’s Menu

New Item: Apple Pie

Challenge of the Day

A stray dog visits the farm and you need to feed him scraps by clicking him whenever he stops. If you don’t feed him quickly, you’ll fail the task. You don’t want to do that because the dog thanks you for feeding him by becoming your entertainer.

The Mouse

Catch the mouse hiding behind the churn.

You make pies by clicking the pie dish in the oven then four apples from the basket to bake a whole pie. Don’t forget about it and let it burn. You can bake a piece of pie with only one apple per piece since the pie dish holds four slices.

Day 6

Today’s Menu

New Items: Cherries, Cherry Jam, and Cherry Pie

Challenge of the Day

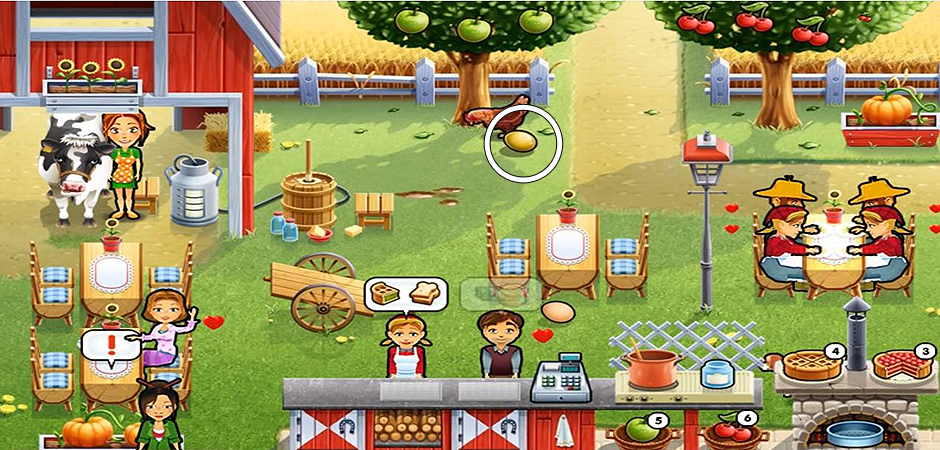
Ready to make an extra $150 in tips today? Just grab all six golden eggs when they are laid. If you are busy, a chime sounds to get your attention. Place the golden egg on your tray and give them to customers when they order an egg, if you already have one.

Delicious - Emily's Taste of Fame - Golden Egg

Delicious – Emily’s Taste of Fame – Golden Egg

The Mouse

Catch the mouse hiding behind the center table where customers eat.

The cherry tree is on the right and holds up to four cherries. Otherwise, everything is the same as it is for the apples.

Day 7

Challenge of the Day

Hurray! The parts to repair Emily’s car have arrived. There are twelve in all so be sure to click the postman when he arrives.

The Mouse

Catch the mouse hiding at the bottom left of the screen behind the pumpkin planter. He’s a bit hard to see.

Day 8

Challenge of the Day

You have a very demanding customer who brings in his own milk tanks for you to fill. Charles owns the candy shop in town. He won’t say thank you at all, even though you fill his tanks six times. Take care of him right away when he comes in. Click Charles, the milk tank, and again when it turns green. No worries, you will get a nice bonus instead.

Delicious - Emily's Taste of Fame - Francois

Delicious – Emily’s Taste of Fame – Francois

The Mouse

Catch the mouse hiding in a hole near the oven.

Day 9

Challenge of the Day

Francois has the TV producer on the phone and he is mad. Ludwig tells you to show up in two weeks or you can forget about the job. This makes Francois nostalgic and there will be five times a red exclamation mark appears over his head when he recalls a memory to share with you. Click Francois for the memories and bonus.

The Mouse

Catch the mouse hiding behind the cow. Did he shrink? He’s hard to find today.

Day 10

Challenge of the Day

Teach Tashi the seven tasks she asks about so she can take over now that you will be leaving the farm. Show Tashi the task she asks about and do so quickly so she doesn’t forget the last thing you taught her.

The Mouse

Catch the mouse hiding on the right side of the cherry tree.

Charles’ Candy Shop

Day 1

Today’s Menu

Pink Soda Pop
Gumballs
9 varieties of shelf candy

Challenge of the Day

None. You just want to try and help Charles save his candy store.

The Mouse

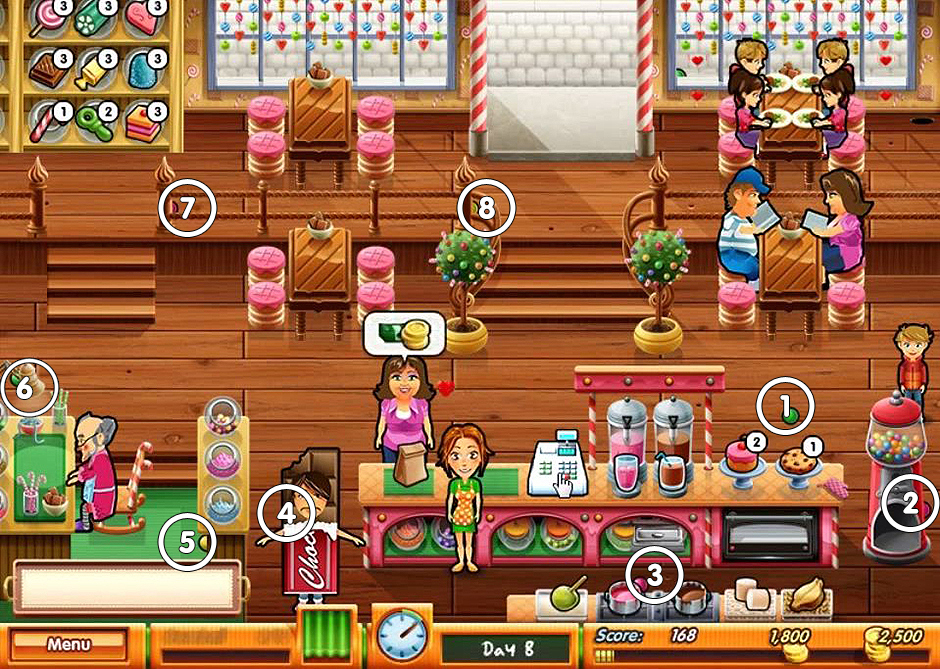
Catch the mouse hiding behind the candy making station

There are three pieces of candy in each jar. Click Charles to refill them and you have to wait until he completes the task to get any candy out. Gumballs are ordered by quantity so you will need to provide the correct amount and please remember to take the bag at the bottom once you have your gumballs. A new customer appears that tips well but has very little if any patience.

Day 2

Today’s Menu

New Item: Candy Apples with Marshmallows

Challenge of the Day

Twin girls come in asking for blue sour drops. Moments later their mom comes in and warns you not to let them have anything blue. Too late! When they stop running and are jumping in place, grab them. You have to continue to do this until the meter reaches 100%.

The Mouse

Catch the mouse hiding behind the empty cake plates on the counter.

Making candy apples requires clicking the apple on a stick, dipping it in the red candy then marshmallows.

Day 3

Today’s Menu

New Items: Chocolate Milk and Cherry Cake

Challenge of the Day

Walk 1,000 steps by walking back and forth between tables when you have spare time. You will easily get enough steps in this way.

The Mouse

Catch the mouse hiding behind a multi-colored candy jar near Charles.

A plate holds three pieces of cherry cake. Click the oven to bake more when you run out. Don’t let it burn. Take it out of the oven when the chime sounds.

Day 4

Today’s Menu

New Item: Apple with Chocolate Dip and Marshmallows

Challenge of the Day

Collect 12 packages from the postman. A chime sounds when he arrives with a new one.

The Mouse

Catch the mouse hiding between the Candy Cane Pole and Pink Soda Pop.

Day 5

Today’s Menu

New Item: Cookies

Challenge of the Day

Take care of the interviewer who arrives by serving him immediately when he orders and answering his three questions so he will write a good story. Answer with yes, no, and no.

The Mouse

Catch the mouse hiding next to the stairs in the upper left corner of the screen.

Bake cookies in the oven when you run out.

Day 6

Today’s Menu

New Item: Nuts for the dipped apples

Challenge of the Day

Fix both tables damaged during a break in.

The Mouse

Catch the mouse hiding on top of the gumball machine.

Francois will be your new entertainer until you leave for the TV Studio.

Day 7

Challenge of the Day

Stack packages the postman brings by. Click the packages then again when the bar lands in the green zone. Do this six times in a row for a bonus of 300. Don’t miss the green zone because it causes a previously stacked package to fall.

The Mouse

Catch the mouse hiding in the left window towards the bottom.

Day 8

Challenge of the Day

Find the 10 gumballs that fell out of the slot. You will need to put the men to work to move them away so you can get all of them.

Delicious - Emily's Taste of Fame - Gumballs Locations

Delicious – Emily’s Taste of Fame – Gumballs Locations

The Mouse

Catch the mouse hiding in the hole on the floor near the table located in the upper right.

Day 9

Challenge of the Day

A troublemaker flings mud at the windows. Click Charles so he can clean the window right away.

The Mouse

Catch the mouse hiding in the window in the right bottom corner. Customers may block the mouse from view.

Day 10

Challenge of the Day

A boy comes in and wants a lot of candy. You have two and a half minutes to get everything he asks for.

The Mouse

Catch the mouse hiding behind the chocolate dip for apples.

The TV Studio

Day 1

Today’s Menu

Meat Delicacy (w/ salt and pepper)
Cake
Pie
Wine

Challenge of the Day

None

The Mouse

Catch the mouse hiding behind the tray at the front of the counters right.

To prepare the meat delicacy: Click the meat, then the salt and pepper.

Score bonus points with a new feature that lets you promote products. Whenever you see the cameraman move to a table at the bottom left, click the table.

Day 2

Today’s Menu

New Items: Steak(w/ salt and pepper) and Sparkling Water

Challenge of the Day

A chime sounds to let you know a fan wants an autograph. You will sign six by clicking the fan who is standing between the counter and the camera in the upper screen.

The Mouse

Catch the mouse hiding behind the promotional table.

Day 3

Today’s Menu

New Items: Meat Delicacy with spices/spinach and Lasagna with spices/spinach.

Challenge of the Day

Find the 10 sets of car keys in the studio. One set can be retrieved when the cameraman goes to the promotion table because they are behind him. Also, look underneath the camera to your left.

Delicious - Emily's Taste of Fame - Keys Locations

Delicious – Emily’s Taste of Fame – Keys Locations

The Mouse

Catch the mouse hiding behind the light on the center table at the bottom.

Prepare lasagna by clicking items in this order: Lasagna, the spinach or spice topping, place in oven, and remove when the oven beeps and click the prepared lasagna.

Spinach is a new topping with a maximum of four that can be stocked. Prepare more spinach topping by clicking the stone mashing bowl.

Day 4

Today’s Menu

New Items: Fish with spices/spinach and Champagne.

Challenge of the Day

Answer the phone and prepare callers orders within two minutes and twenty seconds.

The Mouse

Catch the mouse hiding in front of the studio audience and the camera track.

You can prepare two steaks, fish, or one each at a time.

Day 5

Today’s Menu

New Items: Meat Delicacy or Mushroom with chives)Lasagna with chives and Steak or Fish with chives.

Challenge of the Day

Chase the crazed fan off the stage by clicking him when he stands still. You will have to do this 10 times.

The Mouse

Catch the mouse hiding behind the lamp of the left single seater table.

Five quantities of chive can be filled at one time. Prepare more by clicking the cutting board in front of the chives then click the stone mashing bowl.

Day 6

Today’s Menu

New Items: Orange Juice

Challenge of the Day

Shoot a commercial at the end of the show to promote a product. The responses are:

Orange Box Icon
Spoon Icon
Scale Icon
Orange Box Icon
Smile Icon

The Mouse

Catch the mouse hiding above the raw fish.

Day 7

Challenge of the Day

Prepare a mystery dessert. Whenever you have a spare moment, click the curtain to work on it. You have to fill the meter to 100%.

The Mouse

Catch the mouse hiding at the top of the table where the mystery dessert is. You won’t see him if the curtain’s down.

Day 8

Challenge of the Day

Help your entertaining co-host pick up the microphone he keeps dropping.

The Mouse

Catch the mouse hiding behind Emily’s head on the sign in front of the stage or to the left of the red-headed girl in the audience.

Day 9

Challenge of the Day

2000 Yard Dash can be completed by walking between objects when not serving customers.

The Mouse

Catch the mouse hiding behind the champagne in the middle of the kitchen.

Day 10

Challenge of the Day

Collect five articles of clothing scattered through the studio. Once complete, pack the suitcase until the meter reaches 100%.

Delicious - Emily's Taste of Fame - Suitcase

Delicious – Emily’s Taste of Fame – Suitcase

The Mouse

Catch the mouse hiding behind the plant at the bottom right of the screen.

Snuggford Fair

Day 1

Today’s Menu
Pink Cotton Candy, Pink Lemonade, Orange Juice, Teddy Bear, Flowers

Pink Cotton Candy
Pink Lemonade
Orange Juice
Teddy Bear
Flowers

Challenge of the Day

None. You volunteer to help out with the stands.

The Mouse

Catch the mouse hiding to the right of a tree behind the middle empty cart.

Make extra tips by waiting until the pink cotton candy is at its largest before clicking it.

Day 2

Today’s Menu

New Items: Blue Cotton Candy and Blue Heart Balloon

Challenge of the Day

To prevent the fair from closing Emily will sing whenever she has a spare moment. Click the center of the stage to sing.

The Mouse

Catch the mouse hiding at the teddy bear cart on top of the blue umbrella.

Day 3

Today’s Menu

New Items: Pancakes with syrup and Orange Flower Balloon

Challenge of the Day

Collect 12 packages of fireworks from the postman.

The Mouse

Catch the mouse hiding behind the bowl of pancake batter.

Entertain customers by clicking the podium on the stage for open mic.

Day 4

Today’s Menu

New Items: Pancakes with Sugar and Popcorn with sour cream in a blue container

Challenge of the Day

You have five and a half minutes to prepare all the items the contestants of the eating contest order.

The Mouse

Catch the mouse hiding behind the top right corner of the eating contest sign.

Day 5

Challenge of the Day

Ted wants to tell Emily’s story and needs to interview people she knows. A chime sounds when the pair enters the area. Click on them to send Ted their way but don’t wait too long.

Mo and Tashi
Postman and Maggie
Charles and Matthew

The Mouse

Catch the mouse hiding behind the table of pink tulips to the right and bottom of the screen.

Day 6

Challenge of the Day

Francois will teach you how to dance three times. Watch for the step icons that are purple, green, and blue as you will have to recall the sequence they appear in.

The Mouse

Catch the mouse hiding atop the balloon cart.

Day 7

Challenge of the Day

After serving your last customer, Francois is injured by fireworks. Resuscitate him six times by clicking when the needle is in the green zone.

The Mouse

Catch the mouse hiding behind the blue cotton candy maker.

Day 8

Challenge of the Day

The kid responsible for Francois injury appears and asks if you are angry with him. Say no for the instant bonus because you will have to chase him down if you say yes. Either way, he’ll be your new table cleaner.

The Mouse

Catch the mouse hiding behind decorative flowers on the left table.

Day 9

Challenge of the Day

Help the mayor find 10 notes she dropped at the fair. They are not always easy to locate because people can block them.

Delicious - Emily's Taste of Fame - Notes Locations

Delicious – Emily’s Taste of Fame – Notes Locations

The Mouse

Catch the mouse hiding at the top of the tray that holds your items.

Day 10

Challenge of the Day

Time to celebrate with fireworks! There are four stands to set up and they take some time so start immediately and continue doing so whenever time allows.

Delicious - Emily's Taste of Fame - Set Up Fireworks

Delicious – Emily’s Taste of Fame – Set Up Fireworks

The Mouse

Catch the mouse hiding behind the second batch of fireworks in from the left.

Congratulations! You are to be commended on your achievements. You survived fifty days of serving customers in various environments and met every challenge.

ALL MICE LOCATIONS

All mice locations are listed and shown below:

Betty’s Drive Thru

Delicious - Emily's Taste of Fame - Mice Locations Betty's Drive Thru

Delicious – Emily’s Taste of Fame – Mice Locations Betty’s Drive Thru

  1. In the middle planter to the left.
  2. Above the special task box.
  3. On top of the register.
  4. Near his mouse hole at the left corner of the counter where customers order.
  5. Hiding in the middle planter again. This time, it’s the right corner.
  6. Hiding on the lawns, upper right corner of the screen by a mouse hole.
  7. Hiding above the chips on the counter.
  8. Hiding at the two person table.
  9. Hiding near the plate of chocolates.
  10. On the middle windows windowsill.


Mo’s Farm

Delicious - Emily's Taste of Fame - Mice Locations Mo's Farm (2)

Delicious – Emily’s Taste of Fame – Mice Locations Mo’s Farm (2)

  1. behind the hay bales on your left.
  2. In the barns loft, above the cow.
  3. By the milk canister
  4. Under the register.
  5. Behind the churn.
  6. Behind the center table where customers eat.
  7. At the bottom left of the screen behind the pumpkin planter.
  8. In a hole near the oven.
  9. Behind the cow.
  10. On the right side of the cherry tree.


Charles’ Candy Shop

Delicious - Emily's Taste of Fame -Mice Locations Candy Shop

Delicious – Emily’s Taste of Fame -Mice Locations Candy Shop

  1. Behind the candy making station.
  2. Behind the empty cake plates on the counter.
  3. Behind a multi-colored candy jar near Charles.
  4. Biding between the Candy Cane Pole and Pink Soda Pop.
  5. Next to the stairs in the upper left corner of the screen.
  6. On top of the gumball machine.
  7. In the left window towards the bottom.
  8. In the hole on the floor near the table located in the upper right.
  9. Hiding in the window in the right bottom corner.
  10. Behind the chocolate dip for apples.


The TV Studio

Delicious - Emily's Taste of Fame - Mice Locations The Tv Studio

Delicious – Emily’s Taste of Fame – Mice Locations The Tv Studio

  1.  Behind the tray at the front of the counters right.
  2. Behind the promotional table.
  3. Behind the light on the center table at the bottom.
  4. In front of the studio audience and the camera track.
  5. Behind the lamp of the left single seater table.
  6. Above the raw fish.
  7. Hiding at the top of the table where the mystery dessert is.
  8. In front of the stage or to the left of the red-headed girl in the audience.
  9. Behind the champagne in the middle of the kitchen.
  10. Behind the plant at the bottom right of the screen.


Snuggford Fair

Delicious - Emily's Taste of Fame - Mice Locations Snuggford Fair

Delicious – Emily’s Taste of Fame – Mice Locations Snuggford Fair

  1.  Behind the tray at the front of the counters right.
  2.  Behind the promotional table.
  3.  Behind the light on the center table at the bottom.
  4.  In front of the studio audience and the camera track.
  5.  Behind the lamp of the left single seater table.
  6.  Above the raw fish.
  7.  At the top of the table where the mystery dessert is.
  8.  In front of the stage or to the left of the red-headed girl in the audience.
  9.  Behind the champagne in the middle of the kitchen.
  10.  Behind the plant at the bottom right of the screen.


Congratulations! You’ve completed our Delicious – Emily’s Taste of Fame Walkthrough! For more great tips and tricks, visit our blog!

Delicious – Emily’s Hopes and Fears Walkthrough


The Delicious – Emily’s Taste of Fame Walkthrough is meant as a guide and does not contain cheats, hacks, or serials.


The post Delicious – Emily’s Taste of Fame Walkthrough appeared first on GameHouse.

Twilight Phenomena – The Lodgers of House 13 Walkthrough

$
0
0

In a small town, the citizens are at a loss. People are just disappearing and it appears to be all happening in the same mansion. It appears an evil villain is using these people for some secret rituals. You are an unassuming person who is looking for a new place to explore. You stumble upon the mansion with a room for rent, and the affordable price lures you in and now you need to find a way out.
In Twilight Phenomena – The Lodgers of House 13, you are trying to figure out what exactly is happening in the mansion. You need to figure it out before you become the next victim. The tips and tricks in this walkthrough will help you navigate the mansion and find the solutions to the tougher puzzles.

Contents

General Tips & Tricks

In this adventure game, there is a standard main menu. Here, you will able to change players so that you can save multiple games. You will also be able to determine your level of difficulty: hard, advanced, or casual. If you find the level too complicated or too easy, you can always head back to the main menu and change the difficulty. You can also adjust basic settings, such as the screen resolution and volume of the game.
In terms of controls, there is the eye and hand. The hand allows to you to pick up the objects you need while the eye allows you to zoom in to find items you need. Throughout the game, you will be picking up notes, so this comes in quite handy. These notes are important clues about the house, and you can consult them if you get stuck.

Twilight Phenomena – The Lodgers of House 13 Walkthrough

Chapter One: House 13

To start, you will need to locate and talk to the owner of the house. Find the Broken Pencil and the Bonfire Emblem on the table. Eat the chocolate candy after unwrapping it. Retrieve the Lighter from the potted tree, then place the Broken Pencil into the sharpener and take the new Pencil. Grab the Dry Flowers from the pod, go back to the table, and sign the agreement with the Pencil. Retrieve the Room Key and the note before going to the door.

Go into the next room, grab the note and head to the top door, then use the Room Key to enter the room. Look at the window, move the curtains and retrieve both the Stained Glass and the Metal Gladiator. Head to the bed, pick up the pillow, and grab the Monkey. Retrieve the Passport from the table, place the Dry Flowers in the ashtray, light them with the Lighter, and pick up the Ashes. Grab the Champagne from the bucket and leave the room. Put the Monkey into the niche to activate the first puzzle. Move the puzzle pieces to complete the puzzle and receive the Metal Horse.

Twilight Phenomena - The Lodgers of House 13 - Monkey Puzzle Solution

Twilight Phenomena – The Lodgers of House 13 – Monkey Puzzle Solution

Go back to the table, light the candle with the Lighter, and place the Champagne Bottle in the holder. Grab the Opened Champagne and go to the mirror. Grab the Stained Glass and the Iron before moving on to the outlet. Plug the Iron into the outlet, put the Hot Iron into your inventory and go back to your room. Place the Hot Iron into your ice bucket and retrieve the Water. Go downstairs, locate the pod and pour the Water and the Opened Champagne in. Retrieve the Wooden Cat from inside of the pod before heading back to your room.

Go to the stained glass window and place your two pieces of Stained Glass into the door. Go to the box, put the Wooden Cat on it to open it, and grab the Remote Control. To start the Cat Hologram, turn on the Remote Control and go to the window. Grab the Seed Button, take it to the pod, and put it in there to activate a puzzle. Move the seeds around to get the worm in the hole and receive the Worm and the Golden Symbol.

Twilight Phenomena - The Lodgers of House 13 - Worm Puzzle Solution

Twilight Phenomena – The Lodgers of House 13 – Worm Puzzle Solution

Go downstairs, locate the picture and place both the Metal Horse and the Metal Gladiator on it. Rub the Ash on the side of the board before inserting the Golden Symbol on the niche. Push the symbols into the right order to get the Bronze Leaf. Go through the door and into the forbidden right wing.


Chapter Two: The Forbidden Right Wing

Take the Sharp Glass from the ground before placing the Bronze Leaf on the door. Put the Worm in the pond to receive a Butterfly Wing. Head down the stairs, grab the Net, and cut the doll with the Sharp Glass to get the Shovel Handle. Chase the mice away by using the Cat Hologram and grab the Clover from the sewing machine. Locate the plaque and retrieve the Bat from it by putting the Clover on it.

Go to the basement, obtain the Mustache Part by hitting the ball with the Bat. Go towards the door, place the Mustache Part on the door and go in. Receive the code from the talking head and grab the Nail File from the controls. Go through the next door and open the cabinet door with the Nail File. Grab the Needle and an Empty Cup before walking away. Look in the pond, place the Empty Cup into the water to fill it, and place the Cup with Water into your inventory.

Walk to the porch, look at the tree, and pour the Cup with Water into the base around the tree. Put the shovel head onto the Shovel Handle, use the Shovel to get the Dirty Bone. Walk to the pond, clean the Dirty Bone with water and place the Clean Bone into your inventory. Go back to the basement, go to the safe, give the dog the Clean Bone, and take both the Drumsticks and the Fire Emblem. Place the Needle on the sewing machine to activate a new puzzle. To receive both the Spool of Thread and the Butterfly Wing, you need to sew a single, non-overlapping line through the design.

Twilight Phenomena - The Lodgers of House 13 - Sewing Machine Solution

Twilight Phenomena – The Lodgers of House 13 – Sewing Machine Solution

Return to the porch, locate the birdcage, and use the Cat Hologram on the cage. Retrieve the Moon from the cage and walk away. Locate the panel and start the next puzzle by placing the Butterfly Wings on it. Click on the wings until they are in the correct position.

Twilight Phenomena - The Lodgers of House 13 - Butterfly Wings Solution

Twilight Phenomena – The Lodgers of House 13 – Butterfly Wings Solution

Look at the box, put the Moon in, and get the Chain and the Anchor Emblem. Head back to the porch, grab the note from the ground, and put the two shards together. Go to the box, place the Fire Emblem, Anchor Emblem, and the Bonfire Emblem in to start a new puzzle. Move the tiles to obtain the Activator. Go to the control panel, place the Activator in it and punch in the code you received from the talking head. Go into the door.

Twilight Phenomena - The Lodgers of House 13 - Tiles Solution

Twilight Phenomena – The Lodgers of House 13 – Tiles Solution

Chapter Three: The Angry Landlord

Locate the drum, place the Drumsticks on top, and receive both the Pearl and the Spiral. Place the Chain on the mechanism, pull the lever, and go into the hatch. Grab the Scarf, locate the dolls, and use the thread on the dolls to get the Feather. Obtain the Earring by using the Cat Hologram and throwing the Net on the cat.

Take the Net and place it in your inventory again. Look at the back door, place the Spiral into the lock and tug on the feather before opening the door. Talk to the owner. Grab the Nut from the stand and place the Pearl in the shell to obtain the Bottle with Note. Go to the desk and grab the note. Grab the Clock Hand from the case. Look at the computer and turn it on. Move the arrows to look at the different sections of the house. Locate the clock, replace the Clock Hand and take the Golden Semicircle. Look at the drum, place the Bottle with Note on it and place the Drumsticks next to it. Retrieve the note and the Cameo.

Return to the plaque, put the Earring and Golden Semicircle on it and grab the Record and the Fly. Go in the hatch, look at the cell, and place the Fly in the niche to go into the next door. Speak with Dizzy, use the Cat Hologram and scare the bats. Retrieve the Mask from the eagle statue and open the curtains to find the shield. Activate the puzzle by placing the Cameo on the shield. Move the cameo to the correct spot to obtain the Button.

Twilight Phenomena - The Lodgers of House 13 - Cameo Puzzle

Twilight Phenomena – The Lodgers of House 13 – Cameo Puzzle

Look at the wall of masks and place the Mask on it to activate puzzle. Move the eyes to the correct masks in order to beat the puzzle. Receive the Shield Part before heading down the hatch.

Twilight Phenomena - The Lodgers of House 13 - Masks Solution

Twilight Phenomena – The Lodgers of House 13 – Masks Solution

Find the lion statue, place the Shield Part on the shield and use the Scarf to wipe off the dust. Ring the bell, find the eagle statue and put the Feather into the slot before pulling the lever. Go into the elevator, grab the Ring, and place the Button on the spot to move up. Leave the elevator on the second floor.


Chapter Four: The Second Floor

Look in the first door, grab the Credit Card before moving to the gramophone, and take the Solvent. Grab the Suction Cup from the piano. Head into the next room. Grab the Fish Tail from the table and locate the hamster. Put the Suction Cup on the glass and give the Nut to the hamster. Collect the Hamster and the Picture Tile. Go back through the door. Look at the guillotine to retrieve the Handkerchief. Move the stones around to place the Fish Tail on the mechanical fish and grab the Corkscrew. Go back to the gramophone, place the Record on it and then place the Hamster on the record.

Do not forget to use the Cat Hologram at this point and then take the Neanderthal. Find the calendar and pull it from the wall. Remove the board with the Corkscrew and retrieve the Picture Tile. Look at the frame; place the 2 Picture Tiles on the picture to play the next puzzle. Flip the tiles to solve the puzzle and receive the Lampshade.

Twilight Phenomena - The Lodgers of House 13 - Lampshade Puzzle Solution

Twilight Phenomena – The Lodgers of House 13 – Lampshade Puzzle Solution

Go back to the guillotine room and place the Lampshade on the lamp. Move the light around to match the symbols on the wall. Retrieve the Ring, locate the poster on the wall and put the Neanderthal on the poster to activate puzzle. To win the puzzle and receive the Scissors and Wheel, arrange the tiles for human evolution.

Twilight Phenomena - The Lodgers of House 13 - Human Evolution Solution

Twilight Phenomena – The Lodgers of House 13 – Human Evolution Solution

Walk out of the room and focus on the door. Place the 2 Rings on the fingers to enter. Look at the head, read the message featured on the monitor, and then move to the plant. Retrieve the Wrench from the plant by using the Scissors. Go to the piano, remove the Blue Bolt with the Wrench and go to the door on the right. Focus on the steam pipe, place the Blue Bolt on the pipe and turn the bolts to create the same color. Clean the mirror with the Handkerchief.


Chapter Five: Ruth Hamilton

Pull on the lever after placing the green pin in the correct hole. Move the rope twice and move it towards the second lever. Pull rope and go down into the lab. Grab the Cane from the mirror and then go through the left door to exit outside. Push over three pots with the Cane and take the Bear from the window. Use the Solvent with the Mop before you take a left. Retrieve the Umbrella before moving on. Move past the dog after using the Cat Hologram and retrieve the Jack from the dog house.

Go to the bench and extract a Brick with the Jack. Place the Wheel on the bolt. Go to the tree and obtain an Orange. Retrieve the File from the wheel and also retrieve the Tape. Look at the window, break the bars with the File and then break the window with the Brick. You will also use the Brick to break into the piggy bank to get the Zipper Pull. Look in the container; place the Zipper Pull on the zipper. Retrieve the Leaves before going into the guillotine room. Put the Orange on the guillotine and pull the lever. Put Half an Orange on the juicer to receive Orange Juice. Go through the left door and locate the pipe.

Place the Umbrella on it. Clean up the water near the wires with the Mop before placing Tape on the wires. Give Ruth the orange juice and look for the solution on the monitor. Place the Leaves on the tiles to activate a puzzle. Move the tiles to look like the monitor’s picture and then receive the Sleeping Mixture.

Twilight Phenomena - The Lodgers of House 13 - Monitor Picture Solution

Twilight Phenomena – The Lodgers of House 13 – Monitor Picture Solution

Go to the fountain, find the dog house and place the Sleeping Mixture in the bowl. Take the Dog Bowl after the dog uses it. Head to the pond and use the Cat Hologram to grab the Comb. Follow the path behind the fountain and locate the gnomes. Retrieve the Brush from the larger gnome and the Purple Mermaid from the smaller gnome. To get the Turtle Symbol, comb the gnome’s beard with the Comb. Keep going down the path, grab the Hose and locate the pump. Retrieve the Carrot and inspect the pump. Clean it out with the Brush and attach the Hose. Push the handle and then look at the door. Activate the next puzzle by putting the Bear on the door. Move the planks to solve the puzzle.

Twilight Phenomena - The Lodgers of House 13 - Bear Puzzle Solution

Twilight Phenomena – The Lodgers of House 13 – Bear Puzzle Solution

Go through the door and retrieve the Bananas and the Pruners. Go to the bush and retrieve the Tusk from the bush by using the Pruners. Go back to the pond.

Chapter Six: The Bomb Shelter

Place the Tusk on the elephant; locate the turtle and take both the note and the Matches. Go to the pile of leavers, burn them with the Matches and retrieve the Shell Part. Locate the grid and use the File on it. Place the Purple Mermaid on the board to start the next puzzle. Retrieve the Scale from the mermaid’s tale and go back to the path.

Twilight Phenomena - The Lodgers of House 13 - Mermaid's Tale Solution

Twilight Phenomena – The Lodgers of House 13 – Mermaid’s Tale Solution

Look at the mermaid and replace the Scale to receive the Lightning. Go back to the turtle, replace the shell with the Shell Part and place the Turtle Symbol on top. Go into the hatch to locate the bomb shelter. Look in the fridge to grab both the Cream and the Monkey Spoon. Look in the power box to put the Lightning in. This will activate a puzzle where you need to place all the bulbs correctly into the wire connectors.

Twilight Phenomena - The Lodgers of House 13 - Wire Connectors Solution

Twilight Phenomena – The Lodgers of House 13 – Wire Connectors Solution

Go to the gazebo, find the hedgehog, place the Dog Bowl in front and pour the Cream in. Retrieve the Apple before moving away. Look at the large gnome and place the Apple, Bananas, and Carrot into the basket to get the Fish Symbol. Go back to the bomb shelter. Look at the panel and put the Fish Symbol on it to receive a note, Horseshoe and Valve. Locate the chair and place the Valve on the slot to turn. Retrieve the Mesh Sponge on the pipe before walking away. Find the bomb, cut the wires with the Pruners and walk across the small bridge. Look at the door, place the Horseshoe on the door and knock. Go into the cabin.

Chapter Seven: The Cabin

Speak with the head before obtaining the Arrow from the press. Go to the birdhouse and retrieve the Palm Trees before heading to the playground. Find the archer and retrieve the Rake. Go to the cage and locate the Pump with the Rake. Walk to the boat, place the Pump on the boat and push the lever three times. Retrieve the Oar before going to the alligator. Open its mouth; place the Oar in its mouth to retrieve the Whisk and Oar Part and remove the stick from the mouth. Go to the shed, find the mixer, add the Cream and the Whisk and make Butter.

Go back to the playground. Look at the windmill, place the Oar Part in it and move the blades to receive a piece of paper and the Control Knob. Go to the bomb shelter, put Butter on the valve and turn it. Go back to the pond, grab the Monkey Fork from the bag and take it to the small bridge. Use the Monkey Fork and Monkey Spoon in the slots to enter the cage.

Look in the pot to retrieve the Medal. Place the Palm Tree in the lock to open and grab the Arrow. Go to the ditch and receive the Fishing Rod. Walk away to start a cut-scene. Take a left once the scene ends. Find the archer and place the Arrow in the bow. You will need to use the Cat Hologram in this location as well. Go to the window and enter the garage’s upper space.

Find the Christmas tree and retrieve the note. Grab the basket with the Fishing Rod and retrieve the Pen and Lantern. Grab the Vacuum Hose from the hay and leave. Use the Pen to create a note with the paper before heading into the garage. Put the Medal on the chest to start a puzzle. Move the medals into the correct line to solve the puzzle and receive the Fire Extinguisher. Put out the fire with the Fire Extinguisher and place the Arrow on the control panel to move into the garage.

Twilight Phenomena - The Lodgers of House 13 - Medals Puzzle Solution

Twilight Phenomena – The Lodgers of House 13 – Medals Puzzle Solution

Chapter Eight: The Garage

Take the Saw from the shelf, take the Dirty Toy and place the Control Knob in the correct spot to start a puzzle. Finish the puzzle to receive the Laundry Detergent. Go to the Christmas tree and retrieve the Snowflake with the Saw.

Go to the shed, attach the Vacuum Hose to the vacuum and put the Vacuum Cleaner plus the Sun Symbol to your inventory. Go in the cage, place the Dirty Toy and Laundry Detergent into the pot and clean the toy with the Mesh Sponge. Put the Wet Toy in your inventory. Look in the tree hollow using the Lantern to grab the Blade. Look at the box; place the Sun Symbol and Snowflake in the spots to activate the puzzle. Place all the warm weather icons on the left and all the cold weather items on the right to solve the puzzle and receive the Hairdryer.

Twilight Phenomena - The Lodgers of House 13 - Weather Icons Solution

Twilight Phenomena – The Lodgers of House 13 – Weather Icons Solution

Go to the lower side of the garage, go to the motorcycle and open the bag with the Blade to retrieve the Playing Card. Plug in the Hairdryer, place the Wet Toy on the shelf and dry it. Take the Toy and go into the cage. Find the monkey and place the Toy with him to get the Bug. Go out and to the right to see the scarecrow. Put the Bug on the box to start a new puzzle. Put the bugs in the right order to get both the Rubber Gloves and the Tin of Fish.

Twilight Phenomena - The Lodgers of House 13 - Weather Icons Solution

Twilight Phenomena – The Lodgers of House 13 – Weather Icons Solution

Chapter Nine: The Tree House

Go to the shed, place the Tin of Fish on the press and create a Fish. Go to the birdhouse and give the Fish to the birds. Retrieve the Egg and another Playing Card. Add the Playing Cards to the others to start a puzzle. Place the cards in order to win the puzzle and go into the tree house.

Twilight Phenomena - The Lodgers of House 13 - Cards Puzzle Solution

Twilight Phenomena – The Lodgers of House 13 – Cards Puzzle Solution

Open the control panel with the Rubber Gloves, connect the wires and swap out the plates. Push a button and take the Hook. Clean up the sand with the Vacuum Cleaner. Go to the door on the right and pick up a Glass Shard. Cut the ribbon on the table with the Glass Shard and receive both the Ribbon and Magnetic Card. Go to the left door and use the Magnetic Card to open the door. Receive the Malachite Stones from the tree. Keep moving through the door, go to the table and grab the Brush from it. Head up the ladder, retrieve the Boxing Gloves, place the Ribbon on the wig and receive the Eye. Look in the hamper for the next puzzle. Collect the clothes and put them in the right order to finish the puzzle and get the Belt.

Twilight Phenomena - The Lodgers of House 13 - Wires Puzzle Solution

Twilight Phenomena – The Lodgers of House 13 – Wires Puzzle Solution

Chapter Ten: The Gym

Put the Eye on the book located on the stool, retrieve the Rotor Blades and view the instructions. Head up the ladder and place the Rotor Blades on the helicopter. Obtain the Knight from the parachute and head back down. Locate the chessboard and place the Knight on it to start the puzzle. Move the knight around the board until it touches every space on the board and collect the Razor.

Twilight Phenomena - The Lodgers of House 13 - Chessboard Puzzle

Twilight Phenomena – The Lodgers of House 13 – Chessboard Puzzle

Go back to the monkey, shave his wrist, and get the code. Type the code into the control panel to receive a Ring. Go in the left door, take the Hammer from the picture and place the Ring on the door to go into the gym. Retrieve the Flute by using the Boxing Gloves on the punching bag. Retrieve the Flail from the ladder and place the Hook on the ladder. Look at the weight and put the Belt on it. Find the strength machine and use the Hammer on it. Take the Weight and go up to the roof using the ladder.

Look in the nest; retrieve the Hockey Player and the note. Place the Hockey Player on the hockey table to start the next puzzle. Place the players in the correct positions in order to receive the Knife. Head back to the roof, cut the rope with the Knife and go into the dove house. Use the Stepladder to look into the trough. Use the Cat Hologram and retrieve the Crank. Find the winch, attach the Crank and place the Weight on the antenna.

Twilight Phenomena - The Lodgers of House 13 - Hockey Table

Twilight Phenomena – The Lodgers of House 13 – Hockey Table

Chapter Eleven: The Greenhouse

Retrieve the Mirror from the peacock before heading down to the stone path. Play the Flute to go around the snake and retrieve the Stone Cobra and Pesticides. Place the Stepladder on the steps to see the flower pots and activate the puzzle. Move the flower pots next to the matching plants and take the Ladybug Tile.

Twilight Phenomena - The Lodgers of House 13 - Flower Pots Solution

Twilight Phenomena – The Lodgers of House 13 – Flower Pots Solution

Use the Pesticides on the tree trunk to receive the Harp. Go to the sculpture and place the Harp with it and receive the Paw Print. Head back to the dove house, look in the cage and take out the broken mirror. Retrieve the Shark Tile and head back to the greenhouse. Clean the mossy area with the Brush. Place both the Shark Tile and Ladybug Tile on the board and play the puzzle. Place all of the animals in their correct environments. Collect the Magpie Charm.

Twilight Phenomena - The Lodgers of House 13 - Animals Puzzle Solution

Twilight Phenomena – The Lodgers of House 13 – Animals Puzzle Solution

Go back to the dove house. Place the Magpie Charm in the cage and retrieve the Amber Necklace and the Drinking Bowl. Go into the greenhouse; water the plants with the Drinking Bowl on the plants to collect the Dew. Look at the cactus and place the Dew on the cactus to get a flower. Retrieve the Cactus Flower by using the Razor. Place the Cactus Flower with the stone peacock. Grab the Paintbrush from the grounds and use the Flail on the Wheat Grains. Go to the nest, place the Wheat Grains in and retrieve Bird’s Foot. Head into the dove house, go to the chest, and place the Paw Print and the Bird’s Foot on it to activate the puzzle. Place the doves away from cats by placing them in the correct spots. Receive the Lazurite Stones.

Twilight Phenomena - The Lodgers of House 13 - Doves Puzzle

Twilight Phenomena – The Lodgers of House 13 – Doves Puzzle

Go to the lower door and walk to the round table. Place the Malachite Stones in the mortar and use the pestle to grind the stones. Place the paint on the palette. Put the Amber Necklace in the mortar, grind the stone and put the yellow paint on the palette. Finally, grind up the Lazurite Stones and transport the blue paint onto the palette. Place the Palette in the inventory.

Go back to the peacock statue and place the Egg on the slot. Place the Palette and Brush to activate the puzzle. Color the egg to receive the Ink pot and Triangle Stamp. Go to the right door and place the Triangle Stamp on the lock before heading to the hatch. Use the Rope Ladder and go through the left door.

Chapter 12: The Finale

Retrieve the Heart from the microscope and head to the table. Retrieve the Ruler and Clear Tape. Locate the tile and lift it with the Ruler. Retrieve both the Apple and the Key. Head through the right door, head into the hatch, and unlock the lock with the Key. Lift the board and retrieve the Soldering Iron and the note. Go to the monkey, take his fingers in the Ink pot and get his Fingerprints with the Clear Tape. Head to the right door, place the Fingerprints on the machine. Speak with Dizzy before taking the Circuit Board Part from the pillow.

Place the Circuit Board Part in the machine and obtain the Broken Circuit Board. Take the left door to go into the lab. Head towards the microscope and place the Broken Circuit Board on it. Fix the Soldering Iron to fix the Circuit Board. Go through the right door, put the fixed Circuit Board on the machine and pull the lever. Place the Heart on the hammer and retrieve the Triangle. Look at Dizzy’s wrist and bracelet. Place the Triangle on the bracelet to activate a new puzzle. Fix the snake puzzle to remove the bracelet on Dizzy’s wrist.

Twilight Phenomena - The Lodgers of House 13 - Snake Puzzle Solution

Twilight Phenomena – The Lodgers of House 13 – Snake Puzzle Solution

Keep talking to Dizzy and then go to the bed. Retrieve the Stone Sword and Pliers. Continue through the right door, remove the broken lever from the machine and place the Pliers on the stick. Go into the secret rituals room by using the Rope Ladder in the niche. Look at the female statue, place the Apple in her hand, and retrieve both the Apple Slice and Stone Cobra. Place the Stone Sword in the next statue before heading back to the lab. Place the Apple Slice on the apple. Look in the jar to activate the next puzzle. Move the plants to retrieve the Iron Monkey.

Twilight Phenomena - The Lodgers of House 13 - Iron Monkey Solution

Twilight Phenomena – The Lodgers of House 13 – Iron Monkey Solution

Look in the small fish tank and place your Fish in the tank to play the next puzzle. Match the environment to the fish. Receive the Aromatic Oil from the game and go into the secret rituals room.

Place the Iron Monkey on the hand and retrieve the Green Cobra. Place the Aromatic Oil in the snake’s mouth and the melted gold. Look for a clue on the wall. Place the Gold Cobra and Green Cobra on the device to initiate the final puzzle. Move the cobras around following the clues along the wall. When you have them in the correct order, push the button and solve the mystery.

Twilight Phenomena - The Lodgers of House 13 - Cobras Solution

Twilight Phenomena – The Lodgers of House 13 – Cobras Solution

Once you have solved the mystery, you are free to leave the mansion. The victims of the villain are free as well. The mansion will go back to normal and Dizzy can live her life as freely as she wants. Or can she? Congratulations! You have survived Twilight Phenomena – The Lodgers of House 13. This comprehensive walkthrough has shown you the necessary hints to survive the evil that lurked there.


For more great tips and tricks, visit our blog!

Delicious – Emily’s Hopes and Fears Walkthrough

Big City Adventure – Shanghai Walkthrough

Building the Great Wall of China 2 Walkthrough


The Twilight Phenomena – The Lodgers of House 13 Walkthrough is meant as a guide and does not contain cheats, hacks, or serials.

The post Twilight Phenomena – The Lodgers of House 13 Walkthrough appeared first on GameHouse.
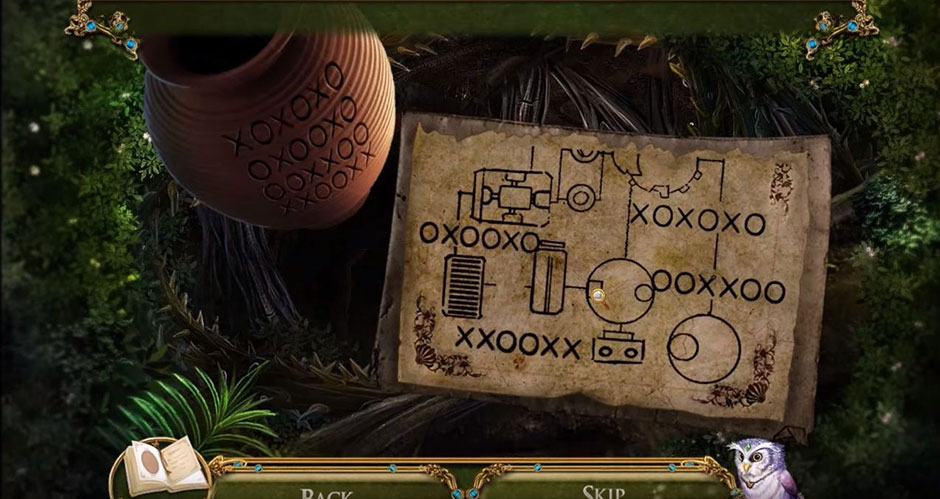
Delicious – Emily’s Tea Garden Walkthrough

$
0
0

Emily has always wanted to have her own business; however, she has had to sacrifice her dream to help her family. Now, it is time for Emily to have her dream come true and you can help her. In Delicious – Emily’s Tea Garden, Emily is trying to establish her own business and she has to go through other restaurant styles first. She is asked by the other restaurant owners for help with their restaurants.
In order to help Emily, you need to be able to effectively you have to help her earn enough money from the other restaurants while building her customer base. You will help decorate, cook, and serve with each level in order to advance Emily. Throughout the game, you will gain assistants and more challenges. In this walkthrough of Delicious – Emily’s Tea Garden, you will find the tips and tricks to helping Emily obtain her dream through this adventure, time management game.

Contents

General Tips & Tricks

The main menu will greet you with the question about your name. Put whatever name you would like to in the space provided. This will allow you to save your game. Then you can adjust your settings, look in the trophy room, learn how to play, or exit the game. If you want to adjust your settings, you can change the screen, volume settings and custom cursors. When you first start, there is a cut scene describing the back story of Emily’s dream.

Within the game, you are able to play two different types of games; however, one game is added after you succeed with a couple of restaurants. The second type is called “Emily’s Diary.” You will have to serve as many customers as you could before you lose a customer. You will have all the food and the help you need with each diary entry. The regular mode is comprised of 50 challenging levels. If you are looking for practice, once you open the diary section, you could hone your skills to make the next restaurant run smoother.

Each restaurant will have a certain style of food. Each day you will have a new item added. Each item will be highlighted before the beginning of the day. If there are more instructions like “place the item on the stove” those will be given to you once a customer orders that particular item. You will need to adapt to each new food fast and make sure you are fully stocked at all times. This will help you learn the new foods.

In order to gain money and points, you will need to keep track of your customers’ happiness levels. If the person is happy, they will have a beating heart next to them and a smiling face. If you make them wait too long, the heartbeat will go away before the person loses the smile. If you make them wait more, their faces will go away. In order to prevent this, you can use your helpers as well as making sure you effectively help each customer as they come up. You will also need to learn the patience level of the customers. If some are prone to be more patient than others, work with the less patient customers first before moving on to the others.

To gain points, you will need to complete chains. While you will make points by serving the customers, you can gain more points in certain ways. First, you gain points by serving the customer’s order completely. You can also gain points by chain actions. Chain actions are when you are putting together a customer’s order and you click on each item you need. This will start your schedule for the tasks at hand. The more chains you get, the more points you will receive.

Your tray will be your lifeline when completing orders. The food you are preparing will be placed on the tray. If the tray is full because of accidental orders, you can simply click on the items. This will remove the items while not deducting points on the score. If you need help with an order, you can simply look at the tray to see what you have finished already. The tray will grow from four maximum items to five throughout the restaurants.

Each restaurant will have tables. It is your job to maintain the tables. When a group gets up, you will need to clean the tables so others can use them. If you leave them messy for too long, you will have customers leave. In order to clean the tables, simply click on the table or the exclamation marks in order to send Emily or the busboy over to clean. If it is just Emily on that particular level, you will need to watch your time management. Tables will seat between 2-4 people meaning you will need to fulfill the orders of all at the table before delivery.

Delicious - Emily's Tea Garden - Tables

Delicious – Emily’s Tea Garden – Tables

You will also have a bar area in some of the restaurants. The customers will treat them like table which means you need to keep them clean. You will be able to send your entertainer to the bar stools to keep the happiness up. Do not forget to check the bar area. The customers can be overlooked when you get busy. Make sure you treat them with as much efficiently as you would the other customers. Pay close attention to where the bar is placed as it is never in the same area of each restaurant. Like the customers at the tables, the person has to leave their place to pay at the register. So keep the line down at the counter.

Delicious - Emily's Tea Garden - Bar

Delicious – Emily’s Tea Garden – Bar

Helpers

In each restaurant, you will have both an entertainer and a cleaner. The entertainer’s main job is to keep the customers at the tables happy. He cannot make the people in line calmer. You can use the entertainer at each table as much as you want. There is no limit. If you have a long line, place the entertainer by the table waiting to play in order to keep the person in line calm.

You will have to wait until the entertainer is done with the table before having him move on to the next table. You cannot use the chain method to keep the entertainer busy. You have to drag him to the table. If you have a table that is especially angry, you can keep the entertainer going back to keep the anger down. If you have a bar in the restaurant, you can send the entertainer there. It will have the same effect as the tables. This will help you keep your tips up.

Delicious - Emily's Tea Garden - Entertainer

Delicious – Emily’s Tea Garden – Entertainer

As your restaurant keeps adding more customers, you will need the cleaner. This helper will clear the tables you will be neglecting while helping fill orders. When you notice the table is ready to go, you can just click on the table to send the cleaner there. Emily will not be able to clean tables once your cleaner arrives so keep track of the tables. Unlike the entertainer, you can click on multiple tables for the cleaner to clean. He will just go from one table to the other without break.

Reservations
A new addition to the Delicious series is the reservations. You will be taking reservations halfway through the first restaurant. You will need to pick it up when it rings. It will tell you how many people are in the party that will arrive soon. You will see a blue bar on the top of your screen. This will show you the amount of time you have until they arrive.

Delicious - Emily's Tea Garden - Reservations

Delicious – Emily’s Tea Garden – Reservations

In order to make sure they have a table, you will have reservation cards. These will help you make sure the tables are ready for the reservations; however, you will need to time the cards perfectly. If you put them out too soon, you could lose customers. If you put them out too late, the tables might be taken. You can decide not to use the cards; however, you will not receive a bonus. To time your card placement correctly, you will need to keep an eye out on the blue bar. When it is almost empty, then you will need to place the card. Look at how many people are in the reservation to plan accordingly. Don’t seat a party of two at a table for four unless you absolutely need to for the reservation. It will keep your other parties waiting if you do that.

You can always change the table selection by picking up the reservation cards. The cards will just return to their place by the telephone. There you would just pick up the cards when you needed them. This will help you if you place the reservation cards too soon.
It is always wise to pick up the phone for the reservations; however, if you miss a call, you won’t exactly be penalized. You will just miss the opportunity to earn bonus points. There will be times you simply cannot answer the phones. That is okay on certain levels. Answering the phones too many times could cause you to fail the level. It is up to you to decide about the phone. If your restaurant is too busy, you can ignore the phone. You will know your reservation customers when they arrive. They will have the cards above their heads. That way you do not have to worry about finding the right group.

Bonuses
As with all Delicious games, you will need to find the mouse. The mouse will present itself on each level. You will need to look for him as you go. To help you know when he is coming, you will hear a squeaking sound. There will also be a mouse hole in the floor where he will pop out of, but this will change as the days increase. He will be hiding in random places throughout each restaurant. If you play the same level over, you will probably not find him in the same spot. If you spot him, click on him and gain an extra 100 points. If your restaurant is too busy, you can ignore the mouse, but you will lose out on the bonus.

You will find bonuses throughout the game. One location involves the chain actions. If you complete two orders, click on both people to deliver their meals. This will cause a chain bonus. The same goes for the cash register. When checking out customers, if you have time, wait until you have two customers at once. You will just click on the register twice to pick up the money from the waiting customers. This will give you bonus points. If you have more than two people waiting to pay, simply keep clicking on the register. You will keep adding points to your bonus.

Decoration

With each restaurant, you will be able to change the decor. It will make each restaurant unique; however, it will not help your game. Each level gives you more money towards the decor. You might not be able to upgrade after each level, but you will be able to change certain areas. The most common places for changes are the tables, floors, and walls. If you do finish the decorations of each restaurant, you will receive a trophy. The best way to work with the decorations is to save the money until the final level of each restaurant. Then you can purchase all the upgrades at once.

Customers

With each restaurant, your customers will be the same. You will have the assortment of women and men along with the elderly. Each group has a level of patience. For the elderly couples, you will see an increase in patience; however, at the tables, they do take a while to order. You will need to plan accordingly in those situations. Other customers will want their food faster. When the tables are full, send the entertainers to the other tables before sending them to the elderly couple. Since their patience is longer, it will help you manage your time.

Delicious - Emily's Tea Garden - Customers

Delicious – Emily’s Tea Garden – Customers

Tips and Tricks
In order to effectively help all your customers, you will need to try to get as much done as you can in one trip. If you are delivering food to a table and the phone rings, pick up the phone first to get the reservation started. If you have two tables of couples, grab all four items to deliver at once. Saving time will increase your tip. If you have a line a the counter, make sure you are constantly clicking on the register. It will increase your time management while making sure the customers from the tables will not have to wait in line. Make sure the food you are preparing can fit onto the tray. This will save you from running around with an item in your hand.

As explained earlier, chaining tasks will increase your score. Make sure Emily has a chain of things to do. If she doesn’t have anything to do, she will just stand in the last spot she was in. Make sure everything stays clean or click on the register to make sure she is close to the counter.

If you have a quiet moment in the restaurant, make sure you stock the food. Get everything up to its maximum so when your next rush hits, you will not be stuck without. When you get a line, take care of the people at the counter first. Unlike the people at the bar or tables, the people in line have nothing to entertain them. If you find you need to pay more attention to your counter than the tables, utilize your entertainer because he will increase the patience of those customers; however, don’t completely forget the tables. You will need to fulfill their orders as soon as you can.

Delicious – Emily’s Tea Garden Walkthrough

Western Restaurant

Your first restaurant is a western barbecue theme. Before you begin, you will meet the owner who will pop up throughout your game after the levels. In fact, you will meet all the owners of the other restaurants throughout their levels. You will be handling chips and salsa, ribs, and steaks as well as minor items like beverages and corn. On the first level, you will be dealing with the chips and salsa as well as the drinks. You will need to keep the chips fully stocked. You stock them by clicking on the chip machine. Make sure you do this whenever you can. The more you have in the machine, the less likely you will have an issue of running out. The customers will choose between green or red salsa. When you add the steak and ribs in other levels, you will add a grill. You will need to monitor the grill so you do not burn the meat.

Delicious - Emily's Tea Garden - Western Restaurant

Delicious – Emily’s Tea Garden – Western Restaurant

In order to ensure the meat is taken off at the right time, you should put off getting any chips and salsa for the order. Once the meat is cooked, you can grab the chips. The customers will have two choices for steak: medium or well done. When the customer places the order, you will see their preference over their heads. If you have the sound on, you will be able to hear when the meat is ready. For medium, you will hear one ring and for well done, you will hear two. If you burn the steaks, they will turn to dust on the grill and you will need to start over.

Like the steaks, there will be two options for the ribs. When the ribs are first introduced, you will only be able to choose one seasoning. As the levels progress, you will have an additional seasoning added. There will be a special ring for the ribs to signal their completion. There are no special orders like the steaks. Once you hear the ring, grab the ribs.

The Beach Club

After a heavy food restaurant, Emily heads to the beach club. Here there are health nuts as customers. You will be in charge of delivering granola bars, juice, fruit bowls, and ice cream. With the granola bars, your customers will have two choices of flavors. You will need to look at the packaging to know you are giving them the right ones. Next, the fruit bowls will require you to look at what the customer is actually ordering. You will need to add the right fruit to the bowl. If you put the wrong fruit in, the customer will not take it. If you have multiple orders of the same bowl, you cannot make them at the same time. You will have to click the fruit then the bowl before moving on to the next order.

The juice is like the fruit bowl. You will need to click on the fruit and then the glass. You have to complete the orders one at a time. If you make the wrong juice, your customer will not take it. Finally you have the ice cream. You will have to keep track of the ice cream tubs. If they get too low or run out, you will need to refill it. This will take time so keep a close watch. When you need to refill, grab the correct fruit and place it in the ice cream bin to create the new ice cream.

The Seafood Restaurant

Emily’s third location introduces a new feature: the frying pan. Since you will be making seafood, the pan is needed to cook. You will have to place the fish selection into the pan. Once the fish is done, you will need to season it based on the customer’s order. You will either add salt and pepper or some kind of citrus. Once the fish is cooked, you will see the pan light up to let you know it is ready.

Along with the fish, you will be cooking paella, clams, and lobsters. With the paella, you will be combining both rice and shrimp. You will need to click on the rice first or else the customers will reject the combination. You can make the paella ahead of time in order to keep up with the rush. You can have a maximum of nine batches.

Delicious - Emily's Tea Garden -The Seafood Restaurant

Delicious – Emily’s Tea Garden -The Seafood Restaurant

To cook the clams and lobsters, you will place them in the boiling pot of water. Wait until you see them come up to the top to finish the orders. To keep up with the orders, you will have two pots. These pots can either be one of each or two of the same selection. It is up to you to choose. Base it on your customers orders. To select the clams or lobster, just click on the pot and it will transport the order to your tray. You cannot cook multiples ones at a time so make sure you fulfill the order before you add another.

The Posh Restaurant

Your dining guests will have a special order immediately after sitting down. They will all want bread baskets. If you have time, grab a bread basket when you see them about to sit down. You will be able to serve them faster. When your bread baskets get low, you will need to cut up the bread. Each piece of bread will create two servings. To keep up with requests, have the maximum 6 servings ready to go. You will have four plates to offer your customers besides wine and bread: asparagus with bread, meat with bread, creme brulee, and crepe. With the meals involving bread, you just have to click on the vegetable or meat and then click on the bread. Give the meal to the customer to complete the order. You will have the choice of two breads by the end of your time at the posh restaurant.

Next, you will have the crepe. Place the batter on the pan. Wait until you hear a ring so you can flip the crepe over. Once you hear the final ring, grab the crepe and top it with the ice cream. If you burn one side of the crepe, you will have to start over again. As you move through your restaurant time, you will have the second type of ice cream added to the selections. Your final food choice is the creme brulee. It is pretty easy to make. You need to click on the cup to activate a round meter. Click on the meter when the needle is in the green section. If you miss that green section, you will have to start again.

The last level of this restaurant is tricky. In order to defeat the level, you will need to ignore the phone. If you cannot leave the phone alone, answer it only once or twice. Keep your focus on the customers who are there. Use your violinist nonstop. Send him from table to table throughout the level. Doing these two things will keep you from failing the level. Most of your customers will want to sit at the tables as well so keep them clean and get the customers served. It will help you in the last level.

Delicious - Emily's Tea Garden - Posh Restaurant

Delicious – Emily’s Tea Garden – Posh Restaurant

Emily’s Tea Garden

Your final location is Emily’s dream. You need to pass all ten levels to fulfill her dream. Your customers will order tea, orange juice, grapefruit juice, mixed juice, puff pastry and fried eggs. Your signature drink will be tea. To make the tea, click on the glass and grab the right type of tea leaves. To get the consistency correct, you will need to look at how many tea leaves you will need. You will need to go into the garden to grab more tea leaves so keep grabbing the leaves from the gardens. The garden is located in the middle of your restaurant. That way you do not have to run outside the restaurant location to get your inventory. Once you click on the leaves, they will go into the inventory. When you pick the leaves, the tea leaves will start to grow back quickly so you can add them when you need them.

Delicious - Emily's Tea Garden - Garden

Delicious – Emily’s Tea Garden – Garden

To create your juices, you will need to see which one the customer wants. Once they choose between oranges and grapefruits, you will click on the fruit twice. It will place the fruit into the machine to juice. You will wait until the glass is full and then place the glass on the tray. Place a wedge of the fruit on the side of the glass. This will distinguish the fruit. You will also have a choice of a mixed juice cocktail. This is one part orange and one part grapefruit. You will follow the same pattern as you do for the other juices and it will be garnished with both a grapefruit wedge and orange wedge.

Your puff pastry will require you to work with a meter again. You will click on the pastry to fill it. Once the meter is in the green part, you click to stop it. If you fill it too much, it will drip the cream on the floor. You will have to clean it up and waste time. Finally, you have the choice of a fried egg. You will click on the eggs to place them into the pan. You will wait to hear the ring for your eggs to finish. Grab them from the pan quickly to serve them. If your customer wants toppings, you will add them prior to delivering the order. At the end of the last day, you will have three new teas. You will also have the eggs and juices added in the middle of your time at the tea garden. Keep track of your customer’s moods in order to effectively complete the game.

Once you finish the tenth day in Emily’s tea garden, you have won! Emily has achieved her dream. She is now the owner of her own restaurant. Through the use of your time management, you have used the tips and tricks found here to effectively succeed in this game. Congratulations!


ALL MICE LOCATIONS

All mice locations are listed and shown below:

Western Restaurant

Delicious - Emily's Tea Garden - Mice Locations Western Restaurant

Delicious – Emily’s Tea Garden – Mice Locations Western Restaurant

01. There is a mouse hole in the floor, top left, near the pillar.
02. Mouse hole in the floor between the fireplace and the table.
03. On the right, above the barrel.
04. Above the nachos machine.
05. On the bottom next to the grill .
06. There is a mouse hole in the doorway.
07. There is a mouse hole in the floor next to the counter.
08. There is a mouse hole in the floor to the right of the fireplace.
09. On the left by the four-seater table.
10. Above the cash register.

The Beach Club

Delicious - Emily's Tea Garden - Mice Locations The Beach Club

Delicious – Emily’s Tea Garden – Mice Locations The Beach Club

01. Left of the tray.
02. Mouse hole in the sink of the bar area.
03. Peeking out from the left windowsill.
04. Peeking from the window on the right side.
05. Peeking out from the entrance.
06. Next to the strawberry on the counter.
07. By the table at the bottom left-hand side.
08. Mouse hole in the middle of the bar.
09. Next to the pineapple.
10. On the left of the main counter.

The Seafood Restaurant

Delicious - Emily's Tea Garden - Mice Locations Seafood Restaurant

Delicious – Emily’s Tea Garden – Mice Locations Seafood Restaurant

01. Bar on the right.
02. By the top left table.
03. On the stairs.
04. On the seat of the bottom left table.
05. Above the rice counter.
06. There a mouse hole at the left-end of the counter.
07. Peeking out from the left pot.
08. There is a mouse hole under the window on the right.
09. Mouse hole next to the fish-tank.
10. Behind the pot-plant.

The Posh Restaurant

Delicious - Emily's Tea Garden - Mice Locations Posh Restaurant

Delicious – Emily’s Tea Garden – Mice Locations Posh Restaurant

01. Next to the music sheet at the piano.
02. There is a mouse hole at the bottom of the pool.
03. At the food table.
04. Next to the telephone.
05. Underneath the piano.
06. Behind the potatoes on the right.
07. Behind the counter next to the bread basket.
08. By the two-seater table on the glass platform.
09. There is a mouse hole on the bottom left next to the tray.
10. Behind the tray.


Emily’s Tea Garden

Delicious - Emily's Tea Garden - Mice Locations Garden

Delicious – Emily’s Tea Garden – Mice Locations Garden

01. By the fruit holder, below the orange.
02. By the tea garden planter.
03. The empty tea holder on the right.
04. There is a mouse hole on the side-walk, near the telephone.
05. Peeking out from the tea cups.
06. There is a mouse hole on the side-walk, above the telephone.
07. There is a mouse hole to the left of the telephone, by the entry.
08. There is a mouse hole to the left of the entrance way, next to the pot-plant.
09. Above the juicer.
10. There is a mouse hole on the side-walk to the right.

Also, by helping Emily achieve her goals, you have helped the other restaurant owners with their restaurants as well. Through the use of the cut scenes, you have been able to get to know the other owners as much as you know Emily. You have successfully completed all the tasks they have asked you to help with and more. By following this comprehensive walkthrough of Delicious – Emily’s Tea Garden, you have made the character’s dreams come true.


For more guides through Emily’s adventures, visit our blog!


Delicious – Emily’s Taste of Fame Walkthrough

Delicious Emily’s True Love walkthrough

Delicious – Emily’s Hopes and Fears Walkthrough


The Delicious – Emily’s Tea Garden Walkthrough is meant as a guide and does not contain cheats, hacks, or serials.


The post Delicious – Emily’s Tea Garden Walkthrough appeared first on GameHouse.
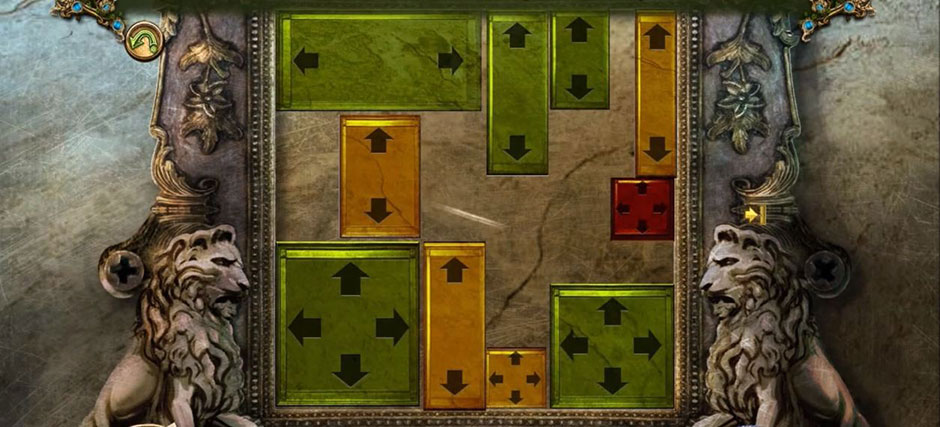
Haunted Halls – Revenge of Doctor Blackmore Walkthrough

$
0
0

Get ready for adventure in this Haunted Halls – Revenge of Doctor Blackmore walkthrough! Don’t worry if you’re stuck in one of the maddening puzzles of this game as you try to save the helpless victims of the vicious Doctor. This walkthrough will help get you, and your sanity, out safely! Full of tips and tricks and other useful information, it is sure to make your journey go much easier.

Contents

Haunted Halls – Revenge of Doctor Blackmore Walkthrough

Chapter 1: Doctor Blackmore’s Return


Take the Cigar and Feather from the Native American statue. Use the Cigar on the pirate hanging on the pillar. Collect the Target, Scissors, and Sugar Cube from the table on the left. You’ll place the Target under our friend the pirate. Collect the Tomahawk after the statue throws it. Give the Sugar Cube to the little creature in the plants so you can collect the Suitcase. You’ll see it now above your notes as you Portable Laboratory! Take another look at the plants to collect the Lighter.

Looking at the monitor on the right side of the screen will trigger a cutsceen. After it has finished, use the Tomahawk on the glass box so you can take the Button. Click on the tentacle to shoo it off before using the Scissors on the cigar you gave the pirate. Now you can use the Lighter to light it for him. Collect the Eye. Go to the door ahead of you and use the Button on the lower left slot and that Eye above the hands. This will start a tile swap puzzle. Finish it to go through the door. The solution is below:

Haunted Halls - Revenge of Doctor Blackmore - Tile Swap Puzzle

Haunted Halls – Revenge of Doctor Blackmore – Tile Swap Puzzle

Take the cables from the floor and add them to the stingray tank. Use the Feather on the pheasant hanging out on the sink. Collect the Egg that she lays then go out the door to the left. Here you will want to collect the Liquid Nitrogen from the table. (Take a look at those files, too!) Inside the cabinet is a hidden object scene. Place the objects in their proper places and in the end you will get a key item.

Pick up the Screwdriver and use it on the Screw. Take the Scissor Blade and use it with the Screw and Scissor Half before using the Screwdriver to create the Scissors. Use them to cut the netting and collect the Empty Pesticide Bottle. Now collect the Chemical Jars and Spray Cap and add the Chemical Jars and  Empty Pesticide Bottle into the slots before mixing them. Now use the Spray Cap on the Pesticide Bottle. Congratulations! You now have Pesticide. Use it on the jar with scorpion so you can collect the Wires. You can use them on the battery. It will show you the code “539”, which you use on the box to open it. Take the Coin from inside.

There is a puzzle on the right wall. This is the solution:

Haunted Halls - Revenge of Doctor Blackmore - Wall Puzzle Solution

Haunted Halls – Revenge of Doctor Blackmore – Wall Puzzle Solution

Collect the Fertilizer and Empty Bottle. Use the Fertilizer on the grass in the sink. Collect the Wheat Grain by clicking on it, then go back to the hall. Use the Liquid Nitrogen and Tomahawk to break the lock on the door. Go through the door and into the ward. The gentleman in the chair is your fiance. Select him to speak with him. Collect the Piece of Bread from the loaf on the floor and the Eye Glasses from the sink. Turn on the sink and use the Empty Bottle to collect Machine Oil. Open the suitcase in the lower left corner. Place the Egg in the nest inside the vent to the left. When it hatches, feed the chick the Wheat Grain. Go back to the Hall.
Give your Piece of Bread to the stingray and the Machine Oil on the gears of the machine to the right. Once you complete it you can place the Coin in the slot and collect the Latex Glove. This is the solution:

Haunted Halls - Revenge of Doctor Blackmore - Gears

Haunted Halls – Revenge of Doctor Blackmore – Gears

Return to the Testing Room. There is a hidden object scene over the cabinet. Open it. Now, take away the netting and collect the Nippers. Take a look at the napkin and then collect the Tweezers and Blunt Knife, which you will use on the sharpening stone to make it a Sharp Knife. Use the Tweezers on the scorpion tail. This will get the venom into the tube. Use the Sharp Knife on the Lemon to collect it. Use the Lemon, then the Vial of Venom on the Acid Jar and collect it. Use this Acid on the lock and get the Can Opener. Give your Eye Glasses to the kangaroo and take the Jar it provides.

Go back to your portable lab. Use the Flowers from the upper right shelf in the Mortar and crush them with the Pestle. The flowers will become powder to put into the Solidifier. Take the Green Crystal and put it into the Grinder, then press the button. Use the Gold Powder in the Liquifier and press the button. Pour it into the Canisters to create the Eye Drops.

There is a helium canister in the back of the room. Use the Latex Glove on the nozzle and recollect it as the Floating Glove. Use it on the ceiling over the kangaroo. Use the Can Opener on the can that falls down. Take the Chicago Disk from inside. Now go back to the Ward and then to the left to reach the Monitor Room. Use your Eye Drops to make the hallucination go away before focusing on the computer. When you use the Chicago Disk here you will open a portal! Go ahead and go through it.

Chapter 2: Chicago

Collect the Shovel from the street then read the newspaper. Go ahead and click on the toys in the tree. Now use the Shovel on the dirt at the base of the water tower and collect the Worm before going up the road to a shed. There is a hidden object area here. Collect the items. When you’re done, you’ll have the Dynamite. Use the Shovel on the sand and put out the fire. Collect the Stone, Poker, and Metal Comb from pile of sand. Now go back to the Main Street

Use the Metal Comb on the two toys in the tree. Take the Twine. Set up the Dynamite at the base of the water tower. Go back to the shed area. Use the Twine on the bucket of glue, turning it into Sticky Rope. Dip this into the pile of gun powder to make a Fuse. Now go back to Main Street again. Add the Fuse to the Dynamite. A cutsceen will play. Now use the Tomahawk on the front door of the building on the left and go inside. Take the Umbrella from the coat rack. Go through the door under the stairs.

Break the window using the Stone. This will let out the smoke. Go back to the Foyer, then to the left to go to the Kitchen. Take the Oven Mitt. After you take it, you will find a puzzle above the mantle when you click on the clock. This is the answer to it:

Haunted Halls - Revenge of Doctor Blackmore - Clock

Haunted Halls – Revenge of Doctor Blackmore – Clock

You’ll collect the Fishing Line with Hook when you’re done.

Open the oven and use the Oven Mitt to grab the tray. Take the Smelling Salts from the wooden cupboard. Take the Vinegar. Now open the windows on the left and take a look outside. Help the beaver out by using the Tomahawk to get rid of the poison ivy. Take the Gas Mask and it will be added to your Portable Lab. Open it and do the following:

Use the Salt and Coal on the Grinder. Take the Dust and add it to the Liquifier. Pour the liquid back into the Grinder where you will add the Seeds. Grind all this together and place the dust into the Mortar before using the Pestle on it. Put the new dust into the device at the bottom. This will let you collect the Gas Mask. Now go back to Foyer.

Use the Fishing Line with Hook on the spear then add the Worm while looking at the fish tank. You will get the Fish. Now go back to the kitchen. Place the Fish onto the tray and use the Oven Mitt to put it back into the oven. Let it cook and then pull it back out, still using the Oven Mitt and collecting the Baked Fish. Now go back to the garage.

There is a hidden object area above. Start it and find the objects that are in black at the bottom of the screen. You will get the Belt. Now you can give the Baked Fish to the Cat sitting on the stand. When she jumps down you can collect her. Now go back to the Storeroom. Place the Cat inside the wheel and after that the Belt can be used on the fan and the smoke will clear out. Use the Umbrella to bring down the box behind the light. There will be a pot in the now empty shelf. You can use the Vinegar to clean it. You will get a code: “X27Z”. Take the Pliers from beside the tied up man before using the Smelling Salts to wake him up. Take the note from him. It will say “4ZHK”.

Now go back to the kitchen and take a look at the oven again. Take the Poker and use it on the coals. Use the Oven Mitt to collect the Iron Tooth. Look back out the window and give it to the Beaver so he can finish carving the tree. Take the Ladder and go back to Foyer where you’ll use it on the stairs. Climb up it. Use the Gas Mask to avoid the hallucination and the Pliers on the key stuck in the door. This will lead you to the next hidden object area. When you are done you will get the Salt.

Go in to the next area: The Study. You will want to fight the moving suit of armor with the Tomahawk. Now go back to the kitchen and use the Salt on the table. A puzzle will start where you grow a pumpkin. Just do as the instructions say and collect the Pumpkin when you’re finished and go back to the Study. There you’d use the Pumpkin on the suit of armor before going back down to the Foyer.

Look at the coat rack, then the staff. This will start a puzzle. You will want to match the puzzle to the largest painting above the stairwell. You will collect the Sword. Now go back to the Study and flight the suit of armor with the Sword to  defeat it. Now you can put the codes “4ZHK” and “X27Z” into the cage in the back. A puzzle will start. Press the Red Button twice and then the Green button 5 times. Then go down to the room under the stairs.

Talk to the man standing here. Collect the Disk Piece and Blue Energy Orb. Go back upstairs from the ladder and click on the hidden object area on the left. Finish the puzzle and collect the Glue. Take the Disk Piece and Glue to the desk and combine them to create the Chernobyl Disk. Now go all the way back to the Screen Room and place the disk into the Chernobyl monitors. A portal will open. Go through.

Chapter 3: Chernobyl

Here in the plaza you’ll see a newspaper on the ground to look at. Keep the number “269-47”. Use the Tomahawk to clear the branches on the statue.

If you look at the broken window on the left. There is a coat that you can move around before you take the Drumsticks. Now go to the door in the far left corner. Go inside the gym and collect the Crowbar and then use it on the lockers. Take the Ammo from inside. There is a heater in the rear of the room. Use the Crowbar again on the heater and break the chain. Take the Ball then go back to Plaza.


Use the Crowbar to move the road chunks from the phone booth, then take a look in. Put the code from earlier in: 268-47. Take the Coin. Take a look at the playground and collect the Octopus Cutter. Now go back to the first area and take the gun from the top of the tank so you can use the Ammo. Once the well is clear, go look at the shop. Take the Clean Glass and Matches. Use the Crowbar to take the panel off of the tank. Now take the Drum and Funnel.

Inside the well you can use the Funnel to start a puzzle. You need to move pipes into place to make a Trumpet that you will collect.

Haunted Halls - Revenge of Doctor Blackmore - Pipes Puzzle Solution

Haunted Halls – Revenge of Doctor Blackmore – Pipes Puzzle Solution

Go back to the lobby and select the red vending machine. Use the Clean Glass in the silver slot, then use a Coin to get a Fizzy Water. Now look at the boy statue at the other end of the room and use the Trumpet. Use the Drum and Drumsticks on the statue of the girl. Wait for them to finish their song then move onto the next area, then return to the plaza where you will give the shadow of a boy the Ball. Now use the broken area to start another hidden object game. Once you finish you will get the Pills. Now go to the Portable Laboratory.

Pour the ?, ?, and X tubes into the Liquidfier, then use the mix in the Grinder with Salt and H20. Put the powder into the Mortar with the Poison and use the Pestle to mix it. Pour this back into the Liquidfier with the ? and Y tubes before putting the mix into the Solidifier. Place the resulting crystal into the mortar with the Poison and Coal and crush it all together. Put this powder into the capsules. You will get the Pills. Use them on the hallucination in the hallway. Move the curtains away and collect the Bubbles. Go through the 2-A door to enter the classroom.

Take the Battery from the glowing calculator. Take the red-orange bag and collect the Gold Paint from inside. Collect the Sponge from the chalkboard after you rotate it out. Give the silhouette of a girl the Fizzy Water then pick up the Bobby Pin. Go back to the hallway and go into the 2-B classroom. There is a Handheld on the lower left desk to collect. Put the Battery inside it. You’ll begin another puzzle. Catch the eggs! Now look at the chalkboard that is at the back of the room on the floor. Take the Chalk from it. In the chest you can click on the star and it will fall apart. Go back to the hall.

Give the Basket to the girl silhouette. Take the Mushroom. Now go down to the basement and give the girl silhouette here the Bubbles. Collect the Bubble that appears and place it into the eye socket of the face painted on the wall. Go back to the Well. There is a puddle of water you can use the Sponge on to collect the Wet Sponge. Use the Mushroom on the large mushroom thingy and collect the Bubble that appears. Go back to the basement and use this Bubble on the other eye socket. A door will appear. Go inside and there is a hidden object area. Finish the puzzle to collect the Nippers. Take a look at the chained door before going back to Classroom 2-B. Look at the blackboard and clean it with the Wet Sponge and use the Chalk to draw a handle on the door. Return to the basement and go inside the now openable door.

In this room you’ll want to take a look at the power panel that is in the green locker.

Finishing this puzzle will turn the fence’s power off. You can use the Nippers to cut the fence and remove it. You can now talk to the gentleman sitting there before going back out into the basement. There is a hidden object area on the left you can access. You will get the Candle once you are done. Now go back to the plaza. Below the Ferris Wheel there is another hidden object area. You will collect a Star when you’re done. Now go back to Classroom 2-B.

Look at the chest under the window. Put the Star into the groove and then paint it with the Gold Paint. This will unlock the chest. The pieces inside need to be arranged into a totem pole. You will be able to collect the Suction Cups once you are done.

Haunted Halls - Revenge of Doctor Blackmore - Rope Solution

Haunted Halls – Revenge of Doctor Blackmore – Rope Solution

Go back to the basement. Place the Suction Cups in an octopus shape. Look at the plate on the right of the gentleman siting there. Place the Octopus Cutter and Candle on the plate. Light it with the Matches. Take the Octopus and place it into the groove on the gate-like door to the left. There will be a puzzle here. You need to match the colored numbers to the dials.

Now collect the Screen and Green Energy Orb. Go back to Classroom 2-B and look at the robot in the corner. You will trigger a puzzle if you place the Screen in the panel. Match the chips to the shapes. When you finish, take the Pompeii Disk. Now go back to the original Monitor room. Like the times before, place the Pompeii Disk into the collection of monitors then step through the portal.

Chapter 4: Pompeii

You’ll start in a courtyard with a big bull blocking the way. Go into the leftmost building and enter the dining area where there is a hidden object area in the corner. Find the objects and collect the Duster once you’re done. Then collect the Trident and the Corkscrew from the table. Look at the Herbs on the left and collect them before leaving back to the Courtyard. Give those Herbs to the Bull and use the Duster to clean the hatch and pick up the Feather. Use it on the Bull’s nose to make it sneeze. Pick up the Shield and the Ring. You can use the Ring on the hatch. Collect the Sword and Oil. Go into the Hostel and collect the Helmet and Flint.

Take a look at the bed on the right. Take the blanket off the bed to see the chest underneath. Now go to the dining area and go past it into the cellar. Pour the Oil into the hanging basin and light it with the Flint. Use the Corkscrew to remove the cork from the jar in the corner. Go back to the main area and collect the bust of Caesar and the Torch. Light the basin with the Torch, turning it into the Burning Torch. Use the Tomahawk to cut away the netting from hanging carcass. Collect the Cooking Fat then go back to the dining area where there is a hidden object area in the corner. When you are done you will collect the Laurel Leaves.

Use the Burning Torch on the wood in the oven. Now go back to the Cellar. There is a small box with leaves where you can use the Laurel Leaves. Place the leaves into the matching places. You will see a yellow outline when they are correct. You will collect the Laurel Wreath before you go back to the dining area and collect the Aquila from the top of the stone oven before going out to the Courtyard. Place the Laurel Wreath on the bust of Caesar and then go to the Hostel.

Cut the rope from the left beam with the Tomahawk. Now you can collect the Rope and use it on the “X” shown here:

Once the rope is hanging go to the bed on the left. Take the rope and attach it to the bed. Use the Bust of Caesar on the left and the bed will be lifted. Take the Lotion Container.

Combine the ? Vial, Salt, and Lemon in the grinder then take the powder from that and place it into the Soldifier. Take the crystal that forms and place it in the Liquifier. Add the liquid and the poison to the mortar and crush them. Add water and the powder into the Liquifier and then pour the liquid into a container to create the Ointment.

You can now collect the Helmet, Sword, Shield, Trident, and Net from the suits of armor. Arrange the objects as shown:

Haunted Halls - Revenge of Doctor Blackmore - Armor

Haunted Halls – Revenge of Doctor Blackmore – Armor

You will be able to collect a White Rose when you finish. Now go back to the Cellar. Use the White Rose in the jar on the floor and it will become a Red Rose. Now go to the courtyard and give the Red Rose to the statue of the woman. You can now go forward to the Hall of Pillars. Pick up the Bucket then use it on the embers under the golden bull. Go up and collect the Signet Ring

Cut the Curtain Holder with the Tomahawk and collect it. Then go to the gold table and use the Signet Ring on the golden box there. You will be able to take a Emerald from inside of it. Now go on to the balcony next. Here you will use the Ointment to make the hallucination. Take the Soap Dish from the edge and then the hidden object puzzle on the left. When you’re done, you’ll have the Bellows to collect. Use it on the pile of ash and then take the Board. Now go back to the baths. There is a lion cub in the bathtub here and you can use the Board to help him escape and follow him back to the balcony. There is a hidden object puzzle on the left. You will collect the Hook when you are done. Now collect the Dirty Lion Cub and go back to the Cellar. On the far left you can look at the jugs and then use the Hook to collect the Key.

Go back upstairs to the dining area. Use the Soap Dish and the Cooking Fat on the oven to start a puzzle. The solution is here:

Haunted Halls - Revenge of Doctor Blackmore - Soap

Haunted Halls – Revenge of Doctor Blackmore – Soap

Collect the Soap and go to the Hostel. There is a small chest you can use the Key to open it and then collect the second Emerald before going to the baths. Place the Dirty Lion Cub in the pool and wash him with the Soap. He will now be a Clean Lion Cub! Pick him up and head back to the Hall of Pillars and give him to the Lioness. Talk to the woman in the chair before taking the Curtain Holder and putting it in the base of the cat. Now you can place the Emeralds in it’s eye sockets.  Now click on the “tail”. The chain will come down. Clicking on the gold bull will start a puzzle. This is the solution:

Now that the woman is free you can get the Yellow Energy Orb. You can put the Aquila above the chair in the slot. Remove the stones where the blue lights shine down. You’ll be able to collect the Alaska Disk. You can once again go back to the monitor room and place the disk into the slot, causing a portal to appear and move onto the next area.

Chapter 5: Alaska

When you arrive, there will be a car in front of you. Open up the hood and look inside to find the Screwdriver and remove the lid from the gas tank. Open the car door and collect the Knife and Insulating Tape. Now move onto the garden where you will see a prisoner. There is a lawn mower here. Collect the Straw and remove the red gas tank lid. Collect the Funnel from the scarecrow and then look at the wooden fence under the scarecrow. You can use the Screwdriver here on the screws to take them then collect the Ladder. Use the Tomahawk on the branches that are under the man. You will be able to collect Chopped Branches. Now go back to the car and look in the hood. Now you can use the Insulating Tape to fix the wires. Put the Funnel into the gas tank then go back to the inside of the car so you can grab the Lighter.

There is a metal drum on the porch of the main area. Use the Chopped Branches and Straw in that drum and then set it on fire with the Lighter. You can now collect the Snow Shovel and return back to the garden area. There is a pile of snow underneath the tree on the right side. Dig there with the Snow Shovel and then look closer. Take the Knife and cut the Hose and collect it before using the Tomahawk on the ice. Collect the Car Key. No go back to the lawnmower and place the Hose in the tank. Back at the car there is a light pole. Place the Ladder there and take the Light Cover. You’ll want to use it with the Hose at the lawnmower and when it is filled up you can collect the Gasoline and use the Car Key inside the car (under the radio) to start the car up. There will be a cutscene now.

Look at the hidden object area that is at the car. Finish the puzzle and collect the Chainsaw. You can now move to the next location and check around the steps. There is a small shed there you can look at where you can collect the Repair Kit and Jack. Remove the screws from the binocular machine with the Screwdriver so you can remove the plate and collect the Segment. Now go on to the shipwreck and head inside. Collect the Bone on the floor. There is a first aid box on the wall you can open. Inside you can collect the Twine. There’s a door on the left that you can use the Jack on to open it. This will lead you to another hidden object area. Once the puzzle is finished, you will get the Lens.

The door on the right starts a puzzle. This is the answer:

Haunted Halls - Revenge of Doctor Blackmore - Door Puzzle

Haunted Halls – Revenge of Doctor Blackmore – Door Puzzle

Now you can go into the next area. There, you will want to use the Segment on the table. Remove the cracked lens and replace it with the Lens. You will now have the Spyglass. Now go back to the hold and start the next hidden object area. Finish the puzzle and you will be able to collect the Ammunition. Now go upstairs and pull on the hook and hose so they lower into the area. The Repair Kit can be used on the hose and the Spyglass goes onto the stand. Now head out to the clearing where you will see a bear. Use the Bone on the bear and collect the Leash before heading back to the deck. You can use the Leash on the gears in the motor. Now go back into the hold and bring the hanging hook down again before attaching the floor on the net. This will keep the cannon secured so you can use the hook to lift it. Now collect the Statue Head. Go to the wheelhouse now. You can set the Ammunition onto the table then use the bullets on the guillotine, take the paper, fold it and use the Twine on it. Now you can collect the Explosive Packet and go back up to the deck. Select the hook and raise it and then select the net to line everything up. Place the Statue Head and Explosive Packet inside the cannon before closing it up and moving it forward by clicking on the wheels. Put the right wheel on the number 5, and the left wheel on the 3. NOW FIRE THE CANNON! (By clicking on it, of course.)

Now go back to the car. There is a hidden object area here. Once you finish it you will be able to collect the Map. Now you can go back to the wheelhouse and focus in on the blue-lit screen in the corner. Use the Map here and take the code: 871 and 243. You will put this code into the safe on the lower right of the dash. Open it and take the Syringe Gun. Now it is time to go to your Portable Laboratory.

First put the water and seeds into the mortar and crush them with the pestle. Along with some poison, place the resulting powder into the grinder. Combine the powder, a lemon, and the vial labeled “A” into the Liquifier. This liquid, along with the  Salt, into the mortar and crush it with the pestle. Put this all into the Solidifier. This crystal and poison need to go into the grinder now. That powder and water need to go into the Liquifier. Poor the mix into the syringe gun. You will now have the Anti-Freeze Tonic. Go to the Garden now and then into the Construction site. You can use the Anti-Freeze Tonic on the hallucination to make it go away, then look to the left window of the construction vehicle. There is a puzzle inside and this is the answer:

Haunted Halls - Revenge of Doctor Blackmore - Construction Vehicle

Haunted Halls – Revenge of Doctor Blackmore – Construction Vehicle

Once you are done with the puzzle, go back to the garden and speak with the gentleman. You can now collect the Pink Energy Orb. Now it is time to go back to the Monitor Room, and then from there, go back to the Ward. There is a suitcase under the right window. Open it up and use the Blue, Green, Yellow and Pink Energy Orbs into the slots. Now you can look at the robot in lights on the right and enter a puzzle. This is the answer:


Haunted Halls - Revenge of Doctor Blackmore - Bomb

Haunted Halls – Revenge of Doctor Blackmore – Bomb

CONGRATULATIONS! You’ve completed our Haunted Halls – Revenge of Doctor Blackmore Walkthrough! If you liked this walkthrough, you might be interested in:

Haunted Legends – The Bronze Horseman

Haunted Halls – Fears from Childhood

This Haunted Halls – Revenge of Doctor Blackmore walkthrough is meant as a guide and does not contain cheats, hacks or serials.


The post Haunted Halls – Revenge of Doctor Blackmore Walkthrough appeared first on GameHouse.
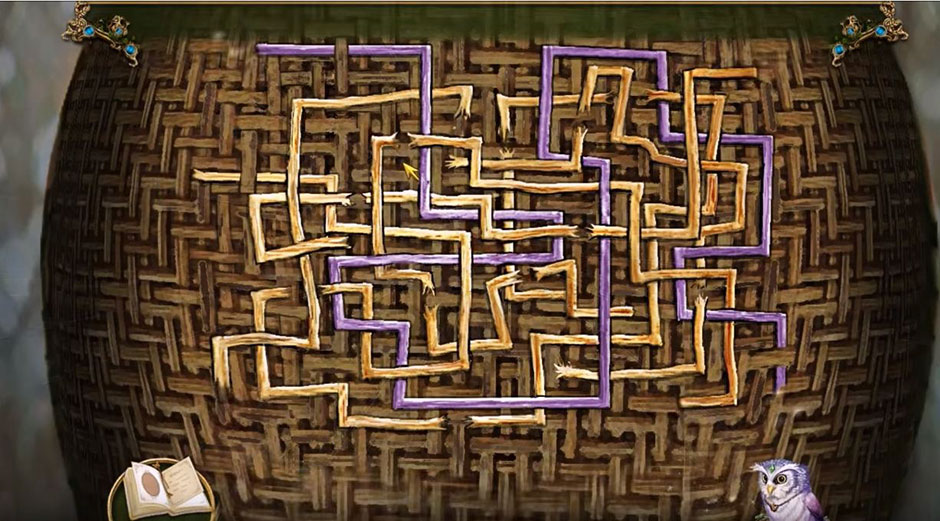
Big City Adventure – New York City Walkthrough

$
0
0

Big City Adventure – New York City is a point and click hidden object game that will take you on a tour through the Big Apple. You will see fascinating scenes depicting many famous destinations, earn mementos, collect postcards and be given many interesting facts about the city and its unique history.

Contents

General Tips & Tricks

Before embarking on your journey through New York City it is a good idea to become familiar with the controls and features of the game. Opening the menu will allow you to go back to the main menu, continue the round or access options. Under options you can control the settings, such as volume, brightness and music.

Once you start a round you will see a box with a list of 12 words. These are the objects hidden in the picture that you will have to find. Click on the objects once you have located them. Each round also has a zoom location. Once you find it, an additional scene will show up and two more hidden objects have to be found in it. You will know when you have found the zoom location as it will be sparkle and glow whenever the cursor is on it.

Keep in mind that if you repeat a level or start it over for any reason that the hidden objects are randomized each time that you do. However, the zoom location for each round will always be in the same spot.

To help you along the way you will collect bonus coins that can be collected in the scenes. Like the zoom locations, the bonus coins are always found in the same spot. Once you find a coin and click on it, it will show up in the bottom right corner of the screen above the “Page/Menu” button and next to the bar containing the list of objects to find. A maximum of five coins can be kept at a time, but once used more can be collected in the next round.

Available coin types are hint, fast forward, time and score and skip. The hint ones will help you find hidden objects you are having trouble locating. The fast forward coins highlight many hidden objects at once for you. Time coins grant you extra time. Score coins give you more points for that round. Skip coins are earned by completing mini-games and when you have enough you can opt to skip over a mini-game and get right to finding hidden objects.

When you are done with a round, you can choose “Quick Continue” to start the next round faster. This will only skip over the score tallying at the end of the round. You will not lose any points by choosing this option.

The game is successfully completed once you have found all 60 mementos. After receiving a memento, you can also go back and play that round again. Extras in the game include postcards and learning about New York City through various facts provided about it. Instead of achievements, this game has high scores.

Big City Adventure – New York City Walkthrough

Round 1 – 10

Round 1 – Times Square

– The goal is to find the 12 objects hidden in the scene.
– Take a closer look at the window of the taxi as the Zoom location can be found in the bottom left corner.

Big City Adventure – New York City – Times Square

Big City Adventure – New York City – Times Square

Round 2 – Little Italy

– Before you reach the Little Italy hidden object screen you will first have to complete a mini-game called “Making a Path.” To win this game you will have to click on road segments to turn them. You must turn them so that they connect and form a road through the puzzle.
– After connecting a road segment to the starting or finishing point the outer border will turn white.
– Connect road segments starting from the point located in the upper left portion of the screen and work your way down to the lower right corner.

Big City Adventure – New York City – Round 2 Puzzle Solution

Big City Adventure – New York City – Round 2 Puzzle Solution

– In the Little Italy scene your objective is to find 12 objects.
– The Zoom location can be found near the center of the scene in the one store window.
– Additionally, two Bonus Coins can be found in this scene. They are circled in yellow.

Big City Adventure – New York City – Little Italy

Big City Adventure – New York City – Little Italy

Round 3 – Grant’s Tomb

– This round starts with a matching tiles mini-game.
– Click on tiles to turn them and match tiles in order to remove them from the board.
– You can use bonus items to remove tiles. The blue bonus objects remove all tiles in one line and the red ones remove from two lines.

– In the scene you have to find 12 hidden objects.
– Three Bonus Coins, circled in blue, are also hidden in the scene.
– The Zoom area is located just above the center of the scene. Find the two objects there.

Big City Adventure – New York City – Grants Tomb

Big City Adventure – New York City – Grants Tomb

Round 4 – Evolution Store

– You start with a “Packing Items” mini game.
– In order to win the game you have to pick up items and place them inside of the trunk. If you need to start over there is a reset button located in the upper left corner of the screen.

Big City Adventure – New York City – Round 4 Puzzle Solution

Big City Adventure – New York City – Round 4 Puzzle Solution

– In this scene you will have to find 12 hidden objects.
– Three Bonus Coins, circled in yellow, can be found in the scene.
– The Zoom location is on the right side of the scene. Once it opens find the two hidden objects.

Big City Adventure – New York City – Evolution Store

Big City Adventure – New York City – Evolution Store

Round 5 – Central Park

– The round opens up with a mini-game of matching star tiles. Match the tiles to remove them from the board. The game is won once you uncover and match the two golden star tiles.

– Find the 12 objects hidden in the scene.
– There are also three Bonus Coins to find. They are circled in yellow.
– Locate the Zoom scene found in the toy boat on the water. Find the two objects.

Big City Adventure – New York City – Central Park

Big City Adventure – New York City – Central Park

Round 6 – Veniero’s Pasticceria

– Play the mini-game “Colored Pieces.”
– In order to remove the pieces you have to click on the top ones. You will know if you can click on the piece by the black border surrounding it.

– In the scene you will have to find the 12 hidden objects.
– Three Bonus Coins can be found in the scene. They are circled in blue.
– Go to the Zoom location on the shelf on the right side of the scene. Find the two objects hidden in the Zoom scene.

Big City Adventure – New York City – Venierros Pasticceria

Big City Adventure – New York City – Venierros Pasticceria

Round 7 – Grand Central Station

– Play the jigsaw puzzle mini-game. Complete the picture by correctly placing the puzzle pieces.

Big City Adventure – New York City – Round 7 Puzzle Solution

Big City Adventure – New York City – Round 7 Puzzle Solution

– Find the 12 hidden objects in the scene.
– Find the three Bonus Coins that are circled in blue.
– Locate the Zoom scene in the counter window near the left side of the scene. Find the two objects in that scene.

Big City Adventure – New York City – Grand Central Station

Big City Adventure – New York City – Grand Central Station

Round 8 – Chinatown

– Play the mini-game. You will have to match pairs of tiles. The joker can be used to remove any pair of tiles. The tiles are always randomized so the game will always be different.

– In this scene you will have to find 12 hidden objects.
– Three Bonus Coins can be found in the scene. They are circled in yellow.
– The Zoom location is on the right side of the screen. Find the two objects in the Zoom location.

Big City Adventure – New York City – Chinatown

Big City Adventure – New York City – Chinatown

Round 9 – Statue of Liberty

– Play the “Making a Path” mini-game.
– Click on road segments to turn them. You must turn them so that they connect and form a road through the puzzle.
– After connecting a road segment to the starting or finishing point the outer border will turn white.
– Connect road segments starting from the point located in the upper left portion of the screen and work your way down to the lower right corner.

Big City Adventure – New York City – Round 9 Puzzle Solution

Big City Adventure – New York City – Round 9 Puzzle Solution

– Find the 12 randomly hidden objects.
– Three Bonus Coins, which are circled in yellow, can be found in the scene.
– Find the Zoom location and then find the two objects hidden in that scene.

Big City Adventure – New York City – Statue of Liberty

Big City Adventure – New York City – Statue of Liberty

Round 10 – Wall Street

– The round starts with a mini-game of matching tiles. Just match pairs to remove them from the board until none remain.

– In the scene you will have to find the 12 hidden objects.
– Four Bonus Coins can be found in the scene. They are circled in yellow.
– The Zoom location is on the right side of the screen. Find the two objects hidden in it.

Big City Adventure – New York City – Wall Street

Big City Adventure – New York City – Wall Street

Round 11 – 20

Round 11 – South Street Seaport

– Play the “Packing Items” mini-game.
– Put the items in the trunk. You can start over by using the reset button in the upper left corner.

Big City Adventure – New York City – Round 11 Puzzle Solution

Big City Adventure – New York City – Round 11 Puzzle Solution

– Find the 12 hidden objects in the scene.
– Two Bonus Coins can be found in the scene. They are circled in yellow.
– Find the Zoom location and then find the two objects hidden in that scene.

Big City Adventure – New York City – South Street Seaport

Big City Adventure – New York City – South Street Seaport

Round 12 – Harlem

– Play the matching star tiles mini-game. In order to win you have to find and match the two tiles with golden stars on them.

– In this scene you will have to find 12 hidden objects.
– Three Bonus Coins can be found in the scene. They are circled in blue.
– Find the Zoom location and then find the two objects hidden in that scene.

Big City Adventure – New York City – Harlem

Big City Adventure – New York City – Harlem

Round 13 – Restaurant Row

– Play a “Colored Pieces” mini-game.
– To remove the pieces, click on the top ones. You will know if you can click on the piece by the black border surrounding it.

– Find the 12 randomly hidden objects.
– Two Bonus Coins can be found in the scene. They are circled in blue.
– Find the Zoom location and then find the two objects hidden in that scene.

Big City Adventure – New York City – Restaurant Row

Big City Adventure – New York City – Restaurant Row

Round 14 – Brooklyn Bridge

– Start with a jigsaw puzzle mini-game.
– Complete the puzzle by correctly placing the pieces.

Big City Adventure – New York City – Round 14 Puzzle Solution

Big City Adventure – New York City – Round 14 Puzzle Solution

– Find the 12 randomly hidden objects.
– Two Bonus Coins can be found in the scene. They are circled in yellow.
– Find the Zoom location and then find the two objects hidden in that scene.

Big City Adventure – New York City – Brooklyn Bridge

Big City Adventure – New York City – Brooklyn Bridge

Round 15 – Coney Island

– Play the matching tiles mini-game.
– Click on matching tiles in order to remove them from the board. Continue until all tiles have been removed.
– There are red and blue bonus objects. The blue one removes tiles on the same line and the red one removes tiles from two lines.

– In the scene you will have to find the 12 hidden objects.
– Three Bonus Coins, circled in yellow, can be found in the scene.
– Find the Zoom location and then find the two objects hidden in that scene.

Big City Adventure – New York City – Coney Island

Big City Adventure – New York City – Coney Island

Round 16 – New York Public Library

– The round starts with a mini-game of “Making a Path.”
– Click on the road segments to turn them. You must turn them so that they connect and form a road through the puzzle. After connecting a road segment to the starting or finishing point the outer border will turn white.
– Connect road segments starting from the point located in the upper left portion of the screen and work your way down to the lower right corner.

Big City Adventure – New York City – Round 16 Puzzle Solution

Big City Adventure – New York City – Round 16 Puzzle Solution

– Find the 12 hidden objects in the scene.
– Three Bonus Coins can be found in the scene. They are circled in blue.
– Find the Zoom location and then find the two objects hidden in that scene.

Big City Adventure – New York City – New York Public Library

Big City Adventure – New York City – New York Public Library

Round 17 – Bleecker Street

– Play the matching tiles mini-game.
– Click on matching tiles in order to remove them from the board. Continue until all tiles have been removed.
– There are red and blue bonus objects. The blue one removes tiles on the same line and the red one removes tiles from two lines.

– In this scene you will have to find 12 hidden objects.
– Three Bonus Coins can be found in the scene. They are circled in yellow.
– Find the Zoom location and then find the two objects hidden in that scene.

Big City Adventure – New York City – Bleecker Street

Big City Adventure – New York City – Bleecker Street

Round 18 – Rockefeller Plaza

– Play the “Packing Items” mini-game.
– Put the items in the trunk. You can start over by using the reset button in the upper left corner.

Big City Adventure – New York City – Round 18 Puzzle Solution

Big City Adventure – New York City – Round 18 Puzzle Solution

– Find the 12 randomly hidden objects.
– Three Bonus Coins can be found in the scene. They are circled in yellow.
– Find the Zoom location and then find the two objects hidden in that scene.

Big City Adventure – New York City – Rockefeller Plaza

Big City Adventure – New York City – Rockefeller Plaza

Round 19 – Subway

– Play the matching star tiles mini-game. In order to win you have to find and match the two tiles with golden stars on them.

– In the scene you will have to find the 12 hidden objects.
– Three Bonus Coins can be found in the scene. They are circled in yellow.
– Find the Zoom location and then find the two objects hidden in that scene.

Big City Adventure – New York City – Subway

Big City Adventure – New York City – Subway

Round 20 – Empire State Building

– Play a “Colored Pieces” mini-game.
– To remove the pieces, click on the top ones. You will know if you can click on the piece by the black border surrounding it.

– In this scene you will have to find 12 hidden objects.
– Three Bonus Coins, circled in blue, can be found in the scene.
– Find the Zoom location and then find the two objects hidden in that scene.

Big City Adventure – New York City – Empire State Building

Big City Adventure – New York City – Empire State Building

Round 21 -30

Round 21 – Corner Store

– Start with a jigsaw puzzle mini-game.
– Complete the puzzle by correctly placing the pieces.

Big City Adventure – New York City – Round 21 Puzzle Solution

Big City Adventure – New York City – Round 21 Puzzle Solution

– Find the 12 hidden objects in the scene.
– Three Bonus Coins, which are circled in blue, can be found in the scene.
– Find the Zoom location and then find the two objects hidden in that scene.

Big City Adventure – New York City – Corner Store

Big City Adventure – New York City – Corner Store

Round 22 – Washington Mews

– Play a matching pair mini-game.
– Uncover two tiles at a time. When they match they are removed from the board. Continue until all are gone. The joker can be used to remove any pair you want from the board.

– Find the 12 randomly hidden objects.
– Three Bonus Coins can be found in the scene. They are circled in yellow.
– Find the Zoom location and then find the two objects hidden in that scene.

Big City Adventure – New York City – Washington Mews

Big City Adventure – New York City – Washington Mews

Round 23 – Theater District

– The round starts with a mini-game of “Making a Path.”
– Click on the road segments to turn them. You must turn them so that they connect and form a road through the puzzle. After connecting a road segment to the starting or finishing point the outer border will turn white.
– Connect road segments starting from the point located in the upper left portion of the screen and work your way down to the lower right corner.

Big City Adventure – New York City – Round 23 Puzzle Solution

Big City Adventure – New York City – Round 23 Puzzle Solution

– In this scene you will have to find 12 hidden objects.
– Three Bonus Coins can be found in the scene. They are circled in blue.
– Find the Zoom location and then find the two objects hidden in that scene.

Big City Adventure – New York City – Theater District

Big City Adventure – New York City – Theater District

Round 24 – Madison Avenue

– Play the matching tiles mini-game. Click on matching tiles to remove them and continue until the board is cleared.

– Find the 12 hidden objects in the scene.
– Three Bonus Coins can be found in the scene. They are circled in blue.
– The Zoom location is found on the left side of the scene. Open it and find the two hidden objects.

Big City Adventure – New York City – Madison Avenue

Big City Adventure – New York City – Madison Avenue

Round 25 – Washington Square Park

– Play the “Packing Items” mini-game.
– Put the items in the trunk. You can start over by using the reset button in the upper left corner.

Big City Adventure – New York City – Round 25 Puzzle Solution

Big City Adventure – New York City – Round 25 Puzzle Solution

– Find the 12 randomly hidden objects.
– Three Bonus Coins can be found in the scene. They are circled in yellow.
– The Zoom location is found on the left side of the scene. Open it and find the two hidden objects.

Big City Adventure – New York City – Washington Square Park

Big City Adventure – New York City – Washington Square Park

Round 26 – Observation Deck

– Play the matching star tiles mini-game. In order to win you have to find and match the two tiles with golden stars on them.

– In the scene you will have to find the 12 hidden objects.
– Three Bonus Coins can be found in the scene. They are circled in blue.
– Find the Zoom location and then find the two objects hidden in that scene.

Big City Adventure – New York City – Observation Deck

Big City Adventure – New York City – Observation Deck

Round 27 – Ellis Island

– Play a “Colored Pieces” mini-game.
– To remove the pieces, click on the top ones. You will know if you can click on the piece by the black border surrounding it.

– Find the 12 randomly hidden objects.
– Three Bonus Coins can be found in the scene. They are circled in yellow.
– Find the Zoom location and then find the two objects hidden in that scene.

Big City Adventure – New York City – Ellis Island

Big City Adventure – New York City – Ellis Island

Round 28 – Tavern on the Green

– Start with a jigsaw puzzle mini-game.
– Complete the puzzle by correctly placing the pieces.

Big City Adventure – New York City – Round 28 Puzzle Solution

Big City Adventure – New York City – Round 28 Puzzle Solution

– In this scene you will have to find 12 hidden objects.
– Three Bonus Coins can be found in the scene. They are circled in yellow.
– Find the Zoom location and then find the two objects hidden in that scene.

Big City Adventure – New York City – Tavern on the Green

Big City Adventure – New York City – Tavern on the Green

Round 29 – St. Mark’s Place

– Play a matching pair mini-game.
– Uncover two tiles at a time. When they match they are removed from the board. Continue until all are gone. The joker can be used to remove any pair you want from the board.

– Find the 12 hidden objects in the scene.
– Three Bonus Coins can be found in the scene. They are circled in green.
– Find the Zoom location and then find the two objects hidden in that scene.

Big City Adventure – New York City – St Marks Place

Big City Adventure – New York City – St Marks Place

Round 30 – Union Square

– The round starts with a mini-game of “Making a Path.”
– Click on the road segments to turn them. You must turn them so that they connect and form a road through the puzzle. After connecting a road segment to the starting or finishing point the outer border will turn white.
– Connect road segments starting from the point located in the upper right portion of the screen and work your way down to the lower right corner.

Big City Adventure – New York City – Round 30 Puzzle Solution

Big City Adventure – New York City – Round 30 Puzzle Solution

– In the scene you will have to find the 12 hidden objects.
– Three Bonus Coins, which are circled in yellow, can be found in the scene.
– Find the Zoom location and then find the two objects hidden in that scene.

Big City Adventure – New York City – Union Square

Big City Adventure – New York City – Union Square

Round 31 – 40

Round 31 – Brooklyn Bridge

– Play the matching tiles mini-game.
– Click on matching tiles in order to remove them from the board. Continue until all tiles have been removed.
– There are red and blue bonus objects. The blue one removes tiles on the same line and the red one removes tiles from two lines.

– In this scene you will have to find 12 hidden objects.
– Three Bonus Coins can be found in the scene.
– Find the Zoom location and then find the two objects hidden in that scene.

Round 32 – Empire State Building

– Play the “Packing Items” mini-game.
– Put the items in the trunk. You can start over by using the reset button in the upper left corner.

Big City Adventure – New York City – Round 32 Puzzle Solution

Big City Adventure – New York City – Round 32 Puzzle Solution

– Find the 12 hidden objects in the scene.
– Three Bonus Coins can be found in the scene.
– Find the Zoom location and then find the two objects hidden in that scene.

Round 33 – Statue of Liberty

– Play the matching star tiles mini-game. In order to win you have to find and match the two tiles with golden stars on them.

– Find the 12 randomly hidden objects.
– Three Bonus Coins can be found in the scene.
– Find the Zoom location and then find the two objects hidden in that scene.

Round 34 – Rockefeller Plaza

– Play a “Colored Pieces” mini-game.
– To remove the pieces, click on the top ones. You will know if you can click on the piece by the black border surrounding it.

– In the scene you will have to find the 12 hidden objects.
– Three Bonus Coins can be found in the scene.
– Find the Zoom location and then find the two objects hidden in that scene.

Round 35 – Wall Street

– Start with a jigsaw puzzle mini-game.
– Complete the puzzle by correctly placing the pieces.

Big City Adventure – New York City – Round 35 Puzzle Solution

Big City Adventure – New York City – Round 35 Puzzle Solution

– In this scene you will have to find 12 hidden objects.
– Three Bonus Coins, can be found in the scene.
– Find the Zoom location and then find the two objects hidden in that scene.

Round 36 – Times Square

– Play a matching pair mini-game.
– Uncover two tiles at a time. When they match they are removed from the board. Continue until all are gone. The joker can be used to remove any pair you want from the board.

– Find the 12 hidden objects in the scene.
– Three Bonus Coins can be found in the scene.
– Find the Zoom location and then find the two objects hidden in that scene.

Round 37 – New York Public Library

– The round starts with a mini-game of “Making a Path.”
– Click on the road segments to turn them. You must turn them so that they connect and form a road through the puzzle. After connecting a road segment to the starting or finishing point the outer border will turn white.
– Connect road segments starting from the point located in the upper right portion of the screen and work your way down to the lower right corner.

Big City Adventure – New York City – Round 37 Puzzle Solution

Big City Adventure – New York City – Round 37 Puzzle Solution

– In this scene you will have to find 12 hidden objects.
– Three Bonus Coins can be found in the scene.
– Find the Zoom location and then the two hidden objects inside that scene.

Round 38 – Little Italy

– Play the matching tiles mini-game.
– Click on matching tiles in order to remove them from the board. Continue until all tiles have been removed.
– There are red and blue bonus objects. The blue one removes tiles on the same line and the red one removes tiles from two lines.

– In the scene you will have to find the 12 hidden objects.
– Three Bonus Coins can be found in the scene.
– Find the Zoom location and then find the two objects hidden in that scene.

Round 39 – Harlem

– Play the “Packing Items” mini-game.
– Put the items in the trunk. You can start over by using the reset button in the upper left corner.

Big City Adventure – New York City – Round 39 Puzzle Solution

Big City Adventure – New York City – Round 39 Puzzle Solution

– Find the 12 hidden objects in the scene.
– Three Bonus Coins can be found in the scene.
– Find the Zoom location and then find the two objects hidden in that scene.

Round 40 – South Street Seaport

– Play the matching star tiles mini-game. In order to win you have to find and match the two tiles with golden stars on them.

– Find the 12 randomly hidden objects.
– Three Bonus Coins can be found in the scene.
– Find the Zoom location and then find the two objects hidden in that scene.

Round 41 – 50

Round 41 – Bleecker Street

– Play a “Colored Pieces” mini-game.
– To remove the pieces, click on the top ones. You will know if you can click on the piece by the black border surrounding it.

– In this scene you will have to find 12 hidden objects.
– Three Bonus Coins can be found in the scene.
– Find the Zoom location and then find the two objects hidden in that scene.

Round 42 – Grand Central Station

– Start with a jigsaw puzzle mini-game.
– Complete the puzzle by correctly placing the pieces.

Big City Adventure – New York City – Round 42 Puzzle Solution

Big City Adventure – New York City – Round 42 Puzzle Solution

– Find the 12 hidden objects in the scene.
– Two Bonus Coins can be found in the scene.
– Find the Zoom location and then find the two objects hidden in that scene.

Round 43 – Central Park

– Play a matching pair mini-game.
– Uncover two tiles at a time. When they match they are removed from the board. Continue until all are gone. The joker can be used to remove any pair you want from the board.

– In the scene you will have to find the 12 hidden objects.
– Three Bonus Coins can be found in the scene.
– Find the Zoom location and then find the two objects hidden in that scene.

Round 44 – Theater District

– The round starts with a mini-game of “Making a Path.”
– Click on the road segments to turn them and turn them so that they connect and form a road through the puzzle. After connecting a road segment to the starting or finishing point the outer border will turn white.
– Connect road segments starting from the point located in the upper left and work your way down to the lower right corner.

Big City Adventure – New York City – Round 44 Puzzle Solution

Big City Adventure – New York City – Round 44 Puzzle Solution

– Find the 12 randomly hidden objects.
– Three Bonus Coins can be found in the scene.
– Find the Zoom location and then find the two objects hidden in that scene.

Round 45 – Coney Island

– Play the matching tiles mini-game.
– Click on matching tiles in order to remove them from the board. Continue until all tiles have been removed.
– There are red and blue bonus objects. The blue one removes tiles on the same line and the red one removes tiles from two lines.

– In this scene you will have to find 12 hidden objects.
– Three Bonus Coins can be found in the scene.
– Find the Zoom location on the left side and then find the two objects in that scene.

Round 46 – Restaurant Row

– Play the “Packing Items” mini-game.
– Put the items in the trunk. You can start over by using the reset button in the upper left corner.

Big City Adventure – New York City – Round 46 Puzzle Solution

Big City Adventure – New York City – Round 46 Puzzle Solution

– Find the 12 hidden objects in the scene.
– Two Bonus Coins can be found in the scene.
– Find the Zoom location and then find the two objects hidden in that scene.

Round 47 – Madison Avenue

– Play the matching star tiles mini-game. In order to win you have to find and match the two tiles with golden stars on them.

– Find the 12 randomly hidden objects.
– Two Bonus Coins can be found in the scene.
– Find the Zoom location and then find the two objects hidden in that scene.

Round 48 – Washington Square Park

– Play a “Colored Pieces” mini-game.
– To remove the pieces, click on the top ones. You will know if you can click on the piece by the black border surrounding it.

– In the scene you will have to find the 12 hidden objects.
– Three Bonus Coins can be found in the scene.
– Find the Zoom location and then find the two objects hidden in that scene.

Round 49 – St. Mark’s Place

– Start with a jigsaw puzzle mini-game.
– Complete the puzzle by correctly placing the pieces.

Big City Adventure – New York City – Round 49 Puzzle Solution

Big City Adventure – New York City – Round 49 Puzzle Solution

– Find the 12 hidden objects in the scene.
– Three Bonus Coins can be found in the scene.
– Find the Zoom location and then find the two objects hidden in that scene.

Round 50 – Tavern on the Green

– Play a matching pair mini-game.
– Uncover two tiles at a time. When they match they are removed from the board. Continue until all are gone. The joker can be used to remove any pair you want from the board.

– In this scene you will have to find 12 hidden objects.
– Three Bonus Coins can be found in the scene.
– Find the Zoom location and then find the two objects hidden in that scene.

Round 51 – 60

Round 51 – Washington Mews

– Starts with a mini-game of “Making a Path.”
– Click on the road segments to turn them and turn them so that they connect and form a road through the puzzle. After connecting a road segment to the starting or finishing point the outer border will turn white.
– Connect road segments starting from the point located in the upper left and work your way down to the lower right corner.

Big City Adventure – New York City – Round 51 Puzzle Solution

Big City Adventure – New York City – Round 51 Puzzle Solution

– Find the 12 randomly hidden objects.
– Three Bonus Coins can be found in the scene.
– Locate the Zoom scene and open it. Find the two objects hidden inside it.

Round 52 – Observation Deck

– Play the matching tiles mini-game.
– Click on matching tiles in order to remove them from the board. Continue until all tiles have been removed.
– There are red and blue bonus objects. The blue one removes tiles on the same line and the red one removes tiles from two lines.

– Find the 12 hidden objects in the scene.
– Three Bonus Coins can be found in the scene.
– Find the Zoom location and then find the two objects hidden in that scene.

Round 53 – Chinatown

– Play the “Packing Items” mini-game.
– Put the items in the trunk. You can start over by using the reset button in the upper left corner.

Big City Adventure – New York City – Round 53 Puzzle Solution

Big City Adventure – New York City – Round 53 Puzzle Solution

– In this scene you will have to find 12 hidden objects.
– Three Bonus Coins can be found in the scene.
– Locate the Zoom scene and open it. Find the two objects hidden inside it.

Round 54 – Subway

– Play the matching star tiles mini-game. In order to win you have to find and match the two tiles with golden stars on them.

– In the scene you will have to find the 12 hidden objects.
– Three Bonus Coins can be found in the scene.
– Find the Zoom location and then find the two objects hidden in that scene.

Round 55 – Ellis Island

– Play a “Colored Pieces” mini-game.
– To remove the pieces, click on the top ones. You will know if you can click on the piece by the black border surrounding it.

– Find the 12 hidden objects in the scene.
– Three Bonus Coins can be found in the scene.
– Find the Zoom location and then find the two objects hidden in that scene.

Round 56 – Evolution Store

– Start with a jigsaw puzzle mini-game.
– Complete the puzzle by correctly placing the pieces.

Big City Adventure – New York City – Round 56 Puzzle Solution

Big City Adventure – New York City – Round 56 Puzzle Solution

– In the scene you will have to find the 12 hidden objects.
– Two Bonus Coins can be found in the scene.
– Find the Zoom location and then find the two objects hidden in that scene.

Round 57 – Corner Store

– Play a matching pair mini-game.
– Uncover two tiles at a time. When they match they are removed from the board. Continue until all are gone. The joker can be used to remove any pair you want from the board.

– Find the 12 randomly hidden objects.
– Three Bonus Coins can be found in the scene.
– Find the Zoom location and then find the two objects hidden in that scene.

Round 58 – Veniero’s Pasticceria

– Play the mini-game “Making a Path.”
– Click on the road segments to turn them so that they connect and form a road through the puzzle. After connecting a road segment to the starting or finishing point the outer border will turn white.
– Connect road segments starting from the point located in the upper left portion of the screen and work your way down to the lower right corner.

Big City Adventure – New York City – Round 58 Puzzle Solution

Big City Adventure – New York City – Round 58 Puzzle Solution

– Find the 12 hidden objects in the scene.
– Two Bonus Coins can be found in the scene.
– Find the Zoom spot on the right side. Locate the two hidden objects in it.

Round 59 – Grant’s Tomb

– Play the matching tiles mini-game.
– Click on matching tiles in order to remove them from the board. Continue until all tiles have been removed.
– There are red and blue bonus objects. The blue one removes tiles on the same line and the red one removes tiles from two lines.

– In this scene you will have to find 12 hidden objects.
– Three Bonus Coins can be found in the scene.
– Find the Zoom location and then find the two objects hidden in that scene.

Round 60 – Union Square

– Play the “Packing Items” mini-game.
– Put the items in the trunk. You can start over by using the reset button in the upper left corner.

Big City Adventure – New York City – Round 60 Puzzle Solution

Big City Adventure – New York City – Round 60 Puzzle Solution

– Find the 12 randomly hidden objects.
– Three Bonus Coins can be found in the scene.
– Find the Zoom location and then find the two objects hidden in that scene.

Round 61 – 70

Round 61 – Empire State Building

– Play the matching star tiles mini-game. In order to win you have to find and match the two tiles with golden stars on them.

– In the scene you will have to find the 12 hidden objects.
– Two Bonus Coins can be found in the scene.
– Find the Zoom location and then find the two objects hidden in that scene.

Round 62 – Grand Central Station

– Play a “Colored Pieces” mini-game.
– To remove the pieces, click on the top ones. You will know if you can click on the piece by the black border surrounding it.

– In this scene you will have to find 12 hidden objects.
– Three Bonus Coins can be found in the scene.
– Find the Zoom location and then find the two objects hidden in that scene.

Round 63 – Coney Island

– Start with a jigsaw puzzle mini-game.
– Complete the puzzle by correctly placing the pieces.

Big City Adventure – New York City – Round 63 Puzzle Solution

Big City Adventure – New York City – Round 63 Puzzle Solution

– Find the 12 hidden objects in the scene.
– Three Bonus Coins can be found in the scene.
– Find the Zoom location and then find the two objects hidden in that scene.

Round 64 – Harlem

– Play a matching pair mini-game.
– Uncover two tiles at a time. When they match they are removed from the board. Continue until all are gone. The joker can be used to remove any pair you want from the board.

– Find the 12 randomly hidden objects.
– Three Bonus Coins can be found in the scene.
– Find the Zoom location and then find the two objects hidden in that scene.

Round 65 – Madison Avenue

– Play the mini-game “Making a Path.”
– Click on the road segments to turn them so that they connect and form a road through the puzzle. After connecting a road segment to the starting or finishing point the outer border will turn white.
– Connect road segments starting from the point located in the upper left portion of the screen and work your way down to the lower right corner.

Big City Adventure – New York City – Round 65 Puzzle Solution

Big City Adventure – New York City – Round 65 Puzzle Solution

– In the scene you will have to find the 12 hidden objects.
– Three Bonus Coins can be found in the scene.
– Find the Zoom location and then find the two hidden objects.

Round 66 – Wall Street

– Play the matching tiles mini-game.
– Click on matching tiles in order to remove them from the board. Continue until all tiles have been removed.
– There are red and blue bonus objects. The blue one removes tiles on the same line and the red one removes tiles from two lines.

– In this scene you will have to find 12 hidden objects.
– Three Bonus Coins can be found in the scene.
– Find the Zoom location and then find the two objects hidden in that scene.

Round 67 – Theater District

– Play the “Packing Items” mini-game.
– Put the items in the trunk. You can start over by using the reset button in the upper left corner.

Big City Adventure – New York City – Round 67 Puzzle Solution

Big City Adventure – New York City – Round 67 Puzzle Solution

– Find the 12 hidden objects in the scene.
– Three Bonus Coins can be found in the scene.
– Find the Zoom location and then find the two objects hidden in that scene.

Round 68 – Observation Deck

– Play the matching star tiles mini-game. In order to win you have to find and match the two tiles with golden stars on them.

– In the scene you will have to find the 12 hidden objects.
– Three Bonus Coins can be found in the scene.
– Find the Zoom location and then find the two objects hidden in that scene.

Round 69 – New York Public Library

– Play a “Colored Pieces” mini-game.
– To remove the pieces, click on the top ones. You will know if you can click on the piece by the black border surrounding it.

– Find the 12 randomly hidden objects.
– Three Bonus Coins can be found in the scene.
– Find the Zoom scene. Open it and locate the two hidden objects.

Round 70 – Union Square

– Start with a jigsaw puzzle mini-game.
– Complete the puzzle by correctly placing the pieces.

Big City Adventure – New York City – Round 70 Puzzle Solution

Big City Adventure – New York City – Round 70 Puzzle Solution

– In this scene you will have to find 12 hidden objects.
– Three Bonus Coins can be found in the scene.
– Find the Zoom location and then find the two objects hidden in that scene.

Round 71 – 80

Round 71 – Rockefeller Plaza

– Play a matching pair mini-game.
– Uncover two tiles at a time. When they match they are removed from the board. Continue until all are gone. The joker can be used to remove any pair you want from the board.

– Find the 12 hidden objects in the scene.
– Three Bonus Coins can be found in the scene.
– Find the Zoom location and then find the two objects hidden in that scene.

Round 72 – St. Mark’s Place

– The round starts with a mini-game of “Making a Path.”
– Click on the road segments to turn them so that they connect and form a road through the puzzle. After connecting a road segment to the starting or finishing point the outer border will turn white.
– Connect road segments starting from the point located in the upper left portion of the screen and work your way down to the lower right corner.

Big City Adventure – New York City – Round 72 Puzzle Solution

Big City Adventure – New York City – Round 72 Puzzle Solution

– Find the 12 randomly hidden objects.
– Two Bonus Coins can be found in the scene.
– Find the Zoom location and then find the two objects hidden in that scene.

Round 73 – Little Italy

– In the scene you will have to find the 12 hidden objects.
– Three Bonus Coins can be found in the scene.
– Find the Zoom location and then find the two objects hidden in that scene.

Round 74 – Corner Store

– Play the “Packing Items” mini-game.
– Put the items in the trunk. You can start over by using the reset button in the upper left corner.

Big City Adventure – New York City – Round 74 Puzzle Solution

Big City Adventure – New York City – Round 74 Puzzle Solution

– Find all 12 hidden objects.
– Three Bonus Coins can be found in the scene.
– Find the Zoom spot. Locate the two hidden objects in it.

Round 75 – Washington Mews

– Play the matching star tiles mini-game. In order to win you have to find and match the two tiles with golden stars on them.

– Find the 12 hidden objects in the scene.
– Three Bonus Coins can be found in the scene.
– Find the Zoom location and then find the two objects hidden in that scene.

Round 76 – Central Park

– Play a “Colored Pieces” mini-game.
– To remove the pieces, click on the top ones. You will know if you can click on the piece by the black border surrounding it.

– Find the 12 randomly hidden objects.
– Three Bonus Coins can be found in the scene.
– Find the Zoom location and then find the two objects hidden in that scene.

Round 77 – Subway

– Start with a jigsaw puzzle mini-game.
– Complete the puzzle by correctly placing the pieces.

Big City Adventure – New York City – Round 77 Puzzle Solution

Big City Adventure – New York City – Round 77 Puzzle Solution

– In this scene you will have to find 12 hidden objects.
– Three Bonus Coins can be found in the scene.
– Find the Zoom spot. Locate the two hidden objects in it.

Round 78 – Tavern on the Green

– Play a matching pair mini-game.
– Uncover two tiles at a time. When they match they are removed from the board. Continue until all are gone. The joker can be used to remove any pair you want from the board.

– Find the 12 hidden objects in the scene.
– Two Bonus Coins can be found in the scene.
– Find the Zoom scene. Open it and locate the two hidden objects.

Round 79 – Bleecker Street

– The round starts with a mini-game of “Making a Path.”
– Click on the road segments to turn them so that they connect and form a road through the puzzle. After connecting a road segment to the starting or finishing point the outer border will turn white.
– Connect road segments starting from the point located in the upper left portion of the screen and work your way down to the lower right corner.

Big City Adventure – New York City – Round 79 Puzzle Solution

Big City Adventure – New York City – Round 79 Puzzle Solution

– In this scene you will have to find 12 hidden objects.
– Three Bonus Coins can be found in the scene.
– Find the Zoom location and then find the two objects hidden in that scene.

Round 80 – Veniero’s Pasticceria

– Play the matching tiles mini-game.
– Click on matching tiles in order to remove them from the board. Continue until all tiles have been removed.
– There are red and blue bonus objects. The blue one removes tiles on the same line and the red one removes tiles from two lines.

– Find the 12 randomly hidden objects.
– Three Bonus Coins can be found in the scene.
– Find the Zoom scene. Open it and locate the two hidden objects.

Round 81 – 90

Round 81 – South Street Seaport

– Start with the “Packing Items” mini-game.
– Put the items in the trunk. You can start over by using the reset button in the upper left corner.

Big City Adventure – New York City – Round 81 Puzzle Solution

Big City Adventure – New York City – Round 81 Puzzle Solution

– In the scene you will have to find the 12 hidden objects.
– Two Bonus Coins can be found in the scene.
– Find the Zoom location and then find the two objects hidden in that scene.

Round 82 – Grant’s Tomb

– The mini game is “Matching Star Tiles.”
– Win the game by matching the two golden star tiles.

– Find the 12 hidden objects in the scene.
– Three Bonus Coins can be found in the scene.
– Find the Zoom scene near the center. Open it and find the two hidden objects.

Round 83 – Washington Square Park

– Play the “Colored Pieces” mini-game.
– Remove the top-most pieces by clicking on them. They can be clicked on if the border is black.

– In this scene you will have to find 12 hidden objects.
– Three Bonus Coins can be found in the scene.
– Find the Zoom location and then find the two objects hidden in that scene.

Round 84 – Ellis Island

– Start with a jigsaw puzzle mini-game.
– Complete the puzzle by correctly placing the pieces.

Big City Adventure – New York City – Round 84 Puzzle Solution

Big City Adventure – New York City – Round 84 Puzzle Solution

– Find the 12 randomly hidden objects.
– Three Bonus Coins can be found in the scene.
– Find the Zoom spot in the scene. Locate the two hidden objects in it.

Round 85 – Evolution Store

– Play a matching pair mini-game.
– Uncover two tiles at a time. When they match they are removed from the board. Continue until all are gone. The joker can be used to remove any pair you want from the board.

– In the scene you will have to find the 12 hidden objects.
– Three Bonus Coins can be found in the scene.
– Find the Zoom location and then find the two objects hidden in that scene.

Round 86 – Restaurant Row

– The round starts with a mini-game of “Making a Path.”
– Click on the road segments to turn them so that they connect and form a road through the puzzle. After connecting a road segment to the starting or finishing point the outer border will turn white.
– Connect road segments starting from the point located in the upper left portion of the screen and work your way down to the lower right corner.

Big City Adventure – New York City – Round 86 Puzzle Solution

Big City Adventure – New York City – Round 86 Puzzle Solution

– Find the 12 hidden objects in the scene.
– Three Bonus Coins can be found in the scene.
– Find the Zoom location on the right side and then locate the two hidden objects.

Round 87 – Chinatown

– Start the round with a matching tiles mini-game.
– Remove tiles from the board by matching the same types. Continue until all the tiles are gone.

– Find the 12 randomly hidden objects.
– Two Bonus Coins can be found in the scene.
– Find the Zoom location and then find the two objects hidden in that scene.

Round 88 – Statue of Liberty

– Play the “Packing Items” mini-game.
– Put the items in the trunk. You can start over by using the reset button in the upper left corner.

Big City Adventure – New York City – Round 88 Puzzle Solution

Big City Adventure – New York City – Round 88 Puzzle Solution

– In this scene you will have to find 12 hidden objects.
– Two Bonus Coins can be found in the scene.
– Find the Zoom spot. Locate the two objects hidden in that scene.

Round 89 – Brooklyn Bridge

– Play the matching star tiles mini-game. In order to win you have to find and match the two tiles with golden stars on them.

– Find the 12 hidden objects in the scene.
– Three Bonus Coins can be found in the scene.
– Find the Zoom location under the right arch and then find the two hidden objects.

Round 90 – Times Square

– Play a “Colored Pieces” mini-game.
– To remove the pieces, click on the top ones. You will know if you can click on the piece by the black border surrounding it.

– In the scene you will have to find the 12 hidden objects.
– Two Bonus Coins can be found in the scene.
– Find the Zoom location and then find the two objects hidden in that scene.

Congratulations! You have now successfully completed our Big City Adventure – New York City Walkthrough! This concludes your trip through one of the greatest cities in the world. If you found the tips and tricks from this walkthrough to be helpful, please take a look at our other guides. These include:

Elven Legend 2 – The Bewitched Tree walkthrough

Goosebumps – The Game Walkthrough

The Big City Adventure – New York City Walkthrough is meant as a guide and does not contain cheats, hacks or serials.


The post Big City Adventure – New York City Walkthrough appeared first on GameHouse.
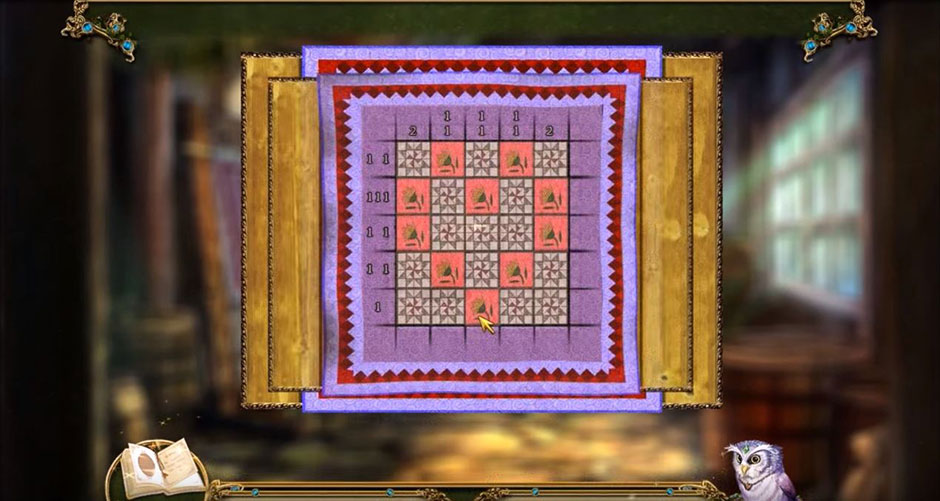
Echoes of the Past – The Revenge of the Witch Walkthrough

$
0
0

Echoes of the Past – The Revenge of the Witch is a story about the Kingdom of Orion, which has been taken over by an evil witch. Work your way through the many puzzles and games to defeat the witch and bring peace to the Kingdom once again. A journey such as this can be tricky, so if your are stuck and you need a hint, this walkthrough will help you find your way.

Contents

General Tips & Tricks

If you are stuck and you don’t want to dive into the walkthrough just yet, try the Hint button. It is in the upper right of the screen. Though it does require some time to recharge, you can use it unlimited times. (It will, however, be disabled in “Expert” Mode.)

Don’t be afraid to use the Reset button during a puzzle if you get stuck. Sometimes a fresh start s all you need to get a puzzle right. Also, if a puzzle is taking too long for you, a Skip button will eventually appear. This will allow you to move on. (This is also unavailable “Expert Mode”.)

Your Journal is a very important tool on your journey. Check it for reminders of important details you’ll gather along the way. Your Inventory Bar is where all your collected objects go. Click on it at the top of your screen to bring it down to explore.

Echoes of the Past – The Revenge of the Witch Walkthrough

Chapter 1: The Knight and the Dogs

Welcome to the game! The first item you need to collect is the Magic Staff. You can find it laying on the ground. Through the game you will be collecting Magic Gems that will be stored in it. Now, go ahead and scare off the bird on the left, then collect the Dagger. Move ahead to the next screen.

Next, you’ll use the Dagger on the stone block. This will remove the Plate with Sword off so you can collect it. There is a box on the tipped over cart. Use the Plate with Sword on it and trigger a puzzle. This is the solution:

Revenge-Of-The-Witch-Puzzle-Solution-01

Revenge-Of-The-Witch-Puzzle-Solution-01

Finishing the puzzle will allow to you to collect the Magic Powder and Scroll. Go to the Knight and use the Magic Powder on him. Collect your first Magic Gem before moving on.

Pick up the Origami Figure and Dry Brush. Now go back to the forest screen. There is a tree with a hole in it. If you look closely, you can use the Dry Brush on the sap in the hole and create the Brush with Glue. Now travel back to the gate and look at the ground for the debris. Zoom in and collect the broken bits. You can use all of these pieces, along with the Brush with Glue to fix the Bas-Relief. Now place it into the locking slot of the gate and start another puzzle. This is the answer:

Revenge-Of-The-Witch-Puzzle-Solution-02

Revenge-Of-The-Witch-Puzzle-Solution-02

Finish the puzzle and you will be let into the next area. When you are there, head to the left. There is a hidden object puzzle on the desk. Collect all the objects to receive the Cupboard Key. Now you can click on the mess on the floor to find Kindling and another Scroll. Use this key on the cupboard to open the lock and start another puzzle. Place the items where they belong and you will be rewardsed with the Empty Oil Can. Now take a look at the painting with the gentleman in the red hat. Collect the Tiny Skeleton Arm from it. You can now leave back to the last area. Here you can use the Empty Oil Can on the hanging lamp. This will collect oil and create the Full Oil Can. You can now leave this area and head back to the main gate.

The Kindling can be used on the torch. This will create the Burning Kindling. Now go to your left and through the back to get to an aquarium area. Light the chandelier by using the Full Oil Can and then the Burning Kindling. Now you can see! Root through the junk on the floor to find and collect the Crown, then the edge of the table to find a Lens, and lastly there is a Scalpel hidden in the leather case on the rightmost table. Now go back to the apothecary room. The Scalpel can be used on the ropes around the left most box. When it opens you can collect the Tiny Skeleton Leg. Now it is time to head back to the main gate.

Here you place the Crown in the slot right over the shield. This will let you collect the Storeroom Key. Head back to the aquarium room now. There is a locked door on the left where you can use the Storeroom Key and go into the next area.

Here in the storeroom you can collect the Hook, Ceramic Decoration, and Elder Leaves. There is a note inside the paper rabbit, too. In the middle of the floor there is a chest where you can use the Tiny Skeleton Arm and Tiny Skeleton Leg. Now go back to the gate. If you take a closer look at the tower with the ladder, you can use the Hook to remove the gold necklace from the skeleton. Now you can collect the Tiny Skull. Return to the chest you placed the bones in before and add the Tiny Skull. You can now collect the Tweezers from inside. Now go back to the aquarium room and use the Tweezers on the aquarium in the lower right corner. You will collect the Aquarium Handle. You can use this on the leftmost aquarium to start a puzzle. Try to get all the creatures to eat the poisonous seaweed by moving them to the right of the tank. You will collect the Plate with Dog Paw when you are finished. Now you’ll go back to the apothecary room. There is a box between the rear archway and the desk that you will want to put the Plate with Dog Paw into. This will start another crystal puzzle. Here is the answer:

Revenge-Of-The-Witch-Puzzle-Solution-03

Revenge-Of-The-Witch-Puzzle-Solution-03

When you finish, you will collect another Scroll and Magic Powder. Go out to the courtyard. You can use the Magic Power on the dog creatures to return them to their true forms. Talk to the Doctor and collect the Magic Gem.

Chapter 2: The Archway and the Fire

Here in the courtyard you will want to collect the Gunpowder Barrel from the broken carriage and use the Scalpel on the leather strap. This will give you the Leather Harness. Go to the right of the puppies to the stairs. There is Metal Lock Part for you to collect on the left and middle of the staircase. The leftmost stone lion will move if you click on it. Inside is the Shield Part. Now go back and past the puppies to the left this time. There is a Ceramic Decoration (2)  in the first caravan. There is a hidden object puzzle over the second caravan. Collect the objects and you will be given the Wooden Quartrefoil. Now pull back and look at the base of the clock tower. First, collect all the boards. Then collect all the nails. You’re done here for now so you can go back to the entrance.

There is a slot in the door to use the Wooden Quartrefoil in. This will start another puzzle. Place the plates into the correct spots by matching them with the ones above. When you are finished with the puzzle, you can go through the now open doors. You can move ahead onto the the next screen after that and collect the Scroll from the left. Inside the seat there is a Plate with Fish Eggs to collect. Now go back the way you came and go left instead. Knock down the painting on the left. There is a code underneath. Now collect the Fountain Part and make your way back to the apothecary room.

There is a hidden object area over the desk. Collect the items and you will receive the Letter N. Back in the stroreroom, there in a gold case on the right. You can use the Plate with Fish Eggs on it and start a puzzle. Click on the tiles in this order: 1, 4, 7, 3, 9, 6, 3, 7, 4, 8, 5, 9, 6, 3, 2, 4, 7, 5, 8, 7, 4, 1. Once the puzzle is finished, you will be given the Scroll, Hammer, and the Fountain Part (2). Go back to the screen with the clock tower and go to the fountain. Here you can use both Fountain Part (1) and (2). A Metal Snake will appear for you to collect. Hisssss!

Go ahead and look at the Clock Tower again. You can now use the Hammer to fix the ladder using it on the nails. This will let you climb to the face of the clock tower. Now you need to go back to the apothecary room once again. On the left there is a box you can use the Metal Snake on. Collect the Aquarium Handle from inside. It’s time to go back to the aquarium room again! Use this Aquarium Handle on the rightmost tank and trigger a puzzle. Once again, you’ll want to lead the creatures to the seaweed. This time you need to separate the green creatures from the red. You will be given the Ceramic Decoration (3) and the Metal Fish. Go back to the apothecary once again. Inside the cupboard in a hidden object area. Place everything back into the correct spots. You will be given the Figurine Part.

Now you will want to go back to the plaza with the clock tower. Go back to the first caravan and use the Metal Fish on the locked box. Collect the Letter A from here. Go back to the hallway with the moved painting and use all three Ceramic Decorations between the doors. You will be able to collect the Letter D. Now you need to go back to the town hall area, where you can use your Letter N, A, and D on the leftmost box. You will be able to collect the Plate with Crown from it. Now go back again to the entrance and place it into the box on the left of screen. This will start a puzzle. You can find the answer here:

Revenge-Of-The-Witch-Puzzle-Solution-04

Revenge-Of-The-Witch-Puzzle-Solution-04

Once you finish the puzzle you will receive the Scroll and Magic Powder. Now go back to the plaza with the clock tower when the Magic Powder on the monster. Now you can pass through and collect the third Magic Gem. Collect the origami figure and the Wormwood before moving ahead into the brewery. There is a hidden object area in the back of the room, on the right. Collect the objects. When you finish, the Wood Figure will be given to you. Now take the Crown from the floor. Go back one screen and then move forward.

Collect the Spade from the left of the screen before going back to the town gate. You can use the Crown on the top of the plaque there. You will be able to collect the Picture Scrap. Now go back to the storeroom and use the Spade to dig up the ground where it is lower. You can collect the Metal Decoration. Go back to the town hall and use the Picture Scrap on the missing place in the far right picture frame. This will start a puzzle where you have to restore the painting. Take the  Metal Lock Part (2). Now go pack the screen with the well, then go down the dirt path. This will take you to a riverbank.

On the left is a satchel. Inside you’ll find a Reagent. Take it and go back to the Apothecary. At the back of the room, you will find a small cabinet. You can use the Reagent here to start another puzzle. Add liquid until the colors are separated on both sides. Now take the Herbicide and Oil. You can go back to the well now and use the Herbicide on the bushes to make them go away. Pick up the Metal Lock Part (3) and head back to the street. There is a door on the left that you can examine and add all three Metal Lock Parts to. The door will open to a toy shop. Collect the Metal Tongs, Gear, and Carving Knife before taking a look at the workbench. You can fix the Figurine Part by now using the Dry Brush on the glue jar. Now take the Leather Harness and on the wheels on the left side of the room. Now go back to the clocktower area and look at the first caravan. You can use the Carving Knife on the wooden figures and collect Wooden Figurine (2). Go back to the brewery. In the right rear of the room there is a cabinet. You can use the Gear here to open it and take the Mint Leaves.

You can now go back to the apothecary. Over the desk on the right is a hidden object area. Find the objects and collect the Card once you are finished. Now go back to the aquarium. Using the table at the back right, use the Mint Leaves, Wormwood, and Elder Leaves on the mortar and crush them with the pestle. Add your Oil to the mix and collect the Insecticide. Now go all the way to the first screen and use it on the insects inside the tree. Collect the Tiny Sword. Go all the way to the Toy Shop and look at the puppet box. It’s underneath the tall statue. Here you can use the Tiny Sword with the knight and take the Toy Princess.

There is a large box to the left. You can use the Toy Princess here inside the outline. This will start a puzzle. First move the prince, then move the princess. Here is the answer.

Revenge-Of-The-Witch-Puzzle-Solution-05

Revenge-Of-The-Witch-Puzzle-Solution-05

Now you can collect the Figure Part. Use this on the figurine with the brush and glue to repair it and collect Wooden Figurine (3). Now move back to the brewery. There is a barrel on the right with fur on top. You can use the Card to trigger a new puzzle where you play a game of solitaire. You can now collect the Safe Handle. Go back to the Toy Shop where you can use it on the safe that is against the left wall. This will trigger a puzzle. This is the solution:

Revenge-Of-The-Witch-Puzzle-Solution-06

Revenge-Of-The-Witch-Puzzle-Solution-06

Now you can collect the Wooden Figurine (4) and go back to the clock tower plaza and climb up to the clock tower face. Use all the Wooden Figurines into the correct slots to get the Plate with Fire Sign. You can now go back to the side street and take a look at the box near the first door on the left and place the Plate with Fire Sign. This will start a puzzle. The answer looks like this:

Revenge-Of-The-Witch-Puzzle-Solution-07

Revenge-Of-The-Witch-Puzzle-Solution-07

One you’ve finished, you can collect the Scroll and Magic Powder. Go back to the town hall and sprinkle the Magic Powder on the fire. You can now collect the fourth Magic Gem.

Chapter 3: The River and the Skeleton

You’ll want to examine the plaque on the large box. Take the Signet from it before returning to the side hall and look at the door on the left. You can use the Signet to open the door and head into the archives. Collect the Scroll and the Decorative Elements. Find all the pages in the mess on the floor. Now leave and go back to the street. The second door on the left can have the Decorative Elements used on it to start a puzzle. This is the answer:

Revenge-Of-The-Witch-Puzzle-Solution-08

Revenge-Of-The-Witch-Puzzle-Solution-08

Now you can go into the smithy. Use the bellows to get rid of the dust so you can collect the Wrench and Nail Drawer. There is a grate you can zoom in on and collect the Metal Wedge. Now go back to the Brewery and use the Nail Drawer on the boarded up door. There is a hidden object area here. Place the objects where they need to go and collect the Piece of Cheese. Now go back to the storeroom and use it on the hole in the wall. Collect the Mouse that pops out. Now go back to the apothecary. Here you’ll want to look at the hidden object area over the cupboard. Put all the items back where they belong to collect the Letter R. Now go back out into the courtyard.

Examine the carriage behind the pups. Use the Wrench on the closest barrel to you to get the Metal Hoop. Now examine the well and use the Metal Hoop on the bucket so you can fix and collect the Bucket. Now go to the riverbank and use the Metal Wedge to split the log by hitting it with the Hammer. Collect the Gear and treat the owl in the tree to a snack by giving him the Mouse. Now you can collect the Domino Pieces. Go back to the Brewery where you’ll find a hidden object screen to the right in the back. Find the objects and then you will be able to collect the Broom. If you take a look at the far left table you can use the Domino Pieces to start a puzzle. The answer is this:

Revenge-Of-The-Witch-Puzzle-Solution-09

Revenge-Of-The-Witch-Puzzle-Solution-09

When you finish you will be able to collect the Metal Decoration (2). Now sweep up the sawdust with the Broom. You can now collect the Rope. Go back to the archives and take another look at the mess on the floor. Tie up the pages with the Rope. Collect the letters for the title of the book and then you will collect the Ancient Book. Place it into the empty slot on the bookshelf. This will open up a secret passage! Go through into… a torture chamber! Collect the origami figure and the Metal Goat. After giving the wheel on the right a spin, examine that skeleton. You can cut the ropes with the Scalpel. Collect the Tower Key, which you can now use to open the rightmost door in the hallway.

Collect the scroll first then move the lower right plaque. Collect the Stone Ball. Add the Lens to the telescope then look above the bell. You can add the Gear here. Now it’s time to go back to the entrance with the stone lions. Give the Stone Ball to the lion on the right and rotate it. Collect the Plate with Water Sign. Now it’s time to go back to the archives. You can use the plate with the box here to start another crystal puzzle. This is the answer:

Revenge-Of-The-Witch-Puzzle-Solution-10

Revenge-Of-The-Witch-Puzzle-Solution-10

Now you can collect the Scroll and Magic Powder. Head back out to the riverbank to use it on the princess in the water. She will give you the fifth Magic Gem. Collect the Weed from the ground and fill the Bucket with Water. You can now go forward and onto the Mountain Path. Grab the origami figure, the Gear and the Quill. Now make your way back to the archives. Use the Quill on the inkwell to start another puzzle. Correct the errors and you will be given a code. Collect the Stone Letter. Now go back out into the hall and notice the painting is no longer covering part of the wall. You can use the Stone Letter here and start another puzzle. This is the answer:

Revenge-Of-The-Witch-Puzzle-Solution-11

Revenge-Of-The-Witch-Puzzle-Solution-11

When you finish the puzzle you will be given the Telescope Handle. Now go up into the tower. You can use the handle on the telescope. Now go all the way back the the plaza with the clock tower. There is a hidden object area over the second caravan. Fin the objects and the Metal Gryphon will be given to you. Time to go back to the mountain path. Explore the door to the carriage and use the Metal Goat and Metal Gryphon here to start another puzzle. This is the solution.

Revenge-Of-The-Witch-Puzzle-Solution-12

Revenge-Of-The-Witch-Puzzle-Solution-12

You can look inside the carriage now. Take the Olives and the Curtain Handle. Go back to the brewery and put the Olives into the press. You can now collect the Olive Oil. From here, go to the town hall where you can use the Curtain Handle with the small curtain. This will start a puzzle. You will have to fix the painting. Once you’ve finished, you can collect the Metal Medallion. Go to the smithy where the Olive Oil should be used on the rusty hinges. This will let you get the Crowbar. On the left is a tray you can fill with the Bucket of Water. You’ll need to go back out to the riverbank and refill the Bucket. Now go back to the central entrance and loosen the left stone with the Crowbar. You can pick up the Metal Decoration (3) now. Go back to the smithy and use the Metal Decorations inside the slots of the grate on the far wall. Take the Letter S. Return to the Mountain Path and pry the stone under the wheel of the carriage with the Crowbar. This will allow you to go to the cottage. Move the traps away and grab the Pick and break of a piece of Clay.

You need to go back to the torture chamber now. Break the bricked-over section of the wall with the Pick. Take the Gear, Decorative Plates, and Ram Horns from there. Now you can go back to the tower. Use the Gears with the pegs above the bell. Take the Barrel-Organ Handle. Now go back to the Brewery and look over the hidden object area. Once you have put everything back where it belongs, you will be given the Wooden Flower. Go ahead and use the Barrel-Organ Handle on the peg above the barrel in the back to start a puzzle. This is the answer:

Revenge-Of-The-Witch-Puzzle-Solution-13

Revenge-Of-The-Witch-Puzzle-Solution-13

Collect the Statuette and go back to the well. There is a door to the left to place the Statuette on the shelf. Rearrange the figures as so:

Revenge-Of-The-Witch-Puzzle-Solution-14

Revenge-Of-The-Witch-Puzzle-Solution-14

You can now move on to the pottery studio and collect the Lever and Statuette Hand. Fill the jar on the left with the Bucket of Water. Take the Cupboard Key and use it on the cupboard in front of you. Take the Plate with Skull. There is a little box on the lower right that you can use the Decorative Plates with. This will start another puzzle. This is the answer:

Revenge-Of-The-Witch-Puzzle-Solution-15

Revenge-Of-The-Witch-Puzzle-Solution-15

Revenge-Of-The-Witch-Puzzle-Solution-16

Revenge-Of-The-Witch-Puzzle-Solution-16

Now collect the Stone with Fish Image and go back to the riverbank to once again will your Bucket with Water. Go to the pottery studio and use it on the basin, then add the Clay. Take the Clay from the basin and place it on the wheel so you can spin it into a Jug and collect it. Now go back to the tower where you can use the Plate with Skull on the box sitting on the ledge. This will start a puzzle. This is the answer:

Revenge-Of-The-Witch-Puzzle-Solution-17

Revenge-Of-The-Witch-Puzzle-Solution-17

When you finish you can collect the Scroll and the Magic Powder. Upon completing the puzzle, click on the Scroll and the Magic Powder to collect them. You can go back to the Torture Chamber and use the Magic Powder on the ghoul and collect the sixth Magic Gem.

Chapter 4: The Spider and the Vines

Now you can use the Lever on the vice to open it and collect the Greenhouse Key. Now go to the side street and use the key on the greenhouse on the right. Go inside and collect the Hacksaw and Paint. Go to the pottery studio again and go to the painting wheel. If you place the Paint and Jug here you will start another puzzle. This is the answer:

Revenge-Of-The-Witch-Puzzle-Solution-18

Revenge-Of-The-Witch-Puzzle-Solution-18

Collect the Statue Head and go back to the town hall, where you can use the Statue Head, Statue Hand and Metal Medallion to put the statue back together. You can now collect the Part of Tablet. Go back to the torture chamber and use the Hacksaw on the chairs above the skeleton. Collect the Crystal and exit to the archives. You can use the Part of Tablet on the frame on the floor in the back to start a puzzle.  This is the answer:

Revenge-Of-The-Witch-Puzzle-Solution-19

Revenge-Of-The-Witch-Puzzle-Solution-19

Collect the Clay Tablet and go to the tower. You can use it in the lower left on the groove and then pick up the Triangular Key. No go to the smithy and take a look at the box under the window. You can use the Triangular Key to start a puzzle. Play checkers with the magician tile to defeat all the monsters by jumping over them. Now collect the Wooden Flower (2) and go to the greenhouse, where you can use both Wooden Flowers to open the drawer on the left. Collect the Wire Cutters. Now it’s time to go to the cottage. Here you can use those Wire Cutters on the mesh so you can take the Wooden Blocks. Now go back to the greenhouse and use the Wooden Blocks with the square cabinet to start a puzzle. Place all the parts back where they belong and collect the Axe Billet. Travel to the smithy and place it into the oven, before using the Metal Tongs to pull it back out and hitting it into shape with the Hammer. You can then drop it into the tray of water. Collect the Blunt Axe Blade and go to the toy shop where you’ll use the sharpening wheel to create the Sharp Axe Blade. Chop the wooden handle with the Sharp Axe Blade then use the Wooden Wedge on the hole you made, then Hammer it into place. This creates the Axe for you to collect.

Now you go back to the Well. You can chop down the tree here and create a bridge to cross. Do so and collect the Scroll, Small Key, Metal Daisy, and Minerals. You can set the Gunpowder Barrel against the rock and then head back to the plaza with the clock. Go to the hidden object area over the second caravan.  Find the items and collect the Metal Sunflower when you finish. You can now go back to the Torture Chamber and use the Small Key on the book. Collect the Metal Tulip. Now you can go back to the greenhouse. In the upper right of the cabinets, use the Metal Daisy, Metal Sunflower, and Metal Tulip to start a puzzle. Click on the buttons in the following order: 3, 1, 3, 5, 5, 1, 4, 2.

Revenge-Of-The-Witch-Puzzle-Solution-20

Revenge-Of-The-Witch-Puzzle-Solution-20

You can now collect the Plate with Spider and go to the pottery studio again. You can use the Plate with Spider on the box here and start another puzzle. The answer is:

Revenge-Of-The-Witch-Puzzle-Solution-21

Revenge-Of-The-Witch-Puzzle-Solution-21

Now collect the Scroll and the Magic Powder and move onto the cottage. You can use the Magic Powder on the spider to cause it to vanish. Now collect the seventh Magic Gem. Only three more to go! Go inside the cottage to collect the Screwdriver and Fuse. Now go to the brewery and start the hidden object screen under the right window. Collect all the objects and you will be awarded the Scale. If you take a look at the cabinet on the right wall, you can use the Screwdriver to take the Hook. Now go back to the town hall.

If you look at the right statue, you can use the Scale to fix it. You can collect the Stone with Bird Image now. Go to the well and use the Hook on the rope so you can use the lever and collect the Stone with Hog Image. Go back to the Gully

and place the Fuse on the Gunpowder Barrel that you left there. Light it with the Burning Kindling. Now with a bang, the rocks will be moved and you can go past them to a clearing. You’ll find a hidden object area on the right. Collect all the items and you will get a Decorative Plate. Now pull back and to the Scroll and the Antlers. Now you can go back to the Pottery Studio. If you look inside the open cupboard you’ll see a box on the lower left to use the Decorative Plate on. This will start a new puzzle for you. This is the answer:

Revenge-Of-The-Witch-Puzzle-Solution-22

Revenge-Of-The-Witch-Puzzle-Solution-22

Revenge-Of-The-Witch-Puzzle-Solution-23

Revenge-Of-The-Witch-Puzzle-Solution-23


Now collect the Letter E and head back to the town hall. Look at the leftmost box and place the Letter E, Letter R, and Letter S on the plaque. This will let you collect the Stone with Squirrel Image. Go back to the cottage and take a look at the slotted stone marker on the right. The Stone with Fish Image, Stone with Bird Image, Stone with Hog Image, and Stone with Squirrel Image all go here. You’ll be able to collect the Plate with Leaf. Go back inside the cottage and look at the box in the back right. Use your Plate with Leaf in it to start a puzzle. The answer is:

Revenge-Of-The-Witch-Puzzle-Solution-24

Revenge-Of-The-Witch-Puzzle-Solution-24

Once you finish, collect the Scroll and Magic Powder before returning to the greenhouse. You can use it on the vines to free the girl. Now collect the eighth Magic Gem!


Chapter 5: The Eagle and the Chains

Take a look at the table in the back. Find all the flower pots and all the flower bulbs before going back to the main area. There a doorway you can now go through into the garden. Collect the Scissors. Now go back inside the cottage and use them on the Fleece Blanket that is laying on the bed. Go back to the greenhouse and slip the Fleece under the snake hiding out under the barrel planter. Light it with the Burning Kindling and make him run off. You can now collect the Saw. Go back to the clearing and bring up the hidden object area on the right. Collect all the objects and you will be given the Honey. Use the Saw on the pile of sticks, which will let you find and collect the Metal Rose. Go back to the garden so you can place the Metal Rose in the statue’s hand. Now collect the Quadrangular Key before going to the brewery. There you can look at the hidden object area on the right and put the pieces back into place. You will be rewarded with the Aloe. Now unlock the box on the middle table in the back of the room with the Quadrangular Key. This will start another puzzle. Like a game of checkers, move the magician piece to jump over the monsters. You will collect the Crystal (2) when you finish. Now go to the garden again.

In the back of the garden, there is a small table. Place the Minerals, Weed, and Aloe into the mixing bowl before using the pestle and crushing it up. Now add the Honey to the bowel. Collect the Growth Accelerate. One the main back table, you can use this on the potted plants. Collect the Live Flowers. Now go back to the clearing. Give the Live Flowers to the fairy statue so you can collect the Decorative Plate. Now go back to the pottery studio and go to the open cabinet. Use the Decorative Plate on the box in the upper right side. This will start a puzzle. The answer is:

Revenge-Of-The-Witch-Puzzle-Solution-25

Revenge-Of-The-Witch-Puzzle-Solution-25


Revenge-Of-The-Witch-Puzzle-Solution-26

Revenge-Of-The-Witch-Puzzle-Solution-26

Collect the Plate with Eagle and move on back to the garden. You can use the Plate with Eagle on the box behind the left statue and start a puzzle. The answer is:

Revenge-Of-The-Witch-Puzzle-Solution-27

Revenge-Of-The-Witch-Puzzle-Solution-27

Collect the Scroll and the Magic Powder before going back to the clearing. Here you can use the Magic Powder on the Eagle and collect the ninth Magic Gem! Only one more to go! Collect the Round Key and go inside the building to the lab. The desk to the left contains beakers. Find them all, then find all the magic crystals. Now go back to the inside of the cottage and use the Round Key to unlock the box on the right. This will start a puzzle. Like checkers, move the magician tile and jump over the monsters. You will be given the Shield Part (2). Go back to the archives. You can use both Shield Parts to fix the coat of arms and collect the Scroll and Magic Liquid. Now go back to the clearing and look at the hidden object area that in on the right. Collect all the objects and you will be rewarded with the Buffalo Horns. Go back inside the cottage now and place the Antlers, Ram Horns, and Buffalo Horns onto the correct animals. Now you can take the Rifle. Go back outside and place the Rifle into the stand on the right. Click the windows to hit all the witches. You can now collect the Golden Key. Go back to the lab and use the key on the cage. Take the Crystal (3) from inside.

Now got back to the table that is by the bookcase. The Magic Liquid goes into the beakers. Collect the Crystal (4). Now use these Crystals on the fountain on the right and take the Plate with Phoenix. Go back out to the clearing. The Plate with Phoenix is used on the box under the tree to start a puzzle. This is the answer:

Revenge-Of-The-Witch-Puzzle-Solution-28

Revenge-Of-The-Witch-Puzzle-Solution-28

When you finish, collect the Scroll and the Magic Powder. Go back to the lab and use the Magic Powder on the chains holding the magician. Collect the tenth and final Magic Gem! Now you can go through the door ahead of you and into the catacomb where a puzzle will start. Click on the balls in the order that they show up. Once you win, place the Magic Staff in it’s place in the back of the room. Congratulations! You’ve beat the game!

You’ve completed our Echoes of the Past – The Revenge of the Witch Walkthrough! For more great tips and tricks, visit our blog!

Delicious – Emily’s Hopes and Fears Walkthrough

Big City Adventure – Shanghai Walkthrough

Building the Great Wall of China 2 Walkthrough

This Echoes of the Past – The Revenge of the Witch Walkthrough is meant as a guide and does not contain cheats, hacks or serials.


The post Echoes of the Past – The Revenge of the Witch Walkthrough appeared first on GameHouse.


Mystery Trackers – Four Aces Walkthrough

$
0
0

As a detective, you have handled many strange cases. One night, you are spending a rare night home with your dog when you receive a call. In another town called Brightfield, residents are being evacuated due to mysterious animal attacks. You are needed to help save the town. When you arrive, you walk into the now ghost town. Your mission in Mystery Trackers – Four Aces is to find out who is behind these attacks. In this walkthrough, learn the tricks to safely navigate through the game in order to restore order.

Contents

General Tips & Tricks

In order to effectively help you navigate through the town, you will be given a map. This will allow you to see where the highlighted areas of your investigation will be located. This highlighting will depend on the level of difficulty you choose to play on.

The level of difficulties for Mystery Trackers: Four Aces are the standard you find in most games; however, there is one new level: detective. In detective mode, you will not be given any hints or helps like you would find in casual, advanced, and hardcore.

You will also have the assistance of your dog, known as Elf. The dog will help you get rid of snow piles and through key locations. You can customize the dog in the dog store on the main menu. Look for Chips throughout the game in order to use the dog store.

Unlike other hidden object games, you will have three buttons to help you through the puzzles. First, you can click the information button which will tell you more about the objective of the puzzle. Next, you can reset the puzzle if you get stuck. Finally, depending on the level of difficulty, you can skip the puzzle once that button is fully charged.

Mystery Trackers – Four Aces Walkthrough

Chapter One: Brightfield

Locate and talk to the girl. Look in the snow to find the ID. Don’t forget to take the Gate Key. Find the lock, enter the Gate Key in the lock, and turn the key one time. Go through the gate, go to the entrance, and find the Puzzle Piece. Go to the window, put the puzzle piece on the board and play the mini-game. Move the Puzzle Pieces until they click in place. Once they are in the right sequence, play the hidden object game. Find the items on the list, use the tongs to grab the horseshoe, and the Blowtorch will be placed in your inventory.

Mystery Trackers - Four Aces - Mini Game

Mystery Trackers – Four Aces – Mini Game

Go to the entrance, place the Blowtorch to open the door, and go in. Locate the Paper and read the article. Find the fountain and pick up the Screwdriver. Proceed to the exit door, find the fire alert panel, use the Screwdriver to undo the screws and find the Flare Gun. Scare the monster near the bag with the Flare Gun, retrieve the Valve Handle with the Post Office Trinket. Find and turn on the recorder.

Return to the fountain, place the Valve Handle on it, and play the hidden object game. Put the seahorse pieces in the correct order to get the Seahorse. Locate the Wings, then place them on an Angel, and put the Angel in your inventory. Use the Net to catch fish in the fountain, and obtain the Security Panel Level. Locate the security panel and use the lever to open it. Go to the gate and grab the next Puzzle Piece. Return to the newspaper stand and locate the final Puzzle Piece.

Mystery Trackers - Four Aces - Fire Station Puzzle

Mystery Trackers – Four Aces – Fire Station Puzzle

Go to the fire station and put the puzzle pieces on the board. Rearrange the pictures and turn the valves. Move away from the board. Go to the extinguisher, grab the Glass Cutter, and walk away. Return to the newspaper stand, use the Glass Cutter to remove the Flower Medallion. Go to the gate and place the Flower Medallion in the slot. Return to the side street, go to the brick wall and move the loose brick. Collect the Letter K Medallion. Go back to the snow pile, use the Elf to remove the snow. Place the Letter K Medallion into the bag slot, locate and take Kelly’s Car Key, and read the letter. Go to the car, use the Car Key and turn it one time. Grab a Glass Shard and go back to the fire station. Locate the extinguisher, cut the ropes around it with the Glass Shard and take the Extinguisher. Return the car and put out the fire with the Extinguisher. Grab the Shovel, return to the side street and use the Shovel to move the snow pile.

Chapter Two: The Dead End

Go to the police car, collect the Fridge Magnet, and turn away. Focus on the balcony and remove the elf in the snow. Once the snow is gone, take the Dagger. Look at the covered window, use the Dagger to cut the thick cloth. Go back to the balcony, lower the ladder and go up. Find the right control panel, find the Access Card, and go to the baggage scanner. Insert the Access Card and play the mini-game.

Mystery Trackers - Four Aces - Mini Game Baggage Scanner

Mystery Trackers – Four Aces – Mini Game Baggage Scanner

 Move the suitcases to the respective area, solve the puzzle, and play the hidden object game. Get the Graduate Bear by placing the hat onto the bear. Take the Control Panel Lever and go back to the control panel. Place the Lever into the slot and pull it. Look at the box and use the Dagger to open it. Grab the next Post Office Trinket and the Loaded Spear Gun. Walk back to the balcony, use the Spear Gun, and climb up the rope. Go into the lair, locate the chair and read the Letter. Look in the fireplace and open the Medallion. Go towards the blocked door and take the last Post Office Trinket.

Mystery Trackers - Four Aces - Hidden Object Chapter 2

Mystery Trackers – Four Aces – Hidden Object Chapter 2

Look at the wooden board and use the Elf. Pick up the Police Car Key and return to the side street. Put the Police Car Key in the back of the police car. Take the Police Badge. Look in the compartment before returning to the fire station. Go to the safe and put the Police Badge in the slot. Enter 9-1-1 into the code to open the safe. Get the Oxygen Mask and Wolf Paw Medallion. Return to the post office and use the Wolf Paw Medallion to disarm a trap. Go into the post office.

Chapter Three: Enter the Post Office

Look down on the floor, read the note and then turn to the left. Place the 3 Post Office Trinkets on the board to play the mini-game. In order to win the mini-game, the symbols must be placed correctly. Go back to the wall and pick up the Microfilm. Take it to the machine and put it in. View the Film and then take another Fridge Magnet. Go to the door and take the Leather Glove. At the window, use the Leather Glove to move the glass shards. Use the Dagger and cut the rope. Take the box, open it, and obtain the final Fridge Magnet. Go down to the lair, go to the refrigerator, and place the 3 Fridge Magnets to open another mini-game. To win, place the Magnets in the correct places and then grab the Tasty Sausage. Return to the side street.

Mystery Trackers - Four Aces - Refrigerator Mini Game

Mystery Trackers – Four Aces – Refrigerator Mini Game

Return to the police car, feed the Sausage to the Seal, and locate/push the lever. Play the hidden object game. Place the Bullet in the Revolver, and put the Loaded Revolver in your inventory. Grab the Metal Ball and the Megaphone. Leave and return to the fire station. Get rid of the bat by using the Megaphone. Investigate the bat’s nest, grab the Oil, and your Flare Gun will be reloaded. Return to the lair, look at the fireplace, place the Oil on the hinges, and play the hidden object game.

Mystery Trackers - Four Aces - Hidden Object Chapter 3

Mystery Trackers – Four Aces – Hidden Object Chapter 3

Receive the Dinosaur, Inflated Balloon, and Rope Ladder from the hidden object game. Take a left in the room, put up the Rope Ladder, and go up. Click on the Beast and scare it away with the Loaded Flare Gun. Find Kelly and place the Oxygen Mask on her.

Go back to the chapel, use Elf to move a rat. Go into the corridor and click on the hooded man. Look at the lantern and grab the Crowbar. Next, move to the flower and grab the Fire Apple. Look down on the floor, grab the paper, and open the new case. Find the Access Card and read another note. Return to the chapel door, and place the Access Card in it. Open the Dynamite Box with the Crowbar and take out of the Duster and Dynamite. Enter the corridor, remove the cobwebs with the Duster and play the hidden object game. Find the Four Tools, place in the Toolbox, and place the Toy Toolbox in your inventory. You will need to put Board with Nails, Disk Saw, and Circular Saw into your inventory.

Head down to the lair. Use the Circular Disk on the blocked door and go through. Send Elf under the bed and get a part of the Transistor. Look at the case, place the Access Card in it and take the Four Aces Key. Return to the chapel. Place the Four Aces Key into the chapel’s entrance and start the mini-game. Grab two pieces that will match the center piece. Go into the chapel.

Mystery Trackers - Four Aces - Chapel Mini Game

Mystery Trackers – Four Aces – Chapel Mini Game

Chapter Four: Enter the Chapel

Begin by viewing the radio and the cut-scene. Look at the case and send Elf to remove another Transistor piece. Go back to the post office, look at the machine, and place the Four Aces Key into the lock. Take the last piece of the Transistor. Return to the dead end, go to the sewer cover, and use the Circular Saw to cut the lid open. Head back to the chapel.

Find the Radio, remove lid and add the Transistors. Play the mini-game where you need to move transistors to close the chains. Go find the beast and take the Magnetic Cross-Shaped Key. Head down the side street, get in the police car, and find the compartment. Place the Magnetic Cross-Shaped Key in the lock, grab the Medicine, and go back to the bedroom. Go to the case, use the Magnetic Cross-Shaped Key and grab the next piece of Medicine. Turn to the fire station, find the cabinet, place the Magnetic Cross-Shaped Key in Magnetic Cross-Shaped Key to start the hidden object game.

Mystery Trackers - Four Aces - Mini Game Radio

Mystery Trackers – Four Aces – Mini Game Radio

Get the Syringe and put the Red Fluid into it. Place it in inventory. Put the Pill into the Glass and place the Glass with Bubbles in your inventory as well. Keep the Human Model. Receive the final piece of Medicine into you inventory. Go back into the chapel. Look at the beast and use the Medicine on the beast to heal. Start the hidden object game. Complete the chess board, take the Knitting Needle, and take the Reel Film. You will receive the Down Button.

Return to the elevator and place the Down Button in the correct spot. Go into the elevator and push the Down Button. Go to the safe, push the right plate sequence, and receive 50 Chips. Go back to the machine, retrieve parts of the Batteryand Electronic Chip as well as Pruning Shears. Head into the bedroom. Use the Pruning Shears to open the cabinet and take part of the Toy Locomotive. Head to the front of the chapel, go to the roses, and use the Pruning Shears on the roses. Locate the other Gold Button and head into the sewers.

Chapter Five: Enter the Sewer

Find the barrel, cut the roses with the Pruning Shears and take the final Gold Lock Button. Place the Dynamite Block on the wooden board and head to the belfry. Look in the cage, add the Buttons on the board, and start the mini-game. Direct the balls onto the right levels to win the mini-game. Give your Fire Apple to the Fire Salamander who will be placed into the inventory. Head back to the sewers.

Mystery Trackers - Four Aces - Apple Mini Game

Mystery Trackers – Four Aces – Apple Mini Game

 
To set off the dynamite, use the Fire Salamander. Look at the skeleton, grab the Sledgehammer, and then go to the bars. Open the bars with the Circular Saw and keep one Chip and the Wrench. Return to the chapel, hand the Sledgehammerto the beast. Find Kelly, talk, and keep the Videophone in your inventory. Go onto the shopping street and activate the cut-scene by clicking on anything.

Look in the kiosk roof. Send Elf up first and then take the second Toy Locomotive. Attach the Pruning Shears to the Stick and place in your inventory. Look at the lantern, cut rope with the Long Pruning Shears and grab the Leafkey. Head back into the sewers.

Look in the chest by placing the Leafkey in the lock, take the final Toy Locomotive piece and head to the bedroom. Add the pieces to the toy machine and play the mini-game. Direct the cars to the correct order to get the Lockpick.

Mystery Trackers - Four Aces - Toy Locomotive

Mystery Trackers – Four Aces – Toy Locomotive

Return to the shopping street, go to the fireworks shop and place the Lockpick in the lock. Play the hidden object game. To win, push the symbol buttons on the register to open. Using your scissors, cut a Long Fuse to add to your inventory. Find the truck, use the Wrench to open the lid, and place the Long Fuse in the tank. Light the fuse with the Fire Salamander. Locate the guy and talk. Call James using your Videophone.

Look at the brochure, pick up the piece of Battery while reading the brochure. Look in the snow piles, use Elf to remove the snow and then use the Fire Salamander to melt the ice. Locate the Museum Key. Head toward the building, place the Museum Key in the lock and enter the museum. Find the man to start a cut-scene. Make Elf enter the cage while you attempt to use the Videophone with him. Take the third piece of Battery. Go into the laboratory and find the final piece of the Battery. The Battery will charge the Videophone. Call James again and take one part of a Dinosaur Foot.

Collect the final Dinosaur Foot in the green control panel. Add the feet of the dinosaur to the skeleton and play the mini-game. Move the skeleton around to the correct arrangement. Win the mini-game and play the hidden object game. Use your Sledgehammer, crack open the egg to collect the Baby Dinosaur. Get the Fire Badge by completing the game.

Mystery Trackers - Four Aces - Dinosaur Mini Game

Mystery Trackers – Four Aces – Dinosaur Mini Game

Go into the fire box, place the Badge in and retrieve the Bucket with Water. Use the Bucket with Water to stop the flames. Grab both the Door Handle and ½ part of the Briefcase Lock Dial. Turn to the right and place the Door Handle on the door and head into the museum office.

Chapter Six: Enter the Museum Office

After the cut-scene, look in the drawer and find the Toolbox Handle. Head towards the shopping street, go to the shop entrance and put the Handle on the toolbox. Retrieve the Wire Cutters before going to the museum. Use the Wire Cutters to cut the wires on the fire box. Grab the Crowbar and head to Canal Street. Use the Crowbar to open the metal bar in the drainage system. Retrieve the Bronze Handle. Go back to the museum office. Place the Bronze Handle on the window. Go to the safe and take the second Briefcase Lock Dial.

Move the chair, go to the skeleton and grab the Floppy Disk. Go back to the entrance, head towards the case and place the Two Briefcase Lock Dials on it. Enter the code and play the hidden object game. Figure out the correct code in order to move the lever. Take the Lamp and the Alarm Clock. You will also have a lever in your inventory. Head to the belfry.

Look at the machine, place the Lever in the slot and push it. Head back to the skeleton and find the Crocodile Amulet. Read the diary fragment and head into the sewers. Place the Crocodile Amulet on the wall and grab the Star Half and Clock Hands. Walk back to the bedroom, put the Clock Hands on the clock, and collect the Star Half and half of a Butterfly. Enter the museum office, locate the safe, and place the Two Star Halves onto it. Open the safe and take out the second Electronic Chip and a Golden Crown. Go into the laboratory and put the chips into the door. Activate the mini-game. Push the gears to open the door.

Mystery Trackers - Four Aces - Mini Chapter 6

Mystery Trackers – Four Aces – Mini Chapter 6

Put the Floppy Disk into the computer. Watch for a video containing a distinct sequence. Head over to the cabinet and enter that code. Unscrew the screws using your Screwdriver while collecting the Rubber Gloves and the Ladder. Go down to canal street. Look at the lantern, put your Ladder against it, and take both the Mermaid Figurine and Neon Fuse.

Go back to the museum office, find the pillows, and grab the Piece of the Picture. walk back to the laboratory, put the Piece of Picture into a hole. Open a door and find another Neon Fuse. Walk to the freezer, place the Two Neon Fuses and enter the code. Take your second Butterfly. Use your Fire Salamander on the key in the freezer and get the Drawer Key. Look for the butterfly showcase and add the Butterflies. Once you finish, grab the Fan Control Switch and a piece of the Bat Amulet Piece. Return to the museum office, place the Drawer Key into the drawer and play the hidden object game.

During the hidden object game, take the December 25 Painted Sailboat, and Shell into your inventory. Put the Fan Control Switch into the slot on the desk. Take the second Shell from the fan and walk to the shell showcase. Move around the shells until you find the right order. Obtain both the Pearl and the second Bat Amulet Piece. Place the Mermaid Figurine, the Pearl, and the Golden Crown in the case to find the final Bat Amulet Piece.

Look for the glass locker. Place the 3 Bat Amulet Pieces into the slot to get the Collar Control Half as well as the Rust Remover. Head to the belfry and place the Collar Control Half with the other one. Play the mini-game where you move the blue tile around the board. You need to turn the whole board blue.

Mystery Trackers - Four Aces - Collar Control

Mystery Trackers – Four Aces – Collar Control

Chapter Seven: Gone to the Heliport

Put the bat on the heliport in order to fly. Look towards the tree, use Elf to chase away the animals and pick up the Hunting Cabin Key. Go back to the heliport, use your Fire Salamander to melt the surrounding ice and pick up the Pocketknife and one Metal Ring. Go to the hunting cabin and use your Fire Salamander again to melt the surrounding ice. Place the Hunting Cabin Key in the lock and open the door. Go to the fireplace.

Have Elf go into the fireplace to obtain the Fountain Pen. Locate the picture above the fireplace and zoom in. Cut the picture with your Pocketknife and retrieve your Power Cord. Go outside to the helicopter, use the Rust Remover to help the lid before going back to the museum office. On the shelf, place the Fountain Pen in a holder, take both the Spades Emblem and Bear Head before walking away. Put the Power Cord on the fan and turn it on. Collect the Ruler before returning to the cabin. Place the Bear Head in the slot for the cabinet while using the Ruler to open it. Find the Helicopter Key in the skeleton.

Go to the helicopter, put the key in and place the hidden object game. Locate all the items to receive a Clubs Emblem. Go back inside and find the picture again. Place the Clubs and Spades Emblem into the picture before pressing the red button. Go towards the bunker entrance, get the Ax by using rubber gloves before heading back to the tree.

Mystery Trackers - Four Aces - Hidden Object Chapter 7

Mystery Trackers – Four Aces – Hidden Object Chapter 7

Use the Ax to cut down branches, have Elf look into the nearby hole and retrieve the Toggle Switch. Head back to the museum entrance, place the Toggle Switch on the dashboard and obtain your Insulating Tape and Wire. Go back to the heliport. Repair the panel using the Wire and the Insulating Tape. Use Elf to obtain the Sun Amulet located near the wall. Go into the laboratory, find the window again and receive the Star-Shaped Key. Head back to the museum.

Find the case and place the Star-Shaped Key into the correct slot, grab the Punch Card and return to the heliport. Look in the bird’s nest to find a Code Scrap. Go back to the laboratory, find the small cabinet, place the Star-Shaped Key in the lock to find the Empty Dart Syringe. Enter the bunker, find a cabinet, put in the Code Scrap and put the Punch Card into a slot. Fill the Empty Dart Syringe with medicine and move on. Go to the window, place the Full Dart Syringe into the gun and put the Tranquilizer Gun into your inventory. Use the gun on the bear before you take the Floppy Disk.

Go into the laboratory. Use the computer again by putting the Floppy Disk in. Obtain your second Metal Ring. Head into the bunker’s laboratory to place the Metal Rings on a board to play a hidden objects game. Once you find all the items, place the Camera in your inventory. Go back to the bear and take a picture of the bear’s eye with the Camera. The Photo of the Eye will be placed in the inventory. Go to the holo-projector, take the Photo of the Eye, and replace it with an Eye Hologram. Place the Eye Hologram on the door to unlock. Head into the museum, burn the branches of a plant with the Fire Salamander and retrieve the Safe Wheel. Head to the belfry to find a Safe. Place the Safe Wheel on the slot and punch in the code. Retrieve the Lion Figurine and the second Flag. Open the door to the bunker office with the Eye Hologram.

Chapter Eight: Enter Bunker Office

Click the Globe, place Two Flags into the right locations, and play the hidden object game. Locate the items on the list. Use the Pestle to make Powdered Sugar. Take the Doll Collection after switching the dolls’ heads. Retrieve the Bottle and fill the Goblet. Put the Filled Goblet with wine in it into the inventory. Put the Bear Figurine in your inventory. Go to the front desk, place the Lion Figurine with the Bear Figurine into the slots, and take the Joker Medallion as well as the Magnet. Go to the showcase. Place the Joker Medallion in a slot, grab the Cartridge, and head to the bunker lab.

Put the Magnet on the floor and find the Control Panel Switch. Head to the machine, place the Cartridge and Control Panel Switch into the slots. Look for the Tuning Fork and head into the bunker office. Find the Glass Box, use the Tuning Fork to break the glass and take a Button. Go towards the wall, use the Tuning Fork to collect the next Button. Go back to the lab, place the Buttons in the machine, and type “Superhuman” with the keyboard. Play the mini-game, place the Buttons near the matching symbols. Exit the bunker with the Evacuation Exit.

Mystery Trackers - Four Aces - Superhuman Puzzle

Mystery Trackers – Four Aces – Superhuman Puzzle

Once you reach the exit, you have solved the mystery! Congratulations! Now the citizens can come home and live without fear. Your role in Mystery Trackers – Four Aces is complete. With this walkthrough, you were able to help not only the citizens but the animals as well through the use of tips and tricks.

For more great tips and tricks and a selection of other walkthroughs, visit our blog!

The Mystery Trackers – Four Aces Walkthrough is meant as a guide and does not contain cheats, hacks or serials.

The post Mystery Trackers – Four Aces Walkthrough appeared first on GameHouse.
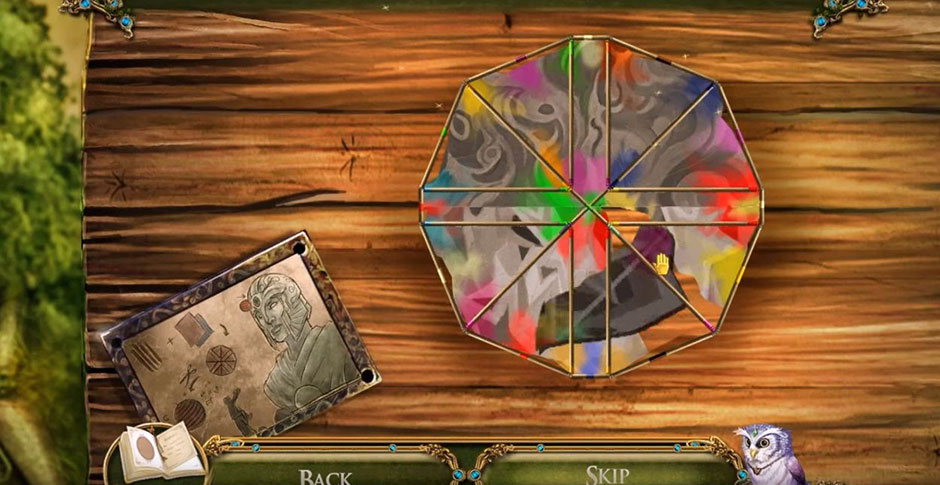
Lost Lands – The Golden Curse Walkthrough

$
0
0

The cursed gold has been disturbed and terrible beasts are wandering the Lost Lands! Join Susan as she attempts to right the chaos and find her way back home. Our Lost Lands – The Golden Curse Walkthrough will help guide you on your journey. Our guide features all Figurine, Morphing Object, and Collection Item locations!

Contents

General Tips & Tricks

Whether you’re just getting started or simply need a refresher, this section covers all the basic tips and tricks you need to get started.


  • There are three difficulties available when starting the game:
    • Easy- Features a tutorial, locations with possible actions shown on the map, sparkles in active areas, sparkles over hidden object scenes, shown objectives, collectible and morphing object locations shown on the map, a fast hint recharge, and a fast skip recharge.
    • Normal- Features all the same features as Easy mode, however hints and skips take twice as long to recharge.
    • Hard- All of the above features are disabled. Hints take 1 minute to recharge and skips take 2 minutes to charge.
    • You may also customize your refill rate for hints and skips regardless of difficulty chosen.
  • The Journal keeps track of all important clues and pieces of story you uncover as you play through the game.
  • The Map can be used to navigate your way through the game. The following legend applies:
    • Circle- Unlocked location
    • Circle with Footprints- Current location
    • Green Circle- Activate location/Location with available actions
    • Rose Icon- Location with Morphing Object
    • Coin Icon- Location with Collection Item
  • Numerous Extras are available in the Platinum Edition of the game. They include wallpapers, concept art, videos, music, mini-games, puzzles, achievements, a bonus game, and even a quiz.
  • Hints are located in the bottom right corner of the screen. Use these when you’re unsure where to go or what to do next. During puzzles or mini-games, the Hint button is replaced with a Skip button.
  • Morphing Objects are hidden throughout the game. Each Morphing Object is listed in the guide below and circled blue in the screenshots.
  • Figurines are another type of collectible hidden throughout the game. These special items are circled in yellow in the guide below.
  • Inventory Items or Collectibles are outlined in bold, with Locations listed in italics. Use this to help yourself navigate our guide faster!


Lost Lands – The Golden Curse Walkthrough

A deadly curse has been unleashed upon anyone greedy enough to touch the cursed gold! You play as Susan- a young woman who finds herself displaced in a land of Druids and fantastical creatures. Can you find your way back home?

Chapter 1: Druid Valley

A portal has been opened, and you’ll find yourself landing in a thicket of leaves. All of your belongings have been lost. It’s time to find out where you are!


Forest

  • Clear away the brush and click on the Journal to obtain Collection Item 1/14.
  • Take a closer look at the bridge on the right. Collect the Manuscript 1/28 (Druid Village), then collect the Hammer Head lying beneath.
  • The Hammer Handle is lying at the base of the stone steps. Combine the Hammer Handle with the Hammer Head in your inventory to acquire the Hammer.
  • Examine the portal toward the upper left. Collect the Map Fragment and the Xylophone Hammer 1/3 propped up at the base to add them to your inventory.
  • Examine the right side of the stone staircase. Attempt to pick up your camera- but oh no! It’s fallen down to a location we can’t reach!
  • Take a closer look at the banner hanging from the settlement wall up ahead. Click on the banner to remove it, then use the Hammer to remove the Nails and Planks. Within the wall alcove, click on the Knife and the Pick-axe Handle to add them to your inventory, too.
  • Examine the bridge on the right again. Use the Planks, the Nails, and the Hammer to restore the bridge.
  • Morphing Object 1/35 is located to the right of the closest stone step, on the way to the bridge.
Lost Lands – The Golden Curse Forest Collectible Location

Lost Lands – The Golden Curse Forest Collectible Location

  • Proceed right to the next location.

Hills

  • Speak with the girl calling for help- she’s stuck in the well, and will need your help to escape.
  • Examine the water trough. Collect the Manuscript 2/28 (Floating Islands), then the Xylophone Hammer 2/3 lying beneath.
  • Take a closer look at the horse directly behind the trough in the distance. Use the Knife to cut the Rope with Hook free and add it to your inventory. Attach the Rope with Hook to the back of the horse’s saddle.
  • Examine the well in the distance. Click on the rope with hook to attach it to the chain.
  • Take a closer look at the horse again. Click on the horse to encourage it to move, pulling the girl up from the well.
  • Speak with the girl. She introduces herself as Fiora. She will give you the Sheet Music.
  • Examine the well again. Click on the drawing of Blossom to learn more about Fiora’s favorite doll, then collect the Xylophone Hammer 3/3 and the Half a Pair of Clippers on the edge of the well to add them to your inventory.
  • Morphing Object 2/35 is located next to the boulder on the right.
  • Figurine 1/24 is located to the right of the leftmost boulder.
Lost Lands – The Golden Curse Hills Collectibles Locations

Lost Lands – The Golden Curse Hills Collectibles Locations

  • Go back to the Forest.

Forest

  • Take a closer look at the gate again. Use the Sheet Music and the Xylophone Hammer 3/3 on the closeup to trigger a puzzle.
  • Play the melody by tapping the hammers in the correct order. The order is 7, 4, 2, 5, 1, 3, 6, 4. The solution, which is numbered according to which hammer you should click in successive order, is shown below.
Lost Lands – The Golden Curse Xylophone Puzzle Solution

Lost Lands – The Golden Curse Xylophone Puzzle Solution

  • Proceed through the gate into the next area.

Druid Village

  • Speak with the Elder to learn more about what’s going on.
  • Figurine 2/24 is located in front of the stump on the left.
  • Morphing Object 3/35 is located at the top of the highest window of the house on the left.
Lost Lands – The Golden Curse Druids Village Collectibles Locations

Lost Lands – The Golden Curse Druids Village Collectibles Locations

  • Examine the fountain straight ahead. Click on the Map Fragment (2) to add it to your inventory.
  • Take a closer look at the house on the right. Click on the tip of the Bloody Spear to add it to your inventory.
  • Examine the stump on the left and collect the Half a Pair of Clippers (2) sitting on top. Place the nearby log on top of the stump before exiting the closeup.
  • Take a closer look at the building straight ahead. Click to clear the debris, then collect the Manuscript 3/28 (Marron) and the Brackets.
  • Examine the alcove at the base of the fountain. Use the Brackets here to trigger a puzzle.
  • Move the brackets and drop the balls so that they land in each pipe at least once. The solutions are shown below. Upon completing the puzzle, water will flow from the fountain again.
Lost Lands – The Golden Curse Fountain Bracket Puzzle Solution

Lost Lands – The Golden Curse Fountain Bracket Puzzle Solution

  • Combine the Half a Pair of Clippers x2 in your inventory with each other to acquire the Clippers.
  • Return to the Hills.

Hills

  • Take a closer look at the well again. Use the Clippers to cut the chain holding the Bucket and add it to your inventory.
  • Go back to the Druid Village.

Druid Village

  • Examine the fountain for a closer view. Use the Bucket on the water to obtain the Bucket of Water.
  • Return to the Hills again.

Hills

  • Take a closer look at the watering trough and pour the Bucket of Water The horses will move away from the path, allowing you to proceed forward to the next area.

Plains of the Dead

  • Figurine 3/24 is located just beneath the tent on the left.
  • Morphing Object 4/35 is propped up against the rocks in the background, just above the chariot wreckage.
Lost Lands – The Golden Curse Plains of the Dead Collectibles Locations

Lost Lands – The Golden Curse Plains of the Dead Collectibles Locations

  • Click on the tent on the left to enter a hidden object area. Upon completing the area, the Ointment will be added to your inventory.
  • Collect the Manuscript 4/28 (Plains of the Dead) and the Cannonball lying on the ground to the right of the cannon.
  • Examine the wheel of the broken chariot. Click on the Stone Feathers 1/6 to add them to your inventory.
  • Take a closer look at the stone with the pickax stuck in it straight ahead. Click on the handle, which will break off. Click on the Broken Pick-axe to add it to your inventory.
  • In your inventory, select the Broken Pick-axe, then use the Hammer to drive out the broken handle remnants. Combine the head with the Pick-axe Handle, using the Hammer again to complete it. The newly completed Pick-axe will be added to your inventory.
  • Proceed forward through the archway ahead.

Ancient Graveyard

  • Figurine 4/24 is to the left and behind the base of the first statue on the left.
  • Morphing Object 5/35 is located behind the first statue on the left.
  • Pick up the Manuscript 5/28 (Mount Bashar) lying on the ground directly in front of you.
  • Take a closer look at the dead flowers in front of the first statue on the left. Remove the dead rose bush. Pick up the Garden Shears to add them to your inventory.
  • Click on the stone slab on the right to clear away the dirt blocking the inscription. Read the writing.
  • Proceed forward through the Ancient Graveyard and to the next location.

Volcanic Cavern

  • Figurine 5/24 is located just above the upper left corner of the stone archway.
  • Morphing Object 6/35 is located next to Figurine 5 of 24, to the immediate left of the upper left corner of the stone archway.
Lost Lands – The Golden Curse Volcanic Cavern Collectibles Locations

Lost Lands – The Golden Curse Volcanic Cavern Collectibles Locations

  • Take a closer look at the columns of rocks ahead. Click on the Spear Head lying on the floor to add it to your inventory.
  • Examine the crystals on the wall on the right. Use the Pick-axe to acquire the Volcanic Crystal.
  • Pick up the Crowbar lying on the ground on the right.
  • Proceed forward to the next area.

Volcanic Crater

  • Morphing Object 7/35 is located next to the path on the right.
Lost Lands – The Golden Curse Volcanic Crater Collectible Location

Lost Lands – The Golden Curse Volcanic Crater Collectible Location

  • Examine the pathway straight ahead. Click on the Lever lying on the ground to add it to your inventory.
  • Take a closer look at the trebuchet on the left. Use the Lever on the apparatus. Once out of the closeup, click on the wheel on the right side of the trebuchet to crank it back.
  • Examine the trebuchet once again for a closer look. Take the Belt and place the Cannonball into the sling. Click on the lever to activate it.
  • Take a closer look at the tower straight ahead in the distance. Click on the base to trigger a puzzle.
  • Restore the damaged pattern. The solution is shown below.
Lost Lands – The Golden Curse Damaged Wall Puzzle Solution

Lost Lands – The Golden Curse Damaged Wall Puzzle Solution

  • Proceed up the path and to the next area.

Arena Entrance

  • Figurine 6/24 is located in the bottom right corner of the screen.
  • Morphing Object 8/35 is located to the immediate right of the bottom of the staircase on the left.
Lost Lands – The Golden Curse Arena Entrance Collectibles Locations

Lost Lands – The Golden Curse Arena Entrance Collectibles Locations

  • Click on the Cage Trap on the lower left to add it to your inventory.
  • Examine the doorway at the top of the left tower. Collect the Bandage and the Clamp lying on the floor at the foot of the iron maiden.
  • Back outside, take a closer look at the weapons rack on the left. Collect the Two-pronged Spear 1/2, then place the Spear Head on the spear remaining on the rack and click to collect the Two-pronged Spear 2/2.
  • Examine the broken ladder lying on the ground on the right. Use the Belt on the ladder and collect the Stone Feathers 2/6.
  • Return to the Volcanic Cavern.

Volcanic Cavern

  • Take a closer look at the foot of the rock columns on the left. Place the Cage Trap here, then exit for now.
  • Return to the Hills.

Hills

  • Examine the bramble thicket between the path to the graveyard and the well. Use the Garden Shears to clip the branch, then click on the branch to remove the Blackthorn Berries and add them to your inventory, along with the Blackthorn Twig.
  • Go to the Plains of the Dead.

Plains of the Dead

  • Examine the base of the trees on the upper right. Use the Blackthorn Twig to shoo away the raven, then click on the Mechanical Eye in the helmet to add it to your inventory.
  • Return to the Druid Village.

Druid Village

  • Examine the door of the house on the left. Use the Crowbar to pry off the bar, then place the Volcanic Crystal in the slot in the door. Enter the house.

Relic Repository

  • Figurine 7/24 is located at the bottom left corner of the stairs.
  • Morphing Object 9/35 is hanging on the wall above the tapestry on the right.
Lost Lands – The Golden Curse Relic Repository Collectibles Locations

Lost Lands – The Golden Curse Relic Repository Collectibles Locations

  • Take a closer look at the table at the bottom of the screen. Read the recipe for the Bloody Antidote, then click on the Flask to add it to your inventory. Place the Ointment on the table and the Blackthorn Berries within it.
  • Back in the main area, take a closer look at the foot of the stairs. Collect the Manuscript 6/28 (Relic Repository) and the Mouse.
  • Click on the large hourglass twice to rotate it. Tip: You will return here later.
  • Click on the tapestry hanging on the right to remove it. Note the unveiled alcove: you will return here later.
  • Head back to the Volcanic Cavern.

Volcanic Cavern

  • Examine the Cage Trap you left at the base of the stone columns. Place the Flask on the rocks and the Mouse inside the trap. Use the Clamp to remove the snake from within the trap. Collect the resulting Viper Venom put into the former Flask to add it to your inventory.
  • Return to the Relic Repository.

Relic Repository

  • Take a closer look at the small table again and pour the Viper Venom into the Ointment mixture. Place the Bloody Spear into the dish, then click on the resulting Potion to add it to your inventory.
  • Exit outside to the Druid Village.

Druid Village

  • Take a closer look at the injured Druid lying on the ground toward the right. Use the Potion on the arm wounds and the Bandage to complete the first aid. Collect the Belt around the upper arm and the Key from the man’s hand once it opens.
  • Enter the Relic Repository once again.

Relic Repository

  • Examine the case at the base of the stairs. Use the Key to open it and collect the Stone Feathers 3/6
  • Return to the Arena Entrance.

Arena Entrance

  • Take a closer look at the broken ladder lying on the ground again. Use the Belt to finish repairing the Ladder, adding it to your inventory.
  • Use the Ladder to access the doorway in the tower on the right. Your Figurine collection is displayed here.
  • Now take a closer look at the area above the portcullis. Collect the Manuscript 7/28 (Arena) sitting on top of the wheel. Once collected, zoom in on the wheel again and click to rotate it.
  • Examine the archway straight ahead. Place the Two-pronged Spear 2/2 beneath the portcullis to hold it open.
  • Proceed through the archway and into the next area.

Arena

  • Morphing Object 10/35 is located between the arches at the top of the Arena to the left of the Minotaur statue on the right.
Lost Lands – The Golden Curse Arena Collectible Location

Lost Lands – The Golden Curse Arena Collectible Location

  • Examine the burn mark on the ground on the left. Click on the Chewing Gum to obtain Collection Item 2/14. Select it in your inventory and click on the wrappers to remove the gum, then click on it once again to obtain the newly-chewed Chewing Gum.
  • Examine the stone pedestal toward the left and click on the cover to remove it. Tip: You will come back here later.
  • Take a closer look at the top of this same stone pedestal. Collect the Manuscript 8/28 (Gorasar Conn) and the Battery (Collection Item 3/14).
  • Back in the main area, examine the stone with the rune marking toward the lower right. Click on the stone to remove it, then collect the Map Fragment (3) There is also a book you may read.
  • Select the Map Fragment (1) in your inventory and combine it with Map Fragment (2) and Map Fragment (3). Click on each to arrange them into their correct position, then add the Chewing Gum. The completed Map will be added to your inventory.
  • Return to the Volcanic Cavern.

Volcanic Cavern

  • Examine the stone columns toward the left and use the Map in this location, then watch the cutscene that follows.

Leproch’s House

  • Collect the Full Jerry Can from the bed on the right, then take a closer look at the generator on the left. Click to remove the red cap, then use the Full Jerry Can to refuel the device. Click on the red cap again to close it, then select the pull string (bottom left corner) three times to restore power to the area.
  • Figurine 8/24 is located on the upper left corner of the shelf straight ahead.
  • Morphing Object 11/35 is located on the small table to the left of the generator.
Lost Lands – The Golden Curse Leprochs House Collectibles Locations

Lost Lands – The Golden Curse Leprochs House Collectibles Locations

  • Click on the hidden object scene straight ahead. Upon completing it, the Stone Feathers 4/6 will be added to your inventory. Tip!: The combination is 279.
  • Take a closer look at the stack of papers sitting on the chair straight ahead. Use the Knife to cut the string, then read the top paper. Upon setting it down, you will be able to pick up the Key sitting on top of the stack.
  • Take a closer look at the bed. Click on the covers to remove them, then collect the Stone Figurine under the mattress.
  • Now take a closer look at the painting bench behind the bed. Examine the compartment on the top left part of the table’s surface. Use the Key to open it, then collect the Puzzle Pieces
  • Examine the stone wall to the left of the bookshelves to trigger a puzzle. Mark the right symbols with the sliding triangles. You’ve seen them before. The solution is shown below.
Lost Lands – The Golden Curse Stone Door Puzzle Solution Part 1

Lost Lands – The Golden Curse Stone Door Puzzle Solution Part 1

  • Now the second part of the puzzle begins. Use the Puzzle Pieces on the design in the wall to trigger it. Place the puzzle pieces in the central area to make a woven pattern. The solution is shown below.
Lost Lands – The Golden Curse Stone Door Puzzle Solution Part 2

Lost Lands – The Golden Curse Stone Door Puzzle Solution Part 2

  • Enter through the passage revealed to reach the next area.

Leproch’s Tomb

  • Examine the flashlight sitting on the rock. Click to remove the back of it, as well as the battery within. Place the new Battery from your inventory into the flashlight, then replace the cap and click the on/off switch.
  • Figurine 9/24 is sitting on the floor at the bottom right corner of the sarcophagus.
  • Morphing Object 12/35 is on the rock to the left of the flashlight.
Lost Lands – The Golden Curse Leprochs Tomb Collectibles Locations

Lost Lands – The Golden Curse Leprochs Tomb Collectibles Locations

  • Take a closer look inside the sarcophagus. Click on the Manuscript 9/28 (Leproch Conn), followed by the Medallion Part beneath it.
  • Examine the stone explorer. Take the Medallion Part (2) from around his neck.
  • Combine the Medallion Parts x2 in your inventory to obtain the completed Medallion.
  • Return to the Druid Village.

Druid Village

  • Speak with the Elder. You will be rewarded with the Stone Feathers 5/6.
  • Enter the Relic Repository.

Relic Repository

  • Examine the large suspended hourglass. Place the Medallion into the center of the hourglass to trigger a puzzle.
  • Rearrange the rays of light so that they all shine toward the inside of the hexagon. Click on the sections of the puzzle in the order shown in the screenshot below to complete it.
Lost Lands – The Golden Curse Hourglass Lightbeam Puzzle Solution

Lost Lands – The Golden Curse Hourglass Lightbeam Puzzle Solution

  • Upon completing the puzzle, collect the Stone Feathers 6/6
  • Return to the Ancient Graveyard.

Ancient Graveyard

  • Examine the winged statue on the right. Place the Stone Feathers 6/6 into the wings.
  • Take a closer look at the newly opened mausoleum Place the Stone Figurine at the base of the bricks into the slot on the left, and the Stone Figurine from your inventory into the slot on the right. Collect the Mask within to add it to your inventory.
  • Return to the Relic Repository.

Relic Repository

  • Examine the alcove at the top of the stairs. Place the Mask into the groove. This will reveal a hidden object area.
  • Complete the hidden object area to acquire a set of gloves which will allow you to touch the cursed gold!
  • Return to the Arena.

Arena

  • Examine the burnt mark on the ground on the left and collect the Cursed Harpy Coin.
  • Return to the Druid Village.

Druid Village

  • Enter the building straight ahead.

Elders’ House

  • Upon entering the house, speak with the Elder.
  • Morphing Object 13/35 is located at the top of the left wooden pillar.
Lost Lands – The Golden Curse Elders House Collectible Location

Lost Lands – The Golden Curse Elders House Collectible Location

  • Examine the table at the base of the pillar on the left. Collect the Nail Polish Remover (Collection Item 4/14).
  • Take a closer look at the throne ahead and collect the Oilcan propped up on the right.
  • Examine the book on the pedestal on the right side of the room. Click on the Manuscript 10/28 (A Century in the History of Lost Lands) and the Candle.
  • Tip: Before leaving, click on the rug on the floor to lift it. There’s a secret spot which requires a lever key you will come back to later.
  • Go to the Relic Repository.

Relic Repository

  • Examine the table at the bottom of the screen and use the Candle on the coals to light it, acquiring the Burning Candle.
  • Examine the alcove in the right wall, behind the tapestry. Place the Burning Candle in the dish, then collect the Powder Flask within the large sculpture. Click on the candle to push it into the sculpture, revealing the Human Figurine at the very top.
  • Return to the Forest.

Forest

  • Take a closer look at the portal on the left. Click on the floating disc and place the Human Figurine into the groove to trigger a puzzle.
  • Move the blocks so the one showing the little man lands on top. The solution is shown below.
Lost Lands – The Golden Curse Portal Puzzle Solution

Lost Lands – The Golden Curse Portal Puzzle Solution

Chapter 2: The Floating Islands

The portal to the Floating Islands has been opened! But the dangerous Harpy still lurks about. Can you progress without falling victim to this bird of prey?

Lower Island

  • Morphing Object 14/35 is located at the base of the tree on the left.
  • Figurine 10/24 is located just above the rock in the lower right corner.

Lower Island Collectibles Locations

  • Click on the Figurine lying in the grass to add it to your inventory.
  • Take a closer look at the tree on the left and collect the Manuscript 11/28 (The Great Metronome).
  • Take a closer look at the door propped up straight ahead. Use the Oilcan on the latch, then click to open it.
  • Tip: Examine the stone slab in the ground straight ahead and click on the leaves to clear them. You’ll be coming back here often later.
  • Examine the rope swing. Click on the rope to re-secure it, then click on the swing to swing it high, knocking loose an item.
  • Examine the area in front of the wooden cart on the right. Click on the Axe to add it to your inventory.
  • Make your way back to the Druid Village.

Druid Village

  • Examine the chopping block on the left. Chop the wood with the Axe, placing it back on the block once split. Do this until you’ve collected the Firewood and added it to your inventory.
  • Take a closer look at the upper portion of the fountain. Place the Figurine in the alcove, then break off the Windsock at the top to add it to your inventory.
  • Select the Windsock in your inventory and click on the end to tie it off, obtaining the Net.
  • Head back to the Lower Island.

Lower Island

  • Take a closer look through the door you opened straight ahead. Use the Net to acquire the Stamp hanging from the vines.
  • Head back to the Plains of the Dead.

Plains of the Dead

  • Examine the cannon on the left. Use the Powder Flask on the hole in the top.
  • Make your way back to the Volcanic Crater.

Volcanic Crater

  • Examine the statue from which lava flows on the right. Place the Stamp in the groove at the top to reveal a secret alcove. Collect the Manuscript 12/28 (Solidus) and the Core of Flames
  • Return to the Lower Island.

Lower Island

  • Examine the front of the wooden cart on the right. Place the Core of Flames into the hole in the ground, then click on the cart hatch to bury it.
  • Proceed across the door-turned-bridge to the next floating island.

Crossroads

  • Morphing Object 15/35 is hanging at the base of the wood post on the left.
Lost Lands – The Golden Curse Crossroads Collectible Location

Lost Lands – The Golden Curse Crossroads Collectible Location

  • Collect the Manuscript 13/28 lying on the grass, as well as the Broken Blades.
  • Examine the signpost straight ahead in the far distance. Click on the “Metronome” Tile sitting on top of the Anvil Peak sign to add it to your inventory, then collect the Tweezers (Collection Item 5/14) on the lower right.
  • Take a closer look at the house-like mailbox on the right. Click on the small door to open it, reading the letter inside, then click on the Rope to add it to your inventory.
  • Select the Rope from your inventory and combine it with the Nail Polish Remover. You will obtain the Alcohol-soaked Rope.
  • Go back to the Lower Island.

Lower Island

  • Place the “Metronome” Tile into the groove in the stone slab in the ground.
  • Make your way back to the Relic Repository.

Relic Repository

  • Examine the chest on the floor in the lower left corner. Use the Tweezers to remove the pin, then collect the Firecracker inside to add it to your inventory.
  • Head to the Plains of the Dead.

Plains of the Dead

  • Take a closer look at the cannon again and use the Alcohol-soaked Rope on the hole where you placed the powder earlier.
  • Next, examine the front of the cannon and place the Firecracker
  • Examine the round stone sitting in the grass straight ahead. Click on the rope to place it in the flaming crevice, igniting the fuse.
  • Once the cannon has fired, return to the Crossroads.

Crossroads

  • Examine the mailbox on the right again. Collect the Device Part inside to add it to your inventory.
  • Take a closer look at the door of the large metronome. Place the Device Part in the center of the door to trigger a puzzle.
  • Turn the circles to move the figurines. Place them in their correct spots as in the image. The solution is shown below.
Lost Lands – The Golden Curse Metronome Door Puzzle Solution

Lost Lands – The Golden Curse Metronome Door Puzzle Solution

  • Enter through the doorway to the next area.

Anvil Peak

  • Speak with the smith, Braeloff.
  • Figurine 11/24 is on the snowy slope above the bellows.
  • Morphing Object 16/35 is in the snow at the bottom of the screen, directly in front of you.
Lost Lands – The Golden Curse Anvil Peak Collectibles Locations

Lost Lands – The Golden Curse Anvil Peak Collectibles Locations

  • Give the Broken Blades to Braeloff. He’ll fix them, for a trade.
  • Examine the small shed straight ahead. Click on the Pole Hook propped up on the left to add it to your inventory.
  • Back in the main area, examine the bellows on the left. Click on the Manuscript 14/28 (The Water of Life) to collect it.
  • Take a closer look at the snowy mound on the right, clicking on it to shift away some of the snow. Tip: Note this location for later, as you’ll be coming back.
  • For now, return to Leproch’s Tomb.

Leproch’s Tomb

  • Use the Pole Hook on the large cluster of Coal on the upper left to collect it.
  • Return to Anvil Peak.

Anvil Peak

  • Give the Coal to Braeloff. In exchange, he’ll give you the fixed Blades.
  • Head back to the Crossroads.

Crossroads

  • Examine the device in the distance, to the right of the leftmost wooden beam. Use the Blades on the device, allowing you access to the next area.
  • Proceed forward to the next location.

Hanging Gardens

  • Figurine 12/24 is located to the right of the stream, toward the upper right hand corner.
  • Morphing Object 17/35 is to the immediate right of the pile of wood straight ahead, beneath the tree.
Lost Lands – The Golden Curse Hanging Garden Collectibles Locations

Lost Lands – The Golden Curse Hanging Garden Collectibles Locations

  • Click on the cave, the origin of the stream, to enter a hidden object area. Upon completing it, the Mother Figurine will be added to your inventory.
  • Take a closer look at the green plant at the base of the tree on the far left. Click on the Young Rose Bush to add it to your inventory.
  • Examine the large wooden ballista. Click on the lever to ready it, then place each of the arrow shafts into the mechanism. Click on the string to release it, creating a bridge to the next floating island.
  • Proceed across the bridge to the next location.

Island of Exile

  • Speak with Fiora, who’s locked in the cage on the right. She will give you the Harpy Claw.
  • Morphing Object 18/35 is above the cage on the right.
Lost Lands – The Golden Curse Island of Exile Collectible Location

Lost Lands – The Golden Curse Island of Exile Collectible Location

  • Examine the mechanism next to the cage. Click on the Manuscript 15/28 (The Harpy), then take a closer look at the Harpy Claw in your inventory. Click on the Shoelace to remove it from the Harpy Claw.
  • Head forward to the next area.

Harpy’s Nest

  • Figurine 13/24 is just above the second step down, on the side of the floating island.
  • Morphing Object 19/35 is beneath the gnarled tree straight ahead.
Lost Lands – The Golden Curse Harpys Nest Collectibles Locations

Lost Lands – The Golden Curse Harpys Nest Collectibles Locations

  • Examine the gnarled tree straight ahead. Click on the Fish Hook beneath the mirror to add it to your inventory.
  • Take a closer look at the brambles on the left side of the island. Use the Harpy Claw on the scratch marks, then collect the Lemon from the receded brambles.
  • Click on the topmost sections of the stone pillar on the right until each section has been removed, revealing the Manuscript 16/28 (The Cube) and the “Tower” Tile.
  • Select the Lemon in your inventory and use the Knife to cut it. You will obtain Half a Lemon.
  • Go back to the Island of Exile.

Island of Exile

  • Take a closer look at the underside of the suspended box. Use Half a Lemon to acquire the Gear.
  • Examine the mechanism next to the cage again and use the Gear on it. Click to lower the cube to the ground.
  • Tip: Head back to the Lower Island.

Lower Island

  • Examine the stone slab in the ground again and place the “Tower” Tile in its correct location.
  • Go to Anvil Peak.

Anvil Peak

  • Speak with Braeloff.
  • Return to the Druid Village.

Druid Village

  • Open the door to the house on the right and proceed inside.

Tavern

  • Figurine 14/24 is beneath the weighing bench on the left.
  • Morphing Object 20/35 is against the counter, just above the fallen stools.
Lost Lands – The Golden Curse Tavern Collectibles Locations

Lost Lands – The Golden Curse Tavern Collectibles Locations

  • Take a closer look at the hole in the floor toward the lower left. Click on the Manuscript 17/28 (The Druids’ Curse), then clear away the boards and collect the Scraper.
  • Examine the fallen basic toward the left end of the room. Click on the Wet Bowl to add it to your inventory. Before leaving, open the crate and collect the Wrench inside, as well as clicking to remove the boards in the barrel on the left, collecting the Fan.
  • Take a closer look at the large barrel at the far end of the room. Click on the Fishing Rod to add it to your inventory.
  • Select the Fishing Rod in your inventory and click on the reel. Use the Fish Hook on it to re-obtain the completed Fishing Rod.
  • Examine the coal pit in the middle of the room. Place the Firewood in the pit and use the Fan to stoke it. Place the Wet Bowl on the stand to dry it, then once dry, click to remove it again.
  • Return to the Forest for now.

Forest

  • It’s finally time to take care of that camera that fell earlier. Take a closer look at the cliff edge ahead. Use the Fishing Rod to obtain the photograph and the Camera (Collection Item 6/14).
  • Head back to the Ancient Graveyard.

Ancient Graveyard

  • Examine the base of the first statue on the left. Place the Young Rose Bush into the hole in the ground, then exit for now.
  • Examine the second statue on the left. Use the Scraper to remove the excess paint, resulting in the Dye Set being added to your inventory.
  • Head back to Leproch’s House.

Leproch’s House

  • Examine the paint bench toward the right side of the house, behind the bed. Use the Dye Set on the flasks at the top of the screen. Next, use the Wrench to loosen the two large flasks on the right. Click on the Flask for Black Paint and Flask for White Paint to add them to your inventory.
  • Head back to the Lower Island.

Lower Island

  • Take a closer look at the front of the wooden cart on the right. Use the Flask for White Paint on the chalk to obtain the Flask of Chalk Dust. Before exiting the closeup, don’t forget to collect the unveiled Lever.
  • Go to the Elders’ House.

Elders’ House

  • Examine the floor beneath the green rug. Use the Lever on the slots, then click to open the wooden hatch. Collect the Metal Brush
  • Go to the Tavern.

Tavern

  • Examine the large bowl sitting on the floor. Place the Flask for Black Paint in front of it, then use the Metal Brush on the bowl to obtain the Flask of Soot.
  • Before exiting the closeup, use the Camera to take a photo of the dancing man etched into the side of the bowl. The Photo of Little Man will be added to your inventory.
  • Return to the Island of Exile.

Island of Exile

  • Take a closer look at the large hanging puppet in the upper left corner. Place the Photo of Little Man above the mannequin to trigger a puzzle.
  • Place the marionette as shown in the photo. The solution is shown below.
Lost Lands – The Golden Curse Marionette Puzzle Solution

Lost Lands – The Golden Curse Marionette Puzzle Solution

  • Upon completing the puzzle, collect the Metal Wing from the marionette’s chest.
  • Return to the Relic Repository.

Relic Repository

  • Examine the mechanical bird hanging above the staircase. Use the Metal Wing on the bird, then click on the key and chain to wind it up. You will acquire the Key.
  • Take a closer look at the glass display case to the left of the stairs. Use the Key on the slot to open it, then click on the Stone Slab inside to add it to your inventory.
  • Go to the Hills again.

Hills

  • Examine the well on the right. Place the Stone Slab into the slot on the side of the well, triggering a cutscene.
  • Head down to the next location.

Chapter 3: Exploring Underground

With the Floating Islands explored, now it’s time to delve underground. What challenges await you in the dark?


Cave

  • Figurine 15/24 is to the left of the statue on the right.
  • Morphing Object 21/35 is on the rock wall straight ahead.
Lost Lands – The Golden Curse Cave Collectibles Locations

Lost Lands – The Golden Curse Cave Collectibles Locations

  • Examine the book sitting on the stone in front of the cave exit on the left. Click on the Manuscript 18/28 (Naga).
  • Take a closer look at the stone basin straight ahead. Click on the Step 1/4 to add it to your inventory.
  • Exit into the light to reach the next area.

Underground Oasis

  • Figurine 16/24 is in front of the two rocks on the right.
  • Morphing Object 22/35 is in the tree on the upper left.
Lost Lands – The Golden Curse Underground Oasis Collectibles Locations

Lost Lands – The Golden Curse Underground Oasis Collectibles Locations

  • Take a closer look at the door on the left. Click on the Doll to add it to your inventory.
  • Select the Doll in your inventory. Pull the Pedal-Key from the front pocket to add it to your inventory, in addition to Fiora’s Doll being added back.
  • Examine the waterfall ahead. Use the Knife to cut the Sunflowers and add them to your inventory.
  • Take a closer look at the base of the large column on the right. Click on the Manuscript 19/28 (The Tree of Life) to collect it.
  • Before leaving the closeup, use the Wrench to loosen the column, causing it to fall and reveal a hidden object area.
  • Enter the hidden object area at the top of the column. Upon completing it, the Blessed Water will be added to your inventory.
  • Examine the door on the left again. Use the Pedal-Key to open the door, then proceed inside to the next area.

Fisherman’s Hut

  • Speak with Sandra, the owner of the home. She will give you the Magic Hammer.
  • Morphing Object 23/35 is located on the left, between the tree and the fallen beam.
Lost Lands – The Golden Curse Fishermans Hut Collectible Location

Lost Lands – The Golden Curse Fishermans Hut Collectible Location

  • Take a closer look at the hearth at the back of the hut and collect the Flask for Sunflower Oil.
  • Examine the table on the right. Collect the Manuscript 20/28 (Sandra’s Memoirs) and the Step 2/4 beneath it.
  • Exit the hut and proceed to the Tree of Life.

Tree of Life

  • Morphing Object 24/35 is located at the center base of the tree.
Lost Lands – The Golden Curse Tree of Life Collectible Location

Lost Lands – The Golden Curse Tree of Life Collectible Location

  • Pick up the large stone blocks labeled 1, 2, and 3 and place them to the right of the tree.
  • Examine the inside of the tree house Collect the Silk Headscarf (Collectible Item 7/14) and the Step 3/4 to add them to your inventory. Use the Silk Headscarf to clear the cobwebs.
  • Back in the main view, click on the tree house to knock it down.
  • Examine the glowing pole on the left. Place the Mother Figurine on the left side.
  • Examine the inside of the fallen tree house Click on the owl inside twice to trigger a puzzle.
  • Find identical feathers on the left and right wings. The solution is shown below.
Lost Lands – The Golden Curse Feather Matching Puzzle Solution

Lost Lands – The Golden Curse Feather Matching Puzzle Solution

  • Upon completing the puzzle, examine the inside of the tree house again. The owl has vacated the hollow. Tip: You will be returning here later.
  • For now, make your way back to the Ancient Graveyard.

Ancient Graveyard

  • Examine the foot of the statue on the left. Use the Blessed Water on the rosebush, then click on the resulting rose that blooms. The statue will bow. Zoom in once more and collect the Rose Petals.
  • Take a closer look at the bowed statue and collect the Button within his hat.
  • Return to Leproch’s House.

Leproch’s House

  • Examine the painting bench beyond the bed. Place the Flask of Soot and the Flask of Chalk Dust back onto their stands.
  • Make your way back to the Tavern.

Tavern

  • Examine the bar on the right. Place the Flask for Sunflower Oil beneath the spigot. Use the Sunflowers on the churn and the press to squeeze them out. The resulting Sunflower Oil will be added to your inventory.
  • Head to Anvil Peak.

Anvil Peak

  • Take a closer look at the anvil on the upper left. Collect the Shovel and read the note with instructions left behind.
  • Examine the bellows. Click on them a few times to stoke the coals, then take a closer look at the coals. Place the Cursed Harpy Coin into the form to melt it down.
  • Make your way to the Hanging Gardens.

Hanging Gardens

  • Examine the dirt to the right of the stream. Use the Shovel to unearth the “Ballista” Tile and add it to your inventory. Collect the remaining pile of Clay as well.
  • Select the Clay in your inventory. Click on it to roll it into a ball, then use the Harpy Claw to create the Clay Form.
  • Go to the Island of Exile.

Island of Exile

  • Give Fiora’s Doll to Fiora, who’s still locked in the cage. You will get the Blacksmith’s Pincers.
  • Return to the Lower Island.

Lower Island

  • Examine the stone slab in the ground and place the “Ballista” Tile in its respective slot.
  • Proceed to Anvil Peak.

Anvil Peak

  • Examine the coals on the left. Place the Clay Form on the edge of the coals. Click on the wire to the immediate left of it to create a handle. Click on the form to place it on the coals, then click on the melted gold to pour it into the form. Use the Blacksmith’s Pincers to retrieve the Nipper with a Cast.
  • Back in the main area, examine the small snowbank on the right. Use the Nipper with a Cast to melt the ice. Once melted, collect the Pliers, and use the Hammer to break the cast, resulting in the Golden Claw Casting.
  • Select the Golden Claw Casting in your inventory and use the Pliers to remove the wire. The Golden Claw Casting will be added back to your inventory.
  • Examine the chest. Place the Button into the slot to trigger a puzzle.
  • Play the melody by pressing the buttons in the correct order. The solution is as follows: 5, 3, 7, 2, 4, 6, 1.
  • When the chest opens, collect the “Anvil” Tile and the Snow Shoes.
  • Examine the anvil on the upper left. Place the Golden Claw Casting on the anvil, then use the Magic Hammer on it. Click to obtain the Golden Claw. Select it once again in your inventory and use the Shoelace on it. You will receive the Golden Harpy Claw.
  • Go back to the Lower Island.

Lower Island

  • Examine the stone slab in the ground and place the “Anvil” Tile in its respective location.
  • Go to the Leproch’s House.

Leproch’s House

  • Examine the painting bench and pour the Sunflower Oil into the black and white paint jars. This will trigger a puzzle.
  • Make the paints you need by mixing the ones you have. The solution is as follows:
    • Blue: Blue + Blue
    • Purple: Blue + Red
    • Light Blue: Blue + White
    • Green: Blue + Yellow
    • Red: Red + Red
    • Orange: Red + Yellow
    • Dark Red: Red + Black
    • Yellow: Yellow + Yellow
    • Black: Black + Black
    • White: White + White
  • Upon completing the puzzle, you will receive the Paint Set.
  • Before exiting the closeup, use the Golden Harpy Claw on the black paint to obtain the Fake Harpy Claw.
  • Make your way back to the Volcanic Crater.

Volcanic Crater

  • Examine the lava. Use the Snow Shoes to cross it. After the cutscene, take a closer look at the lava again. Collect the Package of Nylons (Collectible Item 8/14) and the Step 4/4.
  • Select the Package of Nylons from your inventory and unwrap them to obtain the Nylon Stockings.
  • Head back to the Ancient Graveyard.

Ancient Graveyard

  • Examine the dwarven statue on the far left. Use the Paint Set You will require one more component before you can trigger the puzzle.
  • For now, go back to the Fisherman’s Hut.

Fisherman’s Hut

  • Use the Step 4/4 on the fallen beam. A hidden object area will appear up in the rafters. Complete it to obtain the Mechanical Eye (2).
  • Go to the Arena Entrance.

Arena Entrance

  • Examine the doorway on the upper left. Take a closer look at the iron maiden, then place the Mechanical Eye x2 into the eye slots.
  • Head back to the Island of Exile.

Island of Exile

  • Use the Fake Harpy Claw on the Harpy taunting Fiora, then watch the cutscene that follows.
  • Speak with Fiora, then take a closer look inside the cage. Collect the Paper Clip (Collectible Item 9/14) at the base of the pump.
  • Select the Paper Clip in your inventory and click on it until you acquire the Unbent Paper Clip.
  • Return to Leproch’s House.

Leproch’s House

  • Examine the locker on the other end of the room. Use the Unbent Paper Clip to pick the lock. Collect the Fire Hose and the Flint Stone
  • Go back to the Island of Exile.

Island of Exile

  • Take a closer look at the pump again. Use the Fire Hose here, then click to unroll it. Back in the view of the main area, click on it again to throw it up over the box.
  • Examine the box itself and click on the end of the hose to place it into the hole in the top.
  • Look at the pump again and click on the handle to use it. Examine the top of the box once more. Click on the Brush (Collection Item 10/14) floating near the hole in the top to add it to your inventory.
  • Return to the Ancient Graveyard.

Ancient Graveyard

  • Take a closer look at the dwarf statue again and use the Brush to trigger a puzzle.
  • Paint all parts of the statue the right color. The solution is shown below.
Lost Lands – The Golden Curse Statue Painting Puzzle Solution

Lost Lands – The Golden Curse Statue Painting Puzzle Solution

  • Once finished, the statue will spread its arms. Collect the TNT from the cavity in the statue’s chest.
  • Return to the Island of Exile.

Island of Exile

  • Examine the large box again. Use the TNT on it.
  • Take a look at the green fuse lying on the ground. Use the Flint Stone and the Knife to light it.
  • Run back to the Hanging Gardens, quickly!

Hanging Gardens

  • After the explosion, proceed forward back to the Island of Exile.

Island of Exile

  • Examine the remains of the large box. Collect Maaron’s Staff inside to add it to your inventory.
  • Return to the Elders’ House.

Elders’ House

  • Give Maaron’s Staff to Maaron. You will receive the Dragon Figurine.
  • Make your way back to the Cave.

Cave

  • Examine the circular plate in the wall ahead. Use the Dragon Figurine here to trigger a puzzle.
  • Rotate the discs so that all the beams are lit. The solution is shown below.
Lost Lands – The Golden Curse Dragon Disk Puzzle Solution

Lost Lands – The Golden Curse Dragon Disk Puzzle Solution

  • Once finished, enter through the new doorway to the next area.

Underground Lake

  • Figurine 17/24 is at the bow of the schooner toward the upper right corner of the screen.
  • Morphing Object 25/35 is at the center on top of the stone ruins on the upper left.
Lost Lands – The Golden Curse Underground Lake Collectibles Locations

Lost Lands – The Golden Curse Underground Lake Collectibles Locations

  • Click on the wreckage immediately in front of you to enter a hidden object area. Upon completing it, the Cauldron will be added to your inventory.
  • Enter the Schooner Wreckage toward the upper right corner.

Schooner Wreckage

  • Figurine 18/24 is beneath the gangplank at the bottom of the screen.
  • Morphing Object 26/35 is in the water to the left of the ship’s bow.
Lost Lands – The Golden Curse Schooner Wreckage Collectibles Locations

Lost Lands – The Golden Curse Schooner Wreckage Collectibles Locations

  • Examine the ropes in the lower right corner. Use the Knife to cut them and note the signs revealed.
  • Take a closer look at the bottom of the mast. Click on the rope to secure it, then take a closer look at the wheel on the left. Click on it to tighten the rope, bringing down the mast.
  • Collect the Steering Wheel on the left, then examine the base of the mast again. Note the puzzle tube here for later.
  • Take a closer look at the broken door in the wreckage. Click to collect the Door, as well as Manuscript 21/28 (Chain-mail Fish) beneath it.
  • Back in the main view of the area, use the Door to bridge the gap to the wreckage on the right. Zoom in for a closer look. Click on the Long Log to add it to your inventory, and the grating to open it.
  • Examine the winch on the deck. Use the Steering Wheel on the side.
  • Backtrack to the Underground Oasis.

Underground Oasis

  • Take a closer look at the waterfall in the distance. Use the Cauldron here to obtain the Cauldron of Water.
  • Enter the Fisherman’s Hut.

Fisherman’s Hut

  • Examine the stove at the back of the hut. Place the Cauldron of Water on top of it.
  • Return to the Arena.

Arena

  • Examine the ruins straight ahead and collect the Gold Mask. Look at the steps on the right to collect the Cursed Minotaur Amulet and the soot pile to the left of the stone pillar on the left to collect Solidus’s Cursed Knuckles.
  • Exit to the Arena Entrance.

Arena Entrance

  • Zoom in on the doorway on the upper left and take a closer look at the iron maiden. Place the Gold Mask over the face to open the compartment. Collect the Stacking Toy and Tile-key inside to add them to your inventory.
  • Go to the Cave.

Cave

  • Examine the base of the statue on the right. Use Solidus’s Cursed Knuckles on the holes in the stone, then click to turn it, restoring the flow of water from here.
  • Enter the Underground Lake.

Underground Lake

  • Take a closer look at the small stone column on the left. Use the Tile-key to open the side compartment. Collect the Glue Formula
  • Place the Stacking Toy in the compartment to trigger a cutscene in which Naga will steal the artifact.
  • Return to the Fisherman’s Hut.

Fisherman’s Hut

  • Speak with Sandra. She will give you the Scissors (Collectible Item 11/14).
  • Zoom in on the stove at the back of the room again. Place the Glue Formula page back into the book and note the ingredients.
  • Head for the Hills.

Hills

  • Zoom in on each of the three nearest horses and use the Scissors on each to acquire the Horse’s Mane 3/3.
  • Go back to the Fisherman’s Hut.

Fisherman’s Hut

  • Give the Horse’s Mane 3/3 to Sandra. Now there’s just one more ingredient left to find.
  • Go to the Hanging Gardens.

Hanging Gardens

  • Use the Long Log to bridge the gap to the tree straight ahead, then take a closer look. Use the Knife to acquire the Corkwood Bark.
  • Tip: Note the design etched into the tree. It will come in handy later.
  • Make your way back to the Fisherman’s Hut.

Fisherman’s Hut

  • Give the Corkwood Bark to Sandra. She will give you the Axis Pin.
  • Go outside.

Underground Oasis

  • Examine the small mill straight ahead. Click to remove the Broken Millstone Disk, then collect the Wooden Boards Place the Gold Mask into the mill, then exit for now.
  • Take a closer look at the ladder to the left of the mill. Use the Axis Pin to secure the top.
  • Zoom in on the top of the ladder once propped up against the house. Remove the fronds and collect the Flask.
  • Select the Wooden Boards in your inventory, followed by the Nylon Stockings. Use the Knife to cut them, then click to create the Homemade Lever.
  • Select the Flask in your inventory. Click to unfold the paper on the side. Read it, then add the Flask for Elixir back to your inventory.
  • Return to the Schooner Wreckage.

Schooner Wreckage

  • Examine the open grate on the right. Use the Flask for Elixir here to acquire the Flask of Lake Water.
  • Go to the Cave.

Cave

  • Place the Flask of Lake Water on the stand to the right of the leftmost statue. You will obtain the Potion Flask.
  • Go to the Plains of the Dead.

Plains of the Dead

  • Take a closer look at the chariot wreckage. Use the Homemade Lever to remove the Hook’s Blade from the wheel and add it to your inventory.
  • Select the Hook’s Blade in your inventory and use the Hammer to acquire the Hook.
  • Go to the Arena Entrance.

Arena Entrance

  • Examine the weapons rack on the left. Place the Hook on top of the remaining pole to obtain the Pole Hook.
  • Go down to the Volcanic Crater.

Volcanic Crater

  • Examine the equipment in the distance straight ahead. Use the Pole Hook to retrieve the Glove and the Piece of a Globe hanging above you and add it to your inventory.
  • Go to the Elders’ House.

Elders’ House

  • Examine the glowing alcove in the right pillar. Place the Potion Flask here to acquire the Elixir of Waterbreathing.
  • Head to Anvil Peak.

Anvil Peak

  • Give the Broken Millstone Disk to Braeloff. He will give you the Chisel.
  • Go back to the Plains of the Dead.

Plains of the Dead

  • Take a closer look at the horse skeleton on the lower right. Use the Chisel and Hammer to remove the Horseshoe and add it to your inventory.
  • Go to the Schooner Wreckage.

Schooner Wreckage

  • Examine the open grate on the right again. Use the Elixir of Waterbreathing here to enter the water to the next location.

Sunken Hull

  • Figurine 19/24 is on the upper left, near the floating barrel.
  • Morphing Object 27/35 is on the far right, next to the globe.
Lost Lands – The Golden Curse Sunken Hull Collectibles Locations

Lost Lands – The Golden Curse Sunken Hull Collectibles Locations

  • Zoom in on the globe on the right. Click on the top to open it, then place the Piece of a Globe Click on the top to close it once again and select the globe to trigger a puzzle.
  • Rotate the disks to restore the map. The solution is shown below.
Lost Lands – The Golden Curse Globe Disk Rotation Puzzle Solution

Lost Lands – The Golden Curse Globe Disk Rotation Puzzle Solution

  • Take a closer look at the inside of the globe once the puzzle is complete. Click on the Energy Ball to add it to your inventory.
  • Look at the skeleton straight ahead. Collect the Manuscript 22/28 (Paralyzing Cones) and the Pirate Hook
  • Examine the chest on the left. Use the Pirate Hook to open the lock, then collect the Bottle with a Letter that floats out and to the top of your screen.
  • Look at the triangular net straight ahead. Click to open it, then collect the Fish
  • Go back to the Fisherman’s Hut.

Fisherman’s Hut

  • Upon entering the hut, Sandra will give you the Fishing Net.
  • Examine the table on the right. Place the Fish on the table, then use the Knife to remove the Fish Scales and add them to your inventory.
  • Take a look at the stove at the back of the room again. Place the Fish Scales into the cauldron, then click on the ladle to mix it all. Use the Fishing Net on the cauldron full of glue to obtain the Glue-covered Net.
  • Head to Anvil Peak.

Anvil Peak

  • Examine the stone obelisk ahead and a little to the right. Use the Horseshoe here to obtain the Magnetized Horseshoe.
  • Select the Magnetized Horseshoe in your inventory and combine it with the Glove to acquire the Enchanted Horseshoe with Glove.
  • Head to the Volcanic Crater.

Volcanic Crater

  • Zoom in on the lava. Use the Enchanted Horseshoe with Glove to catch the Chain-mail Fish.
  • Head back to Anvil Peak.

Anvil Peak

  • Give the Chain-mail Fish to Braeloff to acquire the Fixed Millstone Disk.
  • Go to the Underground Oasis.

Underground Oasis

  • Take a closer look at the small mill straight ahead. Place the Fixed Millstone Disk into the mill and click it to grind the gold. Use the Glue-covered Net on the resulting gold dust to acquire the Cursed Net.
  • Now it’s time to take care of Naga once and for all. Return to the Underground Lake.

Underground Lake

  • Use the Cursed Net on Naga, who is located ahead and to the left of the wreckage.
  • After the cutscene, enter the Schooner Wreckage.

Schooner Wreckage

  • Click on the hooks attached to the rope and crank on the deck to throw them out into the water. Click on the crank again to reel Naga in.
  • Zoom in on the cursed net and click to remove the hooks. Use the Knife to cut the net and the Hammer to break the artifact out of Naga’s hand. Click to reacquire the Stacking Toy.
  • Go back to the Underground Lake.

Underground Lake

  • Examine the small stone column on the left again. Place the Stacking Toy into the compartment to trigger a puzzle.
  • Move the disks one by one from the central rod to a rod on the side. You can’t place a bigger on on top of a smaller one. The goal is to move all the disks onto the rod on the right. The solution is shown below.
Lost Lands – The Golden Curse Stacking Toy Puzzle Solution

Lost Lands – The Golden Curse Stacking Toy Puzzle Solution

  • Examine the boat that appears toward the left. Collect the Key Part Click to align the oar and click again to remove the chains from the horns at the front of the boat.
  • Proceed forward to the next area.

Castle of Madness

  • Figurine 20/24 is beneath the drainage pipe on the right.
  • Morphing Object 28/35 is in the upper left corner beneath the large arch.
Lost Lands – The Golden Curse Castle of Madness Collectibles Locations

Lost Lands – The Golden Curse Castle of Madness Collectibles Locations

  • Click on the Wood Saw lying on the ground to add it to your inventory.
  • Examine the swirling basin to the left of the steps. Click on the Stone Tile to add it to your inventory, then place the Energy Ball into the stand.
  • Examine the swirling basin to the right of the steps. Collect Manuscript 23/28 (The Castle of Madness).
  • Return to the Lower Island.

Lower Island

  • Take a closer look at the tree on the left. Use the Wood Saw to cut it, then click on the wood piece to obtain the “Wood-network” Tile.
  • Examine the stone slab on the ground and place the “Wood-network” Tile in its respective location.
  • Head to the Harpy’s Nest.

Harpy’s Nest

  • Examine the glowing blue alcove at the base of the steps. Insert the Stone Tile into the slot. Collect the Key Part (2) inside, and click the lever on the left.
  • Enter the hidden object area that appears in the center of the Harpy’s Nest. Upon completing it, the Energy Ball will be added to your inventory.
  • Select the Key Part (1) in your inventory and combine it with the other Key Part (2) to obtain the Key.
  • Go to the Arena Entrance.

Arena Entrance

  • Examine the doorway on the upper left and take a closer look at the iron maiden. Use the Key to open it and collect Atlas’s Arm
  • Select Atlas’s Arm in your inventory and click to collect the Key. Atlas’s Arm will be re-added to your inventory as well.
  • Head back to the Schooner Wreckage.

Schooner Wreckage

  • Examine the box beneath the fallen mast. Use the Key to open the box, then collect Atlas’s Arm (2)
  • Select Atlas’s Arm in your inventory. Click to collect the Diamond Key from its hand. Atlas’s Arm will be re-added to your inventory.
  • Go to the Castle of Madness.

Castle of Madness

  • Take a closer look at the swirling basin on the right. Place the Energy Ball into the basin, then examine the stone steps to trigger a puzzle.
  • Move the steps to connect the first to the last. Move a step by clicking on it. The solution is shown below.
Lost Lands – The Golden Curse Castle of Madness Steps Puzzle Solution

Lost Lands – The Golden Curse Castle of Madness Steps Puzzle Solution

  • Zoom in on the door straight ahead. Place each of Atlas’s Arms x2 onto the statues to open the door.
  • Enter the Castle of Madness.


Chapter 4: The Castle of Madness

With Naga and the Harpy defeated, now only two villains remain. Can you outwit the Minotaur as you enter the Castle of Madness?


Labyrinth

  • Morphing Object 29/35 is located in the lower right corner next to the steps.
Lost Lands – The Golden Curse Labyrinth Collectible Location

Lost Lands – The Golden Curse Labyrinth Collectible Location

  • Click on the Piece of Pattern on the floor toward the left.
  • Examine the ornate alcove above the steps on the right. Place the Piece of Pattern into the slot, then take a closer look at the pedestal above. Click on the Lipstick (Collection Item 12/14) to add it to your inventory. Place the Diamond Key into the slot.
  • Back in the view of the main area, click on the Manuscript 24/28 (The Order of Madmen) on the steps on the upper right to collect it.
  • Examine the large pendulum on the left. Click on the stone jutting out from the wall to activate a switch, revealing steps to the alcove on the upper left. Before exiting the close-up, collect the Everlasting Match from the top of the pyramid on the left.
  • Open the panel in the pendulum. Open the second compartment inside and collect the Ink Formula.
  • Proceed through the door at the far end of the room into the next location.

Room of Riddles

  • Morphing Object 30/35 is above the archway straight ahead.
Lost Lands – The Golden Curse Room of Riddles Collectible Location

Lost Lands – The Golden Curse Room of Riddles Collectible Location

  • Pick up the Sunglasses (Collection Item 13/14) sitting on the rock on the lower right.
  • Examine the pedestal on the left. Click on the Lens to add it to your inventory and place the Everlasting Match inside the vase.
  • Examine the pedestal on the right to trigger a puzzle.
  • Enter the correct code. You saw a hint earlier. The solution is shown below.
Lost Lands – The Golden Curse Room of Riddles Rotation Puzzle Solution

Lost Lands – The Golden Curse Room of Riddles Rotation Puzzle Solution

  • Upon completing the puzzle, place the Lens into the center slot.
  • Examine the glass surface straight ahead. Use the Lipstick on it to trigger another puzzle.
  • Connect the dots in the correct order. The solution is shown below.
Lost Lands – The Golden Curse Connect the Dots Puzzle Solution

Lost Lands – The Golden Curse Connect the Dots Puzzle Solution

  • Once the puzzle is finished, examine the wall behind it. Click on the brick where the snail’s shell swirl ends to open a passage to a new room.

Room of Insanity

  • Figurine 21/24 is behind the rubble in the lower right corner.
  • Morphing Object 31/35 is at the beginning of the stone steps leading across, just behind the stone block.
Lost Lands – The Golden Curse Room of Insanity Collectibles Locations

Lost Lands – The Golden Curse Room of Insanity Collectibles Locations

  • Click on the Stone Block and the Spoon lying on the floor to add them to your inventory.
  • Examine the pedestal. Click on Manuscript 25/28 (Ruined Temple) to collect it.
  • Make your way back to the Tree of Life.

Tree of Life

  • Place the Stone Block on top of the pile on the right, then take a closer look at the top of it. Click on the Egg inside the nest to add it to your inventory.
  • Return to the Castle of Madness.

Castle of Madness

  • Examine the hot spring on the lower right. Place the Egg in the water to cook it, then use the Spoon to fish out the Boiled Egg.
  • Select the Boiled Egg in your inventory and click on it to remove the shell. The shell-less Boiled Egg will be added to your inventory again.
  • Go to the Room of Riddles.

Room of Riddles

  • Examine the pedestal on the left. Place the Boiled Egg into the glass vase and collect the Crystal Pyramid.
  • Enter the Room of Insanity.

Room of Insanity

  • Examine the pyramid at the top of the large wheel structure at the other end of the room. Place the Crystal Pyramid at the top, then place the Cursed Minotaur Amulet into the slot on the lower right. Collect the Hand Wheel Key that appears.
  • Take a closer look at the vault door on the other end of the room. Use the Hand Wheel Key on the peg on the right, then click to open the door and proceed inside.

The Safe

  • Speak with Yudzhit, the Goldsmith. He will give you the Diamonds and Grains.
  • Morphing Object 32/35 is located on top of the head of the large statue on the left.
Lost Lands – The Golden Curse The Safe Collectible Location

Lost Lands – The Golden Curse The Safe Collectible Location

  • Pick up the Bottle of Cologne (Collection Item 14/14) at the base of the steps.
  • Take a look at the chest at the base of the steps. Pick up the Piece of the Statue lying on top of it.
  • Examine the second tier of steps straight ahead. Read the sign to trigger a puzzle.
  • Move the steps according to their value, from cheapest to most expensive. Click on the steps in the number sequence shown below to solve the puzzle.
Lost Lands – The Golden Curse Step Sequence Puzzle Solution

Lost Lands – The Golden Curse Step Sequence Puzzle Solution

  • Upon completing the puzzle, click on the hidden object area that appears. Upon completing it, the Empty Cartridge will be added to your inventory.
  • Select the Empty Cartridge in your inventory and open it. Exit the close-up for now.
  • Examine the bellows on the steps. Click on the bellows to remove them.
  • Zoom in on the top of the large horn statue. Collect the Manuscript 26/28 (The Minotaur).
  • Go back to the Cave.

Cave

  • Zoom in on the statue on the left. Place the Piece of the Statue into the statue’s face.
  • Return to the Fisherman’s Hut.

Fisherman’s Hut

  • Examine the bird cage hanging on the left. Place the Diamonds and Grains into the slot. Click on the drawer to allow the bird to feed. Once finished, collect the remaining Diamonds to add them to your inventory.
  • Go to the Tavern.

Tavern

  • Examine the table on the left. Place the Ink Formula here, along with the Bottle of Cologne.
  • Go to Anvil Peak.

Anvil Peak

  • Speak with Braeloff. He will give you the Metal Saw.
  • Give the Sunglasses to Braeloff, then go to the Island of Exile.

Island of Exile

  • Take a closer look at the large circular metal grate in the ground. Use the Metal Saw to cut it open. Collect the “Cube” Tile and Key around the skeleton’s neck to add them to your inventory.
  • Go to the Lower Island.

Lower Island

  • Examine the stone slab in the ground and place the “Cube” Tile into its respective location.
  • Head back to the Underground Lake.

Underground Lake

  • Examine the inside of the boat toward the left. Use the Key on the small compartment at the far bottom end of the boat. Collect the Corkscrew and the Leather Roll inside to add them to your inventory.
  • Select the Bottle with a Letter in your inventory and use the Corkscrew to remove the cork. You will acquire the Empty Bottle and the Note.
  • Return to The Safe.

The Safe

  • Give the Diamonds to the Goldsmith.
  • Return to the Tavern.

Tavern

  • Examine the barrel at the far end of the room. Place the Empty Bottle beneath the spigot and turn the handle to collect the Bottle of Wine.
  • Examine the weight table on the left and place the Bottle of Wine
  • Head to Anvil Peak.

Anvil Peak

  • Give the Leather Roll to Braeloff. He will give you the Sliding Bolt Key.
  • Take a closer look at the bellows. Use the Sliding Bolt Key to remove the lock, then collect the Bellows.
  • Go to the Hanging Gardens.

Hanging Gardens

  • Take a closer look at the tree straight ahead. Pin the Note to the right side of the tree to reveal the secret pattern.
  • Head to the Schooner Wreckage.

Schooner Wreckage

  • Take a closer look at the red tube beneath the fallen mast to trigger a puzzle.
  • Enter the correct code. You saw a hint earlier. The solution is shown below.
Lost Lands – The Golden Curse Schooner Tube Code Puzzle Solution

Lost Lands – The Golden Curse Schooner Tube Code Puzzle Solution

  • Upon completing the puzzle, open the tube and collect the Tracing Paper
  • Return to The Safe.

The Safe

  • Take a closer look at the bottom of the large horn sculpture on the right. Place the Bellows
  • Go to Leproch’s House.

Leproch’s House

  • Examine the painting bench on the far end of the room. Pick up the Flask of Black Paint.
  • Head back to the Tavern.

Tavern

  • Examine the weighing table on the left. Place the Flask of Black Paint on the table to trigger a puzzle.
  • Follow the recipe and measure out the required quantity of ingredients. The solution is as follows:
    • Black Oil Paint: 8-unit weight on the left scale, black paint cup and 5-unit weight on the right scale
    • Strong Red Wine: 5-unit weight on the left scale, red wine cup and 1-unit weight on the right scale
    • Solvent: 1-unit weight (x2) on the left scale, pink solvent cup on the right scale
  • Upon completing the puzzle, the Ink Ingredients will be added to your inventory.
  • Select the Empty Cartridge in your inventory and open it. Combine with the Ink Ingredients to obtain the Cartridge.
  • Make your way back to the Labyrinth.

Labyrinth

  • Examine the pendulum on the left. Place the Cartridge inside and collect the resulting Key. Place the Key into the slot in front of the pendulum to release it.
  • As the pendulum swings, place the Tracing Paper on the floor. Once finished, collect the Tracing Paper once again.
  • Go to the Volcanic Cavern.

Volcanic Cavern

  • Examine the design on the left wall of the cavern. Place the Tracing Paper over it. The pattern will be noted in your Journal.
  • Examine the box straight ahead. Click on the lock to trigger a puzzle.
  • Press the buttons in the correct order. You saw the code earlier. The code is: 3, 6, 9, 12, 15, 18, 21, 24.
  • Upon completing the puzzle, click on the Air Element inside the chest to add it to your inventory.
  • Go to the Room of Insanity.

Room of Insanity

  • Examine the control pedestal nearby. Click on the rings to rotate the room so you can access the left doorway.
  • Take a closer look at the round doorway on the left. Place the Air Element on the shelf to open it, then zoom inside and collect the Vacuum Container.
  • Head back to the Lower Island.

Lower Island

  • Take a closer look at the bonsai-like tree next to the wooden cart on the right. Use the Vacuum Container to collect the Cones of Paralysis and add them to your inventory.
  • Head to the Sunken Hull.

Sunken Hull

  • Take a closer look at the cluster of coral on the left. Use the Cones of Paralysis in the closeup, then use the Knife to pry open the clam and collect the Pearl
  • Return to The Safe.

The Safe

  • Give the Pearl to the Goldsmith. You will be rewarded with the Whistle.
  • Examine the bellows at the base of the large horn. Place the Whistle between the bellows and base of the horn, then click on it to make the call. You will obtain the Lever. Examine the bellows and do this once more to trigger a cutscene.
  • Exit to the Labyrinth.

Labyrinth

  • Take a closer look at the alcove high in the wall on the left. Use the Lever on the slot on the right.
  • Back in the main area, click on the Bull-head Key sitting at the base of the steps on the right to add it to your inventory.
  • Examine the pedestal with the diamond key above you. Place the Bull-head Key on top, then click it.
  • Enter the Minotaur’s Lair.

Minotaur’s Lair

  • Figurine 22/24 is in front of the fountain in the wall on the left.
  • Morphing Object 33/35 is on the right wall above the corpse.
Lost Lands – The Golden Curse Minotaurs Lair Collectibles Locations

Lost Lands – The Golden Curse Minotaurs Lair Collectibles Locations

  • Pick up Rail 1/2 propped up against the pillar on the left.
  • Take a closer look at the bed of hay straight ahead. Collect the Jug of Water.
  • Examine the cage in the back left corner. Collect Manuscript 27/28 (The Last of the Madmen).
  • Zoom in on the corpse on the right. Click to move the shield aside, then click on the Trident to add it to your inventory.
  • Examine the hay bedding at the far end of the room again. Use the Trident to sift the hay aside, revealing a box. Click to open it and collect the Tiles
  • Head back to the Room of Riddles.

Room of Riddles

  • Take a closer look at the bookshelf on the right. Use the Tiles on the closeup to trigger a puzzle.
  • Move the tiles to get the correct equation. The solution is as follows: 2 ÷ 2 + 2 = 3.
  • Enter through the new doorway and into the next area.

Great Library

  • Figurine 23/24 is in the opening of the curtains on the left.
  • Morphing Object 34/35 is amid the scrolls beneath the large dome.
Lost Lands – The Golden Curse Great Library Collectibles Locations

Lost Lands – The Golden Curse Great Library Collectibles Locations

  • Collect the Rail 2/2 lying on the ground in front of the box on the right.
  • Take a closer look at the floor straight ahead. Place the Rails x2 onto the tracks to complete them, then click on the ladder at the far end of the room to slide it into position.
  • Click on the Hanging Bucket on the upper left to knock it down, then click on it again to add it to your inventory.
  • Zoom in on the book in front of you. Click to turn the page, then click on the Casket Button inside to add it to your inventory.
  • Exit to the Room of Riddles.

Room of Riddles

  • Take a closer look at the center pedestal. Use the Jug of Water on the jar and collect the Rope Ladder which appears.
  • Backtrack to the Tree of Life.

Tree of Life

  • Zoom in on the tree house straight ahead. Use the Casket Button on the box in the hollow and collect the Disk Knife
  • Return to the Sunken Hull.

Sunken Hull

  • Examine the door at the far end of the area. Use the Disk Knife to cut the algae, revealing a hidden object area. Upon completing the hidden object area, the Bench Piece will be added to your inventory.
  • Return to the Underground Lake.

Underground Lake

  • Examine the large turtle shell on the left. Use the Bench Piece to flip the shell. Collect the Metalworking Scissors beneath and note the pattern on the underside of the shell.
  • Go to the Minotaur’s Lair.

Minotaur’s Lair

  • Look at the corpse on the right again. Use the Metalworking Scissors to cut open the breastplate. Collect the Piece of the Pattern within to add it to your inventory.
  • Return to the Great Library.

Great Library

  • Examine the area above the ladder at the far end of the room. Insert the Piece of the Pattern into the top of the sarcophagus, then click to open it. Collect the Manuscript 28/28 (Geo-table), the Keeper’s Manuscript, and the Empty Beaker
  • Enter The Safe again.

The Safe

  • Give the Keeper’s Manuscript to the Goldsmith.
  • Return to the Minotaur’s Lair.

Minotaur’s Lair

  • Take a closer look at the pile of gold in the center of the room. Sprinkle the Rose Petals on top of the gold. Click on the petal which dies to sift it and gold aside, then click to collect the Cursed Bull Ring.
  • Examine the ruins of the Minotaur on the floor once the cutscene has passed. Use the Hammer to break off the finger and collect the Signet Ring.
  • Examine the break in the column on the left. Click on the lever chain to pull it.
  • Return to the Cave.

Cave

  • Take a closer look at the base of the statue on the left. Insert the Signet Ring and click.
  • Examine the face of the statue on the left. Collect the Sapphire and the Ruby from the basin of water to add them to your inventory.
  • Look at the small pedestal which rises in the center of the room. Click to open it and collect the Emerald
  • Head to Anvil Peak.

Anvil Peak

  • Examine the small wood shed straight ahead. Click on the edge for a closer view. Use the Hanging Bucket to reach the Half-eclipse Tile and add it to your inventory.
  • Return to the Great Library.

Great Library

  • Place the Half-eclipse Tile into the floor around the dome. Tip: You will be returning here soon with one more.
  • For now, head back to The Safe.

The Safe

  • Take a closer look at the chest at the base of the steps. Insert the Ruby, the Sapphire, and the Emerald into the slots and collect the Jade Skull
  • Make your way back to the Ancient Graveyard.

Ancient Graveyard

  • Take a closer look at the circle of jade skulls straight ahead. Place the Jade Skull on top of the pedestal on the left to trigger a puzzle.
  • Arrange the skulls so that they are all looking toward the center. The solution is shown below.
Lost Lands – The Golden Curse Jade Skulls Puzzle Solution

Lost Lands – The Golden Curse Jade Skulls Puzzle Solution

  • Upon completing the puzzle, click on the Water Element that appears in the center of the ring to add it to your inventory.
  • Return to the Room of Insanity.

Room of Insanity

  • Click on the pedestal and rotate the rooms so that you can access the room on the left with the orange-lit door.
  • Take a closer look at the door on the left side of the ring. Place the Water Element on the shelf to open the door, then take a closer look inside. Collect the Books from the shelf on the scorpion’s tail.
  • Return to the Great Library.

Great Library

  • Examine the bookshelves straight ahead. Place the Books on the shelf to trigger a puzzle.
  • Press the buttons with the numbers that are skipped on the shelf. The solution is as follows: 4, 12, 17.
  • Upon completing the puzzle, a hidden object area will appear. Complete the area to receive the Spell Book.
  • Return to the Elders’ House.


Chapter 5: Elixir of Animation

The Minotaur is defeated, but can you face the remaining evil on your own, or will you require the help of someone else?


Elders’ House

  • Collect the Broom propped up against the right pillar.
  • Give the Spell Book to the Elder. You will receive the Lever and the Elixir of Animation Formula.
  • Take a closer look at the statue on the right. Use the Empty Beaker on the statue’s tears to acquire the Nymph’s Tears.
  • Examine the shelf on the left. Place the Elixir of Animation Formula Pour the Nymph’s Tears into the jar.
  • Make your way to the Hills.

Hills

  • Examine the remains of the Harpy on the left. Use the Hammer to break the Chest of Gold 1/9 (Claw) free of the Harpy’s grasp and add it to your inventory.
  • Go to the Cave.

Cave

  • Take a closer look at the statue on the right. Collect the Chest of Gold 2/9 (Knuckles) from the base.
  • Head to the Underground Lake.

Underground Lake

  • Use the Broom to sweep away the sand in the lower right corner, revealing a clutch of eggs. Click to break open each of the eggs. Collect the Switch and the Dragon-egg Shells to add them to your inventory.
  • Enter the Schooner Wreckage.

Schooner Wreckage

  • Examine the remains of Naga on the deck. Collect the Chest of Gold 3/9 (Net) to add it to your inventory.
  • Return to the Minotaur’s Lair.

Minotaur’s Lair

  • Take a closer look at the remains of the Minotaur on the floor. Click on the Chest of Gold 4/9 (Nose Ring) to add it to your inventory.
  • Return to the Elders’ House.

Elders’ House

  • Take a closer look at the table on the left. Place the Dragon-egg Shells into the mortar and use the pestle to crush it. Pour the powder into the jar.
  • Make your way to the Crossroads.

Crossroads

  • Take a closer look at the metal grating straight ahead. Place the Lever on top of the stand and click on the grate to open it.
  • Examine the inside of the grate, which peers straight down. Use the Rope Ladder on the inside of the tunnel down.
  • Take a closer look at the center hole again. This time you will get a closeup of below. Collect the Full-eclipse Tile from the ivy, then click to clear the rest away. Open the hidden panel and use the Switch on the instrument inside. Click on it to toggle it from the + to the – setting.
  • Backtrack to Leproch’s Tomb.

Leproch’s Tomb

  • Take a closer look at the two children with the gold scepter between them. Use the Hammer to carefully remove it, adding the Cursed Scepter to your inventory.
  • Examine the adult explorer. Click on the Cursed Key to add it to your inventory.
  • Examine the small boy behind the explorer. Use the Knife to remove the hardened dirt beneath the tip of the sword, then click to add the Cursed Sword to your inventory.
  • Return to the Crossroads.

Crossroads

  • Examine the face of the metronome on the right, then proceed up the steps to the small booth. Use the Cursed Key to open the door, acquiring the Chest of Gold 5/9 (Key). Click to open the door and collect the (normal) Key
  • Return to the Elders’ House.

Elders’ House

  • Take a closer look at the throne straight ahead. Place the Cursed Scepter into the slot on the left and collect the resulting Glass Punchcard which appears. Re-collect the Chest of Gold 6/9 (Scepter).
  • Go to the Great Library.

Great Library

  • Place the Full-eclipse Tile at the base of the large dome. Take a closer look at the dome to trigger a puzzle.
  • Move the tiles into the correct order. The solution is shown below.
Lost Lands – The Golden Curse Eclipse Tile Puzzle Solution

Lost Lands – The Golden Curse Eclipse Tile Puzzle Solution

  • Upon completing the puzzle, the cover of the dome will be removed. Take a closer look at the model within and click on the rightmost island to move it into a new position.
  • Make your way to the Ruined Temple via Anvil Peak.

Ruined Temple

  • Figurine 24/24 is in the snowbank on the right above the grate from which the water flows.
  • Morphing Object 35/35 is on the left side of the leftmost ruined structure.
Lost Lands – The Golden Curse Ruined Temple Collectibles Locations

Lost Lands – The Golden Curse Ruined Temple Collectibles Locations

  • Click on the Father Figurine at the bottom of the screen to add it to your inventory.
  • Click on the hidden object area within the ruined building on the left. Upon completing the area, the Crown Piece will be added to your inventory.
  • Take a closer look at the water drain on the left. Click on the Crown Part inside to add it to your inventory.
  • Select the Crown Piece in your inventory and combine it with the Crown Part to acquire the Crown.
  • Examine the spherical stone in front of you. Click on the Dice beneath to add them to your inventory.
  • Take a closer look at the structure on the upper right. Click on the stone for a closer look, then use the Key on the +-shaped slot.
  • Examine the top of the leftmost ruined structure for a closer view. Click to clear away the rubble, then click on the Handle to add it to your inventory.
  • Proceed to the Tree of Life.

Tree of Life

  • Take a closer look at the glowing pole on the left. Place the Father Figurine on the right stand.
  • Examine the stone slab on the lower left. Click on it, and it will rise up. Examine it once again to collect the Tree of Life Fruit from the branch above.
  • Go to the Elders’ House.

Elders’ House

  • Zoom in on the table on the left again. Place the Tree of Life Fruit on the table, then use the Knife to cut it. Click on the fruit to squeeze it into the container. Bottle it up and select the Elixir of Animation to add it to your inventory.
  • Go to Leproch’s Tomb.

Leproch’s Tomb

  • Examine the inside of the large stone sarcophagus. Use the Elixir of Animation on the corpse of Leproch within. You will obtain the Key.
  • Examine the inside of the sarcophagus again. Use the Key on the slot near the gold and click to obtain the Chest of Gold 7/9 (Coins).
  • Go to the Great Library.

Great Library

  • Examine the large musical chest on the right. Use the Handle on it and collect the Spring that appears at its base.
  • Take a closer look at the base of the gold globe. Use the Spring on the base, then take a closer look at the globe itself. Click on it to open it up, revealing the Fire Element. Click on it to add it to your inventory.
  • Enter the Room of Insanity.

Room of Insanity

  • Take a closer look at the stone pedestal and rotate the wheels so that you can access the arched door on the right. Place the Fire Element on the shelf on the door to open it, then take a closer look inside. Collect the Plank on the stand to add it to your inventory.
  • Enter The Safe.

The Safe

  • Examine the stone statue of the man to the right of the stairs. Place the Crown on his head and collect the Stone Tablet which appears.
  • Select the Stone Tablet from your inventory and use the Hammer to smash it. Click to clear away the pieces until you’ve collected the Wooden Punchcard hidden within.
  • Go to the Minotaur’s Lair.

Minotaur’s Lair

  • Zoom in on the cell at the back of the room. Use the Glass Punchcard and the Wooden Punchcard on the lock to open it, then take a closer look inside, where there’s a hidden object area. Complete it successfully to receive the Spreading Tool.
  • Return to The Safe.

The Safe

  • Take a closer look at the large statue head on the left. Use the Spreading Tool to open the eyelid, then click on the eye to roll it until the Lens Click on it to add it to your inventory.
  • Backtrack to the Harpy’s Nest.

Harpy’s Nest

  • Examine the pedestal on the right side of the island. Place the Lens on the pedestal and click to angle it.
  • Take a closer look at the glowing marking which appears on the ground nearby. Use the Cursed Sword on the positioning crosshairs to raise the ground.
  • Zoom in on the newly raised portion of ground. Click on the handle sticking out to clear away the dirt, pulling out a box. Click to open it and add the Dice, clicking again to trigger a mini-game
  • Roll the dice to win the game. You need to land on the 31 space exactly to finish it. Tip: The game is entirely randomized. You will need to simply roll over and over until you land on the 31 space.
Lost Lands – The Golden Curse Dice Game

Lost Lands – The Golden Curse Dice Game

  • Upon completing the puzzle, the game board will open, revealing a secret compartment. Click on the Ratchet Strap inside to add it to your inventory.
  • Examine the sword in the ground again. Click on the Chest of Gold 8/9 (Sword) to add it to your inventory.
  • Proceed to the Ruined Temple.

Ruined Temple

  • Take a closer look at the water grate on the right. Use the Ratchet Strap on the bars, then click to tighten them. Take a closer look inside and use the Plank to trigger a puzzle.
  • Move the strips so that their symbols match. You’ve seen the correct pairs before. The solution is shown below.
Lost Lands – The Golden Curse Plank Puzzle Solution

Lost Lands – The Golden Curse Plank Puzzle Solution

  • Upon completing the puzzle, click on the “Sanctuary” Tile to add it to your inventory.
  • Head to the Lower Island.

Lower Island

  • Examine the stone slab in the ground. Place the “Sanctuary” Tile into the remaining slot and collect the Chest of Gold 9/9 (Horn) that appears.
  • Go to the Arena.

Arena

  • Examine the top of the stone pedestal on the left. Place the Chest of Gold 9/9 at the top. You will receive the Tile.
  • Take a closer look at the base of the stone pedestal. Place the into the board, then click on it to trigger a puzzle.
  • Find the pairs. The solutions are shown below.
Lost Lands – The Golden Curse Tile Pairs Puzzle Solution

Lost Lands – The Golden Curse Tile Pairs Puzzle Solution

  • Upon completing the puzzle, click on the Key to add it to your inventory.
  • Examine the pole axe in the distance straight ahead. Use the Key to unlock the the guard, then click on the Pole Axe to add it to your inventory.
  • Examine the dwarf king at the top of the steps ahead. Use the Pole Axe to free the Golden Cup from his grasp.
  • Take a closer look at the treasure chest on top of the stone pedestal again. Place the Golden Cup


With the last champion defeated, the main adventure comes to a close. However, numerous extras and a bonus chapter await! Do you have what it takes to help Susan find her way home? What about her friends?


Congratulations! You’ve completed our Lost Lands – The Golden Curse Walkthrough! For more great tips and tricks, visit our blog!


Delicious – Emily’s Hopes and Fears Walkthrough

Big City Adventure – Shanghai Walkthrough

Building the Great Wall of China 2 Walkthrough


The Lost Lands – The Golden Curse Walkthrough is meant as a guide and does not contain cheats, hacks, or serials.

The post Lost Lands – The Golden Curse Walkthrough appeared first on GameHouse.
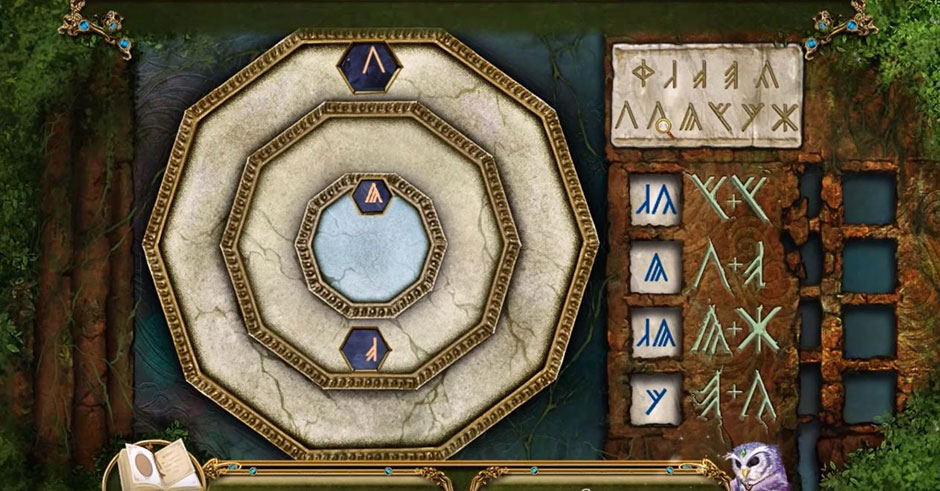
Death at Fairing Point – A Dana Knightstone Novel Walkthrough

$
0
0

Welcome to our Walkthrough for Death at Fairing Point – A Dana Knightstone Novel. This guide is packed with tips and tricks to help you unlock the levels of the game and ultimately solve the final puzzle. Explore beautiful settings and immerse yourself in the delights of Europe as you investigate clues about a mysterious death from the past. Will you be able to right a wrong that was committed many years ago?

Contents

General Tips & Tricks

Navigation:  An arrow will appear when you can move to another part of the location. When you’re zoomed in on an object, you can back out of it by clicking anywhere outside of the zoom window.

Cutscenes: If you want to move the dialogue along faster, right click your mouse. You can also choose to bypass the entire scene if you’re in a hurry.

Cursor Icons: The cursor will change depending on the action you can take. A speech bubble lets you talk to a character, the magnifying glass zooms, and the hand lets you pick up an object.

Inventory: You can view eight items on your screen at one time. To view more items, use the scroll arrows on the sides of the inventory tray.

Notebook and Goals: The game includes a guide in the notebook. The goals tab is especially helpful in letting you know what you need to do next to unlock the next part of the game.

Hints: There’s a very handy hint button on the bottom right of the screen. It’s a little in-game cheat to help you out when you get stuck. You can use it to find hidden objects or to figure out where you need to go next.

Skip Meter: If you really get stuck on a puzzle, you can skip it once the skip meter is full.

Tutorial: There’s an optional, built-in guide to gameplay at the start of your game.

Death at Fairing Point – A Dana Knightstone Novel Walkthrough

Chapter 1: Halward Manor

The game begins at the mysterious Halward Manor. In this chapter, you’ll investigate the bedroom, the second-floor hallway, the lobby, the parlor, the atrium, a magic booth and the conservatory balcony. There are 12 puzzles to solve in this level.

To get started, first speak to the concierge in your bedroom. Then, you’ll see a small table with a cup of tea on it. Go to the table and pick up the Passport. Note down the last four numbers of the phone number on the Business Card.

Head to the safe, punch in the last four digits of the phone number and press enter. The safe unlocks. Put your Passport inside. Pick up the Old Scroll and read the obituary. Close out of that frame.

The window flies open all by itself. Click on the window to close it. Zoom in and see that the latch is broken.

Go to the bed. What a mess! Take the objects out of your inventory and put them where they belong. The camera should go in the camera case, etc. The suitcase closes. Pick up the Umbrella.

Death at Fairing Point - A Dana Knightstone Novel - Objects

Death at Fairing Point – A Dana Knightstone Novel – Objects

Use the Umbrella to pick up the Latch that’s under the bed. Go to the Wardrobe; pick up the Dust Pan and the Screwdriver. Open the window and put the latch on it. Use the Screwdriver to attach the latch. Close the window.

Look below the mirror and use the Dust Pan to pick up the broken pieces. Put the Six Mirror Pieces onto the broken mirror. Rearrange the pieces to see your character’s reflection.

Death at Fairing Point - A Dana Knightstone Novel - Broken Pieces

Death at Fairing Point – A Dana Knightstone Novel – Broken Pieces

Click on the picture of David. David’s ghost appears. Throughout the game, the ghost will lead you to the next step. Click on David’s Ghost to follow it out of the room.

To move on to the next level of gameplay, you’ll need to go to the back wall of the lobby and put the Torn Photo onto one of the paintings in the Photo Frames.

Death at Fairing Point - A Dana Knightstone Novel - Painting

Death at Fairing Point – A Dana Knightstone Novel – Painting

Click on the photo scraps to change their arrangement and complete the picture. Then, move the Name Tags onto the photo to correctly label each person in the picture. Here’s a hint: The first letter of each name from right to left is D, C, W and M.

Photograph will appear in your inventory after you successfully unlock this puzzle. Once again, David’s Ghost appears. Click on it to go to the next level.

Chapter 2: The Manor Grounds

In this chapter, you’ll explore the charming grounds of Halward Manor. The locations include Outside the Pub, Inside the Pub, the Road, the Outside Stables, Inside the Stables and David’s Workshop. There are twelve puzzles to solve in this level.

You start the level outside of the Pub where you’ll pick up the first two Shot glasses of the 10 that you’ll need to find throughout the level. Once you’ve found all 10 Shot glasses, go inside the pub and put them on the shot glass rack on the wall. Swap them around so that the design on each shot glass matches the background of the rack. When you’ve done it correctly, a Valve will fall out. Take it and leave the pub.

Death at Fairing Point - A Dana Knightstone Novel - Shot Glasses

Death at Fairing Point – A Dana Knightstone Novel – Shot Glasses

Outside the pub, go to the barrel. Attach the Valve to the barrel’s faucet. Turn the faucet on to empty the barrel. Now you can look inside of the barrel to find a Box of Metal Letters. Pick it up and go to the stables.

Inside the stables, find the 10 Sketch Pieces that are strewn about the room. Examine the crates and pick up the Number 2 you find there. Put the Sketch Pieces atop the crate and fit them together to form a complete picture.

Death at Fairing Point - A Dana Knightstone Novel - Sketch Puzzle

Death at Fairing Point – A Dana Knightstone Novel – Sketch Puzzle

You’ll find a hidden object scene in the horse stall on the right. Find all of the objects on the list, which will then place Stable Gear into your inventory.

Hang the Stable Gear from the hooks under the window. Click on the bag and grab the Hammer and Chisel. David’s ghost appears. He leads you to a stone wall. Break the wall using the Hammer and Chisel. You’ve found David’s hidden workshop! Inside, find the art supplies that you’ll use to complete a paint-by-number piece of art. David’s ghost will be so pleased with your artwork that he’ll show you where to find a hidden, secret note.

Death at Fairing Point - A Dana Knightstone Novel - Paint By Number

Death at Fairing Point – A Dana Knightstone Novel – Paint By Number

To move to the next level of the game, you’ll need to return to the Pub. Inside the Pub, zoom in on the Cuckoo Clock.

Go to your inventory and take the Hour Hand, the Minute Hand plus the number 10 that you found on the pub sign. Place it onto the clock face. Also, put the number 2 that you found in the workshop and the number 7 that was in the mailbox and place them onto the Cuckoo Clock. A red button and a blue button are on the clock. The red button is for hours, and the blue button is for minutes. Press them until the clock shows 5 o’clock. Take the Photograph.

Death at Fairing Point - A Dana Knightstone Novel - Cuckoo Clock

Death at Fairing Point – A Dana Knightstone Novel – Cuckoo Clock

Chapter 3: Baltoun Village

Next you’re headed to picturesque Baltoun Village. You’ll investigate the Town Hall, the Bridge, the Reception Area, the area Outside Town Hall, the Town Square, the Graveyard Gate, the Records Office, Outside Town Hall and the Graveyard. There are 11 puzzles to solve to move to the next level.

Begin at the Town Hall. Talk to the receptionist and gather up the four Sheets of Paper that are strewn throughout the room. Pick up the blue Feather Duster from the table.

Go to the Bridge where you’ll find a Torn Cat Poster on the grass. Return to the Town Hall and go to the Reception Area. Give the receptionist the Torn Cat Poster. This will activate a puzzle where you’ll drag and rotate the pieces to put the poster back together. Put the Cat Poster into your inventory.

Death at Fairing Point - A Dana Knightstone Novel - Cat Poster

Death at Fairing Point – A Dana Knightstone Novel – Cat Poster

Your character wants to help find this missing kitty by making some copies of the poster. Go to the photocopier. It’s clearly in need of some attention. Move the plugs around to untangle the wires. You’ll know you’ve succeeded when all the plugs turn white.

Put four Sheets of Paper into the photocopier. Put the Cat Poster under the lid. Just like with a real photocopier, press the up arrow button to request 4 copies. Then push the large green button to start the copier.

You’ll now have 4 Cat Posters in your inventory. Put one up on the bulletin board that’s near the receptionist and get out of there. You’ll find Fluffy the cat eventually in the Graveyard, thanks to the help of some Catnip you’ll find growing near the Bridge.

To move to the next level of gameplay, you have to put a Badge onto the statue of Halward that’s located on the town square. To get the Badge, you’ll need to solve the puzzle with the Vintage Coins in the Graveyard. Successful achievement of that puzzle will get you a Special Screwdriver.

Death at Fairing Point - A Dana Knightstone Novel - Vintage Coins

Death at Fairing Point – A Dana Knightstone Novel – Vintage Coins

Take the Special Screwdriver into the Reception Area and take off the nameplate that’s on the family portrait. You’ll find Ink Remover hidden there. Take it and go to the records office. Use the Ink Remover on the briefcase to remove the stain. Then unlock the briefcase by moving the dials to match the letters that were on the nameplate: MDCCCXCIV. Take the Medical Report and Badge from the briefcase and head to the Town Square.

Death at Fairing Point - A Dana Knightstone Novel - Briefcase Lock

Death at Fairing Point – A Dana Knightstone Novel – Briefcase Lock

Put the Badge onto the statue’s chest. Take a look at the Photograph that slides out. Click on it to put it into your inventory. This level’s complete!

Chapter 4: England

The lush, flower-filled locations in this chapter include the Gate to Halward Estate, the Front Door, the Garden, Outside the Cottage and the Housekeeper’s Cottage. This level has a total of 10 puzzles.

You start at the Gate to Halward Estate. Peek around in the shrubbery to the left to find a Torn Note. You’ll find a Scissor Half on the tree on the right of the gate. Pick up the 4 Ringer Parts that are strewn around. Put them onto the old-fashioned ringer on the side of the entrance gate and pull it. Instead of the gate opening, the Ghost of Charlotte appears. Click twice on her ghost and the gate will open. Go into the Garden and through the door on the left.

Talk to the butler. Pick up 5 pieces of the Chore List. Look at the Broken Teapot on the outdoor table. Select and rotate the pieces to put the teapot back together again. The Teapot goes into your inventory. Look at the different kinds of tea, they will come in handy later.

Death at Fairing Point - A Dana Knightstone Novel - Teapot

Death at Fairing Point – A Dana Knightstone Novel – Teapot

Head over to the Housekeeper’s Cottage. Take the pieces of the Chore List and put them on the clipboard that’s hanging near the table. Switch the strips around to put the list together. Then knock on the cottage door to talk to the housekeeper. Go inside, where you’ll find the other Scissor Half. You’ll now have a pair of Scissors in your inventory.

To complete the scene, you need to obtain a Compartment Key that opens the compartment at the foot of the Front Door to the estate. In order to get that key, you’ll need to do a whole host of chores, including making and serving tea. Once you’ve made the Hot Tea and placed it on the table near the Front Door, the butler will show up and give you a Green Crown. 

Go to the garden and look at the lion statues that are flanking one of the gates and the one that is in the pool. Zoom in on each statue and complete the simple puzzles by rotating the squares. The lion with the sun symbol gets the Orange Crown, the lion with the waves gets the Blue Crown and the lion with the leaves gets the Green Crown.
You’ll find a Compass on the ground. Click on the rings to complete it. That’s when the Compartment Key will appear. Take the key and go to the gate. Unlock the compartment and take the Photograph. Enter the estate to move on to the next level of the game.

Death at Fairing Point - A Dana Knightstone Novel - Teapot

Death at Fairing Point – A Dana Knightstone Novel – Teapot

Chapter 5: The Halward Estate

The elegant, rambling Halward Estate is the next place for you to explore. Locations include the Reception Hall, the Library, the Ballroom, the Patio and the Music Hall. This chapter has 17 puzzles in all.

You start in a beautiful library. Look at the plants and take an Angel. Then collect six Bookends that are strewn around the room. Put the Bookends onto the bookshelf to the right. Swap the books around to make pictures that match the bookends on each shelf. Once complete, take the Book.

Death at Fairing Point - A Dana Knightstone Novel - Book Shelf

Death at Fairing Point – A Dana Knightstone Novel – Book Shelf

Go to the left and put the Book on the book stand. Put the pieces together into an oval shape. You’ll receive the Oval. Click on the book to turn the page. You can read half of a letter. From your inventory, place the other Half of Charlotte’s Letter onto the page. You can now turn the letter over to read a riddle. Leave the library.

Death at Fairing Point - A Dana Knightstone Novel - Oval

Death at Fairing Point – A Dana Knightstone Novel – Oval

Go to the Reception Hall and add another Angel to your inventory. Insert the Disc onto the round frame on the ballroom door. A sequence of colors will light up. Press the colored footprints in the same order. You’ll need to do this three times before you can enter the ballroom. The first round you press yellow, purple, aqua and brown. The other rounds are random and different for every player. Once you get it right for three rounds, enter the Ballroom.

To move to the next level, you’ll need to find another Photograph. Using the Dagger, tear down the curtain in the Ballroom. You’ll see a large mural that is actually a hidden object puzzle. Find the items and people who are on the list.

The Ghost of Charlotte appears; click on her Ghost. Look at the plant by the window. There is a Crank in the plant’s pot. Pick it up.

Go to the gramophone. Put the Crank into the hole and put the Record onto the turntable. Click on the Crank to turn it. The floor tiles in front of the steps is a puzzle. Rotate the tiles so that they make a complete pattern. A Photograph appears beneath the tile. Pick it up to move on to the next level of the game.

Chapter 6: France

In this chapter, you go to romantic France. The locations where you’ll be sleuthing include the Outside Alley, the Museum Lobby, the Exhibit Room, the Gallery, the Gift Shop, the Outside Alley and the Storage Room.

You find yourself on a lovely, cobblestoned street in France. First go to the red phone booth. You’ll find a Small Zipper and Salt Shaker. Take them both then head to the Museum Lobby. The Ghost of Charlotte appears. Click on the Ghost of Charlotte.. Pick up the Salt Shaker you find there. You should now have two of four Salt Shakers. Put the Small Zipper onto the pencil case that’s on the counter. Open the pencil case to find a Cutter. Take it.

Now go to the Exhibit Room. You’re not alone! Again, click on the Ghost of Charlotte. Grab the Blue Towel that’s hanging from the window ledge. Go to the plastic sheet that’s on the wall and use the Blue Towel on it. Then use the Cutter to cut through the plastic and take it down.

Go through the opening you’ve just created. You’re in an old Gallery. Take the Light Bulb and put it on the broken lamp, then select the light switch to turn on the light. Take the Salt Shaker. Use the Cutter on the newspaper that’s on the wall. Look at Charlotte’s painting. Leave the room.

You only need one more Photograph. You’ll receive it after you solve the music box puzzle in the Exhibit Room. Once you have that Photograph, go to the Gallery where you’ll find a grouping of empty picture frames on the wall.

Place all Six Photographs into the frames on the wall and arrange them chronologically. Then look at the scale and move the weights around to balance it. Once balanced, the safe door opens to reveal Charlotte’s Ring.

Death at Fairing Point - A Dana Knightstone Novel - Frames

Death at Fairing Point – A Dana Knightstone Novel – Frames

Take the ring and the Blank Letter that’s underneath it. Go to the lobby and use the Matches to light the candle. Hold up the Blank Letter. The invisible ink will become visible. Take the Invisible Ink Letter. You’re now moving on to the final chapter!

Chapter 7: Fairing Point

This chapter brings us to the dramatic, wind-swept sea cliffs of Fairing Point. The beautiful locations for the game’s finale include the Lower Cliff and the Cliff Top. This level has three puzzles to solve to bring the story to an exciting conclusion.

Speak to the concierge at the Lower Cliff. Click on the purple Cloth to take it, then pick up the Half-Painted Canvas and the Easel. Open the box on the right and solve the paint jars puzzle. You need to create the colors that are shown on the swatches. Once complete, the Paint Jars will appear in your inventory.

Death at Fairing Point - A Dana Knightstone Novel - Colors

Death at Fairing Point – A Dana Knightstone Novel – Colors

Now go to the Cliff Top and place the Easel, the Half-Painted Canvas and the Paint Jars in the center clearing. Click on the painting and complete it by painting it as indicated by the symbols. It’s just like a paint-by-number picture but with symbols instead of numbers. Once complete, look at the tree.

Death at Fairing Point - A Dana Knightstone Novel - Finished Painting

Death at Fairing Point – A Dana Knightstone Novel – Finished Painting

There’s a Carving Knife on the tree. Wrap the Cloth around the Carving Knife to take it. Then use the Carving Knife on the tree to remove some bark. A carving in the tree is revealed.

Look at the pile of leaves. Click on them to clear them out, revealing a box. Place your Invisible Ink Letter on the box and leave. David’s Ghost appears. Click on the Ghost. He unlocks and opens the box. You can now take the Lion Face Charm out of the box. Go down the steps to the Lower Cliff.

Click on the stone table and put the Lion Face Charm on the blank spot. Then move the lions around so that the lions are placed next to the flowers that match their colors. Once done correctly, a slot opens up on the stone table. Put Charlotte’s Ring into that slot. The Ghost of Charlotte appears. Click on her and follow her up to the Cliff Top.


Death at Fairing Point - A Dana Knightstone Novel - Lions

Death at Fairing Point – A Dana Knightstone Novel – Lions

Now click on Both Ghosts and watch their long-awaited reunion!

The final step is to congratulate yourself for a job well done! You’ve finished Death at Fairing Point – A Dana Knightstone Novel. Check out our blog for more great tips and tricks!

For your next adventure, consider finding hidden treasures in Shanghai in Big City Adventure: Shanghai.

This Walkthrough for Death at Fairing Point – A Dana Knightstone Novel is meant as a guide and does not contain cheats, hacks or serials.

The post Death at Fairing Point – A Dana Knightstone Novel Walkthrough appeared first on GameHouse.
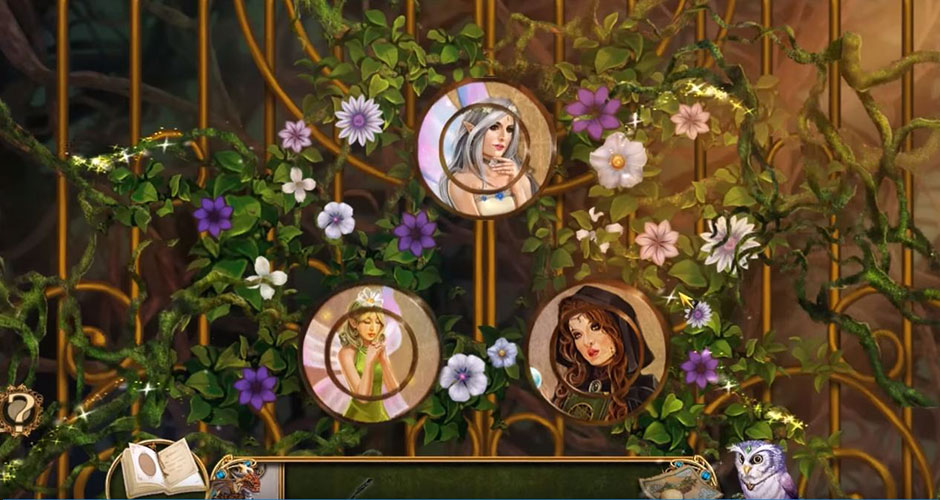
9 – The Dark Side of Notre Dame Walkthrough

$
0
0

9 – The Dark Side of Notre Dame is a hidden object game with a distinctive, detective feel, sending you wandering through the night-time streets of Paris looking for clues. You play as a detective, brought in by the Paris police to solve a seemingly impossible crime after Gargoyles from the Notre Dame Cathedral kidnap a young girl. You will explore the city as well as the cathedral, looking for clues both magical and mundane.

This walkthrough will provide helpful tips and tricks to guide you through the game. The information is specifically designed so you have to do as little back-tracking as possible, but be sure to examine each object in any room carefully so that you know where to come back to later.

Contents

General Tips & Tricks


These are just a couple of useful maneuvers that will help you get from start to finish with minimum frustration.
1: Investigate Everything. This game has a set number of steps and there’s no way to skip them so you’re most likely to lose time if you miss something and have to go back and search room by room. Run your curser over the whole map and click on everything.
2: Use your Map! Getting lost doesn’t help. Memorize which room leads where and keep a handy list of what seems important in each room. The Map is a physical item in game in the Souvenir Shop and will help you jump straight to where you need to go.
3: For the painting sequence, try to use your cursor instead of the brush tip. It’s just easier.

With that said, let’s get started!

9 – The Dark Side of Notre Dame Walkthrough

Chapter 1: Paris

The first location is a snowy street, blocked by a carriage. You must fix it to advance.
First grab the Wheel. The Needle is hidden on the teddy bear and the DIAL is behind a flyer.

Use the Dial on the cellar door and a mini-game will activate.

9 – The Dark Side of Notre Dame - Mini Game Puzzle Solution

9 – The Dark Side of Notre Dame – Mini Game Puzzle Solution

•Move the two squares to the gear cell on the top. Controls are: Down = D, Up = U, Right = R, and Left = L.
•To solve the puzzle click these arrows on left square: D-Lx2-Ux3-Rx2-Ux2-Lx4-Ux2-D-Rx2-Ux3-Lx4, and Rx7.

Enter the souvenir shop.

Click the cash register to get the Map and the Scissors. Then zoom in on the cupboard and locate all the items to get the Carriage Handle, which will open the carriage door. Inside is a Heavy Bronze Statue and the Wheel Wrench. Use the Wheel Wrench to set the Wheel and push the carriage away so you can advance.

First on the next map, grab the Eiffel Tower Miniature. Then use the Scissors on a cloth to get the Rag. Go to the stand and use your Heavy Bronze Statue and Rag on the glass to receive the Notre Dame Miniature. Place the Notre Dame Miniature and Eiffel Tower Miniature at the tourist center to activate a mini-game.

9 – The Dark Side of Notre Dame - Miniatures Puzzle Solution

9 – The Dark Side of Notre Dame – Miniatures Puzzle Solution

•Move the landmarks to their proper locations.
•The order is Notre Dame (Lower Left), Eiffel Tower (Lower Right), Arc De Triomphe (Upper Right), Louvre (Upper Left)

Then pick up Car Keys and open the car door to get the Guardian Amulet.

The next map features a snow pile, hiding the Gargoyle Wing2nd Gargoyle Wing, and a drain hiding the Register Handle. This opens the souvenir shop register and activates a mini-game.

9 – The Dark Side of Notre Dame - Cash Register Puzzle

9 – The Dark Side of Notre Dame – Cash Register Puzzle

•Move each button the number of spaces written on them.
•The order is: Q-HH, N-Q, H-A, EE-H, W-E, B-N, T-B, C-O, U-C, Z-FF, Y-EE, X-Y, M-T, G-M, DD-G, S-X, V-S, P-DD, D-P, AA-Z, BB-AA, CC-BB, JJ-W, II-CC, R-JJ, F-R, I-D, J-I, GG-J, L-F, and K-L.

You earn the Razor Blade. Cut open the chair nearby to get Stone Statuette then go to Notre Dame Plaza. Use the Razor Blade to cut the banners into Thin Twine, freeing the Small Stone Gargoyle.

After this, click on the Gem and then head back into the souvenir shop.

You can now click on the box, combining the reel, lure, and handle with the Thin Twine to make the Fishing Rod. Use it to reclaim the Green Jewel Key from the drain and open a door to the next map.

First complete a mini-game.

9 – The Dark Side of Notre Dame - Elements Solution

9 – The Dark Side of Notre Dame – Elements Solution

•Rotate the square to join four or more elements.

•To solve the puzzle, First set – L, Rx2, Lx2, and R.

•Second set: R x10, and L.


Chapter 2: Notre Dame

Speak with Esme. Then pick up the Fire Iron.
Next, use the brush and the glue to attach your 2 Gargoyle Wings to the Small Stone Gargoyle and bring it to life with the Guardian Amulet.

You will receive Gladriel. Use it to grab objects that are far above you.

By clicking you can get the Empty Bucket. Now use Gladriel on the balloon in the square to get the SOAP. Then, use Empty Bucket on the snow pile to get the Bucket with Snow.

Go to the police station entrance. Use Gladriel on the lamppost to snag a Jukebox Token. Then dump the Bucket With Snow and Fire Iron on the barrel to get Bucket With Water.

Re-enter the stonemason workshop. Use the SOAP on the grater and place the shavings inside the bowl. Then add the Bucket With Water and use the spoon, mix it and bottle it to get the Lubricant.

Head deeper into Notre Dame, going forward two rooms until you find an organ and several statues. Take the Spear and use Lubricant to get the Helmet off one.

Slap the Helmet on the statue of Joan of Arc to get the Fleur-Dye-Lys Key. This opens a cabinet in the room with the organ. Inside you will find the Wire Cutters. Take these to the kiosk by the police station entrance and cut the wire. Inside you will need to find more of the listed items.

As a reward you get the Sheet Music. Head to the main hallway and use the Spear to knock down the ladder. Then climb up the scaffolding for the Wrench.

Go forward one room and take a left. You will find a locked door. Use your Wrench to get Organ Keys.

With these, you can fix the Organ. This will activate a mini-game.

9 – The Dark Side of Notre Dame - Tunes Solution

9 – The Dark Side of Notre Dame – Tunes Solution

•Play all 4 tunes.
• Key Order is 1(4 1 2 3) 2 (2 1 4 3) 3( 4 2 3 1) 4(4 3 2 1)

This opens a secret entrance. Inside is a stained glass window. Click to trigger a cut scene.


Chapter 3: Secret Room

Investigate Esme’s unconscious body and you will be attacked. You wake up alone.

Take the door and find Esme’s Medallion and the Thick Cloth on a table. A Police Badge is located on the slab and the Baking Powder inside a chest. Go to the north tower entrance. Place Esme’s Medallion in the slot beneath the paper to get the Quatrefoil Key. This opens a drawer in Esme’s lab, containing the Heart. Inside the second drawer is Paper With Code. Place the Heart on the main hallway central tile for a mini-game.

•Assemble the pieces to complete the picture, showing the hunchback with a child.

9 – The Dark Side of Notre Dame - Hunchback With A Child Solution

9 – The Dark Side of Notre Dame – Hunchback With A Child Solution

Receive the Snake Symbol. Go right and place it on the gargoyle statue to receive the Ruby Stone. Use this on the snake chest’s eye socket. It drops the Chisel which removes stones from the wall in North Tower. Grab the 2nd Stone Statuette.

Return to stonemason’s workshop. Use the Thick Cloth to take the Light Bulb. Go out to the square and light the lamppost, then go right.

Go to the café and collect the Coins. On the table you will find a Vacuum Tube and a backpack you cannot open.

Take a right and get the Frozen Lock Piece from snowman. Take it to the police station entrance.

First, put the Coins in the newspaper dispenser and take the Luggage Box Code. Use this on the bicycle and Select the code 7-5-0-0-4 to get the Acetone

Use Acetone on the easel to receive the Brush. Thaw the Frozen Lock Piece with a hairdryer from the Notre Dame scaffolding. Then use the Brush on the paint pots to paint each ball and create Part Of A Lock.

At the police station entrance place the Police Badge on the barricade to open a mini-game.

  • Push all the buttons in and select the buttons: G, 7, C and D.You can now enter the police precinct. Place the Part Of A Lockon the van door to open it.You will earn your 3rd Stone Statuette. At the scaffolding you can assemble several stone pieces to get the 4th Stone Statuette.Take this to the stonemason’s workshop and set all 4 Stone Statuettes, along with the Paper With Codeonto the board to trigger a mini-game.•Move the hand according to the code.
    •Sequence is: Red x2, green x3, green x2, and red x3.
9 – The Dark Side of Notre Dame - 4 Stone Statuettes Puzzle

9 – The Dark Side of Notre Dame – 4 Stone Statuettes Puzzle

You will win the Golden Hand. This opens the snake chest. Take the Pump, and the Stained Glass Frame Piece from inside.

Place the Pump on the object called the Animator and locate some hidden symbols with the Guardian Amulet.


Chapter 4: The Animator

The animator upgrades Gladriel. Click on the coffin and select the panel to get a mini-game.

•Construct a line connecting all open cells. Start at 5 across and 2 down (going left to right)

Inside the coffin are more listed items.

Do this to get an Inspired Token. Now head to the square outside Notre Dame and use Gladriel to get the Small Shield from the rightmost statue.

Place this in the relief on the steps of the Police Precinct to earn the Pliers Half and the 2nd Inspired Token. Now find the entrance to the southern tower in Notre Dame.

Combine the Pliers Half to get the Pliers and open that backpack at the café to get the Hot Dog.

Outside the crypt, feed the dog your Hot Dog and pick up the Sharp Crossbeam. Pick the Scoop and Right Sun Part up off the bench. Then use the Scoop on the sand bin to get the Scoop of Sand.

Use the Scoop of Sand to clear the ice from boathouse steps. Enter and use the Sharp Crossbeam on the chest. Put together the pieces inside to get the Brush Attachment. Next check out the cabinet and locate the listed items.

You will get a Vacuum Bag. Use the Chisel on a drawer to get the Stamp. Take that to the table and pull off a ticket from the book. Attach the Stamp and click on the ticket, which gets knocked down.

Repair the vacuum using the Brush AttachmentVacuum Bag, and Vacuum Tube and use it to suck up the Ticket and give it to the boat captain.

Enter the boat and grab the Horn, the Camera, and the Fuel Can. Then return to the frozen fountain where you found the snowman.

Scare the crow by blowing the Horn and take the Left Sun Part. Then snap a photo of the mime with a Camera to get Photo of Zodiacal Pose.

Go to the south tower entrance.

Place the Left Sun Part and Right Sun Part to open the door lock. Take the stairs up to the next map. You will be on a roof with a row of gargoyles.

Pull the Winged Emblem off the front left gargoyle then use it to open the locked the chest in the previous room to get a Big Gear. Pick up the Screwdriver and head back up the stairs.

Set the Big Gear between the gargoyles.
Rotate them to look outward. The gate opens and you get attacked by a hunchback. Surprise!


Chapter 5: The Dungeon

Grab the Decorative Tile and Plunger from the bottom of the pillar and check the shelves. You will need to find several items inside.

Your reward is a Coded Hexagon. Use this on the mechanism to start a mini-game where you rotate the tokens to duplicate the code.

•The solution is: Cx3, Dx5, Ax4, D, Gx2, A, Bx2, E, Bx2, Dx4, Gx2, Fx2, Cx5, Fx3, Cx5, E, B, E, and Bx5.

9 – The Dark Side of Notre Dame - Coded Hexagon Solution

9 – The Dark Side of Notre Dame – Coded Hexagon Solution

Pull the lever then use Gladriel on the upper grate, opening an exit to the sacristy. There is a Dirty Rolling Pin on the throne and an Allen Key on the shelves.

Unlock the right door go back to the souvenir stand cellar.

Using the Allen Key on the gramophone gets you the Record. Enter the café, give the Record to the chef, then place the Jukebox Token in the jukebox. A mini-game will pop up.

9 – The Dark Side of Notre Dame - Juxebox Token Solution

9 – The Dark Side Of Notre Dame – Juxebox Token Solution

• Move the token this way: Right, up, left, down, right, down, left, up, right, up, left, down, right, up, and right.

Now go to the table and make a cup of coffee.

On the shelves you will find the Jam, and Empty Paper Bag. Take these and enter the kitchen.

Clean Dirty rolling Pin in the sink and turn the water on.
The you will be able to pick up the Wooden SpoonClean Rolling Pin, Eggs and the Milk.

If you look in the refrigerator you will find another list of items.

Once this is done you get the Butter.
Combine MilkEggsBaking PowderSugar, and Butter. Use the Wooden SpoonClean Rolling Pin, and Jam to get Raw Croissants. Then pop them in the oven, turn the knobs and use the Empty Paper Bag to get the Paper Bag With Croissants.

Enter the bell tower entrance and grab the Plank and Esme Figurine. At the police precinct, place the Decorative Tile on the door to get a mini-game.

9 – The Dark Side of Notre Dame - Police Precinct Solution

9 – The Dark Side of Notre Dame – Police Precinct Solution

•Clear a path for the decorative tile to slide out.

Enter the police hall once it’s complete.

Get the Phone Numbers. Then speak to the officer and give him your Cup of Coffee, Paper Bag With Croissants, and Phone Numbers. Now enter the Inspector’s office.

Another cut scene will play and you get the Archives Key.

Open the drawer and get the Highlighter and Letter Opener. Then use the Archives Keyon the archive door.

Check the cabinets for the Funnel and the Insulating Tape. In the Inspector’s Office the Insulating Tape repairs the outlet plug. Use the Highlighter on one of the photos to get Photo With Code. This opens a box in the archives.

Inside is the Drawer Handel, which you can use to repair the drawer in the Inspector’s office to get the Signet Ring. Return to the police archives.

Use the Signet Ring to open the book and get the Pattern With 9. A cut scene will play, making the archives inaccessible.


Chapter 6: Number 9

Leave the police archive and head to the frozen fountain. Once there use the Funnel and Fuel Can on the chainsaw. Activate it to get the Chainsaw and the Splinter.

Take these items to the sacristy. Use the Chainsaw on the roots blocking the left door and enter the cemetery entrance.

Have Gladriel bring you the Torch, then set in in the alcove. Go right. The next room will have a cabinet with the 2nd Stained Glass Piece Frame inside. Then look at the fountain and place the Photo of Zodiacal Pose on it to start a mini-game.

•Press the correct three buttons as depicted in the mime poses. Select the Third Stone from the left.

You will receive the Pitcher of Water. Place it in the alcove opposite the torch for a mini-game.

•Paint all the lines blue.
•Use the order: A-H-G-A-C-B-H-F-C-D-E-B-G-F-A-D-B-I-H-E-C-I-D-F-I-G-E-I-A .

9 – The Dark Side of Notre Dame - Gates Puzzle Solution

9 – The Dark Side of Notre Dame – Gates Puzzle Solution

Enter the burial ground and pick up the Jewelry-Box Arrow. Search the coffin to get the Lock Pick. Take these items to Esme’s underground lab and place the Jewelry Box Arrow on the table.

•Place the green gems on the green marked circles using these arrows: F-C-D-G-Bx2-Ex2-C-A and H.

Inside are Matches, and the Golden Thread. Return to the sacristy and use the Letter Opener on the glass case. Place the NeedlePattern With 9, and Golden Thread onto the robe to get the Arkivus Cloak.

•Stitch the pattern of the 9.


9 – The Dark Side of Notre Dame - Stitch The Pattern 9

9 – The Dark Side of Notre Dame – Stitch The Pattern 9

Take it back to the burial ground and use it to enter the vault.

Use Matches to ignite the oil and illuminate the room. Grab the Fleur-De-Lis Amulet. Then open the chest with the Screwdriver. Inside is the Handel GripQuasimodo Figurine, and Dagger Blade.

Place the Dagger Blade on the main hall pedestal to complete the Ancient Dagger. Now return to vault and place the Ancient Dagger on the disk for the 3rd Inspired Token.

Return to the sacristy. Place the FLEUR-DE-LIS AMULET on the throne to reveal the ANGEL WING. Take this to the relief on Notre Dame’s outer door and get the Magnet. Use it to pull up the Metal Plate with Holes in the police Precinct. Head into the Inspector’s office and use it on the cabinet to trigger a mini-game.

•Press the buttons in the correct sequence: In order they are 4-6-2-1-5-3.

You will then receive a list of items in the cabinet.

This will get you a Fuse to activate the fuse box outside the Crypt.

•Create a completed circuit.

9 – The Dark Side of Notre Dame - Wire Circuit Screenshot

9 – The Dark Side of Notre Dame – Wire Circuit Screenshot

Chapter 7: Crypte Archeologique

Take the Magic Sphere from the table then head down the right stairwell. A cutscene will reveal the villain’s secret identity. Don’t worry; we won’t spoil it for you.

This is the Window of Inspiration room. There is a 3rd Stained Glass Frame Piece, and a Mini-Gargoyle Wing.

Leave and go to the stained glass chamber. Set the 3 Stained Glass Frame Piece and the Magic Sphere at the base to activate a mini-game.

•Connect the beams.

9 – The Dark Side of Notre Dame - Beams Solution

9 – The Dark Side of Notre Dame – Beams Solution

Click on the sphere to get the Tube For Water and Tube For Nectar.

First take Mini-Gargoyle Wing to the gargoyle in the stonemason’s workshop to receive the Tube for Poison.

You can fill up the Tube For WaterTube for Nectar, and Tube for Poison at the Cathedral Fountain, the vault orchid, and snake venom in Esme’s underground lab, respectively. When you’re finished click the sphere in the lab and mix them to make the Flask of Poison. Take this out to the spray bottle in cathedral façade to create Revitalizing Spray.

This will revive the petrified girl in the Window of Inspiration room. You will acquire the J Symbol.

Chapter 8: Fleur

In the main hall, place the symbol on the pillar next to the Joan of Arc statue to receive the Hammer Key. Use this on the bell tower door to enter Quasimodo’s workshop.

The Dragon Emblem is sitting on the right table. The Wire is on a shelf. Exit and head down to the plaza. Use the Wire to repair the Shovel, and with it create a path through the snow in the garden fountain.

Grab the Dull Chisel, and Varnish from the ladder. The Varnish and Grindstone are in the cabinet. At the bell tower stairwell, use the grinder to turn your Dull Chisel into a Sharp Chisel.

Head to Quasimodo’s workshop and use the workbench to combine the Handel Grip, Splinter, and Varnish. Use the Lock Pick to get the burner knob and use the Sharp Chisel on the Splinter. Take the carving to the burner and then use the varnish. Finally put the cloak on to get the Arkivus Figurine.

Set all three Figurines on the board and a cut scene will activate. You’ll also get the 4thToken of Inspiration.

Place the tokens on the Window of Inspiration. A crate will be revealed. Inside is the Hammer. Knock down a beam in the bell tower stairway to get the 2nd Plank. These will allow you to cross the open grave in the burial grounds and take the Branch Broom. Clear the bell tower stairwell cobwebs, freeing the Honeycomb Plate and the Hook.

At the Police Precinct combine the Hook with the weight under the stairs to make a Hooked Weight. Attach it to the pulley in the bell tower to get 2nd Honeycomb Plate.

These activate a mini-game when placed on the large statue in the cemetery entrance.

•Select the arrows to push in all hexagons.

This will get you the Case Handle.

9 – The Dark Side of Notre Dame - Cemetery Solution

9 – The Dark Side of Notre Dame – Cemetery Solution

In Quasimodo’s workshop combine the Case Handle with a lid to make the Glass Cutter. Use it, and the Plunger, to open the Crypt display case and grab the Inspired Token Nine.

Then head down the stairwell to the Window of Inspiration and place it in the center.

Congratulations! You’ve completed our 9 – The Dark Side Of Notre Dame Walkthrough! For more great tips and tricks, visit our blog!

Delicious – Emily’s Hopes and Fears Walkthrough

Big City Adventure – Shanghai Walkthrough

Building the Great Wall of China 2 Walkthrough

The 9 – The Dark Side Of Notre Dame Walkthrough is meant as a guide and does not contain cheats, hacks, or serials.

The post 9 – The Dark Side of Notre Dame Walkthrough appeared first on GameHouse.
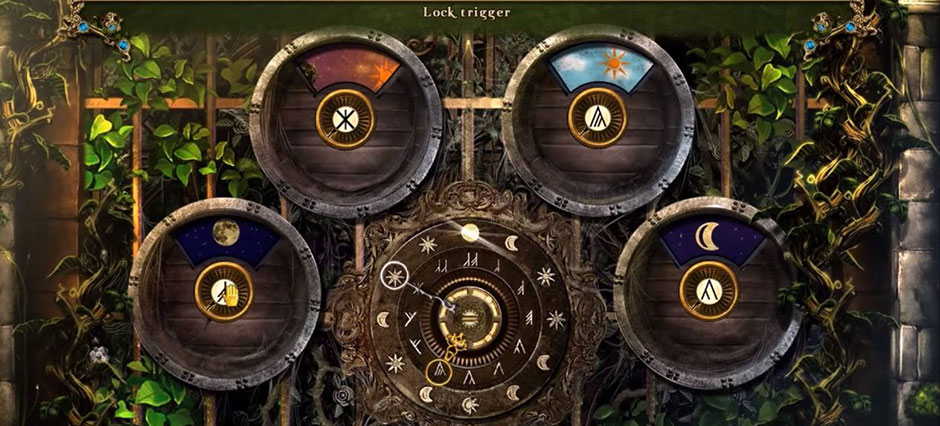
Fantasy Mosaics 11 – Fleeing from Dinosaurs Gameplay Walkthrough

$
0
0

Fantasy Mosaics 11 – Fleeing from Dinosaurs Gameplay Walkthrough

Help the lovable penguins escape the gnashing jaws of the dinosaurs in Fantasy Mosaics 11: Fleeing from Dinosaurs. Join their journey as they explore the forest in this colorful number grid game. Our Fantasy Mosaics 11: Fleeing from Dinosaurs walkthrough will give you tips and tricks to guide you through the deep recesses of the ancient forest to discover its mystical and magical secrets.

Contents

Game Play

The penguins are back in this multi-colored game. Fantasy Mosaics 11: Fleeing from Dinosaurs is a dynamic number grid game consisting of 20 levels with five puzzles each. With each puzzle you solve, you help the penguins escape being eaten by the dinosaurs. Being curious creature, the penguins must stop and explore everything they come across as they flee through an ancient forest.

This is a logic game, and you do not need to be good at math to enjoy. Using only numbers as clues, fill in the colorful mosaic tiles to reveal a vibrant picture depicting the plants and animals the penguins find.

The numbers to the left and on top of the grid tell you how many tiles need to be placed along that line. In the picture shown below, you see that the sixth column has four colored tiles, so you click to fill in those tiles.

For the row with “3, 1, 2”, you know that line will first have a block of 3 tiles in a row, then a single colored tile, then a set of two colored tiles. You must have at least one unfilled space between blocks of colored tiles.

For this installment of the popular game series, you have three colors of tiles to work with. For each color, the numbers beside the grid tell you how many tiles of that color you need to place. The round, colored button on the right allows you to choose a color. You can toggle through the colors as much as you wish, and sometimes you may need to cycle through the colors multiple times.

With each puzzle, you start out with only one hint. As you fill in tiles, you earn more hints. The sun symbol on the right of the screen signifies how close you are to earning your next hint. When you click on Hint, a random tile will be colored in. Additionally, you can use the hammer power-up to fill in any tile you choose.

You are only allowed a certain number of mistakes at the beginning of each puzzle. If you go over that, you have to restart the puzzle. You increase the number of mistakes allowed as you fill in the grid.

You earn a Gold, Silver, or Bronze award at the end of each puzzle. The awards are based on number of mistakes, number of power up hammers used, and number of hints used. You can replay any level to try for a higher award.

When you finish a level, you are rewarded with an item to add to your Garden, such as a fox. Between every level you will be taken to your garden to see your progress.

Settings

After you click play and enter your player name, you will travel to the ancient forest where dinosaurs roam. You can choose if you want to play Casual or Advanced mode.

  • Casual: In casual mode, the numbers will be crossed out for you as you go.
  • Advanced: In advanced mode, the numbers will not be crossed off until you complete the entire row or column.

You can change the play mode at any time by clicking on the Menu button and turning Advanced Mode on or off. On the menu screen you can also control the Music and Sound volumes, and choose to play in Full screen or in a window.

Fantasy Mosaics 11 - Fleeing from Dinosaurs - Bell Flower

Fantasy Mosaics 11 – Fleeing from Dinosaurs – Bell Flower

Fantasy Mosaics 11 – Fleeing from Dinosaurs gameplay Walkthrough

The goal of this game is to complete multi-colored pictures to help the penguins escape the dinosaurs and explore all the creatures that live in the ancient forest. Numbers beside the grid are your only clues to fill in the tiles. You must finish each puzzle to unlock the next one. Fantasy Mosaics 11 – Fleeing from Dinosaurs gameplay Walkthrough will guide you through the strategies of gameplay and does not include cheats.

To fill in a tile, simply click on a square to fill it with a colored tile or click and drag to fill in multiple tiles

Fantasy Mosaics 11 - Fleeing from Dinosaurs Click and Drag

Fantasy Mosaics 11 – Fleeing from Dinosaurs Click and Drag

Numbers at the top and left side of the puzzle are your only clues. These tell you how many colored tiles are in that line. For instance, if you see “5, 4” beside the grid, you know that line will first have a block of 5 tiles in a row, and then a block of 4 tiles in a row.

You must have at least one unfilled space between blocks of colored tiles. You can mark off spaces that you know will not have a colored tile by using the right click.

You need to fill in every colored tile to complete the puzzle, but you do not need to mark every blank tile. As you work through the levels, the puzzles become larger and more complex.

Sometimes, when you first look at a puzzle it may seem impossible. However, all puzzles can be solved without any hints or mistakes. Let’s take puzzle 3-2 as an example.

Fantasy Mosaics 11 - Fleeing-from Dinosaurs Lion

Fantasy Mosaics 11 – Fleeing-from Dinosaurs Lion

Start with what you know. The puzzle automatically has two columns blocked. Therefore, we know that rows 3-5 have nothing on the right side of the two block columns. We also know that there must be a colored tile on row 3/column 8, because if you count 8 blocks from either side, they both have that tile in common.

You can also color the tile immediately below that, because counting down from 4 has to include that tile. Further, you know that you can put a colored tile no more than two tiles below these two colored tiles, so you can mark with the right click below the counted off tiles.

At this point, it may be helpful to switch to a different color. When you switch to light blue, you can completely fill in the seventh row because there is only one possible solution. Continue to fill in what you know with the light blue color. By filling in only the tiles you are sure about, this is what the puzzle will look like:

It is time to switch colors again. You may need to cycle through the colors multiple times. Eventually, you will have this pictures.

Tips & Tricks

Here are some tips and tricks to help you get the most enjoyment from this game. This game is not timed so you can relax, take your time, and enjoy.

  • Try to fill in the borders first. When you know the border, you can count off the exact number of colored tiles and end with a right clicked tile.
  • Always start with the largest numbers.
  • If there are no large numbers, focus on rows that have a lot of small numbers. There may only be one possible solution. For example, if you have 9, 3, 1 on a 15×15 grid, there is only one solution: OOOOOOOOOXOOOXO
  • Even if you cannot fill in the entire row, you can often mark off at least a few spaces. When you have a 15×15 grid with 4, 4, 4, you can fill in a number of spaces. B000BB000BB000B (B is a space left blank
  • If a line has only 1s, immediately block out the space before and after any colored tile in that line.
  • If you get stuck on a color, switching to another color may help.
  • Remember to “cross out” by right clicking tiles when you are sure there will not be a colored tile in that space.
  • Many puzzles are symmetrical, so you may be able to guess some tiles based on what you already have filled in.
Fantasy Mosaics 11 - Fleeing from Dinosaurs - Puzzle

Fantasy Mosaics 11 – Fleeing from Dinosaurs – Puzzle

Congratulations! You’ve completed our Fantasy Mosaics 11 – Fleeing from Dinosaurs Gameplay Walkthrough! For more great tips and tricks, visit our blog!

Mystery Mosaics Walkthrough

Elven Legend 2 – The Bewitched Tree walkthrough

Red Riding Hood – Star-Crossed Lovers walkthrough

The Fantasy Mosaics 11 – Fleeing from Dinosaurs Gameplay Walkthrough is meant as a guide and does not contain cheats, hacks, or serials.

The post Fantasy Mosaics 11 – Fleeing from Dinosaurs Gameplay Walkthrough appeared first on GameHouse.
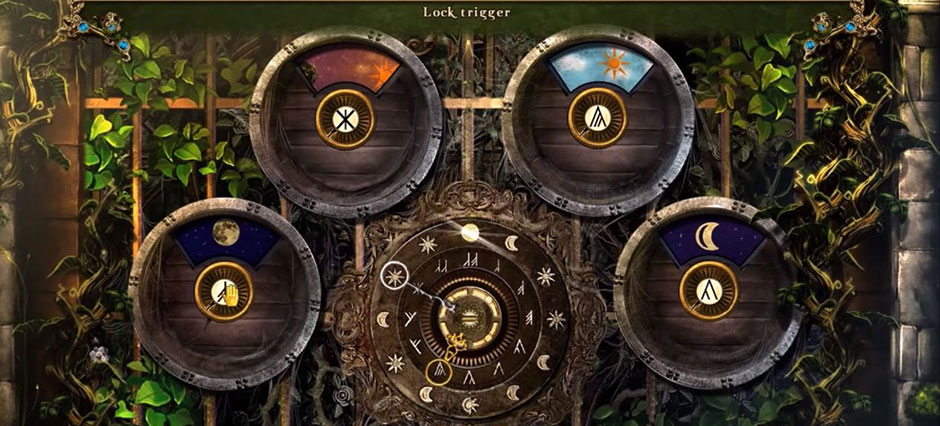
Grim Tales – The Stone Queen Walkthrough

$
0
0

Stoneville is in peril! The evil Stone Queen is terrorizing the town, turning all its residents to stone and ruining what was once a prosperous mining community. Search the city for clues, travel to the underground Stone Castle, encounter ice wolves in an enchanted forest, and save the day!

Grim Tales – The Stone Queen is a hidden-item adventure game. Use your mouse to move from place to place and search the area for helpful items. Complete hidden-object scenes to get important items, and complete challenging puzzles to move forward through the story.

This walkthrough covers the game in its entirety, but is not a straightforward path to the end. There are many other ways to complete the game, and you can do it on your own if you follow the advice in the Tips and Tricks category.

Contents

General Tips & Tricks

Gameplay
The mouse is used for everything in this game. There are four types of cursors:

The Blue Arrow is the standard cursor. It doesn’t mean anything, and it can be changed in the Options menu. It may also show that you can walk in a certain direction.
The Hand with Gears implies that an action can be performed.
The Open Hand shows that an object can be picked up and put into the Inventory.
The Magnifying Glass implies that you can take a closer look at an item or area.

There are several tools available to help you on your quest.

Click the Compass on the bottom right to access the map. This can be used to fast-travel back to a location. However, it is recommended that you walk through each screen, in case you see something you’d missed before.
The Blue Crystals at the bottom left are the Hint button. Click this to show a hint, what to do next or where an item might be. The Hint button recharges slowly and disappears entirely in Hardcore mode.
Sparkling implies that an item or area on screen is important. It disappears entirely on the hardest difficulty.
Your Inventory is at the bottom of the screen. Items you collect throughout the adventure are stored here for later use.

Throughout the game, you will encounter Hidden-Object Scenes. In these scenes, search and collect every item in the list at the bottom. Some objects have multiple steps. For instance, you may need to assemble an item before it can be collected, or you may need to look inside a container.

You will also encounter many puzzles. On all but the hardest difficulty, puzzles can be skipped after a certain amount of time has passed.

Tips and Tricks
This is a hidden-object game. Remember to look absolutely everywhere and collect any item you can find. You will need every single item available to save Stoneville.
There is a great deal of backtracking needed to finish the game. Always remember to return to previous screens and keep and eye out for any subtle changes there. For this reason, it is recommended that you travel screen by screen, instead of using the fast-travel feature on the map.
There is no shame in using the Hint button. It can be a great help when you are stuck. Don’t forget about it.
Be patient and have fun! There is no time-limit and nothing bad will happen if it takes you fifteen or fifty tries to get past a certain puzzle.

Grim Tales – The Stone Queen Walkthrough

Chapter One

After the opening scene, in which you watch a helpless, living woman be turned to solid stone and learn the history of Stoneville and the Stone Queen, your quest begins with you near your unusable car.

At the Stoneville Gate, open the driver’s door and take the Screwdriver from the dashboard. Use it to remove and gather the Screws. You will also need the Coin. Then, check the paper on the ground near the gate and find the Bronze Button with a number 9 on it. Find the brochure and take the Mine Key out of it. Zoom in on the cabinet door and grab the Drill Bit. Now you can use the Mine Key to open the door for the first hidden object scene. Find all the items and claim the Pincers as your reward. You can now use the Pincers to break the chain on the gate and enter the town!

The Town Square is chaotic! That poor uniformed man is made of solid stone! The town is in disrepair. Such a sad scene. Grab the Statue Head Piece and the Battery out of the leather bag, then read the journal and take two Coins from its pages. Find the Oil Can behind the sign on the gas pump, and go back out to the Stoneville Gate.

The stone woman is holding a Flower in her hand, but you can’t get it out! Use the Oil Can to lubricate her stone fingers and take the Flower. Go back to the Square.

Time to save the stone guard. Place the Flower in his chest, and free him from his bonds. When he leaves, you will see a hatch under him. Open it up and take the Stone Lizard. Place the Lizard in his spot on the drilling machine and take the Coin. In the salesman’s stall there is a coin slot. Place all three Coins in the slot and then find all the pairs of items in the pile. There is no pair the to Coat of Arms, so let’s take it! Head back to the Stoneville Gate.

Place the Coat of Arms in its spot on the sign, and a Stone Frog will be revealed to you. Grab it and go back into the Town Square.

Place the Frog in the drilling machine to start a puzzle. The object of this puzzle is to place the four different-colored stars onto the grid so that no beams hit a star of a different color.

Grim Tales - The Stone Queen - Frog Puzzle

Grim Tales – The Stone Queen – Frog Puzzle

In the Town Square, walk forward.

Oh my gosh the path is blocked! You need to drill through that crystal to continue. Take the broken drill bit out of the rock drill and place the good Drill Bit in the machine. Use the rock drill the open a path through the crystal. Head forward to the Hospital Door.

Look at the paper in the window. Grab the Monocle and the Emerald. Have a look at the door. There are three monkey heads. Place the Monocle on the proper monkey head to reveal a Toy Monkey Head, which you should pick up. Go back to the Square.

Grim Tales - The Stone Queen - Monkey Head

Grim Tales – The Stone Queen – Monkey Head

In the vendor’s stall, there is a broken monkey toy. Repair it using the Toy Monkey Head, and take the Spider that appears. Put the Spider on the hatch to start another puzzle.

The object here is to move the spider so that he walks on all strands of the web without repeating any strand. Go to the top-left notch, then follow the edge two places counter-clockwise. Go back up to the top-left notch, then right one, then back to center. Travel left, then counter-clockwise one notch, then back to center. Go right, then to the top-right notch, and then clockwise three notches.

Grim Tales - The Stone Queen - Spider Puzzle

Grim Tales – The Stone Queen – Spider Puzzle

Complete the hidden-object scene under the hatch to receive the Earring. Head back to the Hospital Door.

Put the Earring on the proper monkey head and find a Bronze Button with a number 6 on it. Place the Bronze Buttons on the keypad in the drain to start another puzzle.

For this puzzle, the answer is carved in stone under the grate. Just dial the buttons in the order shown to open the grate and take the Fang.

Grim Tales - The Stone Queen - Keypad

Grim Tales – The Stone Queen – Keypad

Put the Fang on the final monkey head and enter the Hospital Hall.

Talk to the gentleman in the suit and hat, and he will give you a Card. Take the Blue Crystal and the Camera from the man in the crystal and then find the Cross-Shaped Key on the table. You may want to read Brandon’s note and have a look at the photo he is holding before you go back outside.

At the Hospital Door, use the Cross-Shaped Key to open the luggage compartment on the bus and take the Jack and the Gas Can. Back inside.

Use the Jack to raise the bars on the window so you can reach the Scalpel, which you can then use to cut the rope and grab the Oil Lamp. Exit the Hospital.

Use the Scalpel to remove a loose brick and find a Piece of Amulet. Cut open the luggage and take the Funnel. Head back to the Square.

Use the Card to fill up the Gas Can and go on back to your car.

Fill up with gas and place a Brick on the gas pedal. Boom! You smashed your way into the mine!

Place the Oil Lamp on the table, grab the Handsaw, and find all the objects on the trolley to receive the Coil with a Hook. Go to the Square.

Use the Coil to open the shop’s window and find a Piece of Amulet under the television. Go back into the Hospital Hall.

Saw open the medicine chest and take the Sal Ammoniac. Pour that into the bucket and take the Ammonia Rag. Place the two Pieces of Amulet in the card catalog for another puzzle.

This puzzle is randomized, but the main idea is to open continuous blocks of drawers in either rows or columns based on the number that are not crossed out. Take the Stone Flower. Head back to the Mine.

Grim Tales - The Stone Queen - Drawers

Grim Tales – The Stone Queen – Drawers

Free the miner the same way your freed the stone guard, and take his Pickax in thanks. Use it to open the cracked wall. A troll! Oh my! Use the Ammonia Rag to knock him out. Go on to the Castle Gate.

Find the Diamond and the Valve and go back to the Mine.

Use the Valve to open the compartment and take the Amulet. Go back to the Castle Gate.

Use the Amulet on the place where you found the Valve to open the door and take theHeart Key. Go all the way back to the Square.

Use the Heart Key to open the box in the vendor’s stall and take the Stone Queen Emblem and the Relief Jewel. Go back to the Castle Gate.

Install the Stone Queen Emblem and talk to the Goblin. Have him widen the crack to the left of the gate and find the 9 Button. Place the Jewels on the gate and take the 3 Button and the 4 Button, then go back to the Square.

Place the Buttons on the keypad by the television and then press the buttons in the order written above the keypad. Take the Net back to the Castle Gate.

Fish the Jewel out of the water and place it in its slot on the gate. In the puzzle, move the pearls across the board. Place a pearl on a gemstone to open a gate of the same color as the gemstone.

Go into the Castle.

Chapter Two

At the King’s Tomb, have the Goblin destroy the bear so you can get the Sword. Earn the Golden Orb, and then give both items to the king in the sarcophagus in exchange for the Coat of Arms and the Letter. Take the Handle from the painting and then take a picture of it. Use the Coat of Arms on the hidden door to start a puzzle.

In this puzzle, you move your pieces, the Warlock, the Archer, and the Warrior, to the end of the board. Destroy the creatures along the way and take the gold. At least the Warlock has to survive.

Grim Tales - The Stone Queen - Warlock

Grim Tales – The Stone Queen – Warlock

The ferryman will want a Potted Sprout. Get a flower from the flowerbed at the Hospital Door into the Pot and give it to the ferryman so he will take you to Stone City.

In Stone City, place the Three on the mailbox for another puzzle.

Grim Tales - The Stone Queen - Mailbox Puzzle Solution

Grim Tales – The Stone Queen – Mailbox Puzzle Solution

This is a long, hard, randomized puzzle, but it is a lot of fun if you have the endurance. Move the numbers until they are in order. Then, take the Bronze and the Statue Head Piece. Use the Statue Head Pieces to open the basement and complete the hidden-object scene to receive the Rubber Glove.

Once in the Water Tower, the Goblin can tear up the floor, revealing the Bronze and the Fire Cabinet Key. Get the Mallet from the cabinet.

The trader will give you the Chisel for Bronze, the Stem for Silver, and the Wrench for Gold.

Use the Mallet and Chisel to sculpt a Golem’s Hand from the crystal and attach it to his body. Continue forward.

The woman at Stoneville Gate can be saved using the Ruby Flower. She will give you the Ambulance Keys.

On the back of the ambulance is another puzzle. The signs between the numbers are ‘greater than/less than’ symbols. Select two numbers to trade their places, and place them so that every ‘greater than/less than’ is true. Use the Ambulance Keys to open the door. Find $10 in the robe and cut the Key Card out of the pocket. Also grab the Hammer and the Pills. Cut through the window to get the Silver. Open the medical kit with the Key Card and take the Tweezers and Oil.

Grim Tales - The Stone Queen - Ambulance Solution

Grim Tales – The Stone Queen – Ambulance Solution

The mayor can be saved with the Stone Flower, which is earned by returning the Hammer to the blacksmith and placing the Petals and Stem on the anvil.

To repair the king statue’s face, you need to get the Nose from the mole by trading him the Flashlight, the Ears from waking the bat, and the Eye, which is simply found. Place the Photo next to the king statue to start a puzzle. Adjust the statue’s face to match the photo, and it will open up. Take the Scepter and give it to the Golem on the castle door. Head into Stone Castle.

Grim Tales - The Stone Queen - King Statue's Face

Grim Tales – The Stone Queen – King Statue’s Face

Chapter Three

Finally you get to meet the Stone Queen! She stands before you, guarded by two huge stone men. Find the Topaz and the Molecule and then give the Queen the Letter. Take the Letter of Powers and go to the Waterfall.

Find the first Head by the Waterfall, and the second by winning the claw game in the Water Tower. Place the Heads on the Waterfall door to start a puzzle. Moving on head may also move another, and you need to get them all aligned in the center. Try this order: Goat, Cat, Rabbit. Go through the door into the Halfling’s House.

Grim Tales - The Stone Queen - Animal Heads

Grim Tales – The Stone Queen – Animal Heads

Deliver the Letter of Powers, then check in the stove. Read the directions.

Find the Coal in Stone City, and have the Welding Mask repaired by the blacksmith.

Find the Crescent Tile in the Halfling’s house, then use it on the calendar for another puzzle. Change the date to that which is carved on the calendar and then press the green button.

Grim Tales - The Stone Queen - Calender

Grim Tales – The Stone Queen – Calender

Free the stone man in the Carnival Room using the Servant’s Stone and he will give you the Hex Key. Use the new Key to get a Red Light Bulb from the ambulance, and use the Bulb to develop the Photo in the Carnival Room.

(picture of the photo development area would go well here)

The Photo shows the combination to the bus locks. In the Bus Laboratory, mix the Valerian with the Milk and the Pills in the blender.

Grim Tales - The Stone Queen - Locks

Grim Tales – The Stone Queen – Locks

When you have lighted the halfling’s stove and repaired the pump, take the Knowledge Amulet.

The solution to the rune puzzle by the Waterfall is: Tree, ax, man, logs, ship.

Grim Tales - The Stone Queen - Rune Puzzle Solution

Grim Tales – The Stone Queen – Rune Puzzle Solution

The Goblin can open the statue’s head in the Old City.

The bird in the Halfling’s House changes the Ruby Heart to a Crystal, which is put into the statue’s eye in the Old City after you’ve used the Slingshot to scare away the bat.

Take the Rifle Stock to the Carnival Room to start a rifle-building puzzle. Use the flashing hints as a guide for this puzzle. Insert the Ampule, the combined Sleeping Potion and Syringe, into the Rifle.

Shoot the monkey and free the goblin.

Grim Tales - The Stone Queen - Shoot The Monkey

Grim Tales – The Stone Queen – Shoot The Monkey

The Spider Amulet operates a puzzle in the Laboratory. In this puzzle: Look at the numbers on the left, and then press the triangle that lights those three numbers up. This puzzle is randomized, but give it your best.

Grim Tales - The Stone Queen - Laboratory

Grim Tales – The Stone Queen – Laboratory

The octopus puzzle in Old Town requires four Stars. One was found in the spider amulet puzzle, one was in the carousel, one was statue’s mouth, and one was in the halfling’s stove. This puzzle has a clue in the upper right corner. Put the tentacles in order according to the red tentacles in the clue.

Grim Tales - The Stone Queen - Octopus Puzzle

Grim Tales – The Stone Queen – Octopus Puzzle

Once you’ve collected the Pollen in the Test Tube, go back to the Laboratory to make the Healing Potion. The Videotape should help walk you through it. Put the tablet and leaf into the mortar and pestle, use the dropper on the flask, place the funnel in the flask, use the spoon on the mortar and pestle, then stir the flask, then use the pollen on the flask. Give the Healing Potion to Brandon, in the Hospital. Meet him where you got the pollen.

Chapter Four

Take the Fur Coat to the mole in the forest. Find the Bone under the Foliage and give it to the dogs in Stone City. Dig up the Whistle and use it to get rid of the wolf in the forest. The Goblin can get in the den.

Stack Lumber and Foliage under the scarecrow and light him on fire. Get the Palette Knife from the tent. The blacksmith will repair the Bent Saw Blade, which can then be used to repair the Chainsaw. Use the Chainsaw to clear the log from your path.

Use the Palette Knife to clear away the moss on the golem and insert the Queen Amulet. In this puzzle, connect all of the Molecules so that all the connections are used.

Grim Tales - The Stone Queen - Molecules

Grim Tales – The Stone Queen – Molecules

Get the Windup Key and the Gaff from the Square before going back to the Old City. Get the Glove out of the tree, then go to the Forest’s Edge and windup the doll to get the Biker Amulet. In the Forest, use the Palette Knife to pry the Sparkplug from the skull’s mouth. Wear the Glove and pick up the Petal.

Back in the Hospital, use the Biker Amulet to open the pocket and take the Jacket. Go to the Square and find the last Emerald. Use the Glove to get the Petal out of the broken glass, then cover the broken glass with the Jacket. Grab the Net Gun from the excavator.

In the Water Tower, shoot the blue monkey with the Net Gun, then find the last Topaz and the third Petal. The DiamondsTopaz, and Emeralds start a puzzle in the Stone Castle. This puzzle is essentially the same as Candy Crush, simply swap the gemstones to make chains of three or more until the meter fills up.

Grim Tales - The Stone Queen - Gems Puzzle

Grim Tales – The Stone Queen – Gems Puzzle

Equip the Goblin with the Pickax. The Titanium Goblin can break through the wall by the Water Tower.

Find the Plunger and the Nozzle before returning to the Water Tower. Use the plunger to empty the sink and get the Cabin Key. Attach the Nozzle on the Fire Hose and the pick up the Hose. Take the Mug, too.

Use the Palette Knife on the tree at the Forest’s Edge and collect Pitch in the Mug. Go back and attach the Fire Hose to the Firetruck, and plug the hole in the pipe with Pitch. Turn on the valve and open up the truck with the Cabin Key. Repair the wires with Insulating Tape. Look under the hood and place the Sparkplug in the engine. Start up the truck. Start the pipe puzzle on the side of the truck. Swap pipes until they are all connected. Use the Glove to pick up the fourth Petal.

Grim Tales - The Stone Queen - Pipe Puzzle

Grim Tales – The Stone Queen – Pipe Puzzle

Run back to Brandon! Place the four Petals on the stem and then use the Blue Crystal on the flower.

You’ve saved the day! Congratulations, you’ve completed our Grim Tales – The Stone Queen Walkthrough! What a hero!

For more great tips and tricks, visit our blog!

Delicious – Emily’s Hopes and Fears Walkthrough

Big City Adventure – Shanghai Walkthrough

Building the Great Wall of China 2 Walkthrough

This Grim Tales – The Stone Queen Walkthrough is meant as a guide and does not contain cheats, hacks or serials.


The post Grim Tales – The Stone Queen Walkthrough appeared first on GameHouse.
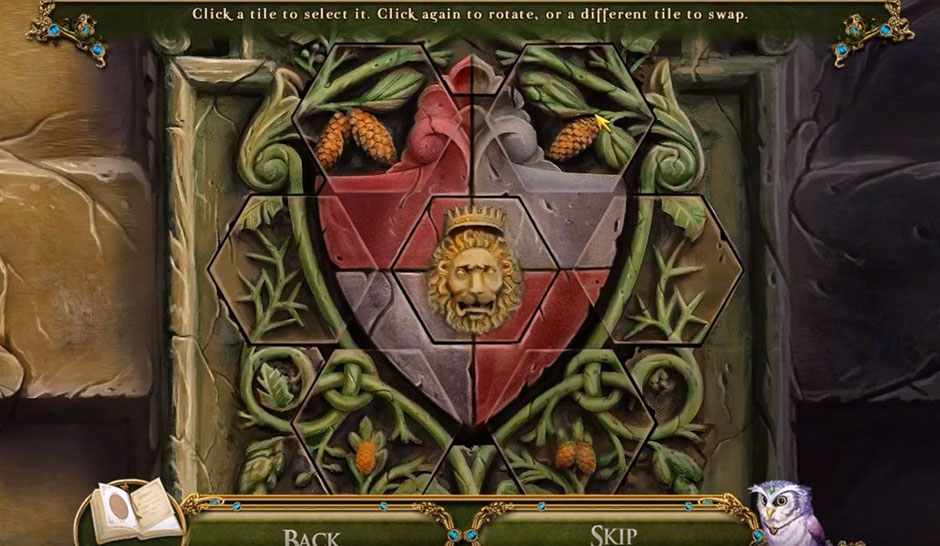
Hidden Clues Walkthrough

$
0
0

Ten cases enshrouded in mystery await you in this exciting puzzle game. Solve the puzzles and uncover the clues necessary to put the villains away for good! With 120 unique puzzles to play, our Hidden Clues walkthrough will help guide you through the basics, and all the tips and tricks you need to know.

Contents

Hidden Clues Walkthrough

How to Play

Whether you’re just getting started, need a basic explanation, or simply a refresher- this section will walk you through how to play Hidden Clues.


  • There are two game modes you can choose from when starting the game for the first time: Casual and Advanced.
    • Casual Mode: Numbers are crossed out one by one when a row is not complete. Hint recharges with time.
    • Advanced Mode: Numbers are crossed out when a row is complete. Hint increases when clicking correct squares and is cumulative.
  • When playing the game, you will start by accepting a case. Each puzzle you solve will uncover a clue necessary for solving the mystery!
  • Numbers along the top and side of the puzzle grid will indicate how many successive squares must be filled in in order to complete that row.
  • Left-click to highlight a square. The goal is to correctly fill the correct boxes in each row and column to form a completed picture.
  • Pins indicate placeholder positions, or positions where no squares will be filled. Right-click to place a pin in an empty square.
  • The computer on the right contains three screen colors. Each color is a new set of boxes which must be filled in on the grid. Click on the computer to switch colors at any time.
Hidden Clues Computer Color Switch

Hidden Clues Computer Color Switch

  • The Hint button above the computer will indicate a square which needs to be highlighted or filled in. Watch this carefully- even though the game will indicate the square, it won’t fill it for you.
  • There is a timer located in the lower right corner of the screen which will help you keep track of how much time you’ve spent on a puzzle.
  • Each puzzle will only allow you to make a set number of mistakes! Once you’ve exceeded the limit, you will have to restart from the beginning.
  • The current case number and grid size is displayed in the upper right corner of the screen. Solve all the puzzles to reveal the killers and solve the mysteries of Hidden Clues!
Hidden Clues Case List

Hidden Clues Case List


Tips & Tricksy

Looking for a few extra tricks or pointers to help you on your way? Look no further- this section is dedicated to the tips and tricks of playing Hidden Clues.


  • Click and hold to select multiple squares at once! You can do this both when highlighting tiles and placing pins.
Hidden Clues Select Multiple Squares

Hidden Clues Select Multiple Squares

  • The first strategy you should always try and implement is to fill in any rows or columns which have all numbers accounted for. For example: in the screenshot above, the third column from the left has the number 10 displayed. This means that 10 squares need to be highlighted. There are only 10 squares available to fill vertically on the grid, so fill these right away. It will often provide an invaluable basis for starting to solve the rest of the puzzle.
  • If you’re playing on Casual difficulty, lines with a 0 will automatically be filled in for you.
  • If you’re feeling stuck and not sure how to continue, try switching the highlight color on the computer on the right. Each highlight color has a different sent of numbers which need to be filled. Sometimes switching colors can help reveal solutions which are already readily apparent.
Hidden Clues Color Switch

Hidden Clues Color Switch

  • Another good strategy to use is to always keep track of the numbers listed in comparison with the squares filled in on the grid. For example, in the screenshot below, the number sequence is 1, 1, 3, 3, 2. If the first square was already filled in, you know right away that there needs to be a space before the next potential square for highlighting is there. Always place a pin on either side of these squares to help narrow down the possibilities.
Hidden Clues Spacing Tricks

Hidden Clues Spacing Tricks

  • While it doesn’t always apply, you can always try the “symmetry” trick. For example: You have a row of 10 squares, and 8 of them need to be filled. Try filling in the 8 center-most squares: so pin 1 square, highlight 8, and pin 1. While it doesn’t always work, the symmetry rule applies more often than not. Give it a shot when in doubt!


Congratulations, you’ve completed the Hidden Clues Walkthrough! Be sure to check our blog for more great tips and tricks!


The Hidden Clues walkthrough is meant to guide you through the game’s basics, and does not include serials, hacks, or cheats.

The post Hidden Clues Walkthrough appeared first on GameHouse.
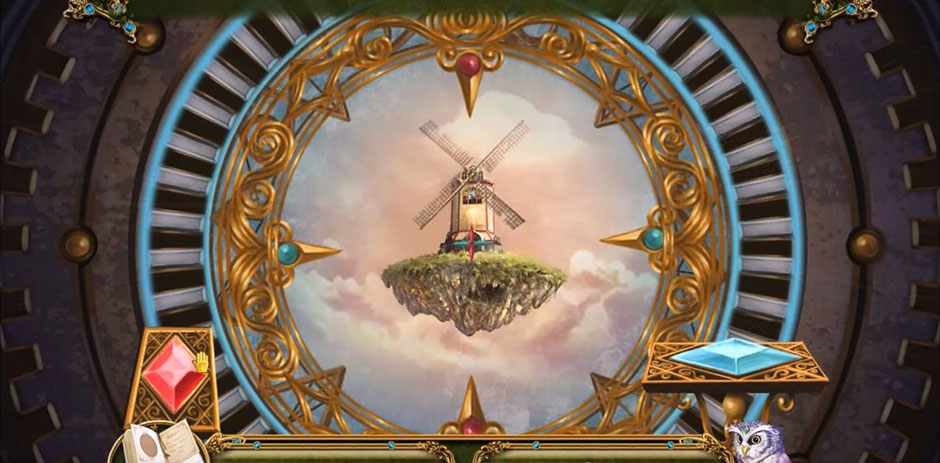

Jewel Match Snowscapes Walkthrough

$
0
0

Jewel Match Snowscapes is a holiday version of this popular Match 3 game series. Swap ornaments to clear away the snow and build a winter wonderland snowscape. Snowball powerups blast through frozen tiles. This guide is designed to help you get the most enjoyment from playing Jewel Match Snowscapes. Besides showing you how to play, it will give you tips and tricks for gameplay and does not contain cheats for the game.

Contents

Jewel Match Snowscapes gameplay Walkthrough

Getting Started

The first thing you must do to play Jewel Match Snowscapes is to choose a game mode. You have three choices:

  • Moves Limited: This is a stress-free mode with no timer. You do, however, only have a limited number of moves to complete the level. If you go over that number, you must restart the level.
  • Relaxed: You will have unlimited moves and no timer when you play in relaxed mode. The drawback is that your gold reward is lower, so it will take you more gameplay to buy powerups.
  • Time Limited: There is no limit as to the number of moves you can make, but you are racing against the clock. When you time is almost up, you are given a choice to either use a life to buy more time or risk losing the level.

To finish a level, clear all the snow tiles and collect all magical elements from the boards. As the game progresses, you have choices to buy powerups and buy elements to create a winter wonderland snowscape.

How to Play

This is a basic Match 3 game. Swap tiles to match three or more ornaments of the same color. You gain points from every match. To finish the level, you must clear all the snow tiles from the board and drop any amulets to the bottom of the board. To clear snow tiles, match ornaments covering them. You gain gold for every snow tile cleared.

At the end of each level, you will be taken to your snowscape. Use your points to purchase elements for your garden.

Moving the Board

The game board is often larger than the size of your screen. You have two ways to scroll the board. The first is to make matches on the edges of the board. The board will automatically move to center on the most recently cleared tile. You can also click and hold the right mouse button to move the screen. If you are playing on a touchscreen, use two fingers to scroll.
You cannot switch to a different board by scrolling. To switch boards, click on the arrows. Sometimes an arrow will be available immediately. Other times, you have to complete certain actions before an arrow is available, such as clearing a board or removing a key.

Jewel Match Snowscapes - Arrow

Jewel Match Snowscapes – Arrow

Completing a Level

To finish a level, you must clear all snow tiles from all the boards in that level, and remove all amulets. When a board is completed you will get a message and the border of that board will change from red to green. When a board is complete, click on an arrow to move to the next board.

Often, simply clearing a board will unlock the arrow. Other locked arrows need a key. To unlock an arrow, remove the key by clearing ornaments beneath it and bringing it to the bottom of the board. Once removed, the key will automatically unlock the arrow. The screen will quickly move to show you what the key unlocked, and then move back to where you removed the key. Keys, and other elements such as amulets, can also be removed by snowballs.

Hammer

You are automatically supplied with a hammer. The hammer refills as you clear ornaments. The original hammer simply removes a single tile. You can buy bigger hammers in the shop.
Spells, Upgrades, and Refills

To boost your game play, you can buy spells, upgrades, and refills in the shop. You can access the shop at any time during a level.

Spells

After you purchase a spell, you can collect mana to charge the spell. These are powerful tools to help you clear large portions of the board. The following list explains what they basic spells do. You can purchase powerful upgrades for each spell.

  • Bomb: destroys a 3×3 grid at the spot of impact.
  • Fireball: destroys 3 cells to the right, left, above, and below the spot of impact.
  • Lightning; sends a flash that randomly bounces around the board, clearing five tiles.
  • Chroma Frenzy: converts 6 random ornaments into a snowball.
  • Chain Destroyer: removes chains in a 3×3 grid at the spot of impact.
  • Snowball: converts 2 random ornaments into a snowball


Jewel Match Snowscapes - Spells

Jewel Match Snowscapes – Spells

Other upgrades you purchase are to increase the size of the hammer and of the chest where your points are stores. You can also purchase mana to fill all spells, a complete hammer refill, and extra lives.

Obstructions

As you progress through the levels, clearing the board becomes more difficult. You will encounter a number of obstruction that need to be removed.

  • Fog: Black fog can cover a portion of a board. You clear the fog by making matches close to the fog.
  • Chains: A single or double chain may lock an ornament into place. You clear the chain by including the locked piece in a match. You need to do this twice to remove a double chain.
  • Wooden Boxes: Boxes may be hiding snow tiles or magical items. Clear a wooden box by making a match adjacent to it.
  • Locked Portions or Arrows: Sometimes sections of a board will be locked, and you must unlock that portion for it to fill with ornaments so you can remove the snow tiles. A key needs to be dropped to the bottom of the board by clearing ornaments below it. Keys and locks are color coded. The key for a specific board may be on a different board in the level.
  • Safe: A safe is a large tile with a number in the center. You must make the given number of matches adjacent to the safe to clear it.
  • Frozen Piece: A frozen piece may be hiding a bag of gold or a hammer which, when dropped to the bottom of the grid, will completely refill your hammer.
Jewel Match Snowscapes - Obstructions

Jewel Match Snowscapes – Obstructions

Special Pieces

Special pieces may be found on a board or may be made by matches. These can be powerful tools to help you clear levels.

  • Atomic Pieces: Occasionally you will see ornaments that have blue lines encircling it. If you include an atomic piece in a match, you will clear a 3×3 grid around the atomic piece.
  • Stomper: You activate a Stomper when you make a match next to it. This special piece stomps down the board, clearing everything below it.
  • Rainbow Tile: Make a rainbow tile by including 4 ornaments in a match. A rainbow tile matches with any ornament.
  • Snowball: When you include 5 or more ornaments in a match you will create a snowball. Depending on the configuration of the match, clicking on the snowball will remove all of the tiles to either side and/or above and below the snowball.
Jewel Match Snowscapes - Special Pieces

Jewel Match Snowscapes – Special Pieces

Tips & Tricks

Following are some tips and tricks to help you enjoy your game. They are not cheats or hacks, but may be helpful if you are new to Match 3 games.

  • When your hammer is fully charged, remember to use is. The maximum upgrade to the hammer will clear every ornament of the type you use it on, including chains and ice cubes.
  • Check your shop often to purchase spells and upgrades as soon as you have enough gold.
  • Look for large matches. It may be more beneficial to make a large match that will create a snowball than a 3-ornament.
  • Strategic matches can get you more points. Horizontal matches have a greater likelihood of creating combo matches than vertical. Also, try to make matches toward the bottom of the board for greater possibility of multiple combos.

Congratulations! You’ve completed our Jewel Match Snowscapes Walkthrough! For more great tips and tricks, visit our blog!

Delicious – Emily’s Hopes and Fears Walkthrough

Big City Adventure – Shanghai Walkthrough

Building the Great Wall of China 2 Walkthrough

The Jewel Match Snowscapes Walkthrough is meant as a guide and does not contain cheats, hacks, or serials.

The post Jewel Match Snowscapes Walkthrough appeared first on GameHouse.
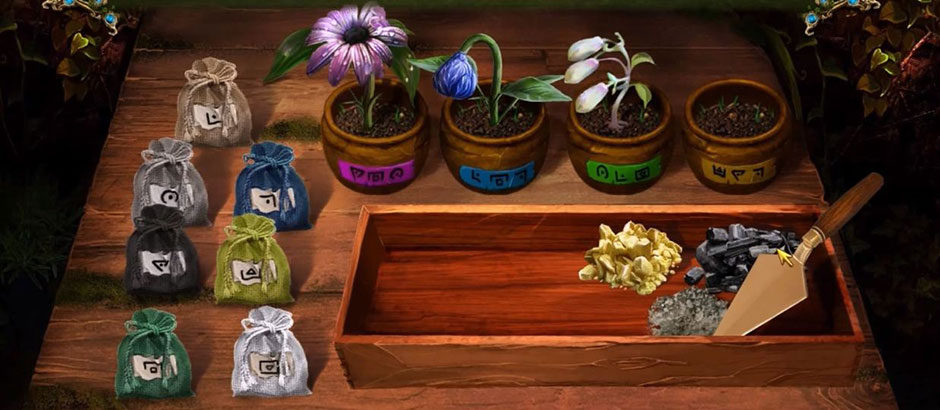
Redemption Cemetery – Grave Testimony Walkthrough

$
0
0

Explore the realms of the dead and the living in this Redemption Cemetery – Grave Testimony walkthrough! If you’ve found yourself in trouble and unable to make progress in your game, this walkthrough will help you move further into your quest. What mysteries will you uncover?

Contents

General Tips & Tricks

You’ll find your Crow on the lower left by the menu button once you reach him in the game. You can use your friendly crow when you have a Crow Rune, otherwise he will be made of stone. Use him to get objects from far off or do certain actions.


Your Diary is where you notes are kept. Important details that you may have forgotten can be found here, including newpapers and other notes you’ve found.


Hint and Skip buttons can be used when you’re feeling stuck and don’t want to use the walkthrough quite yet. Hint will give you a simple hint to help you move forward and the Skip buttons, when they appear, will allow you to go past puzzles if you are taking too long on them.

Redemption Cemetery – Grave Testimony Walkthrough

Chapter 1: Skull Hill

Welcome to the Redemption Cemetery – Grave Testimony. We’re going to start out by taking a closer look at the man on the ground and collecting the Optical Sight. Now move to the left and go to the dock. The Optical Sight can be used to look at the man on the boat. The first dock post has a Skull Piece for you to collect. Walk back to the open grave and now go right to the lake. Here you will use the Skull Piece on the lantern’s lock and take the Empty Locket Half and Candle from inside. Go back to the dock area and click on the little hole that is on the higher left of the dock. You can use the Candle here and a puzzle will start. Move the candles as so: D to F, E to D, B to E, A to B, C to A, D to C, E to D, B to E, A to B, and D to A. When you are finished, a man will show up. Talk to him to get the Crow and Crow Rune. Now the Crow can be used to pick up things, like the hat on the submerged headstone. When the hat is on the dock, study it and take the Photo.

Combine your collected Empty Locket Half with the Photo to get the Locket Half. Now go back to the open grave and take a look at the dead man’s hand. Add your Locket Half to his. Talk to the ghost and then go through the portal.

Welcome to Skull Hill. Take the Handkerchief from the road sign. When you study the car on the left you can peek inside the rear car door and take the Batteries and Elastic Band. You can lift the mud mat from the floor and look at the locket. Place the pieces in the correct positions to make this image:

Redemption Cemetery - Grave Testimony Puzzle 01

Redemption Cemetery – Grave Testimony Puzzle 01

Now you can take the Trunk Key. Pull back and open the front door of the car and take the newspaper. Clean the rear-view mirror with the Handkerchief. This will give you a code.: 347. Now you can pull out and use the Trunk Key to open the trunk. Take the Horses Statuette and Fuel Canister. Now you can walk down the road. Take the Hook off the ground. Use the “347” code to open the suitcase and start a hidden object area. Place the Medallion into the center slot and rotate the center rings. Take the Powder Compact and use it on the locks before clicking the buttons. Take the Key and open the locked box. Grab the Ring and open the round lock with it. Take all the Photos and place them on the square frame, where you will have to put them back together. Collect the Belt and leave.

Go back to Skull Hill. When you’re looking at the sign, use the hook to move the sign and then take the Glass Shard. Combine it with the Belt to make the Glass Knife. Go back to the front seat of the car and open the glove compartment. Use the Glass Knife inside to uncover the puzzle panel. Here you will use the Horses Statuette to start a puzzle. Click on the figures in this order:

Redemption Cemetery - Grave Testimony Puzzle 02

Redemption Cemetery – Grave Testimony Puzzle 02

When you’ve finished, take the Forked Stick from the compartment. Use it with the Elastic Band you’re carrying and create the Slingshot. Now you will want to go back to outside of the mine. Shoot the Slingshot at the bell above the entrance. While the gangster is distracted, take the Cup and Garrote from the table on the right. Now go forward. Here at the gate you’ll want to look at the ladder and use the Garrote to fix the first rung. Now you can look over the fence and grab the Lever. Now back at the main screen, grab the Crow Rune from under the leaves in the bucket. Send your Crow to grab the Grapple. On the bulletin board you can get the note and Pliers. Now go back to the mine.

If you look at the crane you can use the Lever on the panel to start a puzzle. This is the answer:

Redemption Cemetery - Grave Testimony Puzzle 03

Redemption Cemetery – Grave Testimony Puzzle 03

When the puzzle is finished the crate will drop for you to look at. Use the Pliers to cut the wire and then take the Rope and Flashlight without Batteries. You can fill it with your Batteries to create the Flashlight with Batteries. Now put the Rope and Grapple together to make the Grappling Hook. Go back to the gate. The is a red steel drum on the right. Take a look inside with the Flashlight with Batteries and then use the Hook to grab the Valve. You can use this on the spigot on the water tower that is on the other side of the fence, starting the water again. The gate will open when the drum is filled, so you can move forward.

Chapter 2: The Mining Town

Wait for a moment until the man leaves. Now use the Grappling Hook to bring down the ladder. There is a Winch to grab from the sewer grate. Cut the pile of wire with the Pliers and then take the Glass Cutter. If you look closer at the Bulldozer, you will see a lock with gems. Place the gem into the slot, rotate it to where it needs to go, then tap the gem to put it into place. Leave the bulldozer for now.

Take a look at the door on the upper level of the right most building. Cut the window with the Glass Cutter and then go inside to the office. There is a hidden object area in the back. Take the Steak and give it to the fish. Take the Right Medallion Half and then lift the paper to find the Left Medallion Half. Use the both of them in the slot on the book. Take the Ruler and then the Code Message. Move the beads on the abacus to match the diagram then take the Resin Lump. The Ruler will open the drawer so you can collect the Gnome to use on the box on the desk. Take the Fuse from the box and put in into the fuse box. Now that there is power back, you can use the Resin Lump on the lamp. Take the Knight and place it into the empty slot in the book. Now place everything where it belongs inside the book

Redemption Cemetery - Grave Testimony Puzzle 04

Redemption Cemetery – Grave Testimony Puzzle 04

Now you can take the Angel. On the couch there is a Newspaper to pick up. Opening the cabinet will let you gather the Matches. Look at the ceiling and use the Winch with the hook there. Pull the lever. There is a safe on the floor. Latch the hook with the handle and then look at the winch again before using the lever. The safe will lift. Take the Insulating Tape. Now go back outside and look at the bulldozer again. Use the Insulating Tape to the cover the wires. Now use the outmost lever and start the bulldozer, which will move away. Head into the bar and take the Fire Extinguisher.

There is a vent in the right corner. Look inside and take the Article. Take the Angel (2) from the broken jukebox. The upper left of the room has a cabinet to open with the Glass Knife. Take the Stethoscope. Now go back to the office. Use the Stethoscope on the safe to start a puzzle. Turn the dials while moving the Stethoscope to find the correct dial 11placements. Take the Sleeping Pills from the safe. Now go back outside.

That bulldozer is on fire! Use the Fire Extinguisher on it then look at it’s scoop to collect the Jack. Go back into the bar. Use the Jack to lift the refrigerator and then pull it back out. Open the wooden hatch in the floor and cut it open with the Glass Knife. Take the Coffee Beans from the sack then look inside the refrigerator to start a puzzle. Move the objects around until the cat food is in the correct place. Then you will be able to collect the Cat Food Can. Takea look at the coffee maker and place the Matches, Coffee Beans and Cup here to start a puzzle. Make the coffee by aligning the grinder, opening it, adding the coffee beans,  and pulling the lever to grind it. Then add the coffee to the rightmost container, then add the water. Light a fire underneath with the Matches then pour the coffee into the cup. You will collect the Cup of Coffee. Combine this with the Sleeping Pills to make the Coffee with Sleeping Pills. Go back to the Mine and place it onto the table on the right of the man. After he falls asleep you can get into his pockets. Take the Lighter. Then take the Funnel from the steel drum.

Now that the way is cleared, go up the staircase. Inside this workshop you can collect the Forge Bellows and the Article hanging on the bulletin board. Take a close look at the generator and take away the tank cap. Place the Funnel inside and full it with the Fuel Canister. Collect the Coin and then turn on the generator by pressing the red button. Take the Demon from above the power box and leave the workshop and go back to the mine entrance.

There is a hidden object area over the suitcase. Take the Knitting Needles and sew gloves by using them on the thread. Then use the Gloves to pick up the Rose, which you use to open the box. Take the Screwdriver and use it to remove the small plate. Take the Spring and use it inside of the watch. This will let you get the Hairpin, which can be used to open the leather case. Take the Scissors from the case and cut open the ribbon on the gift box. Take the Tin Soldiers from the box to complete the area.

You can now use the Tin Soldiers in the fire drum. Place them in the mold before using the Forge Bellows to increase the heat. Then you can look at the mold again and collect the Angel. Return to the Office.

There is a hidden object area in the back. Fine the objects and use them as follows: Take the Handle and use it on the sharpener and then open the drawer. Take the Pencil and sharpen it in the sharpener then use the Pencil on the paper in the box. Take a look at the phone and dial 7-9-4-8-5. A Piece of Lock will show up that you can use on the lock to fix it. Add the Razor Handle to the Blade to make the Razor. Use this on the chair to get the Broken Spring and then open the locked drawer with it. Collect the Brush from inside. Now you can take a look at the cabinet. There is a puzzle box inside that you start by placing the Angel in the top slot. Match the musicians with the instruments. This is the correct order:

Redemption Cemetery - Grave Testimony Puzzle 05

Redemption Cemetery – Grave Testimony Puzzle 05

Take the Monk and then go look at the chapel door. Insert the Demon and the two Angels you’ve collected. A puzzle will begin where you need to attack the demons. The puzzle is randomized and the demons will fight back. Be careful! The doors will open when you are finished. You can enter the Chapel.


Chapter 3: The Chapel

Inside the Chapel you will want to move both the right and left curtains. Take the book off the floor and then look at the grate to collect the Design Piece. Look at the back of the church and collect the Paints. There is a Crow Rune to collect on the bookshelf. Go back to the workshop where you can use the Crow to collect the Can Opener. Use this to open the can of Cat Food, creating the Opened Cat Food Can. Go back to the bar and use this on the dish. You can now collect the Chisel. Use the Coin on the slot of the jukebox and then collect the Design Piece (2). You can combine both Design Pieces to create the Design. Go back to the church and use the Chisel to remove candle Wax from around the large cross. Now go back to the workshop again. If you place the Wax in the hollow in the work table in the center of the room. Turn on the gas with the valve and light it with the Lighter. You’ll make a Candle to collect. Go back to the church.

You can place the Candle you just made into the holder on the altar on the right. Light it with the Lighter and then collect the Cable. Head back to the workshop. The Cable can be used above the generator between the red and blue sockets. Under the saw there is a lever, which will toss a Saw Blade at you. Collect it. Now examine the saw table and use the wood to create the Wooden Statuette. Using the work bench on the right, place the Paints, Wooden Statuette, and Brush to start a puzzle where you create a monk statuette.

Use the Carving Tool on the wooden blocks and then smooth it with the Sandpaper. Add the Wooden Limbs and then add the Screws. The Screwdriver is used to tighten them. Dip the Brush in the stain and use it on the figure, then use the Cloth to clothe it. Use the Small Brush dipped in the orange paint to paint a face. Use the black paint to paint the robe. Now you will have the Monk (2). Go back to the church. You can use both Monks on both stands in the confessional. A Key will appear to collect. Go back to the mine entrance. You can now open the gates with the Key.

Chapter 4: The Mine

While inside the elevator, take a look at the floor console. No matter what you press, a gear will break. Replace it with the Saw Blade. Take another look and press “B3”. Get off on this level and pull out your Flashlight with Batteries. There is a Crow Rune to collect. Take a look at the miner’s helmet and then take the Central Panel Element before looking at the panel on the wall. Cut the rope with the Glass Knife and then place the Central Panel Element into the center slot. This will start a puzzle. Place the puzzle pieces into the matching color slots and then rotate them. This is the answer:

Redemption Cemetery - Grave Testimony Puzzle 06

Redemption Cemetery – Grave Testimony Puzzle 06

When you finish, the power and lights will come back on. You can go forward now into the chasm. There is a contraption at the back where you can look closer and take the Elevator Button. Go back to the main area and use your crow to activate the lever on the right wall, summoning a mine cart. Look inside to find the Cell Key. No go back to the elevator and fix the panel with the Elevator Button you found. Go to B1 and exit onto that level. You can use the Cell Key to open the door and start a hidden object puzzle. When you collect all the items, you can collect the Insect Spray. Go back to the Chasm.

Use the Insect Spray to remove the bugs from the fallen over mine car. Collect the Stick and Amulet Piece. You’ll want to go all the way back to the Workshop now. On the round table you can saw the Stick into smaller pieces and collect them as Stick Pieces. Now go back to the Chasm, again. You can use these on the mechanism at the back of area. This will open a door for you to go through. Inside the creepy burial site, you’ll see a man who blocks your path. Collect the pickax then take the Elevator Button from the slab on the left. Go back to the elevator to go to B2 using the new button, but the elevator won’t let you, instead dropping you off on B1. There is a hidden object area here. Collect the items so you can collect the Amulet Piece (2). Now go back to the Elevator again.

Try to go to B2 again. Here you can read the scroll before using the Pickax to break the wall of rocks to collect Amulet Piece (3). You’re going to take these three pieces back to the Burial Site and place them in the three slots on the slab. This will start a puzzle. The answer is Ax2, Cx6, Bx3, Dx1.

Redemption Cemetery - Grave Testimony Puzzle 07

Redemption Cemetery – Grave Testimony Puzzle 07

Chapter 5: The Small Town

Back in the graveyard, you’ll want to talk to the ghost and collect the Soul Stone. Examine the water to start a puzzle. You have to place the boards in their proper places by switching them around. When you finish, you’ll move onto the swamp. Look at the water and talk to the ghost before heading through the portal. You’ll end up in a stable. Knock the box off the rafters and collect the Hand Drill. Talk to the man and woman, then take the note from beside the man. Go to the porch and use the Hand Drill on the barrel to empty it.

Take the Pitchfork from the barrel. The Scissors can be collected from the stain glass window. When you look closer at the door on the right house you can get the note and the Saw. Use the Scissorsto cut the rope around the tree before collecting the Fishing Rod. Now go back to the stable and use the Pitchfork on the hay. You will be able to collect the Iron Hammer and the Crow Rune. Use the Saw on the handle of the pitchfork to get the Hammer Handle. Add this to the Iron Hammer to collect the Hammer. Now go back to the porch.

Use your Crow friend to get the Apple from the tree and go back to the stable to give it to the horse. If you look in the bag around the horse’s neck, you will find the Fishing Tackle. Add it to the Fishing Rod to collect the Rod. Go back to the porch again. In the stained glass window over the left door you can use the Hammer. Once the glass is broken, use the Rod to fish the Key out. Use this to open the door of the leftmost house. Go inside!

Chapter 6: The Judge’s House

Now in the foyer, move the rug to find a hatch. If you look to the left there is a fireplace with a Manuscript for you to read. Take a look at the clock and collect the Globe Key. Now use the Saw to cut the door bolt on the upper level and go inside to a library. Open the globe with the Globe Key. Now read the letter on the first bookcase and then go to take the black books. A secret area will open with a hidden object area. Find all the hidden objects and you will be rewarded with the Signet Ring. Take the Coal Tongs from the bottom of the ladder and the Shawl from the top. Now go back to the Foyer and use the Coal Tongs on the Coal in the fireplace to take it, then go back to the library and use it on the bucket of ice. Now that it’s melted, take the Bucket of Water.

Come back to the foyer again and look at the fireplace once more before using the Bucket of Water. Once the fire is out you can take the Signet Ring (2). Now go back to the stable and go to the man and woman again. In the pile of sticks you can use the Coal Tongs to collect the Signet Ring (3). Once again, go back to the foyer. All three Signet Rings can be used in the doors under the stairs. This will start a puzzle. This is the answer:

Redemption Cemetery - Grave Testimony Puzzle 08

Redemption Cemetery – Grave Testimony Puzzle 08

Now that the doors are open you can go to the next screen. There is an Amulet here for you to pick up at the bottom of the tree. You can fix the blade of the windmill with the Shawl. A Gem Eye will appear. Collect it, then the Guide Half from the fence ahead of you. Now go back to the Foyer. Use the Gem Eye and Amulet on the Statue in the left and then take the Ax. Go back out into the backyard and cut the branch against the gate with the Ax. Collect the Workshop Key. Now head back to the porch. The door on the right takes the Workshop Key. Go into the room and look at the hidden object area on the shelf.

Move the hat, then take the Chisel and Trowel. Remove the trap from the Racoon and then take the Bandage inside. Use it on the Racoon’s paw. Take the Oiler and Drawer Symbol. Go to the stack of books and move the top one to see the code. Now use the Oiler on the cabinet. Examine the plant and use the Trowel to collect the Golden Nut that you can use on the nutcracker. This will give you the Clock Button that you can use on the clock frame. Press the buttons at 1, 3, 12, then 2 so you can collect the Drawer Symbol (2). Use the Chisel on a loose board to pull it up, getting the Owl Coin. This will start a matching puzzle. When you finish you will collect Drawer Symbol (3).

You can use all three Drawer Symbols in the drawer with the three slots. Take the Incomplete Telescope. On the table on the right is a Crow Rune to pick up. Now go to the backyard again so you can examine the flat area in the tree. Here you will find a text and the Lever to take. Back in the Clock Workshop, you can look at the clock with no face. Move the top lever on the right to the middle, the left lever on the bottom to the middle, and the right lever on the bottom all the way to the left. You’ll be rewarded with the Gem Eye. Now go back to the Foyer.

Go to the statue that you had placed the previous Gem Eye into and place it’s twin in the slot. When the statue is out of the way, move into the next screen. There is another Guide Half to pick up and a note and Eyepiece in the coffin! Combine the Eyepiece with the Incomplete Telescope to make a Telescope and combine the two Guide Halfs to make an Unmarked Guide. Go back to the backyard now and return to the platform in the tree. You can place the Telescope in the stand here. Once you look through it, use the Unmarked Guide to start a puzzle. This is the answer:

Redemption Cemetery - Grave Testimony Puzzle 09

Redemption Cemetery – Grave Testimony Puzzle 09

When you finish you will be given the Swamp Guide. Go back down to the backyard and go to the gate. You can use the Swamp Guide to move onto the next area.

Chapter 7: The Swamp

Welcome to the swamp! There is a hidden object area under the tree. Collect them all to get the Clock Weight then take the Fork. Examine the tower window ahead of you and then take the Crow Rune. You can go back to the main area to get your Crow friend to get the purse off the branch and look inside it. Take the note and then go back to the clock workshop. There is a hidden object area on the left. You want to knock over the Cup, then use the Shield on the frame and use the Toy Gun with the nutcracker. The gear goes into the watch and you can click twice on the bottom left gear to get inside the compartment. Collect the Mask Eye and then examine the stack of books to get the red Clip which you can use on the Green Bag. Take the Clock Hands and place them on the clock face. You’ll get the second Mask Eye to use with it’s twin on the Mask. Take the Spade Symbol and use it on the satchel. Now a bit of matching with the instuments and handles. Take the second tool on the bottom row to collect the Pliers.

Now at the back of the room, you will examine the chest. Use the symbol solution in your notes to open it. Now take the Urn and the Suction Cup. Use the Pliers on the mirror to the right, removing the flaps holding it. You can now take the Square Mirror. Head back to the swamp.

Take another look at the fallen purse. You can collect the Mirror inside by using the Suction Cup. Now head to the library again and open the hidden object area. Collect all the items to get the Dragon Lever. Move the ladder to put both the Square Mirror and Mirror into the slots above. Opening the book will start a puzzle involving lights. Use these images as a guide for the answers:

Redemption Cemetery - Grave Testimony Puzzle 10

Redemption Cemetery – Grave Testimony Puzzle 10

Redemption Cemetery - Grave Testimony Puzzle 11

Redemption Cemetery – Grave Testimony Puzzle 11

Redemption Cemetery - Grave Testimony Puzzle 12

Redemption Cemetery – Grave Testimony Puzzle 12

You will be given the Tower Key when you finish. Now go back to the swamp and look at the hidden object area. Once you collect all the items, you will have the File. Use the Tower Key on the door for the tower to move on to the next chapter.

Chapter 8: The Tower

Safely in the tower, collect the Bullet, Stick and Dragon Lever (2). Now go all the way back to the foyer. On the left there is a panel where you can use the Dragon Levers. This will start a puzzle. Move the first lever to the center, the second to the top, and the third to the bottom. This will open a hatch on the floor and start another puzzle. The answer is:

Redemption Cemetery - Grave Testimony Puzzle 13

Redemption Cemetery – Grave Testimony Puzzle 13

When you finish the puzzle you can move on to the secret chamber. Open the big cabinet and take the Clock Weight (2). Now go to the coffin room again where you can use both Clock Weights on the chains that are inside the clock. You can take the Set of Picklocks from inside. Now remove the lock from the shut window with the File and then take the Skull Knob. Go back to the secret chamber. There is a book stand on the left to examine and use the Skull Knob on. Take the Central Circle.

Now go back to the Coffin and use the Central Circle on the gap for it. This will start another puzzle. Rotate all the circles so that they match. This is the answer:

Redemption Cemetery - Grave Testimony Puzzle 14

Redemption Cemetery – Grave Testimony Puzzle 14

The coffin will open when you finish so you can use the Urn inside to pick up the ashes, collecting the Vampire Ashes. Go to the backyard and go back into the tree. Use the Fork with the Stick to make a pair of Tongs. Use them to grab the Flask out of the tree. Now go back to the secret room and put the Flask, Vampire Ashes, and the Bullet on the table and start a puzzle. The book will tell you how to combine the ingredients to create the Potion. Now go back to the Tower and examine the cage with the woman inside. Use the Set of Picklocks with the cage and a puzzle will start. Arrange the picklocks into the proper slots by matching. Once the puzzle finishes you can give the Potion to the woman and read the paper scrap before the game takes you back to the swamp.


Chapter 9: The Ship

There is a ghost in the water to talk to and then take the Soul Stone (2). Now you’ll want to go to the right towards the lake of death. Another ghost will show up for you to talk to. Go through the portal he makes and you will end up on the deck. Look down at the grate in the floor and collect the Coin. Take the Wedge from the hatch doors and then examine the wrapped thing on the railing. Take the Coin (2). You can stop the barrel with the Wedge. Go inside the right door and into the cabin. There is Rope and the Dirk to gather here and a sick man to talk to. Take a better look at the window and use the two Coins to hold the latches. If you look out the window, a puzzle will start. Untangle the ropes like so:

Redemption Cemetery - Grave Testimony Puzzle 15

Redemption Cemetery – Grave Testimony Puzzle 15

Take the Medicine from the buoy and take it to the sick man. He will give you a Chest Key which can be used on the chest on the right. Take the Oil Can and the Crow Rune from it and go back up to the deck. The Oil Can can be used on the hatch so you can open them. Take the Harpoon and Oar. If you examine the wrapped object again you can use the Dirk to get rid of the ropes. It’s a spear gun! Combine the Harpoon with the Rope to create the Harpoon with Rope. Use this with the spear gun and then use the Oar on the boat you bring close. On the boat, have your Crow friend to get you the rope so you can go to the other ship. Climb up the rope.

You can examine the fish statue here and use the Dirk to get rid of the seaweed. Take the Anglerfish Light from the monster hanging out over the door. Now go back to the boat and use this on the statue there before collecting the Horn. Then collect the Horn (2) from the other anglerfish. Go back to the rear of the ship and use both Horns on the two goldfish statues. The door will open to the Captain’s Room. Go inside and talk to the ghost, then pick up the Behemoth Eye from the glass tank on the floor. You can get another Crow Rune from the gold shield in the back and then have your Crow friend get the Fish Nose. Go back out to the rear of the ship and examine the monster over the door again. You can place the Behemoth Eye here. Open his mouth and use the Fish Nose to prop it open and grab the Crab Claw.

Go back to the Captain’s room and examine the back of the room. You can use the Crab Claw on the contraption to start a puzzle. This is the answer:

Redemption Cemetery - Grave Testimony Puzzle 16

Redemption Cemetery – Grave Testimony Puzzle 16

The door will unlock so you can move on. Take a look at the cannon and open the back. Collect the Ramrod. Now look at the bucket on the rope and take the Scraper. Go up the stairs to the bow of the ship. There is a hidden object area here. Collect all the objects and you will get a Gem at the end. If you look at the chains to the left, you can get a book and then use the Scraper to collect the Starfish. The barrel has a Map on top of it. You can also use the Dirk to get inside the barrel and grab the Ring. Go back to the Captain’s room and take a look at the bookcase, where you can use the Starfish to open the lock. Grab the Gem (2) and the Pirate Hook. Combine the Pirate Hook with the Ramrod to make the Ramrod with Hook. Now take a look at the aquarium again and cut the glass with the Ring. Now it’s time to head back to the bow.

There is a statue with a crown here you can use both Gems in. Go into the now open hole and go below deck. The Ramrod with Hook can be used to grab the floating bucket so you can collect the Hatch Key. Go back to the deck of the ship and unlock the hatch. Take the Board and go back bellow deck. You can use the Board to make a bridge between the two barrels then get the Net from the right side. Use the Dirk on the barrel floating on the left to get rid of the net, which will let you collect the Fishnet and Cannonball. Back on the deck you can use the Cannonball inside the hanging bucket and a new hidden object area appears.

Pick up the Torch, Cannonballs, Scoop, Ramrod, and Stone. The Scoop in the barrel gets Powder before breaking the lamp with the Stone. Light your Torch on it and then add the Powder, Ramrod, Cannonballs, and Lit Torch on the cannon. Now aim for the platform with the cross on it and fire! You’ll be able to collect the Sea Horse. Go back to the Captain’s Room and go to the gold shield in the back. The Sea Horse can be used here to get the Map (2). Combine the Net and the Fishnet to get the improved Net, then use it in the aquarium to get the Electric Ray. Put this little guy in the bowl back on the deck. You can go down into the hold when it has been drained out.

Chapter 10: Redemption

While you are in the hold, collect the Boot and then take a look at the barrel and take the Map (3). Take the Corkscrew from the rightmost door. Now go back to the bow before going below deck once more. You can open the hatch on the right with the Boot so you can collect the Statue Hand. In the back you can start a puzzle with a mermaid. Switch pieces around until it makes this image:

Redemption Cemetery - Grave Testimony Puzzle 17

Redemption Cemetery – Grave Testimony Puzzle 17

Now had back to the bow and do the hidden object area there. Once you are finished you will be given the Diadem. Now take a look at the statue with bow and add the Statue Hand. Once the anchor rises, use the Ramrod with Hook to fetch the Bracelet. Below deck, take a look at the painting again and give the Diadem to her to get the Map (4). Go back to the hold and use the Bracelet with the tentacle so that the door will open to the cell. Go inside and take the Trident Tines from the statue on the left. Now collect the Bracelet by using the Ramrod with Hook. Now go back to the hold and look at the barrel again, adding the Bracelet to the tentacle. Now watch the octopus have a hissy fit and break the barrel. Examine the wreckage and collect the Crow Rune, Corked Acid and read the note.

Go back to the cell and go to the rusty bars on the right to use the Corked Acid. The bars will melt so you can look at the cage. Take the Bracelet from the cage. Go back out to to the hold and go to the right to use the Bracelet on the tentacle so it will open the door to the treasury. Go inside and take a look at the trident in the statue. Add the Trident Tines and place them in the correct spots:

Redemption Cemetery - Grave Testimony Puzzle 18

Redemption Cemetery – Grave Testimony Puzzle 18

Afterwards, take the Parrot Head and take the scroll. Send your Crow friend to collect the Helmet. Now go back to the cell and take a look at the statue again. Put the Helmet on his head and then take the Mermaid Figure. Go back to the cell and use the Parrot Head on the bird in the cage. Adjust the wing to be lower, then collect the Map (5). Go back to the treasury. Go to the pedestal at the back and use the Mermaid Figure in the groove to start the puzzle. Switch the pearls around until the colors match with the shells. Collect the Map (6) and go back up to the deck. There is a hidden object area here.

The Hook combines with the Rope to become Rope with Hook, which you use on the cannon and chained box. Push the cannon over the side to crack open the box. Inside you will see rune dials you need to adjust, then take the Violet, Red and Green Gems. Now go to the sword and adjust the hilt until the picture of a rose is seen. When it is done, collect the Blue Gem. Use all the Gems on the box and move them so they match. Now you can collect the Map (7).

Go back to the Captain’s room and speak to the Ghost. The is a large frame in the room that you can use the Map (x7) on and start a puzzle. Rearrange them to form the map. You can now collect the Guides. After speaking the ghost, take these to the cabin of the first ship. Place the Guides into the compass box and then take to the man to collect the Hold Key. Return to the deck where you can use the Hold Key on the lock on the grate. Once the prisoner is free, you will be taken back to the Lake of Death. Take the Soul Stone (3). Now you can go back to the dock.

Look at the ferryman and give him all three Soul Stones. This ends the quest! Congratulations! You’ve completed our Redemption Cemetery – Grave Testimony Walkthrough! For more great tips and tricks, visit our blog!


Delicious – Emily’s Hopes and Fears Walkthrough

Big City Adventure – Shanghai Walkthrough

Building the Great Wall of China 2 Walkthrough


This Redemption Cemetery – Grave Testimony Walkthrough is meant as a guide and does not contain cheats, hacks or serials.

The post Redemption Cemetery – Grave Testimony Walkthrough appeared first on GameHouse.
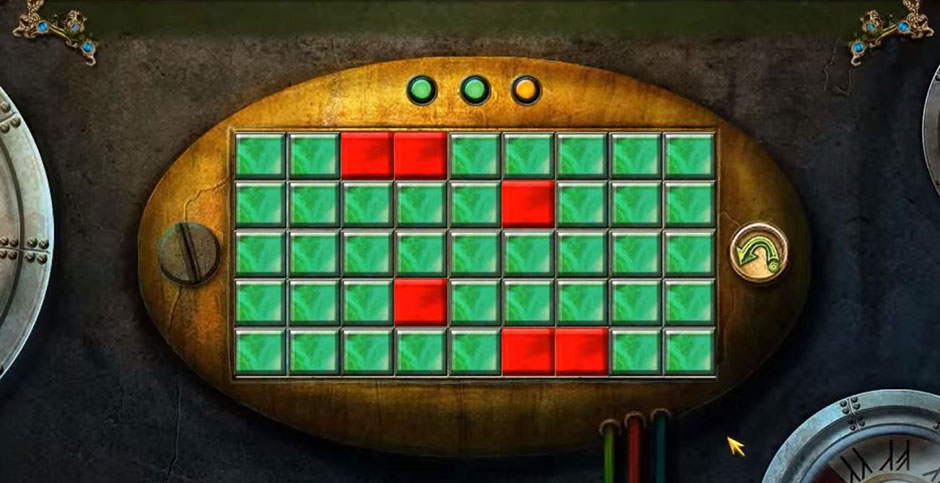
Hidden Mysteries – Return to the Titanic Walkthrough

$
0
0

Rewrite history, and solve a mystery! Posing as a journalist to enter the Titanic, you attempt to track down Robert Ashley and dispel the enigma that is his life. Unfortunately, in the process you become trapped inside the wreckage of the Titanic. In order to escape this watery jail, you must travel through time to rewrite tragedies and unlock the reason fate chose you. This Hidden Mysteries – Return to the Titanic Walkthrough will provide you with the tips and tricks you need to get through the challenges you will face as you work through the mystery of the Titanic.

Contents

General Tips & Tricks

  • This game is divided into chapters. Many tasks within the chapter can be done out of order, but some are required before the story can advance.
  • Sparkling items indicate the start of an hidden object section. Click on them to begin.
  • Many sections of the story are randomized; the solutions will vary from game to game.
  • The hint button is useful if you get stuck on a task in game. Hints are unlimited, but have a recharge timer before a new one is given.
  • The notes tab contains information about your current objectives
  • The blueprints page functions as your map.
  • Locations marked as flashback take place in the past. Locations marked underwater are set in the present

Hidden Mysteries – Return to the Titanic Walkthrough

Chapter 1

  • Begin the game by accepting the anonymous tip from the steward.
  • Talk to Janeck Sarasvat.
  • Enter the First Class Passageway area.
  • Collect the Newspaper in the bottom right portion of the scene.
  • Travel to the First Class Passageway
  • Talk to Diana.
  • Grab the Light Bulb from the lower shelf on the table with the vase on it.
  • Go back to through the First Class Passageway to the Grand Staircase.
  • Go up to the Upper Lobby.
  • Talk to Montague.
  • Grab the Note from the table.
  • Go through the glass door to the Forward Deck.
  • Talk to the Captain.
  • Return to the Grand Staircase.
  • Go back to the First Class Passageway,
  • Enter the closed door on your right to get to Your Room.
  • Use the Light Bulb on the Lamp.
  • Zoom in on the desk, and open your drawer.
  • Grab the Note and the Press Pass.
  • Zoom in on the Suitcase. The code is 4 8 1.
Hidden Mysteries - Return to Titanic - Suitcase Code

Hidden Mysteries – Return to Titanic – Suitcase Code

  • Click on the sparkles to start a Hidden Object Scene.
  • Collect all the items listed at the bottom of the scene, and get the Straight Razor.
  • Leave Your Room, and return to the Grand Staircase.
  • Go down the stairs to the Lower Lobby.
  • Click on the Fireplace, and pick the Wooden Planks and the Claw Hammer.
  • Speak with Joseph.
  • Click on the Paintings, and use the Straight Razor to get the Painting.
  • Return to the entrance to the First Class Passageway.
  • Use the Claw Hammer on the Nails on the left wall to remove them.
  • Travel back to the Upper Lobby.
  • Finish the minigame to expose a nail.
  • Hidden Mysteries - Return to Titanic - Paintings Solution

    Hidden Mysteries – Return to Titanic – Paintings Solution

  • Use the Claw Hammer to remove it.
  • Go to the Forward Deck.
  • Click on the Water Tank; collect the nail using the Claw Hammer.
  • Click on the ladder.
  • Attach the Wood Planks. Secure each plank using the Nails and the Claw Hammer.
  • Climb up and talk to Robert Ashley to complete Chapter 1.

Chapter 2

  • Once the Handgun hits the ocean floor, collect it.
  • Grab the Anchor on the left of the scene.
  • Click on the bag, and collect the Passport.
  • Go into the Elevator Shaft.
  • Toss the Anchor on the opening to enter the Grand Staircase.
  • Speak with the Overseer (the smoke). He will seal off most passages.
  • Enter the First Class Passageway.
  • Take the Lead Pipe and the Thick Rag.
  • Continue forward, and collect the Scissors.
  • You are now able to enter the Engine Room; enter it.
  • Flip over the wheel barrel with the Lead Pipe.
  • Take the Doorknob.
  • Return to the second First Class Passageway.
  • Use the Doorknob on the door.
  • Talk to Diana’s Ghost.
  • Enter the portal.
  • Enter the Stateroom in the Flashback.
  • Take the Gloves.
  • Enter the Engine Room in the Flashback.
  • Click on the mine cart.
  • Use the Gloves to move the hot coals, and collect the Brick.
  • Leave the Engine Room.
  • Use the Brick to smash the bottle; take the
  • Return to the Stateroom, and use the Key to enter the closet.
  • Click on the sparkles to start an Hidden Object Scene.
  • Complete the scene, and collect the Golf Club.
  • Go back to the Engine Room.
  • Use the Golf Club on the handles of the cabinet near the right of the scene.
  • Go back through the portal to the wreckage.
  • Enter the Underwater Engine Room.
  • Remove the Golf Club
  • Click on the sparkles to start the second Hidden Object Scene of the chapter.
  • Complete the scene to get the
  • Go through the portal.
  • Use the screwdriver on the door handle in the Flashback FIrst Class Passageway.
  • This starts a randomized puzzle.
Hidden Mysteries - Return to Titanic - Door Handle

Hidden Mysteries – Return to Titanic – Door Handle

  • Solve the puzzle to enter Diana’s stateroom.
  • Talk to the ghost of Diana’s brother.
  • Return to the wreckage, and talk to Diana’s ghost.
  • Go to the Underwater Grand Staircase, and talk with the Overseer.

Chapter 3

  • Go up the staircase to the Reading Room.
  • Click on the fireplace, and take the Fireplace Shovel.
  • Leave the ship, and go to the Stern Hull.
  • Use the Fireplace Shovel to dig up the sand.
  • Take the Pipe Wrench.
  • Go inside the wrecked ship, and enter the Washroom.
  • Use the Pipe Wrench to remove the
  • Go back to the Reading Room.
  • Click on the floor near the cracked bowl; take the J Shaped Pipe and the Pocket Watch.
  • Click on the table, and use the Pocket Watch on the board.
Hidden Mysteries - Return to Titanic - Pocket Watch

Hidden Mysteries – Return to Titanic – Pocket Watch

  • Completing the puzzle reveals Janeck; this chapter’s goal.
  • Go through the portal
  • Speak to Flashback Janeck.
  • Enter the Flashback Washroom.
  • Grab the
  • Go back through the portal to the Underwater Washroom.
  • Use the Plunger to unclog the toilet.
  • Take the Gold Disk.
  • Go back through the portal to the Flashback Reading Room.
  • Click on the box. Use the Scissors to cut the rope.
  • Take the book, and put the book on the shelf on the right of the scene.
  • Zoom in on the lock that was revealed.
  • Put the Gold Disk into the open space.
  • This starts a randomized puzzle minigame. The goal is to match the icons on the medallions with the icons on the spaces. Each medallion will slide, meaning it needs a clear path to its destination in order to be moved.
Hidden Mysteries - Return to Titanic - Medallions

Hidden Mysteries – Return to Titanic – Medallions

  • Complete the puzzle to open the Secret Passageway. Take this.
  • Knock over the trashcan to find the Small Key.
  • Take the door to the Flashback Infirmary.
  • Take the Flashlight from the cabinet.
  • Find the Bed Pan under the sheets.
  • Use the Small Key to unlock the closet.
  • Click on the sparkles to start a Hidden Object Scene.
  • Complete the scene to earn an Oxygen Tank.
  • Go back to the Flashback Washroom.
  • Put the Oxygen Tank in the porthole.
  • Go back through the portal to the Underwater Washroom.
  • The Oxygen Tank blew out a large hole in the ship’s hull. Exit the ship.
  • Click on the sparkles to start a Hidden Object Scene.
  • Complete the scene to get the Fire Station Mallet.
  • Return to the Flashback Secret Passage.
  • Use the Fire Station Mallet to break the glass.
  • Take the Fire Axe.
  • Go Back to the Flashback Washroom.
  • Chop beam, at the top and bottom, to get the Wood Beam.
  • Go to the Underwater Washroom, and exit the ship.
  • Place the Wood Beam over the rift in the scene.
  • Go to the Coral Reef.
  • Click on the hole. Use the Flashlight, and take the Paint Scraper.
  • Leave the Coral Reef.
  • Use the Paint Scraper to take the Mussels from the side of the ship.
  • Collect the Mussels in the Bed Pan.
  • Go back to the Coral Reef.
  • Feed the octopus the Mussels
  • Click on the canister. Take the SOS Message.
  • Go to the Underwater Reading Room and speak with Jack’s Ghost.
  • Return to the Grand Staircase.

Chapter 4

  • Exit via the Port Hull
  • Click on the crank. Take the Crowbar.
  • Return to the Underwater Washroom, and exit the ship.
  • Click on the Crane, and use the Crowbar to remove the
  • Received the David Crank.
  • Click on the sparkles to start a Hidden Object Scene.
  • Complete the scene to get the Metal Shears.
  • Return to the Port Hull.
  • Click on the Crank. Use the Davit Crank to spin the handle.
  • Click on the sparkles to start a Hidden Object Scene.
  • Complete the scene to get the Diavit Hook.
  • Attach the Diavit Hook onto the chain, and attach the chain to the ship.
  • Spin the handle on the crank again.
  • Enter the Dining Room.
  • Pull on the
  • Click on the rubble, and take the Champagne.
  • Enter the Bar.
  • Take the Menu.
  • Place the Champagne on the shelf to start a randomized puzzle.
  • Solve the puzzle, and talk to Montague’s ghost.
Hidden Mysteries - Return to Titanic - Champagne

Hidden Mysteries – Return to Titanic – Champagne

  • Enter the Flashback Dining Room.
  • Click on the sparkles to start a Hidden Object Scene.
  • Complete the scene to get the
  • Click on the coat; take the Luggage Key.
  • Click on the table. Use the Thick Rag to remove the lid.
  • Take the Carving Knife.
  • Go to the Flashback Gallery.
  • Take the Baking Soda from the Cabinet.
  • Go to the Flashback Boat Deck.
  • Speak with Montague.
  • Remove the cover from the lifeboat, and take the Boat Hook.
  • Click on the chest. Take all five Darts.
  • Prop open the Ice Chest Door with the
  • Take the Ice Axe.
  • Place the Darts on the dartboard to start a randomized puzzle.
  • Solve the puzzle, and click on the compartment behind the dart board.
Hidden Mysteries - Return to Titanic - Dartboard

Hidden Mysteries – Return to Titanic – Dartboard

  • Take the Hair Gel and Comb.
  • Use the Boat Hook to move the Chandelier.
  • Go back through the portal.
  • Enter Montague’s Stateroom through the new hole.
  • Take the note,
  • Click on the Table Drawer, and take the Scrub Brush.
  • Click on the wardrobe door, and take the Tie.
  • Use the Metal Shears to cut open the Locker door.
  • Take the Gate Key.
  • Go back to the Underwater Port Hull.
  • Open the luggage with the Luggage Key, and take the Suit.
  • Go to the Underwater Bar.
  • Click on the Use the Baking Soda and then the Scrub Brush to clean the valve.
  • Spin the Valve.
  • Go into the Underwater Dining Room.
  • Click on the ice. Use the Ice Axe four times.
  • Take the Shoes.
  • Return to the Underwater Lower Lobby.
  • Click on the Fireplace, move the wood, and take the
  • Take the Trowel.
  • Unlock the Gate with the Gate Key.
  • Speak with the ghost.
  • Enter the Underwater Music Room.
  • Click on the hole, and take the seven Piano Keys.
  • Proceed into the Underwater Luggage Room.
  • Use the Carving Knife to cut the Netting.
  • Click on the sparkles to start a Hidden Object Scene.
  • Complete the scene to get the Tie Down Straps.
  • Return to the Flashback Boat Deck.
  • Use the Netting on the racquets to get Racquet Net.
  • Exit the ship via the Underwater Washroom.
  • Go to the Coral Reef.
  • Use the Racquet Net to catch the Tuna.
  • Go to Underwater Montague’s Stateroom.
  • Zoom in on the Luggage to start a puzzle.
  • Fit all the luggage into the suitcase to get Robert’s Suitcase.
Hidden Mysteries - Return to Titanic - Luggage

Hidden Mysteries – Return to Titanic – Luggage

  • Return to the Flashback Bar.
  • Give Robert’s Suitcase to the seated man.
  • Go to the Flashback Gallery.
  • Place the Tuna on the cutting board, and chop it with the Carving Knife.
  • Take Buxley.
  • Go to the Flashback Deck.
  • Give Buxley to Montague.
  • Go back to the Underwater Bar and speak to Montague’s Ghost.


Chapter 5

  • Go back to the Flashback Lower Lobby.
  • Click on the table, and click on the top tap of the book.
  • Take the Number 2.
  • Go to the Flashback Music Room.
  • Click on the Piano.
  • open the Bench lid, and take the Mosaic Tiles.
  • Take the Shrimp.
  • Open the desk drawer, and take the Matches.
  • Enter the Flashback Cargo Hold.
  • Open the chest, and take the Egyptian Staff.
  • Use the Tie Down Straps on the Luggage on the shelf.
  • Take the Mosaic Tiles.
  • Leave the Flashback Cargo Hold, and enter the Flashback Linen Room.
  • Place the Washboard inside the laundry bucket.
  • Click on the sparkles to start a Hidden Object Scene.
  • Complete the scene to get the Sheet Music.
  • Enter the Turkish Baths via the stairs.
  • Take the Bath Salts from the cabinet.
  • Remove the towels from the hamper, and take the number 8.
  • Light the fire with the Matches.
  • Go to the Linen Room.
  • Use the Bath Salts on the laundry bucket, and take the Blue Gem.
  • Go to the Flashback Music Room.
  • Use the Piano Keys and Sheet Music on the Piano to get the Yellow Gem.
  • Go to the Underwater Music Room.
  • Feed the crab the Shrimp, and get the Heart Shaped Key.
  • Enter the Underwater Cargo Hold.
  • Click on the luggage to start a randomized puzzle.
  • Solve the puzzle by organizing the luggage to resemble stairs.
Hidden Mysteries - Return to Titanic - Organizing Luggage

Hidden Mysteries – Return to Titanic – Organizing Luggage

  • Go up the luggage to the Underwater Turkish Baths.
  • Take the Mosaic Piece.
  • Use the Egyptian Staff on the window to get the Empty Bucket.
  • Go to the Underwater Music Room.
  • Place the Mosaic Tiles on the board to start a randomized puzzles.
  • Complete the pattern in the puzzle to receive the Red Gem.
Hidden Mysteries - Return to Titanic - Mosaic Tiles

Hidden Mysteries – Return to Titanic – Mosaic Tiles

  • Go to the Flashback Music Room.
  • Open the box on the desk with the Heart Shaped Key.
  • Take the Number 5.
  • Go to the Flashback Luggage Room.
  • Click on the Briefcase, use the Number 8, the Number 2, and the Number 5 in that order.
  • Move the Number 5 and Number 8 up to open the briefcase; take the Glass Cutter.
  • Go to the Linen Room.
  • Turn the sink on, and fill the bucket to get Bucket of Water.
  • Go to the Flashback Turkish Baths.
  • Use the Bucket of Water on the coals to get the Green Gem.
  • Go to the Flashback Lower Lobby.
  • Place the Red Gem, Yellow Gem, Green Gem, and Blue Gem into the lock on the game to start a randomized puzzle.
  • Solve the puzzle, and go to the Underwater Port Hull.
  • Hidden Mysteries - Return to Titanic - Gems

    Hidden Mysteries – Return to Titanic – Gems

  • Click on the sparkles to start a Hidden Object Scene.
  • Complete the scene to get the Push Button.
  • Go to the Underwater Dining Room.
  • Cut the ice on the floor with the Glass Cutter, and take
  • Go to the Flashback Linen Room.
  • Use the Hacksaw to take the Curved Pipe.
  • Go to the Underwater Turkish Baths.
  • Install the Curved Pipe, and take the Gate Release Lever.
  • Go to the Flashback Turkish Baths.
  • Use the Gate Release Lever to open the gate.
  • Return to the Underwater Lower Lobby and talk to Joseph’s ghost.
  • Go back to the Underwater Grand Staircase.

Chapter 6

  • Go up the stairs to the Underwater Upper Lobby.
  • Move the pillow, and take the Drawer Knob.
  • Go to the Forward Deck.
  • Take the Socket Wrench from the bag.
  • Enter the Captain’s Quarters.
  • Click on the dresser, move the board, and take the Letter Opener.
  • Go to the Underwater Upper Lobby.
  • Cut the canvas with the Letter Opener; take the Crew Photo.
  • Go to the Captain’s Quarters.
  • Place the Crew Photo into the empty photo frame.
  • Speak with the Captain’s Ghost.
  • Go through the portal, and enter the Flashback Forward Deck.
  • Use the Socket Wrench to remove the bolt on the alarm, and take the Alarm Clock Bells.
  • Click on the door on the right of the screen.
  • Take the Desk Key and the note from the drawer.
  • Remove the floorboard on the left of the scene, and grab the Quarter.
  • Enter the Flashback Wheelhouse.
  • Take the Storage Key.
  • Place the Push Button on the time clock.
  • Use the Push Button to receive Unpunched Time Card.
  • Take the Crowbar from the cupboard.
  • Enter Flashback Marconi Room.
  • Use the Drawer Knob on the drawer, and take the Mini Screwdriver.
  • Return to the Flashback Wheelhouse, and go to the Bow.
  • Use the Storage Key on the chest.
  • Click on the sparkles to start a Hidden Object Scene.
  • Complete the scene to get the Car Jack.
  • Go to the Flashback Captain’s Quarters.
  • Use the Desk Key on the desk.
  • Click on the sparkles to start a Hidden Object Scene.
  • Complete the scene to get the Magnifying Lens.
  • Return to the Underwater Cargo Hold.
  • Click on the sparkles to start a Hidden Object Scene.
  • Complete the scene to get the Wood Saw.
  • Use the Car Jack to lift the car, and take the Car Tire Rim.
  • Go to the Underwater Turkish Baths.
  • Use the Crowbar to open the clam, and take the pearl.
  • Go to the Underwater Upper Lobby.
  • Put the Pearl above the barracuda.
  • Pick up the Alarm Clock Bells.
  • Go to the Flashback Captain’s Quarters.
  • Place both Alarm Clock Bells in the clock.
  • Go to the Flashback Bow.
  • Use the Car Tire Rim to lower the ladder.
  • Go to the top of the Crow’s Nest, and take the Marconi Tube.
  • Use the Wood Saw on the mast.
  • Go to the Underwater Forward Deck and enter the Underwater Wheelhouse.
  • Click on the sparkles to start a Hidden Object Scene.
  • Complete the scene to get the Marconi Dial.
  • Click on the Skeleton. Use the Mini Screwdriver to remove the screw, and take the Magnifying Lens.
  • Take the first Pool Ball and Forceps from the first aid kit.
  • Place the Unpunched Time Card into the time clock to start a randomized puzzle.
  • Solve the puzzle, and go to the Underwater Bridge.
  • Hidden Mysteries - Return to Titanic - Time Card

    Hidden Mysteries – Return to Titanic – Time Card

  • Click on the door, place both Magnifying Lenses, and take the Binoculars.
  • Go to the Flashback Marconi Room.
  • Underneath the cabinet, use the Forceps to take the Quarters.
  • Put the Marconi Tube and Marconi Dial into the Marconi device to start a randomized puzzle.
Hidden Mysteries - Return to Titanic - Marconi Device

Hidden Mysteries – Return to Titanic – Marconi Device

  • Solve the puzzle to receive the Marconi Message.
  • Go back one scenario.
  • Place the Punched Time Card into the time clock.
  • Take the Schedule.
  • Hang the Marconi Message on the corkboard.
  • Go to the Flashback Bow, and place the binoculars on the Crow’s Nest stool.
  • Go to the Underwater Upper Lobby.
  • Use both Quarters on the Candy Dispenser to get the Toy Seagull.
  • Go to the Underwater Captain’s Quarters.
  • Place the Toy Seagull on the ledge on the clock, and take the Clock Gear.
  • Go to the Flashback Captain’s Quarters.
  • Place the Clock Gear into the clock, and set the alarm hand to 11.
Hidden Mysteries - Return to Titanic - Captain's Gear

Hidden Mysteries – Return to Titanic – Captain’s Gear

  • Return to the Underwater Captain’s Quarters and speak to the Ghost of the Captain.

Chapter 7

  • Go to the Underwater Grand Staircase, and talk to the Overseer.
  • Go to Your Room via the First Class passageway.
  • Rip open the mattress to find the second Pool Ball.
  • Take the Empty Blow Torch from the vent on the floor.
  • Go through the portal.
  • Find the third Pool Ball under the sheet.
  • Move the snow globe, and take the fourth Pool Ball.
  • Go to the Flashback First Class Passageway.
  • Take the fifth Pool Ball.
  • Click on the plant, and take the Pruning Shears.
  • Dig up the Soil using the Trowel to get the sixth Pool Ball.
  • Take the seventh Pool Ball from inside the fireplace.
  • Go to the Flashback Smoking Lounge.
  • Grab the Wine Bucket and the eight Pool Ball.
  • Go to Café Parisian via the Flashback Grand Staircase.
  • Click on the sparkles to start a Hidden Object Scene.
  • Complete the scene to get the Fuel Hose.
  • Move the vase to get the ninth Pool Ball.
  • Cut the Vines with the Shears, and take the tenth Pool Ball.
  • Go to the Flashback Upper Lobby.
  • Move the pillow to pick up the eleventh Pool Ball.
  • Take the twelfth Pool Ball from the drawer.
  • Go to the Flashback Forward Deck.
  • Open the lid to the Fuel Tank to get the thirteenth Pool Ball.
  • Use the Hose and the Empty Blow Torch on the Fuel Tank to receive the Blow Torch.
  • Click on the doorway, and close to drawer to get the fourteenth Pool Ball.
  • Go to the Underwater elevator Shaft.
  • Use the Wine Bucket to hold the elevator open, and take the fifteenth Pool Ball.
  • Open the panel, and take the
  • Go to the Underwater Engine Room.
  • Click on the sparkles to start a Hidden Object Scene.
  • Complete the scene to get the Sledgehammer.
  • Click on the door, and place the Gear.
  • Enter the Underwater Maintenance Room.
  • Take the Bolt Cutters.
  • Use the Blowtorch to open the gate, and take the Harpoon Gun.
  • Go through the portal to Flashback Your Room.
  • Use the Sledgehammer on the cracked ceiling.
  • Go to the Flashback Smoking Lounge.
  • Place all Fifteen Pool Balls on the Pool Table to start a puzzle.
  • Solve the Puzzle to get the Wax Ball.
Hidden Mysteries - Return to Titanic - Pool Table

Hidden Mysteries – Return to Titanic – Pool Table

  • Use the Bolt Cutters to cut the chain on the Window.
  • Click on the sparkles to start a Hidden Object Scene.
  • Complete the scene to get the
  • Use the Lighter on the wood in the fireplace.
  • Put the Wax Ball near the fire, and take the Anchor Trinket.
  • Go to the Flashback Upper Lobby.
  • Use the Anchor Trinket on the lock in the wardrobe.
  • Move the coats to the left to get the Reach Claw.
  • Move the coats to the right to get the
  • Go to Underwater Your Room.
  • Get the Hand Drill from the toolbox.
  • Go to the Underwater Engine Room.
  • Use the Reach Claw to get the Harpoon Spear from the grate, and complete the Harpoon Gun.
  • Go to the Underwater Elevator Shaft.
  • Shoot the elevator with the Harpoon Gun.
  • Take the Pulley Lever.
  • Go to the Underwater Machine Room.
  • Put the Pulley Lever on the crank.
  • Pull the lever, and click on the chest to start a randomized puzzle.
  • Solve the puzzle, open the chest, and take the Hand Drill.
Hidden Mysteries - Return to Titanic - Randomized Puzzle

Hidden Mysteries – Return to Titanic – Randomized Puzzle

  • Go to Flashback Your Room.
  • Move the mirror to find the safe.
  • Use the Hand Drill on the safe and the tweezers on the hole to open the safe.
  • Take the Note and the Money.
  • Go to Flashback Forward Deck.
  • Give the Money to Montague.
  • Climb up the ladder, and speak to Robert Ashley.

Congratulations! You have officially completed our  Hidden Mysteries – Return to the Titanic Walkthrough!

Delicious – Emily’s Hopes and Fears Walkthrough

Big City Adventure – Shanghai Walkthrough

Building the Great Wall of China 2 Walkthrough
The Hidden Mysteries – Return to the Titanic Walkthrough is meant as a guide and does not contain cheats, hacks, or serials.

The post Hidden Mysteries – Return to the Titanic Walkthrough appeared first on GameHouse.
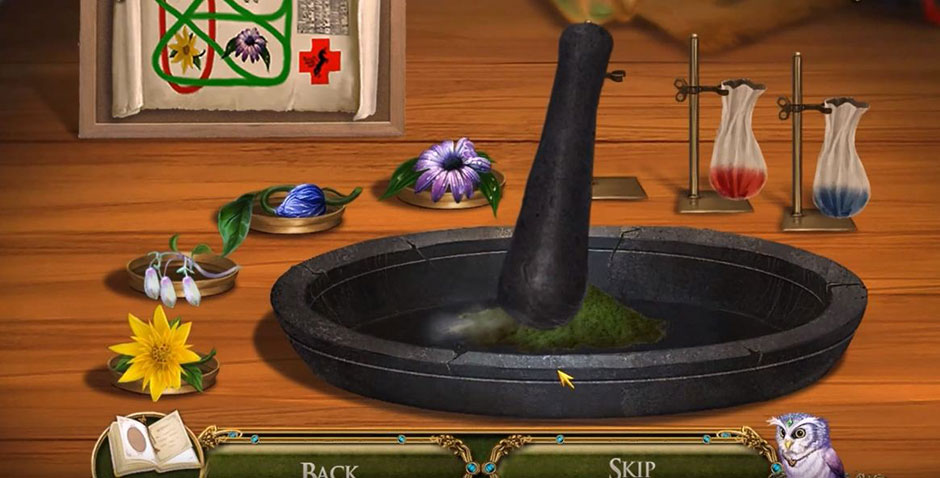
Lost Lands – The Four Horsemen Walkthrough

$
0
0

The evil Four Horseman have returned to destroy the Lost Lands! Luckily, a hero has arisen to save the realm from destruction, and that hero is you! Below you will find countless tips and tricks that will help you upon your quest. The Lost Lands is a mystical place that will test your survival skills. But remember, you are not alone! Use this comprehensive walkthrough to provide you with essential tips and tricks to complete the journey in its entirety.

Contents

General Tips & Tricks

Lost Lands – The Four Horsemen is an action puzzle game that will take you on an epic journey. The Five Realms can be a very dangerous place for a new adventurer. Lost Lands – The Four Horsemen is a very unique game that presents head scratching puzzles at the turn of every corner.

Your inventory is located at the bottom of the screen. Certain items like the Knife can be used multiple times during your journey. However, you will often acquire items that can be used only once. Single use items usually unlock new areas and sometimes other items. Every item that you pick up will have a use of some kind.

If you are unable to find your way, a simple press of the Hint button will help you discover the correct route. Each location offers a different challenge that will require you to scan the area thoroughly. Quest items can sometimes be hard to find, but a slow approach is often the best. If you find that you are completely stumped, don’t be afraid to read our detailed walkthrough. The Five Horseman are dangerous, but we are here to help you save the Five Realms.

Lost Lands – The Four Horsemen Walkthrough

Chapter 1: The Glades

Pick up the Ladder from the base of the cottage.

The Ladder will be added to your inventory at the bottom of the screen.

Place the Ladder on the side of the cottage to reach the room above.

Enter the room above and grab the Knife Handle.

Leave the room after you have inspected it.

Locate the Knife Blade, which is impaled into a piece of paper on a tree stump.

Attach the Knife Handle to the Knife Blade and pull it free.

Read the document about Maaron the Hermit.

You will discover that Maaron is responsible for the safety of the Five Worlds.

Collect the Shovel, which is located next to the Magical Blue Orb.

Monk Figurine can be found to the left of the wagon.

Use your Knife to cut the sack located on the wagon.

The birds located in the room above the cottage will eat the grain spilled from the sack.

Re-enter the room above the cottage and grab the Key from the empty bird’s nest.

Monk Figurine is also retrievable from the shelf now.

Insert the Key into the door handle of the cottage.

Open the door and enter.

Once you are inside of Maaron’s Cottage, click the Glowing Sun Sphere.

A short video will play, and then Maaron will appear.

Speak to Maaron.

You will discover that you’re the chosen one, and it is up to you to save the Forgotten Lands!

Maaron hands you a Rune so that you can teleport between locations.

Once Maaron has left, search the room for important items.

Click the Hay Bale twice to reveal a Sickle.

Search the draws to the right of the fireplace to retrieve a Candle and Manuscript.

Open the top draw and remove the cloth to reveal a Fuel Oil Can.

The third and fourth Monk Figurines are located in Maaron’s cottage as well.

The third Monk Figurine can be found on the bookshelf to the left.

The fourth Monk Figurine can be found on the chair in front of the fireplace.

Exit the cottage.

Insert the Rune into the rock located in front of the cottage.

The rock will glow purple, and you will be teleported to a new location.

Once you have arrived to the tower, grab the Hammer from the rock to the left.

Walk down the path to the left.

You will come upon a beach with a Mermaid.

Speak to her.

The Mermaid reveals the ancient history of her lake, and she forbids you from taking water from it.

Search the boat to the left.

The items located on the boat are missing important pieces.

Click on the Box near the top left of the boat.

Put the picture back together and grab the Scissors.

Lost Lands - The Four Horsemen - Mosaic1

Lost Lands – The Four Horsemen – Mosaic1

Another Hammer can be found on the boat as well.

Dragon Figurine is located on the ground to the side of the boat.

It can be used to open a box which reveals an Amulet.

Use the Amulet to reveal a piece of the missing Triangle.

There is also a Key located to the bottom left of the boat.

It will unlock the small brown box to reveal an Angel Figurine.

You can use the Scissors to cut the Angel Figurine free from the net.

The two Angel Figurines open the Silver Box, which reveals a Magnifying Glass.

Use the Magnifying Glass to reveal the Puzzle Code of the locked box.

Insert the Puzzle Code into the box to retrieve another piece of the Missing Triangle.

Lost Lands - The Four Horsemen - Puzzle Code

Lost Lands – The Four Horsemen – Puzzle Code

Insert both Triangle Pieces into the box to reveal a Stopcock.

Use your Hammer to break the encasing of the Stopcock to free it.

Click on the Thorny Thistle Bush.

Cut down the Bush using your Sickle to reveal the fifth Monk Figurine.

There is a Key on the shore in front of the mermaid’s rock.

You will also discover that something had been dug up in that location as well.

Use the Shovel to reveal a Music Box Drum.

Exit this area for now and return to the start of the level.

Insert the Strange Key into the gate to the left.

Enter the new location to the left.

Look to your right and collect the Pitchfork, the Fishing Net, and the sixth Monk Figurine.

Use the Pitchfork on the large bay of hale to reveal the seventh Monk Figurine.

Click on the Lantern to the left of the moose head to retrieve a Blue Energy Sphere.

Find the red Music Box and click on its handle.

Insert the Music Box Drum into the red Music Box.

Leave this area for now and return to Maaron’s cottage.

Click on the carpet in front of the fireplace and remove the nails with the Hammer.

Saw will be revealed.

Insert the Stopcock into the box beneath the Purple Window.

A mini game will begin once the Stopcock is inserted.

Rotate the images so that they match the background.

Lost Lands - The Four Horsemen - Blue Energy Sphere

Lost Lands – The Four Horsemen – Blue Energy Sphere

Once the puzzle is complete, you will be rewarded with a Blue Energy Sphere.

Exit the cottage and enter the purple portal.

Insert the Blue Energy Spheres into the pedestals in front of the tower.

A short cutscene will follow.

Use your Saw on the branches to the bottom left in order to retrieve the 8th Monk Figurine.

Insert the 8 Monk Figurines into the tower door.

A short mini game will begin, and you will need to link the Monk Figurines together correctly.

Once you complete the puzzle, the door will open.

Lost Lands - The Four Horsemen - Monk Figurines

Lost Lands – The Four Horsemen – Monk Figurines

Enter the tower.

Matchbox can be found in front of the well.

A floorboard to the left can be lifted with your Knife.

Once you have done this, a Mosaic Fragment will be revealed.

Place a Candle into the empty hood of the statue to the left.

Light the Candle with the Matchbox.

A jar of Purple Essence will be revealed.

Click on it and cut off the Tassel from the curtain to the right.

Leave the area and return to the mermaid lake.

Use the Net in order to collect the Duckwood near the shore.

Return to Maaron’s cottage, and examine the table to the left.

You will be making a water portal.

Place the Duckweed into the mortar and crush it up using the pestle.

Next, put the mortar onto the burner and then pour the Purple Essence into it.

Click on the mortar to collect the Powder of the Flying.

Exit the room and enter the area to the left.

Clean off the Music Box Drum using the Tassel.

Close the box and then turn the lever of the Music Box.

Collect the Phoenix Feather and return to the tower.

Insert the Power of the Flying and the Phoenix Feather into the well.

You will then be transported to a new location.

Chapter 2: The Corridor

Collect the Wooden Gear to the right.

Click on the Pile of Stones to reveal a Key.

Collect the Key and return to the area with the Music Box.

Once you have returned to the halfling settlement, click on the pulley system to the left and insert the Wooden Gear.

Click the Wooden Handle to reveal a Wooden Plank.

Take the Plank.

Insert the Key into the wooden door to the right.

This is a hidden items area.
CashRegister
Find all of the items and complete the puzzle to collect the Stone Chip.

After you have completed this area, travel to the area where you first encountered the mermaid.

Place the Wooden Plank across the water.

Return to the upper corridor.

Place the Stone Chip into the pedestal in the room ahead.

A mini game will unlock, and you must complete it by matching the highlighted symbols.

Lost Lands - The Four Horsemen - Match The Symbols

Lost Lands – The Four Horsemen – Match The Symbols

Once you have solved the puzzle, you will be rewarded with a Rune.

Return to the lake of life.

Maaron will be there waiting for you.

He will give you a Mosaic Fragment, and he will ask you to find a very important Compass.

Insert the Rune on the island to the right.

You will be transported to a new location.

Find the Whale RibStone RunePlankJar of Flies, and the Gaft.

Use the Oil Can to lubricate the Rusty Crank.

Place the Wooden Planks onto the base of the tree.

You will notice that you are missing Nails to fasten them.

Move ahead to the next area.

Retrieve the Nails from the small well and insert the Stone Rune into the pyramid to the left.

To the left, there’s a small room blocked by a large boulder.

Use the Whale Rib to remove the boulder and click the door to enter a hidden objects area.

Locate all of the hidden items to reveal a very important Handle.

Return to the previous area.

Attach the Handle to the small well and then click on the bucket of soil twice to reveal Dynamite.

Grab the Dynamite and return to the area with the Whale Skeleton.

Return to the tree and fasten the planks with the Hammer.

Climb the tree and retrieve the Tongs.

Travel to the ship and place the Dynamite in front of the Wooden Planks.

We don’t have a fuel source right now, and we must return to the tower entrance.

Use the Tongs to retrieve the Tower Figurine from the campfire.
Return to Maaron’s cottage.

Use the Gaft to open the trap door located in the top left of the room.

You will receive a Crystal for your troubles.

Place the Tower Figurine onto the shelf on the right of the room.

Exit out of the room and return to the area with the Music Box.

Use the Jar of Flies to retrieve the Snake from the glass container.

Return to the Halfling’s settlement.

Click on the tree to the right and let the Snake loose to scare away the scorpion.

Use the Knife to cut the stone free from the rope.

Grab the Monocle from the skull of the skeleton.

Move the skeleton’s hand to collect the Mosaic Fragment.

Exit the area and return to the broken down pirate ship.

Place the Monocle in front of the Dynamite.

There will be a massive explosion, and then you can collect the Ship’s Wheel.

Travel to the new area to your right.

Use the Stone on the Rope to pull down the tree branch with the nest on it.

Retrieve the Mosaic Fragment, Stone Rune, and Brush.

Hit the return button once, and then click on the rock that is located in front of the Cactus to the right.

Use your Brush to clean the rock.

An important image is revealed.

This will come in handy later.

Exit the area and move to the left.

Place the Stone Rune into the pyramid and travel to the canyon.

Click on the Crystal, and then move the base around until it creates an image.

Once the correct image is displayed, a beam will shine into the room to the left.

Lost Lands - The Four Horsemen - Crystal

Lost Lands – The Four Horsemen – Crystal

Enter the doorway to the left.

Chapter 3: Temple

Click the chain on the floor, and then attach it to the statue to the left.

There’s also a Stone Rune located underneath the statue.

Place the Ship’s Wheel onto the stone column to the right.

Retrieve the Gear from the base of the statue.

Place it onyl the mechanism to the right near the Ship’s Wheel.

You will unlock a mini game, and you must solve this puzzle by placing the Gears in the correct positions.

Once you have completed the minigame, click on the Ship’s Wheel.

Spear will be revealed, and you can use it to retrieve a Mosaic Fragment from the Canvas hanging above.

Place the five Mosaic Fragments into the pedestal up ahead.
This will trigger a mini game.

Solve the puzzle by placing the symbols into the correct locations.

You can also use a hint to solve this puzzle rather easily.

Lost Lands - The Four Horsemen - Mosaic Fragments

Lost Lands – The Four Horsemen – Mosaic Fragments

Enter the room ahead and collect the Note With Symbols.

Return to the Halfling Settlement.

Click on the pyramid structure and insert the final Stone Rune.

Once the Pyramid is open, use the Note With Symbols to create an exact replica of the image.

Lost Lands - The Four Horsemen - Pyramid

Lost Lands – The Four Horsemen – Pyramid

Retrieve the Device that emerges once the puzzle has been solved.

Once you collect the item, a short clip will play.

You’ll meet a dwarf that will tell you more about the Horsemen.

Retrieve the Leather, Rope, and Two Steps.

Exit the area to the right.

Collect the Flywheel and the Glove, and attach the Lever to the Trigger nearby to start a minigame.

Lost Lands - The Four Horsemen - Mini Game

Lost Lands – The Four Horsemen – Mini Game

Place the correct images in the right locations to solve the puzzle.

Exit the area by pressing the return button.

Use the Glove in order to connect the Crystal.

Exit the room to the right.

Insert the Crystal into the component to the left.

Click on the lid and then move ahead.

Talk to the dwarf once more to find out more information about the area ahead.

Use your Knife to cut the bottle of Cold Water free from the rope.

Attach the Flywheel to the mechanism and click on it.

Retrieve the Yield Remover which can be found underneath the waterfall.

Exit the room and head downstairs.

Click on the Corkscrew and the Bowl in order to add them to your inventory.

Click on the Green Fountain in order to unlock a hidden items area.

Be sure to collect each and every item located on the bottom of the screen, and don’t forget to collect the Hammer.

Click the Chain twice, and then retrieve the Circle Sector before leaving.

Hit the return button three times.

Use the Corkscrew to remove the Jammed Cork, and then place the bowl down to retrieve the powder.

Exit the room to the square.

Use the Powder to create a chain of powder.

Exit to the right twice.

Grab the Crowbar, click on the Stones, and then retrieve the Medallion and the Sieve.

Place the Medallion into the statue’s belt.

Hit return once, and then use the Crowbar to pry free the boards in order to reveal a hidden items area.

Retrieve all the items located at the bottom of the screen, and be sure to collect the Emerald.

Exit the area by hitting return once.

Insert the Emerald Key and move to the right twice.

Chapter 4: The Village

Insert the Emerald Key into the gate up ahead.

Walk ahead and begin the hidden objects area.

Find all of the items listed below, and then collect the Hidden Symbol.

Move to the next area.

Use the Feather to tickle the sleeping man’s foot.

Retrieve the Meat, and use the Knife to cut open the tent to the left.

Travel to the left.

Throw the meat to the hungry wolf, retrieve the Step and the Trough.

Place the Circle Selector in the pedestal, and hit return once.

Use your Knife to cut the Leather Sack free from the pull handle.

Hit the return button 4 times.

Place the Trough into the box to the right of the waterfall.

Click on the mechanism to begin a mini game.

Correctly adjust the weights in order to solve the puzzle.

You can also use a hint if you’re having trouble.

Exit the area to the right.

Speak to the man who is waiting for you, and then collect the Step.

Be sure to click on the flowers and collect the Circle Selector hidden underneath them.

Return to the marquee.

Place the Circle Selector in the pedestal up ahead to begin a minigame.

Match all of the images correctly in order to solve the puzzle.

Lost Lands - The Four Horsemen - Flower

Lost Lands – The Four Horsemen – Flower

Use your Knife to retrieve the Flower.

Travel to Mountgore’s Temple.

Hand the flower to the spirit of Mountgore.

Use the Yield Remover to retrieve the Apple from the tree above.

Travel to the mines.

Click on the Four Steps and reinforce them with the Rope Selection.

Retrieve the ladder and position it onto the wall.

Exit to the canyon.

Use the sieve to retrieve the Gold Ore.

Select the Hammer and use it twice to collect the Hearts of Stone.

Retrieve the Key from the sand and exit to the left.

Use the Leather Sack to retrieve the Ashes.

Hit the return button four times.

Use the Hammer and click on the chain.

Retrieve the Horn that appears, and then return to Maaron’s Cottage.

Give Maaron the Stone Hearts, and you will be awarded with a Dwarf Figurine.

Hit return once and then travel to the left.

Use the Dwarf Figurine in the box to the left to begin a mini game.

Place the correct shield and swords together in order to complete the puzzle.

Lost Lands - The Four Horsemen - Shields and Swords

Lost Lands – The Four Horsemen – Shields and Swords

You will receive a Symbol.

Place the Symbol into the pedestal, and then collect the Rune Stone.

Place the Rune Stone into the slot up ahead.

Move ahead.

Retrieve the Basket and the Bottle.

Use your Knife to open the locked door and enter.

Chapter 5: The Hut

Talk to the werewolf.

He will tell you more about the Four Horsemen.

Retrieve the Wool, the Scoop, and inspect the Recipe.

Click on the oven, and then zoom in.

The wall to the right will trigger a mini game, and solving this puzzle requires you to rotate the Discs similar to the image on the oven door.

You can also click the hint button to solve the puzzle rather easily.

Lost Lands - The Four Horsemen - Discs

Lost Lands – The Four Horsemen – Discs

Click on the cover to the left to receive the Medallion.

Return to the temple of the dwarves.

Place the Medallion into the pedestal to the right, and then click the armor and retrieve the Medallion.

Return to the mines.

Insert the key into the stone door. Move ahead into the Fire’s Dwelling.

Retrieve the Door Figurine from the hole in the floor, and then exit to the Dwarf cemetery.

Place the Medallion into the head of the statue.

Retrieve the Urn and move forward.

Click on the Boiling Pot of Water and insert the Scoop.

Retrieve the Saucepan and pour the Boiling Water onto the frozen statue.

Place the Horn into the statue to receive a Puzzle.

Exit to the area to the left.

The Berries to the left can be collected with the Basket.

Insert the Basket of Berries and the Bottle of Bubbles into the pressure machine.

Crush the Berries, and then fill the Bottle with the Sack of Ashes and Urn of Ashes.

Close the lid of the Bottle to receive the Turning potion.

Return to the Fire’s Dwelling.

Click on the throne and insert the Puzzle Piece to begin a mini game.

Connect all the puzzle pieces correctly to solve the mini game.

Lost Lands - The Four Horsemen - Puzzle Pieces Solution

Lost Lands – The Four Horsemen – Puzzle Pieces Solution

You will receive Moondust once the mini game has been solved.

Return to Maaron’s Cottage.

Insert the Door Figurine onto the shelf to the right.

Return to the Werewolf’s Hut.

Use the Turning Potion on the werewolf, and then retrieve the Key to open the trap door above you.

Head upstairs, and you will begin a hidden items area.

Find all of the items located at the bottom of the screen and retrieve the Lantern.

Move to the next area, and collect the mechanism Gear and Brush.

Use the Brush to remove debris from the compartment.

Click on the blanket to retrieve the Lantern Potion Recipe.

Click on the Weight to retrieve a Vial.

Hit the Return button once.

Click on the debris to collect a Stone Flower.

Hit the Return button once.

Click on the mechanism gear and then retrieve the Lever.

Return to the area up ahead.

Connect the Lever to the panel on the wall to the right.

Hit the return button once and move to the right.

You’ll enter a hidden items area.

Once you have found everything, you will recieve a Weight.

Move to the next area and retrieve the stone of fire.

Examine the Note and the hanging Lantern.

Insert Wool into the Lantern.

Return to the halfling settlement.

Place the Weight onto the moose head and collect the handle.

Return to Maaron’s Cottage.

Click on the mantle above the Fireplace and place the Vile and lantern potion recipe down.

Follow the directions of the potion recipe from the nearby diagram.

Lost Lands - The Four Horsemen - Latern Potion Recipe

Lost Lands – The Four Horsemen – Latern Potion Recipe


Lost Lands - The Four Horsemen - Potion Recipe

Lost Lands – The Four Horsemen – Potion Recipe

Exit to the corridor.

Place the Stone Flower into the pedestal to the left, and then collect the Glass Pipe and the Flask.

Return to the Forsaken Sea.

Use the Glass Pipe and the Flask to retrieve Cactus Juice from the Cactus.

Return to the Fire’s dwelling.

Place the Stone of Fire into the statue to the right and return to Maaron’s Cottage.

Use the Cactus Juice to complete the Lantern Potion.

Exit to the swamps

Use the Lantern Potion to light the Lantern to the left.

Move to the area up ahead.

Retrieve Alcohol Soaked Cloth, and examine the Mirror.

Click on the Satchel and enter the Correct Code.

Lost Lands - The Four Horsemen - Correct Code

Lost Lands – The Four Horsemen – Correct Code

You will receive a Precious Stone.

Click on the Cannon and use the Hammer to retrieve a Cork.

Chapter 6: The Lake

Place the Cork into the bottle of Rum and take it.

Dust off the Mirror and collect it.

Move forward.

Retrieve the Scissors and click on the Chain twice.

Place the Precious Stone into the slot to receive the Tuning Table.

Click on the Rope and then hit return twice.

Use the Tuning Table to begin a mini game.

Place the markers in the correct position as shown by the diagram to the right.

Lost Lands - The Four Horsemen - TuningTable

Lost Lands – The Four Horsemen – TuningTable

Once the mini game is completed correctly, you will receive the Fresco Detail.

Move forward twice.

Use the Fresco Detail on the door to the right to enter the dwarf slums.

Put the Scissors near the Tapestry.

Examine the Recipe on the oven door.

Put the Coal inside of the oven, and insert the bottle of Rum.

Return to the marquee.

Place the Handle under the trap door below and click on it.

Retrieve the Red Stone from the package and examine the Note.

Hit the return button three times.

Place the Red Stone into the compartment.

You will then retrieve a Jack.

Move to the right.

Use the Jack to retrieve the Parcel, and then use the Knife to open the parcel.

Collect the Punch Card.

Return to Maaron’s Cottage.

Click on the book in the corner, and insert the Punch Card.

Remember the symbols that are displayed on the Punch Card.

Return to the abandoned halfling settlement.

Click on the statue in the back, and enter the correct sequence similar to the one displayed on the Punch Card.

Lost Lands - The Four Horsemen - Punch Card

Lost Lands – The Four Horsemen – Punch Card

Retrieve the Key and return to the canyon.

Click on the red tent and insert the Key. You’ll receive a Chimera Head.

Return to The Swamp.

Place the Chimera Head on the statue to the right to retrieve the Fresco Detail.

Move forward twice.

Place the Fresco Detail into the gate to the right.

This will begin a mini game that can be solved by rearranging the image correctly.

Lost Lands - The Four Horsemen - Fresco

Lost Lands – The Four Horsemen – Fresco

Once the mini game is solved, you will receive a Vial For Living Water.

Return to the lake of life.

Talk to the mermaid, and then retrieve the Living Water with the Vial For Living Water.

Return to the canyon.

Click on the Code to begin a mini game.

Place the snakes in the correct positions in order to solve this puzzle.

You can also use the Hint button to easily solve this mini game.

Lost Lands - The Four Horsemen - Snakes

Lost Lands – The Four Horsemen – Snakes

You will receive a Boomerang for your troubles, and then you can return to the swamps.

Throw the Boomerang at the cage hanging above.

Retrieve the Note and Key.

Hit the return button once.

Open the locked door with the Key, and collect the easel.

Return to the tower.

Place the Easel and the mirror in front of the blanket to the right.

Click on the blanket to receive a Rune.

Hit the return button twice.

Place the Rune into the rock to the left.

This will begin a hidden items area.

Lost Lands - The Four Horsemen - Solution

Lost Lands – The Four Horsemen – Solution

Find all of the items and retrieve the Colorful Threads.

You’ll then be taken to a new area.

Retrieve the Boreskin, the Ram, and you use your Knife to cut the rope.

Click on the patch and retrieve the Wolf Figurine.

Move forward.

Chapter 7: The Junction

Retrieve the Tongs.

Put down the Ram and click on the rope.

Hit return once.

Look at the trap and use the Tongs to collect the Wheel.

Move forward.

Click on the Rod and place the Wheel on it.

Then click on the Ram and the Rope.

Move up into the attic.

Insert the Wolf Figurine into the chest lock and retrieve the Needle.

Return to the dwarf slums.

Look at the Tapestry, and then use the Colorful Thread and Needle to begin a mini game.

You must recreate the image to solve this puzzle.

Use your Scissors to retrieve the Tapestry.

Lost Lands - The Four Horsemen - Tapestry

Lost Lands – The Four Horsemen – Tapestry

Head over to the junction.

Fasten the Tapestry to the post to the right.

Head over to the left, and this will begin a hidden items area.

Find all of the items listed below, and retrieve the Pendulum Figurine.

Retrieve the Medallion in the next area, and click on the statue to begin a mini game.

Place all the Puzzle Pieces into the correct location to solve this puzzle.

Lost Lands - The Four Horsemen - Hunter's Star

Lost Lands – The Four Horsemen – Hunter’s Star

Retrieve the Hunter’s Star, examine the Note, and then place the Hunter’s Star into the pedestal.

Retrieve the Axe and hit the return button once.

Use the Axe to cut down the branches, and now you can enter the area to the right.

Talk to the Centaur, and retrieve the Comb and Pincers.

Look at the compartment and retrieve the Stone of Fire.

Return to Maaron’s Cottage.

Insert the Pendulum Figurine onto the shelf to the right.

Return to the Fire’s Dwelling.

Place the Stone of Fire into the column to the right and travel to the Dwarf Cemetery.

Use the Pincers to retrieve the dwarf shield and move to the Centaur’s village.

Hand the Dwarf Shield to the centaur and retrieve the Crystal Key.

Also, give the Boar Skin to the centaur as well.

Hit the return button once and head to the left.

Place the Crystal Key into the slot, and use the Staff to raise the Hunter’s Star.

Retrieve the Bird from the cage.

Hit the return button once.

Use the Bird on the blocked area.

Head to the left.

Place the medallion into the Stone to the Right and then move forward.

Retrieve the Venom and use the leaf to retrieve the fish.

Return to Mountgore’s Temple.

Use the Venom on the vines.

Retrieve the Pattern Fragment by clicking on the bag, and insert the Pattern Fragment into the mechanism to begin a mini game.

Rotate the Discs in the correct positions to solve the puzzle.

Lost Lands - The Four Horsemen - Pattern Fragment

Lost Lands – The Four Horsemen – Pattern Fragment

Retrieve the Ontus Figurine.

Return to Maaron’s Cottage.

Place the Ontus Figurine on the shelf to the right to retrieve a Key.

Return to the dead Lake.

Use the Key and retrieve the Hook from the boat.

Return to the waterfall.

Throw the Hook at the tree and climb up.

Retrieve the Sword Hilt, and use the Knife to cut free the red tree wing.

Give the Fish to the Eagle and retrieve the Feathers and Sapphire Symbol.

Hit the Return button once.

Reattach the Hilt to the Sword Blade and pull it from the tree.

Hit return once.

Insert the Sword and retrieve the Chip.

Return to the Centaurs village.

Use the red tree wing on the Centaur.

Retrieve the Door Knocker and Stone of Fire.

Create arrows using Leather and Feathers.

Return to the Fire’s Dwelling.

Insert the Stone of Fire into the statue to the right.

Click on the dirt and insert the Alcohol Soaked Cloth.

Retrieve the Torch and put it into the flames.

Retrieve the Burning Torch and return to the square.

Place the Sapphire Symbol onto the Spear Tip and retrieve the Key.

Exit to the right.

Insert the Door Knocker into the Drum and open the chest.

Retrieve the Screwdriver and Roller Shaped Seal.

Return to the Fire’s Dwelling.

Use the Key to open the chest and receive the Pickaxe.

Return to the red tree top.

Place the Chip into the pedestal to begin a mini game.

Match the correct images to solve the puzzle, and then use the Screwdriver to remove the Screws.

Lost Lands - The Four Horsemen - Chip Mini Game

Lost Lands – The Four Horsemen – Chip Mini Game

Retrieve the Cheese and the Lens from the sack.

Hit the Return button twice.

Use the Cheese to retrieve the Mouse.

Click the return button twice.

Use the Mouse and Comb to retrieve the Comb with Thread.

Move forward and then to the right.

Insert the Comb with Thread onto the Loom and press the handle.

Retrieve the Bow String and insert it onto the Arrow Kit.

Return to the abandoned farm.

Place the Lens into the telescope and return to the Fire’s Dwelling.

Use the Pickaxe to retrieve the Metal from the rock and return to the Dwarf Slums.

Use the Burning Torch and Metal to retrieve the Melted Metal.

Use the Melted Metal on the mold.

Use the bottle of Cold Water on the mold and retrieve the Unfinished Arrowheads.

Place the Unfinished Arrowheads onto the grindstone and retrieve the Arrow Heads.

Return to the Centaur’s village.

Put down the Arrow Heads and then retrieve the Bow and Arrow.

Lost Lands - The Four Horsemen - Bow and Arrows

Lost Lands – The Four Horsemen – Bow and Arrows

Return to the dead lake.

Fire an Arrow towards the Floating Horseman in the sky.

Chapter 8: The Castle

Talk to the dwarf and hand him Mountgore’s Apple.

After you’re done speaking with the dwarf, move forward.

Click the dough roller on the chest.

Press the two boxes and retrieve the Spinning Top.

Click the three stones and retrieve the Armored Glove and place it onto the Glowing Orb.

Retrieve the Skull Figurine and hit return once.

Insert the Spinning Top and click on it once.

Retrieve the Petrified Eye with your Hammer.

Place the Petrified Eye into the guillotine and click the rope.

You will retrieve the Dragon Eye.

Hit return once.

Insert the Dragon Eye into the telescope and remember the Symbols.

Move forward twice.

Insert the Skull Figurine into the door to begin a mini game.

The puzzle can be solved by placing all the Symbols onto the center line.

Lost Lands - The Four Horsemen - Skull

Lost Lands – The Four Horsemen – Skull

Use the Hammer to retrieve the Stone Heart.

Return to Maaron’s Cottage.

Give him the Stone Heart and receive the Spray and Key.

Hit return once.

Use the Spray to retrieve the Flower and move to the left.

Click on the net and place the Symbols into the correct locations.

Lost Lands - The Four Horsemen - Symbols

Lost Lands – The Four Horsemen – Symbols

Next, read the note and then move to the waterfall.

Click on the bag near the tree.

Collect the Wooden Disk and the Wrench.

Hit the Return button once.

Place the wooden disc into the stone tablet.

Move forward twice.

Use the Wrench to retrieve the Bolts and open the door.

Use the Brush to clean the dirty sheets off of the book.

Travel to Folnur’s Refuge.

Put the Brush on the mechanism.

Use the Key to begin a hidden items area.

Find all of the items listed below to retrieve the Old Lens.

Place the Old Lens onto the mechanism and click on the handle to retrieve the Lens.

Return to Mountgore’s Temple.

Hand the Flour to the man to retrieve the Wooden Part.

Use the Clean Sheet on the fountain.

Retrieve the Spell Scroll and travel to the Ontus Glades.

Place the Wooden Part onto the Stone Tablet to begin a mini game.

Lost Lands - The Four Horsemen - Wooden Part

Lost Lands – The Four Horsemen – Wooden Part

Rearrange the pattern to solve the puzzle, and then insert the Lens to retrieve the Light-Filled-Lens.

Return to the tower hall.

Talk to the man who waits for you, and then move ahead.

Use the Light-Filled-Lens on the barrel and press it once.

Next, use the Spell Scroll.

Finally, you have done it! You have returned the realm to safety and stopped the Four Horsemen.


Congratulations! You’ve completed our Lost Lands – The Four Horsemen Walkthrough! For more great tips and tricks, visit our blog!

Delicious – Emily’s Hopes and Fears Walkthrough

Big City Adventure – Shanghai Walkthrough

Building the Great Wall of China 2 Walkthrough


The Lost Lands – The Four Horsemen Walkthrough is meant as a guide and does not contain cheats, hacks, or serials.

The post Lost Lands – The Four Horsemen Walkthrough appeared first on GameHouse.

Mysteries of the Past – Shadow of the Daemon Walkthrough

$
0
0

A mountain lodge sees numerous disappearances after the rise of a spectral demon. Join Jane as she attempts to track down the missing Millers and solve the mystery surrounding the area once and for all! Our Mysteries of the Past – Shadow of the Daemon walkthrough will guide you through all the tips and tricks you need along the way.

Contents

General Tips & Tricks

The following is a handful of useful tips and tricks to help you get started. Whether you’re playing the game for the first time or simply need a little clarification, all the pointers you need can be found here.

  • When starting the game for the first time, you can choose between three difficulty modes:

    • Casual – This mode is intended for players who have never played Hidden Object games. Hint and Skip buttons are recharged more rapidly. All interactive zones and items are indicated with sparkles. There is also no penalty for rapid misclicks.

    • Normal – This mode is intended for fans of Hidden Object games. Hint and Skip buttons are slower to recharge. All interactive zones and items are indicated with sparkles. A penalty exists for rapid misclicking during hidden object scenes.

    • Expert – This mode is intended for players of Hidden Object games who do not wish to have any help or assistance while playing. Hint and Skip buttons are disabled. Sparkle zone and item indicators are off. Misclick penalties are on.

  • You may choose whether to enable or disable the main character in dialogues both when playing the game for the first time, or anytime via the Options menu.

  • Your Hint button takes the form of a light bulb in the lower right corner of your screen. Hints are unlimited, but require time to recharge.

  • Your Journal is located in the lower left corner of your screen and will keep track of any important clues or story bits you encounter while playing.

  • The Map is located in the lower right corner of the screen. A “!” indicates the current active area. You may fast travel between areas by opening your map and selecting the location where you would like to go.

  • When starting the game for the first time and after finishing it, you will be able to choose between playing the Main Story or the Bonus Chapter.

  • Our walkthrough covers both the Main Story and Bonus Chapters. See our table of contents for quick-jumps as necessary. Locations and Inventory Items appear like this in the guide below.

Mysteries of the Past – Shadow of the Daemon Walkthrough

A mysterious letter arrives in the mail from the manager of Big Pine Mountain Lodge. Two of the recent guests, a father and son, have gone missing. It’s up to you to locate the missing guests and solve the mystery behind their disappearance!

Chapter 1: The Mountain Lodge

The manager of the lodge is waiting for you outside and shares the tell of how a dark entity has been haunting the premises You’ll need to find a way inside.

Entrance

  • Speak with the hotel manager. He will give you the Map.

  • Take a closer look inside the minivan. Collect the Battery lying on the seat, then use it on the Stun Gun lying on the seat to add it to your inventory.
  • Examine the doors to the lodge straight ahead. Use the Stun Gun to remove the vines.
  • Speak with the manager again. He will give you the Hotel Key.
  • Take a closer look at the lodge doors again. Use the Hotel Key to open them, then proceed inside.

Reception

  • Examine the small table ahead. Use the Stun Gun to remove the vines, then collect the Tape and the read the guest registry
  • Click on the hidden object area over the desk ahead.
  • Find all the pieces of the objects shown at the bottom of the screen. Once finished:
    • Place the cash register over the wiring on the right.
    • Place the hula girl on the legs to the right of the safe.
    • Place the lock panel into the safe on the left.
    • Place the hammer on top of the safe.
    • Place the phone on the hook straight ahead.
  • Find all the objects listed at the bottom of the screen. Their locations are shown below.
Mysteries of the Past – Shadow of the Daemon Reception Hidden Object Scene

Mysteries of the Past – Shadow of the Daemon Reception Hidden Object Scene

  • Upon completing the area, the Ladder will be added to your inventory.
  • Examine the broken banister at the top of the stairs. Use the Ladder to reach it.
  • Proceed up the steps to the next location.

Hallway

  • Examine the waste basket just past the table on the left. Click on the Hydrant Wheel and the Newspaper inside to add them to your inventory.
  • Take a closer look at the red panel on the right. Use the Hydrant Wheel on the center of it to trigger a puzzle.
  • To complete the puzzle, you need to find the pair of each symbol. The solution is shown below.
Mysteries of the Past – Shadow of the Daemon Hydrant Wheel Matching Puzzle Solution

Mysteries of the Past – Shadow of the Daemon Hydrant Wheel Matching Puzzle Solution

  • Upon completing the puzzle, collect the Letter for Clarkson.
  • Return to the Entrance.

Entrance

  • Give the Letter for Clarkson to the hotel manager, then collect the Pencil from him.
  • Enter the Reception.

Reception

  • Take a closer look at the door on the right. Place the Newspaper under the door, then use the Pencil on the lock to knock out the Lobby Key and add it to your inventory.
  • Use the Lobby Key on the door to open it and proceed into the next area.

Lobby

  • Examine the chair straight ahead and on the other side of the room. Click on the Matches to add them to your inventory, then click on the pillow to move it aside and collect the Note and Crank Handle beneath.
  • Take a closer look at the wire lying on the floor. Click on the wires to tie them together, then use the Tape to insulate them.
  • Return to the Reception.

Reception

  • Examine the phone sitting on the desk. Pick up the receiver to answer the call, then once the phone falls apart, collect the Spring which was under the dial wheel to add it to your inventory.
  • Enter the Hallway.

Hallway

  • Zoom in on the far end of the hallway. Attach the Crank Handle to the hole in the wall and proceed up the steps that appear.

Attic

  • You will immediately encounter a hidden object area. Find the objects listed at the bottom of the screen. Their locations are shown below.
Mysteries of the Past – Shadow of the Daemon Attic Hidden Object Scene

Mysteries of the Past – Shadow of the Daemon Attic Hidden Object Scene

  • Place the remaining items into their proper locations. The solution is shown below.
Mysteries of the Past – Shadow of the Daemon Attic Object Placement Solution

Mysteries of the Past – Shadow of the Daemon Attic Object Placement Solution

  • Upon completing the area, the Umbrella will be added to your inventory.
  • Zoom in on the upper right corner of the screen and use the Umbrella to pull down the ladder.
  • Examine the area straight ahead. Find four keys and insert them into their locks according to their colors. Their locations are shown below.
Mysteries of the Past – Shadow of the Daemon Attic Keys and HOS

Mysteries of the Past – Shadow of the Daemon Attic Keys and HOS

  • Place the four panels into the left door of the cabinet to open it, then collect the Penetrating Spray inside.
  • Take a closer look at the area on the upper right again. Use the Penetrating Spray to obtain the Paper.
  • Return to the Entrance.

Entrance

  • Examine the rack on top of the van. Use the Penetrating Spray to remove the Shovel and add it to your inventory.
  • Go back to the Hallway.

Hallway

  • Examine the vase on the right side of the hallway. Use the Shovel to acquire the Hand Saw inside.
  • Proceed up the steps again and into the Attic.

Attic

  • Look at the area on the upper right again. Use the Hand Saw to acquire the Metal Bar.
  • Examine the area crossed off with boards ahead and a little to the left. Use the Metal Bar to pry them loose. Take a closer look at the letter inside, then collect the Spatula in the bucket.
  • Go down to Reception.

Reception

  • Take a closer look at the glass case on the left. Use the Spatula to open the cabinet, then collect the Poison and the Room 11 Key inside.
  • Enter the Hallway.

Hallway

  • Take a closer look at the door on the right. Use the Poison to remove the vines, then use the Room 11 Key to enter the room (Tip: You will need to click the key to turn it and open the door).

Room 11

  • Upon entering the room, you will immediately find yourself in a hidden object scene. Find the objects listed at the bottom of the screen. Their locations are shown below.
Mysteries of the Past – Shadow of the Daemon Room 11 Hidden Object Scene

Mysteries of the Past – Shadow of the Daemon Room 11 Hidden Object Scene

  • Once you’ve found all the objects, place the remaining ones into their correct locations. The solution is shown below.
Mysteries of the Past – Shadow of the Daemon Room 11 Object Placement Locations

Mysteries of the Past – Shadow of the Daemon Room 11 Object Placement Locations

  • Upon completing the area, the Rope will be added to your inventory.
  • Examine the fireplace on the left. Collect the Note, then click on the Nail to add it to your inventory. Use the Paper and Pencil in your inventory on the etchings in the stone to receive the Rosette Combination.
  • Take a closer look at the mantle on the left. Click on the Green Gem in the eye socket of the figurine to add it to your inventory.
  • Exit to the Hallway.

Hallway

  • Take a closer look at the window on the left. Use the Rope to retrieve the Gardening Knife and add it to your inventory.
  • Head up to the Attic.

Attic

  • Examine the box sitting on the table straight ahead. Place the Green Gem into the empty slot to trigger a puzzle.
  • Try to create a triangle by correctly putting the green gems into the intersections of the circles of the mechanism. The solution is shown below.
Mysteries of the Past – Shadow of the Daemon Gem Rotation Puzzle Solution

Mysteries of the Past – Shadow of the Daemon Gem Rotation Puzzle Solution

  • Upon completing the puzzle, the box will open. Collect the Wooden Rosette inside to add it to your inventory.
  • Return to Room 11.

Room 11

  • Examine the side table next to the bed. Place the Wooden Rosette into the slot, then add the Rosette Combination.
  • Try to position the rosettes according to the layout. The solution is shown below.
Mysteries of the Past – Shadow of the Daemon Rosette Puzzle Solution

Mysteries of the Past – Shadow of the Daemon Rosette Puzzle Solution

  • Collect the Sleeping Drops and the Corkscrew from inside the cabinet.
  • Exit to the Hallway.

Hallway

  • Take a closer look at the table on the left. Use the Corkscrew to open the drawer, then collect the Door Knob inside to add it to your inventory.
  • Enter the Lobby.

Lobby

  • Examine the door at the back of the room. Use the Door Knob to open the door and proceed inside to the next area.

Kitchen

  • Click on the hidden object area in the back left corner.
  • Find the pairs of items in the scene. Their locations are shown below. Locate the Green Book afterward to add it to your inventory.
Mysteries of the Past – Shadow of the Daemon Kitchen Item Pairs

Mysteries of the Past – Shadow of the Daemon Kitchen Item Pairs

  • Take a closer look at the fridge on the right. Collect the Frozen Meat and the Screwdriver.
  • Examine the fan in the back right corner. Use the Screwdriver to remove the bottom panel and collect the Gear.
  • Go to the Reception.

Reception

  • Take a closer look at the file cabinet on the left. Place the Green Book in the empty slot to trigger a puzzle.
  • Place the files in a way that ensures that they are linked together by their colors. The solution is shown below.
Mysteries of the Past – Shadow of the Daemon File Cabinet Puzzle Solution

Mysteries of the Past – Shadow of the Daemon File Cabinet Puzzle Solution

  • Upon completing the puzzle, the Gate Lock 1/2 will be added to your inventory.
  • Take a closer look at the fallen chandelier. Use the Screwdriver to open it up, then collect the Medalion inside.
  • Enter the Lobby.

Lobby

  • Examine the table in the lower right corner. Use the Gear and Spring in the slot to open the case. Collect the second part to complete the Gate Lock.
  • Go to the Entrance.

Entrance

  • Examine the wooden gate on the left. Use the Hand Saw to cut away the branches. Use the Gate Lock on the groove in the gate to open it, then proceed through to the next location.

Garage

  • Take a closer look at the toolbox lying on the ground. Collect the Bandage, the Hex Key, and the Pipe inside.
  • Return to the Kitchen.

Kitchen

  • Examine the boiler on the left wall. Use the Hex Key to open the panel, then place the missing Pipe inside to trigger a puzzle.
  • Rotate the individual tube sections to connect them and form one pipe running from the valve to the circular water-outlet. The solution is shown below.
Mysteries of the Past – Shadow of the Daemon Tube Pipe Puzzle Solution

Mysteries of the Past – Shadow of the Daemon Tube Pipe Puzzle Solution

  • Collect the Pot sitting on the center island, then examine the sink beneath the boiler. Place the Pot in the sink and click on the faucets to turn the water on. The Full Pot will be added to your inventory.
  • Take a closer look at the stove at the far end of the room. Place the Full Pot on the stove and the Frozen Meat inside the pot. Add the Sleeping Drops and use the Matches to light the stove. The Boiled Meat will be added to your inventory.
  • Make your way back to the Garage.

Garage

  • Give the Boiled Meat to the dog, then take a closer look at the trap around its foot. Open the trap by clicking on it, then use the Bandage to wrap the wound.
  • Back in view of the main area, use the Shovel to dig just in front of the trap. Take a closer look into the hole and use the Medalion on the center of the box to trigger a puzzle.
  • By rotating the circular segments, create the symbol of a bird of prey. The solution is shown below.
Mysteries of the Past – Shadow of the Daemon Medallion Rotation Puzzle

Mysteries of the Past – Shadow of the Daemon Medallion Rotation Puzzle

  • Examine the parchment inside the box once open, then collect the Necklace, the Wire Cutters, and the Piece of Map inside.
  • Take a closer look at the hanging box up and behind the dog. Use the Wire Cutters to open it, then collect the Showcase Key inside.
  • Return to the Lobby.

Lobby

  • Take a closer look at the showcase on the left. Use the Showcase Key to open the display, then take a closer look inside. Add the Piece of Map to trigger a puzzle.
  • Assemble the pieces together to form a complete map. You can rotate the map fragments. The solution is shown below.
Mysteries of the Past – Shadow of the Daemon Lobby Map Fragment Puzzle

Mysteries of the Past – Shadow of the Daemon Lobby Map Fragment Puzzle

  • Upon completing the puzzle, click on the Amulet of Gravetalk that appears to add it to your inventory. Collect the Map and the Clamp beneath.
  • Return to the Kitchen.

Kitchen

  • Take a closer look at the center island. Use the Clamp to secure the sharpener, then select the Gardening Knife in your inventory to sharpen it into the Sharp Gardening Knife.
  • Go to the Attic.

Attic

  • Examine the curtains with rope in the rear right corner of the room. Use the Sharp Gardening Knife to cut the rope, then examine the wardrobe beneath. Place the Necklace in the groove around the figure to unlock the wardrobe, then proceed inside.

Chapter 2: The Forest

A mysterious portal within the Attic cabinet has led you into a dark forest, just like what happened to Clarkson. Can you make sense of this new area?

Forest

  • Take a closer look at the ferns on the lower left. Click to clear the ferns away, then click on the Rope to add it to your inventory.
  • Examine the end of the pathway on the left. Click to remove the broad leaf, then select the Glass Part 1/2 and the Stump to add them to your inventory.
  • Place the Stump in front of the large tree on the left, then take a closer look inside the hollow. Click on the Wire inside the nest to add it to your inventory.
  • Examine the end of the pathway on the left again. Use the Wire to add the Antlers to your inventory.
  • Use the Rope on the large tree to the right of the forward path. Attach the Antlers to the end of it and click on it to trigger the trap.
  • Examine the hidden object scene which appears inside the hole on the right.

  • Find the objects listed at the bottom of the screen. Their locations are shown below.

Mysteries of the Past – Shadow of the Daemon Forest Pit Hidden Object Scene

Mysteries of the Past – Shadow of the Daemon Forest Pit Hidden Object Scene

  • Upon completing the area, the Bow and the Feather will be added to your inventory.
  • Examine the hollow in the left tree again. Use the Feather on the arrow to acquire the Bow and Arrow for your inventory.
  • Use the Bow and Arrow on the path directly ahead to trigger the trap, allowing safe passage.
  • Proceed forward to the next area.

Clearing

  • Examine the bottom left portion of the path. Click on the Stick and the Circle Lock 1/2 to add them to your inventory.
  • Take a closer look at the stones to the right of the pathway. Click to clear the stones, then read the parchment left behind. Collect the remaining piece of the Circle Lock to add it to your inventory.
  • Examine the tree on the left. Use the Circle Lock on the suspended box, then click on the rings until they match the code etched into the box: 2-6-8 (Tip! It may appear as “2-8-8” instead). Collect the Carpenter’s Square and the Axe Handle to add them to your inventory.
  • Go back to the Forest.

Forest

  • Examine the ferns on the lower left again. Use the Axe Handle on the blade here to acquire the Axe for your inventory.
  • Enter the Clearing again.

Clearing

  • Take a closer look at the fallen tree branch straight ahead. Use the Axe to chop it and clear it away, then proceed forward to the next area.

Outside Hut

  • Examine the left side of the hut. Click on the Pliers and the Rope to add them to your inventory.
  • Take a closer look at the pelt hanging to the left of the cabin door. Use the Pliers to remove the Chisel and add it to your inventory.
  • Examine the left side of the cabin again. Use the Chisel to pry off the bottom of the left barrel, then click on the Totem Mask and the Cairn Stone 1/2 to add them to your inventory.
  • Go back to the Clearing.

Clearing

  • Place the Totem Mask at the top of the center tree on the left. Collect the Empty Glass from the totem pole.
  • Go back to the Outside Hut.

Outside Hut

  • Zoom in on the front door. Use the Empty Glass to capture the spider and add the Spider in Glass to your inventory.
  • Use the Carpenter’s Square to pry open the door, then proceed inside.

Inside Hut

  • Find the objects listed at the bottom of the screen. Their locations are shown below.

Mysteries of the Past – Shadow of the Daemon Inside Hut Hidden Object Scene

Mysteries of the Past – Shadow of the Daemon Inside Hut Hidden Object Scene

  • Place the objects back into their correct locations. The solution is shown below.

Mysteries of the Past – Shadow of the Daemon Inside Hut Item Placement

Mysteries of the Past – Shadow of the Daemon Inside Hut Item Placement

  • Upon completing the area, the second piece of the Cairn Stones will be added to your inventory.
  • Return to the Clearing.

Clearing

  • Examine the cairn stones on the right. Place the Cairn Stones into the wall to trigger a puzzle.
  • You can freely exchange the stone segments with each other so that they form a complete and correctly arranged painting. The solution is shown below.

Mysteries of the Past – Shadow of the Daemon Cairn Stone Puzzle Solution

Mysteries of the Past – Shadow of the Daemon Cairn Stone Puzzle Solution

  • The totem pole to the left will fall, creating a bridge over into the next area.

Sacrificial Place

  • Show the Amulet of Gravetalk to the Guardian. This will trigger a minigame. Mark all the symbols in the right order. Use the notebook for a clue. The solution is shown below.
Mysteries of the Past – Shadow of the Daemon Guardian Puzzle Solution

Mysteries of the Past – Shadow of the Daemon Guardian Puzzle Solution

  • Examine the alcove in the wall toward the right. Click on the Chain to add it to your inventory.
  • Head to the Inside Hut.

Inside Hut

  • Take a closer look at the hatch in the floor. Attach the Chain.
  • Click on the chain again to rig it up, then click on the hatch to open it and zoom in. Collect the Pry Bar to add it to your inventory.
  • Return to the Sacrificial Place.

Sacrificial Place

  • Use the Pry Bar on the large boulder directly in front of you. Take a closer look beneath it to trigger a puzzle.
  • Place all the parts of the skeleton in their correct positions. The solution is shown below.

Mysteries of the Past – Shadow of the Daemon Skeleton Assembly Puzzle

Mysteries of the Past – Shadow of the Daemon Skeleton Assembly Puzzle

  • Upon completing the puzzle, you will receive the First Aid Box Key.
  • Continue speaking with the Guardian to receive the Magical Wind Chimes.
  • Return to Inside Hut.

Inside Hut

  • Take a closer look at the back wall. Use the First Aid Box Key to open the cabinet, then collect the Tweezers inside to add them to your inventory.
  • Return to the Sacrificial Place.

Sacrificial Place

  • Examine the pot to the left of the large stone. Use the Tweezers to retrieve the Razor inside.
  • Go to the Outside Hut.

Outside Hut

  • Examine the pelt to the left of the door. Use the Razor to cut it, obtaining the Leather Stripe.
  • Go back to the Sacrificial Place.

Sacrificial Place

  • Examine the alcove in the right portion of the rock face. Use the Leather Stripe in combination with the Stick to bend the bar, then click on the Statue Head to add it to your inventory.
  • Take a closer look at the statue body on the right. Place the Statue Head on the body and collect the Bone Knife.
  • Go to the Inside Hut.

Inside Hut

  • Use the Bone Knife to cut the curtain hanging in the upper right corner. Click on the hidden object area that appears.
  • Find 6 pairs of objects. Their locations are shown below.

Mysteries of the Past – Shadow of the Daemon Inside Hut Pairs Puzzle

Mysteries of the Past – Shadow of the Daemon Inside Hut Pairs Puzzle

  • Once you’ve found all the pairs, locate the Bell, which is in the upper left corner. Upon finishing the area, it will be added to your inventory.
  • Go to the Forest.

Forest

  • Examine the stone to the left of the path. Insert the Bell to trigger a puzzle.
  • Play the right melody on the bells by the numbers on them. The numbers are in Roman numerals and go to 16. If you’re unfamiliar with Roman numerals, they are as follows: 1 = I, 2 = II, 3 = III, 4 = IV, 5 = V, 6 = VI, 7 = VII, 8 = VIII, 9 = IX, 10 = X, 11 = XI, 12 = XII, 13 = XIII, 14 = XIV, 15 = XV, 16 = XVI.

  • Upon completing the puzzle, the Stone Puzzle will be added to your inventory.
  • Return to the Sacrificial Place.

Sacrificial Place

  • Examine the hollow in the left boulder. Place the Stone Puzzle into the hollow to trigger a puzzle.
  • Set circles correctly, so they link to the surrounding relief and create a complete image on the face of this rock by turning them. The solution is shown below.

Mysteries of the Past – Shadow of the Daemon Stone Puzzle Solution

Mysteries of the Past – Shadow of the Daemon Stone Puzzle Solution

  • Take a closer look inside the new passageway.

Chapter 3: The Cure

Moving aside the rock blocking a secret passageway, you discover the missing father and son. But not all is right with the unwilling prisoners..

Cave

  • Speak with the boy, William. He will give you the Medallion, which will be kept next to your Hint button and Map.
  • Examine the base of the cell. Click on the Sharp Stone in the upper left of the closeup to add it to your inventory.
  • Take a closer look at the shelf above the door on the right. Click on the Door Handle and the Oil Can to add them to your inventory.
  • Zoom in on the metal lunchbox sitting on the floor. Use the Oil Can to open it, then read the Note inside. Click on the Tongs to add them to your inventory.
  • Examine the door on the right again. Use the Sharp Stone to pry off the boards, then use the Door Handle on the hole that appears.
  • Proceed through the door to the next location.

Hideout

  • Click on the Medallion to clear away the demon’s wall.
  • Click on the hidden object area straight ahead.

  • Find all the objects shown at the bottom of the screen. Once you’ve located the components:

    • The bear goes over the teddy bear body on the left.

    • The globe sits on the flat stand toward the right.

    • The phonograph sits on the box straight ahead.

    • The clock components go into the clock on the upper left.

    • The wheel goes on the right, beneath the monkey and behind the globe.

  • Once everything has been set, locate the objects listed at the bottom of the screen. Their locations are shown below.

Mysteries of the Past – Shadow of the Daemon Hideout Hidden Object Scene

Mysteries of the Past – Shadow of the Daemon Hideout Hidden Object Scene

  • Upon completing the area, the Corkscrew will be added to your inventory.
  • Examine the fire pit in the lower right corner. Collect the Puzzle Piece 1/3, the Ember, and the Ring to add them to your inventory.
  • Examine the metal cabin on the right. Click on the Potato Peeler sitting on the console to add it to your inventory.
  • Take a closer look at the bit of mossy stone clinging to the rock wall on the left. Use the Potato Peeler to acquire the Moss and add it to your inventory.
  • Examine the fire pit on the lower right again. Place the Ember in the smoker, followed by the Moss. Click to obtain the Smoker.
  • Back in the main area, use the Smoker on the wasp nest on the right. Once it’s gone, proceed forward to the next area.

Treehouse

  • Examine the second tree from the left. Collect the Bone Saw in the lower right corner. Use the Bone Saw to cut the Wooden Handle and add that to your inventory as well.
  • Return to the Cave.

Cave

  • Examine the metal lunchbox on the floor again. Use the Ring to open the box and obtain the Owl Symbol. Use the Corkscrew to open the bottle and the Wooden Handle to retrieve the Ice Pick.
  • Go back to the Hideout.

Hideout

  • Take another look at the white crystal stuck to the wall. Use the Ice Pick to break off the Crystal and add it to your inventory.
  • Go to the Treehouse.

Treehouse

  • Examine the second tree on the left again. Place the Crystal in the torch to obtain the Crystal Torch.
  • Return to the Hideout.

Hideout

  • Proceed through the doorway on the left into the next area.

Cellar

  • Examine the stone above the wooden barrel. Place the Crystal Torch into the holding in the wall to light the area. Collect the Dynamite and the Code Table 1/2 to add them to your inventory.
  • Take a closer look at the cages straight ahead. Click on the Knob to add it to your inventory.
  • Return to the Treehouse.

Treehouse

  • Examine the base of the tree with the steps toward the right. Place the Knob in the door of the small wooden house to trigger a puzzle.
  • Place the wheels in their correct positions so that the pieces fit together and the device might work. The solution is shown below.

Mysteries of the Past – Shadow of the Daemon Gear Puzzle Solution

Mysteries of the Past – Shadow of the Daemon Gear Puzzle Solution

  • Upon completing the puzzle, you will be able to enter the treehouse. Proceed up the steps to the next location.

Inside Treehouse

  • Take a look at the window with the yellow curtain on the right. Hang the Magical Wind Chimes in the window. (Tip! You will be returning here to complete it later.)
  • Examine the table on the left. Click on the green Glass Shard to add it to your inventory. Use the Potato Peeler to remove the cover of the device and collect the remaining piece of the Code Table inside.
  • Exit back outside.

Treehouse

  • Examine the base of the center tree. Place the Code Table into the top of the box and input the symbols so that they match those displayed. Done successfully, the box will open and you may collect the Bell.
  • Head back up into the treehouse.

Inside Treehouse

  • Examine the window with the yellow curtain on the right again. Use the Bell on the wind chimes to restore them, awakening the Shaman.
  • Take a closer look at the stove on the right. Collect the Pliers and the Tape to add them to your inventory.
  • Zoom in on the device on the table again. Use the Pliers to remove the Fuse Middle Part and add it to your inventory.
  • Go back to the Hideout.

Hideout

  • Take a closer look at the fire pit on the lower right. Use the Glass Shard to cut open the sack in the upper right corner and collect the Fuse Base inside.
  • Go back to the inside of the treehouse.

Inside Treehouse

  • Take a look at the stove again. Use the Fuse Base and the Fuse Middle Part on the blueprints on the right to obtain the Complete Fuse.
  • Go back to the Hideout.

Hideout

  • Examine the suspended carriage on the right again. Use the Complete Fuse on the end of the red wire to trigger a puzzle.
  • Find the correct position for each fuse so that the sum of the values for each connected pair matches the given value. The solution is shown below.

Mysteries of the Past – Shadow of the Daemon Fuse Value Puzzle Solution

Mysteries of the Past – Shadow of the Daemon Fuse Value Puzzle Solution

  • Upon completing the puzzle, you will be taken to a new area.

Precipice

  • Take a closer look at the weather station on the left. Collect the Cabinet Key hanging in the upper left corner to add it to your inventory.
  • Go back to the Cave.

Cave

  • Examine the cabinet hanging on the back wall. Use the Cabinet Key on the lock and click to open it. Collect the Twine inside to add it to your inventory.
  • Return to the Precipice.

Precipice

  • Examine the shelf at the base of the precipice. Click on the yellow tin of Wax to add it to your inventory.
  • Take a closer look at the shack in the distance. Collect the Lever on top of the mailbox to add it to your inventory. Use the Wax to open the box and collect the Glass Ball inside. Finally, use the Twine and the Tape to repair the door and enter.

Shelter

  • Take a closer look at the dividers on the right. Click on the Ski Pole to add it to your inventory.
  • Examine the shelf on the back wall. Place the Owl Symbol into the owl carving and collect the Stove Handle inside.
  • Return to the Cellar.

Cellar

  • Examine the device on the right. Use the Lever on the lower right and throw the switch. Insert the Glass Ball into the compartment that appears to trigger a puzzle.
  • Find correct positions for every ball. The solution is shown below.

Mysteries of the Past – Shadow of the Daemon Glass Ball Puzzle Solution

Mysteries of the Past – Shadow of the Daemon Glass Ball Puzzle Solution

  • Upon completing the puzzle, click on the gold Puzzle Piece 2/3 that appears on the left to add it to your inventory.
  • Go back to the treehouse interior.

Inside Treehouse

  • Take a closer look at the stove on the right. Use the Stove Handle on the upper left drawer, then collect the Wire Hook inside to add it to your inventory.
  • Go back to the Cellar.

Cellar

  • Examine the cages at the far end of the room. Use the Wire Hook to retrieve the Zipper Slider from the top cage and add it to your inventory. Do the same to obtain the Weather Station Handle from the top cage.
  • Return to the Precipice.

Precipice

  • Take a closer look at the weather station on the left. Place the Weather Station Handle into the hole on the left and click to open it. Collect the Wheel inside to add it to your inventory.
  • Zoom in on the shelf at the bottom of the precipice again. Use the Ski Pole to retrieve the red bag, then use the Zipper Slider to open the bottom pocket and collect the Opening Knife.
  • Enter the Shelter again.

Shelter

  • Zoom in on the top of the screens on the upper right. Use the Wheel to restore functionality here.
  • Take a closer look at the rope binding the screens together. Use the Opening Knife to cut the rope, revealing a hidden object area behind the screens.
  • Find 6 pairs of objects hidden in the scene. Their locations are shown below.

Mysteries of the Past – Shadow of the Daemon Shelter Object Pairs

Mysteries of the Past – Shadow of the Daemon Shelter Object Pairs

  • Upon finding all the pairs, click on the Axe hanging on the wall to add it to your inventory.
  • Return to the Treehouse.

Treehouse

  • Examine the base of the center tree again. Use the Axe to chop the log in the background and obtain the Wooden Step.
  • Backtrack to the Precipice.

Precipice

  • Examine the stone wall with the steps on the left. Place the Wooden Step into the hole, then proceed up to the next area.

Mountain Peak

  • Take a closer look at the nest straight ahead. Click on the final one of the Puzzle Pieces to add it to your inventory.

  • Return to the Shelter.

    Shelter

  • Examine the pull-down cot on the left. Place the Puzzle Pieces in the upper slots to trigger a puzzle.

  • By means of gradual rotation, using the buttons, change the color of all the segments of the minigame from red to green. The solution is shown below.

    Mysteries of the Past – Shadow of the Daemon Puzzle Color Rotation

    Mysteries of the Past – Shadow of the Daemon Puzzle Color Rotation

  • Upon completing the puzzle, click on the Nut and the Net to add them to your inventory.

  • Return to the Mountain Peak.

    Mountain Peak

  • Examine the base of the bridge closest to you. Give the Nut to the rodent, then collect the Flint and Steel.

  • Take a closer look at the base of the tree on the right. Tuck the Dynamite between the roots, then use the Flint and Steel to light it.

  • A hidden object area will appear. Find the objects listed at the bottom of the screen. Upon completing the area, the Chisel will be added to your inventory.

  • Return to the Cellar.

    Cellar

  • Examine the torch on the wall ahead. Use the Chisel to remove the stone block to the left of the torch and collect the Gardening Shears hidden within.

  • Make your way back to the Mountain Peak.

    Mountain Peak

  • Take a closer look at the nest again. Use the Gardening Shears to clip away the twigs, allowing passage to the main portion of the nest.

    Nest

  • Examine the pile of twigs on the right. Click on the Bread Crust nestled among them to add it to your inventory.

  • Zoom in on the raven. Give the raven the Bread Crust in exchange for the Safety Pin.

  • Go back to the Shelter.

    Shelter

  • Examine the owl statue on the back shelf. Use the Safety Pin on the pouch next to it to open it and obtain the Lock Pick.

  • Head back to the Cellar.

    Cellar

  • Take a closer look at the cages at the back of the area. Use the Lock Pick to open the bottom door, then click on the Falconry Glove to add it to your inventory.

  • Return to the Nest.

    Nest

  • Zoom in on the bird and use the Falconry Glove to obtain the Raven.

  • Make your way back to the inside of the treehouse.

    Inside Treehouse

  • Give the Raven to the Shaman. He will give you the Grappling Hook.

  • Go back to the Nest.

    Nest

  • Use the Grappling Hook to cross the chasm. Take a closer look at the end of the rope toward the right and click to tighten it.

  • Proceed across to the next area.

    Cliff

  • Zoom in on the area to the right of the rope. Attach the Net to the handle to obtain the Apple Picker.

  • Remove the rocks over the safe while still in the closeup. Click on the number pad and enter the correct code. The code is 6-2-5-0. Collect the Gem inside the safe to add it to your inventory.

  • Back in the main view of the area, examine the crevice to the left. Use the Apple Picker to retrieve the Moonlight Herb and add it to your inventory.

  • Return to the Shaman.

    Inside Treehouse

  • Give the Moonlight Herb and the Spider in Glass to the Shaman. You will receive the Cure.

  • Return to the Cave.

    Cave

  • Take a closer look at the bottom of the cell. Use the Gem on the lock to trigger a puzzle.

  • Arrange the ring sections so that when the parts of the symbols are correctly arranged in the center circle they create a complete symbol. The solution is shown below.

    Mysteries of the Past – Shadow of the Daemon Cell Lock Puzzle Solution

    Mysteries of the Past – Shadow of the Daemon Cell Lock Puzzle Solution

  • Upon completing the puzzle, the cell door will open. Give the Cure to Mr. Miller.

Chapter 4: The Truth

Now that the Millers have been rescued, it’s time to uncover the truth behind the mysterious demon that plagues the area!

Cave

  • Examine the plate left inside the cell. Click on the Bread and the Token to add them to your inventory.

  • Continue to the next area via the door on the right.

    Hideout

  • Proceed through the door on the left.

    Cellar

  • Examine the left column of stone. Place the Token in the empty slot to trigger a puzzle.

  • Move the tokens to their correct position to match their color. The solution is shown below.

    Mysteries of the Past – Shadow of the Daemon Token Puzzle Solution

    Mysteries of the Past – Shadow of the Daemon Token Puzzle Solution

  • Upon completing the puzzle, a ladder will lower. Proceed up the ladder to the next location.

    Outside Pool

  • Examine the doors straight ahead. Click on the Oil Lamp to add it to your inventory.

  • Examine the glass doors on the left. Click on the Match to the immediate right of the door handle to collect it.

  • Return to the Hideout.

    Hideout

  • Examine the stone wall straight ahead and to the left of the junk pile. Place the Oil Lamp on the hook, then use the Match to light it, illuminating the area.

  • Click on the hidden object area that appears over the pile of junk. Find the 6 matching pairs. Their locations are shown below.

    Mysteries of the Past – Shadow of the Daemon Hideout Matching Pairs Solution

    Mysteries of the Past – Shadow of the Daemon Hideout Matching Pairs Solution

  • Once you’ve found all the pairs, locate the Padlock Piece to add it to your inventory. Tip: It’s in the crystal directly in front of you.

  • Return to the outside of the pool.

    Outside Pool

  • Examine the fence on the right. Place the Padlock Piece into the missing gap to trigger a puzzle.

  • Rotate the segments to assemble the image on the padlock. Tip: Click on a piece and follow it around the board to move it to the location you’d like. The solution is shown below.

    Mysteries of the Past – Shadow of the Daemon Bird Padlock Puzzle Solution

    Mysteries of the Past – Shadow of the Daemon Bird Padlock Puzzle Solution

  • Upon completing the puzzle, the Ladder will be added to your inventory.

  • Proceed through the gate on the right.

    Backyard

  • Take a closer look at the fuse box on the left. Click on the Twine (right) and Cutter Handle (bottom left) to add them to your inventory.

  • Go back to the outside of the pool.

    Outside Pool

  • Examine the middle glass door again. Use the Twine on the nail to acquire the Nail on Twine.

  • Prop the ladder up against the left wall to reach the window, then take a closer look. Use the Nail on Twine on the open window to unlock the latch and proceed inside.

    Room 13

  • Take a closer look at the bed directly beneath you. Click on the Screwdriver tucked under the covers to add it to your inventory.

  • Zoom in on the bed stand on the left. Click on the Code to add it to your inventory.

  • Return to the Cellar.

    Cellar

  • Examine the machine on the right. Use the Screwdriver to obtain the Switch.

  • Return to Room 13.

    Room 13

  • Examine the bedside table again. Place the Switch into the gap in the lamp cord, then click to turn it on, restoring light to the area.

  • Don’t be frightened! It’s only Sidney Brody, after all

  • Give the Bread to Brody. You will receive the Drill in return.

  • A hidden object area will be triggered. Find the items listed at the bottom of the screen. Their locations are shown below.

    Mysteries of the Past – Shadow of the Daemon Room 13 Hidden Object Scene

    Mysteries of the Past – Shadow of the Daemon Room 13 Hidden Object Scene

  • Place the items back into their correct locations. The solution is shown below.

    Mysteries of the Past – Shadow of the Daemon Room 13 Item Locations

    Mysteries of the Past – Shadow of the Daemon Room 13 Item Locations

  • Upon completing the area, the Cake Knife will be added to your inventory.

  • Return to the Cave.

    Cave

  • Examine the dish on the floor of the cell. Use the Cutter Handle on the piece beneath the left side of the dish to add the Glass Cutter to your inventory.

  • Go back to the Cellar.

    Cellar

  • Take a closer look at the torch on the wall. Use the Cake Knife to remove the Vacuum Hook from the water canister on the lower right.

  • Head up the ladder to the next area.

    Outside Pool

  • Look at the glass doors on the left. Place the Vacuum Hook on the glass, then use the Glass Cutter to remove a portion and unlock the door.

  • Enter through the door and into the next location.

    Pool

  • Take a closer look at the lockers on the right. Place the Code to the right side of the lock to trigger a puzzle.

  • Set the correct code by turning the circles. The solution is shown below.

    Mysteries of the Past – Shadow of the Daemon Locker Code Puzzle Solution

    Mysteries of the Past – Shadow of the Daemon Locker Code Puzzle Solution

  • Upon completing the puzzle, click on the Battery inside the locker to add it to your inventory.

  • Zoom in on the interior of the pool. Use the Drill and the Battery on the Drill Machine on the left to add it to your inventory.

  • Go back to Room 13.

    Room 13

  • Take a closer look at the side of the fireplace. Use the Drill Machine to remove the stone, then collect the Painkillers and the Safebox to add them to your inventory.

  • Give the Painkillers to Brody. He will give you the Access Card and the Pool Storage Key in return.

  • Go back to the Pool.

    Pool

  • Take a closer look at the left door on the other end of the room. Use the Pool Storage Key on the lock to open the door, then look inside.

  • First, click on the light bulb on top of the basket on the lower right and screw it into the hanging socket on the upper left to restore light to the area. Then, find the objects listed at the bottom of the screen. Their locations are shown below.

    Mysteries of the Past – Shadow of the Daemon Pool Storage Hidden Object Scene

    Mysteries of the Past – Shadow of the Daemon Pool Storage Hidden Object Scene

  • Upon completing the area, the Broom and the Hoses will be added to your inventory.

  • Backtrack to the Hideout.

    Hideout

  • Take a closer look at the fire pit on the lower right. Use the Broom to sweep the dirt away, revealing the Crowbar and the Striker. Click on them to add them to your inventory.

  • Enter the door on the left.

    Cellar

  • Examine the cages at the back of the room. Use the Crowbar to remove the wood paneling, then collect the Welding Torch hidden in the compartment between cages to add it to your inventory.

  • Go to the Pool.

    Pool

  • Take a closer look inside the pool. Attach the Hoses to the cylinders on the right. Take out the Welding Torch and place the Safebox on the crate. Click on the blue knob of the gas cylinder until the pressure is correct, then use the Striker to light the torch. Once the box is open, click on the Card Reader and the Tooth inside to add them to your inventory.

  • Back in the main view of the area, examine the right door at the far end of the room. Place the Card Reader on the outline on the door, then swipe the Access Card.

  • With the door now open, enter the next room.

    Generator Room

  • Examine the equipment at the bottom left of the curtain. Click on the Electrolyte to add it to your inventory.

  • Examine the upper left portion of the curtain frame and collect the Heating Coil.

  • Take a closer look at the mask on the left side of the back wall. Place the Tooth into the gap to trigger a puzzle.

  • By clicking on the mask’s teeth, repeat a correctly played sequence. The solution is shown below.

    Mysteries of the Past – Shadow of the Daemon Tooth Sequence Puzzle Solution

    Mysteries of the Past – Shadow of the Daemon Tooth Sequence Puzzle Solution

  • Upon completing the puzzle, collect the Amulets 1/4 and the Night Table Key.

  • Exit back out to the Pool.

    Pool

  • Take a closer look inside the pool again. Use the Electrolyte on the Car Battery between the cylinders and the open crate to add it to your inventory.

  • Return to Room 13.

    Room 13

  • Examine the night stand. Use the Night Table Key to open the cabinet and acquire the Dry Torch and the Amulets 2/4.

  • Go back to the Generator Room.

    Generator Room

  • Examine the tray at the base of the machine on the right. Use the Dry Torch on the oily and combine it with the Striker to obtain the lit Torch.

  • Head to the Backyard.

    Backyard

  • Use the Torch against the large black wolf to ward it off.

  • Examine the snow where the wolf was standing and click on the Fuse to add it to your inventory.

  • Take a closer look at the fuse box on the left and place the Fuse in the empty slot to trigger a puzzle.

  • Switch on the fuses in the correct order so all the green lights go on. The solution is shown below.

    Mysteries of the Past – Shadow of the Daemon Fuse Order Puzzle Solution

    Mysteries of the Past – Shadow of the Daemon Fuse Order Puzzle Solution

  • Take a closer look at the wood pile at the far end of the shed. Click on the Letter Opener sticking out to add it to your inventory.

  • Examine the frozen pole beneath and a little to the left of the light. Place the Car Battery on the ground and combine it with the Heating Coil to melt the ice. Click on the Fireplace Handle to add it to your inventory.

  • Return to the Pool.

    Pool

  • Take a closer look at the fireplace at the back of the room. Attach the Fireplace Handle and open the hatch to obtain the Magnet.

  • Return to the Backyard.

    Backyard

  • Examine the grating above the wood on the left. Use the Magnet to remove the stubborn latch, then collect the Camera and the Amulets 3/4 inside to add them to your inventory.

  • The raven will reappear. Read the message it brings.

  • Return to the Hideout.

    Hideout

  • Use the Medallion next to your Hint button.

  • Examine the floor beneath the junk pile. Remove the rocks, then collect the Tomahawk and the last of the Amulets.

  • Go to the Generator Room.

    Generator Room

  • Examine the top let corner of the curtain frame. Use the Tomahawk to sever the line holding the curtain, revealing a hidden object area beneath.

  • Locate the colored wrenches and use them on the bolts shown in your inventory. Their locations are shown below. (Tip! Make sure you select a wrench, then use it on the bolt. Selecting multiple wrenches may result in a bug that will require you to restart your game.)

    Mysteries of the Past – Shadow of the Daemon Generator Room Colored Wrenches Locations

    Mysteries of the Past – Shadow of the Daemon Generator Room Colored Wrenches Locations

  • Once you’ve disassembled all the screws, find the objects listed at the bottom of the screen. Their locations are shown below.

    Mysteries of the Past – Shadow of the Daemon Generator Room Hidden Object Scene

    Mysteries of the Past – Shadow of the Daemon Generator Room Hidden Object Scene

  • Once you’ve located all the objects, place the tiles in their correct locations over the glass cabinet on the right. Finally, collect the Wire Cutters on that shelf (toward the right, behind another item) to add them to your inventory.

  • Back in the main area, examine the machinery at the bottom left of the shelves. Use the Wire Cutters on the device, then click on the UV Bulb to add it to your inventory.

  • Go to the Pool.

    Pool

  • Examine the light stand on the left. Place the UV Bulb into the light, then click to turn it on.

  • Click on the lit symbols in the pool for a closer view and use the Camera to obtain the Note with Symbols.

  • Go to Room 13.

    Room 13

  • Examine the door hidden in the paneling on the left. Place the Note with Symbols here to trigger a puzzle.

  • Re-position the tiles in a manner in which they correctly display the symbols on the photo. The solution is shown below.

    Mysteries of the Past – Shadow of the Daemon Room 13 Door Symbols Puzzle Solution

    Mysteries of the Past – Shadow of the Daemon Room 13 Door Symbols Puzzle Solution

  • Upon completing the puzzle, the door will open. Follow Brody into the next room.

    Secret Room

  • Speak with Brody, then collect the Fireplace Shovel he leaves on the right.

  • Head for the Backyard.

    Backyard

  • Examine the snow where the wolf was standing before. Use the Fireplace Shovel to dig, revealing the Car Jack and the Empty Eyedropper.

  • Go down to the Outside Pool area.

    Outside Pool

  • Take a closer look at the back fence at the corner of the building. Use the Car Jack between the wall and the post.

  • Tip: Before you can progress further here, you’ll need to return to the Generator Room.

    Generator Room

  • Examine the pan beneath the generator on the bottom right. Use the Empty Eyedropper on the tray to obtain the Full Eyedropper.

  • Go back to the Outside Pool area.

    Outside Pool

  • Examine the back post again and use the Full Eyedropper to free the car jack. Click on it until it snaps the post, revealing the location of the Saw Blade. Click on it and the Switch 1/2 beneath to add it to your inventory.

  • Head back to the Generator Room once again.

    Generator Room

  • Take a closer look at the device at the bottom left corner of the shelves. Attach the Saw Blade, then click on the Electric Saw to add it to your inventory.

  • Go to the Secret Room.

    Secret Room

  • Examine the right desk drawer straight ahead. Use the Letter Opener to pry it open, then click on the second part of the Switches, as well as the Safe Combination to add them to your inventory.

  • Take a closer look at the cabinet on the right. Use the Electric Saw to cut it open, then zoom in for a closer look. Place the Safe Combination here to trigger a puzzle.

  • Set the correct combination for the lock. The combination is as follows: Left 11, Right 17, Left 12, Right 17, Left 4, Right 12, Left 2, Right 8, Right 10, Left 4, Left 9.

  • Upon completing the puzzle, the safe will open. Click on the Chest inside to add it to your inventory.

  • Back in the main view of the area, zoom in on the desk. Place the Chest on the desk and place the Switches in the grooves to trigger a puzzle.

  • Turn the switches so that their sum corresponds to the number above the individual locks. The solution is as follows:

    • 12 = Left 3, Right 9

    • 9 = Left 4, Right 5

    • 15 = Left 8, Right 7

  • Examine the book lying inside the chest to trigger a cutscene.

Congratulations! You’ve completed the Main Story of Mysteries of the Past – Shadow of the Daemon! You may now choose to play the Bonus Chapter from the game’s Main Menu.

Bonus Chapter

With revelations unveiled, only you can stop the demon now. But is it already too late?

Prison

  • Examine the floor at your feet. Read the note, then click on the Candle and the Amulets to add them to your inventory.

  • Take a closer look at the lamp on the wall. Click on the Broken Handle next to it and the Soap behind it to add them to your inventory. Before leaving, use the Candle on the lamp to obtain the Lit Candle.

  • Examine the corner of the door on the right. Use the Soap on the cobblestones, then click on the stump to slide it into position.

  • Zoom in on the alcove above the door. Click on the Rag to add it to your inventory.

  • Look at the floor again. Use the Rag on the puddle to acquire the Wet Rag.

  • Examine the alcove above the door again and use the Wet Rag and the Broken Handle on the bars. You will acquire the Bar.

  • Once again, look at the floor. Use the Bar on the sharpening stone to obtain the Sharpened Bar.

  • Take a closer look at the beam propped up against the wall on the left. Click on the Beam to add it to your inventory. Use the Sharpened Bar to outline the wall and scrape out the mortar, then use the Beam to break through. Place the Lit Candle in the shaft and proceed into the next area.

    Crossroads

  • Examine the parchment hanging in the upper left corner.

  • Proceed down the path to the right.

    Outside Garage

  • Zoom in on the wood pile on the right. Click on the Mitten and the Twine to add them to your inventory.

  • Examine the garage doors. Click on the Farm Jack Lever to collect it.

  • Return to the Crossroads.

    Crossroads

  • Examine the base of the tree straight ahead. Use the Mitten to remove the snow from the Symbols 1/3, then click on it to add it to your inventory.

  • Look up into the next tree on the right. Use the Twine on the Snow Shoes, then click to add them to your inventory.

  • Place the Snow Shoes on the snow bank on the left to proceed to the next area.

    Outside Hut

  • Take a closer look at the front door. Click on the Fishing Line to collect it.

  • Examine the base of the tree on the right and collect the Pan.

  • Zoom into the left side of the cabin and place the Farm Jack Lever beneath the barrel.

  • Tip: You’ll return here later. For now, go to the Outside Garage area.

    Outside Garage

  • Examine the box on the left side of the doors. Use the Fishing Line on the Fishing Reel to add it to your inventory.

  • Return to the Outside Hut area.

    Outside Hut

  • Zoom in on the front door and use the Fishing Reel on the pole to acquire the Fishing Rod.

  • Go back to the Crossroads.

    Crossroads

  • Look up into the center tree again and use the Fishing Rod to pull down the Sledge Runner.

  • Go to the Outside Garage area.

    Outside Garage

  • Examine the wood pile on the right. Use the Sledge Runner to fully restore the Sledge and add it to your inventory.

  • Return to the Outside Hut area.

    Outside Hut

  • Examine the left side of the cabin again and combine the Sledge with the Farm Jack Lever to acquire the Farmjack on Sledge.

  • Head once again to the Outside Garage area.

    Outside Garage

  • Take a closer look at the front doors. Use the Farmjack on Sledge to open them, then proceed inside.

    Garage

  • Find the objects listed at the bottom of the screen. Their locations are shown below.

    Mysteries of the Past – Shadow of the Daemon Garage Hidden Object Area

    Mysteries of the Past – Shadow of the Daemon Garage Hidden Object Area

  • Once you’ve located all the objects, place the remaining ones into their correct locations. The solution is shown below.

    Mysteries of the Past – Shadow of the Daemon Garage Item Locations

    Mysteries of the Past – Shadow of the Daemon Garage Item Locations

  • Examine the tires to the left of the work bench and find the 6 matching pairs. Their locations are shown below.

    Mysteries of the Past – Shadow of the Daemon Garage Matching Item Locations

    Mysteries of the Past – Shadow of the Daemon Garage Matching Item Locations

  • Once you’ve located all the pairs, click on the Cleaver in the barrel up front to add it to your inventory.

  • Return to the Outside Hut area.

    Outside Hut

  • Examine the front door of the hut. Use the Cleaver to open the door, then proceed inside.

    Inside Hut

  • Click on the hidden object area over the table on the right. Find the pairs of matching items. Their locations are shown below.

    Mysteries of the Past – Shadow of the Daemon Inside Hut Item Pair Locations

    Mysteries of the Past – Shadow of the Daemon Inside Hut Item Pair Locations

  • Upon locating all the pairs, click on the Ornament in the center of the table to add it to your inventory.

  • Examine the cabinet in the left corner of the room. Place the Ornament into the groove to trigger a puzzle.

  • Find pairs of cups with identical pictures. The solution is shown below.

    Mysteries of the Past – Shadow of the Daemon Matching Jam Jars Puzzle Solution

    Mysteries of the Past – Shadow of the Daemon Matching Jam Jars Puzzle Solution

  • Upon completing the puzzle, the Puzzle Piece will be added to your inventory.

  • Go to the Garage.

    Garage

  • Examine the chest above the cabinet in the rear right corner. Place the Puzzle Piece into the groove at the top to trigger a puzzle.

  • Arrange the numbers so that the sum of the rows, columns and diagonals is the same. The solution is shown below.

    Mysteries of the Past – Shadow of the Daemon Garage Safe Combination Puzzle

    Mysteries of the Past – Shadow of the Daemon Garage Safe Combination Puzzle

  • Upon opening the safe, click on the Handle to add it to your inventory.

  • Take a closer look at the snowcat on the left. Place the Handle on the hatch to open it. Collect the Sickle inside.

  • Return to the Inside Hut area.

    Inside Hut

  • Use the Sickle to cut the Rope in the upper left corner and add it to your inventory.

  • Head to the Crossroads.

    Crossroads

  • Examine the cliff face straight ahead. Use the Rope to create a way up to the next area.

    Magic Tree

  • Examine the mound at the base of the tree on the left. Use the Pan to scoop the snow away, then click on the Crowbar to add it to your inventory.

  • Go back to the Garage.

    Garage

  • Take a closer look at the hatch in the floor. Use the Crowbar to pry up the boards, then collect the last of the Symbols inside.

  • Return to the Magic Tree.

    Magic Tree

  • Examine the markings at the top of the tree. Insert the Symbols to trigger a puzzle.

  • Try and find the right positions for all three round symbols by turning them. The solution is shown below.

    Mysteries of the Past – Shadow of the Daemon Magic Tree Symbols Solution

    Mysteries of the Past – Shadow of the Daemon Magic Tree Symbols Solution

  • Enter the Magic Tree to the next location.

    Corridor

  • Collect the Empty Water Bag slung over the statue’s shoulder.

  • Examine the fountain on the left. Use the Empty Water Bag here to obtain the Full Water Bag.

  • Head back to the Outside Hut area.

    Outside Hut

  • Zoom in on the left side of the cabin. Use the Full Water Bag on the barrel to raise the water level, then collect the Cork inside to add it to your inventory.

  • Head back to the Corridor.

    Corridor

  • Examine the fountain on the left again and use the Cork to stop the flow of water. Click on the Chisel to add it to your inventory.

  • Head to the Outside Hut area again.

    Outside Hut

  • Take a closer look at the canoe on the left. Use the Chisel to remove the ice and flip the canoe, then use the Chisel once again to break open the ice and collect the Bracelet.

  • Return to the Corridor.

    Corridor

  • Take a closer look at the statue on the right. Place the Bracelet on the arm, then click to rotate the center piece until the design is completed.

    Mysteries of the Past – Shadow of the Daemon Bracelet Complete Design

    Mysteries of the Past – Shadow of the Daemon Bracelet Complete Design

  • Once you’ve done this successfully, click to add the Bow and Arrow to your inventory.

  • Return to the Outside Hut area once again.

    Outside Hut

  • Use the Bow and Arrow on the upper portion of the tree on the right. Examine the base of the tree and click on the Stove Handle and Hairpin within the nest to add them to your inventory.

  • Enter the hut.

    Inside Hut

  • Take a closer look at the stove on the left. Place the Stove Handle on the stove door, then open it and collect the Pliers inside.

  • Head back to the Garage.

    Garage

  • Take a closer look at the workbench ahead. Place the Hairpin on the desk, then use the Pliers to bend it into the Improvised Lockpick.

  • Return to the Corridor.

    Corridor

  • Examine the chest in the wall on the upper left. Use the Improvised Lockpick to trigger a puzzle.

  • Stick the lockpick through 5 flaps of the lock and move them. The trick is to click on each pin quickly multiple times to move it up to the top. Once all pins are locked into the top, the puzzle will be complete.

  • Once the puzzle is complete, click on the Mechanism Handle to add it to your inventory.

  • Examine the wheel on the right and use the Mechanism Handle on the empty slot. Click on the mechanism and proceed through the door that opens ahead.

    The Final Room

  • After a brief cutscene, you will become locked in battle with the demon! Click on the Medallion to initiate your attack.

  • Each time you successfully initiate an attack with the Medallion, a puzzle will be triggered in which you must find and select the correct pairs of symbols. You can match symbols in any order, so long as they’re in pairs. Taking too long may cause additional symbols to spawn again. Each time you match all the pairs, you will need to use the Medallion to attack the demon again. The puzzles become progressively more difficult the closer you are to defeating the demon.

  • Tip: Sometimes symbols are obstructed. Hover your cursor over an obstructed symbol to reveal the symbol beneath.

  • Once you’ve done enough damage, the demon will retreat. Take a closer look at the pedestal straight ahead.

  • Place the Amulets into the pedestal, then turn the column elements to combine their energy by clicking on them. The solution is shown below.

    Mysteries of the Past – Shadow of the Daemon Demon Fight Column Segments

    Mysteries of the Past – Shadow of the Daemon Demon Fight Column Segments

  • After a brief cutscene, you will find yourself transported back to the Garage.

    Garage

  • Click on the hidden object area to the left of the people you rescued. Find the items listed at the bottom of the screen. Their locations are shown below.

    Mysteries of the Past – Shadow of the Daemon Epilogue Hidden Object Scene

    Mysteries of the Past – Shadow of the Daemon Epilogue Hidden Object Scene

  • Upon completing the area, the Snowcat Keys and the Saw Blade will be added to your inventory.

  • Take a closer look at the workbench straight ahead. Use the Saw Blade on the handle here to obtain the Saw.

  • Zoom in on the gas canister on the lower right. Use the Saw to remove the chain, then click on the Jerrycan to add it to your inventory.

  • Examine the snowcat on the left. Use the Snowcat Keys to open the cabin, then take a closer look inside. Click on the Battery sitting on the right and the Funnel behind the steering levers to add them to your inventory.

  • Back on the outside, take a closer look at the snowcat again. Place the Battery into the lower compartment, then insert the Funnel into the top hole and fuel it with the Jerrycan.

  • Examine the inside of the snowcat again, specifically the cabin. Insert the Snowcat Keys into the ignition and click to turn it on.

Congratulations! You’ve completed our Mysteries of the Past – Shadow of the Daemon Walkthrough! For more great tips and tricks and a selection of other walkthroughs, visit our blog!

The Mysteries of the Past – Shadow of the Daemon Walkthrough is meant as a guide and does not contain cheats, hacks, or serials.


The post Mysteries of the Past – Shadow of the Daemon Walkthrough appeared first on GameHouse.
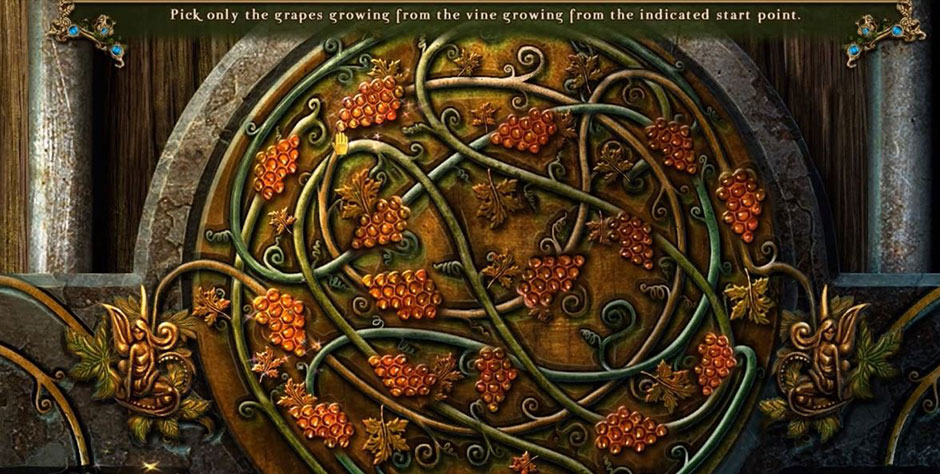
Viewing all 192 articles
Browse latest View live