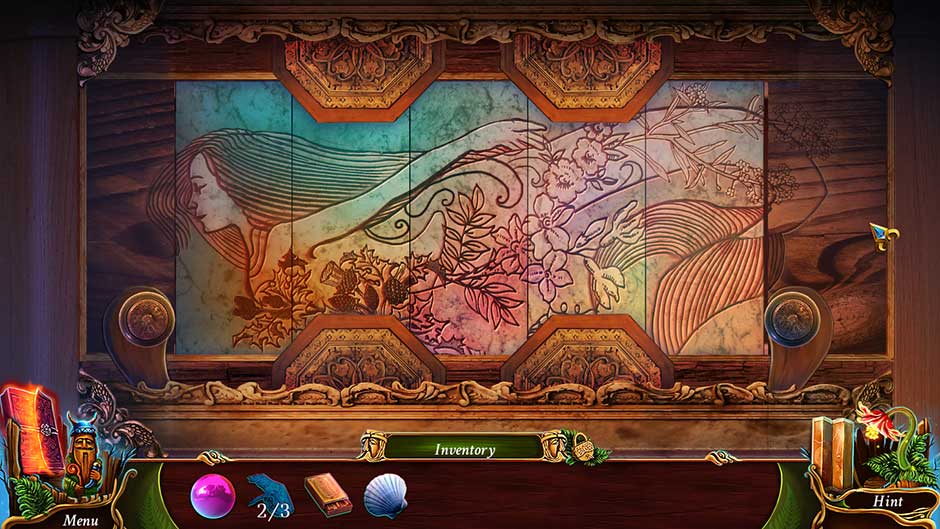
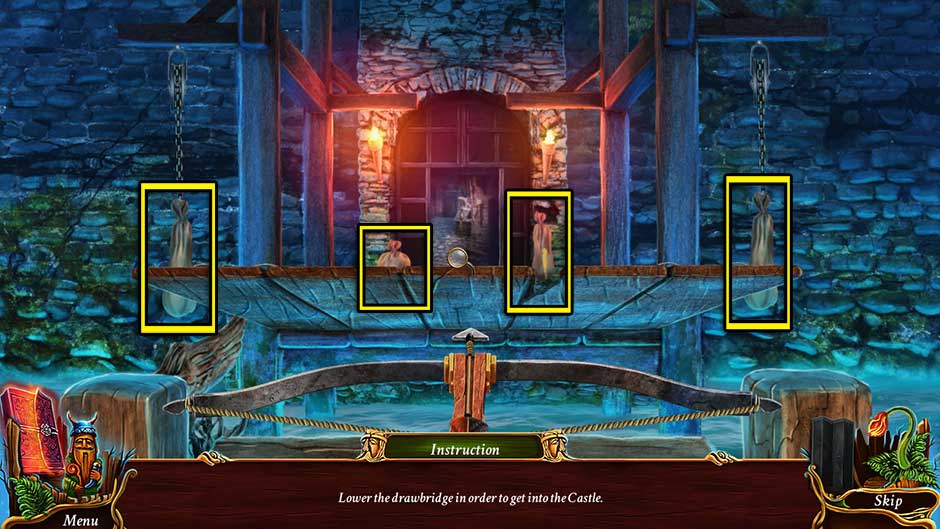
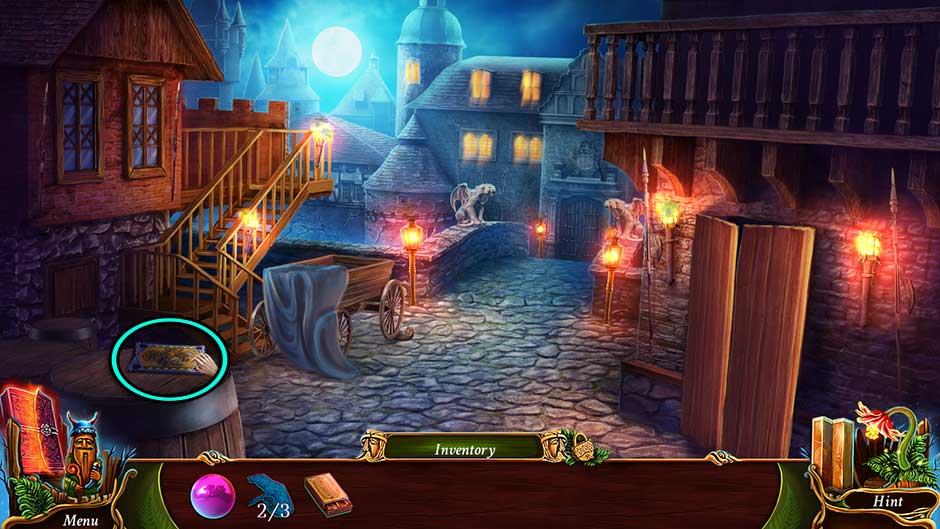
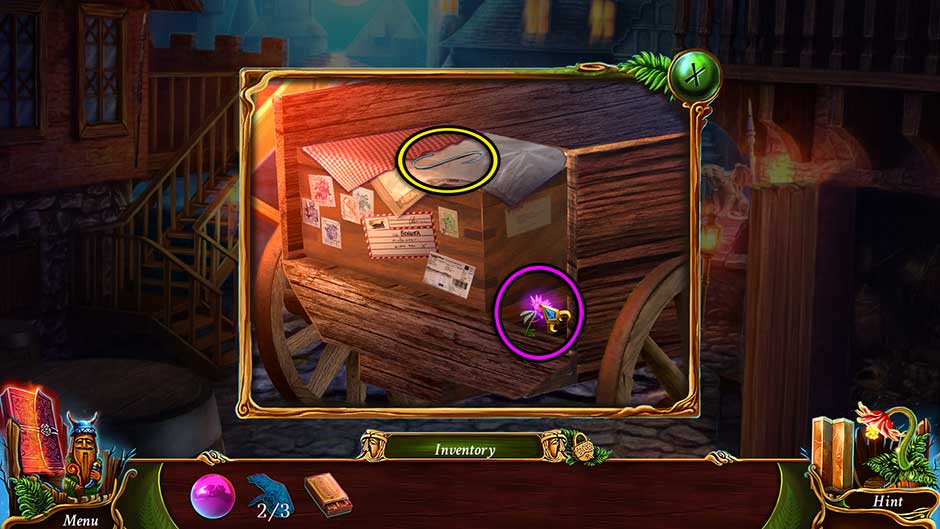
Quantcast
Channel: Guides – GameHouse
Viewing all 192 articles
Browse latest View live

Dark Parables – The Red Riding Hood Sisters Walkthrough

$
0
0

The land has been overrun by mysterious wolves. The Red Riding Hood Sisters have all gone missing. You are the only one who can bring them back and stop the Wolf Queen’s evil plot. Travel to the Mist Kingdom to free the Red Riding Hood Sisters! Travel to Fairy Tale Land to meet the Wolf Queen in a final good-vs-evil face-off! The world needs you!

Dark Parables – The Red Riding Hood Sisters is a hidden-object adventure and puzzle game set in a fantasy world where Snow White, Red Riding Hood, and other fairy tales intersect. The following walkthrough provides simplified instructions to help you through the hard parts of the game, and offers general advice to help you make it on your own.

Contents

General Tips & Tricks

In Casual difficulty, the Hint button recharges fastest, and puzzles can be skipped. On Normal difficulty, the Hint button recharges slower, and puzzles can only be skipped after a certain amount of time has passed. In Hard mode, the Hint button doesn’t work, and puzzles can never be skipped. Hard mode also removed the sparkle on objects of interest. For the first play-through, Casual or Normal difficulty is encouraged, as it still offers a solid challenge.

Tips and Tricks
This is a hidden-object game. A keen eye is important. Click everything, go everywhere, and make sure to revisit places you have already been. Screens often change when you revisit
them, so look out for subtle differences and brand new items. If an object can be picked up, observed, spoken to, or if any other action can be taken, your mouse icon will change. Click everything.


There are many, many items that need to be collected to pass through the game. It is highly recommended that you venture through every possible room in every chapter, and search for items that may be helpful in the future. Every item you can pick up will be used at some point, and finding them early, when there are fewer areas to search, will save you a lot of time and backtracking  in the later parts of the game.


Your map is a great asset. It not only lets you know where you are, but also where you can go, and areas in which there are vital items or puzzles will be shown and specially designated on the map. If you are not sure where to go, looking at the map may help you quite a bit.


There is a Parables button in the bottom left. Clicking that will open a “journal” window, reminding you of important aspects of the storyline and reminding you what all you need to do to proceed through the story and save the world from the
Wolf Queen.

If you are ever completely stuck, remember that there is a Hint button in the bottom left. Clicking that button will reveal a hint to get you started. It will recharge slowly, and recharging will speed up as the game progresses. A Hint button can be a lifesaver in an open-world hidden-object game like this.

Icons

Your mouse icon can change to any of the following, and each icon implies a certain action. Magnifying Glass – Zoom in on an area
Hand – Pick up or interact with an item
Chat Bubble – Talk to a character
Tools


There are many tools available to help you through the game.

  • Inventory – Your inventory is in the bar at the bottom of the screen
  • Map – The map tells you where you are, and
    shows where you can go.
  • Tasks – The task button in the lower left tells
    you what to do to proceed.
  • Hints – In the lower left corner. Click for
    help if you’re stuck!
  • Along with these tools, the game points out
    specific areas of interest by making them sparkle, and gives you the
    option to skip a particularly hard puzzle.

Dark Parables – The Red Riding Hood Sisters Walkthrough

Introduction

You’ve been ambushed! Your wrecked carriage lays before you. Find a way to continue on your journey to find the Red Riding Hood Sisters!

In this introductory chapter, you need to find the Moonstone, the Machete, the Sharp Stone, and
the Misty Orb. The Moonstone is on the ground by the carriage. The Machete is in the carriage. The Sharp Stone is buried in the sand in the area to the left. The Misty Orb is your reward for completing the hidden object scene on the desk. Use the Misty Orb on the statue of the angel
and devil, and then use the Machete to clear the vines and continue down the path.


Dark Parables - The Red Riding Hood Sisters - Introduction

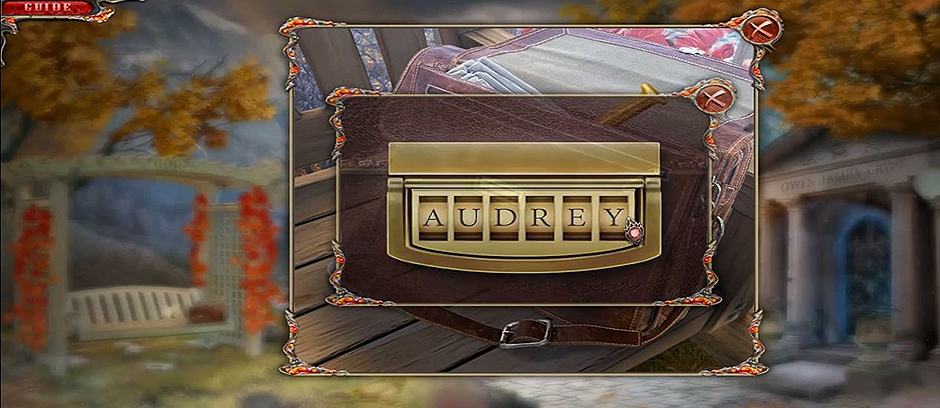
Dark Parables – The Red Riding Hood Sisters – Introduction

Chapter 1

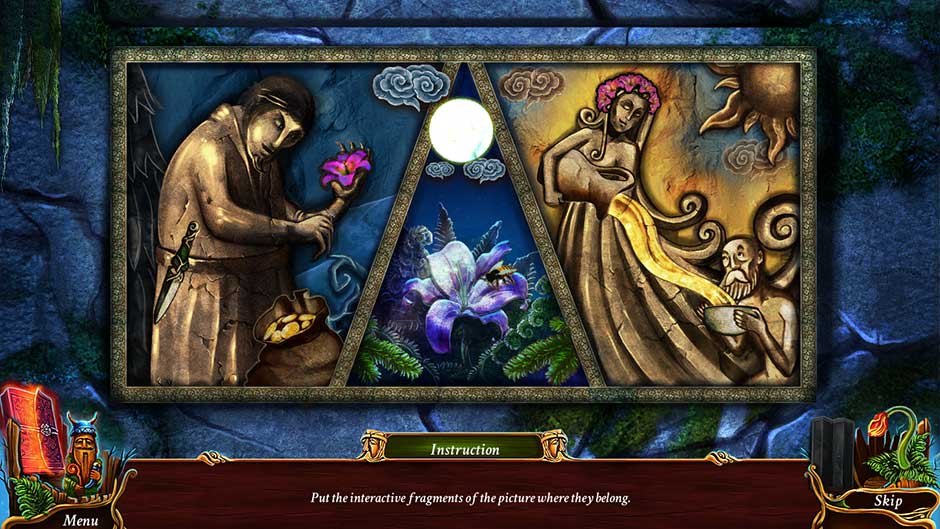
You’ve found one Red Riding Hood Sister, but she is poisoned! You need to find a way to save her! In the first part of Chapter One, you will explore the forest to find Herbal Medicine for the Red Riding Hood Sister. The flower that produces the medicine is in the Hollow Tree. You will need to place the Silver Moon and the Golden Moon on the gate in the Hollow Tree to make the flower bloom, and you will need the Empty Vial to collect the medicine. There is a Red Riding Hood Sister in the archer’s quiver. In the second part of Chapter One, you will explore the Red Riding Hood Sisters’ Hideout, which has been ransacked! You will need the Red Riding Hood Figurine and the Wolf Figurine, which can be found by the lake, to enter the Hideout.

In the Hideout, you will need the Bronze Eagle from the Hollow Tree and the Silver Wings from in front of the memorial to open the gate to the Training Room, by the waterfall. You will then need the Hunter Statue Head from under the waterfall and the Hunter Body Statue from inside the training room. Place the statue parts on the statue in front of the memorial to open the doors, enter the meeting room and talk to the Truth Mirror. There are Red Riding Hood Sisters by the wolf’s head near the waterfall and in the grandmother’s memorial by the hunter statue.

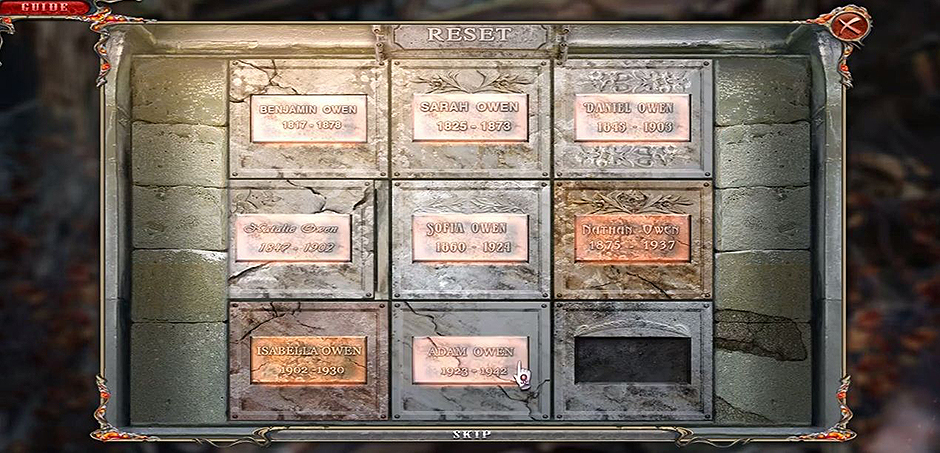
Dark Parables - The Red Riding Hood Sisters -Mini-Puzzle Chapter 1Dark Parables - The Red Riding Hood Sisters -Mini-Puzzle Chapter 1

Dark Parables – The Red Riding Hood Sisters -Mini-Puzzle Chapter 1

In the third part of Chapter One, you have to open one last gate to regroup with Ruth. You will need the Polished Arrow from the meeting room and the Elegant Sword from the training room to open this gate. In the training room, place two Fangs in the wolf’s mouth to make a wolf statue appear. There is an Order of the Red Riding Hood Sisters under the wolf statue and another in the crest n the tree above the Red Riding Hood Statue.

Make sure you take the Ravenwood from the wolf’s head by the waterfall.

Dark Parables - The Red Riding Hood Sisters -Sisters Pictures

Dark Parables – The Red Riding Hood Sisters -Sisters Pictures

Chapter 2

Ruth will help you save the Red Riding Hood Sisters! You have to find the orbs needed to open the door to the Mist Kingdom. You already have the Moonstone. There is a Moon Goddess in this room. The Water Orb is under the waterfall. The Fire Orb is in the meeting room. Using the Sister Medallion on the frame in the meeting room reveals the fourth Red Riding Hood Sister. The Wind Orb is in the training room, as is a Mist Kingdom. You will need to complete the Hunter Statue puzzle to get the Miniature Castle to place on the wall of the training room before the Wind Orb is revealed. Place all orbs in the device in the room where Ruth is,the observatory. You will get the Moonstone back. Go back to the Red Riding Hood Statue in the hideout, and grab the Skull and Telescope Base before heading all the way back to the lake and crossing into the Mist Kingdom.

Dark Parables - The Red Riding Hood Sisters -Hunter Statue Puzzle

Dark Parables – The Red Riding Hood Sisters -Hunter Statue Puzzle

In the second part of Chapter Two, you need to enter the Wolf Queen’s palace. You will have to explore the Mist Kingdom until you can use the Large Gearset to fix the palace gate mechanism.

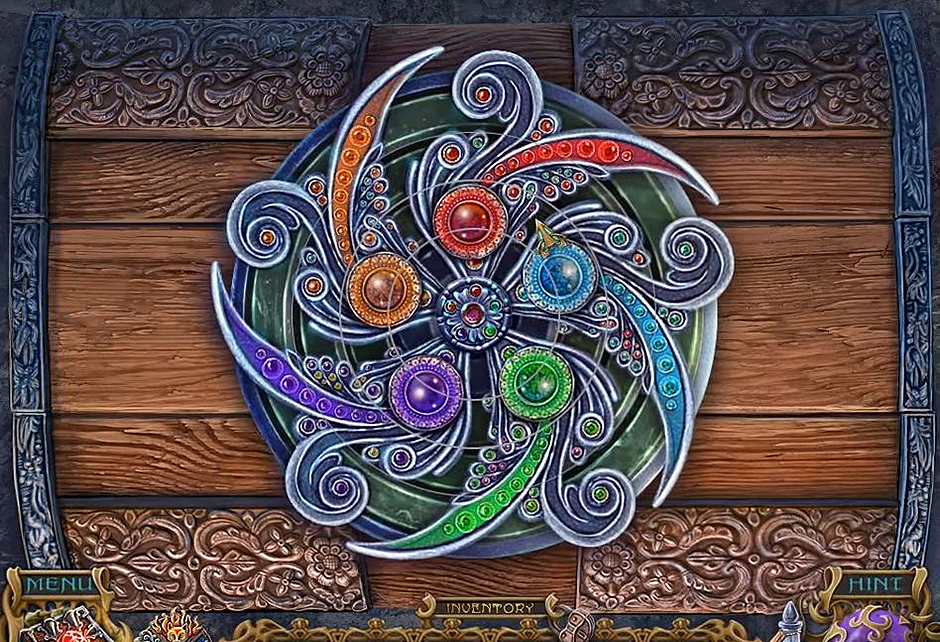
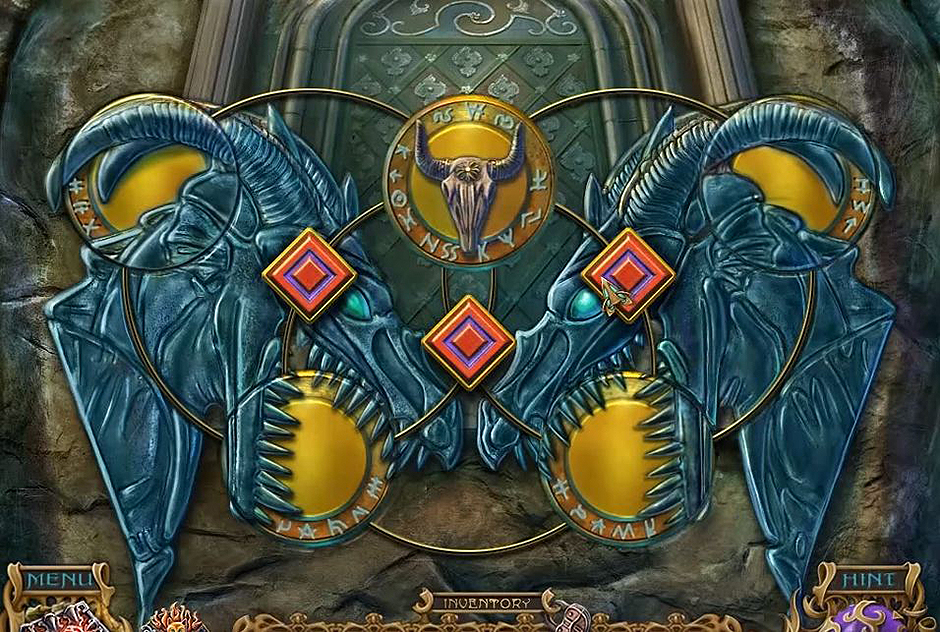
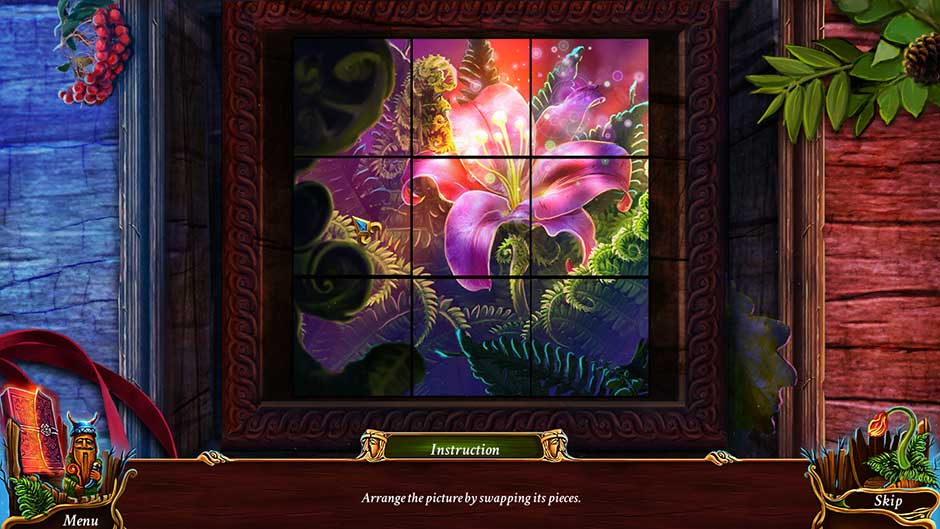
There is an Order of the Red Riding Hood Sisters in the entrance to the Mist Kingdom. There is a complex puzzle to enter the Town Hall. The solution is: The star in the upper left, the moon in the upper right, the second sun on the left, the lightning in the bottom right, the hidden coin twice, the stack of hay, the house on the bottom right, place the coins in the throne to reveal the blue button, click all blue buttons to open the door. The Large Gearset is in the next room, along with a Fallen Sister. In this part, you will also need to use Sulfuric Acid to melt a door lock and enter the Constructor’s House. Like it said in the Tips and Tricks section, click everything, try everything, go
everywhere.

Dark Parables - The Red Riding Hood Sisters -Town Hall Puzzle Solution

Dark Parables – The Red Riding Hood Sisters -Town Hall Puzzle Solution

Make sure you find the Harp in the constructor’s house, the Goddess Bracelet in Mist Kingdom, the Telescope Base from under the Red Riding Hood statue, the Telescope Stand from the Mist Kingdom, and the Aquarius Base from the Mist Fountain.

Chapter 3

You’ve sneaked into the Wold Queen’s palace! Now to find the Red Riding Hood Sisters, free them, and save the day! If you’ve been exploring and collecting items as recommended, this chapter is quick and easy. The first step is to open the locked door to the hall. You’ll need the Deer Plate from the jail cell, which can be accessed after giving the Aquarius Vase and the Halo, from the castle entrance, to the angle statue in the courtyard. Find the Prison Keys in the hall and go back to the jail cell. Talk to the man, open the door, and receive the Dragon Blood. Make sure you find the Violin in the castle hall.

Dark Parables - The Red Riding Hood Sisters - Deer Plate

Dark Parables – The Red Riding Hood Sisters – Deer Plate

Chapter 4

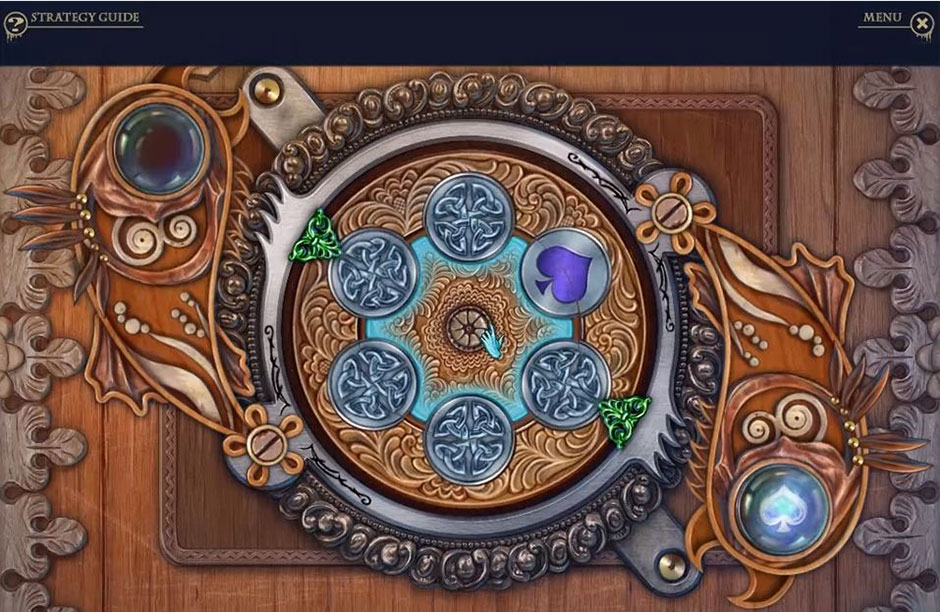
Four The Red Riding Hood Sisters are free! Now they need to get out of the Mist Kingdom. The first step is to enter the ballroom. The fourth Order of the Red Riding Hood Sisters is in the jail cell. The ballroom is through the door on to the right in the courtyard. You will need the Ballroom Key, which is found by inserting the Stone Rabbit into a pedestal in the castle entrance. The ingredient needed to create a portal out of the Mist Kingdom are in a list found on Theresa’s body. The Portal Orb is also found on Theresa’s body. There is a Fallen Sister in the ballroom. In the jail cell, there is a mini-game with two rounds. The first round is won with the following moves: The bottom right piece, the center piece, the bottom right piece again.

Dark Parables - The Red Riding Hood Sisters -Jail Cell Mini-Game

Dark Parables – The Red Riding Hood Sisters -Jail Cell Mini-Game

The second round is won with the following moves: The upper piece to the far right, the farthest left piece on the top row, the piece directly to its right, the top piece to the far left, the piece directly below it, the lone piece in the top left, the top piece in the far left, the top piece in the far left, the bottom piece to the right.

Dark Parables - The Red Riding Hood Sisters - Mini-Game Chapter 4

Dark Parables – The Red Riding Hood Sisters – Mini-Game Chapter 4

Poison the Steel Arrow, found in the jail cell, and use it to shoot the man in the hall. In the next room, there is a Mist Kingdom totem. Use the Portal Orb and the Dragon Blood on the fountain in the hall, and use the Mirror, found by using the Bottled Glue on the broken mirror in the castle grand hall. on the knight statue to open the portal. Make sure you find the Telescope Connector in the castle grand hall.

Chapter 5

You saved the Red Riding Hood Sisters! Now we need to find the Moon Shrine and stop the evil Wolf Queen! There is a Moon Goddess in the area with the desk, from the introduction. You will need to set up the telescope at the lake, and you will need all piece, the Telescope Base from under the Red Riding Hood Statue in the Hideout, the Telescope Stand from the Mist Kingdom, the Telescope Connector from the Mist Kingdom Palace, where you found the mirror used to open the portal, and the Telescope found on the desk.

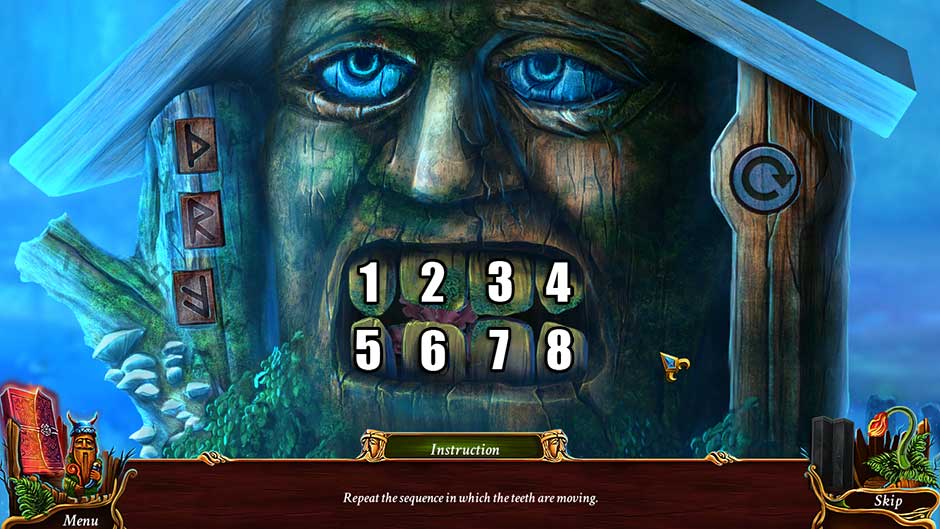
There is a mini-game to enter the Moon Shrine. This is a simple memorization game, but it is randomized. You can skip it using the SKIP button if it is too hard, or if you just don’t want to do it. Make sure you find the Church Key at the archer’s statue.


Dark Parables - The Red Riding Hood Sisters -Moon Shrine Puzzle

Dark Parables – The Red Riding Hood Sisters -Moon Shrine Puzzle

Chapter 6

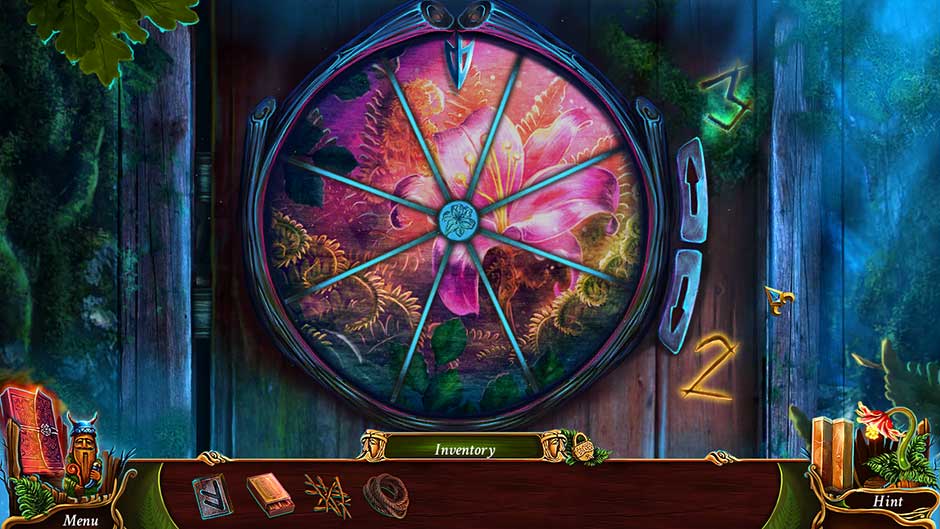
You’ve entered the sacred Moon Shrine of the Red Riding Hood Sisters! Maybe you’ll get to meet the Moon Goddess? There is a Moon Goddess in the Moon Shrine entryway. You will need to give the Goddess Necklace, the Goddess Tiara, the Goddess Scepter, and the Goddess Bracelet to the Goddess statue. You can find the Goddess Necklace in the Forest path where you first met Ruth. You can find the Goddess Tiara in a chest in the meeting room. The Goddess Scepter is behind the waterfall. You can part the water by placing the Crystal Bell on the structure at the base of the waterfall and ringing the bell. The Goddess Bracelet is in the Mist Kingdom.

Take the Moon Essence from the chest by the Goddess statue. Make sure you find the Horn in the Moon Shrine,

Dark Parables - The Red Riding Hood Sisters -Moon Essence

Dark Parables – The Red Riding Hood Sisters -Moon Essence

Chapter 7

You’ll need the Centaur Bow to defeat the evil Wolf Queen! You will need to find the Violin by
searching the archer’s statue before you go back to the Mist Kingdom. You will need to enter the Mist Church using the Church Key. You will need the Council Scroll and the Church Scroll to find the instructions to creating the Centaur Bow. The Council Scroll is found in the constructor’s house. The Church Scroll is found in the Mist Church. You need to use the magical anvil in the Mist Church to create the Centaur Bow. You will also need a Unicorn Hair, Ravenwood, Imbuing Potion, and Forging Mallet. The Unicorn Hair was found in the town hall. The Ravenwood was found in the wolf head’s mouth by the waterfall. The Imbuing Potion was found in the Mist Church. The Forging Mallet was found in the hidden object scene at the castle gate. Use the Centaur Bow to dispatch the wolf guarding the Wolf Queen’s palace. Make sure you find the Owl Emblem in the Mist Church, and the Violin from the archer’s statue.

Dark Parables - The Red Riding Hood Sisters -Unicorn Hair

Dark Parables – The Red Riding Hood Sisters -Unicorn Hair

Chapter 8

You’re ready to vanquish the Wolf Queen! You just have to find her… You need to give musical instruments to the cupids at the castle entrance. The Violin, which you found at the archer’s statue, belongs to the furthest cupid on the right. The Flute from the castle hall goes with the furthest cupid on the left. The Cello found in the castle hall belongs to the closest cupid on the left. The Horn, found in the Moon Shrine, goes to the middle cupid on the left. The Harp from the constructor’s house belongs to the closest cupid on the right. There is a Mist Kingdom in the castle entrance, as well.

Use Eldra’s Mask on the left wall in the castle grand hall to enter Eldra’s room. There is a Fallen Sister in this room. Use the Left Palace Emblem, found in the town hall, and the Right Palace Emblem, found in the statue’s box in the ballroom, which can be unlocked using the Skeleton Comb from Eldra’s room, on the wall of the castle grand hall to start a
puzzle. The puzzle is solved with the following steps, counting from the left: third, fourth, fourth, fourth, second, second. Take the Eagle Helmet from the knight on the left of the throne room and step through the portal. Make sure you find the Heretic Shield in the ballroom and the Wolf Emblem in Eldra’s room.

Dark Parables - The Red Riding Hood Sisters -Frames Puzzle

Dark Parables – The Red Riding Hood Sisters -Frames Puzzle

Chapter 9

You’ve crossed through another portal on the trail of the Wolf Queen! You will need the Skull Helmet, which can be found in Eldra’s room, and the Eagle Helmet, which was in the Throne Room. Place the Eagle Helmet on the knight to the left. Place the Skull Helmet on the knight to the right. Use the Skeleton Key from Eldr’as room to get through the fairy tale gate. There is a Mist Kingdom in the throne room, and you need to place the Owl Emblem, from the Mist Church, the Nightengale Emblem, from the Wolf King’s throne, and the Wolf Emblem, from Eldra’s room, in the painting to the right of the throne room.

Use the King’s Key from the treasure room to unlock the chest in the throne room and take the Gilded Wolf’s Head. Use the Gilded Wolf’s Head to open the cage by the Wolf King’s Throne.
Make sure you find the Holy Shield in the treasure room and the Dusk Sword at the Wolf King’s throne.

Dark Parables - The Red Riding Hood Sisters -King's Key

Dark Parables – The Red Riding Hood Sisters -King’s Key

Chapter 10

Time to finally face the Wolf Queen and save the world!! You will need the Holy Shield, from the treasure room, and the Dawn Sword, found near the Wolf King’s throne, as well as the Heretic
Shield, from the ballroom, and the Dusk Sword, from the Wolf King’s throne. Equip the bright knight in fairy tale land with the Holy Shield, Dawn Sword, and Eagle Helmet. Equip the dark knight with the Heretic Shield, Dusk Sword, and Skull Helmet. You will need the Fairy Tales Lang Insignia and the Earth Land Insignia. Both are found in the treasure room. Place both Insignias in the their slots behind the altar near the fairy tale carriage. The is a Fallen Sister by the anvil.

Use the Centaur Bow on the anvil to create the Mist Bow. Take the Mist Bow to the Wolf
King’s throne to start the final puzzle.

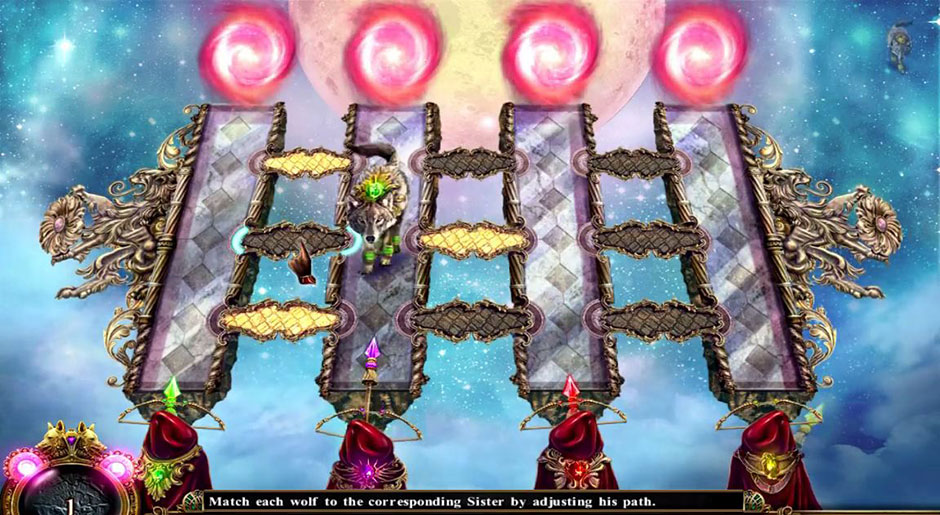
In this puzzle, white paths control where the wolves move, and the object is to move the wolves so that the Red Riding Hood Sisters can shoot them.

Dark Parables - The Red Riding Hood Sisters -Wolf Puzzle

Dark Parables – The Red Riding Hood Sisters -Wolf Puzzle

Congratulations! You’ve completed Dark Parables – The Red Riding Hood Sisters! You saved the Red Riding Hood Sisters, defeated the evil Wolf Queen, and spared the world from her reign of terror! You truly are the world’s greatest detective!

Delicious – Emily’s Hopes and Fears Walkthrough

Big City Adventure – Shanghai Walkthrough

Building the Great Wall of China 2 Walkthrough
The Dark Parables – The Red Riding Hood Sisters Walkthrough is meant as a guide and does not contain cheats, hacks, or serials.


The post Dark Parables – The Red Riding Hood Sisters Walkthrough appeared first on GameHouse.


Weather Lord – The Successor’s Path Walkthrough

$
0
0

Find all the missing pieces of a powerful artifact to claim your kingdom and control the weather in Weather Lord – The Successor’s Path. In this great time-management game, you will have to travel throughout the kingdom looking for pieces of the artifact, battle epic bosses and rebuild the lands along the way. Once you have found all the pieces, you can claim the throne that was meant to be yours and you will be able to use the weather to your advantage.

Contents

General Tips & Tricks

In the Weather Lord – The Successor’s Path you can choose from three gameplay settings. By successfully completing the levels you will be able to unlock achievements and awards.

Once the game loads, you will be able to enter your player name. If you have already played, you can also select a previous profile or delete an existing one. Then you will be shown the opening screen with the main menu. From here you can start the game by choosing “Play” or adjust graphics or sound settings by choosing “Options.”

Once you start you will see an opening cut-scene. This can be skipped over. A map of the kingdom is then shown and from here you can access the levels. You can only advance to the next level once you have successfully completed the one prior to it. Only those available to you can be chosen from the map screen. To start a level, simply click on the one you want.

Once the level has loaded, you will see your objectives on the bottom of the screen in the taskbar. In addition, messages will tell you what you are supposed to do. The bar on the top shows you how many resources you have. The goal is to complete all the objectives as quickly as possible. On the right side of the top bar you will see a timer with three stars under it. Keep the timer filled up as much as possible and if you hear a loud clock ticking sound, that means that your time is running out.

Weather Lord – The Successor’s Path Walkthrough

Level 1 – 10

Level 1

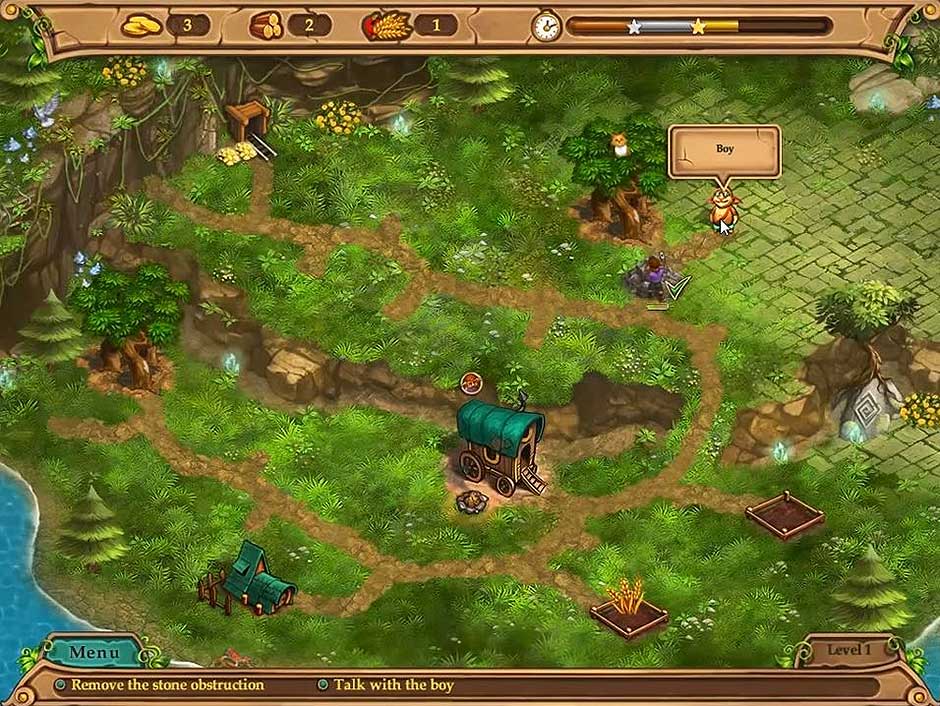
The first thing you will have to do in this level is collect the Resources. Once you have them, build the House.

After the house is complete, continue up the path towards the Boy. In order to continue, you will have to remove the Stone obstructing the path.

Click on the Boy and speak to him. He is looking for his Cat. Find the cat for the boy and then return it to him.

Weather Lord - The Successor’s Path - Level 1

Weather Lord – The Successor’s Path – Level 1

Level 2

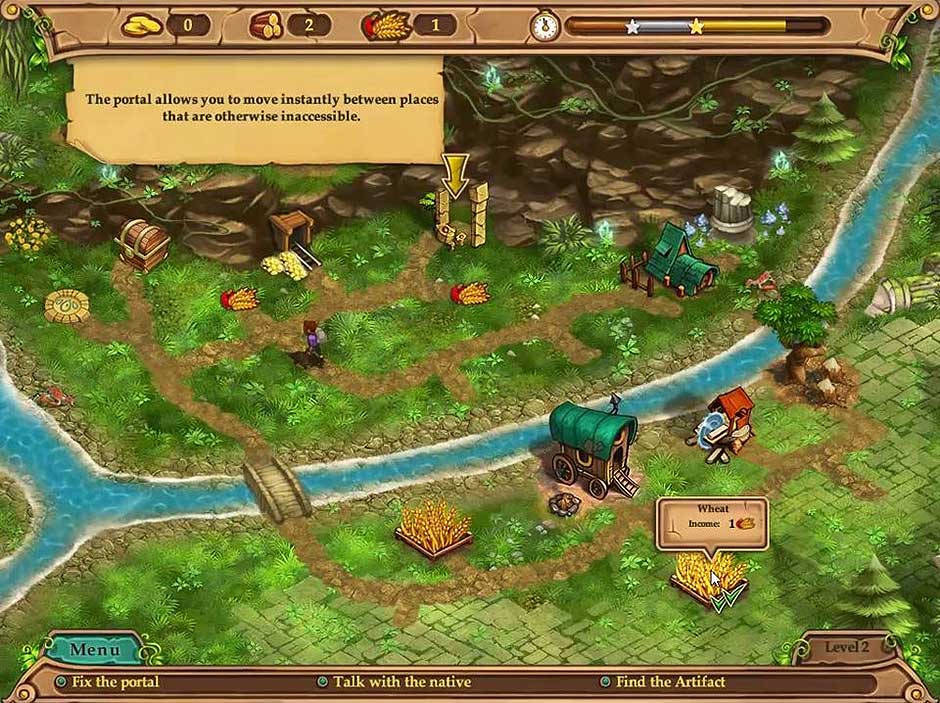
You start this level off by building the Saw Mill. Next. you will remove the Tree and then collect the Resources. Use them to fix the Bridge.

The next step is to build the House. Collect more Resources. Now find the broken Portal and repair it.

Once all of that is done you will have to make your way over to the Native located in the upper left part of the map. Collect the Resources along the path. In order to reach the native you will have to remove what is obstructing the way. After clearing the path talk to the Native. Finally, collect the Artifact.

Weather Lord - The Successor’s Path - Level 2

Weather Lord – The Successor’s Path – Level 2

Level 3

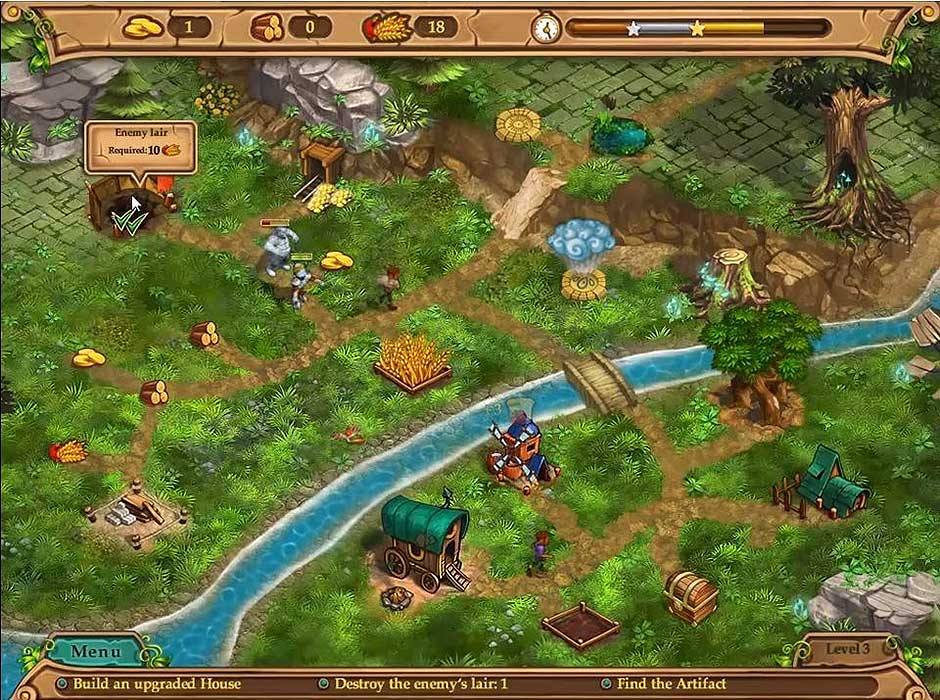
Start this level by collecting the Resources from the area outlined in yellow. Build the Mill.

Collect some more Resources. Go to the upper part of the map and find the Golem. Battle the monster and destroy its lair.

Weather Lord - The Successor’s Path - Level 3

Weather Lord – The Successor’s Path – Level 3

Now you can collect the Artifact. Once you have it, proceed to drain the swamp.

Level 4

The first step is to collect Resources and then build the House.

Chop the Tree and build the Mill.

You can now use the rain to activate the Bridge. In order to move on you will have to remove the object obstructing the path.

Finally, battle the Golem.
Go back and chop the Tree once again.

Now you can use the sun to dry the swamp. Once dry, collect the Resources.

The Bridge can now be repaired. You can cross and save the Native.

The last step of this level is to destroy the Golem Lair.

Level 5

Start by collecting the Resources from the are outlined in blue.

Go to the Boy and talk to him.

Build the House.

Chop the Tree and then go to the Bridge and repair it.

Go back and chop the Tree again. Collect the Resources.

Build the Mill and when that is done, go and repair the Bridge.

Chop the Tree once again and collect the Resources. You can now go and repair the Bridge.

Build the Mill.

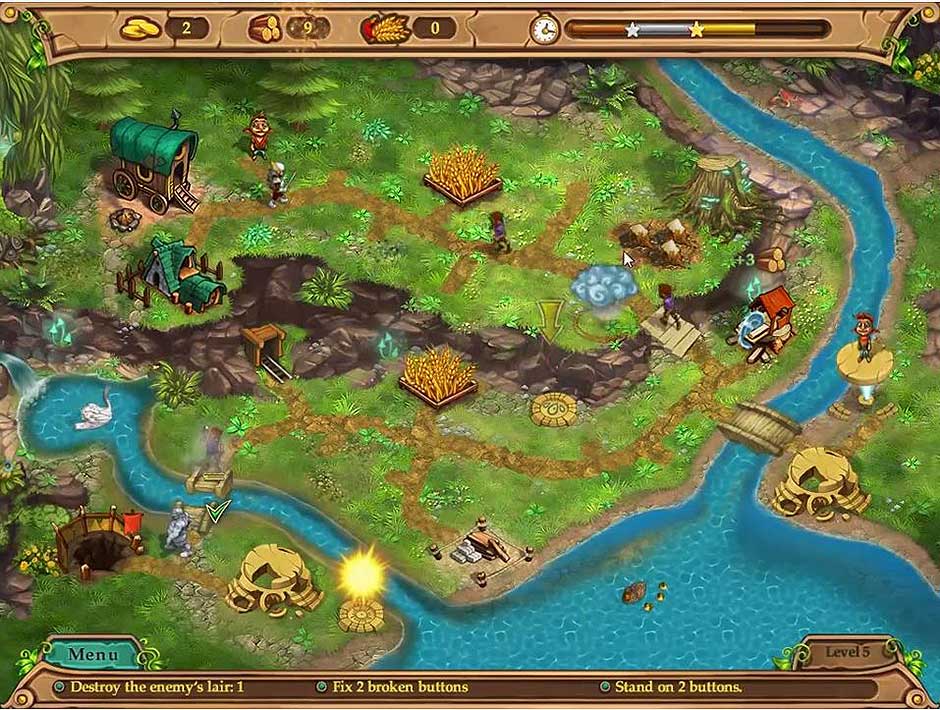
Weather Lord - The Successor’s Path - Level 5

Weather Lord – The Successor’s Path – Level 5

Continue on until you find the Golem. Battle the Golem and when he is defeated, destroy the Golem Lair.

Chop the Tree some more and then repair the broken Button.

Chop the Tree again and repair the other broken Button.

Click on the two Buttons and save the Boy.

Level 6

Collect the Resources in the area outlined in green and then speak to the Boy.

Repair the Bridge. Build the House and then upgrade it.

Continue over the bridge into the next area and collect the Resources.

Pick up the Toads. Use the Sun to dry up the swamps.

Build the Saw Mill.

Chop the Tree and then go repair the Bridge.

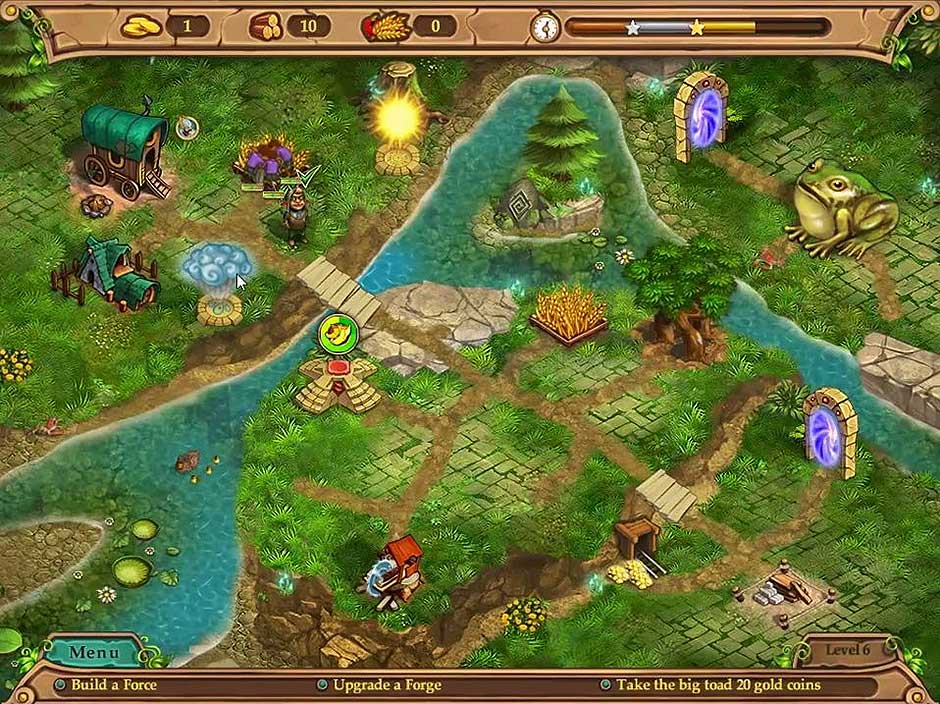
Weather Lord - The Successor’s Path - Level 6

Weather Lord – The Successor’s Path – Level 6

Move on to the next area and collect all the Resources.

Go back to the Tree and chop it. Once that is done, go and repair the Bridge.

Pick up the Toad and then use the Sun to dry the swamp again.

Now you can repair the Portal. Proceed to repair the Altar, as well as the Forge.

Once everything is repaired, mine the Gold.

Finally, go into the Portal and then speak to the large Toad.

Level 7

Start by collecting the Resources.

Next, you will have to speak to the Native.

Use the Sun and dry the swamp so you can build the House.

Select the Sun again to dry the swamp. Then select the Rain Cloud to put out the Flames.

Build the Mill and continue on to the Mine. Go mining.

Now you can build the Forge.

Return to the Tree and chop. Collect all the Resources.

Now you can build the Sun Tower.

Find the Golem and battle him.

Dry the swamp using the Sun.

Find the Golem’s Lair and destroy it.

Collect Honey from Trees.

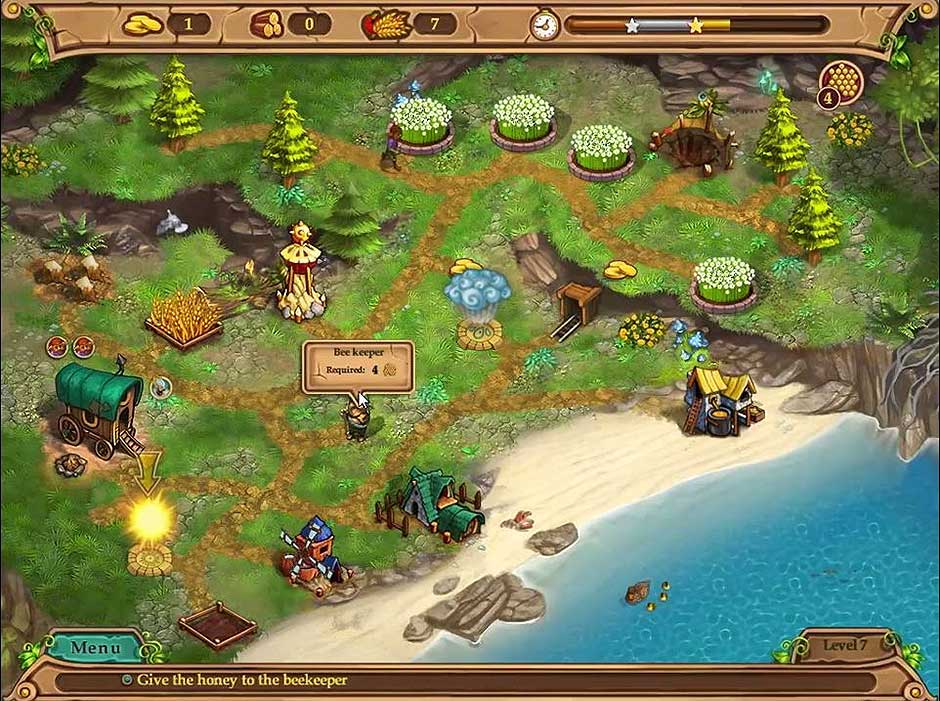
Weather Lord - The Successor’s Path - Level 7

Weather Lord – The Successor’s Path – Level 7

Bring the Honey to the Beekeeper.

Level 8

Start by collecting the Resources from the first area.

Build the House and the Saw Mill.

Chop the Tree and repair the Bridge.

Go to the Mine and mine it. Return to the Tree and chop it. Then use the Rain Cloud on that Tree.

Build the Forge and Sun Tower.

Now you can repair both the Bridge and Altar.

Find and destroy the Golem’s Lair.

Use the Sun on the Sun Tower in order to destroy the Golem.

Collect the Poison, which is then used on the Vine. Finally, cut the Bushes.

Level 9

Collect Resources from the first area and then build the House.

Chop the Tree, build the Mill and then repair the Portal.

Repair the Bridge and then continue on to the next area. Collect the Resources there.

Talk to the Engineer.

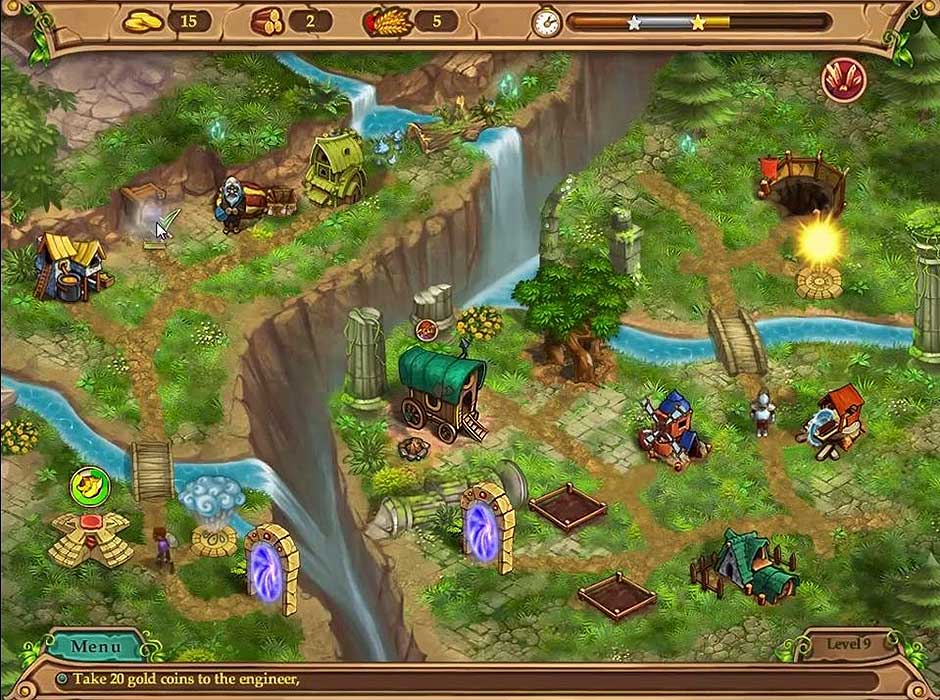
Weather Lord - The Successor’s Path - Level 9

Weather Lord – The Successor’s Path – Level 9

Build the Forge, go mining in the Mine and chop the Tree.

Proceed to build the Sun Tower and fix the Bridge.

Collect the Fire Crystal. Bring it to the Engineer.

Level 10

First, collect the Resources. Then build the House.

Talk to the Boy.

Chop the Tree. Then build both the Mill and Saw Mill.

Go mining in the Mine.

Fix the Bridges.

Select the Knight and then fight the Golem. When he is defeated, destroy the Lair.

Fix the Bridge.

Give the Flowers to the Boy and then pour the Potion into the River.

Level 11 – 20

Level 11

Collect the available Resources.

Build the House and Mill. Then upgrade the House. Chop the Tree.

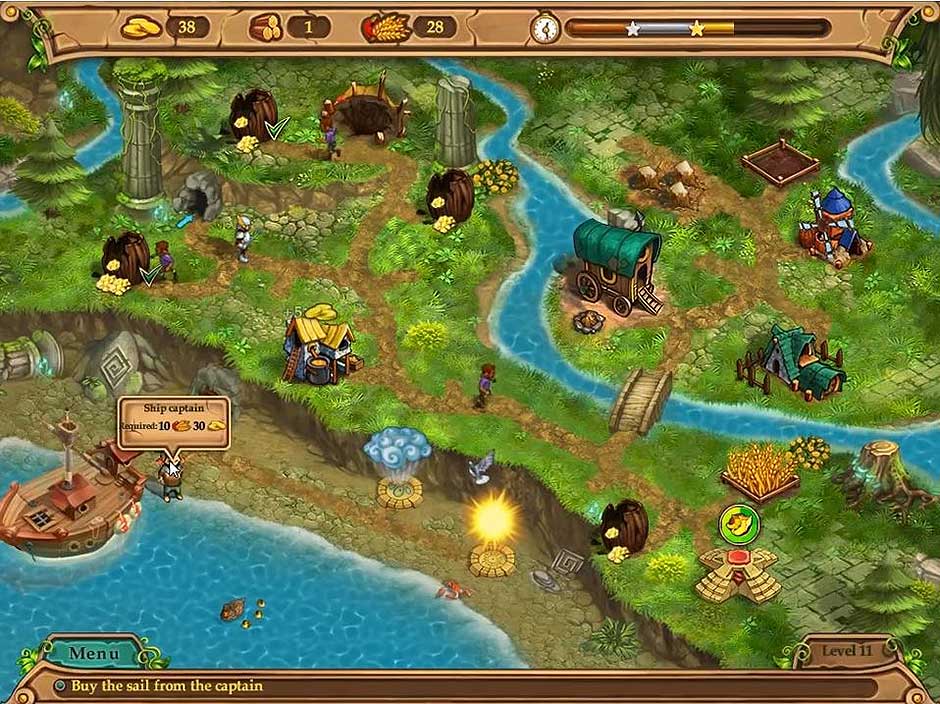
Fix the Bridge.

Select the Sun and move it over the Vines.

Collect Resources. Find the Altar and fix it.

Fight the Golem. Once he is defeated, destroy the Lair.

Go to the Barrels of Gold and open them.

Talk to the Captain of the ship.

Build the Forge.

Purchase the Sail from the Captain.

Weather Lord - The Successor’s Path - Level 11

Weather Lord – The Successor’s Path – Level 11

Level 12

First, collect the Resources.

Proceed to build the HouseSaw Mill and Mill.

Remove the Blockage. Go the Tree and chop it.

Hire two Workers and repair the Bridge.

Next, go to the other Bridge and repair it.

Defeat the Warlock Ogre.

Chop the Tree.

Click on the two Buttons and then collect the Artifact.

Level 13

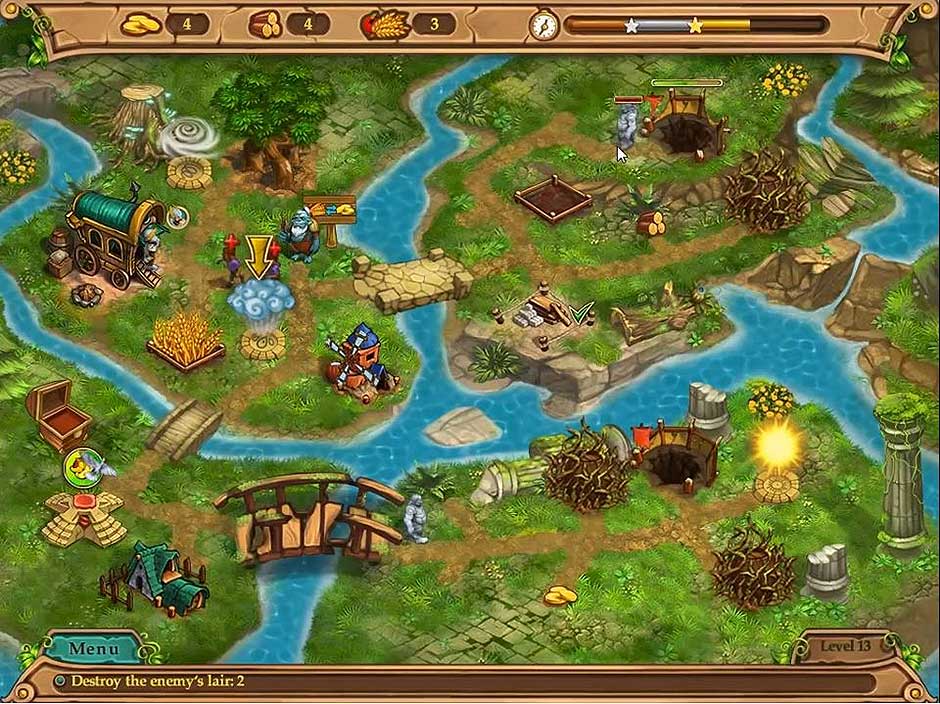
Collect the Resources and then talk to the Trader.

Build the Saw Mill.

Chop the Tree.

Fix the Bridge and then build the House. When building is complete, repair the Altar. Go back and upgrade both the Saw Mill and House.

Select Wind to remove the fog.

Go to the Bridge and repair it. Speak to the Trader.

Collect the Magic Weather Artifact.

Fight the Enemy and destroy its Lair.

Build the Saw Mill.

Chop the Tree and fix the Bridge.

Create the Water Warrior. You do this by placing a Rain Cloud over a Warrior.

Now go and defeat the Enemy and destroy its Lair.

Weather Lord - The Successor’s Path - Level 13

Weather Lord – The Successor’s Path – Level 13

Level 14

Collect the Resources and build the Bridge.

Remove the fog by selecting the Wind.

Collect the Resources in the next area and speak with the Old Man.

Build the House and then upgrade it.

Go mining in the Mine.

Build the Saw Mill, repair the Altar and chop the Tree.

Fix the Bridge. Cross it and fight the Enemy.

Chop the Tree and then destroy the Lair.

Fix the Portal.

Go destroy the second enemy’s Lair.

Remove the Blockage.

Level 15

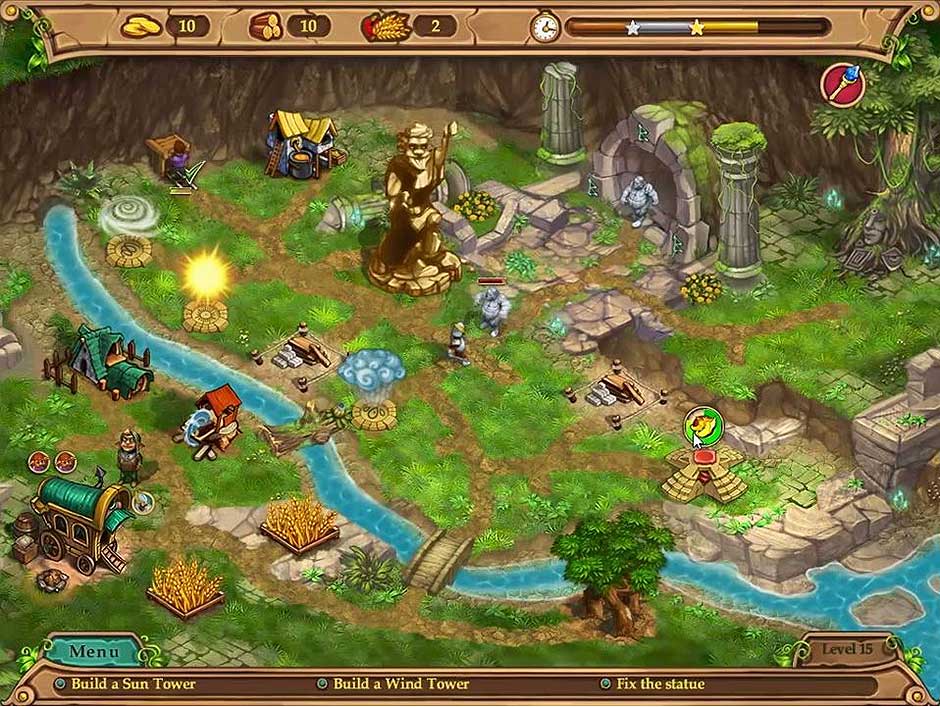
Collect the Resources.

Speak to the Native.

Build the House and Saw Mill. Upgrade the House.

Remove the Blockage.

Go to the Tree and chop. Fix the Bridge.

In the next area, collect the Resources.

Fix the Altar.

Battle the Enemy.

Weather Lord - The Successor’s Path - Level 15

Weather Lord – The Successor’s Path – Level 15

Go mining in the Mine.

Create a Wind Warrior.

Select Sun to dry the puddle.

Collect the Staff.

Build the Sun Tower and Wind Tower. Then build the Forge.

Return the Staff of Stability to the Native.

Repair the Statue.

Level 16

Collect the Resources. Chop the Tree and fix the Bridge.

Talk to the Ogre.

Build the House and upgrade it. After that, build the Mill.

Talk to the Trader.

Fix the Bridge.

Fight the Enemy.

Remove all the Blockages.

Collect the Sapphires and then bring the Sapphires to the Ogre.

Put the Magic Sphere into the Column.

Weather Lord - The Successor’s Path - Level 16

Weather Lord – The Successor’s Path – Level 16

Level 17

Collect the Resources. Then build the House and the Mill. After that, chop the Tree.

Fix the Bridge.

Collect the Resources and then build the Forge. Go mining in the Mine.

Talk to the Uncle.

Choose the Dynamite to destroy the enemies. Get the Magic Weather Artifact.

Talk to the Dragon.

Level 18

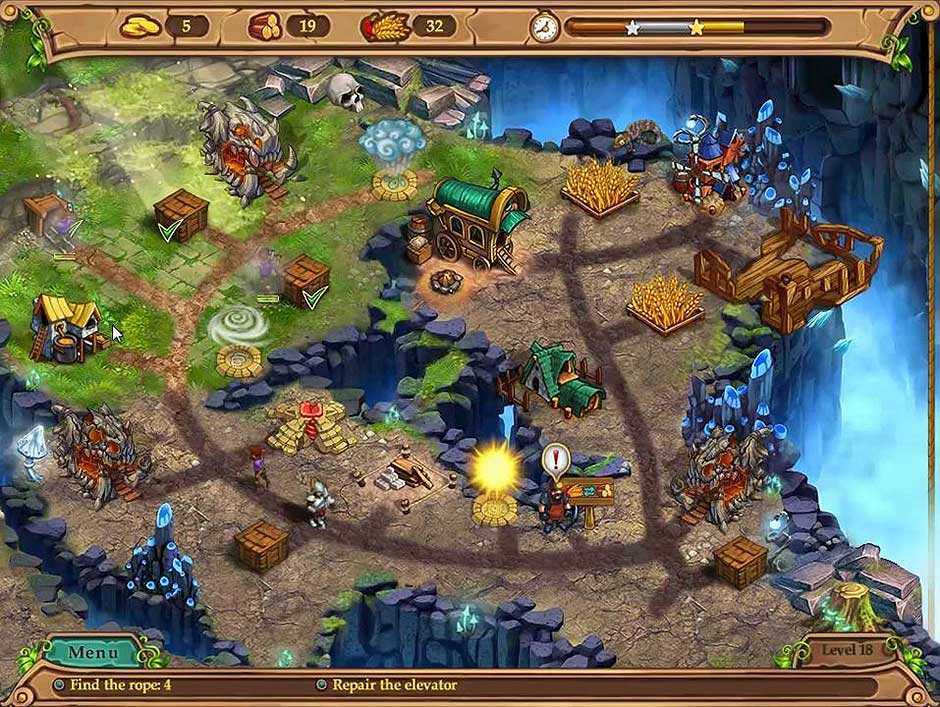
Start by collecting the Resources from the first area outlined in yellow.

Next you will have to build the House and the Saw Mill.

Create a Solar Warrior by selecting the Sun and then speak to the Miner.

Continue on to the left side of the screen and collect the Resources there.

Create another Solar Warrior by selecting the Sun and then go destroy the Lair.

Build the Forge and upgrade it when construction is complete.

Select the Sun again to create a Solar Warrior.

Go mining in the Mine and then click on Boxes to collect Ropes.

Fix the Elevator.

Weather Lord - The Successor’s Path - Level 18

Weather Lord – The Successor’s Path – Level 18

Level 19

Collect the Resources the first area and repair the Bridge.

Continue to the next area collect the Resources. Build the House and upgrade it when construction is complete. Chop the Tree.

Remove the Cobwebs by using the Wind Cloud.

Repair the second Bridge.

Collect the Resources again.

Now repair the Button on the Altar and build the Mill. Go to the Tree and chop.

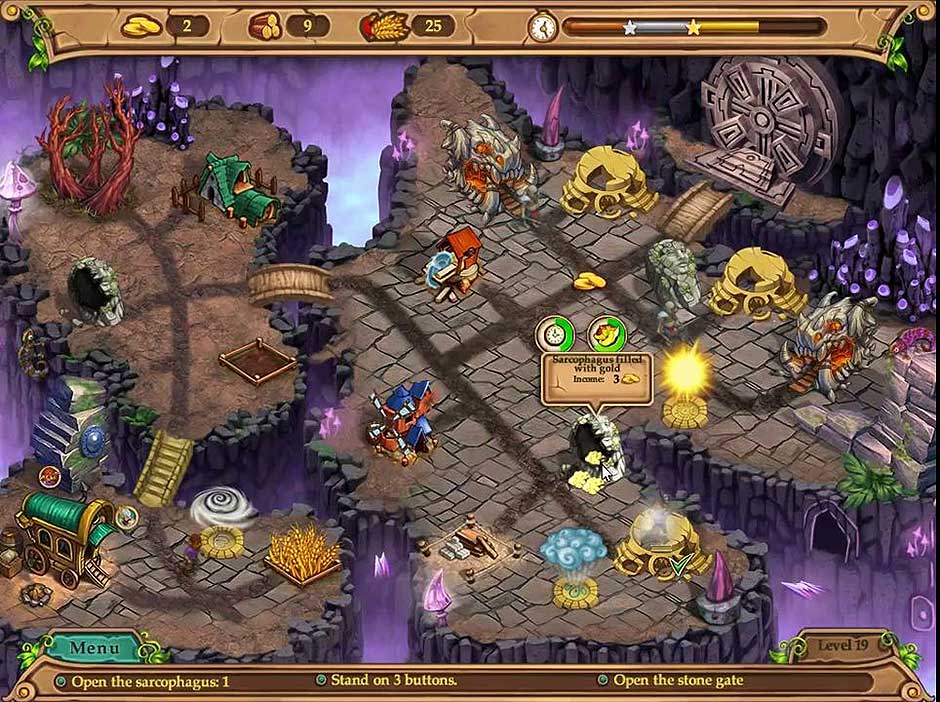
Find the enemy Lairs and destroy them. Open all of the Sarcophagi and then repair the Altars.

Click on the three Buttons.

Open up the Stone Gate.

Weather Lord - The Successor’s Path - Level 19

Weather Lord – The Successor’s Path – Level 19

Level 20

Start the level by collecting the Resources. Then build both the House and the Mill.

Repair the Altar and the Portal.

Talk to the Alchemist.

Create a Sun Warrior by using the Sun and then destroy the Lair.

Water the Tree by using the Rain Cloud. Chop the Tree after it has been rehydrated.

Now you can repair the Bridge.

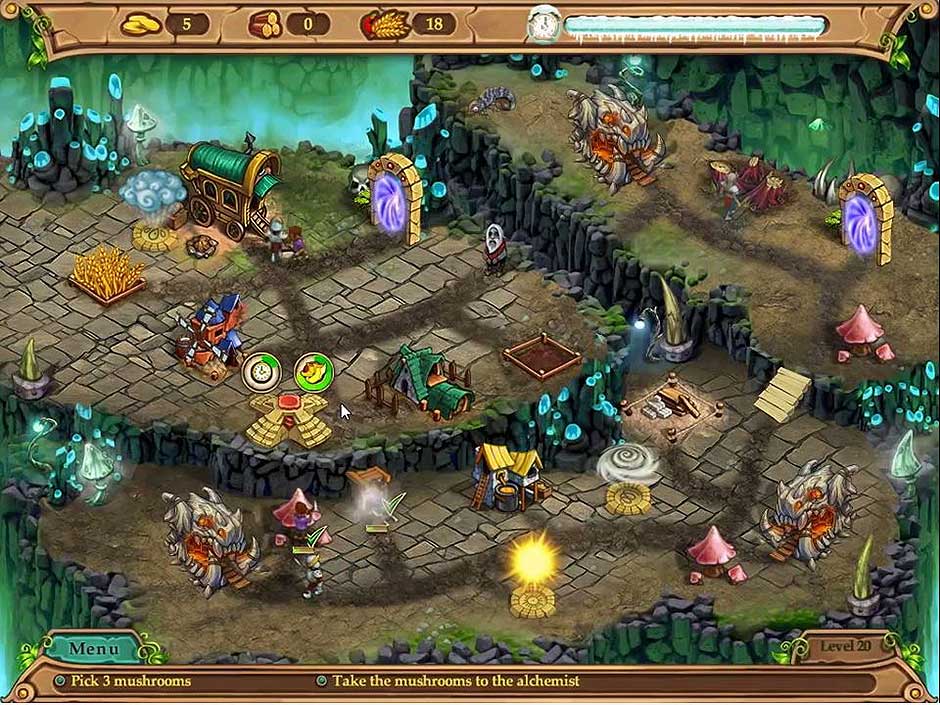
In the final area, start by producing Mushrooms by using the Sun. Then use the Sun again to create a Sun Warrior.

Find the enemy’s Lairs and destroy them.

Now build the Forge and go mining in the Mine.

Harvest the three Mushrooms and bring them to the Alchemist.

Weather Lord - The Successor’s Path - Level 20

Weather Lord – The Successor’s Path – Level 20

Level 21 – 30

Level 21

Collect the Resources. Proceed to build the House and the Mill, chop the Tree.

Remove the Cobwebs by using the Wind Cloud.

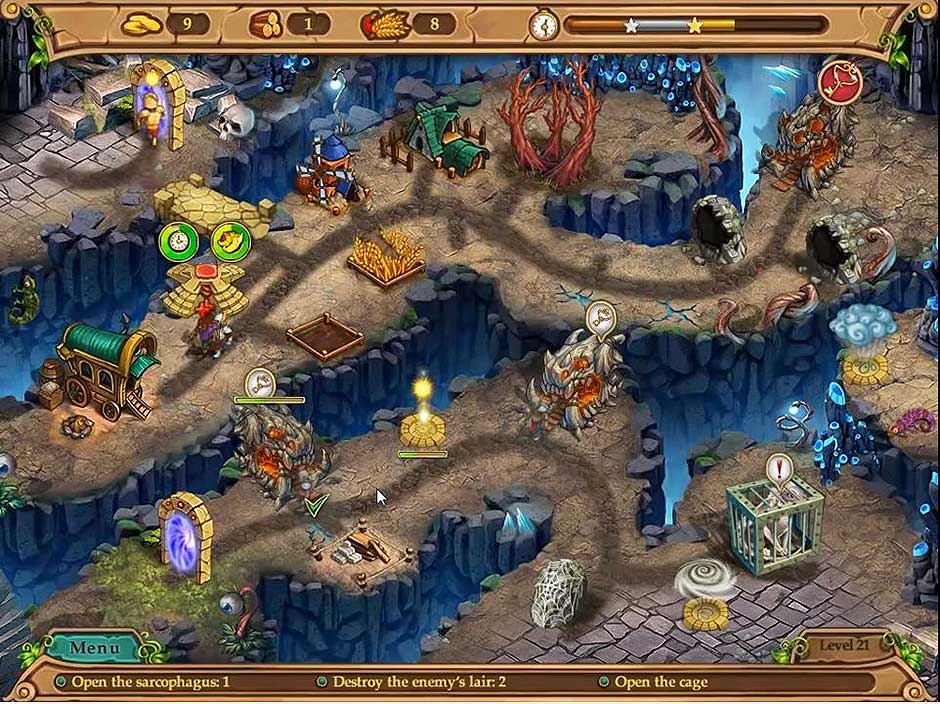
Use the Sun to create a Sun Warrior and then destroy the enemy’s Lair.

Repair the Altar and then open the Sarcophagi.

Now you have to repair the Bridge and the Portal.

Create another Sun Warrior by using the Sun and then destroy enemy Lairs. Open up the Cage.

Using the Wind Cloud, remove the Cobwebs.

Open the Sarcophagus.

Weather Lord - The Successor’s Path - Level 21

Weather Lord – The Successor’s Path – Level 21

Level 22

Collect the Resources. After collecting everything, build the House and the Mill. Now chop the Tree.

Repair both the Statue and the Portal.

Use the Sun to create a Sun Warrior and then destroy all enemy Lairs.

Repair the Altar.

Charge the Magic Spheres and get the Artifact.

Level 23

First, collect all of the Resources. Now build the House, build the Mill and chop the Tree.

Repair the Portal and the Altar.

In the second area, go mining in the Mine.

Speak to the Native and then upgrade the Mill.

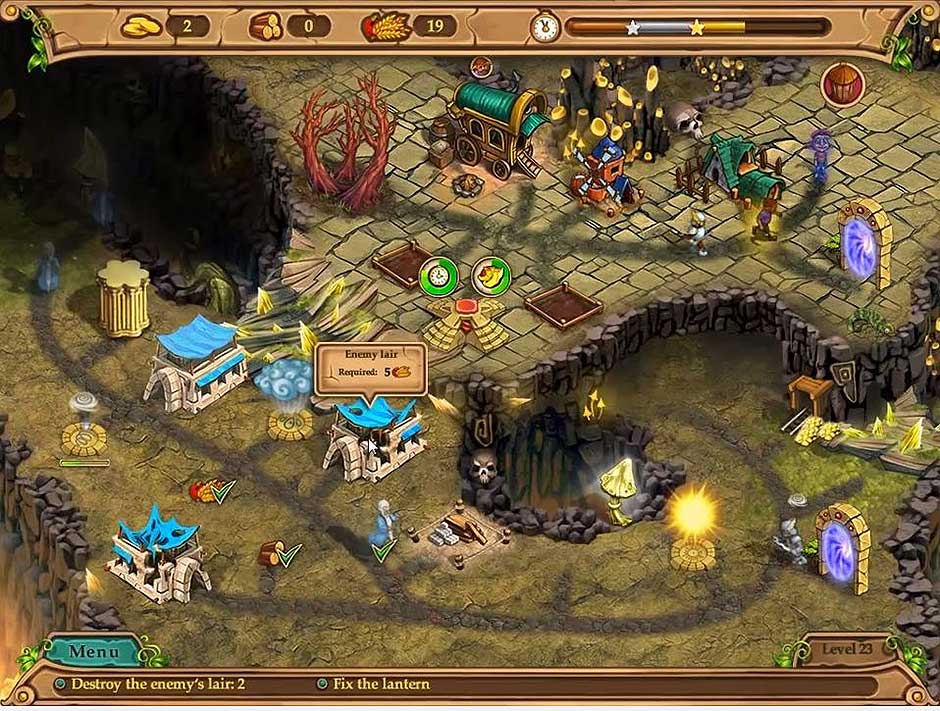
Make a Wind Warrior by using the Wind Cloud and go destroy enemy Lairs.

Repair the Lantern and then use the Sun to light it.

Weather Lord - The Successor’s Path - Level 23

Weather Lord – The Successor’s Path – Level 23

Level 24

Collect the Resources. Build the House and then remove the Cobwebs from the first area outlined in pink.

Chop the Tree and go mining in the Mine. Build the Mill.

Make a Wind Warrior.

Repair the Altar and the Bridge.

Continue to the second area, which is outlined in yellow, and open the Sarcophagi and collect Spheres.

Collect the Resources.

Now you have to use the Wind Warrior. After that place the Spheres onto the Pedestals and collect the Artifact.

Level 25

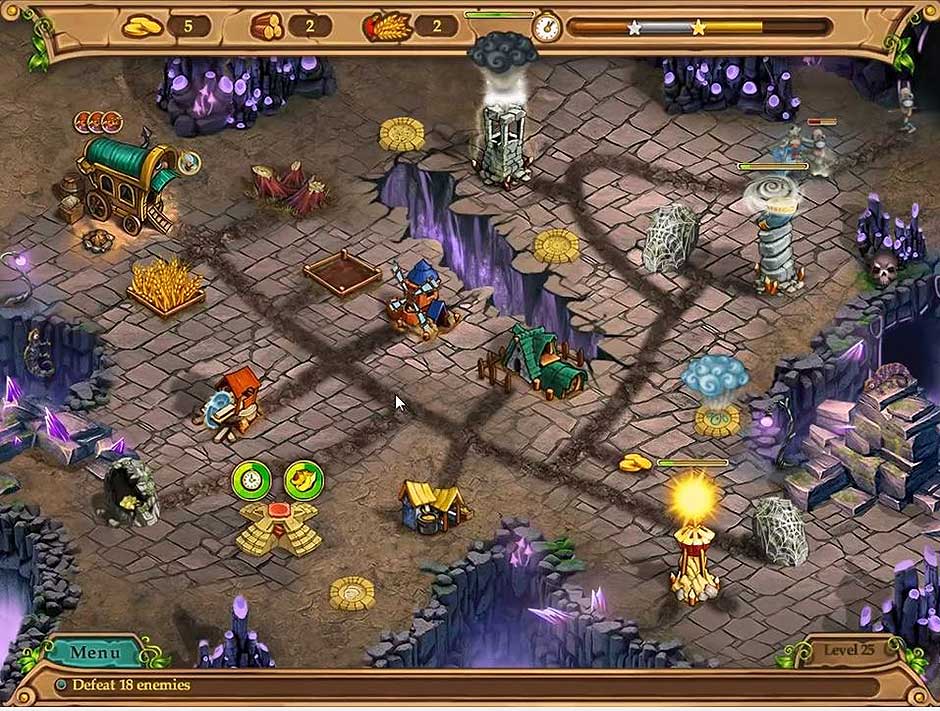
Collect the Resources. Now build the HouseForgeMill and Saw Mill. Go to the Tree and chop.

Repair the Altar and proceed to remove Cobwebs.

Go to the next area, outlined in green, and then destroy the suspicious-looking Altar.

Collect the Resources.

Build the Sun TowerWind Tower and Thunder Tower. Finally, destroy all the Enemies using the powers of the three towers.

Weather Lord - The Successor’s Path - Level 25

Weather Lord – The Successor’s Path – Level 25

Level 26

Collect the Resources. Build the HouseMill and Saw Mill. Chop the Tree.

Make a Wind Warrior and destroy the enemy’s Lair.

Repair the AltarButton and Portal.

Now you can continue on and repair the Bridge.

Go and destroy the Lair. Now you can repair and click the Buttons.

Pick up the Key. Open the Cage using the Key.

Level 27

Collect the Resources.

Build the House and Saw Mill. Upgrade the Saw Mill. Go to the Tree and chop.

Repair the Altar.

Create a Wind Warrior.

Repair the Bridge and cross to the next area.

Now repair the Button and click on it. Next, repair the Portal.

Use the Wind Warrior and destroy the Lair.

Repair the Button and click on it.

Collect the Artifact.

Level 28

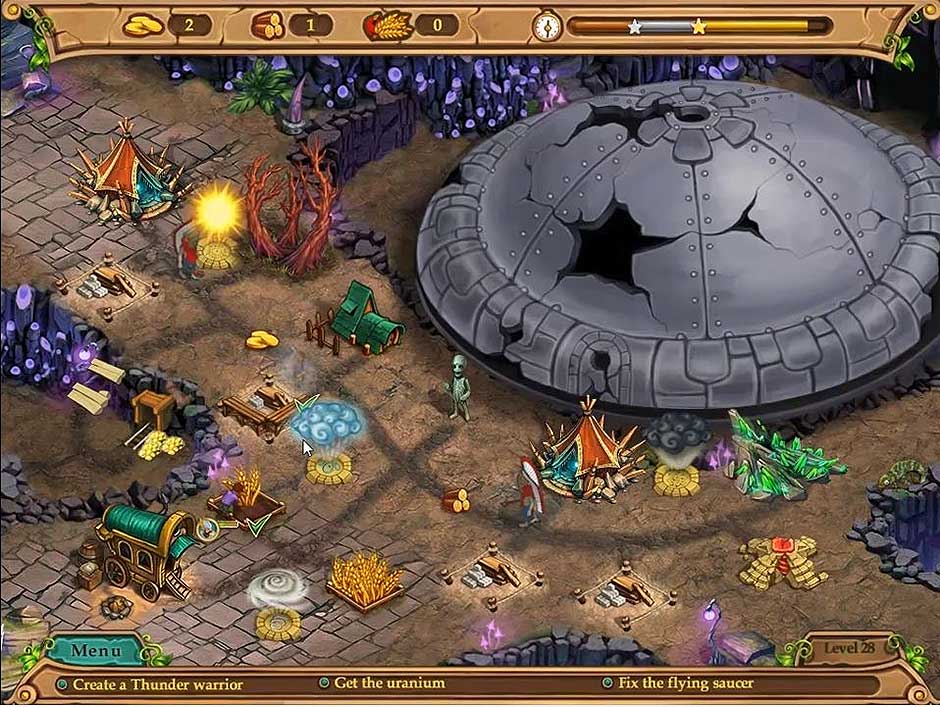
In the first area, collect the Resources and then speak to the Alien.

Build the House and Mill. Chop the Tree.

Create a Thunder Warrior.

Now build the Forge and then upgrade it. Go mining in the Mine. Finally, collect the Uranium.

Now you can repair the Flying Saucer.

Weather Lord - The Successor’s Path - Level 28

Weather Lord – The Successor’s Path – Level 28

Level 29

Collect the Resources. Build the House and the Mill. Upgrade the House. Go to the Tree and chop it.

Repair the Altar.

Find the enemy’s Lair and destroy it. Now go mining in the Mine.

Build the Saw Mill and Forge. Upgrade the Forge when construction is complete.

Repair the Portal.

Create a Thunder Warrior and destroy all the enemy Lairs.

Fix the Bridge and then destroy the Crystal of Weakness.

Level 30

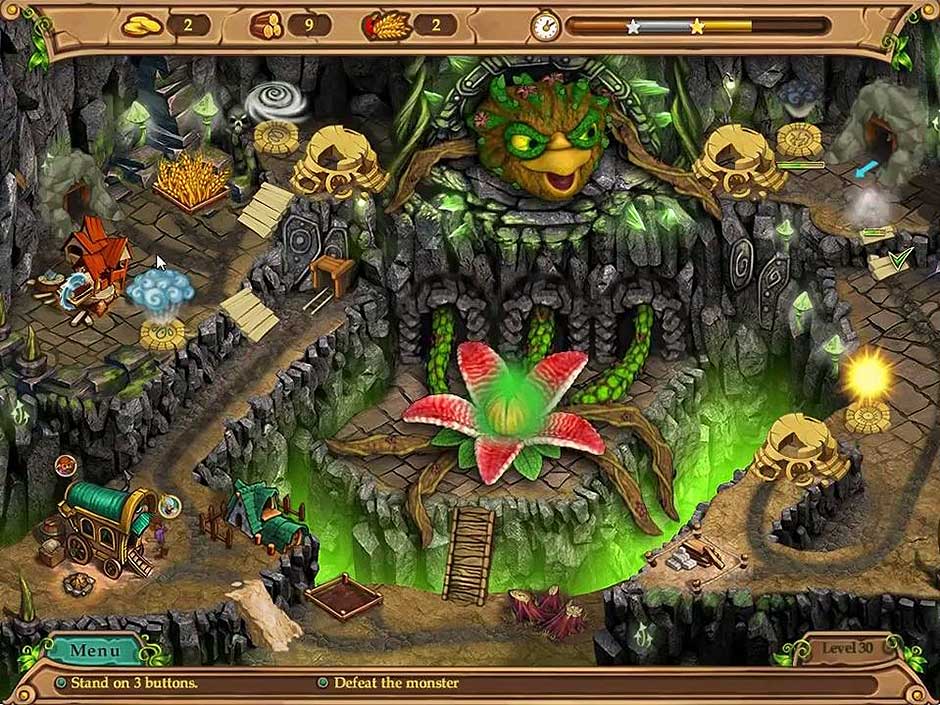
Collect the Resources. Then build the House and upgrade it after construction is complete. Chop the Tree and go mining in the Mine.

Remove the Tentacle Vines by using the Thunder Cloud.

Repair the Bridge.

In the second area, outlined in yellow, first collect the Resources. Then build and upgrade the Saw Mill. Go to the Tree and chop it. Finally, repair the Bridge.

Chop the Tree again and then repair the Bridge.

Repair the Buttons and then click on them. Lastly, collect the Artifact.

Weather Lord - The Successor’s Path - Level 30

Weather Lord – The Successor’s Path – Level 30

Level 31 – 40

Level 31

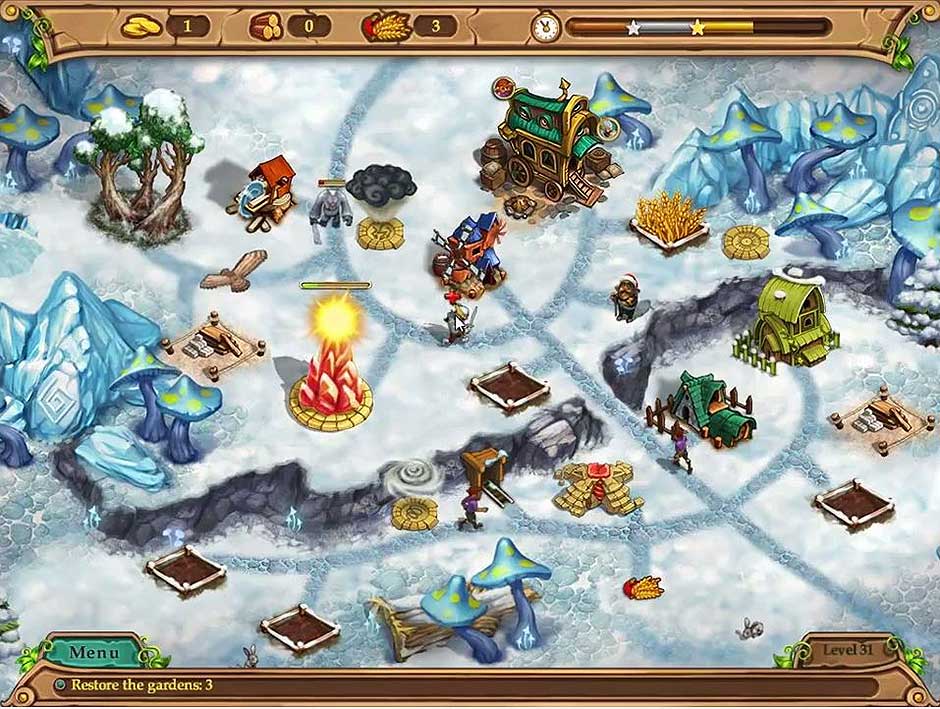
First collect the Resources and then speak to the Native.

Build the HouseMill and Saw Mill. Upgrade the House and the Mill.

In the second area, start by mining the Mine and then chopping the Tree.

Repair the Crystal and then create a Thunder Warrior by using a Thunder Cloud. Battle the Yeti.

Remove Snow from the Gardens. Place the Sun over the Crystal and use it to restore the Gardens.

The last step is to repair the Barn.

Weather Lord - The Successor’s Path - Level 31

Weather Lord – The Successor’s Path – Level 31

Level 32

Collect the Resources. Proceed to build the HouseForge and Saw Mill.

Speak to the Native.

Now chop the Tree and go mining in the Mine. Upgrade the House and build the Mill.

Mine for the Crystal and then fix the Altar.

In the next area, once again collect the Resources.

Next, create a Thunder Warrior by choosing the Thunder Cloud and then fight the Yeti.

Collect all of the Rhinestones.

Repair the Bridge and move on.

Bring the Rhinestones to the Native.

Finally, decorate the Christmas Tree and then light it using the Thunder Cloud.

Level 33

Collect the Resources. Build the House and the Saw Mill.

Go speak to the Native.

Chop the Tree. Now you will have to build the Mill, but to do so it will be necessary to first destroy the Saw Mill.

Repair the Altar.

Battle the Yeti using the Thunder Warrior.

Pick up all the Gifts. Go mining in the Mine and then repair the Portal.

Now go to the second area and first speak to the Were Bird.

Repair the Fort and then pick up the Gift.

Bring the Gifts to the Native and give them to him.

Level 34

First, collect the Resources. Then build the House and Mill before going mining in the Mine. Once mining is complete, build the Saw Mill. Go to the Tree and chop.

Now mine for the Crystal and continue on to remove the Blockage.

Repair the Altar.

In the second area, start by removing the Snow Hills. Then repair the Buttons and click on them.

Collect the Resources.

Battle the Yeti with the Thunder Warrior. When he is defeated, collect the Snow Artifact.

Now you will have to save the Boy. This is done by using the Snow Cloud to freeze thePond.

Level 35

Start this level by building the House and then freezing the Pond using the Snow Cloud.

Collect the Resources. Now you can upgrade the House.

Continue to the second area and speak to the Native. Then build the Mill and Saw Mill. Chop the Tree and go mining in the Mine.

Fight the Yeti by using the Thunder Warrior.

Go to the Altar and repair it. Mine for the Crystal.

Freeze the other Pond by using the Snow Cloud.

Collect the Resources.

Collect the Map by using the Sun.

Level 36

Collect the Resources. Then build the House and upgrade it.

Fight the Yeti with the Thunder Warrior. Now freeze the Pond with the Snow Cloud.

Build the Saw Mill and then chop the Tree.

Go and speak to the Native.

Now you can repair the Altar. Once that is done, demolish the Saw Mill and then build the Mill.

Go mining in the Mine.

Freeze the next Pond with the Snow Cloud.

Build the Forge.

Fight the Yeti with a Thunder Warrior.

Mine for the Crystal and then locate the four Gifts.

Deliver the Gifts to the four Houses found in each corner of the screen.

Level 37

Build the House and then collect the Resources.

Go and speak to the Native. Once that is done, freeze the Pond by using the Snow Cloud.

Build the Saw Mill and then chop the Tree. Fix the Altar and build the Mill. Now you will have to demolish the Saw Mill so that you can build and upgrade the Forge.

Go mining in the Mine and then mine the Crystal.

Battle the Yeti by using the Thunder Warrior. Collect Snow Balls. Now you can build the Snow Hill.

Level 38

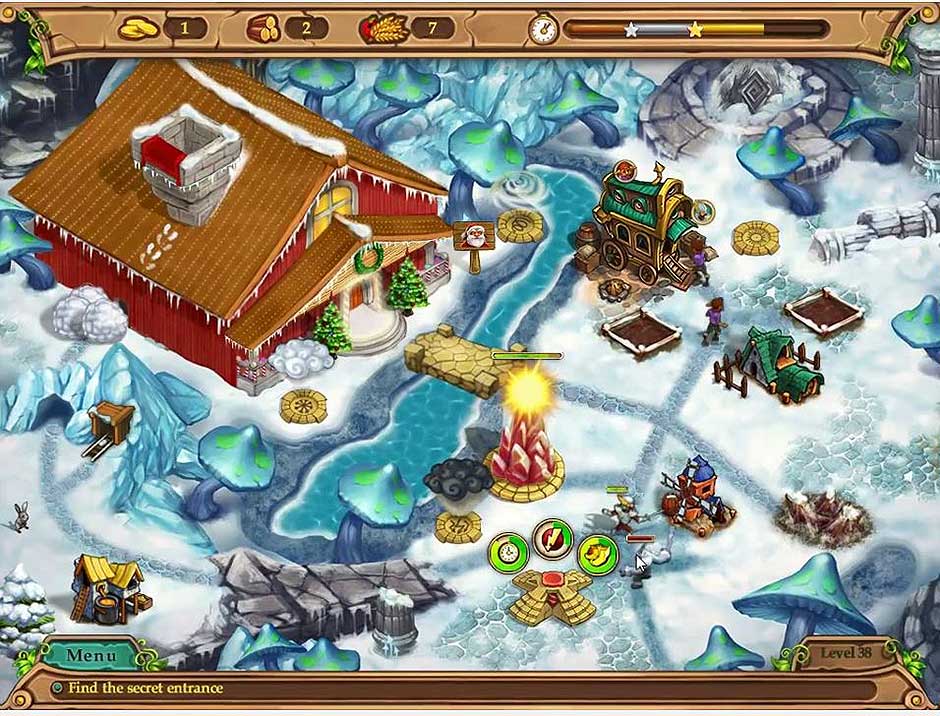
First, collect the Resources. Now build the House.

Fight the Yeti with the Thunder Warrior.

Next you will have to build the Saw Mill, chop the Tree and then fix the Altar. Build the Mill after demolishing the Saw Mill.

Go mining in the Mine and then build the Forge. Once constructed, upgrade the Forge. Mine for the Crystal.

You will now repair the Bridge to move onto the second part of the level. Once the Bridge is repaired, knock on the Door of the Guardian’s House.

Click on the Snowballs and then locate the three Footprints.

Weather Lord - The Successor’s Path - Level 38

Weather Lord – The Successor’s Path – Level 38

Level 39

Collect the Resources and then build the House. Once construction is complete, upgrade the House. Now freeze the Pond by using the Snow Cloud. Build the Saw Mill.

Open the Gift.

Next, build and then upgrade the Saw Mill.

Use the Wind Cloud on the Gifts and then open them up. Go to the Tree and chop.

Fight the Snowman with the Thunder Warrior.

Mine for the Crystal and then go speak to the Native. Fix the Portal.

Continue through to the next area and remove the Obstruction. Now you can get the Sled. Bring it back to the Native and give it to him. Finally, fix the Sled.

Level 40

Start by collecting the Resources. Then build the House and upgrade it.

Freeze the Pond by using the Snow Cloud.

Go to the next area and collect the Resources.

Battle the Snowman with the Thunder Warrior.

Now you can build the Forge. Once that is complete, go mining in the Mine and mine for the Crystal. Next, build the Saw Mill and chop the Tree. The next step is to demolish the Saw Mill in order to build the Mill.

Repair the Altar and the Button. Click on the Button.

Move up to the final area of the level by clearing the Obstruction. Now repair the Button and click on it.

Build the Thunder Tower.

Clear all of the remaining Obstructions. Now you can collect the Key. Use it to open the Cage.

Finally, create a Snow Warrior by using the Snow Cloud. Use that and the Thunder Tower to destroy all Enemies.

Level 41 – 45

Level 41

Collect the Resources. Now build the House and the Mill.

Remove the Snow by using the Wind and then open the Gift. Using the Snow Warrior, remove the Snowman.

Mine for the Crystal and finally, repair the Portal.

In the next area, start by removing the Snowballs. Then you can build the Saw Mill and chop the Tree.

Remove the Snow using the Wind and open up the Gift.

Repair the Altar and then collect the Resources. Finally, build the Forge.

In the last area, start by using the Snow Cloud to freeze the Pond. Now you can once again collect the Resources.

Remove the remaining Snowman with the Snow Warrior.

Remove the Gate. Continue on and build the Sun Tower. Use the Sun Tower to destroy the enemies.

Level 42

Collect the Resources. Then remove the Snowman by using the Snow Warrior. Next, build and upgrade both the House and the Forge, build the Mill.

Go mining in the Mine. Mine for the Crystal.

Build the Saw Mill now and then chop the Tree. Now you can also repair the Altar.

Go speak to the Native.

In the next area, start off by collecting the Resources and then chopping the Tree.

Collect the Snow from last year and give it to the Old Man.

Finally, l decorate the Christmas Tree.

Level 43

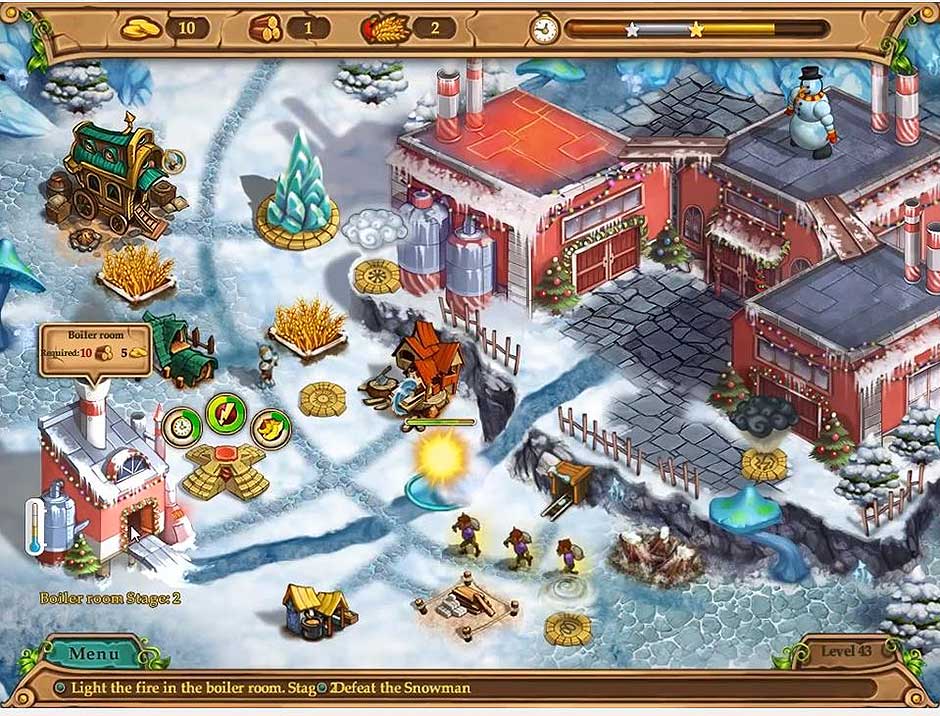
Collect the Resources. Now use the Snow Warrior and remove the Snowman. Next, melt the Snowball by using the Sun.

Go mining in the Mine.

Build the HouseSaw Mill and Forge. Chop the Tree. Go and repair the Altar.

In the Boiler Room you will now have to light the Fire. Once lit, stoke the Fire.

Battle the Snowmen.

Weather Lord - The Successor’s Path - Level 43

Weather Lord – The Successor’s Path – Level 43

Level 44

Collect the Resources and then build the House. Now repair the Bridge and then build the Mill.

In the second area, outlined in purple, once again collect the Resources. Go back and upgrade the Mill. Next, build the Saw Mill and upgrade it. Go chop the Tree.

Using the Rain Cloud, create a Rain Warrior. With him you can now battle the Enemy.

Fix the Altar and then the Bridge. Go mining in the Mine.

Collect the remaining Resources.

Battle the Enemy using the Rain Warrior.

Pick up the Sphere and put it on the Pedestal.

The last step is to use all of the Weather Clouds to open up the Gate.

Level 45

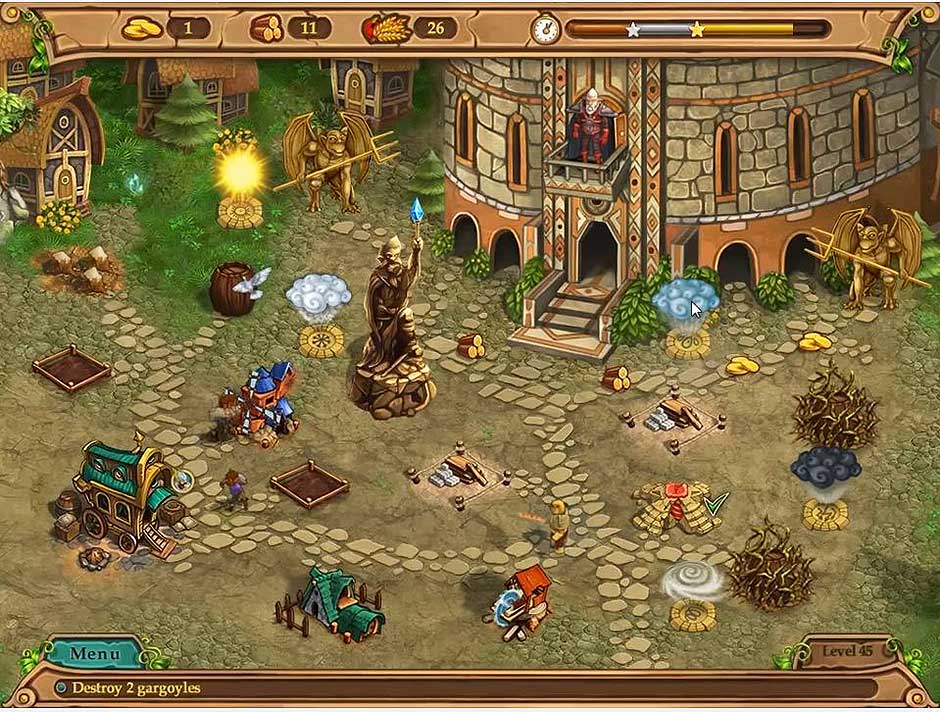
Collect the Resources. Build the HouseMill and Saw Mill. Upgrade the Mill. Go to the Tree and chop.

In the final area of the game, start by collecting the Resources. Next, repair the Well.

Battle the Enemies with the Thunder Warrior.

Build the Forge and then upgrade it. Now you can open all the Barrels.

Build the Thunder Tower and then use it to destroy the all the Enemies, including the Gargoyles.

Now you will have to repair the Statue of Maximus. Take the Artifact and attach it to theStatue.

Finally, defeat the Uncle.

Weather Lord - The Successor’s Path - Level 45

Weather Lord – The Successor’s Path – Level 45

Congratulations! You can now be proud of yourself for successfully finishing Weather Lord – The Successor’s Path!

If this game guide was helpful, then you should check out a few of our other walkthroughs. They are all full of hints, gameplay instructions and valuable tips and tricks. Some of our other guides include:

Spear of Destiny – The Final Journey Walkthrough

Royal Detective – The Lord of Statues Walkthrough

The Weather Lord – The Successor’s Path Walkthrough is meant as a guide and does not contain cheats, hacks or serials.

The post Weather Lord – The Successor’s Path Walkthrough appeared first on GameHouse.

12 Labours of Hercules IV – Mother Nature Walkthrough

$
0
0

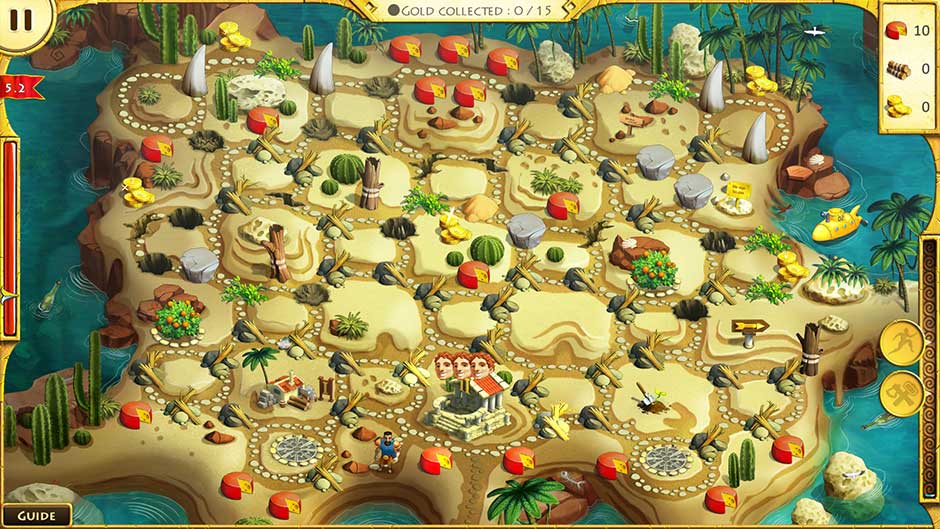
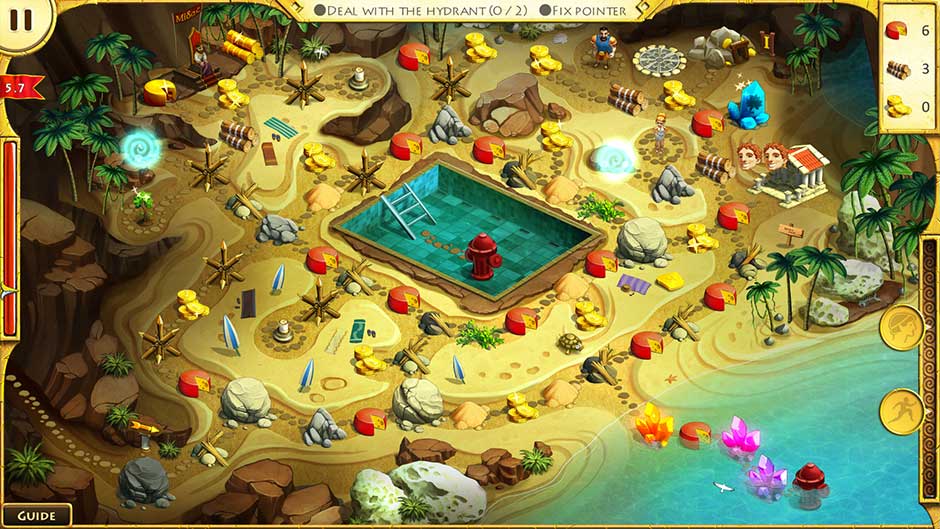
12 Labours of Hercules IV – Mother Nature is a strategic time-management game. You lead Hercules, his wife Megara, their servants, and a host of mythical beings including Medusa and Cerberus on a quest to save the earth from a curse laid out by ancient evils. Bring dead trees back to life, smash hydrants to water the forests, and send ghosts screaming back to the afterlife.

Contents

Gameplay

You play this game by clicking to collect resources, remove obstacles, and upgrade buildings.

Resources

The three resources are food, wood, and gold. All three can be found, gathered, or created in a building. It is usually most efficient to find the resources on the road, but there is rarely enough of any resource available that way. Resources are used to build or upgrade buildings or to remove obstacles.

Food looks like Cheese. It can be found in the road, picked from Fruit Trees, grown on Farms, or gathered as a Ham if there is a lion available. The most efficient way to create food is with a Fruit Tree, but a level-three farm will also produce a good amount in very little time. Food can be traded with the Trojan centurion in exchange for wood, or it can be traded to King Midas in exchange for gold.

Wood looks like logs. It can also be gathered by chopping down dead trees, or created in a Workshop. On most higher levels, you will want to upgrade your Workshop as soon as possible, because wood allows you to build bridges, repair roads, and build or upgrade other buildings. Wood can be traded to King Midas in exchange for gold, or collected from the Trojan in exchange for food.

Gold looks like gold. It is often hard to collect much gold, and there are many levels on which you will need quite a bit. Gold is used to repair some bridges, and it is used to get Medusa to turn minotaurs to stone or Cerberus to chase ghosts back to the underworld. Gold can be collected from King Midas in exchange for food or wood.

Obstacles

There are too many obstacles to list. Most of them are removed by paying either food, wood, or gold, and many of them give an alternate resource in return. There are several special obstacles to outline here:
– Boulders block a section of the roadway. There may be a way to avoid them entirely. Boulders can only be moved by Hercules, and may take a lot of food to get rid of.
– Crystals can be removed by any worker, but cost gold, and sometimes a lot of gold, to be removed. The y come in sizes small and large, and can often be avoided entirely.
– Ghosts can be removed only by Cerberus. They cost gold to remove, but usually not too much.
– Minotaurs can only be removed by Medusa. You will have to find and build Medusa’s Lair before she can be summoned, and it costs gold to get her to come out and turn a minotaur to stone.
Hercules’ Evil Twin appears on some levels. If any worker comes near him, he will shout and scare them back to the storehouse. Only Hercules can defeat him, and only temporarily. He will disappear but return in a few seconds. Keep an eye out for him.

General Gameplay Tips and Tricks

– You can arrange actions ahead of time. Clicking on something gives the command to perform the appropriate action even if everyone is busy. Use this to stay three or four moves ahead.
– Don’t do everything. On most stages, there will be many more resources to collect, ghosts to scare, obelisks to build, and buildings to upgrade than you need. If you want to stay on three-star time, you have to pick and choose only those actions that move you quickly toward your objectives.
– You have helpful buttons on the bottom right side of the screen. Use these for speed boosts, extra helping hands, and occasionally even to stop the clock.
– If you are stuck, waiting for a second or two usually produces and Blue Arrow that will point out what you should do next. It does not always find the most efficient route, but it will help you if you are overlooking something.
– Prioritize resources. If you have plenty of wood, don’t send your workers to gather more. If you are going to need gold, upgrade your Gold Mines as soon as possible.
– Lay down the infrastructure first. Clearing off more roadways does no good if you are constantly running out of resources and having to stop and wait. Build up your resource gathering ability before heading toward the final objectives.
– The timer doesn’t start until you click the first time. Before starting an area, give the stage a good look-over and determine where your early resources will be coming from, what will be the most needed resource, if you are going to need, say, Cerberus’ help, and where anything you might need can be found.

12 Labours of Hercules IV – Mother Nature Walkthrough

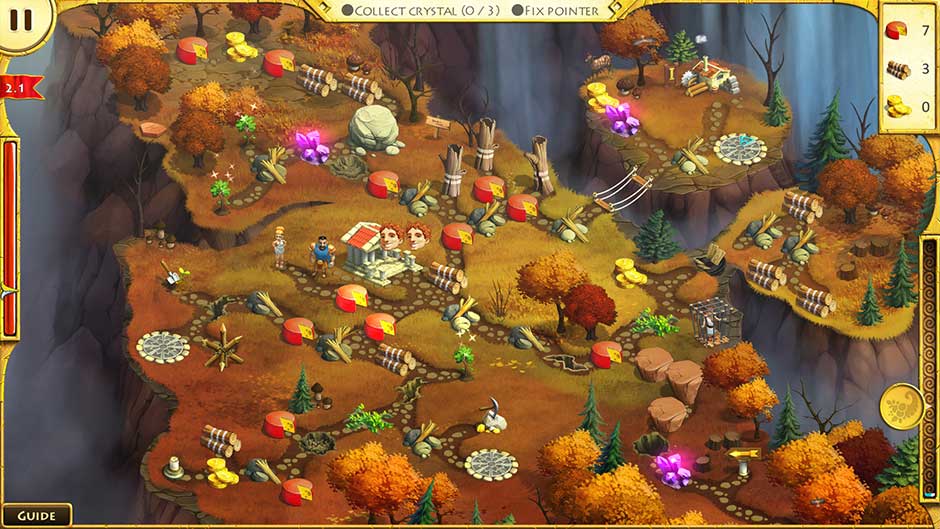
Level 1

You first task is to revive three trees. Have you workers collect the food and let Megara revive trees as you go. Hercules can get rid of the boulder that is blocking your path.
Garden by the River
You will need wood and gold and food for this part. Have your workers collect supplies and fix the roads as needed. Megara can revive Fruit Trees, which can then be harvested by your workers. Build a Workshop as soon as you can. After your workers repair the crack in the road, Hercules can clear the boulder blocking the bridge. The bridge is repaired in three parts, and clears the way for Megara to revive the trees and finish the area.

12 Labours of Hercules IV - Mother Nature - 1.1

12 Labours of Hercules IV – Mother Nature – 1.1

Burning Wind
Megara is not in this section. Use the Work Faster button liberally to get top marks. You will have to build farms. Start collecting food and clearing roads to access more resources. Build a Farm as soon as possible near the storehouse. Build a Workshop right after. You can build another farm and another workshop. Hercules can open the Ancient Hydrant and revive the area. Move the boulder to move on.
Trapped
You have to fix the Sign and release the Prisoner in this area. Start by collecting food to clear the way to the small farm and then fix the road to free Hercules, who can then destroy the boulders to open the rest of the area. Go South, then East, then North to access resources most efficiently. Don’t worry to much about the Fruit Tree as you can build several Farms. Use the Gold Mine to save enough gold to remove on of the crystals blocking the path. You only need to remove one.
Gold Rush
Use the More Resources button liberally for top marks. Revive the Fruit Tree beside the storehouse as soon as possible. Go southwest first, and build the Workshop. Upgrade the Workshop as soon as possible to help build Gold Mines faster. The Gold Mines are in the bottom right and the top left corners. The Gold at the top of the screen is misleading, you will spend more gold to get to it than you will get as a reward. Don’t worry about it. Hercules smashes the Hydrant and you’re on your way!
Green Pasture
Free Megara and revive the Fruit Tree as soon as possible. Move along the south road and build a Farm early on, then go north and build the Workshop. Have Hercules destroy the boulder in the top right, and then the two boulder along the north road. You will need the gold from the top of the screen. Hercules destroys the Hydrant, the worker removes the stone blocking the road, and you’re done!
Three Boulders
Go west to open up two Workshops, but don’t worry about the Gold Mine. When the route is clear for the workers, have Megara revive the Fruit Tree. Build Farms and upgrade them as soon as possible. Collect gold on the way to the Sign and you will have more than enough. Hercules repairs the Sign and opens the Hydrant, and you’re done.
Water Mill
Clear the path east and build a Farm as soon as possible. Then build the Outpost. Clear the southwest bridge first and colelct resources while clearing the path to the Prisoner. Build the Workshop near the Hydrant and upgrade it. Build the second Farm near the Outpost and upgrade both farms. Clear the way and have Megara revive the Fruit Tree at the bottom left. Collect as much food as possible so that Hercules can clear the Boulders, open the Hydrants, and fix the Sign.
The Big Clean-Up
First clear the way and revive the Fruit Tree near the storehouse. Clear the Oil and access the Workshoop. Head north to collect the gold on the hill. Repair Hermes’ Obelisks as soon as possible to make your workers faster. The hardship is that wood is produced slowly and you will need a lot of it. Use the More Resources button liberally for top marks. Mine the Gold Mine the top of the screen and pass the level by collecting plenty of each resource.
Viaduct
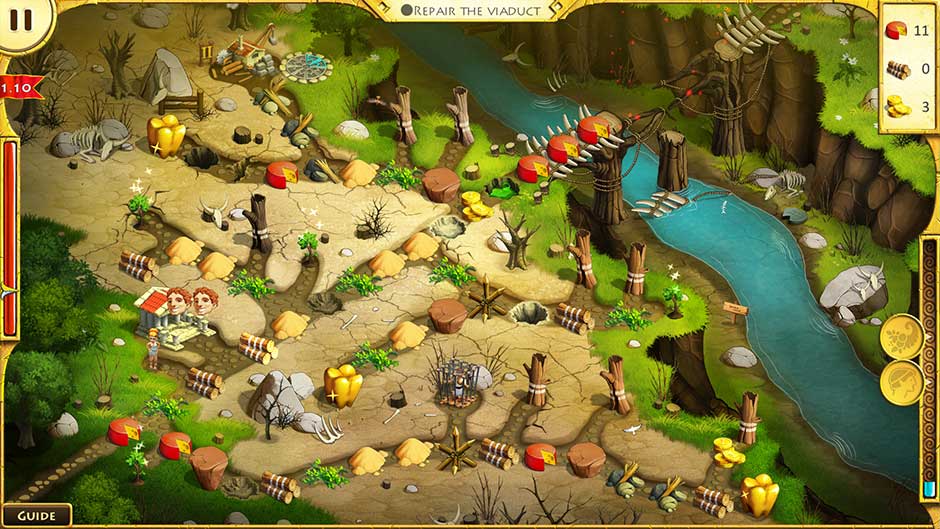
Clear the way south to collect food and revive the Fruit Tree, then north for two more Fruit Trees. Continue on the south road to free the Prisoner. You need 50 food to collect the big gold nuggets, so make sure to keep one worker collecting from the Fruit Trees constantly. Access the Workshop and start collecting wood. Start work on the Viaduct as soon as you have laid out the proper infrastructure outlined above. It will take all available resources to finish the Viaduct.

12 Labours of Hercules IV - Mother Nature - 1.10

12 Labours of Hercules IV – Mother Nature – 1.10

Level 2

Entering the Forest
Clear your way to the logs in the center to gather wood, and clear your way to the Fruit Tree to gather food. Wood is hard to come by and should be your first priority. Build the Farm to get a steady food supply. Clear your way to the Workshop in the upper right corner. Build the Gold Mine at the bottom of the screen, and clear your way to all the gold resources available. Fix the Obelisk as soon as possible to increase production. Use the More Resources button liberally for top marks.

12 Labours of Hercules IV - Mother Nature - 2.1

12 Labours of Hercules IV – Mother Nature – 2.1

Haunted Meadow
Clear your way to the Farms in the bottom left and upper right corners. Don’t worry about the ghosts at this point. Clear the way to the Workshop. Hercules’ evil twin will come and stand in the center, but Hercules can scare him off. Upgrade your Farms to make food faster. When you’ve gathered enough gold, the dog will frighten the ghosts away, and you can take the resources they protect. Clear your way to the Obelisk in the upper right corner to repair the bridge.
On the Beach
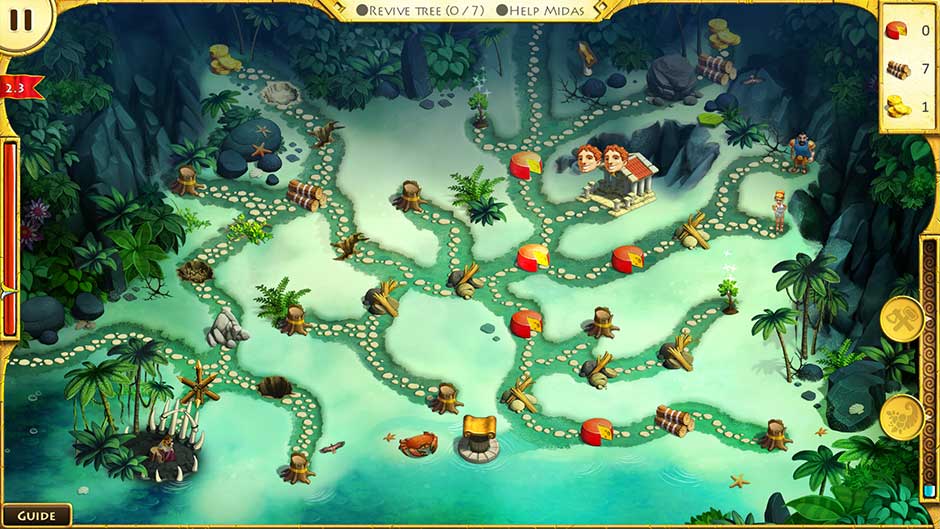
Clear the way to Megara and Hercules. Revive the nearby Fruit Tree. Clear the way for Megara to revive the Dried Up Trees. You will need all available gold. Hercules can free King Midas.
Antihero
Revive the Fruit Tree near the storehouse and head south. Build the Farm and then continue west to build the Workshop. Upgrade the Workshop as soon as possible, and break the builder so you can build the Gold Mine. Hercules can beat up his evil twin, but it costs food. Upgrade the Farm to keep a steady food supply. Gather the Midas Wood and then repair the Sign to continue!
Three Loops
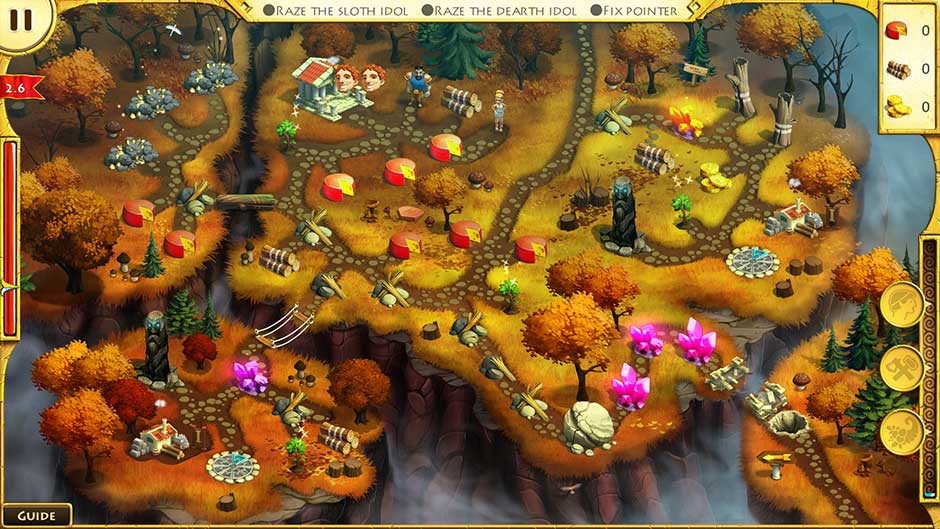
Gather the nearby food and then continue to clear the roads north and south. Find your way to Hercules as soon as possible. Once he is free, go east to free Megara. There is a Gold Mine and an Outpost in the center that will be especially helpful. Send Megara to revive the Fruit Tree near Hercules, and the one south of the storehouse.. The Evil Twin will show up, and needs to be frightened away. Use the Stop Clock button liberally for top marks. Avoid breaking the crystals.

12 Labours of Hercules IV - Mother Nature - 2.3

12 Labours of Hercules IV – Mother Nature – 2.3

Crossing the Bridge
Revive the Fruit Tree. Head west across the log to reach the Gold Mines. Have Hercules dismiss the Evil Twin promptly. Go across the bridge to the southwest to access and upgrade the Workshop as soon as possible. Clear the way east to access and upgrade the other Workshop, and don’t forget the Fruit Tree nearby. Use the More Resources button for top marks.
Three Bridges
Clear the way west to the Workshop and then south to the Dried Up Tree and the Fruit Tree. Upgrade the Workshop as soon as possible, twice. Clear the way to the Fruit Tree at the bottom of the screen, and be sure to gather the Midas food and Midas wood. Clear the way to the Obelisk for a speed boost.

12 Labours of Hercules IV - Mother Nature - 2.6

12 Labours of Hercules IV – Mother Nature – 2.6

Cross the Bog
Break the ice around the Fruit Tree first. Build the Workshop near the storehouse as soon as possible, and then the Farm nearby. Upgrade those two buildings quickly. Go farther east ot harvest gold so that you can clear away the stakes. Build the Gold Mine and upgrade it. If you take too long to collect from your buildings, thieves will steal your resources.
Temple by the Sea
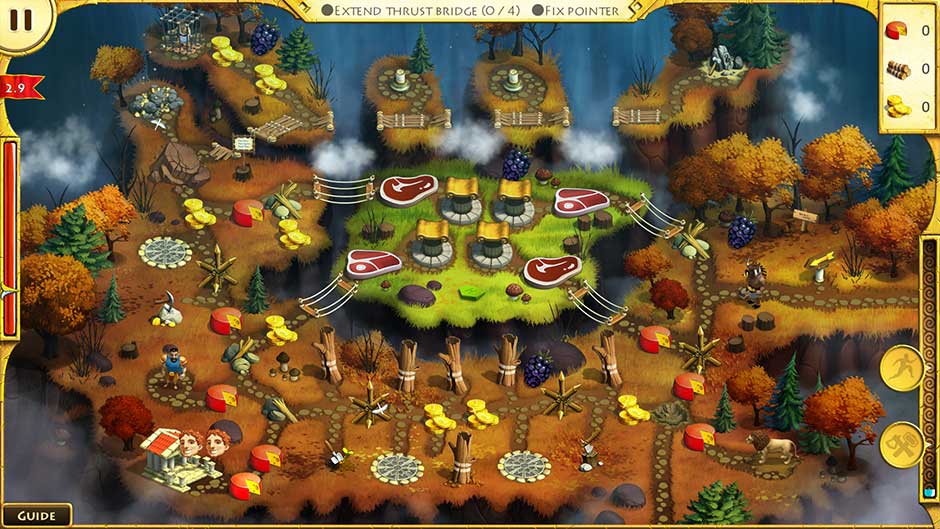
Revive the Fruit Tree to the west of the storehouse, then clear the way to the next Fruit Tree. Have Megara revive Dried Up Trees on the way. Hercules has to clear the boulder before your workers can clear the rubble blocking the minotaur. You have to build Medusa’s Lair before you can get rid of the minotaurs. The shark will disappear when Hercules opens the Hydrant behind the minotaur.

12 Labours of Hercules IV - Mother Nature - 2.9

12 Labours of Hercules IV – Mother Nature – 2.9

Level 3

Curls
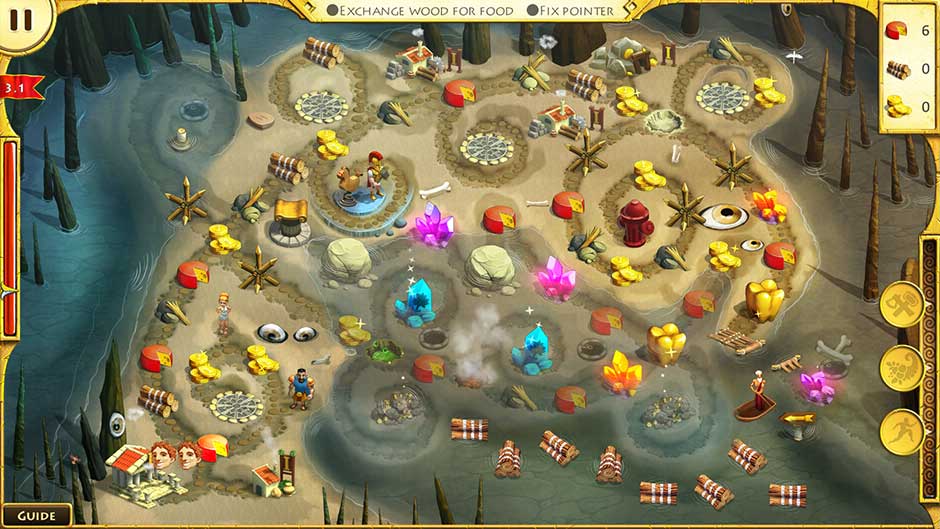
Upgrade your Home as soon as possible! You want more workers for this area. Upgrade your Workshops too. You have a Work Faster button, a More Resources button, and a Run Fast button in this area. Be sure to utilize all three for top marks! Hercules must destroy the Hydrant to open up the Gold Mines at the bottom of the screen and the boatman who can collect the floating wood. It will take a lot of gold and food to get to the pillar that opens the drawbridge, and this is a long level, so don’t worry too much if it seems like it is taking more time than usual.

12 Labours of Hercules IV - Mother Nature - 3.1

12 Labours of Hercules IV – Mother Nature – 3.1

Submerged
Start heading south to free Hercules and Megara. Revive the Fruit Tree near the storehouse, and build the Workshop in the upper left corner. You’ll need plenty of wood, so it’s a good idea to upgrade that Workshop. Build the Farm near the storehouse, and repair Demetrius’ Obelisk at the top of the screen. Build and upgrade the second Workshop. Use the Stop Clock button liberally for top marks.
Roundabouts
You need to clear out the minotaurs before you can get much else done. You can reach the Farm on the east side of the screen, and luckily your workers can travel through the tunnel into the center where most of the resources are, and around to the top of the screen to build Medusa’s Lair. Build the Lair and then collect gold from the Gold Mine or other sources until you can pay Medusa to destroy the minotaurs. After that, this is a straightforward are that doesn’t even require upgrading any buildings.
Greeks Bearing Gifts
Build the Workshops as soon as possible. Start with the one northeast of the storehouse. Also be sure to revive the Fruit Tree by the storehouse early in the level. Upgrade your Workshops and build everything you can build. There is no way to earn food except by the Fruit Tree or by exchanging wood for food via the centurion.

12 Labours of Hercules IV - Mother Nature - 3.2

12 Labours of Hercules IV – Mother Nature – 3.2

Fork
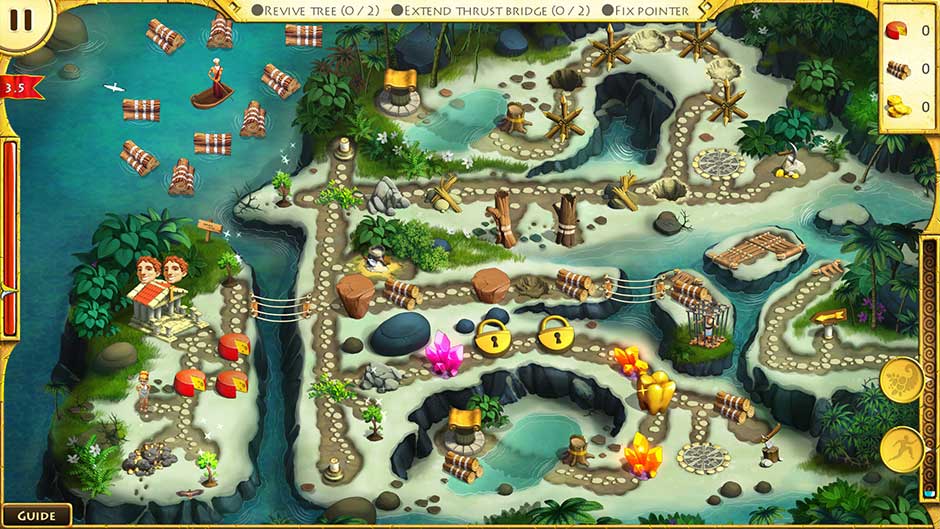
Don’t forget about the boatman who can help you gather wood quickly. There is a Gold Mine near the storehouse, and you will need to make good use of it constantly. When you can build the Workshop, do so and upgrade it immediately! The same goes for the Gold Mine on the far right of the screen. Make liberal use of the More Resources button for top marks. You will probably face some times when there is nothing you can do but wait: use those times to plan.

12 Labours of Hercules IV - Mother Nature - 3.5

12 Labours of Hercules IV – Mother Nature – 3.5

Catapults
Revive the Dried Up Tree in the top left corner to open a path for your workers. Build the Farm in the center and the Workshops. Use the Catapult in the top right corner, which appears after activating the pillar at the top of the screen, to smash the Upper Tower in the center. Activate the bottom pillar for another Catapult, and destroy the Lower Tower, then build the Gold Mine. The only building you need to upgrade is the Gold Mine. Clear the path to Medusa’s Lair and then clear the minotaur from the road.
Morning in the Forest
Gather as much wood as you can, and use it to build and upgrade first the Workshop, then three Gold Mines, then the other Workshop. Don’t bother with the Farm, the two Fruit Trees will provide all the food you’ll need.
Collaboration
Break boulders as soon as possible, upgrade your Gold Mines, and make good use of the boatman. Use the Stop Clock and More Resources buttons liberally for top marks.
Trustworthy
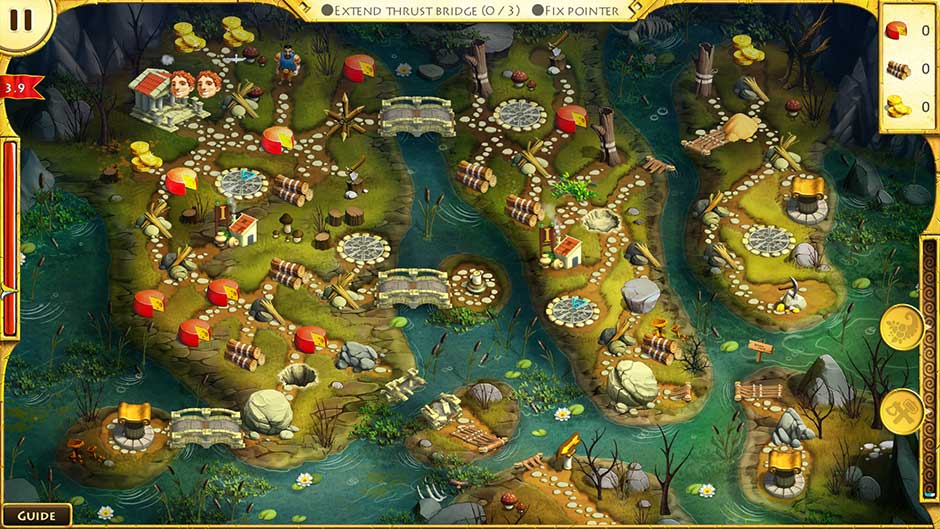
Upgrade all available buildings to speed things up, and use Hermes’ Obelisk to speed it up even more. Make especially good use of buildings near the storehouse. Activate all three pillars and build the bridge in the bottom center to continue.

12 Labours of Hercules IV - Mother Nature - 3.9

12 Labours of Hercules IV – Mother Nature – 3.9

Volcano
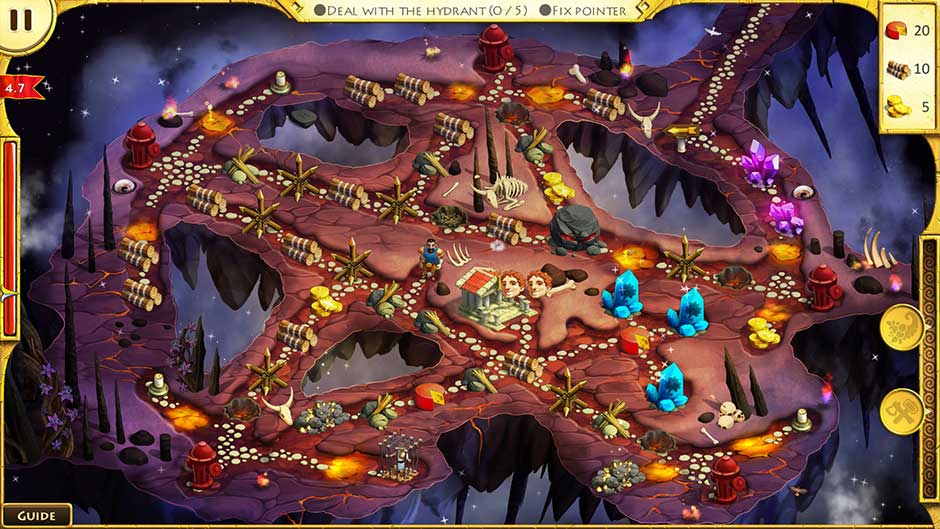
Collect wood to repair the bridge by the storehouse and access the Gold Mine. Use Demeter’s Obelisk to speed things up. The pillar in the center opens the path to two Fruit Trees that will be your renewable source of food. Upgrade the Workshop and the Gold Mine to level three.

12 Labours of Hercules IV - Mother Nature - 3.10

12 Labours of Hercules IV – Mother Nature – 3.10

Level 4

Giant Snail
Make good use of the Farm and the Workshop near the storehouse. Upgrade them both as soon as possible. Clear a path to the Gold Mine near the giant snail. Upgrade the Gold Mine to level three. Build the Outpost and the Farm in the bottom right. Clear away the crystals and have Hercules break open the Hydrants.
This Gold of Mine
Don’t worry about the level three Workshop in the bottom left. Upgrade the buildings you have. Use the Fruit Tree in the top right as your renewable food source. When your first Workshop and one of your Gold Mines are level three, then go for the big Workshop on the island.

12 Labours of Hercules IV - Mother Nature - 4.7

12 Labours of Hercules IV – Mother Nature – 4.7

Bubbles
First off, do not be intimidated by the sheer number of oil spills and prisoners in this area. Build and upgrade the Workshop east of the storehouse to level three as soon as possible. Use Fruit Trees as your food-source. Build and upgrade the other Workshops as quickly as you can. Build all Outposts to greatly reduce running time. There will be no down-time in this area, but don’t worry about the Obelisks. You do not need them.
Which Way
Don’t worry about the level-three buildings in the forest. Upgrade the Farm and Workshop near the storehouse. Continue to clear the path as usual until the high-level Workshop and Farm are reached naturally. Upgrade the Gold Mine to level three. Use the Stop Clock button liberally for top marks.
High Steaks
Go northeast for the Fruit Tree and the Gold Mine first, then west to the Workshop. Upgrade the Workshop before the Gold Mine. Expand over the middle bridge first to free the Prisoner, then the top bridge to clear the oil spill, and then the bottom bridge last. Use Hermes’ Obelisk, in the bottom right, to speed everything up. The centurion will exchange wood for food.
Warp
The warps transport your workers to other parts of the area. Make a note of where they are and which portal leads where before starting the level. Other than that, this one is entirely straightforward. Upgrade the Workshop and Farm to level three, but the Gold Mine does fine at level two. Use Hermes’ Obelisk to speed things up.
Summoning
Use the Fruit Trees for food. Upgrade the Home as soon as possible. Use Demeter’s Obelisk, Hephaestus’ Obelisk, and Hermes’ Obelisk.
Ghost/Sheep
Upgrade the Workshop as soon as possible and repair the bridge to free Megara. Build the Outpost in the top right to gather resources in the area quickly, and upgrade the Workshop to level three. Use the Catapult to free the cyclops, who will steal the sheep, and use the dog to scare away ghosts.
Pearls
Upgrade your Workshop to level three before going after the level three Gold Mine. Upgrade the other Gold Mine to level three as well. Use the Obelisks to speed things up. Use the Run Faster button liberally for top marks.
Secret Mirror
Watch out for the Evil Twin! Upgrade all buildings. This is a very long level, but does not include anything you haven’t faced before.

Level 5

Go Dive
Outposts look like tents now, but nothing else has changed. The portals are your friends. Keep them in mind when sending your workers off. The closest resource might be through a portal. Upgrade your Farm and Workshop to level two.
Hive
Build a Workshop early on to get wood to build and upgrade a Farm as soon as possible. Make use of every food-course you can find! Keep an eye out for thieves and that Evil Twin.
Skilled Tactician
You will need to use the centurion and King Midas in this area. Upgrade your Workshop to level three as quickly as possible, and trade everything you can spare to King Midas. You will need a ton of gold to get through the crystals and leave the area.

12 Labours of Hercules IV - Mother Nature - 5.2

12 Labours of Hercules IV – Mother Nature – 5.2

Make a Plan
You will need plenty of wood to build all the bridges. Make heavy use of the boatman, who can use the portal access more resources. Upgrade your Workshop and Farm early on. There may be times when all you can do is wait: use those times to plan. Don’t worry about Hephaestus’ Obelisk. You do not need it.
Twisted Road
There is only one path you can take. Upgrade your buildings, collect everything, repair the Obelisks and use the Stop Clock button liberally for top marks.
Lighthouse
Head east quickly to free the cyclops so he can help with the sheep. Use Fruit Trees for food, Gold Mines for gold, and upgrade the Workshop for wood. Do not forget about the boatman.
Pool Party
There is a Fruit Tree on the far side of the portal. Upgrade your Home and Gold Mine as early as possible. Use the portal and avoid going around the outskirts to save time. Trade with King Midas to gain gold quickly.

12 Labours of Hercules IV - Mother Nature - 5.7

12 Labours of Hercules IV – Mother Nature – 5.7

Fair
Get to the Fruit Tree and upgrade the Farm as soon as possible. The only way to get gold is to trade with King Midas. This one is interesting but fairly straightforward apart from the use of King Midas.
Green Hill
You have to free Cerberus so that he can scare away the ghost before you can get to the middle Evil Boulder. Use the portals to reach the bottom road. Do not worry about the Hams, or the Obelisks. Just upgrade your buildings, free Hercules, and smash those Evil Boulders.
Hatching the Egg
There is no trick to this one. Upgrade your buildings, prioritize your resources, and plan three moves ahead.

Congratulations! You’ve just made it through 50 stages of 12 Labours of Hercules IV – Mother Nature. If there happen to be more stages than this, you can conquer them without fear, and if you get stuck you can find some helpful suggestions in the General Tips and Tricks section of this walkthrough.


Delicious – Emily’s Hopes and Fears Walkthrough

Big City Adventure – Shanghai Walkthrough

Building the Great Wall of China 2 Walkthrough


This Bubble Shooter Walkthrough is meant as a guide and does not contain cheats, hacks, or serials.

The post 12 Labours of Hercules IV – Mother Nature Walkthrough appeared first on GameHouse.

Lost Island – Eternal Storm Walkthrough

$
0
0

After living countless centuries in peace, the Elves suddenly faced unimaginable evil and were forced to leave their homeland. They didn’t even have their ancient king to lead them, because he had fallen into a sleep and would only awake to help them out of a dire situation. Now you will take on the role of King in Lost Island – Eternal Storm and unite the inhabitants of the island so that together you find a way to break through the storm and leave.

In this Lost Island – Eternal Storm walkthrough you will find valuable tips and tricks on how to play the game. You will learn all you need to know in order to successfully complete the game, including how to beat each level and solve the mini-games. With the help of this guide you will be able to enjoy the game and get the most out of it.

Contents

General Tips & Tricks

This is a point and click game so everything can be done with the mouse.

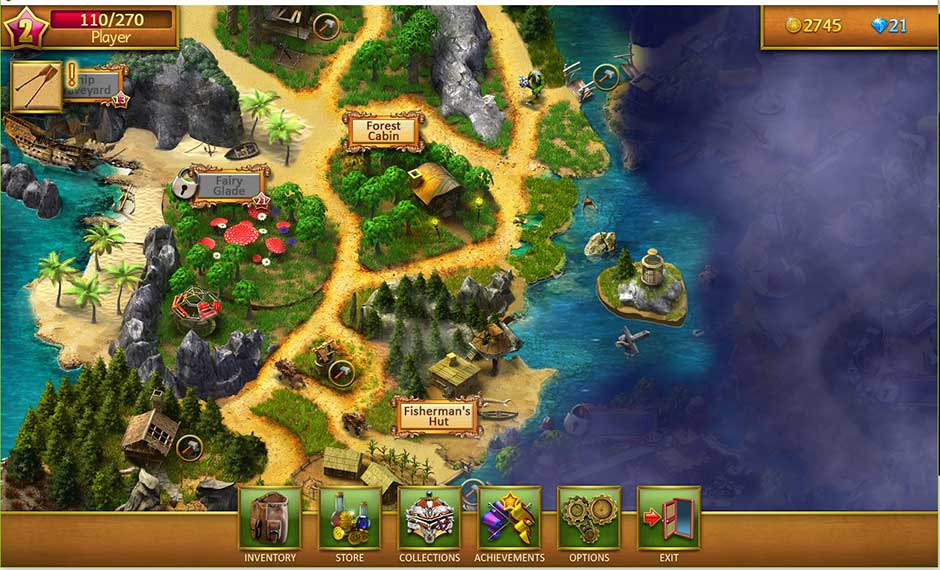
On the bottom part of the screen you will see a number of buttons with various options. The Inventory button brings up all the items you own. The Store button will open the shop. In the shop you will be able to buy items with the gems you have earned. You can see how many coins and gems you have in the box in the upper right part of the screen. The Options button allows you to adjust difficulty and music levels, as well as whether you want to play in windowed or full screen mode.

Lost Island - Eternal Storm Tips and Tricks

Lost Island – Eternal Storm Tips and Tricks

To create a new player profile, switch to a different player or delete an existing profile click on the box in the top left corner of the screen. In this box you will see the player name, level, amount of experience for the current level and the number of experience points needed to level up. Once you click on this box, you will be given the player options.

On the map you will see the locations you have been to and which still have to be explored. You will have to advance in order to unlock the entire map. You can see where you have to go next and what tasks you have to complete by clicking on the Objectives button. This box contains a round icon and has a glowing exclamation point next to it and is found right below the player level box.

This game also features Achievements and Collections. You can see what you have completed, as well as what needs to be done still, by opening up the corresponding buttons on the bottom of the screen. In addition, each hidden object level has a mastery bar and you can see how far along you are by clicking on the scene location in the main map. As you master a level, you improve the location. The Location level is indicated by the awards with the numbers in them.

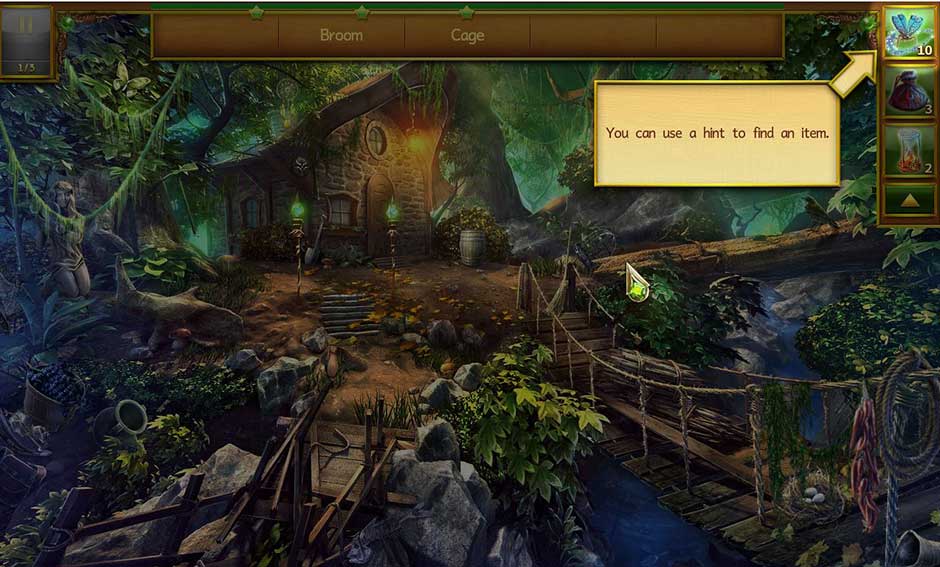
In the hidden object scenes you will see the list of the objects to find in the bar at the top of the screen. If you need help finding something, you can use the Hint button found in the upper right corner. There are also other help buttons you can use during the hidden object scenes. The Magnetic Dust automatically collects everything that has to be found in the scene. The Hourglass freezes time for 30 seconds.

Lost Island - Eternal StormTips and Tricks 4 Hint

Lost Island – Eternal StormTips and Tricks 4 Hint

You will have to repeat the hidden object scenes to find items that will be needed to unlock levels that follow. You can see what can be found in each scene by clicking on it and looking at the information box that shows up. On the bottom is a list of items that can be found.

After Objective requirements have been fulfilled, collect the rewards.

Lost Island – Eternal Storm

Part 1

Forest Cabin

– Follow the instructions provided on the screen. This level serves as a tutorial.
Find the 3 Hidden Objects.
– The next objective is to find the Gold Coin. This is found in the Chest of the Forest Elves. Access the Chest by first clicking on Inventory button on the bottom task bar and then opening it.
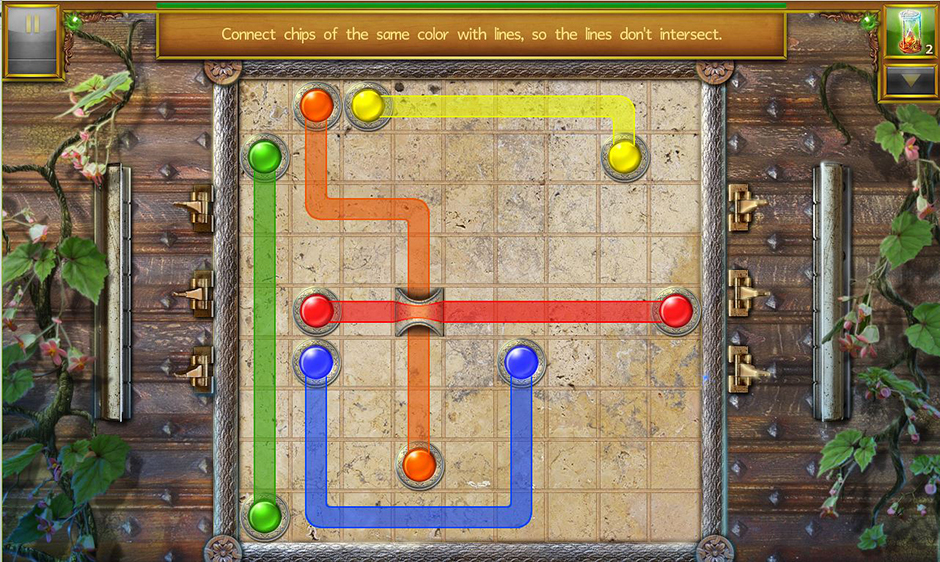
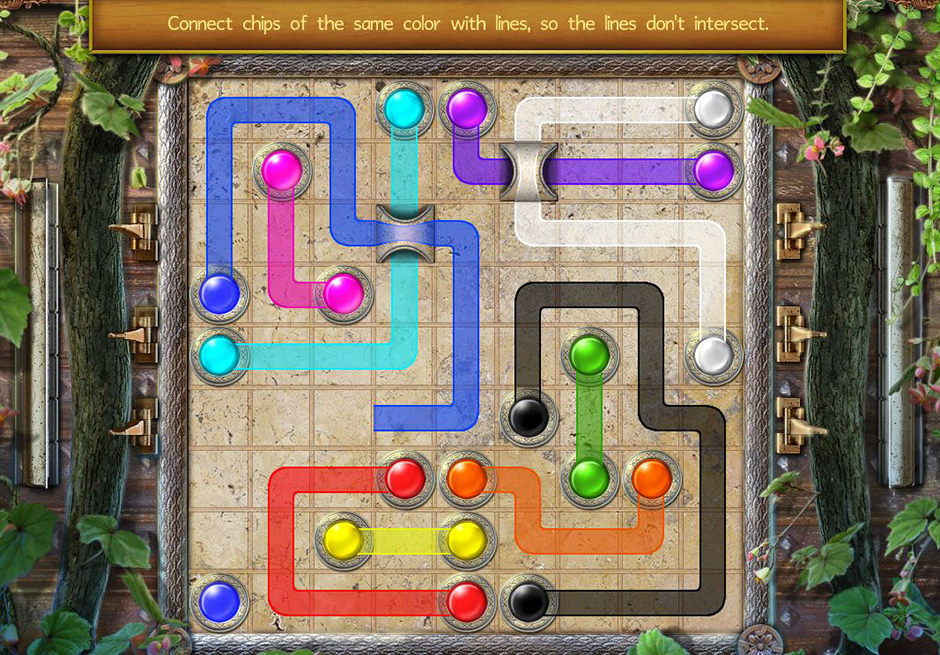
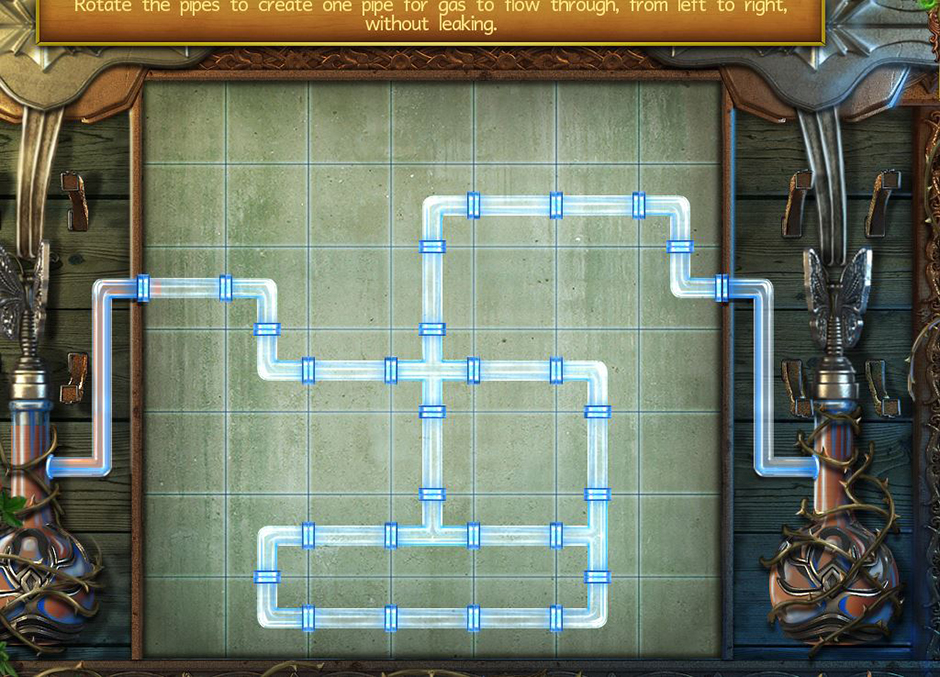
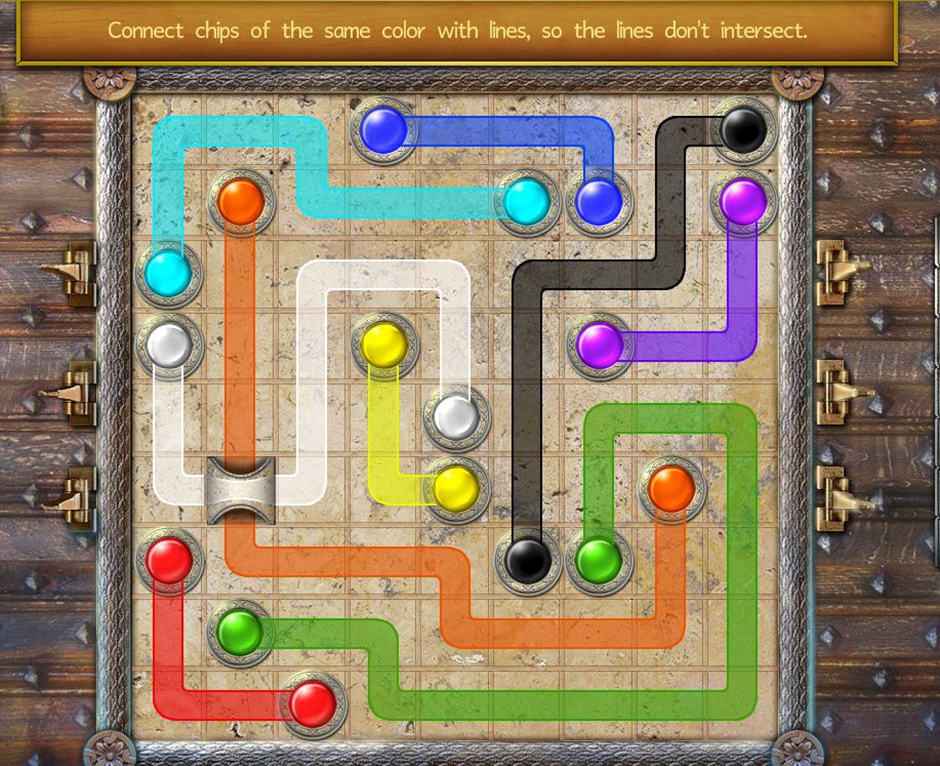
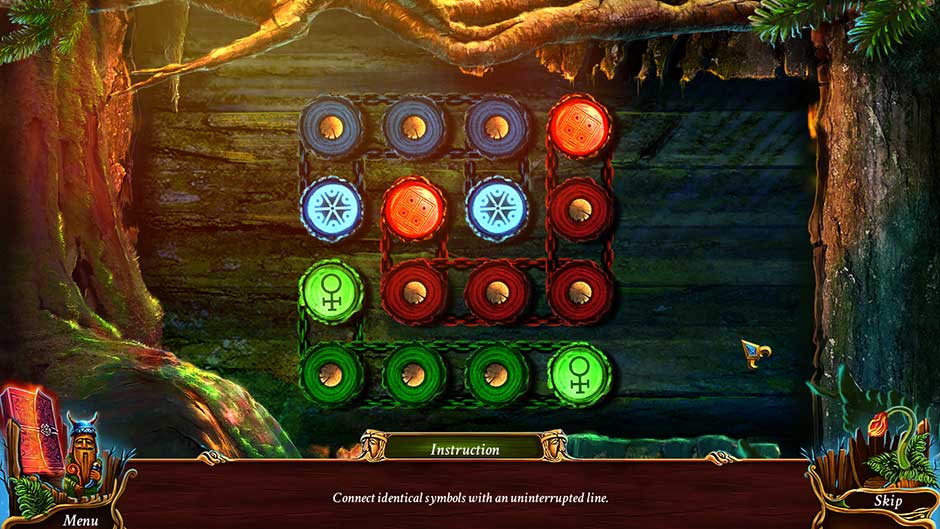
– Finally, solve the mini-game in order to unlock the Chest. You will have to connect the chips with the same colors. However, you will have to connect the chips without any of the lines intersecting.

Fisherman’s Hut

– Unlock the hidden object scene by using the Gold Coin. Click on Explore and proceed to the scene. Find all the objects in the scene, including the Oars needed to use the boat.

Cave Kobolds

– For this objective you will have to banish the Kobolds bothering the people of the island. To accomplish this, find the Kobolds wandering the paths on the map and click on one of them. You will need a Sword to banish them. More can be purchased for coins in the Store if you run out.
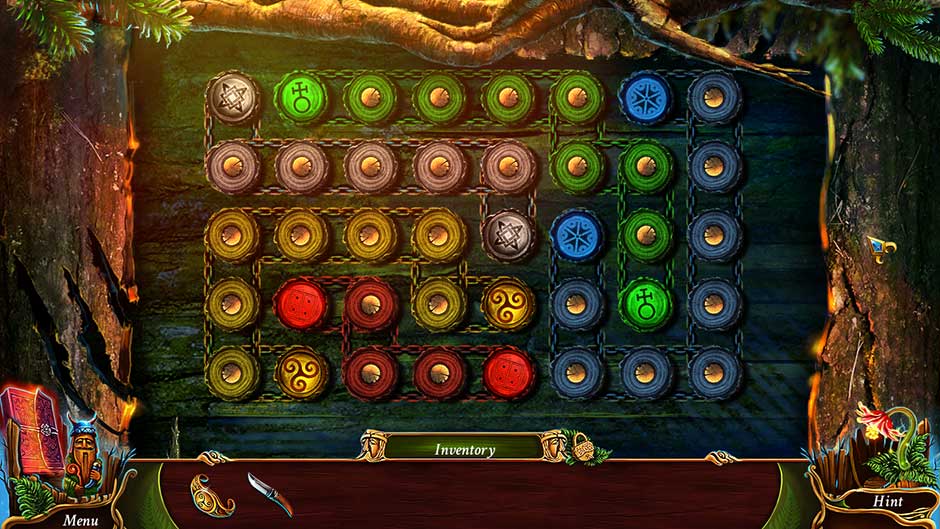
– Collect the Chest that is dropped after killing a Kobold. Unlock it by solving the mini-game. You will have to connect buttons of the same color without having any of the connecting lines intersect.

Lost Island - Eternal Storm - Forest Cabin Mini - Game Solution

Lost Island – Eternal Storm – Forest Cabin Mini – Game Solution

Forest Cabin

– Return to the Forest Cabin. Repeat this scene until you find the Tar needed to finish repairing the boat.

Boat

– Go to the Boat on the map. Repair it and unlock the next map area.

Forest Cabin

– Return to the Forest Cabin scene and find the the hidden objects to earn the Arrow Quiver. This item is needed to unlock the Old Town scene.
– It may be necessary to repeat this scene until the Arrow Quiver is received.

Old Town

– Next, you will investigate Old Town. Find all the Hidden Objects in the scene.

Forest Cabin

– You will now have to find Ancestor’s Ring to prove that you are the first-born and King of the Elves. Return to the Forest Cabin on the map and find it.
– Find all the Hidden Objects to get the ring.

Ring of Stamina

– Your objective now is to find the Ring of Stamina. Return to the Fisherman’s Hut scene where it is located. Find all the Hidden Objects to earn the ring.
– The second part of this is to actually use the Ring of Stamina. It can be found in your Inventory under Amulets. Click on it to use it. It will grant you an extra minute of search time for the next 30 minutes.

Fishing Gear

– To complete this objective, you will have to find the fisherman Arundo a new Rod and Net since his were destroyed by Kobolds.
– To get the Rod, return to the Forest Cabin. Find all the Hidden Objects in the scene. Repeat until you have the rod needed for the fisherman, Arundo.
– To find the Fishing Net, return to the Old Town hidden object scene. Find all the Hidden Objects there until you have the net.

Kitar’s Fireflies

– Complete this Objective by using the Kitar Firefly to show you a hint in any hidden object scene. When complete, click on it to collect your reward.


Weapons

– For this Objective you will have to help the Elves from Old Town. To do this, first find two Long Spears.
– Return to the Forest Cabin. Find all the Hidden Objects in the scene. Repeat until you have the objects needed for the Elves.

Lost Island - Eternal Storm - Weapons 2

Lost Island – Eternal Storm – Weapons 2

Fishing Business

– Now you will have to help Arundo set up a fishing business. To do this, you will have to complete the Fisherman Collection.
– Click on Collections and then go to Fisherman. You can see what items you have already collected and which are missing. If items are missing, click on those and you will be told in which hidden object scene they can be found.

– If necessary, return to hidden object scenes to find missing Collection Items.
– Once you have everything needed to complete the Collection, exchange it.

Night Patrol

– Help the Elves by patrolling the Old Town by night. Only a portion of the scene is displayed at once, that visible area can be enlarged by clicking on the Lantern. The Wand will display the entire scene.
– Find all the Hidden Objects in the scene.

Lost Island - Eternal Storm - Night Patrol

Lost Island – Eternal Storm – Night Patrol

Northern Wall

– Rebuild the Northern Wall. First you will need all the times required to build it.
– Obtain all the missing items needed by returning to the appropriate Hidden Object Scenes, killing Kobolds or opening Chests.

Stone Golem

– Help the Elves by defeating the Stone Golem.
– Certain items will be necessary to defeat the Stone Golem. You will have to find these before you can complete the quest.
– Obtain all the missing items needed by returning to the appropriate Hidden Object Scenes, killing Enemies or opening Chests.
– Once you have everything, defeat the Golem. A new area of the map will be unlocked.

Magnetic Dust

– To complete this objective, simply use the Magnetic Dust in any hidden object scene.


Night Fishing

– Help Arundo by investigating the Fisherman’s Hut scene by night.

Lost Island - Eternal Storm - Night Fishing

Lost Island – Eternal Storm – Night Fishing

Rope Ladder

– First return to the Forest Cabin. Find all the Hidden Objects in the scene.
– Get the Rope Ladder and complete the quest.

Stone Quarry Dwellers

– You will now have to explore a new location, the Stone Quarry. Unlock the scene by using the Rope Ladder.

Old Enemies

– Help Saxum drive off the Cave Kobolds.
– Find four Cave Kobolds on the map and banish them with a Sword.
– It is possible to find two Chests while defeating the enemies. Unlock each chest by solving a mini-game. You will have to connect buttons of the same color with lines. However, none of these lines can intersect.

Lost Island - Eternal Storm - Mini - Game Solution - Mini-Game Solution 3

Lost Island – Eternal Storm – Mini – Game Solution – Mini-Game Solution 3

Lost Island - Eternal Storm - Mini - Game Solution - Mini-Game Solution 4

Lost Island – Eternal Storm – Mini – Game Solution – Mini-Game Solution 4

Part 2

Stolen Chest

– While killing the Kobolds, the Chest found will be part of the next objective.
– Collect the rewards for finding the Chest.

Library

– Repair the Library.
– Find all the items needed to build the Library. If an item is missing, click on it and go to the location where it can be found. Once you have everything, you can finish the quest. Once constructed, the Library will generate experience over time.

– Collect the experience points by looking on the map near the Library after the specified time period, such as 10 minutes, is up. You will see a pink star on the map. Click on it and those points will be added to your experience point total.
– Build one of the Houses across from the Library. Find all the items required to build one and complete construction. Every 15 minutes a House will produce one Gem. If you want to, you can also build two or all three of the Houses at this time.

Druid’s Folio

– Help Arundo free the river from the giant lizards. In order to complete this objective, find the Druid’s Book.
– The book can be found in the Old Town hidden object scene. Return there and find all the Hidden Objects in the scene.
– Repeat the level until you have found the Druid’s Book.

Ancient Hawk

– Your task is to find the Ancient Hawk.
– It can be found in the Old Town hidden object scene. Return there and find all the Hidden Objects in the scene.
– Repeat the level until you have found two Ancient Hawks.

Regalia

– Find the Magic Staff of the Elves.
– The Staff be found in the Forest Cabin hidden object scene. Return there and find all the Hidden Objects in the scene.

Snakelizards

– Defeat the Snakelizards.
– Find four Snakelizards on the map and defeat them. They can be found walking on the paths.

– You can potentially find the Chest of Stone Winds after defeating one of the Snakelizards. This chest can be opened by solving a mini-game. In this puzzle you will have to slide the stone blocks in such a way that the crystal can be moved into the hold on the right side.

Lost Island - Eternal Storm - Mini - Game Solution - Mini-Game Solution 6

Lost Island – Eternal Storm – Mini – Game Solution – Mini-Game Solution 6

Staff of Light

– Find the Staff of Light.
– It can be found in the Fisherman’s Hut hidden object scene. Return there and find all the Hidden Objects in the scene.

– Build the Diver’s Raft. This will produce items for your collections over time. After a certain time period you will be able to pick up the item produced on the map.

Black Wings

– Dark Heralds have come to the island. Venator explains that this is not good and they must be banished. Defeat three Dark Heralds using the Staff of Light.
– Find the Dark Heralds flying around on the map. Once you have defeated three of them, return to the objective screen and collect your rewards.
– You will need one Staff of Light for every Dark Herald enemy you banish. If you need more, these can be found in the Fisherman’s Hut hidden object scene or purchased with coins from the store.

Blue Ribbon

– Arundo wants you to retrieve a Blue Ribbon. This can be found in the Forest Cabin hidden object scene. Return there and find all the Hidden Objects in the scene.
– As part of this quest you will have to defeat two Snakelizards. Find them walking along the paths on the map.

Woodcutter’s Hut

– Repair the Woodcutter’s Hut.
– To build the hut, you will need certain items. Find them all and complete repairs.
– Over time, the hut will produce Wood. This is an item used for repairing other buildings. Collect the wood when it appears on the map and it will be added to your items.

Stolen Medallion

– Saxum wants you to retrieve the stolen Leader’s Medallion.
– In order to obtain the Leader’s Medallion, you will need to complete the corresponding Collection.
– If any items required to complete the collection are missing, you can click on the picture and it will show you where that item can be found. You will have to repeat the hidden level scenes or defeat enemies until you have what is needed.

Farm

– The next objective is to defeat six Redeye Boars.
– The Redeye Boars can be found walking along the paths on the map. Just click on them to banish.

– While defeating the enemies, you will find a Chest of Mountain Crystal. To open it, you will first have to unlock it by solving a mini-game. In this puzzle you will rotate the green crystals in such a way that a laser beam will lead through all of them.

Lost Island - Eternal Storm - Mini - Game Solution - Mini-Game Solution 8

Lost Island – Eternal Storm – Mini – Game Solution – Mini-Game Solution 8

Seeds

– Find the Seeds for the halfling, Cibus.
– The Seeds can be found in the Fisherman’s Hut hidden object scene. Return there and find all the Hidden Objects in the scene.
– Once you have the Seeds, you can unlock the Farm hidden object scene.

Kobold Caves

– Saxum needs you to clear out the Kobold Caves. To complete this task, you will have to repair them.
– Find all the materials necessary to repair the caves. If you are missing anything, click on that material and you will be told where it can be found or which enemies will drop it after being defeated.
– Over time, the Kobold Caves will produce Chests. These can be collected and opened for more construction materials.
– Collect the first Chest from the Kobold Caves. This Chest of Mountain Crystal can be opened after unlocking it by solving a mini-game. This puzzle requires you to rotate the green crystals so that a laser beam will lead through all of them.

Lost Island - Eternal Storm - Mini - Game Solution - Mini-Game Solution 10

Lost Island – Eternal Storm – Mini – Game Solution – Mini-Game Solution 10

Fertility Doll

– Cibus needs your help in making a Fertility Doll. You can get the Doll by completing the corresponding Collection.
– Go to Collections and click on the Fertility Doll one. See what items you still need to exchange it. If you are missing items, click on those items and you will be told where they can be found. Repeat the scenes containing those items until you have them or defeat the enemies that drop those items as loot.
– If you battle a Dark Herald, you have a chance of receiving the Chest of Forgotten Mage. You can unlock and open this Chest by solving the mini-game. This puzzle requires that you move the stones so that the two rays do not intersect.

Lost Island - Eternal Storm - Mini - Game Solution - Mini-Game Solution 9

Lost Island – Eternal Storm – Mini – Game Solution – Mini-Game Solution 9

Rake & Shovel

– Cibus needs a Rake and Shovel.
– Find the Rake in the Old Town hidden object scene.
– Find the Shovel in the Stone Quarry hidden object scene.
– It may be necessary to repeat the hidden object scenes to find the items.

Shield & Helmet

– You will now need to find a Helmet and Shield for Venator.
– Find the Helmet in the Forest Cabin hidden object scene.
– Find the Shield in the Stone Quarry hidden object scene.

Nocturnal Thief

– Investigate the Farm hidden object scene by night. Find all the Hidden Objects in the scene.

Fighting the Satyrs

– Fight and banish three Predacious Satyrs using the Flail of Fire.
– The Satyrs can be found walking along the paths on the map.

Dispersing the Darkness

– This objective requires you to investigate the Stone Quarry hidden object scene by night.
– Use the Green Lantern to help you search for the objects at night.

Part 3

Healing the Wounds

– To complete this objective, you will have to use the Hourglass in a hidden object scene.

Snakelizards’ Captive

– Banish five Snakelizards using an Ancient Hawk.
– The Snakelizards can be found walking along the paths on the map.

Threads & Needles

– First, find the Needle and the Thread. Go to the targets to find them.
– Next, defeat two Redeye Boars.

Born of Fire

– Defeat three Fiery Golems using a Battle Pickaxe.
– The Fiery Golems can be found walking the paths on the map.

Forest Map

– Find the Forest Map. It can be found in the Old Town hidden object scene.

Animal Breeder’s Book

– Find the Animal Breeder’s Book.
– Find the Book in the Forest Cabin hidden object scene.

Vermin

– Banish three Dark Heralds.

– If you have the Chest of Healing Potion in your inventory, open it now. To do so, you will have to first unlock it by solving a mini-game. Solve this puzzle by rotating the pipes so that the gas flows through them without leaking.

Lost Island - Eternal Storm - Mini - Game Solution - Mini-Game Solution 11

Lost Island – Eternal Storm – Mini – Game Solution – Mini-Game Solution 11

Sword of the First Elves

– First find the Sword of the First Elves.
– Next, investigate the Stone Quarry hidden object location.

Large Catch

– First, investigate Old Town hidden object scene.
– Next, find four Nets. These can be found in the Old Town hidden object scene. Go there and find all the Hidden Objects in the scene. Repeat until you have the required number of items.

– It is a good time to repair the North Bridge. Collect enough materials to construct the bridge and you will earn 1000 experience points.

Healing Plants

– Find the Azure Ribwort. It can be in the Farm hidden object scene.
– Find the Hairgrass. This item can be found in the Forest Cabin hidden object scene.

– If you have the Chest of Winged Unicorn in your inventory, open it now. To unlock it, solve the mini-game. Solve this puzzle by placing the mosaic pieces on empty fields until they are filled in.

Lost Island - Eternal Storm - Mini - Game Solution - Mini-Game Solution 12

Lost Island – Eternal Storm – Mini – Game Solution – Mini-Game Solution 12

Snow Buffalo Horn

– Find the Snow Buffalo Horn for Arundo. It can be in the Old Town hidden object scene.

Herbalist

– Find the Yarrow and Oak Bark.
– Yarrow can be found in the Farm hidden object scene.

– Oak Bark can be found in the Menagerie hidden object scene. Go there and find all the Hidden Objects in the scene. Access the Menagerie scene by unlocking it with an Animal Breeder Book.


Menagerie

– Investigate the Menagerie hidden object scene. In order to access the Menagerie you will need to have two Meats to feed the tiger at the entrance.

Lost Island - Eternal Storm - Menagerie

Lost Island – Eternal Storm – Menagerie

– Special note about the object list: The word “Clover” is spelled “Clever” in this scene. If you see “Clever,”, then you need to look for the Clover.

Mysterious Town

– Investigate the Fisherman’s Hut scene by night.

– Check your inventory to see if you have found a Chest of Abyssal Pearl. If you do, unlock it and open it by solving a mini-game. To solve this puzzle, move the shell through the maze so that it eats up all the pearls. Each tile can only be used once.

Lost Island - Eternal Storm - Mini - Game Solution - Mini-Game Solution 13

Lost Island – Eternal Storm – Mini – Game Solution – Mini-Game Solution 13

Healing Ointment

– Virdis needs to complete the Healing Ointment. Complete the corresponding Collection.

Disorder at the Menagerie

– Find a Birdcage and a Brush.
– Find the Birdcage in the Menagerie hidden object scene.
– The Brush can be found in the Menagerie hidden object scene.
– Repeat the location until both items are found.

New Plans

– Investigate the Forest Cabin and Old Town hidden object scenes by day.
– Check your inventory to see if you have a Chest of Mountain Crystal. If you do, unlock and open it by solving a mini-game. The puzzle requires that you rotate and position the green crystals in such a way that the laser beam is led through all of them.

Lost Island - Eternal Storm - Mini - Game Solution - Mini-Game Solution 15

Lost Island – Eternal Storm – Mini – Game Solution – Mini-Game Solution 15

Entangled Trouble

– Investigate the Forge hidden object scene. To unlock this location, go to the Old Town hidden object scene and find a High-Mountain Caterpillar. To access the Forge after unlocking the scene, you will need to have Coal.

Ogres and Elves

– Bring Saxum five Wineskins. These can be found in the Farm hidden object scene.

Forge Errand

– Find three Coal. These can be found in the Old Town hidden object scene. Repeat the scene until all items are found.
– Investigate the Forge hidden object scene.

Part 4

Legend of Raven-Men

– Investigate the Forest Cabin hidden object scene by night. Do this twice to complete the quest.

– Check your inventory to see if you have another Chest of Winged Unicorn. If you do, unlock and open it by solving a mini-game. To solve the puzzle, place all the mosaic pieces into the empty fields until it is full.

Lost Island - Eternal Storm - Mini - Game Solution - Mini-Game Solution 14

Lost Island – Eternal Storm – Mini – Game Solution – Mini-Game Solution 14

Rare Metal

– Find the Glowing Pinecone. It can be found in the Farm hidden object scene.

Competition

– You have been challenged to defeat enemies by the ogres.
– Defeat five Cave Kobolds, three Redeye Boars and three Predacious Satyrs.

Heavy Armor

– Complete the Heavy Armor Collection. Once you have all the required items, exchange it and complete the objective.

– Check to see if you have a Chest of Winged Unicorn in your Inventory. If you do, unlock and open it by solving the puzzle. For this mini-game, place the mosaic pieces so that they fill up all the fields.

Lost Island - Eternal Storm - Mini - Game Solution - Mini-Game Solution 16

Lost Island – Eternal Storm – Mini – Game Solution – Mini-Game Solution 16

– If you have the Chest of Healing Potion in your inventory, open it now. To do so, you will have to first unlock it by solving a mini-game. Solve this puzzle by rotating the pipes so that the gas flows through them without leaking.

Lost Island - Eternal Storm - Mini - Game Solution - Mini-Game Solution 17

Lost Island – Eternal Storm – Mini – Game Solution – Mini-Game Solution 17

Farmer’s Set

– Complete the Farmer’s Set Collection. Once you have all the required materials, exchange it and complete the objective.

Pledge of Allegiance

– Find the Gauntlets for Arundo. They can be found in the Farm hidden object scene. Find all objects until you obtain the gauntlets.

Fruit Dragon

– Find Leather Mittens and a Thick Chain.
– Both items can be found in the Forge hidden object scene. Go there and find all the Hidden Objects. Repeat until you have the mittens and the chain.

New Tools

– Investigate the Stone Quarry hidden object scene.
– Find four Battle Pickaxes.

Forest Thicket

– Complete the Forest Keeper Collection.

Lost Island - Eternal Storm - Forest Thicket

Lost Island – Eternal Storm – Forest Thicket

Union

– Complete this objective by investigating the Stone QuarryFarm and Menagerie hidden object scenes.

Story of Lighthouse

– Find two Basket of Apples. These can be found in the Farm hidden object scene.
– Find two Crusty Breads. These can be found in the Menagerie hidden object scene.

Warrior Code

– Find the Warrior Code. It can be found in the Old Town hidden object scene.

Paid Help

– Complete the Treasure Chest Collection.
– Build the Archer’s Workshop. This is found next to the Forge. Every 10 minutes it will produce an Arrow Quiver needed to access the Stronghold hidden object scene.

Visiting Stronghold

– Investigate the Stronghold hidden object scene two times.
– In order to reach the Stronghold, you will first have to repair the South-Western Bridge.
– Unlock the Stronghold by using the Warrior Code. Access the scene by using two Arrow Quivers.

Watch at the Forge

– Investigate the Forge hidden object scene by night.

Animal Breeder’s Set

– Complete the Animal Breeder’s Set Collection. Find all the required items and exchange them.

Lost Island - Eternal Storm - Animal Breeder's Set

Lost Island – Eternal Storm – Animal Breeder’s Set

Halfling’s Request

– Investigate the Farm hidden object scene by day.
– Investigate the Farm hidden object scene by night.

Shoes of Invisibility

– Find two Boots of Invisibility for Virtus.
– The Boots can be found in the Stronghold hidden object scene. Repeat until you have two of them.

Stolen Keys

– Find the Key. It can be found in the Farm hidden object scene.
– Defeat four Snakelizards. They are found walking the paths on the map.
– If you need more weapons to defeat enemies with, you can now repair the Weapon smith. Collect the items needed to repair it and once built, it will produce a weapon every 10 minutes. It can be found south of the Stronghold on the map.

Darkwings on the Loose

– Defeat three Darkwings. They can be banished with the Elven Whistle. Find them along the paths on the map and click on them to defeat.

Part 5

Watchtowers

– Repair the Watchtowers. This building is found next to the Houses on the northern part of the map.

Wealth of the River

– Find one Gold Eel. This can be found in the Fisherman’s Hut hidden object scene.
– Find one Deep-See Lancet. Go to the Fisherman’s Hut hidden object scene to find it.

Ceramic Utensils

– Complete the Ceramic Utensils Collection. Find all the required items and exchange them.

Lost Island - Eternal Storm - Animal Breeder's Set - Ceramic Utensils

Lost Island – Eternal Storm – Animal Breeder’s Set – Ceramic Utensils

Murlocks Defeat

– Find the Teleportation Stone. It can be found in the Old Town hidden object scene.

Fortifying the Forge

– Investigate the Forge hidden object scene.

– Check your Inventory to see if you have another Chest of Winged Unicorn. If you do, unlock and open it by solving the puzzle. In this mini-game you have to place the mosaic pieces into the empty fields to fill them up.

Lost Island - Eternal Storm - Mini - Game Solution - Mini-Game Solution 18

Lost Island – Eternal Storm – Mini – Game Solution – Mini-Game Solution 18

Memory of the Soul

– Find the Nemesis’ Mirror for Viridis. It can be found in the Forge hidden object scene.

– To earn an extra 1000 experience points, repair the South-Eastern Bridge found between the Stronghold and Forge.

Soul’s Memories

– Find the Beryllium Telescope. This can be found in the Stronghold hidden object scene.

– If you need gems, you can earn 10 now by repairing a Well. One is found to the left of the Fisherman’s Hut hidden object location and another can be found south of the Stronghold.

Love is All Around

– Complete the Elegant Gown Collection.

Lost Island - Eternal Storm - Animal Breeder's Set - Love is All Around

Lost Island – Eternal Storm – Animal Breeder’s Set – Love is All Around

– Check your inventory for a Chest of Abyssal Pearl. If you do, unlock it and open it by solving the puzzle. In this mini-game you will have to move the shell through all the pearls while only using each cell once.

Lost Island - Eternal Storm - Mini - Game Solution - Mini-Game Solution 19

Lost Island – Eternal Storm – Mini – Game Solution – Mini-Game Solution 19

Dwarf Caverns

– Investigate the Dwarf Caverns hidden object scene two times to complete this objective. It can be found north of the Library and Houses.
– Unlock the area where the Dwarf Caverns is located by defeating the Murlocks. You will need 10 Gold Coins to do defeat them.

– To unlock the actual hidden object scene, you will first need to have the Dwarf Medallion. This can be found in the Forge hidden object scene.

– Next to the Dwarf Caverns location there is also a Coal Mine. Repair it now. It will produce one Coal every 10 minutes.

Dragons

– Find an Ice Dragon and a Pearl Dragon to complete this objective.
– The Ice Dragon can be found in the Fisherman’s Hut location. The Pearl Dragon is found in the Farm hidden object scene.

Eques’ Dream

– Complete the Dragons Collection for Esques.

Lost Island - Eternal Storm - Eques Dream

Lost Island – Eternal Storm – Eques Dream

Royal Advisor

– To speak with Aurum about his brother, you will have to first defeat two Predacious Satyrs and three Redeye Boars. Find these enemies walking along the paths on the map and banish them with the appropriate weapons.

Rune of Death

– Find five Runes of Death for Virtus. They can be found in Stronghold hidden object scene.

Decaying Forest

– Find Water of the Southern Mountain. It can be obtained by completing the Stone Quarry hidden object scene.

Warrior Shadows

– Venator needs you to drive away the Warrior Shadows. Defeat four of them. In order to banish them you will need Silver Arrows.

Drinking Water

– Find one Water of the Forbidden Lake. This can be found by completing the Stronghold hidden object scene.
– Find one Water of the Western Mountain. This can be found by completing the Fisherman’s Hut hidden object scene.

Food Reserves

– Complete the Food Supplies Collection.

– Open a Chest of Forest Elves. Unlock and open by solving the puzzle. You will have to connect buttons of the same color without having any intersecting lines.

Lost Island - Eternal Storm - Mini - Game Solution - Mini-Game Solution 22

Lost Island – Eternal Storm – Mini – Game Solution – Mini-Game Solution 22

Dark Threat

– Find the Grimoire for Venator. This book can be found by completing the Stronghold hidden object scene.

Childhood Memories

– Complete the Reminiscence Collection for Faber.

– Check your Inventory for a Chest of Winged Unicorn. If you have one, unlock and open it by solving the puzzle. In this mini-game your goal is to place the mosaic pieces into the fields so that they are filled up.

Lost Island - Eternal Storm - Mini - Game Solution - Mini-Game Solution 20

Lost Island – Eternal Storm – Mini – Game Solution – Mini-Game Solution 20

– Also check for a Chest of Healing Potion. If you have one, unlock and open it by solving the mini-game. This puzzle requires you to position the tubes so gas flows through them without any leaking.

Lost Island - Eternal Storm - Mini - Game Solution - Mini-Game Solution 21

Lost Island – Eternal Storm – Mini – Game Solution – Mini-Game Solution 21

Threat of War

– Defeat seven Darkwings to prevent the Dwarves from declaring war on the Elves.

Part 6

Wrecked Ship

– Investigate the Ship Graveyard. This location can be found on the far left side of the island. To unlock it, you will first need the Sailors’ Gold. This can be found by completing the Dwarf Caverns hidden object scene. Once unlocked, a Gold Coin is needed to access the scene.

Captain’s Spirit

– Find the Steering Wheel for Pelagus. It can be found by completing the Ship Graveyard hidden object scene.

Mysterious Stones

– Find the Red Rune. This can be found by completing the Dwarf Caverns hidden object scene.
– Find the Blue Rune. This can be found by completing the Dwarf Caverns hidden object scene.

Refined Smithing

– Complete the Refined Smithing Collection.

Lost Island - Eternal Storm - Refined Smithing

Lost Island – Eternal Storm – Refined Smithing

Compass & Logbook

– Find the Compass.
– Find the Ship’s Logbook.

Cleansing Ritual

– Find the Bone Necklace for Arundo to cleanse the river. it can be found by completing the Stronghold hidden object scene.

Scary-Looking Ogre

– Find the Potion of Transformation for Saxum. It can be found by completing the Dwarf Caverns hidden object scene.

Deadly Parasite

– Find one Dead Water for Venator. It can be found by completing the Menagerie hidden object scene.

Pie Fair

– Find the Taste Amplifier. You can obtain it by completing the Farm hidden object scene.

Serum of Truth

– Virtus needs you to find the Serum of Truth. Complete the Stronghold hidden object scene to obtain this object.

Fisherman’s Goods

– Complete the River Treasure Collection.

Lost Island - Eternal Storm - Fisherman's Goods

Lost Island – Eternal Storm – Fisherman’s Goods

– Open a Chest of Healing Potion if you have one. Position the pipes so that the gas flows through them without leaking.

Lost Island - Eternal Storm - Mini - Game Solution - Mini-Game Solution 23

Lost Island – Eternal Storm – Mini – Game Solution – Mini-Game Solution 23

– If you have a Chest of Mountain Crystal, open it by solving the puzzle. Rotate the crystals so that the laser leads through them all.

Lost Island - Eternal Storm - Mini - Game Solution - Mini-Game Solution 24

Lost Island – Eternal Storm – Mini – Game Solution – Mini-Game Solution 24

Desecrated Graves

– Defeat five Cave Kobolds for Saxum.

Smelly Ritual

– Investigate the Old Town hidden object scene by night.

Kitar’s Runes

– Complete the Kitar’s Runes Collection.

Night Celebrations

– Investigate the Dwarf Caverns by night.

Captain’s Set

– Complete the Captain’s Set Collection for Pelagus.

Irresistible Delicacy

– Complete the Rainbow Flower Collection for Eques.

Sounds of Music

– Complete the Musical Instruments Collection.

Mysterious Employer

Investigate various locations for Virtus.
– Investigate the Stone Quarry three times.
– Investigate the Menagerie three times.
– Investigate the Dwarf Caverns three times.


Overseas Curiosity

– Find the Music Box for Aurum. It can be found by completing the Ship Graveyard hidden object scene.

Part 7

Night Abduction

– Saxum needs you to investigate the Fisherman’s Hut location by night.

Lost Collection

– Complete the Overseas Wonders Collection for Cibus.

Lost Island - Eternal Storm - Lost Collection

Lost Island – Eternal Storm – Lost Collection

Price of Freedom

– To prevent a possible war between elves and humans, find the Phoenix Figurine for Arundo. This item can be found by completing the Menagerie hidden object scene.

Besieged Village

– Defeat 10 Predacious Satyrs for Faber.

The Last Griffin
– Eques needs help to battle Redeye Boars. Defeat seven of them.

Griffin Egg

– Find the Griffin Egg for Eques. It can be found by defeating Redeye Boars.

– If you have a Chest of Forgotten Mage, open it now. This can be done by solving the mini-game. For this puzzle, position the stones so that the rays do not intersect.

Lost Island - Eternal Storm - Mini - Game Solution - Mini-Game Solution 25

Lost Island – Eternal Storm – Mini – Game Solution – Mini-Game Solution 25

Well-Lit Town

– Find five Forged Lanterns for Venator. These can be found by completing the Forge hidden object scene.

Defending the Menagerie

– Defeat 10 Predacious Satyrs for Viridis.

Dreaming of Flying

– Complete the Griffin Harness Collection.

Noisy Falagars

– Drive off Falagars for Pelagus. Defeat five of them. They can be found moving along the paths on the map.

Excruciating Pain

– Find the Potion of Pain-Relief for Venator. It can be found by completing the Stronghold hidden object scene.

Guide

– Complete the Black Magic Collection for Viridis.

Lost Island - Eternal Storm - Guide

Lost Island – Eternal Storm – Guide

Anchor

– Find an Anchor for Arundo by completing the Ship Graveyard hidden object scene.

Betty

– Complete the Betty Shipwreck Collection for Pelagus.

Dark Forest Curse

– Investigate the Bog hidden object scene. It can be found south of the Stronghold on the map.
– To unlock this location you will first need the Ghost Catcher. This can be found by completing the Stronghold hidden object scene.

Fancy Horseshoes

– Find the Dragon Figurine by completing the Stone Quarry hidden object scene.

Golden Scimitar

– Investigate the Forge hidden object scene.
– Find the Golden Scimitar by completing the Ship Graveyard hidden object scene.

Kitar’s Gate

– Defeat 10 Undead. They can be found walking along the paths on the map.

Poisoned Spikes

– Find the Antidote for Eques. It can be found by completing the Bog hidden object scene.

Trial of Agility

– Complete the Swamp Spirits Collection to earn Foenum’s trust.

Lost Island - Eternal Storm - Trial of Agility

Lost Island – Eternal Storm – Trial of Agility

Part 8

Trial of Strength
– Defeat three Buzzing Deaths for Foenum.

Under Siege

– Investigate the Forest Cabin hidden object scene.
– Defeat five Ratlings.

Stronghold Defenses

– Investigate the Stronghold location.
– Find five Silver Arrows.
– Find a Heavy Sword.

Weaved Baskets

– Find five Baskets
– Defeat four Predacios Satyrs.

New Tradition

– Find a Feather for Aurum.
– Defeat five Ratlings.

Instant Crops

– Find three Potion of Growth for Cibus. These can be found by completing the Ship Graveyard hidden object scene.

Celestial Landmarks

– Investigate the Ship Graveyard by night.

Accident in the Stone Quarry

– Help Saxum by investigating the Stone Quarry hidden object scene twice.

Forged Chest

– Investigate the Ship Graveyard twice.
– Find the Key.

Last Trial

– Investigate the Bog hidden object scene by night.

Floating Isles

– Investigate the Floating Isles.
– To unlock this scene, you will first need to find the Griffin in the Bog hidden object scene.
– In order to access the scene later on, you will need to have a Rope Ladder.

Lost Island - Eternal Storm - Floating Isles

Lost Island – Eternal Storm – Floating Isles

Absent-Minded Mechanic

– Find the Alarm Clock for Pulvis. Obtain it by completing the Floating Isles hidden object scene.

Broken Altar
– Complete the Keepers’ Altar Collection for Foenum.

Mechanics & Magic

– Investigate the Floating Isles hidden object scene two times.

New Invention

– Find five Heavy Swords and a Dragon’s Claw for Pulvis.

Mechanical Arm

– Find the Mechanical Prosthesis for Pulvis by completing the Floating Isles hidden object scene.

Mechanic’s Story

– Find the Clockwork Robot for Pulvis. It can be found by completing the Floating Isles hidden object scene.

Old Scarecrow

– Complete the Frightening Scarecrow Collection for Cibus.

Living Water

– Complete the Living Water Collection for Foenum.

Harvest Festival

– Complete the Sweets Collection for Cibus.

Part 9

Leader’s Crown

– Find the Leader’s Crown by completing the Old Town hidden object scene.

Lighthouse

– Complete the Kitar’s Plans Collection for Pulvis.

Kitar’s Magic

– Investigate the Mage Tower hidden object scene. This location can be found on the bottom of the left side of the island.
– Unlock the location with the Map of the Old Woods. This can be found by completing the Stronghold hidden object scene.
– Once the scene is unlocked, you will need a Staff of Protection to access the location.

Kitar’s Diary

– Find Kitar’s Diary by completing the Stronghold hidden object scene.

The Undead Attack

– Defeat seven Undeads.
– Defeat five Darkwings.

High Mage’s Staff

– Complete the High Mage’s Staff Collection for Vigor.

The Spiderlikes

– Defeat eight Spiderlikes for Foenum.

Magic Charge

– Investigate the Mage Tower location for Eques.

The Fair

– Go back and investigate the Old Town hidden object scene for CIbus.

Return

– Investigate the Dwarf Caverns to retrieve Kitar’s Diary.

Exchange

– Find five Dried Fish.
– Find five Dried Venison.
– Find Crusty Bread.

Moon Water

– Find one Moon Water. Find it by completing the Bog hidden object scene.
– Find three Flasks. Obtain these by banishing Snakelizards.

Magic Knowledge

– Investigate the Mage Tower hidden object scene by night.

The Herbalist’s Vision

– Investigate the Ship Graveyard hidden object scene for Foenum.

Amber Eye

– Investigate the Ship Graveyard location three times.
– Find the Amber Eye by completing the Ship Graveyard hidden object scene.

Mage Cauldron

– Investigate the Old Town and Stone Quarry locations.
– Find the Cauldron by completing the Forest Cabin hidden object scene.

Limping Dragon

– Defeat five Lame Dragons for Vigor. They can be found roaming the paths on the map.

Appearance of Kitar

– Investigate the Mage Tower hidden object scene twice.

Mercenaries

– Defeat 10 Buzzing Deaths for Virtus.

Dice Game

– Investigate the Dwarf Caverns and Forge locations.
– Find Dice for Pelagus by completing the Fisherman’s Hut hidden object scene.

Part 10

Mage Items

– Complete the Mage Items Collection.

Soul Stone

– Investigate the Stronghold hidden object scene three times and find the Soul Stone.

Lightning Bugs

– Find two Lightning Bugs for Foenum by completing the Floating Isles hidden object scene. Repeat until you have the required number of items.

Kitar’s Will

– Investigate the Sunken City location two times.
– Unlock the Sunken City hidden object scene by first finding a Submarine, which can be obtained by completing the Ship Graveyard hidden object scene.
– To access the location once unlocked, you will need a Potion of Water Breathing.

Neptune’s Trident

– Find Neptune’s Trident for Undine. It can be found by completing the Bog hidden object scene.

Across the Bog

– Investigate the Bog location three times for Pelagus.

Undine’s Gifts

– Complete the Undine’s Gifts Collection.

Engineer’s Request

– Investigate the Floating Isles location twice for Pulvis.

Rite of Passage

– Investigate the Mage Tower location by night.

The Fisherman’s Dream

– Investigate the Sunken City hidden object scene three times.

Underwater at Night

– Investigate the Sunken City by night.

Kitar’s Pentacle

– Find Kitar’s Pentacle by completing the Stone Quarry hidden object scene.

Decoded Plans

– Investigate the Floating Isles location three times.

Legendary Bird

– Find Garleon for Venator.

Fairy Glade

– Investigate the Fairy Glade location two times.
– To unlock this scene, you will need a Lily Nectar. This can be found by completing the Old Town hidden object scene.
– To access the location after unlocking it, you will need a Potion of Shrinking.

Lost Island - Eternal Storm - Fairy Glade

Lost Island – Eternal Storm – Fairy Glade

Fairies in Danger

– Drive away the Meatnaggers for Folium. Defeat eight of them.

Lighthouse Construction

– Investigate the Floating Isles three times.
– Investigate the Sunken City three times.
– Investigate the Old Town three times.

Ruined Houses

– Investigate the Fairy Glade location three times.

Fairy Dust

– Find two Vial of Fairy Dust for Undine. They can be found by completing the Fairy Glade hidden object scene.

Kitar’s Belongings

– Go to the Dwarf Caverns and find Kitar’s Signet.

Kitar’s Amulet

– Find Kitar’s Amulet by completing the Fairy Glade hidden object scene.

Going Back Home

– Defeat 10 Spiderlikes.
– Defeat 10 Undead.
– Defeat 10 Lame Dragons.

Congratulations for completing our Lost Island – Eternal Storm Walkthrough! You have accomplished what you set out to do. If this walkthough helped you, please go to our blog and check out some of our other gaming guides. These include:

Grave Mania: Undead Fever Walkthrough

Forgotten Tales: Day of the Dead Walkthrough

Halloween Stories: Mahjong Walkthrough

The Lost Island – Eternal Storm Walkthrough is meant as a guide and does not contain cheats, hacks or serials.

The post Lost Island – Eternal Storm Walkthrough appeared first on GameHouse.

Dark Dimensions – City of Ash Walkthrough

$
0
0

In Phoenix Hill, a twilight has fallen over it, and the residents are trying to figure out how to cope with all of the ashes, after the residents turn into volcanic ashes. There are a lot of exciting puzzles and hidden object scenes in this fun packed and mysterious game. Our Dark Dimensions – City of Ash walkthrough will guide you through all the tips and tricks you need.

Contents

General Tips & Tricks

While playing the game with the walkthrough, you can adjust many things like music and effects in the options menu. In the hidden object scenes, you may find that you have to move some of the other things in the picture to find the items on the given list. In the game, you can choose between three different modes: Casual, Advanced, and Hard.

Tips and Tricks
Tip #1 – When working through a puzzle, you are given the option to skip it after a certain amount of time. This can be done due to its complexity or merely lack of interest in completing it.

Tip #2 – If in doubt of what to do next in the game, you can always see the given game clues in your journal.

Tip #3 – You can also use the hint button in hidden object scenes. After a while you will be able to use it again if needed.

Tip #4 – Whenever looking at a new puzzle, you can click on the information button at the bottom right of the screen. This button will provide you with the instructions for any given puzzle.

Tip #5 – In order to view your tool box, you need to maneuver your cursor to the bottom of the screen. If you do not like the fact that it constantly disappears, you can choose to lock it by clicking on the padlock on the right side of the tool box. This is actually where the items you pick up go.

Dark Dimensions – City of Ash Walkthrough

Chapter 1: Phoenix Hill

To begin the game, you need to click anywhere on the screen to start talking to the little girl. After clicking on the brush, move the leaves and pick up the brush and the handle. Then, click on the danger sign, on the left. Read the flyer and collect the toggle switch.

Click on the shutters. After this, you need to read the newspaper there and remove the closed sign. Once it’s gone, use the handle to open the shutters. Click on the man to get close-up and personal. Here, use the brush to wipe away the ashes and push the light button. Looking at the booth, use the toggle switch to switch on the booth. Finally, click on the newsstand to access the first hidden object scene.

After completing the scene, get rid of the padlock with the nippers to get the meter. To get the donation, put the money into the donation jar. To get the correct route, use the pencil on the map. Collect the numbered button, and enter into the cable car.

Take the screwdriver from the first aid kit. Use it to open the panel. Then, use the numbered button in order to start a puzzle. Arrange the buttons to match the diagram.

Dark Dimensions - City of Ash - Buttons

Dark Dimensions – City of Ash – Buttons

Take the wooden stick from the window. Use it to pry open the seat, and then, get the green cross from the bag. To get the scissors, put the green cross on the first aid kit. Get the hammer by using the scissors on the net found on the seat. Break the window with the hammer. Then, go through it.

Look at the gate. Read the note and watch the cut scene. After it is over, take it. Move the branch at the fountain to take the valve and the fuse ½. Use the valve on the spigot at the gate to receive the heart pendant. You will get the valve back. Use the heart pendant on the purse’s lock and take the note. Here you will get the combination dial and a long chain. Click on the open stand to see the next hidden object scene.

To get newlyweds, put the bride and groom together. Use the film reel on the projector to see the cinema. Use the wheel on the bicycle frame. To get an apple, break the ice with the ice axe. This will give you a fire extinguisher. Use the fire extinguisher on the gate before going to the tunnel. Look at the doorway. Get the vent handle from the window.

Get the other fuse from the suitcase. Put the two fuses into the fuse box for a puzzle. After the puzzle, move forward. Use the vent handle on the inside of the car interior. Get the suitcase key and coin. Get the drill bit from the car trunk. Click on the booth for the next hidden object scene.

Dark Dimensions - City of Ash - Fuses

Dark Dimensions – City of Ash – Fuses

Make a pizza by putting the pepperoni on the dough. Puncture the tire with the awl. Put the dog’s head on the dog. Get shards of glass by using the hammer. This will give you a pick. Go back. Use the suitcase key on the suitcase. Get the blowtorch. Use the pick three times on the room in the doorway. Head through the now cleared doorway.

Chapter 2: Pool

Pick up ½ volcano tiles from the diving board. Get the pliers from the tool chest. Use the valve on the water pipe’s stem. Get the glass cutter after using the blowtorch on the grate. Put the coin on the door to trigger a puzzle. After solving the puzzle, go through the new door and use the pliers on the nails found on the crate.

Dark Dimensions - City of Ash - Coins

Dark Dimensions – City of Ash – Coins

Take the drill after putting the drill bit on it. Move the ashes three times to find the key. Remove the diving board by using the drill on the screws. Head forward. Put the diving board over the gap. Take the fan from the window. Use the key on the door to unlock it, and then go through the door. Put the combination dial on the lock to get Audrey’s photo and the notebook. To trigger the puzzle, use the fan on the dust. After completing the puzzle, collect the punch card.

Use the punch card on the locker to get the rope ladder. Put Audrey’s photo in the middle of the pictures to get 1/3 mosaic tiles. Put the robe ladder on the hooks at the window to go through it. Get the razor from the door before going to the pool. Use the razor on the cloth. The next hidden object scene can be found under the cloth.

After the puzzle, get a Jolly Roger by putting the skull with the crossbone. Get snake poison from the snake with the cup. To get an ice skate, combine the skate blade and the skate shoe. Connect the sail to the boat to get the sailboat. After doing this, you get an angel. Use the glass cutter on the window to get the 2nd angel. Put the two angels at the base of the statue to get the 2nd volcano tile. Head to the town square.

Collect the note and the 2/3 mosaic tile. Use the 2 volcano tiles on the bench to trigger a puzzle. After completing the puzzle, you will receive the play button and the zipper pull. Head to the pool. Use the zipper pull on the purse to get the hood ornament. Put the play button the tape cassette to get the photos.

Dark Dimensions - City of Ash - Volcano

Dark Dimensions – City of Ash – Volcano

Head to the parking. Put the head ornament on the car to open the hood and get the lever. Head to Town Square. Play the radio at the fountain to get the newspaper. Slide the lever down in the slot. This unlocks the next hidden object scene.

Use the valve on the faucet, and put the fish in the bowl to get the fishbowl. Get the message in a bottle by using the corkscrew. To get the diamonds, strain the sand. Smash the piggybank for the hammer to get the coins. To get Poseidon, move the ivy to receive the trident. Then, put it on the statue. This will give you a tile.

Use the tile on the door for the next puzzle. After completing the puzzle, you can enter into the new doorway.

Dark Dimensions - City of Ash - Tiles

Dark Dimensions – City of Ash – Tiles


Chapter 3: Church

Talk to Audrey. Pick up the dropped key. Look at the pew to discover the next hidden object scene.

Make the Easter bunny, by giving the bunny the egg. Make a stained-glass with the piece and the frame. To get the eye of providence, use the eye in the triangle. To get a caduceus, use the snakes and wings. To get lava, use the matches and the volcano. This will give you a switch. Head to the Embankment to the left. Take the note from inside the phone booth. Take the clip from the phone. Get the tweezers from the flower cart. Head to the left.

Open the hat box with the click to get the symbol and scissors. Get the 3rd mosiac tile from the mail box. Get the letter with the tweezers. Get the 2nd symbol. Use the scissors on the thistles in the flower cart to get the rake. Head to the tunnel. Put the 3 mosaic tiles at the base of the statue to get the coins. Head to the Town Square. Look in the fountain for the next hidden object scene.

Get the keys from the drawer to get the tape. Use the rake on the ladder at the balcony. Head to the Embankment. Put the phone disc in the citer. Use the coins in the slots. Use the telephone number to trigger the puzzle.

Dark Dimensions - City of Ash - Telephone

Dark Dimensions – City of Ash – Telephone

Get the 3rd symbol from completing the puzzle. Head to the Church. Put the 3 symbols on the locked door for the next puzzle. Completing this puzzle lets you enter the Secret Chamber.

Dark Dimensions - City of Ash - Secret Chamber

Dark Dimensions – City of Ash – Secret Chamber

Use the tap and switch on the broken wife to fix the lamp. Get the batteries. Get the needle from the bulletin board. Go to the hidden object scent by clicking on the pews.

Collect the hook. Use the needle on the panel’s latch. Pull the level and get the chain. Head to the Embankment. Put the chain on the motorcycle at the gate. Head to the Landing Stage. Use the hook on the buoy to get the flashlight and the gear. Head to the Secret Chamber. Put the batteries in the flashlight and use it under the bed. Get the shovel and the diagram. Use the gear on the hourglass to get a key. Put the diagram on the post for the next puzzle.

Use the shovel on the sand to get the rudder and the metal scrap. Head to the Church. Use the metal scrap on the gears in the panel. Unlock the chest with the key to get ½ golden locks. Head to the Landing Stage. Use the rudder on the boat and turn the key.

Chapter 4: Island

Get the net. Get the code from the gazebo. Head to the Park. Use the net at the waterfall to get the car handle. Then, use it to get the fish. Look at the name on the trellis. Spell “Audrey” on the briefcase’s lock. Get the Letter “I”. Go to Owen’s house over the bridge. Give the fish to the cat. Get the medal from under the leaves. Put the car handle in the car and turn it. Click on the car to access the next hidden object scene.

Dark Dimensions - City of Ash - Audrey

Dark Dimensions – City of Ash – Audrey

To get a driver’s license, put the photo on the document. To get a keychain, use the ring on the Eiffel tower. Get the Klaxon Horn. Use the Klaxon Horn on the owl, and get the Letter “E”. Head to Owen’s House. Click on the car for the next hidden object scene.

Get the box. Put the box in the tool chest to trigger the next puzzle. Get the nail puller from the puzzle, and head to Owen’s house. Use the nail puller on the drain’s lid to get the Letter “A”. Use the three letters on the door, and then, unlock it with a key. Go into Mansion’s hall.

Dark Dimensions - City of Ash - Drawers

Dark Dimensions – City of Ash – Drawers

Remove the clothing from the antlers to get the broom. Get the sharp glass after knocking over the bottle. Go upstairs, and get the key after the cutscene. Get ½ daggers from the wolf head. Use the sharp glass on the patch to get the heart and pages. Use the broom to get rid of the cobwebs on the display case. Click it again for the next hidden object scene.

Construct a mace. Construct a loaded crossbow. On the feathers, use the scissors to get plumage. Construct a loaded bandolier. Get the saw. Use the saw on the antlers to get a horn. To get the eye, use the heart on the trinket box. Head upstairs. Put the horn on the moose.

Dark Dimensions - City of Ash - Horn

Dark Dimensions – City of Ash – Horn

Put the pages on the crest to unlock a puzzle. Get the snake tile. Use the snake tile on the crypt door to unlock the next puzzle. After the puzzle, enter the Vault.

Dark Dimensions - City of Ash - Symbols

Dark Dimensions – City of Ash – Symbols

Chapter 5: Vault

Put the eye in the skull’s socket to get the oil. Head to the Armory. Use the oil on the armor’s face plate to get the handle. Access the next hidden object scene in the display case.

Collect an axe. Use the axe on the door. Go through it. Put the handle on the drawer. Take the towel and page. Head to the Vault. Use the towel on the coffin’s dust 3 times. Get the ladybug and the plate. Put the plate on the vault for a puzzle. Get the 2nd dagger, and head to the armory.

Dark Dimensions - City of Ash - Puzzle Solution

Dark Dimensions – City of Ash – Puzzle Solution

Use the 2 daggers on the plaque to get the key. Head to Audrey’s room. Use the key on the cage’s lock. Get the red crystal, and head to the Town Square. Use the red crystal on the pawn shop’s door. Go inside and upstairs. Get the ball from the button drawer of the cabinet. Get the code from the left drawer. Use the ball on the glass case to unlock the puzzle. Get the pendant.

Dark Dimensions - City of Ash - Necklaces

Dark Dimensions – City of Ash – Necklaces

Put the code on the instrument case. Put in the code, 2497. Get the string. Use the string on the bracelet. Take it. Put the bracelet and pendant on the display. Head to the secret vault. Click the lamps by the desk for the next hidden object scene.

Construct a pendant. Construct scales. Construct a butterfly. Get the leaf. Get a heart from the bracelest using the magnifier. Construct a pocket watch. Get lighter fluid. Head to Audrey’s room. Use the ladybug on the box to trigger a puzzle. Get the file and the pearl. Use the file on the bag get the brooch and the note. Put the brooch on the dress in the armoire.

Dark Dimensions - City of Ash - Ladybug

Dark Dimensions – City of Ash – Ladybug

Get the incense and the ash from the suitcase. Head to the Pawnshop Office. Move the paper on the desk. Look at the symbols by using the charcoal pencil on the page. Put the paper with a code with the note. Put the note on the dials to unlock a puzzle.

Dark Dimensions - City of Ash - Dials

Dark Dimensions – City of Ash – Dials

Get the alarm clock, key, gold bar, and note. Put the key on the chest. Move it to the right. Get the tile and the lighter. Head to the Secret Vault.

Chapter 6: Windmill

Get the mold. Use the goldbar, mold, lighter fluid, and lighter on the stove. Turn the dial. Get the mold with gold. Put it in the bowl. Get the 2nd golden lock. Head to the Town Gates. Put the 2 golden locks on the gate lock. Head inside. Get the jack from the tractor. Put the tile on the mill door for the next puzzle. Click the mill door for the next hidden object scene.

Dark Dimensions - City of Ash - Picture Solution

Dark Dimensions – City of Ash – Picture Solution

Get a HELP US! With the brush on the sand. Construct a spider. Construct a stain. Construct a stem. Get a cat. Get the tractor key. Turn the tractor on with the tractor key. Use the jack on the bus to get a lock pick and the wheel. Use the lock pick on the panel lock to unlock a puzzle. Get the rope and click on the mill house for the next hidden object scene.

Dark Dimensions - City of Ash - Lock Pick

Dark Dimensions – City of Ash – Lock Pick

Get the dynamite. Use the rope in the well to get the mint. Put the alarm clock and dynamite at the cave entrance. Go in the cave. Put the wheel on the mechanism. Look at the floor tile for a puzzle. Go forward and select the people. Get the lava from the lava rock. Get the book. Get the key from the pedestal. Get the mint from the pedestal. Get the medal from the pedestal. Get the lava from the pedestal. Put the ashes on all four pedestals after the cutscene. Put the following items in center in this order: the Book, the Incense, and the pearl.

Dark Dimensions - City of Ash - FloorTile

Dark Dimensions – City of Ash – FloorTile

Congratulations! You have completed the Dark Dimensions – City of Ash mystery game! One of the most important things to remember is that the game comes in three different modes! Do not forget to experience the game in all of the different modes!

Delicious – Emily’s Hopes and Fears Walkthrough

Big City Adventure – Shanghai Walkthrough

Building the Great Wall of China 2 Walkthrough

The Dark Dimensions – City of Ash Walkthrough is meant as a guide and does not contain cheats, hacks, or serials.

The post Dark Dimensions – City of Ash Walkthrough appeared first on GameHouse.

Nightmare Realm – In the End Walkthrough

$
0
0

Nightmare Realm – In the End Walkthrough will help you navigate this exciting and challenging puzzle game with highlights and hints to unlocking extras.

Contents

General Tips & Tricks

The map icon opens to reveal the game map and your current location, marked with a white figurine, and locations yet to be discovered. Areas visited, but incomplete appear as green exclamation marks.

Inventory is located in the lower panel and it also auto hides. You can freeze it to remain open by selecting the lock. There are unlimited hints, but time’s need to recharge before you can request another.

The most important tip is the randomization of both mini-games and hidden object scenes. If unable to solve puzzles with the solution provided, peruse other walkthroughs until you find an untried solution. Also, words marked in yellow in hidden-object scene require additional steps to acquire the object. You often will need to combine objects to create the requested object marked in yellow.

Event cards provide an overview of the storyline up to where you are in the game. Simply hover over the map and a picture from that area will display. Also, collect origami scattered throughout the game to unlock secret character cards.

Each chapter of the walkthrough provides the location and items you will need to progress. Hidden object scenes, puzzle solutions, and origami locations are included.

Nightmare Realm – In the End Walkthrough

Chapter 1: The Nightmare Realm

Origami Locations

  • Strange Place on the table
  • Prison Entrance
  • Prison Hallway inside the termitarium
  • Strange Place on the painting mini-game

Move leaves aside in the cart, take the stick then retrieve the metal rod from the pond. Open mailbox, use stick on the bird. Use the metal rod on the mailbox door.

Take the umbrella then look at journal on the table. Turn journal pages until you find clip. Use the clip on suitcase zipper. Locate Emily and provide her with the letter for Emily.

Place colored pieces adjoining matching colored pieces into the grid to complete picture. Pieces are in the correct places when you see a flourishing movement.

Nightmare Realm - In the End - Colored Pieces Puzzle

Nightmare Realm – In the End – Colored Pieces Puzzle

Take the hourglass and talk to Emily again. Take the picture of shackled children before entering portal. Remove a game from the box and use the cutting knife on the tape. Continue removing items until picture of David is revealed.

Use the umbrella on the pond to pull the vial closer. Use solvent on the sponge and use sponge on the painting thrice. Read instructions on the portal. Put pictures in these areas:

  • Picture of David in upper left hand
  • Picture of a City in lower left hand
  • Picture of a shadow person in upper right hand
  • Picture of Shackled Children in lower right hand
Nightmare Realm - In the End - Pictures

Nightmare Realm – In the End – Pictures

Take the goblet from the warden’s table and the key from the bench. Proceed through game until you come to a termitarium. Use the key in the lock to remove blade from the glass. Return to warden’s table and place the blade into hilt.

Use the dagger on the roots thrice before removing upper piece. Place the bat ornament into the box lid.

Drag a circle piece over another to swap positions and hover over a circle and select the arrows to rotate it into position.

Nightmare Realm - In the End - Puzzle Pieces Solution

Nightmare Realm – In the End – Puzzle Pieces Solution

Chapter 2: The Dryad’s World

Origami Locations

  • Magic Opening
  • Magic Tree
  • Dryad

Wake caterpillar and use the dagger thrice on the bamboo and take three firewood. Place firewood in campsite’s pit and use your flint on the firewood. Look at the cave for a hidden object scene.

As a general guide, items that must be combined are listed only.

Combine chameleon and red mushroom: Red Chameleon
Use bone on crocodile and ax to open log.
Use furs to take hedgehog.

On the island, move doll to the stone picture. Place four beads on the green cord. Place cloth, green algae, and leaf on the doll. Place waterlily on the leaf. Use charcoal on dolls face. Move dead flower, take straw and place on doll. Place beads on doll.

Nightmare Realm - In the End - Doll

Nightmare Realm – In the End – Doll

The wraps can be removed from dryad’s mouth with the dagger. Locate campfire and remove embers with the scoop to retrieve scoop with embers. Use on the egg located in the nest. Receive a flower token after speaking with the dragon. Place it on the magic stone.

Move clouds to the top and flowers to the bottom. Select tokens to move to adjacently and if there are two positions available, the areas will light up until one is selected.

Nightmare Realm - In the End - Clouds and Flowers

Nightmare Realm – In the End – Clouds and Flowers

Talk to the dragon and take the leaf. Use the leaf on embers in the campfire. Place spell on tree. Place stick to campfire’s right and wraps on the stick, placing in fire to make a lit torch to use on the caterpillar. Place spell on tree again and take magical fruit to give the dryad. Return to the dragon once more and take dragon after speaking. Remove the empty vial from the nest and give the dragon to the boy. The boy tells you about a flute.

Chapter 3: Saving Emily

Origami Locations

  • Davids Cell
  • The Bridge
  • Floating Island

Place goblet in fountain. Place it under the bench in front of the pipe. Use dagger on goblet. Find the serpent and use ice on it. Use the empty vial to collect David’s tears.

Locate Emily; touch her head.

Place the vial of tears into her eyes. Take the bowl and cloth from the bed of David’s cell. Move sheet and use the dagger on the seam to remove parts of a dark robe. Use dagger on the tree hole to remove bark. Place cloth on pitch to gain cloth with sticky pitch.

Nightmare Realm - In the End - Stool

Nightmare Realm – In the End – Stool

To the right is a stool that needs the leg put on before you use the cloth with sticky pitch on it. Take the stool. Use the bowl on the water. Retrieve another parts of dark robe. Place stool on the floor near aquarium then use the bowl with water on the plant. Look to painting for another parts of dark robe. Enter dryad’s world and talk to boy who will give you a flute. Use the flute on plants. Now use bowl on dripping acid.

Nightmare Realm - In the End - Boat

Nightmare Realm – In the End – Boat

  • Move two monsters to the boat
  • Pull Lever
  • Move one monster from boat to shore on left
  • Pull Lever
  • Move monster from left to the boat
  • Pull Lever
  • Move a monster to the right shore
  • Pull lever
  • Move Monster from boat to left shore
  • Move two children to the boat
  • Pull the lever
  • Move two children to the right shore,
  • Move monster to the boat
  • Pull lever
  • Move monster to left shore
  • Move child to boat
  • Pull lever
  • Move child to right shore
  • Move monster to boat
  • Pull lever
  • Move another monster to the boat
  • Pull lever
  • Move one monster to shore
  • Pull lever
  • Move monster from left shore to boat
  • Pull lever
  • Move two monsters from boat to right shore
  • Walk forward

Chapter 4: The Sanctum of Knowledge

Origami Locations

  • Castle Wall
  • Tower Stairs
  • Sanctum of Knowledge

Take log then look to ledge and pull the rope up, tie it in a loop and use it on the log at the far ledge then pull rope back in. Place both logs on arbalest, pull it back then place grappling hook and rope on it. Select the spool to fire the arbalest so the old man will give you the sun amulet. Note the positions of the figures on the shield when you take the pike and crank handle. Use the pike five times on clogged vent holes.

Take tongs from the desk to use on vent and receive part of the ancient seal. Place crank handle on flagpole hole, turning it; take the flag.

Use the pike to pry locker open. Place flag over book and belt on flag. Place both dragon head tokens into niches on the desk. Open container to place demon book inside. Take the sealed book, place ancient seal on the cover. Take metal flames from vault to place on sealed book.

Place sun amulet into top
Place metal flames on sides
Use metal flames to fill in holes
Move figures to same positions noted earlier on shield

Nightmare Realm - In the End - Shield Figures

Nightmare Realm – In the End – Shield Figures

Take the wooden ship in a bottle then go to the old man to receive an old knight figurine. Open door to prisoner’s cell. Use large branch on the rock where rat hole is. Place the wooden ship in a bottle on termitarium. Place bottle of termites on the large branch root and talk to Jeff for magic powder.

Use magic powder on beast in aquarium, taking enchanted beast. Place enchanted beast into mouse hole.

Move beast to dark robe piece then select a space to move the beast along to earn parts of dark robe. If danger lurks, beast returns to beginning.

Nightmare Realm - In the End - The Maze

Nightmare Realm – In the End – The Maze

Remove parts of dark robe from desk and enter loom. Pull lever to your left and look out window. Place all parts of dark robe on loom.

Left click pieces of dark robe to place or take and right click to rotate in place. Place all pieces of dark robe into frame. Select shuttle to weave pieces together.

Nightmare Realm - In the End - Dark Robe

Nightmare Realm – In the End – Dark Robe

After entering the gate, peer into hole near elevator. Take sack labeled family bonds located in crate. Open statues head by swinging the wrecking ball several times. Place both sack labeled determination and sack labeled family bonds on right scale then move sack labeled negligence to left scale. Look at statue base and take rock to use on sword. Use part of sword to unseal crates top. Capture two glow worms from the grass by placing glass pyramid at base of the left statue to receive glass pyramid with glow worms. The glass pyramid breaks if you hit rocks capturing glow worms. Look into hole to place glass pyramid with glow worms.

Move stack of five to right by placing smaller weights atop larger ones. Once solved, go to elevator car.

Nightmare Realm - In the End - Glass Pyramid

Nightmare Realm – In the End – Glass Pyramid

Chapter 5: The City

Origami Locations

  • City Entrance
  • City Square
  • City Catwalk
  • Junkyard
  • Chessboard in Junkyard

Find crowbar near broken bridge. Take marbles from chessboard. Locate city square gate to find triangle key. Use crowbar on the scaffold. Return to broken bridge, placing planks over the hole. Use dagger to take strange gear.

Locate bike in junkyard and take triangle key, use dagger on bike tire for rubber tire. Place strange gear into strange contraptions semi-circle before placing rubber tire on U shape. Place marble in hand to load slingshot. Bring house into focus until balloon appears in the center.

Press the red button to fire and load another marble. Aim and fire until both balloons release the house. Enter house, look at chessboard and talk to Kjuu to learn about mechanical dog.

Nightmare Realm - In the End - House

Nightmare Realm – In the End – House

Use knife to cut open chair for springs. Pull chair lever to find camera. Use knife to open radio Pull chain down to find battery. Look to table and use the blueprints to build mechanical dog. Place springs into the nuts. Place toaster, then camera on springs. Place cassette, then propeller into toaster slot. Put vacuum tubes, then binoculars on camera. Place bandana on neck and plug at the tail end. Place battery in the dog’s mouth and take mechanical dog to give to Kjuu.

From house hall take stone buckle from cupboard and tablet of symbols from door. Place tablet with symbols in statues right slot and stone buckle in center. Return to cupboard and remove contents once ice melts. Tilt cupboard right and quickly take extractor’s book and place on statues lap.

Take two color coded symbol fragments from the book and place them into the fire to make symbols that match a letter. Some of the symbol fragments are used more than once to create a matching letter. The goal is to spell Klaatu. Proceed to the study.

Nightmare Realm - In the End - Klaatu

Nightmare Realm – In the End – Klaatu

Remove lever from bookcase and replace with the crowbar, then turn it after you take the triangle key. On the table is a case lid that will house all four triangle keys. Take the key and use it on the tube.

Go to the spell statue and again place two color coded symbol fragments from the book into the fire to make the symbols matching a letter and spell out verato.

Walk up the spiral staircase. Use dagger to remove wallpaper. Remove the candle from hole, walk down and use candle on flames before walking upstairs again.

Place the hooded figure silhouette and door silhouette on the lanterns mechanism before placing the burning candle inside. Figurines can be moved to form shadows on the wall. Triangular buttons move figurines near or far and circle buttons swap positions of the figurines once two figurines are near it.

From left to right: Small hooded figurine, large door, small door and large hooded figurine. Change direction by clicking figurine or door.

Place door knob on door and enter secret room. On the shelf, remove four origami’s before using the strange key. Take the button and place it in the empty triangle of the punch card machine with blank cards being placed in front of machine, and one in the slot. Press buttons in the following order with the red button pressed after each creature button: Wolf, Snake, Eagle, and Scorpion. Go to city square and use the punch card on the slot at the gate.

Chapter 6: The Tower

Origami Locations

  • Tower Entrance
  • Archives
  • Painting in Archives
  • Archivist in Archives
  • Post Office
  • Post Office Attic

Take spider ornament from left statue, proceeding to archives. Place spider ornament in niche of archivist.

Use blue buttons to change features on the diagram to match photo from the file. Use the weird key in case’s lock.

Nightmare Realm - In the End - Diagram

Nightmare Realm – In the End – Diagram

Place repair kit in holder located beneath painting. Open repair kit and place postman doll on it.

Colors will need mixing and must be applied in correct order. Empty the sprayer by clicking disposal if you select wrong color. Follow sequence below:

  • Blue and white paint/blue tab
  • Blue and orange paint/brown tab
  • Yellow paint/yellow tab
  • Yellow and blue paint/green tab
  • Orange paint/orange tab
  • Orange and white paint/flesh tab
  • White paint/white tab
Nightmare Realm - In the End - Postman Doll

Nightmare Realm – In the End – Postman Doll

Enter painting.

Use insecticide on spider in the wall case before cutting web with scissors. Take glasses and give them to the postman.

Location/Item List

  • Top Left Drawer/Balloon
  • Bottom Right Drawer/Rat
  • Pour Alcohol on Burner
  • Use Matches to Light Burner
  • Place Pot on Burner
  • Place Wax Sticks into Pot
  • Use Pot Holder and Take Pot
  • Use Bucket of Water on Flames
  • Use Hammer on Hole
  • Pour Wax on Package
  • Use Seal on Wax
  • Use Quill on Package
  • Lower Left Drawer/Stamps
  • Place Stamps on Package
  • Use Knife on Last Stamp
  • Place Last Stamp on Package
  • Take Key/Unlock Upper Right Drawer
  • Open Drawer and Take Bravery Elixir

Pour Bravery Elixir into cat food and take the lever to give to the Postman. Climb ladder, take belt; go down hole. Use belt on gears in case; flip switch before climbing ladder. Look at mosaic. Object: Restore dove mosaic by swapping two panels.

Nightmare Realm - In the End - Dove Mosaic

Nightmare Realm – In the End – Dove Mosaic

Use scissors and cut string on the box. Place wax seal ornament on bird statue, taking the turtledove. Take spatula from other statue to give mailbag to mailman. Pull lever; use spatula on roof gunk and pull lever. Place roof tile on roof . Place glass eye in eye socket of bird statue. Place both turtledoves in doors lock. Look at clock through the doors.

Discs should line up to depict a trees life cycle. Take paper and place in outline. Place star on empty square and key on the cage. Set time on clock to 8:30. Proceed to junkyard.

Nightmare Realm - In the End - Clock Mini Game

Nightmare Realm – In the End – Clock Mini Game

Go to chessboard, placing all figurines on it. Click the house.

Find saddle by flipping the chair lever twice. Locate anchor by placing the valve on the tank. You have curator’s mask now.

Chapter 7: The Curator

Origami Locations

  • Corridor
  • Balcony
  • Execution Place

Place ancient tablet into opening.

Arrange color coded symbols so outer section matches middle section then select two pieces to swap positions. A drawing appears in the white area when a section is correct.

Nightmare Realm - In the End - Symbols Solution

Nightmare Realm – In the End – Symbols Solution

Take book from the bureau and open it. Remove inhaler from the drawer. Pull back bed curtain and talk to Phillip. Remove vinyl record case and mechanical arm from bed. Go to the door and use mechanical arm on handle to go through it. Take another mechanical arm, the puppet controller, and hooked wire; placing the puppet controller and both mechanical arms on the puppet.

Nightmare Realm - In the End - Puppet

Nightmare Realm – In the End – Puppet

Walk down until you arrive at the statues. Place arrow key into indentation of left statue. Use the wire hook on the bureau to get a puppet controller from the jar. Go to balcony and place puppet controller on the puppet; remove broken piece from hood, replacing it with light bulb, and curator’s mask over light bulb before taking starting handle. Place phonograph horn on pipe, and vinyl record case in the holder. Locate record title begone and place on turn table. Move needle to play record. Place starting handle on right.

Take the crown and gate key from the the mysterious compartment. Use the crown on Phillip. Go to the gate and use gate key in lock. From the execution place, go to David and place origami tulip on him.

Congratulations on your stellar achievements. Are you ready for another adventure? Check out our Walkthrough for Mystery of the Ancients – Curse of the Black Water Platinum Edition.


The Nightmare Realm – In the End Walkthrough is meant as a guide and does not contain cheats, hacks or serials.

The post Nightmare Realm – In the End Walkthrough appeared first on GameHouse.

Imperial Island – The Search for New Land Walkthrough

$
0
0

Sail the high seas with Emperor Omadon In Imperial Island – The Search for new Land to rescue Prince Caleb, who was shipwrecked in dangerous waters. Match 3 action propels you through violent storms while you seek safe passage around dangers such as pirates and a giant octopus. Beware of the jellyfish, for they will overrun the board if you do not catch them soon enough.


Contents

Imperial Island – The Search for New Land gameplay Walkthrough

Imperial Island – The Search for New Land is a straightforward Match 3 style game. Swap tiles to match three of the same kind in a row vertically or horizontally. While game play is simple, this instalment is extremely challenging when played in the timed mode. This guide does not include cheats, but offers tips and tricks designed to help you get the most out of playing this addictive.

Getting Started

You can play Imperial Island – The Search for New Land in Relaxed or Timed mode. If you are new to Match 3 games, start with Relaxed mode. While game play is identical in these two modes, this game offers a relatively short amount of time to complete puzzles.

While playing, your statistics are displayed across the top of the screen. The first red space indicates how many levels you have completed. Next is your accumulative score from all levels. The third space shows how many crowns you have earned, and the fourth space shows how many time records you have broken. The last space indicates the total number of stars you have achieved.

Below this last space is a small question mark. This is the Help button, and will take you to a basic tutorial for game play. In the upper left, below the Menu button, is a spyglass. Clicking on the spyglass will pause your game. In the lower left is your progress meter for the level. If playing in timed mode, a time indicator will appear on the lower right.

During a level, your objectives are shown at the bottom of the screen, and count down as you achieve them. If you hover over a task, the board will reveal only those tiles you need to finish the level, which can help you focus on what you need to do.

As you progress through the levels, you will earn access to more charged bonuses. These bonuses will appear on the bottom right of your screen.


How to Play

Game play in Imperial Island – The Search for New Land is standard Match 3 action. Swap tiles to create either a row or column of three or more identical tiles. Larger matches reward you with bonus tiles.

Completing a Level

Each level has a specific objective you must reach to clear that level. The objectives are displayed in a bar across the screen at the start of every level.

Imperial Island - The Search for New Land - Level

Imperial Island – The Search for New Land – Level

All levels require that you remove all the yellow and red tiles. To clear a colored tile, simply make a match over that tile. You only need one match to clear a yellow tile. Red tiles require two matches, as the first match will change the tile from red to yellow, and the second match will remove the yellow tile.

Most regular levels also require that you make a certain number of matches of a particular tile type. During play, your objectives are shown in the middle of the bottom of the screen. The numbers indicate how far you have to go to complete the level.

Imperial Island - The Search for New Land - Matches

Imperial Island – The Search for New Land – Matches

During a level, if you have trouble finding your objective tiles hovering over the objectives at the bottom of the screen will reveal where they are on the board. This is especially helpful when you are playing on a large board and the tiles are small.

Imperial Island - The Search for New Land - Help

Imperial Island – The Search for New Land – Help

Special Objectives

Occasionally you will encounter special objectives. You usually find these special objectives during dangerous storms, avoiding obstacles such as a giant octopus, or while fighting off pirates.

  • Pearls: On some levels, particularly during storms, you will see clam shell tiles. A few of the clam shells will hold pearls. When your objective is gathering pearls, empty clam shells do not count towards your objective.
Imperial Island - The Search for New Land - Pearls

Imperial Island – The Search for New Land – Pearls

  • Drop Item to Bottom of Board: In some levels, you must remove certain items from the board. You do this by matching tiles below the item, allowing it to fall to the bottom of the board.
Imperial Island - The Search for New Land - Board

Imperial Island – The Search for New Land – Board

Obstacles

While playing Imperial Island – The Search for New Land, you will encounter certain obstacles. You must clear the obstacles to accomplish your objectives for that level.

  • Jellyfish: Jellyfish occasionally swarm your ship. To remove jellyfish, simply make matches next to them. Certain bonuses can also remove jellyfish.
  • Ice, Sand, and Stone: Ice, sand, and stone can cover tiles. You must remove these obstacles by using bonuses or make matches near these tiles. Some obstacles will need more than one hit to completely clear them.
  • Chains: Chains will lock a particular tile in place. To free the tile, include it in a match or use a bonus to destroy the chain.
  • Keyhole: A keyhole blocks certain portions of the board. Unlocking the keyhole will reveal hidden portions of the board. To unlock, simply make a match adjacent to the keyhole or use a bonus to blow it up.

Bonuses

There are two basic types of bonus. One type is earned by making matches of four or more, creating a special tile on the board. The other type requires a charge, and when released will perform a certain action on the board.

You can create six different types of bonus tile: bombs, cannons, poison, cross-fire, arrows, and rockets. Each type of bonus tile has three levels of strength bas. You can find more information about these bonuses by accessing the Help menu in the game.

Imperial Island - The Search for New Land - Bonuses

Imperial Island – The Search for New Land – Bonuses

You also have four types of bonus that requires a charge: hammer, shuffle, magic ball, and collector. Charge these bonuses by matching tiles that have sparks.

Imperial Island - The Search for New Land - Charge Bonuses

Imperial Island – The Search for New Land – Charge Bonuses

Charge bonuses will become more powerful as you advance through the game. For instance, your basic hammer only creates a single hit. If you use a basic hammer on a red tile, it will simply change the tile to yellow. An advanced hammer equals two hits, so hitting a red tile with an advanced hammer will completely remove the color.
Combo Mode

If you make 16 quick matches in a row you will enter Combo Mode. When in Combo Mode, all matches yields dramatically higher points. A countdown timer from 10 flashes in the middle of the screen to tell you how much longer you have of this rapid score bonus.

Trophies

During game play, you can earn 21 different trophies. Trophies have a bronze, silver and gold level. Some of the trophies signify great achievements, such as earning crowns. Other trophies are more of a Hall of Shame trophy, such as the “Unobtainable Goal” for completing a number of levels in a row without earning a trophy.

Tips and Tricks

  • Gather charges. Charged tiles are sparkly. Making matches with the charged tiles fills up your charge bonuses.
  • If you need to remove a significant numbers of a tile to meet your objective, you may want to use the collector bonus. When you activate this bonus, every tile of the type you click on is instantly removed from the board.
  • Unlock hidden parts of the board first. Sometimes certain areas of a board are extremely difficult to make matches in until the entire board is unlocked. Unlocking these areas first can greatly decrease the overall time it takes to clear the level.
  • Making matches towards the bottom of the board increases your chance of making combo matches.
  • Look for the biggest match. The bonus tiles you earn for large matches helps clear the board faster and earns more points.
  • Remove the jellyfish as soon as possible. Jellyfish multiply every time you make a match that does not include a jellyfish. If you neglect the jellyfish, they will quickly multiply and take over your board.

Congratulations! You’ve completed our Imperial Island – The Search for New Land Walkthrough! For more great tips and tricks, visit our blog!

Lost in Reefs – Antarctic Walkthrough

Jewel Match Twilight Walkthrough

Delicious – Emily’s Hopes and Fears Walkthrough

The Imperial Island – The Search for New Land Walkthrough is meant as a guide and does not contain cheats, hacks, or serials.


The post Imperial Island – The Search for New Land Walkthrough appeared first on GameHouse.

Ghost Cleaner Walkthrough

$
0
0

It’s time to put your brain to the test and take on the haunted world of Ghost Cleaner! Utilize physics and arcade puzzle strategy to figure out how to release ghosts trapped in purple capsules. With 100 unique levels, a few tips and tricks could help guide you on your way. Our Ghost Cleaner walkthrough will guide you through all the tips and tricks you need to put the ghouls to rest.

Contents

Ghost Cleaner Walkthrough

Welcome to the Ghost Cleaner walkthrough! Whether you’re playing the game for the first time, or simply looking for a few tips and tricks to help you on your way, this guide covers all the essentials a ghost hunter needs.


How to Play

Getting Started

  • Your Mission is simple – destroy all the purple bricks! Each purple brick (or orb on some levels) contains a ghost inside. Unleash them all to complete the level.
  • There are three colors of brick you will encounter:
    • Purple – These contain ghosts. You will need to clear all of these to complete a level.
    • Blue – These are standard bricks. They will improve your score, but aren’t required to complete a level.
    • Grey – These bricks are indestructible.
  • You have a limited number of shots for each level. A number indicator on the left of your screen will indicate how many shots you have left.
  • Aim and click your mouse button to shoot. A white line or arc extending from the ghost cleaner will help you map out your shot’s trajectory. The further the target is from the gun, the stronger the shot is. This means you need to adjust the distance and direction of your shot in order to able to lob the ammo ball far enough to reach the bricks better.
Ghost Cleaner Trajectory

Ghost Cleaner Trajectory

  • On the left you will see a ghost icon with a number above its head. This indicates how many purple bricks/tiles/orbs you have left to hit to complete the level.
  • By freeing ghosts in each level, you’ll be able to save up credits to purchase special types of ammo. The ammo store is located in the upper right corner of the Level Select screen. You can select your ammo types by clicking on the icons on the bottom left or by using the arrow keys.


Score

Your score per level is divided into stars. The minimum score with which you can pass a level is 1 star. The maximum score with which you can pass a level is 3 stars. In order to obtain these scores:

  • 1 Star – Complete the level by clearing all of the purple bricks with the number of shots given.
  • 2 Stars – Complete the level by clearing all of the purple bricks without using any special bought ammo.
  • 3 Stars – Complete the level by clearing all of the purple and blue bricks with the number of shots given.

Levels with a 3-star rating will appear yellow in the Level Select screen.

Ghost Cleaner Level Select

Ghost Cleaner Level Select

How to Play

Mopping up ghosts is all good and well, especially when you can purchase new types of ammo with ghosts captured! There are six advanced types of ammunition which you can purchase when you’ve captured enough ghosts.

Ghost Cleaner Ammo Types

Ghost Cleaner Ammo Types

  • X-Ray AmmoCost: 50 Ghosts – All blue blocks and orbs will turn invisible! This ammo is ideal for shooting right through all obstructions and straight into purple ghost orbs. This ammo type is only affected by grey blocks, which cannot be shot through.
  • Rocket AmmoCost: 35 Ghosts – Shoot off this ammo to have it rocket-propelled along a straight trajectory, and it won’t stop there! Rocket-propelled ammo will continue on its path until the burners run out, at which point it will drop and act as normal ammo would. Perfect for reaching that far hard-to-reach ghost block!
  • Double Size AmmoCost: 35 Ghosts – This particular ammo type has a glowing aura which doubles its effective range! It’s like having ammo twice the size. More orbs and blocks will be affected within range of this ammo. Ideal for cleaning out tight spaces!
  • Multiplier AmmoCost: 25 Ghosts – Three orbs are better than one! The moment this ammunition hits, it will multiply! Each ammo orb is affected by normal physics. The ultimate three-in-one shot, this one’s ideal for clearing out large areas.
  • Bomb AmmoCost: 35 Ghosts – Go in with a bang! Bomb ammo explodes on impact, leaving behind a large cloud. All orbs and blocks within this cloud will be cleared, and the ammo will finish out its life as a normal orb after the explosion. Tip: Try using this ammo type when faced with a ghost orb that’s on the other side of a difficult-to-reach spot! Area of effect is key!
  • Unstoppable AmmoCost: 100 Ghosts – This powerful ammo orb can shoot through nearly anything. Shoot straight through blue and purple blocks and orbs as you like – as many as you like! Line up your shot – the more the merrier. The only thing that can stop this ammunition are grey orbs or blocks, which it will harmlessly bounce off.


Tips & Tricks


  • A freezer, or multiple freezers may appear at the bottom of the screen in some levels. If your shot lands in the freezer, you will get it back for free! Freezers will close up for a short while after a shot has landed inside, so plan your shots carefully to utilize this free ammo pass!
Ghost Cleaner Freezer

Ghost Cleaner Freezer

  • While the ultimate goal of each level is to destroy all the purple bricks or tiles, you don’t necessarily have to hit them to destroy them! The best alternate way to approach it is not to simply hit all the purple bricks, but to get them to the bottom of the screen. If a purple tile falls past the bottom of the screen, it will automatically be count as “hit”. Use this alternate strategy to finish some levels in a more timely or efficient manner!
  • Speaking of alternate strategies, some levels will contain “strings” of orbs which are anchored to a given point. Rather than try and aim through all the orbs to try and hit the purple ones, try eliminating the string as a whole by aiming for the orbs which anchor the strings! An example of one of these is shown in the screenshot below.
Ghost Cleaner Anchor Points

Ghost Cleaner Anchor Points

  • Ghost Cleaner is ultimately a physics game, so use physics to your advantage! On levels which have loose rods or clusters of bricks, try using the force of your shots to knock them off their platforms and into the pit below. Remember: if it reaches the bottom of the screen, it counts as a hit!
Ghost Cleaner Physics Shot

Ghost Cleaner Physics Shot

  • When lining up shots, take your time and try to determine the flow or shape of the level. For example, here’s a tip: try following the curve of arcs or circles when lining up your shots, so you can hit as many bricks as possible. Done correctly, you may even be able to complete a level with a single shot!
Ghost Cleaner- One Shot Level

Ghost Cleaner- One Shot Level

  • If you’re feeling stuck, don’t forget to try purchasing ammo from the Level Select screen! The Ammunition section above outlines all the ammo types, as well as which types are best used in which situations. Remember though that special ammo is disposable. If you fail a level and have to replay, you will not get your ammo back, so use it wisely!


Congratulations, you’ve completed our Ghost Cleaner Walkthrough! Be sure to check out more great walkthroughs on our blog!


Our Ghost Cleaner Walkthrough is meant as a guide and does not contain cheats, hacks, or serials.

The post Ghost Cleaner Walkthrough appeared first on GameHouse.


Phantasmat – Crucible Peak Walkthrough

$
0
0

Imagine you’re living it up, skiing, having an amazing time when all of a sudden you’re caught in a freak avalanche. You dig your way out of what could have been your icy grave only to find yourself at the entrance to a mountain resort with creepy inhabitants who just really, really don’t want you to leave… ever. In Phantasmat – Crucible Peak it’s your job to find out what exactly is going on, uncover the resort’s dark secrets, and escape if you can!

In this guide, we provide tips and tricks that are perfect for those moments when you find yourself frustratingly stuck, or if you want to be taken by the hand through the game step-by-step!

Contents

General Tips & Tricks

All right, let’s get started. Shall we?

Difficulty: When you begin the game, you’ll discover that there are at least three (3) difficulty settings. As with many other games, you’ll see that there’s casual (easy), advanced (medium difficulty), and hard. During gameplay, you can easily change these settings from the options menu.

Objectives and Tasks: In the lower left-hand corner of your screen you can click on “tasks.” This will reveal a list of goals that you must achieve in order to move forward in the game. You can also see which objective is current “right now.”

Navigation Arrows: As you unlock new areas and find yourself able to move forward to new and exciting areas, navigation arrows will appear. You should click on them to move to the next screen.

Your Trusty Magnifying Glass: If and when your cursor changes into a magnifying glass icon, it means there is something at which you should take a closer look. Here’s a hint … zoom in on the area when you see this icon!

Your Inventory: This can be found at the bottom of the screen. You can also reach it through a quick keyboard shortcut. Just tap (B). You may not see your inventory initially, so you can hover your mouse over the bottom of the screen to bring it up. If that annoys you, locking it in place is always an option. You can easily do this by clicking on the padlock, which you will see to the left of the inventory bar. You can also make the things in your inventory easier to see by clicking on the magnifying glass, which is also to the right of the inventory bar.

Hand Cursor: You can pick up items in this game when your cursor turns into a hand. Once you pick something up, you can add it to your inventory or interact with that item in one way or another.

Skip Button: If you find yourself having too much trouble during a mini-game, and you feel like moving forward without working through it, you can simply click the skip button. Hint: To make the game more fun to replay, these mini-games are puzzles are often randomized.

Get Hints: These are found in the right hand corner of your screen near the bottom. If you find yourself stuck, you can click here to get a hint. However, once you use one the game forces you to wait a while before you are able to use another.

Scenes with Hidden Objects: When you encounter these scenes, any areas with a hidden object will sparkle. Blue objects are right there in plain sight. White objects are actually hidden, and you must do something “more” in order for you to find them.

These general tips should get you started. Read on for a walkthrough of each level’s gameplay!

Phantasmat – Crucible Peak Walkthrough

Chapter 1: The Resort

Welcome to the resort! First thing’s first. You need to get the flare pistol. There’s a rodent in this area, and you need to scare it off. Do that by clicking on it. Then go get the ski part. You should see a bunch of equipment here. You need to zoom in and check everything out. You’ll need the rope with the safety fastener, so grab that and add it to your inventory. Then go look over the edge of the cliff.

Phantasmat - Crucible Peak - Chapter 1

Phantasmat – Crucible Peak – Chapter 1

Ok, now that you are looking over the edge of the cliff, you’ll notice you can’t see anything. Time to get rid of the darkness! Here’s where you use the flare pistol. Now that you can see, use your rope with the safety fastener and climb down the cliff.

You hit the ground at the bottom of the cliff. Now what? You’ll see a bottle with water lying in the snow. Go grab it and add it to your inventory. Grab the ski pole. Add it to your inventory too. Next, take a good look at the sign standing next to the ramshackle cabin. Don’t forget to grab the ski glove, and then head back up the cliff by climbing the rope.

Right, now you find yourself back at the top. You’ll see a backpack hanging on a tree. Use your ski pole to snag it. Go back down the rope, and then select the backpack to access a hidden object scene!

Inside the hidden object scene, you need to locate all items on the list you’ll see at the bottom of the screen. (Interestingly, you can switch from the hidden object scene here to the Match 3 Mode. You can see this option at the top of your screen.) Anyway! On with the hidden object scene. Open the backpack’s pouch to discover a whistle. Take it and then open the thermos. Pour the coffee. Don’t forget to open the flap of the backpack to find the sock and flashlight. Take them and add them to your inventory. Once you have these you will earn a cup! Take it, and then exit this area by climbing up the rope, and then walk down.

Next you’ll see a bunch of equipment. Take a look at it, and then put the cup you just earned onto the burner. Pour the water from the bottle with water into the cup. Light the stove by pressing the ignite button. Let the water boil. Once it’s boiling, take the cup. You won’t be able to do this unless you take the ski glove from your inventory and use it. Now go look back down the cliff, and climb down the rope.

All right. You are back at the cabin. Check out the door and try to open it. You can’t! It’s frozen shut. You need to use the boiling water in your cup! Use it on the doorknob. Now you can turn the doorknob and head into the cabin.

Once inside the cabin, you’ll notice that there is a mini-game on the table. You can play it if you want! But, what’s important here is the trapdoor. You need to get it open somehow. Use your ski pole to snag it and open it up. Once it’s open, you’ll see a butane torch. Grab it and add it to your inventory.

Next, look around. What do you see? What can you use the butane torch on? Well, there’s an ice flow. Use the torch on the ice. Just hold down the left mouse button to use it. Trace the outer edge of the boot you’ll see. Grab the crampons (the spiky things attached to the bottom of the boot.) Now walk down.

Back outside, you’ll see another rodent. This time you don’t want to scare it off. You want to try and capture it. You’ll see a path off to the right. You’ll need to use your crampons to walk it.

You’ll come to an area where you’ll see a dead dude (frozen stiff, ha!) You’ll also see the rodent again. Try one more time to capture it. Then take the maze map you’ll find on the corpse. Walk back down and go back into the cabin. The maze map is part of the mini-game you saw before on the table.

You’ll need to place the maze map into the frame you see on the table to trigger the mini-game. In this game, there are four (4) symbols, which you will need to drag so that the lens is over a matching symbol. All four symbols are color coded. You’ll notice a background in each symbol. Pay attention to the background in order to determine the correct location. Once you get everything correct, the thermometer will fill up. Poof! Like magic, directions will appear on the map. Note them, and then exit the map. Walk down, and then walk to the right.

Phantasmat - Crucible Peak - Map

Phantasmat – Crucible Peak – Map

Here you will see a map in the lower left corner of the screen. You need to select it. Now walk right, up, left, right, up right, and up one last time.

Once you get to the next screen, you’ll notice a break in the power lines. Zoom in, and notice that there are downed power lines here. Again, there’s another rodent to try to catch. You’ll also see a lock pick. Go grab it and add it to your inventory. In this screen you should also note the fishing shack, the house, and the resort. Now walk forward.

Here, you see two barriers blocking the road. Click on them to move them aside. You’ll also see a yellow traffic cone. Knock it over, and zoom in. You’ll discover a trowel. Grab it and add it to your inventory. Look at the map, and then walk down and go right to the resort.

At the front of the resort, you see a fence. There’s a brick in it that you need to take out. Use the trowel to do so. Once you have the brick, use the brick to break one of the windows of the resort. You’ll then notice broken glass. Grab a glass shard, and add it to your inventory.

You’ll also notice a butterfly net. Take it and add it to your inventory. You can’t get into the resort through the window, so you’ll want to look at the door. It’s locked and you don’t have a key. You also can’t use the lock pick yet. Instead, pull the doorknob and then use the glass shard to completely remove it. There will be a triangular hole where the doorknob used to be. Now you can use the lock pick! Open the door and go inside.

Once inside, take a look around. You’ll see a map on the table. You should also select the door next to the staircase to discover a hidden object scene!

Inside the hidden objects scene, again you’ll need to locate all the items on the list at the bottom of the screen. In particular, you need the garlic and the corkscrew. Turn on the light switch to find them. You will need to move the coat, which is hanging on the coat rack. Behind it, you’ll discover a tail. Grab the tail and add it to your inventory. There’s a green case along the wall. You need to open it. Inside, you will discover a mouse. Grab it! Add it to your inventory. Once you do, you’ll earn a wrench! You’re all done here, so exit and walk up the stairs.

At the top of the stairs, there’s a landing. Here, you’ll see a ladder to the right. Grab it and add it to your inventory. You’ll also see a shelf. There’s a fuse bulb on it that you will also need to add to your inventory. You’ll also see a book, which you need to open. Inside is a piece to a puzzle. Take it! At the back of the landing there’s a cabinet. Look at it to discover a mini-game.

When you look at the cabinet, you’ll see a puzzle. To trigger the mini-game, put the puzzle part into the left position. Note the symbols, and then move the squares to correct positions based on those symbols. To spin the blocks, you need to press the snowflake buttons, and to swap squares, you need to press the purple buttons. There’s a particular order that you need to press these buttons. Here it is: : L, Kx2, Mx3, Ox3, N, Mx2, K, L, Kx3, Ox2, Mx3, N, O, M, N, M, L, Mx2, N, Mx3, and N.

Phantasmat - Crucible Peak - Symbols

Phantasmat – Crucible Peak – Symbols

Now, you’ll also notice a letter opener. Grab it and add it to your inventory. Go back downstairs and look closely at the map that you saw on the table.

At the top of the map, you will see a letter. Open it with the letter opener. Inside the letter is a roll of electrical tape. You need to grab this and add it to your inventory. Now, examine the photos that are pinned to the map. Exit the close-up, and then walk down twice.

Here you are back outside the resort on the road with the downed power lines. You need to use your ladder here, and place it against the pole. Examine the power box. There are four (4) bolts. Use the wrench in your inventory on the bolts. Open the power box. Inside there’s an area with bulbs. When you select it, you will discover another mini-game.

In this mini-game, you need to put the fuse bulb into the lower right socket. The lights in the center will light up in a particular sequence. Now, all you have to do is select the colored bulbs in the same order. The sequences are randomly generated, and you must do a series of three of them. The meter on the left will show your progress.

Now, exit the close-up and take a good look at the downed power lines. You should be able to fix them using the electrical tape in your inventory. Once you’ve done this, simply look at the power box and flip the switch. The power is back on! Now walk to the far house.

You’ve just finished chapter one!

Chapter 2: Inside Peter’s House

Here we start off outside Peter’s house. You’ll notice a bunch of broken boards. Grab them and add them to your inventory. Next to the house, you’ll notice a cellar door. Zoom in to discover a butterfly. Use the butterfly net in your inventory to trap the insect. Add the bug to your inventory. Now walk down, and go left to the boathouse.

At the boathouse, you’ll see some cattails to the left of a broken dock. Zoom in. There’s a frog hiding there. Give the butterfly to the frog. You’ll also see a wooden handle floating in the water. Grab it and add it to your inventory. Now, you can use the boards you took earlier and use them to fix the broken dock in front of you. Now look at the pole holder on the dock, and take the hammer. Finally, walk down, go right, and go back inside the resort.

Inside the resort, at the top of the stairs, you’ll see a phone. Zoom in on it. Select the dial. Below it you’ll see a pair of pliers. Grab them and add them to your inventory. Now exit the close-up and walk down twice. Go forward to the mountain pass. You’ll see a road sign, which you can zoom in on. Use the pliers here to grab the bent nails. Add those nails to your inventory. Now walk down, and go toward Peter’s house.

Outside Peter’s house again, you’ll notice a rock. Put the bent nails you took from the sign onto the rock. Now use the hammer to straighten out the nails. Next you need to examine the cellar door. Take the wooden handle from your inventory, place it on the cellar door, then place the straitened nails, and finally use the hammer to attach the wooden handle to the door. Pull the handle, and then select the cellar for a hidden object scene!

As with all hidden object scenes, you need to locate all the items on the list at the bottom of the screen. Now, move all the boards you see on the left to reveal a locomotive. Grab it and add it to your inventory. Tip the green bucket over to reveal a sneaker. Take the sneaker and add it to your inventory too. Once you’ve done this, you will earn the wooden hand. Now, exit the cellar and look at the front door to Peter’s house to discover another mini-game.

To trigger the mini-game here, you’ll need to place the wooden hand into the device. Use the 2nd and third fingers to move the thumb and light all the numbers. The fingers need to be pressed in the following order: 3, 2, 3, 2, 3, 3, 2, and 3.

Phantasmat - Crucible Peak - Wooden Hand

Phantasmat – Crucible Peak – Wooden Hand

Now go inside the house.

Inside Peter’s house, you meet none other than … Peter! You need to get the snowmobile key from him. On the counter you will see another butane torch. Take it and add it to your inventory. Finally, open the refrigerator and look inside.

Inside Peter’s fridge, there’s a ton of ice. You need to use the butane torch to melt some of it. As you use the torch, you’ll discover an object. Trace its outline to reveal a metal leaf. Grab the leaf and add it to your inventory. Now walk down one time.

Outside Peter’s house you’ll notice a shed to the right. Look at the door to access another mini-game. Here’s a small hint, use the metal leaf you just took to trigger the game. You’ll see colored numbers written on the wood. You’ll also see three colored leaves. Select the leaves in the following order: U, V, W.

Now go inside the shed.

Inside the shed, take a look around. You’ll notice a workbench. Zoom in real quick and you’ll see a propeller. You need to grab that and add it to your inventory. Exit the close-up and continue looking around until you find a fishing rod that doesn’t have a fishing line. Take that too and add it to your inventory. In the back of the room, you should see some shelves. Select the shelves to access a hidden object scene!

All right. Here are with another hidden object scene. As with all the rest, you need to locate all the items listed at the bottom of the screen. In the lower left-hand corner, you’ll see a crate. Open its lid and you’ll find a magnet. Grab the magnet and add it to your inventory. Next, you’ll notice that there is a paint bucket with a paint brush sitting on one of the shelves. You need to use the paint brush to paint the sailboat that you’ll see sitting nearby. Once you do this, you’ll earn a saw blade!

Still inside the boathouse, you’ll notice a snowmobile sitting off to the right. Take a look at the handlebars and zoom in. You’ll see a saw frame. Grab that and add it to your inventory. Exit the close-up, and then zoom in to the base of the snowmobile. You’ll see a vise lever. Grab that too and add it to your inventory. Finally, place the ski part from your inventory onto the front bracket of the snowmobile.

Now it’s time to get to work! Exit the close-up of the snowmobile. To the left of the room, you’ll see a workbench. Zoom in to use the vise. Place the vise lever you took from the snowmobile on it. Now place the saw frame in the vise, and then take the saw blade and put it into the frame. Next, grab the hacksaw you see sitting on the workbench. Walk down and you’ll see a latch in the door. Use the hacksaw on the latch. Finally, walk down, and go back inside Peter’s house.

Back inside Peter’s house, you need to talk to Peter again. On the coffee table in the living room, you can zoom in. Grab the fishing line you’ll see sitting on the crossword puzzle. Notice that there’s a divorce decree sitting nearby under a wooden duck. Take a look at that. Exit the close-up and then check out the photograph hanging on the back wall. Finally walk down twice and go left toward the fishing shack.

Outside the fishing shack, you’ll see a rod holder on the dock. Zoom in, and then place the rod without a fishing line into it. Next, take the fishing line you got from Peter’s house and put it on the fishing rod. Spin the handle. Now, you should also see a dummy floating in the water. You’ll see a zipper on its suit. Grab the zipper pull and put it in your inventory. Finally, walk down, go right, and go back into the resort.

Back inside the resort, you’ll notice that there is a suitcase underneath the stairs. Zoom in, and you’ll notice that you can’t open it because it’s zipped up. You need to take the zipper pull you took from the dummy and use it to open the suitcase. Inside, you’ll find a pump. Grab that and add it to your inventory. Now walk down twice, and go left to the boathouse.

Outside the boathouse you’ll meet Otto. You’ll need to get a wooden fish from him. Next, look at the boathouse door to access another mini-game.

Phantasmat - Crucible Peak - WoodenFish

Phantasmat – Crucible Peak – WoodenFish

All right! Time for another mini-game. Take the wooden fish you got from Otto and place it on the mechanism to activate the mini-game. Next, you’ll notice a symbol shown in the eye. Rotate the two discs until they form a symbol that matches the one in the eye. Another symbol will form in the other eye. In all, there are six symbols. Move the center disc first. As it moves, the outer disc will rotate in the opposite direction. Finally, go inside the boathouse.

Inside the boathouse, you’ll see yet another mini-game on the left wall. Here, you need to rotate the center piece, and align it with the outer pieces. Once they are aligned, attach the outer pieces to the center.

Phantasmat - Crucible Peak - Boat

Phantasmat – Crucible Peak – Boat

Now you’ll notice a boat floating in the water. You’ll need to use the pump beside it to inflate the boat. Now look at the boat and zoom in. Inside the boat you’ll discover a rope with a hook. Take the rope and add it to your inventory. Now walk down.

Outside the boathouse, you’ll notice a rowboat floating in the water. Use the rope with the hook to grab the boat. Next, look at the boat and zoom in for a hidden object scene!

In the hidden object scene, examine everything and locate all the items on the list located at the bottom of your screen. Look until you find the first aid case. Open it to find the bandage. Grab the bandage and add it to your inventory. Now notice the vest hanging over one of the boat’s seats. Open the vest pocket to find the wallet. Take the wallet and add it to your inventory. Next you need to move a board to reveal a pair of binoculars. Add these to your inventory too. Once you’ve done all this, you’ll earn the engine! Now exit the close-up and go inside the boathouse.

Back inside the boathouse you need to look at the boat and zoom in. Place the engine on the mount, and then place the propeller on the engine. On the engine, you’ll see a starter cord. Pull it. Finally, push the boat into the water.

Chapter 3: The Ski Lift

Here at the beginning of Chapter 3, you should find yourself standing outside a ski lodge. You’ll see some sandbags sitting in the snow next to a work sign. Look at the sandbags and zoom in. Inside, you’ll see a carrot. Grab it and add it to your inventory. Now exit the close-up and look at the vending machine next to the ski lodge. Zoom in and grab the cutting pliers you’ll discover there. Exit the close-up and then walk right to go to the ski lift.

Outside the ski lift, you’ll notice the pass gates. Look at them and zoom in. Grab the fuse you’ll find there and add it to your inventory. Exit the close-up and then take a look at the tower door on the upper right-hand side of your screen. Zoom in, and use the cutting pliers on the chains. Now enter the tower.

Inside the tower, you’ll see a map on the far wall with a big number written on it. Pay attention to that number. Next, you’ll see a control panel with a toy alligator sitting on it. Look at the controls and zoom in. Grab the butane torch and add it to your inventory. You’ll also see a slot to the left. Place the fuse in the slot. Exit the close-up and then exit the tower.

Back outside, next to the ski lift entrance you’ll see The Market. Check out the door grate and zoom in. There’s a keypad covered in ice. You need to use the butane torch to remove the ice. Once you’ve done that, select the following numbers in this order: 5, 7, 9. Now head into the market.

Inside the market you’ll see a shopping cart. Look at it and zoom in. Grab the toy’s eye you’ll see there and add it to your inventory. Exit the close-up and then look at the counter and zoom in. Grab the oil sitting next to the cash register. Exit the close-up, and then walk down and go back inside the tower.

Inside the tower again, you need to zoom into the control panel. Use the toy eye you just got from the market on the toy alligator. You’ll see a key inside the alligator’s mouth. Grab that and add it to your inventory. Exit the close-up, and then notice a boat hook lying propped up on the red chair against the wall. Grab the boat hook and add it to your inventory. Now walk down twice.

Back outside the ski lodge, you’ll notice a mailbox. Zoom in. The key you took from the toy alligator’s mouth is a postal key. Use it in the lock. Now, open the mailbox for a hidden object scene!

First thing’s first. Locate all the items listed at the bottom of your screen. Next, find the flag and move it to find the dress. Take the dress and add it to your inventory. Now scare away the butterfly to reveal some flowers. Grab the flowers and add them to your inventory. Once you’ve done this, you will earn the cart wheel! Now walk to the right and go back to the market.

Back inside the market, look at the shopping cart again. Zoom in and attach the cart wheel. Exit the close-up and then pull the cart back. Through a hole in the ceiling, you should be able to see a cable car. Look at it and zoom in. Grab the scissors you see there. Also, on the underside of the cable car you’ll see a circuit chip. Use the boat hook to snag it. Add the circuit chip to your inventory. Now exit the close-up and walk down. Go back inside the tower.

Back inside the tower again, you need to take a look at the control panel and zoom in. Take the circuit chip you got from the cable car, and place it in the control panel. This will trigger a mini-game.

Phantasmat - Crucible Peak - Car

Phantasmat – Crucible Peak – Car

In this mini-game, you need to select arrows to form a sequence, which will move the car to the end. Now select the “go” button to start the car. You can select the reset button to start over. Now walk down twice.

Back outside the ski lodge, you need to look at the sandbags again. Zoom in, and then use the scissors on the knot. Once the sandbag is open, grab the button and add it to your inventory. Walk forward. Now check out the ice covered fountain. Zoom in and take the ½ coin you find there. Add it to your inventory. Now walk down, go to the right and go back inside the market. Look at the register on the counter and zoom in.

All right! Time for another mini-game on the cash register. Use the button and place it on the register. In the top window, take a look at the shape. Now select any button below to recreate the shape and change its color. Keep pressing a button until you find whatever color you want. Now continue fitting shapes on the board until it’s full. Don’t worry about making the board perfect. The board can actually have some empty squares. If you need to erase a shape, use the undo button. Remember that you can’t use the undo button if you’ve completed a shape. Now, select the next button to see another shape. Once you’ve done all that you should be able to take the 2/2 coin from the drawer on the register. Now walk down twice!

Phantasmat - Crucible Peak - Drawer

Phantasmat – Crucible Peak – Drawer

Outside the ski lodge, take a look at the vending machine again. Zoom in and use the 2 coins in the vending machine slot. Take the pass card from the vending machine. Exit the close-up and then, walk to the right.

You need to get into the cable car. But, to do so, you’ve got to use the pass card you just took from the vending machine. Zoom in on the scanner, and use the pass card on it. Now enter the cable car.

Inside the cable car, you should look out the roof and zoom in. You’ll see the wheels on the cable. Use the oil from your inventory on the wheel. Exit the close-up and then take the snowboard boots you see lying to the right, and add them to your inventory.

Now look around the cable car. You will see a control panel. Look at it and zoom in. To the right you’ll see a mask and goggles. Grab these and add them to your inventory. You’ll also see a cup. Knock it over, and then move the lever you’ll see on the left-hand side. Exit the close-up, and then open the cable car door and push down the ladder. Then exit the car.

You’ll find yourself outside with the snow falling. Visibility is bad, so you need to use the mask and goggles you took from the cable car so that you can see. Now take the branch you’ll see lying in the snow and add it to your inventory. Next, look at the door to the building in the background and zoom in. Take the winch you’ll see there and add it to your inventory too. You should also see a snowboard propped against the wall next to the door. Use the snowboard boots on the board to get the snowboard. Add it to your inventory, and then walk to the right.

Here you are at the ski lift. Look at the chair and zoom in. Attach the winch. You’ll notice a scarf and an avalanche beeper on what looks like a dangling corpse. Grab these off the corpse and add them to your inventory. Exit the close-up and place the snowboard on the snow.

Next, you need to use the avalanche beeper on the packed snow. Next, notice that there’s a snowman off to the right. You need to give him a nose. Use the carrot. He needs another arm. Use the branch. Finally, he’s cold. Use the scarf. The snowman is good to go! Now, look for the snow shovel. Once you’ve found it, grab it and add it to your inventory.

Now use the snow shovel to dig in the packed snow. You’ll uncover another corpse. Look at him and zoom in. Grab the flat camera and Schultz’s keys that you discover. Exit the close-up and walk down twice. Now check out the door to the store. Zoom in and use Shultz’s keys in the lock. Then go inside.

Inside Schultz’s store, you get to meet none other than … Schultz! Talk to him and pay attention to the directions he gives. Now examine the radio. Zoom in and grab the USB cable and add it to your inventory. Then look at the back wall for another hidden object scene!

In this hidden object scene, you need to locate all the items on the list at the bottom of your screen. Now look around until you see a sign. Move it to reveal a skier. Add it to your inventory. Then use the remote on the television to find the satellite. Add it to your inventory too. You should see a pouch on the shelf. Open it to find a compass. Grab the compass and add it to your inventory. Once all this is done, you will earn the power strip. Now walk down and go to your left.

Remember that Schultz gave you directions? Here’s where you use them. If you don’t remember what he said, it’s ok. We remember, and here’s what he told you: “walk right (S), left, straight, right, and left.”

Here you find yourself in a new area. You should see a box standing in the snow. Zoom in and open the box. Grab the antenna and the roll of paper that you find inside. Add them to you inventory. Now, walk to your left.

Again you are in a new area here. Use the snow shovel you’ve got on the pile of ashes you see. You’ll discover another butane torch. Grab that and add it to your inventory. Now walk down. You’ll see a building in front of you. Look at the door. You’ll see that it is frozen shut. You need to use the butane torch to melt the ice. Run the torch around the outline of the door. Then go inside.

Inside the building you’ll see a desk chair. Move it. Then examine the cabinet and zoom in. Place the power strip from your inventory in the outlet. Now move the plug to the power strip.

Exit the close-up and look at the far wall. You should see a speaker sitting on another desk. Grab the speaker and add it to your inventory. There’s a seismograph sitting on the first desk. Zoom in to examine it. You’ll see a roll of paper. Grab it and add it to your inventory. You’ll also see a series of numbers. Press 2007. Now you need to grab the radio frequency. Exit the close-up and walk down 3 times. Then go inside the ski shop.

Inside the ski shop, you need to locate the radio. Once you have found it, zoom in and attach the antenna. Also plug in the speaker. Now use the radio frequency on the radio. Exit the close-up and walk down. Go to your left, right, and then go inside the station.

Inside the station you should see a computer. Take a look at it and zoom in. Attach the USB cable to the computer. Then attach the flat camera to the cable. Turn the computer on by pressing the power button on the CPU. Tap the keyboard, and then look at the monitor. Photos will appear. Scroll through them and then take the camera. Exit the close-up and walk down, and then go to your left.

Here you should see a crater. Use the camera to take a snapshot. Add the snapshot to your inventory. Walk down three times and go back inside the ski shop. Here you’ll see Schultz again. Talk to him and give him the snapshot of the crater. Then select the back wall for another hidden object scene.

Okay! Here we go. Another hidden object scene! First, locate all the items on the list at the bottom of your screen. Next use the fist on the ice to find the knife. Add the knife to your inventory. Next, move the snowboard to find the traffic rod and the exclamation mark. Now remove the hat to find the whistle. Add it to your inventory too. You’ll earn the snowmobile parts. Now, walk down, right, forward twice, and then down 4 times. You’ll meet Greta. Talk to her and then walk toward Peter’s house, and then enter the shed.

Chapter 4: The Church

Inside the shed, you need to look at the snowmobile again. Zoom in, and then use the snowmobile parts you were just awarded on the battery cover. Then grab the dead battery and add it to your inventory. Exit the close-up and then select the shelves for another hidden object scene!

As always, locate all the items on the list at the bottom of your screen. Now grab the feather and the greaser you’ll find by moving the red cloth. Add them to your inventory. Next, move the the jug to find the glue and the insulating tape and add them to your inventory too. You’ll earn the glue. Walk down twice, go left, go inside the boathouse, go forward, right, then enter the cable car.

Inside the cable car you need to locate the controls and look at them. You’ll notice that there is a broken cup on the floor. Use the glue to fix the cup. This will trigger a mini-game.

In this mini-game, you have to restore the cup. You have to place all of its pieces on the base. You do this by selecting the arrow to spin the base. You should use the shadow outlines as a guide. Once the cup is repaired, grab it and add it to your inventory. Now exit the cable car and walk down.

Phantasmat - Crucible Peak - Broken Cup

Phantasmat – Crucible Peak – Broken Cup

Back outside the ski lodge, you need to examine the sandbags again. Zoom in and then use the cup on the opening to get a cup of salt. Exit the close-up and then select the mailbox for another hidden object scene.

Okay! Easy one here. Locate all the items on the list at the bottom of your screen. Now open the box to reveal a wine glass. Add the wine glass to your inventory. You’ll earn the club symbol. Now walk forward.

You’ll now find yourself in a new area outside of a church. Look at the church steps and use the cup of salt on the ice to melt it. Then go inside the church.

Once inside the church, you need to look at the confessional. Zoom in and then look at the chair. There’s a huge lock surrounding a book on the chair. You need to use the club symbol on the lock. This will allow you to open up the book. Look at the book, zoom in, and turn the page. Grab the corkscrew you’ll find embedded in the book. Add it to your inventory. Now walk to your right.

You’ll find yourself in front of a stained glass window. Select the window to start a mini-game. Rotate the pieces to restore the image. Once the window breaks, grab the stone hand that is revealed and add it to your inventory.

Phantasmat - Crucible Peak - Image

Phantasmat – Crucible Peak – Image

You should also see a bottle. Use the corkscrew on the cork in the bottle to open it. Take the torch, which is inside the bottle. Add it to your inventory. Walk up the stairs, then down. You should see a pole propped against the church steps. Zoom in on it. Place the torch into the pole’s fittings. You should then take the lamplighter pole and put it in your inventory. Then go into the church. Inside, you’ll need to use the lamplighter pole on the chandelier to get the lighted torch. Finally walk to your right.

All right. Inside the church, you should see a statue along the back wall. Take a look at the base of the statue and zoom in. You’ll see some candles there. You need to use the lighted torch on the candles. In front of the candles, you will some boards. Pay attention to them. Now take a look at the head of the statue. Zoom in here and place the stone hand in the slot to the left. On the right-hand side (the left hand of the statue) you will see some tongs. Take the tongs for coal and add them to your inventory. Finally, look at the shelves to for a hidden object scene!

Here we need to locate all the items on the list at the bottom of the screen (as in all the hidden object scenes). Now, you’ll see a cabinet near the top of the screen. Open it to find the scissors. Take the scissors and add them to your inventory. Next, you’ll see a drawer on the right-hand side of the screen. Open it to find the devil. Grab the devil and add it to your inventory too. You’ll earn the axe once you’ve done all of this. Now, go back to the base of the statue. Zoom in and use the axe on the boards.

Now, to the left of your screen, you should see a plate. Grab it and add it to your inventory. Next, look at the fireplace to the right of the center of the screen. Zoom in and use the tongs for coal to grab the hot coal you’ll see there. Add the hot coal to your inventory. Now grab the screwdriver you’ll see lying at the bottom of the fireplace. Exit the close-up and take a look at the bulletin board above the fireplace. Zoom in and take the 1st village picture. Add it to your inventory. Finally, go up through the hole, go up the stairs, and then you need to walk down.

Back outside, you’ll see the frozen fountain again. Zoom in, and grab the plate with water. Add it to your inventory. Okay, now you need to head back into the church and walk right. You’re now back in the room with the statue. Look at it, and zoom in. Put the plate with water into the statue’s hands. In the center of the statue, you’ll see a small statuette. Grab it and add it to your inventory. Finally, exit the close-up and walk up the stairs.

Here you find yourself in the church sanctuary. Slightly to the right of center you will see a cabinet. Zoom in, and place the statuette on the right. Slightly to the left of this, you will see some incense. Take the incense and add it to your inventory. Exit the close-up and leave the sanctuary. Go to your right, and then enter the hole.

You’ll find yourself in a new area. Look to the bottom right of your screen. You’ll see a golden cup and a censer. Place the hot coal from your inventory into the cup. Next you should also place the incense into the cup. Then, take the censer. Exit the close-up, look at the statue and zoom in. Now you need to place the censer in the statue’s hands. There should also be a series of arrows directly to the left of the statue. These are directions, and you should pay attention to them. Now exit the close-up and look for the cave entrance. Time to head into the cave!

Here, you need to follow the directions you took from the statue. These are as follows: walk left, right, forward, left, left, forward, and right.

By following the directions from the statue, you find yourself in a new area. Here, you need to look at the sign, which you will see against the far wall, against a stalagmite. Zoom in, and take the 2nd village picture. Add it to your inventory. Scroll up to take the notes and these to your inventory too. Exit to close the close-up and then look at the bench near the center of your screen. Zoom in and take the paw symbol you’ll see there. Also, use the screwdriver on the train car, and then grab the magnet and add it to your inventory. Exit the close-up, and then walk down twice and go up the hole.

Here it’s time for another hidden object scene. To access it, select the shelves. Locate all the items on the list at the bottom of your screen. You’ll need to open the donations box located on the left-hand side of your screen. Inside, you’ll find a coin. Grab it and add it to your inventory. Next, open the suitcase located in the center of your screen and grab the rope you’ll find inside. Add it to your inventory as well. Once you have completed these things, you will earn the 3rd village picture. Finally, walk up the stairs and look at the organ to access another mini-game.

To activate this mini-game, you need to place the notes onto the organ. Now, move the metal slider so that green smoke ends up coming from all the pipes. Note that the color of the smoke actually means something here. Red smoke means you are way off and you are doing something wrong. Yellow smoke means you are only one place off. Whenever you want to see where you are in the mini-game and if you are on the right track, you just need to select the music book.

Phantasmat - Crucible Peak - Melody

Phantasmat – Crucible Peak – Melody

Once you are done with the mini-game, you should walk forward. You’ll find yourself in a new area outside. You’ll see what looks like an oil or gas tank. Select it and zoom in. Grab the butane torch you’ll find there. Exit the close-up. Now, to the right you’ll see a toolbox covered in ice. Use the butane torch to melt the ice and free the funnel. Grab the funnel and add it to your inventory. Now take a look at the chimney on the cabin in the background. Zoom in and take the valve you find there. Exit the close-up and enter the tent you see near the center of your screen.

Inside the tent, you need to turn on the lantern. Then you should take a look at the chest you’ll see next to the table with the med kits on it. Zoom in and take the hook with the handle and add it to your inventory. Exit the close-up, and then take a look at the table with the med kits. Zoom in and take the lattice part you’ll find there. Then exit the close-up, and go out of the tent. Walk down.

Outside, you should see a manhole in the pavement. Here you need to use the hook with a handle to remove the lid from it. Look down the manhole. Inside (when zoomed in) you will need to place the valve on the pipe, and then turn it on. Exit the close-up, and then look at the ice covered fountain again. Zoom in and grab the tumbler and add it to your inventory. Exit the close-up and go back inside the church.

Okay, you are back inside the church’s sanctuary. Here you need to look at the confessional. Examine the grate. You need to put the lattice part here. You’ll also need to take the 4th village picture. Exit the close-up and walk down, go forward, then go back inside the tent. Inside, you need to look at the table for another mini-game.

Here inside the tent, you begin a new mini-game. Here’s what you need to do. Put all the village pictures you’ve got (there should be four) on the scrapbook. But, you need to put them into the correct holders for each one. Pay attention to the huge number scrawled across everything: 302. Now exit the close-up.

Phantasmat - Crucible Peak - Scrapbook

Phantasmat – Crucible Peak – Scrapbook

Still inside the tent, take a look at the chest and put the tumbler in the lock. But! You need a code. Here it is: turn the wheels to 3-0-2.

Now grab the rope, add it to your inventory, and head down.

Okay, you are back outside the tent. Take a look at the chimney on the cabin in the background again. Zoom in and place the rope on the right. Then take the magnet and attach it. Pull the rope and pull up the bucket. Grab it and add it to your inventory. Exit the close-up and then look at the tank again. Place the tap on the pipe, and put the bucket you just took underneath it. You’re going to fill it up with fuel. Once it’s full, grab the bucket full of fuel and add it to your inventory. Exit the close-up and walk down. Go back inside the church, and then go right, enter the hole in the floor, and walk left twice.

Here you will have reached a new area. You should see a generator sitting on the floor near the left edge of your screen. Look at it and zoom in. You need to place the funnel in the tank and then pour the bucket of fuel. In the same close-up, you need to select the panel to play a mini-game.

In this mini-game, you have to move the lightning piece to the power connection. Basically, you have to slide the pieces in a particular direction, which is indicated by numerical order.

Phantasmat - Crucible Peak - Power Connection

Phantasmat – Crucible Peak – Power Connection

Once you’ve solved this mini-game, that’s it! It’s the end of Chapter 4!

Chapter 5: The Museum

Okay, time to for some achievements in “Chapter 5: The Museum.” Don’t you agree? So, to get things started with a bang, let’s take a look at the post office door and then use the axe in your inventory on it. Cut the thing down! Now enter the post office.

Here, we are inside the post office. Let’s take a look at the base of the fan. Zoom in and grab the key you’ll find there. Next, on the right side of the room, you’ll need to open up the cabinet. Use the key you just took on the drawer. Now, grab the wife’s letter and add it to your inventory. Walk down.

In this area, you will see Peter again. Talk to him and give the wife’s letter to him. Now take a look at the museum door and access another mini-game.

To play this mini-game, you need to slide the four animal chips over to the correct treat. Here’s what you do: Move the pink bunny right, then move the blue dog up. Slide the orange bear down, left, then up. Move the blue dog right, then down. Slide the green cat left, up, left, down, then right. Good job! Now go inside the museum.

Phantasmat - Crucible Peak - Animal Chips

Phantasmat – Crucible Peak – Animal Chips

Directly inside the museum, you should take a look at the table, which is up against the wall next to the ice bear. Zoom in and take the fan button. Exit the close-up and then select the sculpture in the center of the room to access a hidden object scene!

Next, as always, locate all the items on the list you’ll see at the bottom of your screen. Now, move the chainsaw you’ll see at the upper left-hand side of your screen in order to find the bat. Grab the bat and add it to your inventory. You’ll earn the electrical plug. Now walk down and go inside the post office.

Inside the post office you need to look at the base of the standing fan, which you see near the wall in the center of your screen. Attach the electrical plug on the wire and then plug it in. Now take a look at the top of the fan. Here’s where you’ll use the fan button. Turn the fan on. Then, select the fan so that it turns. On the counter to your left, you should take a look at the scale. Zoom in and take the phoenix you’ll find there. Exit the close-up and then go out of the post office. You then need to go back inside the museum.

Inside the museum, you should pay attention to where the stairs OUGHT to be. It’s on the back wall on the left-hand side. Now, take a look at the base of the ice wolf on the right-hand side and take note of a phoenix shaped indentation at its base. Yes, here you need to use the phoenix you just took and place it in the indentation. When you do, you’ll access a mini-game.

In this mini-game, you need to trace the diagram completely without duplicating any lines. First of all, select any point to begin, then click on a connecting point (green arrow). There are 3 patterns to complete (P, Q, R). Finally, walk forward up the stairs.

Phantasmat - Crucible Peak - Diagram

Phantasmat – Crucible Peak – Diagram

Now take a look at the ice bear. Zoom in and note that there is a place for you to put the paw symbol. Do that, and then take the pencil that you will see protruding from the bear’s mouth. Then walk forward.

Here you’ll find yourself in another new area of the museum. You should see a generator standing next to an ice statue on the left-hand side of the screen. Zoom in on the generator, and pay attention to the number 3.14. Now, take the bulb and add it to your inventory. Exit the close-up and then note the fallen head on the floor near the center of your screen. Then walk down twice.

Back in the main hall of the museum, you should now look at the table on the right-hand side of the room. (The one next to the ice bear) Zoom in and look at the sharpener. Place the pencil in it and turn the handle to sharpen it. Then take the graphite powder that falls from the sharpener. Exit the close-up and walk down twice. Go back inside the post office, and look at the scale on the left.

Inside the post office you need to use the graphite powder on the scale. Then, remove powder from the scale until it reads 3.14. You’ll have to do this three times to get the correct reading. Then you need to use the bulb on the powder. Once you do, you’ll get the graphite conductor. Once you’ve got it, walk down, go back into the museum and go forward twice.

Here you are back in the room with the generator. Take a look at it again and zoom in. Place the graphite conductor in the slot you’ll see there. Then pull the switch. You’ll see a chess piece lying here too. Take the chessman and put it in your inventory. Now, exit the close-up and walk down twice.

Here you should see a chess board to the left. Zoom in on it, and then place the chessman on the symbol. Move the piece, and then take the face part. Exit the close-up and then walk forward twice.

It’s time for another mini-game. Look at the fallen face in the back for a mini-game. Place the face part on the face to trigger the mini-game. Place the pieces on the button (I) to rotate them, then place the piece into the face (J). Now you need to walk forward.

Phantasmat - Crucible Peak - Fallen Face

Phantasmat – Crucible Peak – Fallen Face

Here you find yourself in a new area. Note the locked car. On the left side of your screen, you will see a glass sphere. Take it and add it to your inventory. Then, walk down.

Okay, back in the generator room. Look at the generator and zoom in. Place the glass sphere over the bulb. You’ll talk to Greta here. After doing so, you need to look at the torso and then take the miniature face you see and add it to your inventory. Then walk down twice.

You’re back in the main room of the museum. Here, you need to look at the table to the right. Zoom in, and then place the miniature face into the indentation. Then, take the fangs symbol and add it to your inventory. Finally, select the statue in the center of the room for another hidden object scene!

In this hidden object seen you need to locate all the items on the list located at the bottom of the screen. On the right-hand side of the screen open the bag to locate the hammer. Add it to your inventory. You’ll earn the butane torch! Now, walk forward.

In this room, you need to look at the wolf and zoom in. Then place the fangs symbol onto the appropriate place on its head. Grab the heart that you’ll see in the wolf’s mouth. Then exit the close-up and walk forward..

Here you need to look at the torso on the right-hand side of the screen. Use the butane torch to melt open a hole, and then you need to put the heart inside. Now, grab the car key, which is hanging inside the rib cage of the torso, and add it to your inventory. Exit the close-up and walk forward.

Here you need to look at the car. Zoom in and use the car key in the lock. Look inside the car and note that there is a locket on the corpse. Grab the locket and add it to your inventory. Then, walk down.

Here you’ll meet Greta again. Give the locket to her. Then, take Otto’s room key from her and add it to your inventory.

Back in the generator room, you need to zoom in on it. Then place the dead battery on the shelf. Grab the charged battery you’ll see there. Then you’ll need to walk down 5 times, go up the hole, up the stairs, walk down 5 times, go right, enter the resort, and walk up the stairs.

Here you find yourself in a new area. Take a look at the door and zoom in. Use Otto’s room key on the lock and go inside. On the floor you’ll see an RGB amplifier. Grab it and add it to your inventory. Note the dolls on the floor on the right side of the room. Then look at the dresser, zoom in, and grab the red eye you’ll see there. Add it to your inventory. Finally, select the wardrobe to access a hidden object scene!

In this hidden object scene, you need to locate all the items on the list, which you’ll see at the bottom of your screen. Next, remove the poster on the wall above the nightstand, to reveal a broken mirror. Add the mirror to your inventory. Then, note a dart board on the upper left-hand side of your screen. Use a dart to make a bull’s eye. Once you do so, you will earn the green eye. Now take a look at the dolls you saw before.

Now, time for something creepy! Turn on the TV. You’ll need to place the RGB amplifier under the TV dial. Next, put the red eye in the doll to the left, and the green eye in the doll to the right.

Phantasmat - Crucible Peak - Eyes

Phantasmat – Crucible Peak – Eyes

Here, you’ll need to change the color of the lava lamp. You do this by opening and closing the eyes of the dolls to match the pattern you’ll see on the TV. Here’s the pattern: Close, then open the blue eye. Close the red and green eyes, open the red, then the green. Close the red, blue, then the green eye. The TV screen will break, and then you should be able to take the ¼, 2/4, and ¾ medical pages. Finally, select the wardrobe for a hidden object scene!

Here, as with all the rest, you need to locate all the items on the list, which you see at the bottom of your screen. Now, open the drawer of the nightstand to find the medicine chest. Next, move the jacket in the closet to find the suspenders. Once you do this, you will earn the 4th and final medical assignment pages.

Now, take a look at the dresser and zoom in. Put the four medical assignment pages into the book you find there. Then, look at the book to get the medical card. Otto should be in the room now. Give the medical card to him. After you do that, take the can of gasoline from Otto. Now it’s time to go! Walk down 4 times, head towards Peter’s house, and then go inside the shed.

Once you are inside the shed, you need to look at the base of the snowmobile again. Zoom in and put the charged battery inside. Next, look at the handlebars, open up the gas tank and pour in the gasoline from the can that you took from Otto. Now, use the snowmobile keys in the ignition and turn the key.

Rock on! You’ve just completed the game! We hope these tips and tricks helped you get through difficult areas of gameplay.

For more great tips and tricks, visit our blog!

Delicious – Emily’s Hopes and Fears Walkthrough

Big City Adventure – Shanghai Walkthrough

Building the Great Wall of China 2 Walkthrough

The Phantasmat – Crucible Peak Walkthrough is meant as a guide and does not contain cheats, hacks or serials.


The post Phantasmat – Crucible Peak Walkthrough appeared first on GameHouse.

The Far Kingdoms – Sacred Grove Solitaire Walkthrough

$
0
0

A deadly earthquake has destroyed centuries of Elven structures, and only the magic of Solitaire can restore the kingdom to its former glory. The Far Kingdoms – Sacred Grove Solitaire walkthrough will guide you through all the tips and tricks you need to become a master of Solitaire. Can you rebuild the kingdom?

Contents

The Far Kingdoms – Sacred Grove Solitaire Walkthrough

How to Play

Getting Started

If you’re new to Solitaire, or simply need a refresher, this portion of the guide is dedicated to teaching you the essentials in how to play.


  • The goal of each level is to remove all the cards from the board using the cards provided to you in the deck below.
  • The Foundation Card is the name of the card that appears face-up at the bottom of your screen. Click on a card in the field with a number that is one above, or one below this card. For example: If your foundation card is a 9, you may pick an 8 or a 10. If your foundation card is a 10, you can pick a 9 or a Jack. If your foundation card is an Ace, you can pick a King or a 2.
  • Remember, card color and suit doesn’t matter – only number!
  • Crystals are hidden beneath cards in the field. Clear all the cards to uncover additional crystals! You will also receive a crystal bonus per board completed.
  • Click on the Hint button in the lower right corner to reveal the locations of crystals hidden beneath the cards. These locations will be briefly illuminated once the button has been selected.
  • Click on the Deck at the bottom of your screen when you have no more cards left to play. For example: If you have a Queen at the top of your pile, but there are no Jacks or Kings on the board, click on the Deck to draw a new card.
  • When you click on a card in the field which can be played, it will replace your current Foundation Card. For example: If your Foundation Card is a 10, and you click on a Jack in the field, the Jack you clicked on will become your new Foundation Card. Now you need to find a 10 or a Queen as your next card. Try to select cards based on how many possibilities are open. The more, the better! Tip: A good basic strategy to use here is “Up and Down”. Don’t hesitate to repeat card sequences: the goal is to remove as many cards from the board as possible!
The Far Kingdoms - Sacred Grove Solitaire Selecting Cards

The Far Kingdoms – Sacred Grove Solitaire Selecting Cards

  • Playing five consecutive cards will trigger a Combo. Combos increase your multiplier bonus, which multiplies the number of crystals you earn at the end of a round. Once you can no longer play any more cards, click “End Combo” to select the next card in the deck. Tip!: Try using a Wild Card to prolong the duration of a combo!
  • Removing cards from the field will reveal the cards turned face-down beneath them. Usually these cards are additional deck cards, but sometimes you will find Wild Cards. A Wild Card is an extra card you may find which can be used to replace the Foundation Card. Wild Cards are stored in a special area to the right of your current Foundation Card and Deck. Each Wild Card will have a number or letter on it indicating which card it will replace. For example: If you have a Wild Card with a K on it, it means it can act as a King. Regardless of your current Foundation Card, if you select the Wild Card with the K on it, the Wild Card with the K will become your new Foundation Card, a King. Now you will need to find a Queen or an Ace.
The Far Kingdoms - Sacred Grove Solitaire Wild Cards

The Far Kingdoms – Sacred Grove Solitaire Wild Cards

  • If you make a mistake, don’t worry! There is a small purple Undo button to the right of your Deck and Foundation Card. Click on this to correct a mistake. You get one free mistake correction per round.
  • If you didn’t earn enough crystals in a round to Rebuild a structure, don’t worry. You can still work toward the goal by clicking on the “Continue” button. Crystals you earn and progress is saved and shown at the top of your screen. Once you’ve gathered enough crystals to complete the goal, you will automatically get the option to return to the Map.


The Map

Now that you understand the basics of the game, it’s time to understand the functionality of the map and help rebuild the Elven Kingdom!


  • The Map represents the entirety of the Elven Kingdom. After the earthquake, the entire kingdom was destroyed. You will need to collect Crystals in order to restore the kingdom to its former glory!
  • Select the silhouette or contour of a building at the bottom of the Map screen in order to view the requirements needed to rebuild it. Each building has a specific number of Crystals needed in order to restore it, and will offer you a special bonus once rebuilt. Click “Rebuild” to start!
The Far Kingdoms - Sacred Grove Solitaire Building Restoration

The Far Kingdoms – Sacred Grove Solitaire Building Restoration

  • If you don’t have enough Crystals to restore the building, simply click the Play button to earn more!
  • Additional requirements may sometimes come into play once the number of Crystals needed to restore a building has been acquired. For example: Once you gather enough Crystals to rebuild the Armory, you will discover that the plans needed to do so have been torn into pieces. You may need to complete an additional task, such as completing a puzzle, in order to restore the plans and move on to the next boards or buildings.
  • The Far Kingdoms - Sacred Grove Solitaire Puzzle

    The Far Kingdoms – Sacred Grove Solitaire Puzzle

    You will only be able to restore some buildings in a certain order. Building silhouettes with a lock and chain over them will require you to rebuild other structures first, before you can focus on restoring them. Restore them all to rebuild the kingdom!


The Grove

In addition to the Map, there’s one more special area you can access called the Grove. Click on the Menu button and select the “Grove” button to view it. As you play through the game, you may find Magic Sparks. There are 10 of them hidden throughout the game on various boards. They look like blue diamond-shaped crystals, and are hidden beneath cards. Each time you recover a Magic Spark, it will automatically go to the Grove. As you find more and more Magic Sparks, the Sacred Tree will recover and regain some of its life. Collect them all to restore the tree to its former glory!

The Far Kingdoms - Sacred Grove Solitaire Sacred Tree

The Far Kingdoms – Sacred Grove Solitaire Sacred Tree

Relics

Relics are special items hidden within some of the Far Kingdom structures. They will allow you to use special bonuses or abilities when playing on the Solitaire boards. When assembling Relics, pieces of the Relic you are assembling will be hidden in each game board. Collect all the pieces to add it to your collection! Once added, you will be able to select the Relic above your deck in any board you play to gain its special powers! The following is a list of Relics you may find while playing the game:


  • Sword of Glory – Use this to remove any face-up card on the board. Select the Sword of Glory, then select the face-up card you would like to remove. You may use this relic a maximum of twice per round.
  • Hammer of Destiny – Use this to randomly open two face-down cards. You may only use this relic once per round.
  • Wheel of Time – Use this to gain one more Undo per round. Once activated, you will be allowed to click the Undo button up to two times per round.
  • Book of Knowledge – Use this to see the top card in the deck. Once used, hover your mouse cursor over the top card in the deck to reveal it. This relic will remain active for the entirety of the round.
  • Golden Fish – The Golden Fish will set the initial score multiplier to 1.2x. This medallion will provide this function automatically in every round, and does not need to be selected.
  • Apparatus – Use this to reveal the locations of the Hidden Crystals. You can only use this item once per round.
  • Ring of Changes – Use this to shuffle all the cards in the deck. This item can only be used once per round.


You can view any Relics you’ve collected at any time by selecting the “Relics” button in the upper left corner of the Map screen. Collect them all!

The Far Kingdoms - Sacred Grove Solitaire Relics

The Far Kingdoms – Sacred Grove Solitaire Relics

Tips & Tricks

So you’ve got the hang of the basics. But what about additional tips and tricks? This section of our The Far Kingdoms – Sacred Grove Solitaire walkthrough covers some of the lesser-known features of the game.


  • Change the look of your Solitaire cards at any time via the Options menu! You can choose between four styles of card face and three styles of card back. Which style will you play with?
  • The Far Kingdoms - Sacred Grove Solitaire Card Styles

    The Far Kingdoms – Sacred Grove Solitaire Card Styles

    Do you like the background of the level or board you’re currently playing? Here’s a tip: Click on the telescope in the upper right corner to view the artwork without the game’s interface. You can even choose to set the artwork shown as the current wallpaper on your computer.

  • Use Wild Cards to prolong combos and gain additional points!
  • Try to avoid using Wild Cards if your current Foundation Card can still be matched to cards out on the playing field.
  • Have you lost track of your current objective? Click on the “Goals” button in the upper left corner of your screen to view what you need to do in order to achieve your goal!
  • Don’t worry if you fail a level, it’s not the end of the world! Failed levels will still reward you with bonus crystals depending on how well you did.


Congratulations, you’ve completed our The Far Kingdoms – Sacred Grove Solitaire Walkthrough! Be sure to check out more great walkthroughs on our blog!


Our The Far Kingdoms – Sacred Grove Solitaire Walkthrough is meant as a guide and does not contain cheats, hacks, or serials.

The post The Far Kingdoms – Sacred Grove Solitaire Walkthrough appeared first on GameHouse.
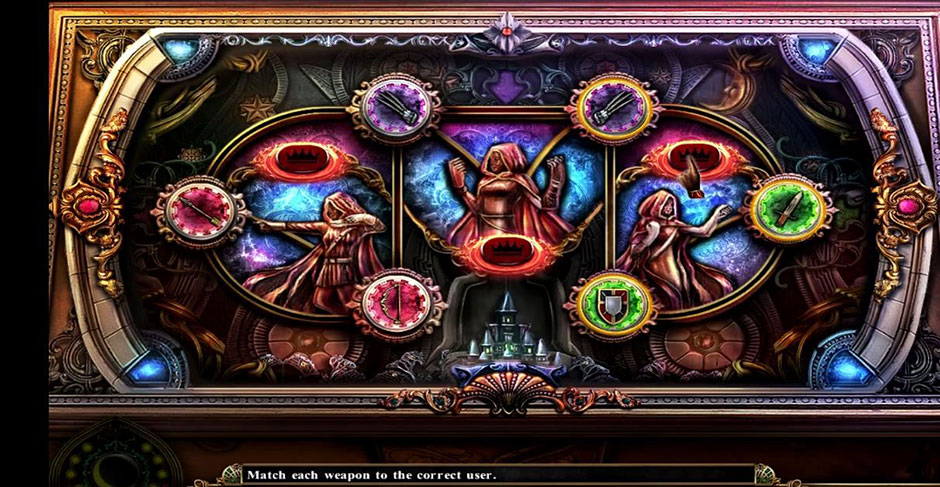
Elves Vs Goblins – Defender Walkthrough

$
0
0

Deep within the forest, the Elves guard a precious treasure. But those greedy Goblins can’t keep their paws off it! Fight alongside the Elves in Elves Vs Goblins – Defender to protect the treasure from the insatiable hordes! Our Elves Vs Goblins Walkthrough will guide you through all the essential tips and tricks you need.

Contents

Elves Vs Goblins – Defender Walkthrough

Defending the kingdom isn’t always an easy task. It’s important to know both friend and foe alike. Familiarize yourself with your army and that of your enemy with our quickstart guide below!

How to Play

Getting Started

So you find yourself on the front lines of the age-old battle between elves and goblins. How do you know what’s what? Well, that’s what this section is for! Below is everything you need to know when getting started.

  • After clicking Play, you will be taken to Level Select. From here, the current level is displayed, and you will be able to choose your team of defenders. Choose your allies from the available list shown. Allies you’ve chosen to fight with you for that level will be displayed in the slots at the top of the screen.

Tip: All slots at the top of the screen need to be filled before the level can begin!

  • Reset defenders at any time by clicking on the trash icon in the upper right corner. Make sure your defense team is well thought-out when entering levels.
  • If you’d like to play a different level, not to worry! Click on the banner icon in the lower left corner to view all the levels currently available to play, then select the one you’d like. Once ready, follow the above steps, then click Start!
  • Tip: Remember! All enemies you will face per level will always be immediately visible on the right when choosing your Defenders. Take these into account when choosing your team!
Elves Vs Goblins – Defender Level Select

Elves Vs Goblins – Defender Level Select

Battle

The front lines can be a daunting place, especially if you’re not sure what’s going on. But not to worry: we’ll guide you through the basics in order to give you a comprehensive understanding of your surroundings.

  • As soon as you click Play, enemies will start approaching from the right. The goal of each level is to prevent enemies from reaching the line of statues on the far left.
  • Select a Defender from those you chose in the Level Select screen, which are displayed at the top of the screen. Once selected, click on a square in the field to place them.

Tip: Did you make the wrong selection? Right-click to cancel!

  • Once you’ve placed a Defender, a cooldown period will automatically go into effect. This means you must wait a short period of time before you can place another Defender of the same type.
  • Each Defender you place requires a certain number of resources. Resources come in the form of Golden Berries and Magical Berries. Golden Berries are necessary for purchasing new Defenders. Magical Berries are necessary for upgrading existing Defenders, or using Magic.
  • As soon as a Defender is placed, they will begin attacking any enemies within their same row (unless otherwise stated). They will do this until either they or the enemy is defeated. Defenders can be placed anywhere in the field, except for the two columns of dark tiles on the left side of the screen.
  • The dark tiles on the left side of the screen are for Plants. Your plants are located in the upper left corner of your screen. Click on a plant, then select one of these tiles to plant it. Plants are responsible for providing Golden and Magical Berries, which will allow you to acquire more Defenders or purchase upgrades. Berries will appear periodically.
  • A timer is located in the lower right corner of your screen. This indicates how much time is remaining in the level before it’s complete. You can click on the Play and Fast Forward buttons to the left of the timer to slow or speed up time.
  • Make sure enemies don’t reach the statues on the left! If these statues are destroyed, it’s game over!
Elves Vs Goblins – Defender Battle

Elves Vs Goblins – Defender Battle

Upgrades

Each time you complete a level, you will receive a star ranking for doing so. The better you do, the more stars you’ll earn! You can earn between 1-3 stars per successful level completed. Stars can be used to purchase Upgrades via the Main Menu Shop. Simply select the Shop tab, then choose the upgrades you’d like to purchase! There are seven types of upgrades with four levels each. They are:

  • Gold Blessings – Receive more gold units.
  • Power – Increase the overall weapons power of your Defenders.
  • Cadency – Increase weapon cadency.
  • Gold Berry – Increase the growth rate of Golden Berries.
  • Magic Berry – Increase the growth rate of Magical Berries.
  • Defender – Unlock an additional Defender slot per upgrade purchased.
  • Shield – Increase the defense stats of your Defenders.
Elves Vs Goblins – Defender Shop Upgrades

Elves Vs Goblins – Defender Shop Upgrades

Trophies

In addition to Upgrades, the game features several Trophies which may be unlocked and viewed from the Main Menu. Each trophy has tiers you can unlock and will keep track of your current progress on said achievement. The following is a list of trophies and how to unlock them:

  • Boom! – Use Bombs against enemies.
  • Master Elf – Complete levels and make your way through the third World.
  • Hero – Defeat hordes of enemies.
  • Specialist – Upgrade your Defenders.
  • Gardener – Harvest from Plants during battles.
  • Librarian – Unlock missing archive pieces.
  • Shopping Queen – Purchase upgrades from the Upgrades menu.
Elves Vs Goblins – Defender Trophies

Elves Vs Goblins – Defender Trophies

Worlds

There are three worlds available to play in the game. By default, Elves Forest will be the first unlocked. Complete the 20 level challenges here to unlocked the next world! The three worlds are as follows:

  • Elves Forest – Level 1 – 20

The first world you will play, Elves Forest features a lush green landscape and generally neutral enemies. Acquaint yourself with battle in these levels!

  • Goblin Moor – Level 21 – 40

A magma paradise, the goblins are truly in their element here. Here you will face additional challenges, such as fire-based attacks and Magma Golems.

  • Troll Glacier – Level 41 and up

A frigid and barren snowscape, enemies are at their worst here. Ice-based attacks will show up more frequently, as well as enemies such as Ice Golems.

Defense

The best offense is a good defense, and a good defense is made by knowing your allies! This section is dedicated to teaching you about each ally you’ll encounter and can assign to your defense team. Take into account which enemies you’ll be facing, then choose the roster that’s right for you!

Elves Vs Goblins – Defender Defense

Elves Vs Goblins – Defender Defense

Knife Thrower

Upgrades: N/A

This Combat Elf is good against normal enemies, but does very little damage to stone enemies, and no damage to ghosts.

    • Attack: 1
    • Defense: 10
    • Cost: 100
    • Special: N/A

Bush

Upgrades: Ghost Tree

Effective as a blockade against smaller enemies, but has no effect on ghosts.

    • Attack: 0
    • Defense: 40
    • Cost: 75
    • Special: Blocks incoming enemies for a short time. When upgraded with magic, it can delay or hinder banshees.

Bang Thistle

Upgrades: N/A

Small, but mean! This thistle destroys all enemies within the target tile, as well as the neighboring left and right tiles.

    • Attack: 100
    • Defense: 0
    • Cost: 50
    • Special: N/A

Magic Elf

Upgrades: Fire and Frost

These magical magician trainees are very useful with their special abilities. Fire and Frost variants are also available.

  • Attack: 3
  • Defense: 20
  • Cost: 125
  • Special: Slows down enemies. Fire variant is highly effective against ice monsters. Frost variant is highly effective against fire monsters.

Mushroom

Upgrades: N/A

These shrooms do not like to be trampled and will explode on enemy contact, eliminating the enemy. Mushrooms do no damage to ghosts and have very little effect on stone enemies.

  • Attack: 100
  • Defense: 0
  • Cost: 50
  • Special: N/A

Stone

Upgrades: N/A

A more effective roadblock than the Bush and is also effective against moderate enemies. The Stone has no effect on ghosts.

  • Attack: 0
  • Defense: 60
  • Cost: 125
  • Special: N/A

Bowman

Upgrades: N/A

A mighty warrior; his magic arrow deals heavy damage and is capable of piercing multiple enemies. Also effective against ghosts.

  • Attack: 3
  • Defense: 15
  • Cost: 125
  • Special: Shoots magic arrows which penetrate through all enemies.

Rainbow Caterpillar

Upgrades: N/A

A faithful Elven companion, this little guy hurts everyone it touches with its toxic spikes. Has no effect against ghosts or stone enemies.

  • Attack: 1
  • Defense: 10
  • Cost: 75
  • Special: Invulnerable! Enemies will take multiple hits of damage while crossing over.

Chili Bomb

Upgrades: N/A

So hot, it should be forbidden! These will eliminate every nearby enemy. Effective against all enemy types within the field.

  • Attack: 100
  • Defense: 0
  • Cost: 100
  • Special: Removes large numbers of enemies instantly.

Ram Elf

Upgrades: N/A

Harnessing the power of Aries, he can fire shots in three different directions, making him a fearsome opponent for any enemy regardless of location.

  • Attack: 2
  • Defense: 12
  • Cost: 175
  • Special: Fires three shots simultaneously.

Magic Flower

Upgrades: N/A

Similar to the Mushroom, but is effective against ghosts! These lovely blooms are ready after only a short break.

  • Attack: 100
  • Defense: 0
  • Cost: 150
  • Special: N/A

Healer Elf

Upgrades: N/A

Capable of healing all defenders within the radius of one field, but cannot attack incoming enemies.

  • Attack: 0
  • Defense: 15
  • Cost: 300
  • Special: Defense only!

Blue Crystal

Upgrades: N/A

The sharpest tool in the shed! No one is allowed to pass without feeling the sharp edges of this guy!

  • Attack: 1
  • Defense: 24
  • Cost: 175
  • Special: Highly efficient blocker which also deals damage to enemies.

Dwarf Elf

Upgrades: N/A

This powerful hammer-wielding defender can deal three highly damaging blows.

  • Attack: 9
  • Defense: 30
  • Cost: 300
  • Special: All three shots are highly effective against enemies.

Boomerang Elf

Upgrades:N/A

A little quirky, this guy’s boomerang doesn’t always fly straight, so his attacks may not always hit the enemy directly in front of him.

  • Attack: 3
  • Defense: 22
  • Cost: 500
  • Special: Highly effective, even from the back of the field.

Enemies

Keep your friends close and your enemies even closer. It’s important you know exactly who, and what, you’re going up against! The following is a list of enemies you will encounter in Elves Vs Goblins – Defender.

Elves Vs Goblins – Defender Enemies

Elves Vs Goblins – Defender Enemies

The Green Terrible

An ordinary goblin which deals minimal damage. He usually shows up with a bone from his last meal.

  • Speed: Normal
  • Power: 0
  • Special: N/A

Stone Golem

Partly magical creature, this colossus cannot be stopped by ordinary weaponry. Deals large amounts of damage.

  • Speed: Normal
  • Power: 6
  • Special: Immune to Rainbow Caterpillar and Magic Circle

Iro Goblin

Constantly in a state of riot, he causes relatively little damage. However, the spiked wooden mace he carries makes him seem very powerful.

  • Speed: Normal
  • Power: 12
  • Special: N/A

Basilisk

A rather annoying little guy, any time you spot him, you’ll either want to run or defeat him as quickly as possible!

  • Speed: Normal
  • Power: 18
  • Special: All non-magic defenders in his path will be banished to sleep.

Magma Golem

Partly magical creature, he cannot be successfully stopped by ordinary weapons. Deals large amounts of damage.

  • Speed: Normal
  • Power: 24
  • Special: Immune to Rainbow Caterpillar, Magic Circle, and fire shots.

Banshee

A ghost which can pass through normal blockades, she is only effected by magic-based attacks (such as the Magician, the Bowman, the Ghost Tree, and the Magic Circle).

  • Speed: Fast
  • Power: 30
  • Special: Immune to all non-magical defenses.

Ice Golem

Partly magical creature, he cannot be successfully stopped by normal weaponry, and deals a great deal of damage.

  • Speed: Fast
  • Power: 36
  • Special: Immune to Rainbow Caterpillar, Magic Circle, and ice shots.

Wüsten Goblin

Highly aggressive, he uses his slingshot to deal large amounts of damage.

  • Speed: Fast
  • Power: 42
  • Special: Highly dangerous from the start due to the range of his slingshot.

Banshee-Mom

Similar to the smaller banshee, but older and tougher. Her irritable screaming causes large amounts of damage.

  • Speed: Fast
  • Power: 48
  • Special: Immune to all non-magic attacks.

Ninja-Goblin

He can sneak up on anyone and avoid traps, too! Be wary of his close combat skills.

  • Speed: Fast
  • Power: 54
  • Special: Immune to all in-ground hidden defenses.

Speedygobler

A speedy opponent with quick reflexes. He’s so fast, he can even hold of magic arrows!

  • Speed: Fast
  • Power: 60
  • Special: Capable of catching magic arrows.

Pig-Pugs Trainer

If he encounters any resistance, he will call on his trusty pig-pugs for reinforcement!

  • Speed: Fast
  • Power: 66
  • Special: Blockades present a special challenge for this goblin!

Magic Goblin

Capable of running to the next defender and teleporting away with them.

  • Speed: Fast
  • Power: 72
  • Special: Once he’s reached a defender, there’s no escape.

Knight Goblin

A heavily-armored goblin which can only be damaged once his armor has been destroyed.

  • Speed: Fast
  • Power: 78
  • Special: Behaves very similarly to the Iro Goblin.

Goblizone

The strongest of all warriors, her endurance is legendary!

  • Speed: Fast
  • Power: 84
  • Special: Both attractive and deadly, she is very difficult to defeat.

Tips & Tricks

Now that you know the basics, it’s time to put that information to good use! This section features useful tips and tricks which will help you overcome the hordes of enemies. Can you put them to good use in the battle against the goblins?

  • It’s always a good idea to try and establish Plants as soon as possible in a level. Plants are responsible for giving you resources to purchase more Defenders – and that includes additional plants! You will need several Defenders in order to successfully complete a level.
  • Keep a sharp eye on any Plants you’ve planted. They will provide Golden Berries and Magical Berries in intervals, but these won’t be automatically collected! You will need to hover your cursor over them in order to collect them, so pay close attention!
  • You may place a Defender on a tile even if an enemy is currently on it. However, the Defender will only be able to attack that enemy if they have only just entered the tile. If the enemy is 1/3 or further across the tile, they will likely walk through the Defender as if they weren’t there.
  • If an enemy passes the main section of tiles and reaches the flowerbeds on the left, they will be invulnerable to attacks, and you will need to rely on the statue’s emergency defenses or choose from a selection of special attacks shown at the bottom of your screen. They are:
    • Lightning Attack (Cost: 500 Magical Berries) – Kill all enemies within a single tile.
    • Meteorites (Cost: 800 Golden Berries) – Kills all enemies within a single tile.
    • Toxic Cloud (Cost: 1000 Golden and Magical Berries) – Kills all enemies in a 9 tile radius.
Elves Vs Goblins – Defender Emergency Defenses

Elves Vs Goblins – Defender Emergency Defenses

  • If a lower level enemy reaches one of your statues on the far left of your screen, try not to panic! Statues have a basic defense and can poison enemies. This is often enough to defeat smaller enemies without losing the level. Just be careful not to let this happen too often, or the statue will take too much damage and you’ll lose the level.
  • Blue lines on the timer bar indicate when large waves of enemies are incoming. Try to make sure your defenses are ready to handle these large waves!
  • It’s a good idea to always have an “emergency Defender”. This is a Defender which can take out a large group of enemies in case of an emergency, such as the Chili Bomb or the Bang Thistle.
  • Keep a keen eye on whether or not a level features Banshee enemies. These are the most difficult enemies to hit or effect, so you will need to make sure you have the proper defenses, or else you will lose the level quickly! Refer to the Defense section above to see which Defenders are best suited for the job.
  • Always place Plants in rows behind Defenders. If an enemy reaches a Plant, they will destroy it, and you will receive less resources, so make sure your Plants are guarded!
  • Make sure you visit your Upgrades menu often! Upgrades are an essential part in boosting your Defenders to handle new challenges! It’s highly recommended you start off by boosting overall attack or defensive power.
  • If you see any Gold Bags pop up, collect them! These contain Berry bonuses.
  • Use the Sickle at the bottom of the screen to remove any unwanted Plants.
  • Use the Shovel at the bottom of the screen to clear any debris which may prevent you from placing a Plant or a Defender. Try to stay on top of this and accomplish this between large waves of enemies.
  • Larger obstacles or barricades blocking placement of Plants or Defenders can be removed with the Shovel at a cost of 100 Magical Berries each.
Elves Vs Goblins – Defender Shovel

Elves Vs Goblins – Defender Shovel

  • Stone column barricades which appear in the field can’t be removed, even with the Shovel.
  • It’s a good idea to always have at least one Defender who can deal heavy damage. Sometimes the best Defense is a good offense!

Congratulations, you’ve completed our Elves Vs Goblins – Defender Walkthrough!


Be sure to check out more great walkthroughs on our blog!


Our Elves Vs Goblins – Defender Walkthrough is meant as a guide and does not contain cheats, hacks, or serials.

The post Elves Vs Goblins – Defender Walkthrough appeared first on GameHouse.
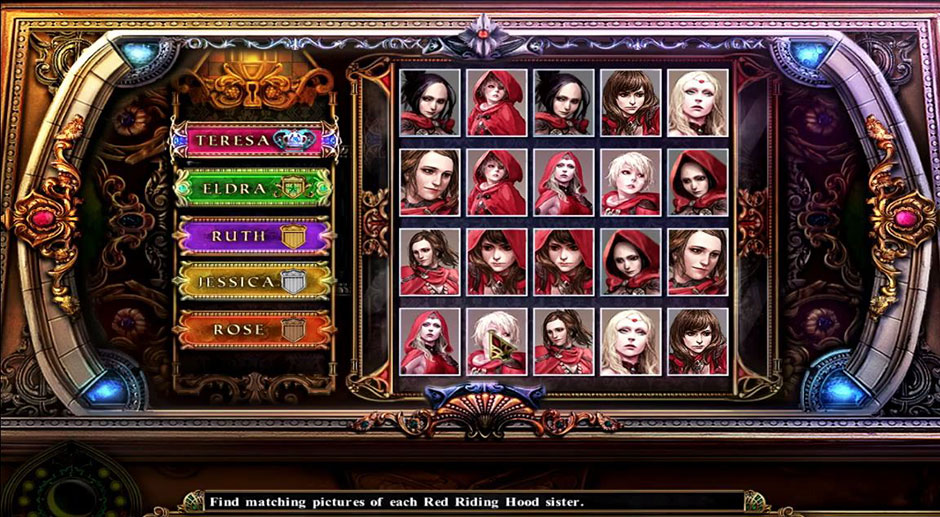
Reality Show – Fatal Shot Walkthrough

$
0
0

A man has been murdered on a popular television program. This calls for a great detective. Follow the clues, from the police headquarters to television sets to the board room of the station. Only you can solve this case and bring justice and closure to the victim’s grieving widow.

Reality Show – Fatal Shot is a hidden-object adventure game. You will search for clues, collect items, and solve puzzle to keep moving forward in the story.

Contents

Gameplay

Like other hidden-object games, this game uses only the mouse. The character is moved, objects are collected, and actions are taken by clicking the appropriate area on the screen.

The character keeps a diary, in which is listed all pertinent information and clues the player has collected over the course of the game. It is accessed by clicking the book at the bottom left of the screen.

Items that are collected are kept in the inventory, which is shown across the bottom of the screen. Click an object in the inventory, and it can be used to interact with items in the area.

There is a Hint button located at the bottom right of the screen. Use this button anytime you get stuck to reveal a hint, such as the location of an object or where you should go next. The hint button recharges over time, and disappears entirely on the hardest difficulty setting.

Puzzles that arise throughout the game are accompanied by specific instructions. The keyboard may be usable for some puzzles, but only the mouse is ever required. If a puzzle is especially difficult, it can be skipped using the Skip button at the bottom right, which charges over time.

Tips and Tricks

This is a hidden object game, so be on the lookout for hidden objects. Some objects are under others, and some are in places that cannot be seen without taking a closer look at nearby objects or areas. The most efficient way to tackle this is to keep a good, trained eye open at all times. The most foolproof way to tackle this is to click everything that can be clicked.

This game requires quite a bit of backtracking. Areas will change as you uncover more pieces of the mystery, so always be on the lookout for subtle differences when you return to a room. If you are stuck, you might try revisiting rooms you’ve been in before to see if there is anything new in there.

The best piece of advice a player can get is to use the Diary and the Hint button. The diary quite often shares clues as to what to look for and where to find it. The hint button can help you out of a tight spot. Since this game is not quite linear, you might find yourself stuck at a certain part, and you may be missing an item that this walkthrough assumed you found a long time ago. The hint button can be an invaluable asset during those times.

Relax. There is no way to fail except to quit. Have fun!

Reality Show – Fatal Shot Walkthrough

The Police Station

Sarah needs our help. We have to do whatever it takes to get to the bottom of this. Take the Envelope she offers you. Find the Blade under the newspaper on the chair. Open the drawer and pull out the folder to find your Badge, then the second folder to find the Handle. Attach the Blade to the Handle to make a Knife. Finally, put the Envelope on the table and cut it open. Pull out the Invitation. Talk to the officer behind the desk, and give him the Invitation. Grab the Dog Toy from his desk and return it to the dog. Take the charged Battery from the outlet by the door and let’s go!

Chase the clown! Go left!

There he is! Have a good look at him and his ice cream cone. Take the Hat from him, but don’t forget the Note. Talk to the homeless man and he’ll give you his Cup. Last, we need the Jack from the bushes. Take a step back and then to the right and you’ll find yourself at the Police Line.

In the mailbox, you’ll find a Clock Hand. Clear the way to enter the Crime Scene. Take a step right.

Peek into the caravan, behind the blanket, and find the second Hat. Examine the crate. Use the Knife to cut the ropes. Open the crate for the first mini-game.

This is a claw machine game. The buttons in the top left move the crane, and the center button drops the claw. Put the pieces back in their proper positions to solve the puzzle.

Reality Show - Fatal Shot - Mini Puzzle 1

Reality Show – Fatal Shot – Mini Puzzle 1

A cat! That’s weird. And she’s standing over a Fancy Key. Grab it and go back to the Police Station.

Pick up the phone. Open the gift-box. Take the Train Handle. We should read the instructions. Grab the Ultraviolet Lamp. Wow, that’s a great gift. This is going to be useful. Use the Ultraviolet Lamp on the red balloon in the box.

I never trusted him. Let’s go outside.

Let’s check out that alley. Cut the poster with the Knife, then turn off the light. The secret code is 467. Go back to the motorcycle and check out the compartment on the back. Put the Badge in its place and enter the code in the lock to open it up. Ah! That was creepy. Take the Clown Head. Go to the Boardwalk.

Look at the clown’s box. Open it and take the Tusks from the walrus. On a table there is a jewelry box topped with dancers. Use the Fancy Key to open the lock, then put the Battery in the Remote. Step back and to the right.

Open the van, climb in, and find the Oil Can. Go to the Caravan.

Put the Jack under the window, lube it with the Oil Can and turn the handle to open the window. Take the Instant Coffee. Let’s make a cup of joe. Back to the Station!

Plug in the coffee maker, and put the Cup on the table. Turn on the electric kettle. When it’s done, pour the water into the cup, then dissolve the Instant Coffee. It may not be fancy, but the homeless man will love it. Let’s deliver it to him.

He’ll give you a Coin for his coffee. Examine the train. Reattach the Clown Head and the Train Handle, then insert the Coin and let’s play a mini-game!

Reality Show - Fatal Shot - RailRoad Mini Puzzle

Reality Show – Fatal Shot – RailRoad Mini Puzzle

To get the train to its destination, swap and rotate the bits of track to complete the railroad. When the track is fixed, the train will drive away. Follow the train!

It crashed into the door! Search the debris for the Stick and the Hat. Take a step to the right.

Let’s search in the trailer on the left. In the trailer, you need to find the Puzzle Piece and the Cannonball. Go back outside. Put the Puzzle Piece in the puzzle on the other trailer.

The finished puzzle is a picture of two kittens playing. It is refreshingly cute compared to the clowns and murder. Swap adjacent pieces until the image is completed.

Enter the trailer.

Oh gosh is she dead? No, wait, she’s a puppet. In the drawers, you’ll find a Puppet Head and some Matches. There’s also a newspaper worth reading. In the manicure kit on the desk, you’ll find some Money and a pair of Scissors. Take the Banjo from its case, then repair the clock for another mini-game.

Rotate the clock hands until the correct time is displayed. The correct time is six o’clock. A winning sequence is: Blue, blue, blue, green, green, blue, green, green, green, green, blue, green, blue. Collect your prizes, the Hat and Cannonball.

Reality Show - Fatal Shot - Clock

Reality Show – Fatal Shot – Clock

Pick up the puppet’s Wig on your way out.

Talk to the lady by the door in the center. Use the Scissors to cut open the crate and reattach the Puppet Head, then take the Puppet and go back into the first trailer.

Read the note on the bulletin board, then remove papers until you find the old photo. Put the Puppet with his friends, and let’s play haberdasher. Swap the clothes and accessories on the puppets until they are all properly outfitted. The left-most puppet wears a tuxedo and top-hat. The second puppet wears a vest, stripes, and a bowler. The third is a policeman, and the fourth is a plumber. Take the Studio Keys. Go back outside.

Reality Show - Fatal Shot - Puppets

Reality Show – Fatal Shot – Puppets

The Studio

Use the Studio Keys to enter the Studio.

Look at the recorder on the right wall. There’s a Bell under that reel. And a red balloon! Use the Ultraviolet Lamp to reveal the secret code. Heart is red. Circle is green. Diamond is Blue. Triangle is yellow. Got it.

There’s a tiny puppet in a locker by the stage, and he needs his tiny Banjo. This is a puzzle. Hit the frets and then the corresponding fingers in the order laid out by the secret code. Heart, red, circle, green, diamond, blue, triangle, yellow.

Reality Show - Fatal Shot - Banjo

Reality Show – Fatal Shot – Banjo

The stage has changed, and there is now a Sun that we need to take with us. Use the Scissors to cut through the seam in the backdrop. Walk through to the Cave Set.

Put the Tusks in the tiger’s mouth. Step right to the Civil War Set.

Supply the cannon with Cannonballs. Shoot all four of the targets with cannonballs of the same color.

Take the Flag from the fallen pole, then pull the electrical switch in the box nearby. Go back to the Cave Set.

Give the caveman the Stick, then wrap the Flag around the end. Light his torch with the Matches so he can defend his family from the tiger. Find the Tax where the tiger used to be, then go left.

Near the lamppost, find the Board. By the boxes, find the Bucket. Fix the camera dolly by removing the metal bar in its wheel. Move the dolly aside. Have a look at the stage.

This guy is here again. He wants to give you a Crest. Plug his Crest into the center of the stage to start a puzzle.

Reality Show - Fatal Shot - Stage

Reality Show – Fatal Shot – Stage

Pick up the man with the Taxi. Give him some Money. Attach the Bell to the house.
Use the Ultraviolet Lamp to see the hidden message. Cut the thread and take the Key.

Use the Key to open the elevator to the right. Solve a puzzle to open the handbag. The puzzle is solved when all of the vines are aligned.

Reality Show - Fatal Shot - Handbag

Reality Show – Fatal Shot – Handbag

In the handbag, you’ll find a Photo, a Note, and a Key. Go to the second floor.

Under the pillars is a box of tools. Take the Nail Gun. Use the Bucket on the stairs. Replace the broken Board. Attach it with the Nail Gun. Put the Sun in the moon. Go right, open the door, and then take a step forward. You should be in a room with an electrical closet and a railway on the bottom right.

Grab the chair. Hmmm….Pick up the Lens in the box. Take the Wrench from the door. Let’s go right.

A red balloon! Use the Ultraviolet Lamp to find the secret compartment. Inside, you’ll find a Stethoscope and a Glass Cutter. Take the Repellant from the table, and get a Tube from the mailbox. Take a step back.

Use the Repellant to get rid of the spider so you can get in the tool bag. Grab the Wheel and Saw. Go back to the area with the secret compartment.

Attach the Wheel to the camera dolly, and then move it out of the way. Take the Ladder. Back to the spider room.

Set the Ladder up above the tool bag. Go right and then through the door.

On a shelf by some wires you’ll find a Lightbulb, and under those wires you’ll find some Pliers. Now, we just need the Red Button from beside the fish tank. Take two steps back.

Examine the lighting above the ladder. Connect the Lightbulb, and then cover it with the Lens. Go back to the room where you found the bulb.

Use the Pliers to fix the lock, and then head on through the door.

The Prop Room

On the table is the second Tube. Open the prop box on the left and take the Triangular Prism and the Green Button from inside. The Glass Cutter can open the scary alien-face tank, allowing you to pick up the File. To get into the cabinet, however, you need to pick the lock.

Use your Stethoscope to listen to the tumblers. In this puzzle, you use the display to know if the code is too high or too low. When you find the correct code, press the buttons to open the door. The correct code is 739.

Reality Show - Fatal Shot - Code

Reality Show – Fatal Shot – Code

Read the note, then grab the Rubber Glove and the Hook. Back in the room, use the File to open the compartment on the table and find the second Triangular Prism. Take a step back.

Back in the electrical control room, have a look at the light board. Use the Rubber Glove to turn the handle. Take another step back.

Look in the secret compartment. Attach the Red Button and the Green Button to the top of the safe to start a puzzle. In this game, you need to end up with more green buttons than red buttons. The game is too complex and there are too many possible solutions to be outlined here. If it is too hard, you can skip it, as stated in the Tips and Tricks section.

Reality Show - Fatal Shot - Secret Compartment

Reality Show – Fatal Shot – Secret Compartment

Now that the door is open, find the Screws, the Steel Ball and the Rag. Go back to the control room.

Clean the tank using the duster nearby. Reach in the with Hook and collect the Board Key. Use the Key to open the electrical cabinet, and then use the Tubes to start another puzzle.

Reality Show - Fatal Shot - Lights

Reality Show – Fatal Shot – Lights

For this puzzle, place the red lights into the slots so that each light is touching the head of a chip. After the puzzle, take a step back.

Zoom in on the mailbox. Hit the switch. Let’s go back into the control room.

Pick the Pump up from the floor. Then, put the two Triangular Prisms on the board over the desk for another puzzle.

In this puzzle, you’ll have to rotate the mirrors to direct the rays to the exit points of the same color. The blue ray has to reach the bottom. The red ray reaches the top. The green ray reaches the left. The yellow ray, however, goes from one prism to the other. After the puzzle, go back to the room where you changed the lightbulb, then walk between the ladder and the window.

Reality Show - Fatal Shot - Puzzle Solution

Reality Show – Fatal Shot – Puzzle Solution

This room has an old car in it. An old car with a flat tire. Connect the Pump and take the Doorknob. Use the Pliers to open the trapdoor on the pool. Put the Steel Ball in the trapdoor to start a puzzle.

In this puzzle, put the steel balls in order to spell ‘Oscar’ and then spell ‘Neil’. The blank ball has to go between the R and the N. Take the Key, then take a step back and go through the door on the left.

Reality Show - Fatal Shot - Oscar Neil

Reality Show – Fatal Shot – Oscar Neil

Affix the Doorknob in his spot with the Screws, then use the Key to unlock the door and head on through.

Outside, find the Wire and the Knob. You’ll need to cut the metal bar with the Saw so you can get the Metal Rod, which you can then use to break the chain and continue forward.

Use the Wire to break into the van and get the Doughnut and the Knife. You can break the boards blocking the route under the bridge with the Metal Bar, and then keep moving forward.

The Bridge

Pick up the Flashlight and pull the Tape out of the coat pocket. Repair the ladder by taping the Metal Rod in place of the broken step. Find the Can and the Medallion Part before taking a step back.

Lay the Flashlight under the van and pick up the Bottle Cover Go back inside, to the room with the old car.

Examine the car. Put the Bottle Cover back on the bottle and pick up the Solvent. Go back to the bridge.

Use the Solvent to loosen the bolts under the ladder, then remove them with the Wrench. Climb down the ladder.

Find the Cone on the steps and then move forward.

Grab the Hammer from the fence and then attach the Knob to the door for a puzzle.

In this puzzle, spin the layers until a picture of a bird on a twig is created. One possible solution is to hit the top button once and then the bottom button three times. Put the Key in the keyhole and go inside.

Reality Show - Fatal Shot - Bird

Reality Show – Fatal Shot – Bird

Talk to the woman. Pick up the Crowbar that’s on the table and find the Thread that’s in the mailboxes. Let’s take two steps back to the base of the bridge.

Use the Knife to cut the netting around the barrels, then untangle the fishing supplies to get the Hook. Use the Hammer on the barrel to break it free and pick it up. Near the center of the wall is a friendly little mouse. Give him a Doughnut! He’ll give you his Pin in exchange. Move forward until you are outside the apartment building.

Put the Barrel by the stairs. Use the Hook and Thread to hang the Can from the birdhouse. Go back inside.

The lady is gone! Take the Disk Lock from her desk, then use the Pin to open her drawers and find the Lightbulbs. Use the Disk Lock to open the mailboxes. Rotate the plates to form the number 13 and grab the Elevator Lever.

Put the Key on the thing by the floor numbers, then reattach the Elevator Lever. The solution to the puzzle is, with the lever positions listed from top to bottom: Black, 4, Wilson, 2, Parker, 5, Johnson, 1, Smith, 6, Murphy, 3. Turn the key to get moving.

Reality Show - Fatal Shot - Elevator Solution

Reality Show – Fatal Shot – Elevator Solution

Step off the elevator into the hallway. Replace the Lightbulbs on the wall. Use the Crowbar to remove the boards from the door and enter the room.

Find the Brick and examine the box on the floor. Find the Fragment, read the note, and pick up the Piano Key. Take a step back.

Open the piano with the Key to find the Winch and the Red Button. Step right.

Use the Crowbar to rip the Door from the cabinet. Put the Winch on the device for another puzzle.

Put the gears in position and pull the lever. Look out the window. Put down the Door. Throw a Brick through the window and then climb through.

Reality Show - Fatal Shot - Gears

Reality Show – Fatal Shot – Gears

The child’s Room

Find the chess board in the cabinet for a puzzle. Match three items to clear the board. Pry it open with the Crowbar a pick up the Tweezers. In the jacket there is a Green Button and a message. In the castle, there find the Bearing and then put the Buttons into their slots.

Reality Show - Fatal Shot - Match Game

Reality Show – Fatal Shot – Match Game

Pick up the balls and place them on the spots of the same color, then guide the yeti into the room. Use the Tweezers to get the Photo.

Reality Show - Fatal Shot - Yeti Solution

Reality Show – Fatal Shot – Yeti Solution

Back in the room, look at the cabinet again. Put the Medallion on the shelf and put the Photo inside. Grab the Rope Ladder and take a step back.

Use the Rope Ladder to climb down to the street.

Attach the Cone to the Extinguisher and pick it up. Let’s move forward.

Find the Toolbox Key under the flowers on the left. Take a step back.

Open the toolbox with the Key and take the Pipe, then go forward again.

Closely examine the flowers on the left to access the irrigation system. Apply the Pipe to start puzzle. Rotate the pipes until everything is connected. Head into the building.

Reality Show - Fatal Shot - Pipes

Reality Show – Fatal Shot – Pipes

Check in the office on the right side. Find the Iron Lever and the Padlock Key in there. Use the Ultraviolet Lamp to find the secret message on the computer. Go back to the lobby and get the Ruler, then use it to open the drawer and collect the Punch Card and the Bearing. Take a step back.

Look through the flowers on the right to find the padlock, then open it with the Key. FIRE!! Quick! Use the Extinguisher! Take the Valve, and take a step back.

Attach the Valve to the machine by the bench for a puzzle. Push the middle button, then the upper-left valve, then the bottom button. After the puzzle walk forward twice. Step into the elevator and get off at the loading dock.

Reality Show - Fatal Shot - Machine

Reality Show – Fatal Shot – Machine

Find the Bearing, the Lightbulb and the Videocassette. Attach the Lever to the control panel for a puzzle. Deliver all of the crates, then take a step forward.

Reality Show - Fatal Shot - Crates Solution

Reality Show – Fatal Shot – Crates Solution

Grab the Shovel and keep moving forward.

Find the Weight by the far door and put the Bearings under the stage. Take a step back.

Smash the glass door with the Weight. Pick up the Glass Polygon and put the Punch Card in the slot. Solve the puzzle by hitting the middle-right button, the bottom-left button five times, the bottom-right button, the bottom-left button, and then the top-left button twice.

Go through the stage door.

Reality Show - Fatal Shot - Stage

Reality Show – Fatal Shot – Stage

The costume Room

Find the Tape Recorder and the Lightbulb in the side table and walk forward.

Use the Ultraviolet Lamp to see the secret message, grab the Lightbulb, and then find the Videocassette . Take a step back.

Put the Glass Polygon and the Lightbulbs in the cabinet for a puzzle. Use the lights to form the outline of a star. Take the Videocassette and the Closet Key, then take a step forward.

Reality Show - Fatal Shot - Star

Reality Show – Fatal Shot – Star

Open the door with the secret message on it using the Key. Grab the Mop. Put the Videocassettes on the control panel for a puzzle.

Match the pattern on the screen with the patterns at the top. Complete the puzzle to receive the master Videocassette. After the puzzle, use the Mop to lift a ceiling tile. Grab the Fan off the ground and take five steps back.

Reality Show - Fatal Shot - Patterns

Reality Show – Fatal Shot – Patterns

Take the elevators up. Open the vent and put the Fan in the duct, then go right into the office.

Behind the painting is a Magnetic Card and a hidden message. Tape the Recorder to the phone and make the Recording. Swipe the Card through the electronic lock by the door and enter the secret code, 2571, then go through the door.

Use the Recording to get past the voice-lock. Dig up the Handle from under that spiky little shrub. Walk forward.

Find the Script, tape it back together, and pick it up. Use the Ultraviolet Lamp to see the hidden clue. Grab the Chip and take three steps back, then one forward.

Find the second Handle, the walk back one, right one, and forward two. Put the Handles on the big circular window.

In this puzzle, rotate the wheel in the following order: Right twice, left four times, right thrice, left, right twice, left, right, left twice, right, life twice, right, left, right thrice, left. Take the Button. Take three steps back and one forward, to find the elevator.

Reality Show - Fatal Shot - Wheel

Reality Show – Fatal Shot – Wheel

Reattach the Button and take the elevator to the board room. Talk to the executive, then take the Jacket from the chair. Go left.

Put the Videocassette in the machine. For the video to play right, balance the passive and active waves. Use the Speed button twice, the Height button three times, and then the Frequency button three times. Go right.

Reality Show - Fatal Shot - Videocasette

Reality Show – Fatal Shot – Videocasette

Find the Suction Cup, then take two steps back. Place the LTV Logo by the company logo, and then rearrange the company logo until the LTV Logo is formed. Take the Crystal Shard. Go left.

Reality Show - Fatal Shot - LVT

Reality Show – Fatal Shot – LVT

Use the Suction Cup and the Crystal Shard to dip the Jacket into the fish tank. Go right.

Use the Wet Jacket to put out the fire and then put the Chip in the circuits on the wall to start a puzzle. Lay the chips so that electricity can flow from one end to the other. Call the elevator, and walk off into the night.
Reality Show - Fatal Shot - Electricity

Congratulations! You just finished our Reality Show -Fatal Shot Walkthrough!

For more great tips and tricks, visit our blog!


This Reality Show – Fatal Shot Walkthrough is meant as a guide and does not contain cheats, hacks or serials.


The post Reality Show – Fatal Shot Walkthrough appeared first on GameHouse.
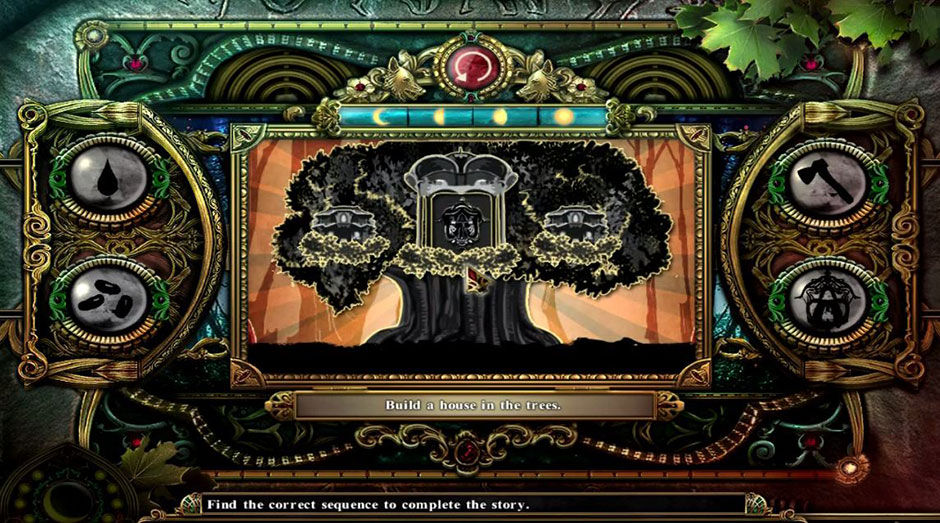
Roads of Rome New Generation Walkthrough

$
0
0

Restore the provinces of the great Roman empire in Roads of Rome New Generation. When a deadly earthquake hits and all but wipes the empire from the map, it’s up to you to aid Marcus in his quest to connect the kingdom once more. Our walkthrough contains tips and tricks for each level, as well as the locations of all secret hidden treasures.

Contents

General Tips & Tricks

Whether you’re just beginning your adventure or continuing from where you left off, the following section offers useful tips and tricks to help you along your journey.


  • When playing the game for the first time, you will be able to select your difficulty. The higher the difficulty, the more difficult it is to complete levels. Choose Relax if you’d rather play without a timer. Keep in mind that you can change the game’s difficult at any time, however your game progress is saved per difficulty. So if you’ve been playing the game up until Episode 2 on Easy, then switch to Relax, you will start Relax at Level 1 of Episode 1. But don’t worry: re-selecting the previous difficulty will automatically resume your game progress on said difficulty.
  • There are five types of resources in the game:
    • Food – Necessary for completing several tasks. Food can be gathered from Berry Bushes, Mushrooms, Gardens, Pig Farms, or Fisherman’s Huts.
    • Wood – Necessary for completing several tasks and completing buildings. May be gathered from trees, washed-up branches, or Sawmills.
    • Stone – Necessary for completing missing sections of road, along with other tasks. May be gathered from Blockages or Quarries.
    • Gold – Necessary for completing several tasks. May be traded, gathered from deposits or Gold Mines.
    • Bombs – Required to remove Huge Blockages. May be acquired from Bomb Merchants, Demolitionist Huts, and occasionally found out in the open.
  • Workers are responsible for completing tasks, such as building bridges, clearing obstructions, or gathering resources.
  • Tasks cannot be stacked – you are required to have an available Worker before you can select a task.
  • There are numerous Bonuses available to your Workers:
    • Speed Boots – Temporarily increases your Workers speed.
    • Magic Sack – Temporarily increases the amount of resources your Workers can collect.
    • Hammer – Temporarily increases the speed at which your Workers can construct buildings.
    • Ax – Temporarily increases the speed at which your Workers can both collect resources and clear obstructions.
  • A chime sound will occur when a Bonus becomes available on a level, so listen closely!
  • In addition to Worker Bonuses, the Clock Bonus will freeze time temporarily when collected. Tip!: Gather Clock Bonuses immediately when you find them. Doing this quickly will cause more to spawn later in the level. This is often an essential strategy when playing Hard difficulty!
  • There are numerous buildings which appear in the game:
    • Camp – The home base for your Workers.
    • Sawmill – Gives 50 Wood resources when built.
    • Quarry – Gives 50 Stone resources when built.
    • Pig Farm and Fisherman’s Hut – Gives 50 Food resources once built.
    • Gold Mine – Gives 50 Gold resources once built.
    • Demolionist’s Hut – Gives 30 Bomb resources once built.
    • Storehouse – Adds 10 units to obtained resources.
    • Market (and Merchants) – Allows you to exchange resources for other resources.
    • Boathouse – Once built, will allow you to cross bodies of water.
    • Tavern – Once built, will allow you to hire an additional Worker for some time.
    • Cobbler – Once built, grants a temporary speed boost to Workers.
    • Smithy – Once built, grants a temporary bonus increasing the speed of the Hammer.
    • Workshop – Once built, grants a temporary bonus bonus increasing the speed of the Ax, the Pick, and the Shovel.
  • Buildings which provide resources will not provide additional resources unless the resources provided have been collected by a Worker. Resources provided by buildings are not automatically collected nor added to your resources by default – a Worker must collect them first.
  • Doves deliver letters providing information on building upgrades. Upgrade a building to increase the output of your Workers and/or resources!
  • Remember, levels are timed! Try to complete each level before nightfall!
  • Secret Hidden Treasure can be found in each level! Click on these locations to receive a bonus resource to help you complete your tasks. The location of all Hidden Treasure is outlined per level in the guide below.

Roads of Rome New Generation Walkthrough

A great earthquake has shaken the kingdom. It’s up to Marcus to lead an expedition to reconnect the Roman Empire and gain Caesar’s favor. The following walkthrough contains tips and tricks for the game, as well as the locations of all secret hidden treasure locations organized per level.


Episode 1: Level 1 – 10

The first episode takes place in the lush green lowlands of the Roman Empire. Flooding has become rampant here as a result of the earthquake. Can you inspire the workers and restore the route through the kingdom?


Level 1

Level Tip! – Your workers set up camp at the first stop. Restore the road destroyed by the earthquake!

Objectives:

  • Restore the Route
    • Build 2 Wooden Bridges (50 Wood each) and clear 1 Flood (20 Food, 10 Gold) to complete this objective.

Hidden Treasure Location:

  1. In the fire pit in the ruins in the upper right corner.
Roads of Rome New Generation Hidden Treasure Location Level 1

Roads of Rome New Generation Hidden Treasure Location Level 1

Level 2

Level Tip! – Berries are an important source of food. Pick Berries to increase your Camp’s food supply!

Objectives:

  • Restore the Route
    • Clear 1 Fallen Tree (30 Food, 20 Gold). This will provide you with 40 Wood resources.
    • Build 2 Wooden Bridges (50 Wood) and clear 2 Floods (20 Food, 10 Gold) to restore the path.

Hidden Treasure Location:

  1. In the sand beneath the overturned kayak.
  2. Inside a treasure chest hidden behind the first fir tree to the right of the camp. You will need to chop down the tree to reach it.
Roads of Rome New Generation Hidden Treasure Location Level 2

Roads of Rome New Generation Hidden Treasure Location Level 2

Level 3

Level Tip! – A Dove from Rome will fly in to deliver important messages. The information the Dove provides can help you accomplish tasks and objectives faster!

Objectives:

  • Restore the Route
    • 1 Fallen Tree (30 Food, 20 Gold) blocks your path. Clear this to receive 40 Wood resources.
    • Clear the Flood (20 Food, 10 Gold).
    • Clear the Big Flood (see the bullet point below).
    • 2 Small Blockages (40 Food each) and 1 Blockage (60 Food) block the remainder of your path. Clear these to move on to the next level.
  • Dredge the Flood
    • A Big Flood blocks your path! You will need 100 Food and 90 Gold to clear it, so place emphasis on building the Pig Farm.
  • Build a Pig Farm
    • Build 1 Wooden Bridge (50 Wood) and clear 1 Flood (20 Food, 10 Gold) to reach the Pig Farm.
    • Build the Pig Farm using 50 Wood. You will receive 50 Food resources from here.

Hidden Treasure Location:

  1. Beneath the small rock to the right of the cliffs at the top of the screen.
  2. Within the stone ruins on the right side of the map.
Roads of Rome New Generation Hidden Treasure Location Level 3

Roads of Rome New Generation Hidden Treasure Location Level 3

Level 4

Level Tip! – Boulders blocking the road are impossible to remove with picks alone. Find a Bomb to clear them instead!

Objectives:

  • Restore the Route
    • 2 Small Blockages (40 Food, 10 Gold each), 2 Blockages (60 Food, 20 Gold each) and 1 Huge Blockage (40 Gold, 20 Bombs) block your path.
    • You will also need to build 1 Wooden Bridge (50 Wood) to extend the path.
    • Tip! 20 Bombs are located north of the Pig Farm. You will need to build a Wooden Bridge to reach them.
  • Build a Sawmill
    • Clear 1 Flood and 1 Fallen Tree to reach the Sawmill.
    • Rebuild the Sawmill using 50 Wood resources. The Sawmill will provide 50 Wood resources in return.
  • Rebuild a Farmer’s Hut
    • You will need 120 Wood resources to rebuild the Farmer’s Hut, so make sure you focus on rebuilding the Sawmill first.

Hidden Treasure Location:

  1. Within the stone ruins on the right side of the island with the farm, near the first bridge.
  2. Beneath the rock below the tree in the upper left corner of the top portion of land (the one with the stone path).
Roads of Rome New Generation Hidden Treasure Location Level 4

Roads of Rome New Generation Hidden Treasure Location Level 4

Level 5

Level Tip! – Rebuilding the Lighthouse and the nearby Settlement are an essential part of completing this level.

Objectives:

  • Restore the Route
    • 2 Blockages, 3 Small Blockages, 1 Huge Blockage, and 1 Big Flood block your path.
  • Rebuild the Lighthouse
    • The Lighthouse is located in the upper left corner of the area. Rebuild 2 Wooden Bridges to reach it.
    • The Lighthouse requires 150 Wood and 150 Stone to build.
  • Rebuild the Settlement
    • After clearing the Big Flood, clear an additional Small Blockage to reach the Settlement. 2 Houses requiring 100 Wood each need to be rebuilt here.
  • Clear the Canal
    • After clearing the Big Flood, clear an additional Big Flood heading north to reach the Canal.
    • You will need to clear 1 Small Blockage, 2 Blockages, and 1 Huge Blockage to unblock the Canal.

Hidden Treasure Location:

  1. Between the mound and the trees to the right of the Sawmill.
  2. To the right of the ruins behind the houses on the upper right side of your screen.
Roads of Rome New Generation Hidden Treasure Location Level 5

Roads of Rome New Generation Hidden Treasure Location Level 5

Level 6

Level Tip! – During your journey, you will meet nomadic Traders. Traders offer a one-time trade in which you can exchange goods or various resources to acquire the ones you need.

Objectives:

  • Restore the Route
    • You will need to clear 1 Fallen Tree, 2 Floods, 1 Small Blockage, 1 Blockage, and 1 Huge Blockage.
    • Additionally, you will need to build 1 Stone Bridge.
  • Build a Storehouse
    • After building the Stone Bridge, clear the Fallen Tree in front of the steps to reach the Storehouse.
    • Build the Storehouse using 60 Wood and 20 Gold. The successful construction of the Storehouse will give you an additional 10 units of each resource.
  • Repair a Seaman’s Hut
    • Once you’ve cleared the second Flood, head west to reach the Seaman’s Hut.
    • Rebuild the Seaman’s Hut using 100 Wood.
  • Rebuild a Pier
    • The Pier is located in front of the Seaman’s Hut. Rebuild it using 80 Wood resources.
  • Clear the Canal
    • In order to reach the Canal, you will first need to clear the Big Flood up the path behind the horse.
    • Remove the 2 Small Blockages in the Canal to complete this task.

Hidden Treasure Location:

  1. To the right of the ruins, located next to the Bomb Merchant and his fire pit
  2. Beneath a small dirt mound immediately in front of the camp, beside the horse.
Roads of Rome New Generation Hidden Treasure Location Level 6

Roads of Rome New Generation Hidden Treasure Location Level 6

Level 7

Level Tip! – The river is simply too wide in some places to build a bridge. Building Pontoons are necessary to gain access to the Mines!

Objectives:

  • Restore the Route
    • You will need to build 2 Stone Bridges first and foremost.
    • Once you’ve built the bridges, you will need to clear 1 Big Flood, 1 Huge Blockage, and 3 additional Blockages to restore the route.
  • Build a Cobbler
    • Clear the Fallen Tree to reach the Pig Farm.
    • Once you’ve reached the Pig Farm, clear the Flood and build the Wooden Bridge beyond that to reach the Storehouse.
    • Once the Storehouse has been reached, clear the final Flood to access the Cobbler.
    • Build the Cobbler for 60 Wood resources. It will grant you a temporary bonus which will make your Workers move faster.
  • Rebuild the Settlement
    • A damaged House and Watermill lie in the upper left corner of the map, reachable upon building 1 Wooden Bridge. Repair both of these to restore the Settlement.
  • Restore Water Supply
    • Remove the Small Blockage in the upper left corner of the map, past the Settlement, to clear this task.

Hidden Treasure Location:

  1. Beneath a stone past the water blocking the stone path, on the left.
  2. Hidden within a treasure chest after chopping down the trees in the upper left corner of the map.
Roads of Rome New Generation Hidden Treasure Location Level 7

Roads of Rome New Generation Hidden Treasure Location Level 7

Level 8

Level Tip! – Locate the Key to open the gated entrance of the Cave and explore the depths within!

Objectives:

  • Restore the Route
    • Clear 1 Fallen Tree, 1 Big Flood, 1 Flood, and 1 Blockage.
    • Additionally, you will need to build 1 Stone Bridge.
    • Tip! The Key is located up north, past the Storehouse and 1 Huge Blockage.
  • Rebuild the Settlement
    • The Settlement consists of 2 Houses and is located in the upper right corner of the level.
    • You will need to restore 2 Pontoon Bridges to reach the northern land mass, then clear 2 Small Blockages and 2 Blockages to reach the Settlement.
  • Repair the Archimedes’ Screw
    • Archimedes’ Screw is located in the same area as the Settlement Houses. Restore it using 40 Food and 60 Wood resources.
  • Collect Flowers
    • 2 Flowers can be found up north, past the Storehouse after building the 2 Pontoon Bridges and clearing 1 Fallen Tree. Remove the Huge Blockage to reach this area.
    • A third Flower can be found in the Settlement, to the right of Archimedes’ Screw.

Hidden Treasure Location:

  1. Beneath a dirt mound to the left of the broken barrel next to the water, near the Farm.
  2. Beneath a stone in the upper left corner, behind the Quarry.
Roads of Rome New Generation Hidden Treasure Location Level 8

Roads of Rome New Generation Hidden Treasure Location Level 8

Level 9

Level Tip! – Don’t forget about other tasks while focusing on rebuilding the road!

Objectives:

  • Restore the Route
    • 2 Big Floods, 2 Floods, 2 Small Blockages, 2 Blockages, and 1 Huge Blockage block the road.
    • You will need to build 3 Stone Bridges to complete the path.
  • Build a Quarry
    • The Quarry is located in the bottom right corner of the level. You will need to restore the route completely before you can reach it.
    • Build the Quarry using 60 Wood. You will receive 50 Stone output from the building.
  • Rebuild the Settlement
    • The Settlement consists of a House and a Watermill. They are located north and northeast.
  • Establish Water Supply for the Village
    • Restore the Archimedes’ Screw next to the House with 40 Food and 60 Wood to establish a water supply for the village.

Hidden Treasure Location:

  1. Located inside a treasure chest behind the trees in the upper left corner of the level.
  2. Beneath a stone boulder to the right of the stairs in the lower right corner of the screen.
Roads of Rome New Generation Hidden Treasure Location Level 9

Roads of Rome New Generation Hidden Treasure Location Level 9

Level 10

Level Tip! – The Aqueduct was an essential source of water for the kingdom. Restore it to the way it was before the earthquake hit!

Objectives:

  • Restore the Route
    • You will need to build 2 Stone Bridges to restore the missing sections of the road.
    • Clear 2 Blockages and 1 Huge Blockage to finish restoring the route.
    • Tip! The Key is located next to the Storehouse. You will need to clear 1 Flood and build 2 Wooden Bridges to reach it.
  • Rebuild the Settlement
    • 1 Watermill and 3 Houses make up the Settlement.
    • After you’ve built the 2nd Stone Bridge, you can immediately reach the Watermill. Clear the Fallen Columns to reach the 3 Houses up the stone steps.
  • Fix an Aqueduct

Hidden Treasure Location:

  1. Behind the trees at the top of the screen, hidden within a treasure chest.
  2. Beneath a dirt mound to the right of the Camp.
Roads of Rome New Generation Hidden Treasure Location Level 10

Roads of Rome New Generation Hidden Treasure Location Level 10

Episode 2: Level 11 – 20

The second episode of Roads of Rome New Generation introduces you to the sands of Africa. Dunes hinder your path and new challenges await in this arid climate.

Level 11

Level Tip! – The African desert conjures piles of sand all across the road. Prepare yourself to clear the way!

Objectives:

  • Restore the Route
    • 5 Small Dunes and 1 Dune block the road. Clear them using Food and Gold resources.
  • Rebuild the Lighthouse
    • The Lighthouse is located on the ruined dock area behind the horse. Repair it using 150 Wood and 150 Stone.
  • Build a Fisherman’s Hut
    • You can reach the Fisherman’s Hut by building 4 Wooden Bridges.
    • Once reached, build the Fisherman’s Hut using 60 Wood. It will give you 50 Food in return.

Hidden Treasure Location:

  1. Within the front portion of the stone ruins beneath the ruined dock on the left.
  2. Beneath a sand mound toward the bottom portion of the upper right island.
  3. Beneath a large boulder behind the Storehouse.
Roads of Rome New Generation Hidden Treasure Location Level 11

Roads of Rome New Generation Hidden Treasure Location Level 11

Level 12

Level Tip! – Focus on building Markets in order to exchange excess resources for the ones you really need.

Objectives:

  • Restore the Route
    • 8 Small Dunes, 2 Fallen Trees, 2 Small Blockages and 1 Huge Blockage block the road.
    • You will need to build 2 Stone Bridges to reach the second half of the path.
  • Build a Market
    • The Market is located in the lower right corner of the level.
    • Build the Market using 40 Wood resources. It will allow you to exchange Wood for Gold.
  • Clear the Way to the Well
    • Once you’ve built the 2 Stone Bridges, head south and clear the Small Blockage to reach the Well.
  • Rebuild the Settlement
    • Once you’ve built the 2 Stone Bridges, you can reach the Settlement, which is comprised of 2 Houses at the bottom of the area.

Hidden Treasure Location:

  1. Hidden within the fire pit next to the Bomb Merchant.
  2. Beneath a sand mound to the upper right of the pineapples.
  3. Beneath a large boulder behind the Quarry.
Roads of Rome New Generation Hidden Treasure Location Level 12

Roads of Rome New Generation Hidden Treasure Location Level 12

Level 13

Level Tip! – Some sections of road simply can’t be rebuilt. Instead, build new roads to serve as detours!

Objectives:

  • Restore the Route
    • 3 Dunes, 4 Small Dunes, and 1 Small Blockage block the path.
    • You will need to Bypass Road to restore the route. This will cost you 40 Food and 60 Stone resources.
  • Build a Gold Mine
    • The Gold Mine can be reached after bypassing the road and clearing 2 Small Dunes and 1 Dune. It’s located on the far right of the screen.
    • Build the Gold Mine with 60 Wood. You will receive 50 Gold in resources.
  • Fill a Cart up with Provisions
    • Speak with the Peasant located past the first two Dunes to work on this task.
  • Rebuild the Settlement
    • The Settlement is made up of 5 Houses toward the lower left corner of the area. You will need to clear 1 Huge Blockage past the detour in order to reach them.

Hidden Treasure Location:

  1. Beneath a rock to the left of the pineapples, in the lower left corner of the screen.
  2. Hidden within a sand mound to the upper right of the pineapples.
  3. Nestled within the stone ruins at the bottom of the screen, to the right of the cobblestone path.
Roads of Rome New Generation Hidden Treasure Location Level 13

Roads of Rome New Generation Hidden Treasure Location Level 13

Level 14

Level Tip! – You now have access to a Boat. Use the Boat to reach remote locations!

Objectives:

  • Restore the Route
    • 4 Small Dunes, 1 Blockage, and 1 Huge Blockage obstruct your path.
    • You will need to build 3 Stone Bridges to continue the path.
    • Toward the end of the road, you will need to take a detour (Bypass Road).
  • Build a Boathouse
    • Clear the Small Blockage after clearing the 1st Small Dune to reach the Boathouse.
    • Rebuild the Boathouse with 100 Wood. This will allow you to cross over to the northernmost land mass.
  • Build a Tavern
    • The Tavern is located just before the Bypass Road.
    • Use 40 Wood and 50 Stone to built it. You will acquire 1 extra Worker for an amount of time afterward.
  • Rebuild the Settlement
    • The Settlement consists of 2 Houses past the detour. You will need to clear 1 Small and 1 normal Blockage to reach them.
  • Clear the Cave Entrance
    • Reach the Cave Entrance using the boat. Clear the Huge Blockage to gain entrance.

Hidden Treasure Location:

  1. Within a treasure chest behind the Fishing Pier, located between the two palm trees.
  2. Under a mound of dirt above the Quarry.
  3. Beneath a sand pile in the lower right corner of the screen, above the stone path.
Roads of Rome New Generation Hidden Treasure Location Level 14

Roads of Rome New Generation Hidden Treasure Location Level 14

Level 15

Level Tip! – There may be no roads in this underwater cave, but delicious mushrooms grow in abundance. Gather these as additional Food resources!

Objectives:

  • Clear the Cave Exit
    • You will need to clear 5 Stalagmites, 2 Floods, 3 Small Blockages, 2 Blockages, and 1 Huge Blockage.
    • You will also need to build 2 Stone Bridges to continue the winding path.
  • Collect Starfishes
    • There are 4 Starfishes you can collect. The 1st is just below the Market. The 2nd is on the southern shore of the center island. Tip: You will need the Boathouse to get there.
    • The 3rd is located past a Huge Blockage just before the Stone Bridges. The 4th is located just before said Huge Blockage.
  • Clear the Way to the Cart

Hidden Treasure Location:

  1. Beneath a mound toward the top of the screen, south of the broken barrel and next to a volcano.
  2. Underneath a boulder below the Cobbler.
  3. In the cliff wall just above the stone bridges.
Roads of Rome New Generation Hidden Treasure Location Level 15

Roads of Rome New Generation Hidden Treasure Location Level 15

Level 16

Level Tip! – Remember to build a Tavern! Building a Tavern will grant you one additional Worker.

Objectives:

  • Restore the Route
    • You will need to clear 1 Fallen Tree, 2 Small Blockages, 1 Blockage, 2 Small Dunes, and 1 Dune to both reach and clear the route.
  • Rebuild the Settlement
    • The Settlement is located in the lower left corner of the level and consists of 3 Houses.
  • Restore Water Supply
    • Rebuild the Archimedes’ Screw south of the Storehouse to restore the water supply.
  • Build a Smithy
    • The Smithy is just down the path after clearing the Fallen Tree. It costs 60 Wood to build and will give a temporary speed bonus to the Hammer.

Hidden Treasure Location:

  1. Within the bottom portion of the stone ruins in the lower right corner, just above the path.
  2. Beneath a sand mound next to the pineapples.
  3. Underneath a large boulder above the Cobbler’s.
Roads of Rome New Generation Hidden Treasure Location Level 16

Roads of Rome New Generation Hidden Treasure Location Level 16

Level 17

Level Tip! – Fill the cart with the resources needed in order to complete the objective!

Objectives:

  • Restore the Route
    • 2 Dunes, 1 Small Dune, 3 Small Blockages, 3 Blockages, and 1 Huge Blockage stand in the way of your route.
  • Collect Opuntia
    • Opuntia is located behind a Blockage next to the horse. Collect it for 30 Food and 10 Gold resources.
  • Help the Peasant
    • The Peasant is located at the very end of the route. He needs 200 Wood and 150 Stone.

Hidden Treasure Location:

  1. Beneath a brown boulder at the bottom of the leftmost island, across the way from the bridge.
  2. Inside a treasure chest hidden within the trees at the top of the screen, just above the horse.
  3. Hidden within a sand mound near the large sand mound blocking the path at the top of the screen.
Roads of Rome New Generation Hidden Treasure Location Level 17

Roads of Rome New Generation Hidden Treasure Location Level 17

Level 18

Level Tip! – Caesar’s expectations are high. Don’t fail the emperor! Instead, use the strategies utilized in the levels above!

Objectives:

  • Restore the Route
    • 5 Small Dunes, 1 Dune, 2 Small Blockages, 1 Blockage, and 2 Huge Blockages obstruct the road.
  • Restore Water Supply
    • Upon reaching the 2nd Huge Blockage, you can divert left and reach the Settlement by building 1 Wooden Bridge and removing 1 Blockage.
    • Rebuild the Archimedes’ Screw on the left side of the Settlement to restore the flow of water.
  • Rebuild the Settlement
    • 3 Houses toward the bottom left portion of the screen make up the Settlement. Restore them all to clear this task.
  • Fix an Aqueduct
    • 2 Aqueducts are located behind the horse at the top of the screen. Use 150 Gold and 250 Stone each to fix them.

Hidden Treasure Location:

  1. Beneath a brown boulder next to the three palm trees, toward the lower left corner of the screen.
  2. Underneath a sand pile to the left of the dead trees in the dead center of the map. They’re located to the lower left of the right angle in the path.
  3. Beneath the sand pile to the right of the bottom-most bridge.
Roads of Rome New Generation Hidden Treasure Location Level 18

Roads of Rome New Generation Hidden Treasure Location Level 18

Level 19

Level Tip! – Use the Boats in order to gain access to remote Buildings you may not be able to reach otherwise.

Objectives:

  • Restore the Route
    • 3 Small Dunes, 1 Dune, 2 Small Blockages, 3 Blockages, and 3 Huge Blockages obstruct the path.
    • You will also need to build 1 Stone Bridge and 1 Bypass Road to continue the route.
  • Rebuild the Settlement
    • The Settlement is located to the left after clearing the Fallen Columns. It consists of 3 Houses which much be rebuilt.
  • Restore Water Supply
    • Repair the damaged Water Trough in the southern portion of the Settlement using 20 Food and 40 Wood resources.
  • Collect Opuntia
    • Once you’re able to reach the Sawmill, build 1 Wooden Bridge, clear 1 Small Blockage and 2 Thorns to reach the Opuntia on the cliff to the left of the horse.

Hidden Treasure Location:

  1. Underneath the large brown boulder toward the upper left corner of the screen. Left of the Storehouse. Right of the cacti.
  2. Beneath a sand mound within the circle of dead trees, just behind the horse.
  3. Hidden within a treasure chest behind the third palm tree next to the Bomb Merchant.
Roads of Rome New Generation Hidden Treasure Location Level 19

Roads of Rome New Generation Hidden Treasure Location Level 19

Level 20

Level Tip! – Focus on repairing the Wooden Fort. You will need lots of Wood and Gold resources to accomplish this task!

Objectives:

  • Restore the Route
    • The path is obstructed by 3 Small Dunes and 1 Dune.
    • You will need to speak with the Priest (100 Food, 70 Gold) to reach the Settlement area up the steps.
  • Clear the Way to the Pier
    • After speaking with the Priest, clear the Fallen Columns to reach the Pier.
  • Restore the Fort
    • The Wooden Fort costs 450 Wood and 200 Gold resources. Tip: You may want to save this task for last on this level of the game.
  • Rebuild the Lighthouse
    • Access the Lighthouse by clearing the Dunes, then building a Wooden Bridge to reach the Boathouse.
    • Restore the Boathouse and take the Boat to the upper right island.
    • Clear the Huge Blockage and head up the steps to rebuild the Lighthouse.
  • Rebuild the Settlement
    • The Settlement lies around the Fort and consists of 5 Houses, 1 Fountain, and 1 Well.

Hidden Treasure Location:

  1. In the right corner of the burnt ruins above the Fort.
  2. Within the stone ruins at the very top center of the screen, beneath the Stone resource indicator.
  3. Hidden within a treasure chest behind the pine trees above the Ship.
  4. Inside the fire pit at the bottom of the screen next to the Bomb Merchant.
Roads of Rome New Generation Hidden Treasure Location Level 20

Roads of Rome New Generation Hidden Treasure Location Level 20

Episode 3: Level 21 – 30

The third episode will take you high into the snowy mountains. Traverse caves and mountaintops as you attempt to reconnect the empire.

Level 21

Level Tip! – A Crack prevents you from reaching the Demolitionist’s Hut. Fill it in order to reach him and gain access to his services!

Objectives:

  • Restore the Route
    • 1 Bypass Road is necessary at the start of the route.
    • 3 Small Blockages, 3 Blockages, and 3 Huge Blockages obstruct the cobblestone path.
    • You will need to build 1 Stone Bridge and help the Peasant before you can complete restoration of the route.
  • Build a Demolitionist’s Hut
    • Bridge the Crack before the final Huge Blockage to reach the Demolionist’s Hut.
    • Build the Demolionist’s Hut using 80 Wood and 30 Gold. You will receive 30 Bombs in return.
  • Help the Peasant
    • Aid the Peasant at the end of the road using 500 Wood resources.

Hidden Treasure Location:

  1. Beneath a gray mound between the Storehouse and the Quarry.
  2. Within a large stone portion of the cliff wall toward the top of the screen, to the left of the waterfall.
  3. Beneath a sand pile in the lower right corner of the screen, next to the Farm.
Roads of Rome New Generation Hidden Treasure Location Level 21

Roads of Rome New Generation Hidden Treasure Location Level 21

Level 22

Level Tip! – Extend a rope across the river in order to gain access to the illusive Crystals you need!

Objectives:

  • Restore the Route
    • 2 Small Blockages, 2 Blockages, and 4 Huge Blockages stand in the way on this level.
    • You will also need to bridge 2 Cracks and Bypass Road to complete restoration of the route.
  • Get Crystals
    • The Crystal is located at the northernmost and southernmost portions of the level.
    • Clear the path to the Cobbler, then clear all the obstructions heading east to reach the northernmost Crystal.
    • Head to the Pig Farm and bridge the gaps across the water using the Rope. Do this in the two locations to the south to reach the second batch of Crystals.

Hidden Treasure Location:

  1. Within a sand pile to the right of the Camp.
  2. Beneath a gray stone to the lower left of the Farm.
  3. In the rock face at the top of the screen immediately above the stone path, north of the Quarry.
Roads of Rome New Generation Hidden Treasure Location Level 22

Roads of Rome New Generation Hidden Treasure Location Level 22

Level 23

Level Tip! – Make sure you build the Storehouse in this level. It’s an important part of helping you complete your tasks!

Objectives:

  • Restore the Route
    • 1 Small Blockage, 3 Huge Blockages, and 4 Cracks block the path.
    • You will need to build 2 additional Stone Bridges to complete the road.
  • Rebuild the Settlement
    • The Settlement takes up the upper left portion of the level and consists of 5 Houses. You can reach it once you’ve cleared the path up to the Blockages.
  • Restore Water Supply
    • Fix the Archimedes’ Screw in the Settlement to restore the water supply. You will also need to replace the surrounding Water Troughs.
  • Fix an Aqueduct

Hidden Treasure Location:

  1. In the rubble to the left of the burned house toward the upper left corner of the screen.
  2. On the left side of the rock face at the top of the screen, directly beneath the Bomb resource.
  3. Inside a treasure chest hidden behind the trees at the lower left corner of the screen, to the left of the path.
Roads of Rome New Generation Hidden Treasure Location Level 23

Roads of Rome New Generation Hidden Treasure Location Level 23

Level 24

Level Tip! – Keep an eye out for Hidden Treasure! The extra resources these provide can go a long way in helping you complete this level.

Objectives:

  • Restore the Route
    • The road is blocked by 1 Fallen Tree, 3 Small Blockages, 2 Blockages, 2 Huge Blockages, and 4 Cracks.
    • You will need to build 1 Stone Bridge to continue the path.
  • Rebuild a Thermae
    • The Thermae is located in the upper left corner of the screen, and can be reached once you’ve bridges an additional Crack next to all the Blockages.
    • Rebuild it using 70 Gold and 120 Stone resources.
  • Rebuild the Settlement
    • The Settlement is located on the upper left and is made up of 5 Houses and 1 Fountain.
  • Restore Water Supply
    • Rebuild the Archimedes’ Screw and the 6 nearby Water Troughs in the Settlement to complete this task.

Hidden Treasure Location:

  1. Hidden inside a treasure chest in the olive grove. Above the Cobbler’s on the left side of the screen.
  2. Beneath a boulder behind the camp, above the horse.
  3. Within a sand mound in the bottom right corner of the screen, in front of the Quarry.
Roads of Rome New Generation Hidden Treasure Location Level 24

Roads of Rome New Generation Hidden Treasure Location Level 24

Level 25

Level Tip! – Help the Priest on top of the mountain. He will open the way to the Obelisk!

Objectives:

  • Restore the Route
    • 2 Small Blockages, 4 Blockages, 2 Huge Blockages, 1 Fallen Tree, and 2 Cracks bar the way along the route here.
  • Rebuild an Obelisk
    • Speak with the Priest up the left series of steps (150 Food, 100 Gold) to clear the way to the Obelisk.
    • Rebuild the Obelisk with 80 Food and 70 Stone resources.
  • Restore the Fort
    • The Wooden Fort is located on the upper right and costs 450 Wood and 200 Gold to rebuild.
  • Get Crystals
    • All the Crystals are located up north. Two can be reached immediately by heading down the steps to the right of the Priest. The third can be reached by building a Wooden Bridge spanning the chasm next to the first two.

Hidden Treasure Location:

  1. Within a treasure chest behind the trees in the lower left corner of the screen, above the horse.
  2. Beneath a gray boulder to the left of the boulder blocking the second staircase on the Camp level.
  3. In the rock face below the Cobbler’s.
  4. Underneath a pile of sand between the dead trees near the Storehouse.
Roads of Rome New Generation Hidden Treasure Location Level 25

Roads of Rome New Generation Hidden Treasure Location Level 25

Level 26

Level Tip! – Place priority on building the Quarry on the opposite riverbank!

Objectives:

  • Restore the Route
    • 1 Small Blockage, 2 Blockages, 2 Huge Blockages, and 3 Cracks (plus an additional Bypass Road) all block the route in need of restoration.
    • You will need to build 3 Stone Bridges to restore the broken portions of the path.
  • Find a Manuscript
    • After building the first Stone Bridge, head down the steps and clear the Small Blockage. The Manuscript is lying in front of the open treasure chest.
  • Rebuild the Settlement
    • When you’ve reached the end of the path, speak with the Priest (200 Food, 200 Gold) and clear 2 Small Blockages to reach the Settlement.
    • The Settlement is made up of 2 Houses, a Windmill, and a Well.

Hidden Treasure Location:

  1. In a treasure chest behind the green trees near the Sawmill.
  2. In the right corner of the ruins in the lower right corner of the map.
  3. Within the cliff face toward the bottom of the screen, directly south of the Farm.
Roads of Rome New Generation Hidden Treasure Location Level 26

Roads of Rome New Generation Hidden Treasure Location Level 26

Level 27

Level Tip! – Be especially careful with your Stone resources in this level. The majority of this resource is required in order to build a detour.

Objectives:

  • Restore the Route
    • Bypass the Road first and foremost.
    • On the bypassed road, you will need to clear 3 Blockages, 2 Cracks, and 4 Huge Blockages.
  • Get Crystals
    • The Crystals are located deep within the crater, on the right side of the map.
    • You will need to clear 1 Small Blockage, 3 Blockages, and 1 Huge Blockage, in addition to 1 Small Stalagmite and 1 Stalagmite to reach them.
  • Help the Peasant
    • The Peasant is located at the end of the path and requires 300 Gold.

Hidden Treasure Location:

  1. Beneath the gray stone to the right of the green trees, just below the stone bridge.
  2. In the rock face toward the lower left corner of the screen, just above the path and toward the right of the Smithy.
  3. Underneath a sand mound just below the Gold Mine.
Roads of Rome New Generation Hidden Treasure Location Level 27

Roads of Rome New Generation Hidden Treasure Location Level 27

Level 28

Level Tip! – Approach this level with care. A sound strategy is of the utmost important. Use the techniques and tricks described above to help you along your way, and don’t forget to collect the Hidden Treasure!

Objectives:

  • Restore the Route
    • 4 Cracks, 2 Small Blockages, 2 Blockages, and 2 Huge Blockages obstruct the cobblestone road.
    • You will need to build 2 Stone Bridges to extend the route.
  • Rebuild the Settlement
    • The Settlement is located in the upper right corner of the level. Speak with the Priest (500 Food, 200 Gold) to access it.
    • 2 Houses make up the Settlement.
  • Restore Water Supply
    • You can access the Archimedes’ Screw toward the upper center of the area once you’ve reached the Settlement. Restore this and the 5 nearby Water Troughs to complete this objective.
  • Build a Workshop
    • Follow the divergent path into the crater to reach the Workshop. You will need to build a Wooden Bridge and clear 2 Stalagmites first.
    • Construct the building using 60 Wood resources. Once finished, it will give a temporary boost that makes the Ax, the Pick, and the Shovel faster.

Hidden Treasure Location:

  1. Inside a treasure chest behind the trees to the immediate right of the Quarry.
  2. Underneath a rock to the lower left of the Storehouse.
  3. Beneath a sand pile at the bottom of the screen, below the path to the right of the Cobbler.
Roads of Rome New Generation Hidden Treasure Location Level 28

Roads of Rome New Generation Hidden Treasure Location Level 28

Level 29

Level Tip! – Use the Boat to gather all the Edelweiss Flowers needed to complete the level.

Objectives:

  • Restore the Route
    • The path is blocked by 3 Small Blockages, 5 Blockages, 2 Huge Blockages, and 3 Cracks.
    • You will need to construct 2 Stone Bridges in areas where the path was washed out.
  • Collect Flowers
    • The Edelweiss Flowers can be found in 3 locations:
    • The first Flower is located in the upper left corner. You will need to build a Wooden Bridge and clear the Blockages to reach it.
    • The second Flower is toward the lower left corner, next to the Cobbler.
    • The third Flower is in the far upper right corner, past a Small Blockage in the Settlement.
  • Rebuild the Settlement
    • The Settlement is located in the upper right corner upon reaching the location for the 2nd Stone Bridge. It is comprised of 2 Houses and 1 Well.

Hidden Treasure Location:

  1. Hidden inside a treasure chest behind the trees to the left of the camp, immediately above the horse.
  2. In a sand mound immediately below the Bomb Merchant’s.
  3. Within a rock face to the lower left of the Storehouse.
Roads of Rome New Generation Hidden Treasure Location Level 29

Roads of Rome New Generation Hidden Treasure Location Level 29

Level 30

Level Tip! – You will need to rebuild both the Settlement and its water supply in order to complete this level.

Objectives:

  • Restore the Route
    • The route is blocked by 1 Small Blockage, 1 Blockage, 2 Huge Blockages, and 2 sets of Fallen Columns.
    • You will need to construct 3 Stone Bridges in order to reach the Settlement area.
  • Rebuild the Settlement
    • The Settlement for this level is quite large and consists of 6 Houses, 1 Windmill, 1 Fountain, 1 Thermae, and 1 Stone Fort. It takes up the entire upper right portion of the map and resides past the Fallen Columns.
  • Establish Water Supply for the Village
    • Once you reach the Settlement, rebuild the Archimedes’ Screw and the 7 damaged Water Troughs.

Hidden Treasure Location:

  1. In a hidden chest behind the trees to the left of the start of the stone path, in the upper left corner of the screen.
  2. On the left side of the stone ruins on the right side of the screen.
  3. On the right side of the burnt out stone ruins on the right side of the screen, near the houses and to the upper left of the pink flowers.
  4. Underneath a pile of sand in the bottom right corner of the screen, next to the dead trees.
Roads of Rome New Generation Hidden Treasure Location Level 30

Roads of Rome New Generation Hidden Treasure Location Level 30

Episode 4: Level 31 – 40

Snow gives way to fire in the fourth and final episode of the game. Make your way along the treacherous volcanic slopes in a final bid to complete your epic journey!

Level 31

Level Tip! – Build a Market. Do this, and you will have all the Stone you need!

Objectives:

  • Restore the Route
    • 2 Small Blockages, 2 Cracks, 3 Blockages, and 2 Huge Blockages obstruct the road.
  • Rebuild the Settlement
    • Unlike the other levels, you’ll start out in the Settlement area. Rebuild 2 Houses and 1 Fountain here.
  • Rebuild the Lighthouse
    • Use the Boat via the Boathouse in the lower right corner of the screen to reach the small island at the bottom of the screen. The Lighthouse is located at the top of the steps and requires 150 Wood and Stone resources to be rebuilt.

Hidden Treasure Location:

  1. In the stone cliff side behind the trees beneath the first staircase on the left.
  2. Hidden inside a treasure chest behind the olive trees at the center of the screen.
  3. On the right side of the stone ruins toward the upper left of the horse.
  4. Beneath a pile of sand at the bottom left corner of the screen, below the Cobbler.
Roads of Rome New Generation Hidden Treasure Location Level 31

Roads of Rome New Generation Hidden Treasure Location Level 31

Level 32

Level Tip! – The terrain here is especially tough. Use your resources carefully!

Objectives:

  • Restore the Route
    • The road has suffered quite a bit of damage here: 3 Small Blockages, 5 Blockages, 3 Huge Blockages, 3 Cracks, and the need for 1 Bypass Road.
  • Rebuild the Settlement
    • The Settlement is nestled away in the lower right corner of the screen. You will need to rebuild 3 Houses and 1 Water Reservoir to complete this task.
  • Collect Charcoal
    • Small portions of Charcoal are scattered in the lower left and top portions of the level. Clear the Small Lava above the horse to reach two deposits of Charcoal. The third is next to the Gold Mine after filling in a Crack.

Hidden Treasure Location:

  1. In a sand pile beneath the cluster of volcanoes in the upper left corner of the screen.
  2. Within the fire pit at the top of the screen.
  3. In the cliff face behind the Water Tower toward the lower right corner of the screen.
  4. Inside a treasure chest hidden behind the trees at the bottom of the screen, between the stone steps and the Bomb Merchant’s.
Roads of Rome New Generation Hidden Treasure Location Level 32

Roads of Rome New Generation Hidden Treasure Location Level 32

Level 33

Level Tip! – Focus on helping the locals rebuild their Settlement and the accompanying Water Tower!

Objectives:

  • Restore the Route
    • Once again, the route has suffered quite a bit of damage. The path is obstructed by 3 Small Blockages, 2 Blockages, 2 Huge Blockages, and requires 1 Road Bypass and 1 Stone Bridge.
  • Get Crystals
    • The Crystals look very similar to the Gold Deposits. However, there’s only one set of Crystals, located in the far lower right corner of the area. Bridge the gap using the Rope to acquire them.
  • Rebuild the Settlement
    • The Settlement is located toward the end of the path after rebuilding the Stone Bridge. Rebuild 2 Houses and 1 Water Reservoir to complete this task.

Hidden Treasure Location:

  1. In a pile of sand on the second level, between the gold and the stone steps.
  2. Beneath a rock between the gold and the dead trees, above the Cobbler’s.
  3. Hidden inside a treasure chest behind the trees at the center of the level.
  4. In the remnants of the stone ruins toward the upper right corner of the screen.
Roads of Rome New Generation Hidden Treasure Location Level 33

Roads of Rome New Generation Hidden Treasure Location Level 33

Level 34

Level Tip! – You will need to proceed through the Cave. There are no trees inside the Cave, so place priority on building a Sawmill first and foremost!

Objectives:

  • Restore the Route
    • 1 Small Blockage, 2 Blockages, and 2 Huge Blockages obstruct your path.
    • You will need to additionally build 2 Stone Bridges and speak with the Priest (500 Stone) at the end of the path on the upper right.
  • Get Crystals
    • There are four locations for Crystals in this level. The first is to the immediate left after the Stone Bridges. Remove the 2 Small Lavas and 1 Lava, crossing the 2 Cracks to reach it.
    • The second Crystal location is up the steps on the left. Bridge the 2 Cracks and remove the Lava to reach them.
    • The final Crystal location is toward the very end of the route, to the left of the Priest.

Hidden Treasure Location:

  1. In a sand pile below the gold at the top of the screen.
  2. In the cliff face above the gold, to the left of the Bomb Merchant’s.
  3. Under a boulder to the left of the cobblestone path, above the stone bridges.
Roads of Rome New Generation Hidden Treasure Location Level 34

Roads of Rome New Generation Hidden Treasure Location Level 34

Level 35

Level Tip! – The Fire Altar was yet another important landmark destroyed by the earthquake. In this level, focus on rebuilding it!

Objectives:

  • Restore the Route
    • The route here has gone through quite a lot. 2 Small Blockages, 2 Blockages, 3 Huge Blockages, 1 Bypass Road, 2 Small Lavas, 2 Lavas, and 2 Cracks are all located along the path and in need of addressing.
  • Rebuild the Altar
    • The Fire Altar is located in the upper left corner of the map. You will need to build 3 Stone Bridges and remove 2 Small Lavas to reach it.
    • Once reached, the Fire Altar can be rebuilt for 80 Gold and 100 Stone.
  • Collect Charcoal
    • There is a piece of Charcoal located on the portion of broken land on the left, between the 2nd and 3rd Stone Bridges.
    • Additional Charcoal can be found in the lower right corner of the level. One is next to the dead tree immediately south of the Tavern, and the other is lying to the left of the Demolionist’s Hut.

Hidden Treasure Location:

  1. Beneath a boulder in the upper left corner of the screen.
  2. Underneath a sand pile directly below the Quarry.
  3. Wedged in the rock face above the Camp.
  4. Hidden within a treasure chest behind the trees to the left of the Cobbler’s.
  5. Disguised in the fire pit on the right side of the screen, above the Bomb Merchant’s.
Roads of Rome New Generation Hidden Treasure Location Level 35

Roads of Rome New Generation Hidden Treasure Location Level 35

Level 36

Level Tip! – It is required that you help the Priest in order to open the path leading to the Cave.

Objectives:

  • Restore the Route
    • A large, fiery chasm has opened up over the main portion of the route, so Bypass Road is necessary.
    • Clear 1 Small Blockage, 3 Blockages, 3 Huge Blockages, and 4 Cracks to reach the other side.
  • Find a Manuscript
    • Speak with the Priest past the first 2 Cracks (300 Wood) to discover the location of the Manuscript.
  • Get Crystals
    • Crystals are located up north, to the left of the Storehouse.

Hidden Treasure Location:

  1. Underneath a boulder in the bottom left corner of the level, next to the horse.
  2. In a sand pile to the right of the gold, next to the Storehouse.
  3. Within a treasure chest hidden behind the trees, to the right of the Storehouse.
  4. In a fire pit just above the Sawmill.
Roads of Rome New Generation Hidden Treasure Location Level 36

Roads of Rome New Generation Hidden Treasure Location Level 36

Level 37

Level Tip! – In order to complete this level, you will need to help the local Treasurer complete all his tasks.

Objectives:

  • Restore the Route
    • Again, a Bypass Road is necessary.
    • Clear 4 Blockages, 4 Huge Blockages, 1 Fallen Tree, 1 Lava, and 3 Cracks to reconnect with the path on the lower right.
  • Provide the Treasurer with Gold
    • The Priest is located at the end of the path and requires 500 Gold before you can pass.
  • Get Fire-Flowers
    • Fire Flowers can be found in three locations. The first is next to the Tavern. The second is to the right of the Cobbler. The third is to the left of the Demolionist’s Hut.

Hidden Treasure Location:

  1. Inside a sand pile just below the Tavern on the left side of the screen.
  2. Hidden within a cliff face, on the second tier north of the Farm.
  3. In a treasure chest behind the trees, just behind the Cobbler.
  4. Under a boulder just below the Bomb Merchant’s.
Roads of Rome New Generation Hidden Treasure Location Level 37

Roads of Rome New Generation Hidden Treasure Location Level 37

Level 38

Level Tip! – There’s no Gold Mine in this level! Instead, exchange resources via the Market to acquire the Gold you need.

Objectives:

  • Restore the Route
    • Bypass Road to forge a new path to the original route.
    • Clear 4 Blockages, 2 Huge Blockages, and 4 Cracks to reconnect with the path.
  • Rebuild the Altar
    • The Fire Altar is located at the bottom center of the screen. You will need to use Ropes to reach it.
  • Fill a Cart up with Wood
    • The Cart can be found in the upper right corner. Speak with the Peasant here. He requires 500 Wood resources.

Hidden Treasure Location:

  1. In the rock face to the upper left of the Storehouse.
  2. Within a pile of sand directly above the Cobbler.
  3. Under a boulder to the right of the Cobbler’s.
  4. Within a fire pit next to the Merchant in the upper right corner.
Roads of Rome New Generation Hidden Treasure Location Level 38

Roads of Rome New Generation Hidden Treasure Location Level 38

Level 39

Level Tip! – A sound strategy is extremely important for this level. Refer to our tips and tricks to help you along your way!

Objectives:

  • Restore the Route
    • Take the divergent path to the south. Bridge the 4 Cracks to continue here.
  • Get Fire-Flowers
    • After bridging the first Crack, head south past the Market, then clear the Small Blockage down the steps to reach a Fire Flower.
    • Another Fire Flower can be found down the steps just south of the Workshop in the lower right corner.
    • Take the two staircases on the upper right and clear the Blockages along the way to reach the final two Fire Flowers. You will need to give 500 Wood to the Priest in order to reach the topmost one.

Hidden Treasure Location:

  1. Hidden within the rockslide toward the top left portion of the screen.
  2. Hidden in the rock to the left of the base of the large stone staircase leading to the upper right portion of the level.
  3. Beneath a boulder to the left of the Cobbler’s, on the immediate left side of the path.
  4. In a sand pile directly beneath the Cobbler.
Roads of Rome New Generation Hidden Treasure Location Level 39

Roads of Rome New Generation Hidden Treasure Location Level 39

Level 40

Level Tip! – The final frontier awaits! Rebuild the Stone Fort and the Settlement.

Objectives:

  • Restore the Route
    • Bypass Road starting from the path on the left side of the screen.
    • Clear 1 Small Blockage, 3 Blockages, and 4 Huge Blockages to reach the Settlement area on the upper right.
  • Rebuild the Settlement
    • Construct 2 Houses, 1 Water Reservoir, and 1 Stone Fort on the upper right to fulfill this task.
  • Get Crystals
    • One set of Crystals is located up the first staircase on the right when heading up to the Settlement.
    • Three more Crystals can be found due south. Fill in the Crack to reach them.
    • The final cluster of Crystals can be accessed via Rope after clearing the 3 Huge Blockages on the Bypassed Road.
  • Rebuild the Altar
    • The Fire Altar is located in the lower left corner of the screen. You will need to bridge the Cracks along the original road in order to reach it.

Hidden Treasure Location:

  1. Beneath a large rock beneath the sole dead tree on the left side of the level. It’s next to the cobblestone path, just before it breaks off into the chasm.
  2. Within a sand pile below the Camp, in front of the horse.
  3. Hidden inside the cliff face at the top of the first (lower) stone staircase on the right.
  4. Hiding in the remains of the ruins in the upper right corner of the screen, near the houses.
Roads of Rome New Generation Hidden Treasure Location Level 40

Roads of Rome New Generation Hidden Treasure Location Level 40

Bonus Level

Upon completing all four episodes, you will unlock access to the Bonus Level! The Bonus Level presents a special final challenge worthy of any centurion.

Level 41

Level Tip! – Place focus on gathering rare multicolored crystals.

Objectives:

  • Rebuild the Settlement
    • There are 4 damaged Houses and 1 Windmill toward the lower right corner of the screen. You will need to repair the Stone Bridge (70 Wood, 90 Stone) to access the fourth House and the Windmill.
  • Collect Flowers
    • Two Edelweiss Flowers are located in front of the Storehouse. Another is located on the left side of the map past three Blockages. The final Edelweiss Flower is on the right side of the map above the Settlement, but you will need to cross the Crack (60 Food, 50 Stone) to reach it.
  • Get Crystals
    • There are 3 Crystal locations. One is next to the Cobbler. You will first need to repair the Wooden Bridge (50 Wood) to reach it.
    • The second and third Crystals are located on either side of the large waterfall at the top of the screen. One is near the Storehouse, but you will first need to remove a Blockage to reach it. The other is near the Tavern, and will require you to remove a Huge Blockage (100 Gold, 50 Bombs) to reach it.
    • Tip! There is a Clock Bonus next to the second Crystal. Collect it to save on time!

Hidden Treasure Location:

  1. Beneath a pile of sand just past the first wooden bridge on the left, to the left.
  2. Underneath a boulder hidden in the trees to the right of the staircase leading up to the Storehouse.
  3. Hidden in the small grove of trees to the left of the staircase leading up to the gold deposits.
  4. In the cliff face to the right of the staircase leading up to the gold deposits.
Roads of Rome New Generation Hidden Treasure Location Bonus Level 41

Roads of Rome New Generation Hidden Treasure Location Bonus Level 41


Congratulations, you’ve completed our Roads of Rome New Generation walkthrough! Be sure to check back soon for more tips and tricks!


The Roads of Rome New Generation walkthrough is meant as a guide and does not contain cheats, hacks, or serials.

The post Roads of Rome New Generation Walkthrough appeared first on GameHouse.
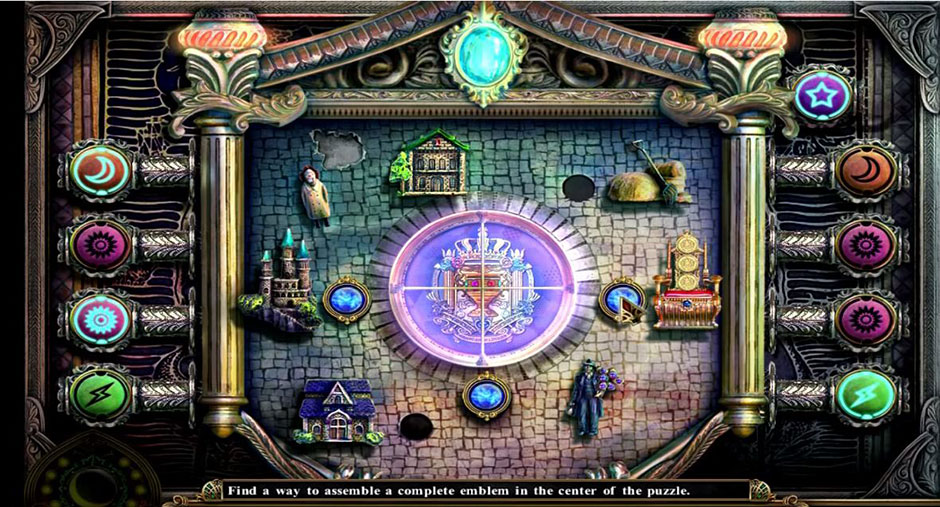
Spirits of Mystery – The Dark Minotaur Walkthrough

$
0
0

Spirits of Mystery: The Dark Minotaur is a hidden object electronic game with a quest. Four magical animals have been abducted. Rescue the magical animals before the Minotaur is summoned by witch Mortis and her crony Isa.

This gameplay guide is a complete walkthrough of the game. The guide contains gameplay instructions along with tips and tricks and hints to help players solve the mini-games or hidden object puzzles to rescue the four missing animals.

Toggle back and forth among the sections of the gameplay guide to clear scenes and keep gameplay moving when unable to solve the puzzles. Review the Main Menu option and General Gameplay Tips and Tricks before diving into the four game sections: (1) the zoo; (2) the village; (3) the hotel; (4) the forest prince; (5) Hanna’s house; and (6) the castle.

Contents

Main Menu

The Main Menu is the starting point for the Gameplay Guide. In the Main Menu the player is able to customize the game and save her progress by adding or deleting players. The settings enhance the gameplay experience by permitting the player to modify or change screen, music, cursor and sound settings accessed through the Options button. Other games by the developer can also be accessed through this screen including a Special Collector’s Edition of the game.

General Tips & Tricks

The objective of the game is to rescue four animals by solving games and puzzles. Some guidelines apply to all chapters. The most notable are highlighted below.

Puzzles or mini-games may be skipped once the skip button recharges.

There are two points during gameplay where the player receives the Invisibility Potion, this potion permits the player to clear scenes incognito or invisible. Without the Invisibility Potion the gameplay locks. Play can only continue with possession of the Invisibility Potion in the player’s inventory.

Items collected are placed in the Inventory section. Keep tabs on the collected items for use to uncover or access other items.

Diary, is included to collect notes and to serve as a reference guide during gameplay.

Hidden Object Scenes are found wherever sparkles appear in a scene.

Each of the six sections contain a rechargeable Hint button that provides guidance on clearing the scene or solving the puzzle.

Spirits of Mystery – The Dark Minotaur Walkthrough

SECTION 1: THE ZOO

After speaking with the nanny, examine the base of the angel statue to collect the Crest. Examine the picture and place the Crest, in the nook. Collect the Blue Drop. Examine the fruit bowl and collect the Banana. Examine the picture frame and collect the Aquamarine Drop.

Collect the Red Drop from the cat on the bed. Examine the chest and place the Aquamarine DropRed Drop, and the Blue Drop, into the slots. Collect the Diary, and open and close it. Collect the Nail Scissors and the Shell. Exit through the open door.

Feed the creature by giving it the Banana, on the table. Collect Chester’s Brush. Select Nail Scissors and use it on the knot around the scroll to take note. Examine the fountain and collect the Trumpet from the angel and replace it with the Shell.

Collect the Book Page and place it on the book on the table and take the note. Collect the Key. Examine the gate and use the Key to unlock the gate by turning Key twice. Go through the archway on the right after going through the gate.

Collect the Scoop Net. Examine the ground, select the Handkerchief and collect the Medallion. Select the Medallion twice to collect the Handkerchief with Initials.

Mini-Puzzle 1: The first of five mini-puzzle games begins when the player examines the small castle. TIP: Collect the Air Symbol by removing three roots, touching the moon, touching the sun four times, and touching the cloud. To exit, go left.

Collect the Pruners and 1/3 Fish and cross the bridge. Examine the rocks and collect the Pickax. Use the Pickax on the glimmering rock.

Mini-Puzzle 2: Using the Trumpet on the dwarves starts the second mini-puzzle. HINT: Collect the Earth Symbol by giving tools to the dwarves.

Spirits of Mystery - The Dark Minotaur -Tools

Spirits of Mystery – The Dark Minotaur -Tools

At the temple, collect the Fishing Pole and Bowl and walk down to the waterfall to collect the Bowl by using the Bowl to collect the water.

Examine the bird and use the Pickax on the loose stone and collect the Worm. Use the Pruners on the roses and collect 2/3 Fish and Crystal. Go through right archway.

Examine the large castle and place the Crystal in the stand. Turn on the lights by selecting lights in order. Collect the Fire Symbol. Walk left.

Spirits of Mystery - The Dark Minotaur -Lights

Spirits of Mystery – The Dark Minotaur -Lights

Attach the Worm to the hook and place the Fishing Pole on the pond. Collect the Net by using Scoop Net. Go towards the temple. Examine the waterfall and give Net to the statue and collect the Bell Hammer. Return to the temple. Use the Bowl in the soil of the potted plant.

Mini-Puzzle 3: Using the Bell Hammer activates the third mini-puzzle. When finished with the puzzle, by placing the balls in sequence collect the 3/3 Fish from the plant.

Spirits of Mystery - The Dark Minotaur -Bell Hammer

Spirits of Mystery – The Dark Minotaur -Bell Hammer

To exit, walk down twice.

Mini-Puzzle 4: The fourth puzzle begins when 3 Fish are placed on the steps. HINT: To solve the puzzle rotate the fish until they face the stairs. Place a fish in the top right section and another fish in the bottom right section. When complete, collect the Water Symbol and walk down.

Examine the bowl and place the Air SymbolEarth SymbolFire Symbol, and Water Symbol in the grooves to activate the fifth mini-puzzle.

Mini-Puzzle 5: The object of the puzzle is to rotate the rings until they are displayed in the correct order. When finished solving the puzzle, collect the Amulet. Give the Handkerchief with Initials and Medallion to the nanny.

To exit the section, go through the gate.

SECTION 2: THE VILLAGE

Please note that Hidden Object Puzzles or HOPs are accessed wherever sparkles are present. When a scene is entered scroll cursor over scene to notice the sparkles. Click on the sparkles to access the HOP.

HOP 1: Collect the items listed below to clear the scene. Unlock the gate by obtaining the Key found inside the barrel. Use the Hammer to obtain the spyglass to help look inside the barrel for the Key. Collect the Dragon Head.

Examine the gate. Collect the Shaft, Scarf, Bamboo, and Well Crank. Go to the shop.

Collect the Bag of Luminous Fungi Spores at the shelf. Placing the Dragon Head on the box begins the next HOP.

Hop 2: Clear the scene by touching the sphere to use or place objects in the scene. Collect the Seal when finished clearing the scene.

Open the scroll by placing the Seal on the scroll at the shelf. The player receives an the first of two Invisibility Potions.

TIP: As long as there is potion in the bottle, the Invisibility Potion keeps the player invisible.

HINT: Player can only pass through the gate and continue to play if she has collected the Invisibility Potion in her Inventory.

Collect the Firewood at the well and Pliers at the window sill.

To collect the Chain, remove the Nail with the Pliers.

At the well obtain the bucket by placing the Shaft on the well; the Well Crank on the Shaft; and the Chain on the crank. Use the Well Crank to pull up the bucket. Collect the Glass Cutter.

Clean the window glass with the Scarf and use the Glass Cutter on the glass. Collect the Tape and Yellow Button.

HOP 3: Next, play the third HOP by opening and closing the gate as hidden items are found and cleared from the scene. Collect 1/3 Candle Wax.

At the pyramid, cut the glass with the Glass Cutter and collect the Magic Fertilizer. Go outside by the well.

Use the Magic Fertilizer on the bucket and collect the Bucket With Fertilizer to use at the wall on the ivy.

Mini-Puzzle 1: Examining the chest begins a puzzle. CHEATS: Rotate rings until an image is formed. Sometimes when a ring is rotated it affects the direction of the ring beside it. Keep turning ring until picture created.

Spirits of Mystery - The Dark Minotaur -Rings

Spirits of Mystery – The Dark Minotaur -Rings

Brush the cat with Chester’s Brush and place him in the menagerie. Collect the Key to Room Number 8. The Amulet opens the menagerie. Exchange Bamboo with Chester to collect the Green Button.

Mini-Puzzle 2: Place the Yellow Button and Green Button into the grooves to begin the second puzzle in the chapter. When finished solving puzzle. Use hints to obtain instructions to solve puzzle and overcome a block. Go to the hotel.

Spirits of Mystery - The Dark Minotaur -Mini Puzzle 2

Spirits of Mystery – The Dark Minotaur -Mini Puzzle 2

Chester the cat is saved. Three more animals to find and rescue.

SECTION 3: THE HOTEL

Collect the 2/3 Candle Wax, the Pot of Milk, and the Page. Exit through the door.

Select the picture twice and collect the following: Chair LegPiece of Yarn, and Snake Eye. Secure the Chair Leg with Tape and collect the 3/3 Candle.

Examine the snake. Place the Firewood and Snake Eye inside the snake’s mouth and socket. Place 3 Candle Waxes in the ladle. Place the Piece of Yarn in the box and touch the box twice. Exchange the Candle in the fire to collect the Lit Candle to place in the lamp. To reveal the code on the Book Page, hold the Book Page over the flame. Exit through the door.

Go through the left door by placing the Key To Room 8 in the lock. Collect the Lock Part under the pillow.

Collect a Shield by opening and closing the door to find hidden items. HINT: the Invisibility Potion is all used up and the player is visible again. Isa provides a Puzzle Part. To exit, access the hatch by removing the rug.

Place the Bag of Luminous Fungi Spores and Volcanic Ashes inside the basket. Collect the Sword.

In this section there is only one HOP to clear and one mini-puzzle to solve.

HOP: To illuminate the scene, light the lantern with the lighter. Use the Sword to break the vase to take the lyre and collect the Cooper Knife.

Mini-Puzzle: Place the Shield and Sword on the knight by the back door. HINT: position the knights in order by moving the joints. Exit through the door.

Spirits of Mystery - The Dark Minotaur -Knights

Spirits of Mystery – The Dark Minotaur -Knights

SECTION 4: THE FOREST PRINCE

The Forest Prince gives player the Mirror. Collect the Berries and Bamboo. To collect the Cinnamon use the Cooper Knife on the tree. Move right.

Mini-Puzzle 1: Using the Mirror on the nymph to begin the sections first mini-puzzle. HINT: Collect the monsters by viewing scene with Mirror.

Collect the Recipe, the Wine Glass, and the Onion. To collect the Pestle give the Bamboo to Chester once Amulet is opened.

Mini-Puzzle 2: Click on the waterfall to activate the second mini-puzzle. HINT: Match like items to make them disappear from the scene before time runs out. Receive more time to complete the puzzle by resetting the game; progress however is lost.

Spirits of Mystery - The Dark Minotaur -Match Game

Spirits of Mystery – The Dark Minotaur -Match Game

Exchange the Wine Glass for the Wine Glass With Water. Cut the Onion with the Cooper Knife. Collect the Tear and Cauldron after giving Wine Glass With Water to the snake.

Placing the Cauldron in the water fills it up and provides player with a Full Cauldron to use to make an Elixir by following Recipe provided. Give the Elixir to the Prince to obtain the Part of the Elf Wand. Exit left.

Mini-Puzzle 3: Placing Puzzle Part on the sign activates this game. Collect the Diamond after switching pieces in the same row. Isa has the Magic Powder, take it and use it on the door. Collect the Bracelet and Sickle With Handle. Exit right through the door.

Collect the Cheese and Seaweed. At the plant, collect the Bamboo and Spider. Give Chester the Bamboo after opening the Amulet and collect the ½ Monster Head. Place the bracelet on the dragon to start a hidden object game. When finished collect the Top Of The Elf Wand. Exit through the door.

SECTION 5: HANNA’S HOUSE

Collect the Sickle and Fir Tree. Place the Cheese in front of the mouse hole and Fir Tree in the groove to collect the Horn to place on the deer head. The teeth below the counter opens when the Horn is selected. Collect the Jug and exit right.
Mini-Puzzle 1: Placing the spider on the web begins game. The objective of the game is to place spiders on the web until all spiders are on web. Collect the Hammer. Exit left.

Collect the Edged Sickle by placing and grabbing various items to use on the plant by the fence. This action activates the first HOP. When complete collect the Elf Wand Sphere. Go right.

Assemble the Elf Wand by combining the Part of the Elf Wand, Top Of The Elf Wand and Elf Wand Sphere together and placing wand in the dragon’s paw. Collect a Feather by using Elf Wand on guard. Travel towards the castle. Isa provides the Magic Powder and Key. Place the Diamond on the head of the gargoyle and collect the Hammer.

Collect the ½ Medal by using the Magic Powder on the door and giving Arton the Feather. Climb the ladder to exit the scene. Collect the Horn after playing the Hidden Object Game to place on the dragon chest. Open the chest with the Key. From Isa, get Isa’s Yarn Ball and the Magic Powder. Clear the second HOP and collect the 2/2 Medal.

Mini-Puzzle 2: Place 2 Medals on portal door to start game. When placed in the correct spot, the puzzle piece lights up. The third HOP starts when the Magic Powder is placed on the portal. Collect the 2/2 Monster Head.

Spirits of Mystery - The Dark Minotaur -Medals

Spirits of Mystery – The Dark Minotaur -Medals

Mini-Puzzle 3: At the castle door, placing the 2 Monster Heads on the door begins the game. Place the heads in the correct order. Clear the fourth HOP and collect ½ Stone Feather.

Spirits of Mystery - The Dark Minotaur - Monster Heads

Spirits of Mystery – The Dark Minotaur – Monster Heads

Mini-Puzzle 4: Rings must be rotated and placed in order to solve the puzzle and collect the Glove.

Solve the fifth HOP and collect the Pin.

Fill the with water to collect the Jug With Water. Rescue the Turtle by breaking the glass with the Hammer. Feed the Turtle with Seaweed and collect 2/2 Stone Feather. Collect the Magic Flower by using the Glove. Exit towards the right door.

SECTION 6: THE CASTLE

Hanna provides the second Invisibility Potion in exchange for the Magic Flower. Complete the first HOP and collect the Spear. Collect the Obsidian Claw by breaking the creature’s claw with the Hammer. Collect the Bell by placing Pin on it. Exit left.

Collect the Fruit Picker and Magic Growth Pear after opening book on table, flipping through the pages and taking a picture. Exit through the center door.

Collect the Domino and the Bottle by giving the goblin the Magic Growth Pear. Collect the Tweezers by placing 2 Stone Feathers on the door. Exit through the right door.
Collect the Horn by placing Bell on the panther’s tail and Cup of Milk by placing Pot of Milk in the bowl.

Mini-Puzzle 1: Placing Domino on the throne begins the first mini-game. Drag like items together to arrange by background color.

Obtain the Lens by using the Obsidian Claw on the stained-glass window. Go through the archway with the Invisibility Potion or gameplay will stop. Exit left.

The Obsidian Claw is also used to cut the cactus to receive Acid that should be collected in the Bottle. The second mini-game is activated by placing the Lens on the stones. With the Tweezers collect the Seeds. Exit right after walking down four times.

Make sure to take the Invisibility Potion and obtain the Book to enter the throne room in the castle or gameplay will be stopped.

Collect the Pliers and Ring and play the Hidden Object Game to receive the Tooth. Use the Acid on the frame and place the Horn, Ring, and Tooth on the face.

Mini-Puzzle 2: Begins when Isa’s Yarn Ball is placed on the maze. Get through the maze by taking the Clue. Hint: Keep in mind that the player will be taken back to the beginning of the maze if she makes a wrong move.

Use the Acid on the Chain to collect it and the Pliers on the glass tube by the monster. Give the cat the Cup of Milk to receive the Fire Medallion to place on the monster’s Chain. Exit through the door.

Collect the Pick, File, Clay Flask, Wheel, and Axe. Fill the Clay Flask with water to collect the Clay Flask With Water.

Collect the Luminous Moss and Silver Nugget (use the Pick) and repair the pipes by placing items in the correct places.

Inside the castle, clear the HOP to collect the Seal and Silver.

Follow the Recipe in the Book to make the Growth Potion. Clear the next two HOPs to collect the Shovel and Grain.

Spirits of Mystery - The Dark Minotaur -Recipe

Spirits of Mystery – The Dark Minotaur -Recipe

At the flower bed collect the Lock Key and ½ Puzzle Part. Plant the Seed and add the Growth Potion. The Invisibility Potion is all used up.

Rescue the bird by using the Lock Key and feeding it grain to collect the 2 Puzzle Parts which activates the final mini-puzzle.

Mini-Puzzle 3: Rotate the parts until an image is created.

All four magical animals are rescued and the monster banished to the netherworld.


Congratulations! You’ve completed our Spirits of Mystery – The Dark Minotaur Walkthrough!

For more great tips and tricks, visit our blog!

The Spirits of Mystery: The Dark Minotaur Walkthrough Gameplay Guide is meant as a guide and does not contain cheats, hacks, or serials.


The post Spirits of Mystery – The Dark Minotaur Walkthrough appeared first on GameHouse.

Avalon Legends Solitaire 2 Walkthrough

$
0
0

Avalon Legends Solitaire is a magical spin on the classic card game. Take on the role of a mystic druid on the hunt to reclaim cards of power that were stolen long ago. The journey will be long and hard, but the rewards are great. Do you have what it takes to reclaim the lost deck and use its power to weather the coming storm? This walkthrough will give you the tips and tricks that you need to ensure you can reach the finale of Avalon Legends Solitaire 2.

Contents

Avalon Legends Solitaire 2 Walkthrough

Getting Started

  • To start the game, simply click on the play button from the main menu. The first level will automatically load after the introductory cutscene is finished.
  • Every stage has an objective. Be mindful of these so you don’t waste your moves.
  • The card at the bottom of the screen is referred to as the Foundation Card. It is the one you will build your deck around.
  • Even if you start your stack by counting up, don’t forget that you can switch the direction that your stack is going. You can even go back and forth to get the best combo possible.
  • The game will highlight cards that can be played on the first three levels, but after that, you are on your own.
  • Generally, you will get one undo per level. Some levels will give more or less of these as you progress.
  • You can keep Wildcards in between hands, so don’t feel pressured to play them right away.
  • Clicking on the Magic Deck button will show you your progress towards completing the deck and winning the game.
  • The score screen at the end of each hand will show you how many more hands remain in that stage.
  • Achievements are earned for completing tasks within the game. You can view the ones you have earned, as well as the incomplete achievements, from the View Awards button on the menu. The View Awards button is also accessible at the end of each hand. See if you can collect them all.


Avalon Legends Solitaire - Map

Avalon Legends Solitaire – Map

Solitaire

  • This represents the bulk of the game, but Avalon is not quite like the traditional card game you know. You will always be building a stack of cards around the Foundation Card at the bottom of your screen. You can play any card that is one above or below that Foundation Card. Aces are low, but Kings count as one below an Ace.
  • As in the traditional game, the cards on the board are arranged in stacks. You can only play with the top card of each stack. In order to get to the lower ones, you must first use the top cards. Unlike the classic card game, you do not need to clear all the stacks to finish a level. Clearing the board gives you a large score bonus, and it can sometimes be critical to getting the score needed to finish a stage.
  • Wildcards will sometimes appear on the board. They are white with a blue text. Unlike normal cards, you can see what they are even before they are flipped, but you must still clear the stack to play them. Wildcards won’t be added to your Foundation Card. Instead, they go to a separate area for you to play them later on. They can be played on any Foundation, but must be followed up with cards according to normal rules.
Avalon Legends Solitaire - Wildcard

Avalon Legends Solitaire – Wildcard

  • Hands end when the board is clear of stacked cards or when you have run out of cards in the Draw Deck. If this happens, simply click on the End Hand and Save button to finish the round and head to the score screen. Most rounds have more than one hand, so don’t worry if you don’t do as well as you had hoped. You will have to play all of the hands to finish the stage, but once the objective is completed, you will be able to advance, regardless of your result. You should still do your best, even when the hands don’t matter. Getting gold early is key to being able to get the upgrades that you need quickly before the endgame hits. These extra hands are also great times to collect Wildcards and Magical Cards without having to worry about extra objectives.
  • Combos occur when you make 6 moves without having to flip over a card from the Draw Deck. Keeping stringing together moves for as long as you can to get the best score possible. Once you are out of possible moves, click on the Draw Deck to end the combo. Using a Wildcard will not count against your combo. Combos are the key to getting the scores needed at higher levels of the game.
Avalon Legends Solitaire - Combo

Avalon Legends Solitaire – Combo

  • Gold is earned from clearing cards and from finishing levels. Clearing a stack from the board will net you bonus gold. Finishing a stage with a perfect rating gets you the most gold possible, but you will still earn a smaller reward for finishing with less than five cards. The shop can be accessed in between hands to use the gold you earn to get powerful items. These are very expensive, but make the game much easier in the later stages. The Rabbit’s Foot and the Deck of Plenty are two of the most cost effective upgrades in the game.
  • Some cards on the board will appear encased in granite blocks. Before you can play these cards, you must find the Magic Hammer Card. The Hammer’s location can be seen before it can be played, but it must be uncovered to get access to it. Once it is uncovered, the granite cards will flip over, and any cards directly under the Hammer will be flipped as well. Often the Hammer will appear in between two stacks. This means that it must be revealed on both stacks in order to use it. Clearing the Hammer quickly should be a top priority. Leaving the granite cards on the board is a severe handicap.
  • Cards that appear coated in a translucent layer of ice are Ice Cards. These cause snow to appear on other cards on the board. Just like granite cards, snow covered cards can not be played right away. All of the Ice Cards must be cleared from the board before the snow will be cleared. Unlike the Magic Hammer, the Ice Cards follow normal card rules. You must play them onto a foundation card, and you won’t be able to see what is below the top card in the stack. Just like the Magic Hammer, Ice Cards should be a priority, but clearing them can be a bit trickier. This is a good time to use Wildcards you have saved up from other hands.
  • Magic Cards will appear in some stages. These are the key objective of the game. You must collect all 52 in order to beat the game. To collect the Magic Card, simply play it as you normally would. They obey all the standard rules of the game. If you have not yet collected it, the Magic Card will flash with an arcane purple glow. Magic Cards earn twice the points of regular cards when they are cleared. As you collect them, they will replace their non magical equivalent in your deck.
  • This game lacks a map or overworld section. Instead, you are given a bit of story and taken to the next stage. Stages get harder as the game goes on, so using your skills and knowledge of the game mechanics becomes even more critical. Always remember to check the stage objective at the beginning of each level. Sometimes it will be a curveball. As an example, Stage 2, the Icy Peaks, requires you to get a perfect hand. Your score is irrelevant on this stage if you can’t clear the board at least once.
Avalon Legends Solitaire - Gameplay

Avalon Legends Solitaire – Gameplay

If you keep all of the tips and tricks contained in this walkthrough fresh in your mind, reclaiming all of the lost magical cards should be no problem, and you will be a master druid in a flash. Good luck, and have fun!

For more great tips and tricks, visit our blog!


This Avalon Legends Solitaire 2 Walkthrough is meant as a guide and contains no cheat codes, hacks, or serials.

The post Avalon Legends Solitaire 2 Walkthrough appeared first on GameHouse.
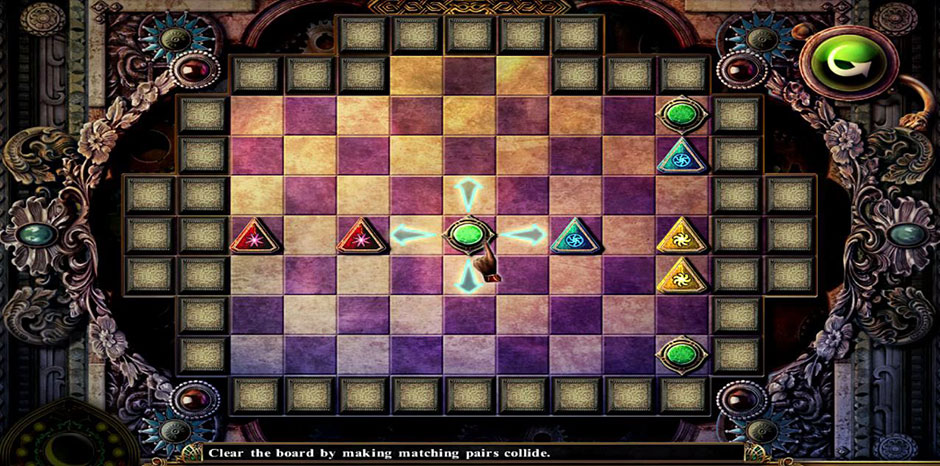

Witches’ Legacy – Lair of the Witch Queen Walkthrough

$
0
0

The second game in the Witches’ Legacy series, this game follows Lynn after she has awakened her magic power. After getting a letter about Elizabeth, she must go on a new journey to stop an evil being before she can complete her descent into darkness. Our Witches’ Legacy – Lair of the Witch Queen walkthrough will help you through this adventurous hidden object game.

Contents

General Tips & Tricks


At the start, you can pick a difficulty level.

Casual will make things easier to spot, and there are no penalties for clicking the wrong item. Hint and skip buttons will recharge faster.

Normal is the standard difficulty level for the game. Sparkles will still appear to indicate active areas.

Hard mode has no sparkles to indicate activities, no hint or skip buttons, and has penalties for mis-clicks in hidden object scenes.

Click on your journal in the lower left corner for notes on the story and important clues.

From the journal, you can also click on the map after you locate it. This will show you if you have things left to do in a certain area.

Your inventory is the bar at the bottom of the screen. Items you pick up will be here to use. It will hide unless you mouse over it. You can also click the lock on the right of the bar to keep it shown.

The skull on the bottom right is your hint button. You can use hints anytime, but you’ll need to wait for the skull to refill before you can use another one.

The cursor will change depending on what you can do. You will see the following icons:

The hand icon shows when you can pick up an item or interact with it.

The magnifying glass tells you when you can zoom in to an area.

A speech bubble means you can speak with that character.

Throughout the game you will need to solve hidden object scenes and mini-game puzzles. If you get stuck on a hidden object scene, you can opt to complete a memory match game instead by clicking the green button in the top right corner. You can switch back to the hidden object scene at any time.

Witches' Legacy - Lair of the Witch Queen - Map

Witches’ Legacy – Lair of the Witch Queen – Map

Witches’ Legacy – Lair of the Witch Queen Walkthrough

Chapter 1: Follow Lynn

House

Complete the tutorial if you want an introduction to how to play.

Zoom in on the dollhouse and open the lid. Pick up the Imp inside and name it.

Open up the drawer underneath the dollhouse and take the Mirror and Ribbon.

Click on the planter on the left side of the room. Hang the Ribbon on the pole and then click on it twice to receive the Cabinet Key.

Click on the wardrobe on the right and use the Cabinet Key to open it. Pick up the Axe. Try to open the door; click the handle and use the Axe to chop it open.

Go up the stairs.

Upstairs Bedroom

Click on the desk and collect the ½ Rune Stencil. Open the book on the desk and turn the page to pick up a Ring.

Zoom in on the circle on the floor and pick up the Note. Click on the book to the left and insert the Ring. Click on the book two times to receive the 2/2 Rune Stencil. Zoom back out.

Put the Rune Stencils into the window. Click on the dress and put down the Mirror to get the combination. Go back downstairs.

Click on the wardrobe and use the combination on the box to open it. Grab the Chalk and go back upstairs to the circle.

Put the chalk on the circle and complete the puzzle by connecting the colored circles. Paths cannot cross.

Witches' Legacy - Lair of the Witch Queen - Colored Circles

Witches’ Legacy – Lair of the Witch Queen – Colored Circles

Go through the portal that opens.

Chapter 2: Find Morgana

Outside Street

Pick up the Bag of Hay on the right. Open the mailbox and take the Map. Click on the wagon to complete a hidden object scene. Find all the objects or complete the memory game. You’ll receive Punch Card #80.

Use the Punch Card #80 on the mailbox and take the Lever. Place it on the side and pull it to get the Planets Diagram and Saw.

Click on the torch on the opposite side of the scene. Use the Saw to take the Torch and the Air Medallion. Use the Torch on the dark cloud and move forward.

Front of Building

Talk to Lynn, the girl on the bench. Select the snow pile in the center of the path and take the Valve. Walk to the right.

Outer Gate

Talk to Lynn again. Look at the manhole in the street and take the Glove. Walk back to the front of the building.

Front of Building

Take the Earth off of the bench. Use the Glove to pick up the blade. Go back to the right.

Outer Gate

Look at the gate. Speak to the guard. Give the Bag of Hay to the horse and use the Blade on the hay. Pick up the Breaker Handle and the Sun.

Look at the suspended platform and find the controls on the left side. Insert the Breaker Handle and lift it to unlock a mini-game.

To complete the mini-game, find the path from left to right using the right amount of colored circles.

Witches' Legacy - Lair of the Witch Queen - Minigame 1

Witches’ Legacy – Lair of the Witch Queen – Minigame 1

Now you can click on the platform for a hidden object scene. Find all the items or complete the memory game to receive Punch Card #78. Go back twice to the outside street.

Outside Street

Use the Punch Card #78 on the mailbox and pull the lever. Take the Fly. Go forward and right back to the outside gate.

Outside Gate

Look at the gate and place the Fly in the web. Open the gate and go right.

Entrance

Pick up the Shovel to the left of the door. Knock on the door and speak with Morgana. Take the Bat and walk back down to the gate.

Outside Gate

Look at the box and put the Bat in the lock to open it. Take Tom’s Things. Head back right.

Entrance

Give Tom’s Things to Morgana and talk to her. Look in the box she holds. Talk to Lynn.

Open the box on the table and take Saturn and the Office Doorknob. Walk back to the area with the benches.

Chapter 3: Go to University

Click on the door to find a planets mini-game. Use the Planets Diagram, Earth, Saturn, and Sun on the door to activate the mini-game. Use the diagram to press the planets in the right order.

Witches' Legacy - Lair of the Witch Queen - MiniGame Chapter 3

Witches’ Legacy – Lair of the Witch Queen – MiniGame Chapter 3

Elegant Hallway

Go through the door. Look at the desk and grab the Small Pliers. Read the certificate. Go back and right to the outside gate again.

Outside Gate

Look at the building’s ledge on the left and click on the nozzle to send your Imp in. Give him the Small Pliers and you’ll receive the Firehose Nozzle. Travel back through the planets door.

Elegant Hallway
Zoom in on the stairs and talk to Lynn. Open the cabinet here and attach the Firehose Nozzle to the hose. Put the Valve on the pipe and take the Hose. Walk forward.

Upstairs Hallway

Take the ½ Bas Relief from the right chair. Click on the second door on the left for a hidden object scene. Find all the objects or complete the memory game to receive the Golden Spider. Look at the first door on the left for a mini-game.

Place the Office Doorknob on the door to start the game. Create a connected path using the grid that touches the circles a certain number of times. Complete all three levels to proceed. Go into the office.

Witches' Legacy - Lair of the Witch Queen - Level 3

Witches’ Legacy – Lair of the Witch Queen – Level 3

Office

Talk to Lynn and read the note on the left wall. Zoom in on the desk and turn on the kettle to take a Hot Kettle. Take the 1/2 Heart Locket. Read the newspaper.

Look down at the frozen door and use the Hot Kettle to open it. Go back to the hall.

Upstairs Hallway

Use the Hot Kettle on the ice on the right side. Take the Ruby and go back into the office.

Office

Look at the safe on the bookshelf and put the Ruby in the indent. Click it and take the Fire Medallion and Punch Card #79. Go back four times to get to the outside street.

Outside Street

Use the Punch Card #79 on the mailbox and pull the handle. Take the Stone Clock Piece. Click on the wagon again for another hidden object scene. Find all the items on the list or complete the memory game to earn the Box of Matches. Go forward to the area with benches.

Front of Building

Look at the base of the left statue. Place the Stone Clock Piece in the indent and click the tile. Take the Half of Tile. Go forward twice to the upstairs hallway.

Upstairs Hallway

Click on the frame on the left side, and place the Half of Tile inside. Flip the tiles so that the number reads correctly. Take the Toy Torch and the Dynamite. Go back downstairs.

Witches' Legacy - Lair of the Witch Queen - Number

Witches’ Legacy – Lair of the Witch Queen – Number

Elegant Hallway

Zoom in on the desk and give the imp your Toy Torch. Click on the hole in the glass to start a mini-game.

Click on the arrows to create a path for the imp to follow to the other side to finish the mini-game and receive a Water Medallion. Go back and try to return to the outside gate.

Witches' Legacy - Lair of the Witch Queen - Path

Witches’ Legacy – Lair of the Witch Queen – Path

Front of Building

Look at the ice to the right and put the Dynamite in the crack. Use the Box of Matches on the dynamite. Go right and forward.

Abandoned Car

Take the Earth Medallion from the tree. Look at the rings and place the medallions in the right order. Place Fire Medallion in upper left, Air Medallion in lower left, Water Medallion in upper right, and Earth Medallion in lower right. This starts a mini-game.

To complete the mini-game, move the colored tiles to the circles of the same color. Click in this sequence to finish: A-D-E-B-B-C-D-E-E-D-E-E-E-B-E-E-E-A-E-E-E-C-C-E-A-E-E-E. Go forward.

Witches' Legacy - Lair of the Witch Queen - Tiles

Witches’ Legacy – Lair of the Witch Queen – Tiles

Chapter 4: At the Lake

The Pier

Zoom in on the dock and take the Thermal Fuse. Try to take the Horn. Click on the boat for a hidden object scene. Find all the objects on the list or play the memory game to earn a Gaff. Go to the left.

Frozen Crevice

Take the Folding Knife and the Lever. Talk to the tree. Move forward.

Fountain

Take the 1/2 Vine and the Crowbar. Use the Gaff on the right side tree to get the 2/2 Vine. Use the Vine on the boulder and walk down.

Frozen Crevice

Give your Vine to the tree and take the Bowl near the roots. Use the Shovel on the snow by the tree and pick up the Acorn. Go forward.

Fountain

Zoom in on the fountain and put the Bowl under the water to pick up a Filled Bowl. Go back down to the pier.

The Pier

Use the Shovel on the dirt to dig a hole. Put your Acorn in the hole and use the Shovel to bury it. Pour your Filled Bowl over the dirt. Go back to the area with the car.

Abandoned Car

Click on the car and use the Crowbar to open it. Take the Chest Emblem. Zoom in on the fire extinguished and cut the straps with the Folding Knife. Take the Fire Extinguisher. Go down and right back to the house entrance.

Entrance

Look at the box on the table and place the Chest Emblem in the indent. Take the 2/2 Heart Locket piece and go back to the pier.

The Pier

Use the Fire Extinguisher on the fire. Walk forward towards the house.

Outside Cabin

Put your Heart Locket in the chest of the angry snowman. Take the Strainer. Go back to the pier.

The Pier

Click on the boat to start a hidden object scene. Find all the objects on the list or complete the memory game to receive a 1/2 Triangular Rune.

Zoom in to the dock and click on the hole in the water. Use the Strainer to receive the Horn. Go forward.

Outside Cabin

Use the Horn on the skull in order to open the door and go inside.

Witches' Legacy - Lair of the Witch Queen - Skull

Witches’ Legacy – Lair of the Witch Queen – Skull

Chapter 5: The Decrepit House

Decrepit House

Take the Disc Part and click on the mirror to make it break. Take the 2/2 Triangular Rune. Take the 1/4 Mirror Fragment from the trapdoor area. Put your Triangular Rune in the indent and go through the trapdoor.

Basement

Pick up the 2/4 Mirror Fragment. Use your imp to get the Gas Burner from the left shelves. Pick up the Wrench from the left table. Click on the center table to start a hidden object scene.

Find all the hidden objects or complete a memory game in order to receive the Clockwork Key. Go back upstairs.

Decrepit House

Use your Clockwork Key on the clock to the left. Pick up the 3/4 Mirror Fragment and Silver Spider inside. Go back through the trapdoor.

Basement

Find the mini-game located on the shelves. Insert the Golden Spider and Silver Spider to start the mini-game. Swap spiders in order to complete the mini-game. Move them as follows:

A2 to B3, E2 to D3, B3 to D1, D3 to B1, A4 to B3, B3 to C4, D1 to E2, E4 to C2, C2 to A4, B1 to C2, C4 to A2, E2 to C4, C2 to D1, A2 to B1, B1 to E4, C4 to D3, D1 to B3, B3 to A2, and D3 to E2.

Witches' Legacy - Lair of the Witch Queen - Spiders

Witches’ Legacy – Lair of the Witch Queen – Spiders

Pick up the Pliers and Hose Clamp. Go back upstairs.

Decrepit House

Use your Pliers and grab the 4/4 Mirror Fragment. Look at the broken mirror and use the Mirror Fragments to fix it. You’ll need to complete the mini-game, which is like a jigsaw puzzle. You can rotate and drag the pieces to complete it. Go into the mirror.

Witches' Legacy - Lair of the Witch Queen - Broken Mirror

Witches’ Legacy – Lair of the Witch Queen – Broken Mirror

In the Mirror

Talk to Wolfgang and receive the Book Emblem. Grab the Lantern hanging from the chain. Go back through the trapdoor to the basement.

Basement

Remove the cover on the furniture to the right. Use the Book Emblem and take the 1/2 Coat of Arms. Click on the table for another hidden object scene. Find the items on the list or finish a memory match game to receive the Bar.

Outside Cabin

Look into the tree stump and hang the Lantern up on the left side. Click inside the stump and take the Magic Crystal. Go back two screens to the car.

Chapter 6: Return to University

Abandoned Car

Melt the ice on the right with the Gas Burner and take the 2/2 Coat of Arms. Go back into the University and up the stairs.

Upstairs Hallway

Look over the door and place the Coat of Arms in the indent. Go into the second door on the left to complete a hidden object scene. Find the items on the list or complete the memory game to get a Workshop Key. Go through the double doors.

Library

Take the 2/2 Bas Relief and zoom in on the counter to pick up a Safe Handle. Go back to the University office.

Office

Click on the desk and insert the Safe Handle to start a mini-game. To complete the game, you need to click on the buttons in order to move the characters into the right positions. To finish, follow this sequence:

A, E, C, B, F, C, F, C, B, F

Witches' Legacy - Lair of the Witch Queen - Portraits

Witches’ Legacy – Lair of the Witch Queen – Portraits

Receive the Access Card, Thermal Fuse, and the Shawl. Go back to the library.

Library

Zoom in on the counter and use your Access Card on the cash register. Take the Lock Part and Acid. Zoom in on the fire and use your Shawl to receive the Tongs. Go back downstairs.

Elegant Hallway

Zoom in on the door to the left. Use your Wrench and remove the bolts. Put the Lock Part inside to start a mini-game. Move the symbols around to their proper colored circles. Use the outer shield to rotate the symbols and the inner shield to grab them and place them in the correct location. Go through the doors.

[insert screenshot Chapter6_Circles]

Statue

Zoom in on the sundial to the left side. Put the Bas Relief on top and take the Iron Key. Go back to the library.

Library

Zoom in on the counter and use the Iron Key on the safe. Grab the Mold Part and Anvil Emblem. Go back to the statue.

Statue

Zoom in on the book on the bench to the right. Move the leaf to pick up the Chip. Click on the door of the cabin and put the Anvil Emblem in the indent. Use the Workshop Key and go inside.

Workshop

Zoom in on the tank and attach the Hose and Hose Clamp. Zoom in on the hearth and put down the Bar and Tongs. Put the bowl on the heat and place the Bar inside. Receive the Dolphin Symbol. Go back.

Statue

Click on the dolphin statue and use the Acid. Receive the Astronaut. Place the Dolphin Symbol in the indent. Complete the mini-game by matching the numbers. To do this, follow this sequence:
Press 6, 7, and turn C.
Press 7, 9, and turn D.
Press 2, 6, 9, and turn E.
Press 6, 7, 9, and turn F.
Press 2, 6, 7, 9, and turn G.
Press 7, 18, and turn H.
Press 7, 9, 18, and turn I.

Witches' Legacy - Lair of the Witch Queen - Minigame

Witches’ Legacy – Lair of the Witch Queen – Minigame

Take the Mold Part. Go back to the workshop.

Workshop

Click on the furnace and start a new mini-game by placing the two Mold Parts. To restore the mold, press the buttons in this order:

V, M, M, Q, P, O, M, N, T, S, W, L, M, U, R, Q, O, T, U, V, W, N, W, T, T, S, S, V, V, V, L, L, M, M, O, P, and Q.

Witches' Legacy - Lair of the Witch Queen - Furnace

Witches’ Legacy – Lair of the Witch Queen – Furnace

Press the mold and use the Tongs to pour the metal into it. Take the Sewer Key and go down three times and right to the open gate.

Chapter 7: Sewers

Outside Gate

Use the Sewer Key on the manhole cover and go in.

Sewer Entrance

Pick up the Knight and go forward.

Control Room

Take the Bird Key from the panel. Click on the table to start a hidden object scene. Find all the items or finish a memory game and receive the Big Valve. Go back down.

Sewer Entrance

Place the Big Valve on the left pipe. Use the Lever on the valve and go forward.

Control Room

Open the fencer. Zoom in on the panel and receive the Seeds. Go back to the University entrance.

Front of Building

Zoom in on the gate and use the Bird Key. Pull the lever and go through.

Street

Zoom in on the bird cage and take the Thermal Fuse. Go back to the sewer control room.

Control Room

Zoom in on the panel and place the Thermal Fuses to start a mini-game. Use the arrows to place the fuses in the correct sequence.

Witches' Legacy - Lair of the Witch Queen - Fuses

Witches’ Legacy – Lair of the Witch Queen – Fuses

Take the Lock Part and Dimensional Key. Go down.

Sewer Entrance

Click on the left panel for another mini-game. Use the Lock Part to start. Swap tiles so they will have the right color and symbol for the position. Receive the Cro Magnon and Lion Bas Relief. Go back to the street.

Witches' Legacy - Lair of the Witch Queen - Lock Part

Witches’ Legacy – Lair of the Witch Queen – Lock Part

Street

Zoom in on the door and place the Cro Magnon, Knight, and Astronaut to start a mini-game. Turn all the figures so they face inward. Click them in order, 1-5, to complete it. Go through the door.

Chapter 8: Enter the Museum

Museum Start

Pick up the Diagram and look at the statue to take a Twig Key. Go back to the street.

Street

Place the Twig Key in the bird cage and grab the Spearhead. Put the Seeds in the cage and receive the Caged Bird. Go into the museum.

Museum Start

Zoom in on the statue and use the Caged Bird and Spearhead to take the spear. Go forward.

Museum Exhibits

Put the spear on the man to the right. Take the Curtain Tie off the tiger. Go back.

Museum Start

Use the Curtain Tie on the hook hanging from the ceiling. Pull the rope and click on the dinosaur for a hidden object scene. Find the items or finish a memory game to receive a Lion Bas Relief. Go back to the sewer control room.

Control Room

Click on the door and put the Lion Bas Relief into the indent. Go through the door.

Sewer Room

Grab the Pickaxe from the left. Zoom in on the figure to take a Hairpin. Go back to the workshop.

Workshop

Zoom in on the worktable to the right. Use the Diagram and Chip to start a mini-game. Move the chips to match the diagram using the following pattern:

H, F, F, F, F, I, I, G, G, G, G, G, H, H, and I, I, I, I, I.

Witches' Legacy - Lair of the Witch Queen - Diagram

Witches’ Legacy – Lair of the Witch Queen – Diagram

Take the Slingshot and Stone Rune, and go back to the street.

Street

Use your Slingshot on the right to get the Tusk. Go into the museum.

Museum Entrance

Look at the doll and use the Hairpin to unlock the handcuffs. Take the Prehistoric Child and go forward.

Museum Exhibits

Put the Prehistoric Child on the left and take the Glasses. Use the Tusk on the podium to receive the Stone Eye. Go back.

Museum Entrance

Click on the dinosaur for a hidden object scene. Find all items or do a memory game to receive another Prehistoric Child. Go forward.

Museum Exhibits

Place the second Prehistoric Child on the left. Take the Dimensional Key. Go back to the entrance to Morgana’s house.

Chapter 9: Morgana

Entrance

Zoom in on the door and put the Glasses on the face. Go through the door.

Living Room

Take the Bone from the plate. Zoom in on the photo and look at the mini-game to the right. Put the Stone Eye in to start the game. Slide the eye through the path to hit each cell once. Finish to get the Green Gem. Go back to the street.

Street

Zoom in on the hungry dog and give him the Bone. Receive a Second Skull. Go back into the mirror from the Witch’s House.

Mirror
Zoom in on the lock and use the Magic Crystal and a Dimensional Key. Get the Sword Hilt. Go back to the sewer.

Sewer Entrance

Use the Sword Hilt on the blade to the left. Use the Pickaxe to get the Sword. Take the Stone. Go forward.

Control Room

Click on the table to start a hidden object scene. Find all the items or finish a memory game for the Spellbook. Go forward.

Sewer Room

Zoom in on the figure and use the Sword and Spellbook. Receive another Dimensional Key. Go back to Morgana’s living room.

Living Room

Zoom in on the case and break the glass with the Stone. Take the Baton and go to the gate.

Outside Gate

Click on the lowered platform for a hidden object scene. Find all the items or do a memory game and get a Bottle. Go to the car.

Abandoned Car

Zoom in on the trunk and use the Bottle to get a Bottle of Glowing Liquid. Zoom in on the statue and give it the Baton to get the First Skull. Go back to Morgana’s living room.

Living Room

Zoom in on the chest and place the two Skulls. Use the Bottle of Glowing Liquid to start a mini-game. Rotate the rings to connect each skull and get a Dimensional Key. Go back into the mirror.

Witches' Legacy - Lair of the Witch Queen - Skull

Witches’ Legacy – Lair of the Witch Queen – Skull

Mirror

Zoom in on the lock and use the remaining Dimensional Keys. Go forward.

Chapter 10: Mystic World

Mystic Entrance

Take the Sleepy Fruit from the left. Look at the building for a hidden object scene. Find all the items or finish a memory game to get a Dagger. Go forward.

Mystic Gate

Talk to the knight. Take the Pendant Without Chain and use the Dagger to pick up a Stone Bowl. Go to the left.

Battleground

Take the Hexagon. Talk to the tree stump. Click on the fire to complete a hidden object scene. Find everything or do a memory game and receive an Enchanted Sword. Go forward.

Mystic Tree

Take the Small Jug and go back to the entrance.

Mystic Entrance

Place the Pendant Without Chain on the chain hanging on the right to get a Pendant. Go to the gate.

Mystic Gate

Give the Pendant to the knight. Take the Battle Net. Look at the gate and use your Enchanted Sword to break the chains. Go forward.

Mystic Building

Take the Hexagon. Zoom in on the water and use your Battle Net to get a Fish. Go back to the battleground.

Battleground

Zoom in on the case. Use the Small Jug, Fish, Sleepy Fruit, and Stone Bowl. Place fruit in bowl. Use pestle on bowl. Pour the bowl into the jug and add the vial. Use the jug on the fish to make a Fish with Sleeping Potion.

Place fruit in bowl. Use pestle on bowl. Pour the bowl into the jug and add the vial. Use the jug on the fish.

Click on the fire for another hidden object scene. Find all items or do a memory game to get a Whip. Go forward.

Swamp

Give your Fish with Sleeping Potion to the cat to get the Charged Crystal. Use the Whip on the signpost. Have the imp climb up and get the Hexagon. Go back to the building.

Mystic Building

Zoom in on the arch and use the Charged Crystal and Stone Rune to start a mini-game. To finish it, drag the runes so none of the lines cross each other. Receive a Sacred Wand. Go back to the battleground.

Battleground

Use the Sacred Wand on the ground and talk to the tree stump. Pick up the Jewel and Gate Handle. Go back to the entrance.

Mystic Entrance

Zoom in on the statue and use the Jewel and Green Gem. Take the Hexagon. Click on the building for another hidden object scene. Find all items or do a memory game to get another Hexagon. Go forward to the building.

Mystic Building

Use the Hexagons, Disc Part, and Gate Handle on the door to start a mini-game. Rotate the discs to create paths that go to the center. Go through the door.

Witches' Legacy - Lair of the Witch Queen - Hexagon

Witches’ Legacy – Lair of the Witch Queen – Hexagon

Final Room

Talk to Lynn. Select the following responses – 3, 1, 2, 1, and 3.

Congratulations, you’ve now finished our Witches’ Legacy – Lair of the Witch Queen Walkthrough!


For more great tips and tricks, visit our blog!

The Witches’ Legacy – Lair of the Witch Queen is meant as a guide and does not contain cheat codes, hacks or serials.


The post Witches’ Legacy – Lair of the Witch Queen Walkthrough appeared first on GameHouse.
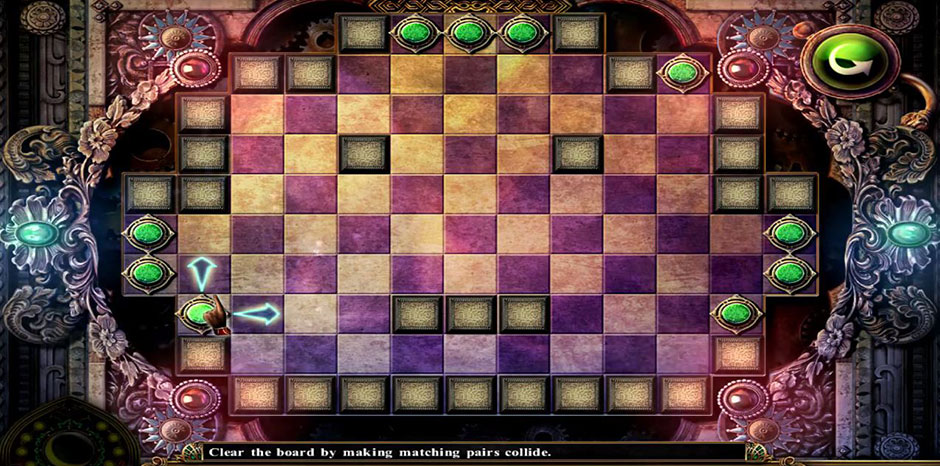
Time Mysteries – The Final Enigma Walkthrough

$
0
0

Esther receives a letter from her uncle prompting her to attend a meeting with a mysterious man. She commences in a journey that will take her across the space. Join her as she attempts to use her wits to influence the past in order to change the future.

You can use Time Mysteries – The Final Enigma Walkthrough as a reference guide when the going gets tough from the beginning until the end. There are plenty of screenshots from actual gameplay to help you understand and solve the miseries.

Contents

General Tips & Tricks

  • This walkthrough will assist you solve mini-puzzles and get all items required to complete the game successfully.
  • Your first step is to play the tutorial to get more insights about gameplay elements.
  • You must perform a task in order to progress in the game. You can look around to see which item you can pick or access your inventory to see if there is any item you can use.
  • There is a Menu button at the bottom right of the screen. You can use this button to get access to the options screen.
  • If you want information about gameplay, click the Menu button-Options-Help.
  • Inventory is located at the bottom of the screen. Items collected throughout the game are kept here.
  • Click anywhere outside the zoom-in window to close it. Tip: If you are able to zoom in on the area again, chances are you haven’t found everything in that location.

Difficulty Modes

When in Regular mode, Skip and Hint buttons recharge more quickly while active areas glitters. In Expert mode both the Skip and Hint buttons recharge slowly while active areas does not glitter at all.

Cursors

  • Arrow Cursor-This cursor tells you the direction you are supposed to move to.
  • Hand Cursor –This cursor tells you to pick an item to add to the inventory
  • Mouth Icon- This cursor tells you that you can interact with another character in the game
  • Magnifying Glass Icon – It tells you that you can zoom into the area to inspect it more closely

Hints: Move any of the above cursor around watching it to change. It is the only way to be sure that you have found and picked everything.

Elements in Gameplay

  • Hidden Object Scenes (HOS): Hidden object scenes will be indicated by green sparkles. You will need to find items in these scenes. There is no penalty clicking on the scene or item severally.
  • Inventory: You can access your inventory at the bottom side of the screen. Items collected in every scene go to the inventory.
  • Hints: The hint button found near the Diary on the lower left side corner of your screen. When you are stuck, you can access it by clicking the question mark in the blue circle.
  • Diary: The diary is located in the lower left side corner of the screen. There is a tab containing notes about the story line. You can read this section to keep up-to-date on the gameplay.
  • Time-Travel Device: You can access this device from the lower tight side corner of your screen. This device functions like a map.
  • Skip: You can click on the skip button if you don’t feel like solving a mini-game.


Time Mysteries: The Final Enigma Walkthrough

Esther Ambrose receives a letter from Merlin, her uncle, instructing her to travel through a difficult journey. She is given a task of fixing the past and preventing the world from becoming to an end. In Time Mysteries: The Final Enigma, you will play the role of Esther Ambrose. In the opening, Ester is attacked by his Merlin’s wife. This is your first task where you are supposed to defeat this sorceress. Keep in mind that your task is not only to save the world, but discover the enemy behind it. Your primary achievement is to rise to any challenge and save the world from catastrophe.


Chapter 1: Uncle Sean

House

  • Zoom into the desk and take the Medallion. Open the bag on the Chair and take the Wooden Puzzle 1/4. Take the Room Key from the window.
  • Click twice to tear the wall paper back. Use the Room Key to open the door. Enter inside, take notes from the man and then proceed to the street.

Street

  • Click on the boy to talk to him and proceed to Uncle Sean’s House.

Uncle Sean’s House

  • Click on the flower near the railing and take the Door Handle. Proceed to the alley. Click on the hooded man to talk to him and take the Crowbar. Go back to the street.

Street

  • Zoom in near the boy and use the Crowbar on the chest. In the hidden object area, find all the items. Once you get the Shears, go forward one screen. Zoom into the basement window and use the Shears on the branches and then the Crowbar on the window.

Basement

  • Enter the basement and click on the device in front of you. The mini-game will start. The primary goal of this game is to get the energy to the fuses by turning the dials. When you have done it successfully, click the handle on the right.
  • Zoom into the shelf and take the Wooden Puzzle 2/4. Take the Cork from the bottle and remove the hanging cloth. Remove the curtain on the wall to reveal a hidden object area.
Time Mysteries The Final Enigma - Fuses

Time Mysteries The Final Enigma – Fuses

  • Play the hidden object game to find all the items on the list. You will get an Empty Oil Can.
  • Zoom into the machine on the back wall and use the Empty Oil Can on the empty platform. Start the machine by clicking on the valve and then click the handle to refill the Empty Oil Can.
  • Zoom into the door at the top of the stairs and apply the oil from the Full Oil Can on the gears. Use the Door Handle to open the door. Go through the door.

Next Room


  • Talk to the man and then Click on the device in front of you to start a mini-game.
Time Mysteries The Final Enigma - Device

Time Mysteries The Final Enigma – Device

  • The goal of the game is to place all the pieces in their right location. Clocks on the bottom left, gears on the top let and hourglasses on the top right. When done, move the arms of the clock in the bottom right by pressing the buttons on green and orange on the sides.
  • Talk to Uncle Sean and then take the Time-Travel Device. Zoom into the Mirror and take the notes. Adjust to 487 on the Time-travel device and travel forward.

Chapter Two: Merlin’s World 487


Bridge

  • Zoom into the bridge end, take the Chalk and zoom out. On the stone near the path, scroll to learn how to cast the spell.
  • Use the Chalk to complete the drawing on the stone. Next to the drawing, move the stone and take the Frost Powder.
  • Again zoom into the bridge and use the Frost Powder on the water. Cross the river to the Cave.

Cave

  • Click on the 4 rocks to start the mini-game.
  • The primary goal of this game is to find the correct sequence to light up the rocks. The solution is 2, 3 1, 4 then 4, 2, 1, 3 and finally 1, 4, 3, 2. Climb the cliff.
Time Mysteries The Final Enigma - Rocks

Time Mysteries The Final Enigma – Rocks

Cliff

  • Click to play the HOS and collect all the items. The Bucket Handle goes to the inventory.

Merlin’s staff


  • Click on the ground near the Merlin’s staff and take the Tough Branch. Zoom into the tree and speak to Merlin and then travel to 1796 to the street scene.

Street

  • Zoom into the bucket and use the Cork on the hole and the Bucket Handle on the top. Take the bucket and travel to 487 to the cave.

Cave

  • Place the Touch Branch on the Pickax Head. Take the Pickax and then go back one screen. Z

Bridge

  • Zoom into the end of the Bridge and strike the Pickax on the ice thrice to break through. Refill the Bucket with water and return to the Cliff.
  • Cliff
    Zoom into the tree and place the Bucket Of Water on Merlin and then proceed to Merlin’s Hut.

Merlin’s Hut

  • Zoom into the roof of the hut and read the notes. Take the Dragon Carving and then enter the hut.

Chapter Three: Nimue


  • Zoom into the girl and take the Vines Stone. Place the Vines Stone on the bottom of the bowl and take the Dragon Key and Magic Crystals. Play the HOS and find all the objects on the list and take the Tobacco.

Alley

  • Travel to 1796 to the alley and use the Tobacco on the man. Pick the Dragon Carving and travel in 487 to the Hut.

Hut


  • Zoom into the chest and place the Dragon Key on the lock. Turn the key and place the Dragon Carvings on the chest. A mini-game will start.

Time Mysteries The Final Enigma - Tiles

  • To solve this game, swap the tiles to create a picture. Take the 502 Times Crystal and use on the empty slot. Travel to the year 502. Take the Crystal Shard and return to the Hut. Take the Engraved Brooch from the dream catcher and the Magic Fruit from the magic plant. Travel in 487 to the cliff.

Cliff

  • Use the Magic Crystals on the Merlin’s Staff; take the Magic Staff and travel to Uncle Sam at in the year 1796.

Uncle Sam’s house

  • Place the Engraved Brooch on the cabinet’s lock to start a mini-game.
  • Make sure all the hands are free by clicking on the right locks and then take the Wooden Puzzle.
Time Mysteries The Final Enigma - Cabinet

Time Mysteries The Final Enigma – Cabinet

  • In the latch, play the HOS and collect all the items. Receive the Letter A. Lower the machine and open the lid. Return to your room.
  • On the desk, place Letter A on the book. Once the book is open, take the Dragon Shape. Place the Dragon Shape on the box near the bag. Take the Butterfly Catcher from the box and return to Merlin’s Hut.

Merlin’s Hut

  • PlaceCatcher on the butterflies and enter the hut. Use the Medallion in the slot, pick the Rune Stone and return to the cave.

Cave

  • Place the Rune Stone in the slot. Pick the Silver Sickle and the Cave Flower and return to Uncle Sean’s House. Place the Silver Sickle on the flower, take the Magic Flower and return to Merlin’s Hut.

Merlin’s Hut

  • Place the Magic Fruit, Cave Flower, Crystal Shard and Magic Flower in the mortar and grind them. Take the Healing Salve and return to the hut.

Hut

  • Zoom into the Nimue and place the Magic Staff and Healing Salve n the aura. Take the Visionary Crystal and return to Merlin’s Hut.

Merlin’s Hut

  • Place the ladder next to the tree and return to Uncle Sean’s House.

Uncle Sean’s House

  • Zoom into the mirror and place the Visionary Crystal on the empty slot. Return to Merlin’s Hut in 502.

Merlin’s Hut

  • Talk to the man, zoom into the flower, pick the Future Time-Crystal and use it on the machine. Click to travel to the future. Play the HOS and find all the items. You will get a Screwdriver. Proceed to the Tower Door, and use the Screwdriver on the panel. A mini-game will start. Solve the game by lighting up all the light bulbs. Enter the lift.
Time Mysteries The Final Enigma - Light Bulbs

Time Mysteries The Final Enigma – Light Bulbs

Chapter Four: The Workshop

Computer and Book

  • Talk to the man and zoom into the computer. Open the bookcase by clicking on the right arrow twice and then the unlock button.
  • Take the Nut Driver from the bookcase, read the book and return to Uncle Sean’s House in the basement.

Basement

  • Use the Nut Driver to take out the nut from the robot. Play the HOS, get the Wrench and go back two screens. Play the HOS and receive the Tweezers.
  • Use the Wrench to remove the lid from the street lamp. Take the Music Box Plate and return to the basement.
  • Use the Tweezers to remove the Clock Dial from the arm of the robot. Go back to your room.

Your room

  • Place the Clock Dial on the clock to start a mini-game. Solve the clock puzzle. Make sure to set the clock dials guided by the notes. If successful, take the Cylinder and return to the tower.

Tower

  • Place the Music Plate Box and Cylinder on the music box. Pick the Times Crystal and use it in the slot in the Times machine. Return to the year 1812.

Year 1812

  • Play the HOS and receive the Sabre. Remove the pot from the pack on the left. Use the Sabre to cut the rope and then open the door. Enter inside.

House

  • Read the two books on the table and pick the 1/3 Small Mirror. Take the shovel from the fireplace and use it on the ashes. Proceed to the bedroom. Take the Tree Shape and 2/3 Small Mirror. Go back one screen.
  • Place the Tree Shape in the empty niche near the fireplace. Pick the Wardrobe Key and return to the bedroom.
  • Use the Key to open the wardrobe, play the HOS and get the 1/2 Mechanism Piece.
  • Solve the mechanism puzzle found on the bed by removing all the objects. Get the 2/2 Mechanism Piece, go back one screen and use it in the empty slot. Go into the Workshop.
  • Remove the blanket, read the book on the desk and pick the Drawer Knob, 1/3 Piano Key and Vision Crystal.
  • Open the box near the chest and pick the Coal. Remove the curtain from the puppet theater and return to the bedroom.
  • Place the Drawer Knob in the slot, open the drawer and then the letter. Pick the Dragon Head and 1/3 Metal Plate and return to Uncle Sean’s House.

Uncle Sean’s House

  • Zoom into the mirror and place the Vision Crystal in the empty slot. Play the HOS, receive 4/4 Wooden Puzzle and return to the bedroom. Use the Wooden Puzzles in the slot to start the Wooden Puzzle mini-game.
Time Mysteries The Final Enigma - Wooden Puzzle

Time Mysteries The Final Enigma – Wooden Puzzle

  • To solve the game, recreate letter A by swapping puzzle pieces.
  • Take the Lance, read the book and return to the workshop to the teat 1822.

Workshop

  • Use the Dragon Head and Lance on the puppet theater to start the Dragon Puzzle game. To solve this game, you must click the right buttons. Select the buttons A-C in the following sequence: C, A, C, and B. See the screenshot for the solution.
Time Mysteries The Final Enigma - Dragon Game

Time Mysteries The Final Enigma – Dragon Game

  • Take the Times Crystal, place it on the times machine and travel to the year 1913.

Chapter Five: The House in 1913

  • Remove the plate from the door; take the Chain and time-travel to the tower base.

Tower base

  • Use the Chain on the Car’s mechanism.
  • Play the HOS until you get the Gas Can. Zoom into the car and use it on the torch. Pick the Industrial Torch and time-travel to year 1913.

Year 1913

  • Place the Industrial Touch on the door to open it. Get inside, zoom into the fireplace, and use the tongs on the hot stones. You will get the Hot Stone Lock.
  • Read the notes on the table and take the 1/3 Russian Doll Lock.
  • Go back one screen, use the Hot Stone Lock on the snow, pick the Stone Lock and return inside.
  • Place the Stone on the niche to open the box. Take the Blue Mask and White Mask. Go back one screen.
  • Use the Blue Mask on the statue on left and White Mask on the statue on the right.
  • Enter the showroom.

Showroom

  • Remove the cover from the glass cabinet, zoom in and take the Puzzle Lock Piece.
  • Use the Nut Driver to remove the nut, open the lid and pick the Gears. Go down one screen.
  • Use the Puzzle Lock Piece on the cabinet to start the mini-game. To solve this game, you must move the tiles to form the picture.
  • Take the Lock Part and use it on the empty niche on the right door.
  • Open the door, go in the bedroom and pick the Shield.
Time Mysteries The Final Enigma - Picture

Time Mysteries The Final Enigma – Picture

  • Open the window, play the HOS and receive the 2/3 Russian Doll Lock. Time-travel to the 487 to the Cliff.

Cliff

  • Play the HOS and get the Stick With Resin. Time-travel to year 1913.

Year 1913

  • Place the Stick With Resin on the item in the engraving’s mouth. Get the Black Rook and return to the showroom.

Showroom

  • Remove the plate from the device and use the Gears on it. Pull the handle, and then go back to one screen. Enter the bedroom.
  • Use the blankets on the bed to make a rope and use it on the hook. On the dresser, pick up the stamp and use it twice to break the glass display. Take the 2/3 Metal Plate and Vision Crystal, and time-travel to Uncle Sean’s House.

Uncle Sean’s House

  • Place the Vision Crystal in the empty slot and return to the bedroom and into the garden.

Garden

  • Open the cage and play the HOS. Receive the Corn. On the bird cage, place the Corn on the bird. Take the Gazebo Lock and the 3/3 Russian Doll Lock. Place the Gazebo Lock on the board; pick the Garden Key and time-travel in 1812 to the dining room

Dining Room

  • Use the Key to open the door. Enter inside.

Chapter Six: The Garden

Dining Room

  • Remove the blanket, move the planks and take the 2/3 Piano Key. Pick the Guard Plate. On the statue, play the mini-game.
  • To solve this game, move the heads of the statues and weapons to find the correct poses. Take the Lens and go back two screens.
Time Mysteries The Final Enigma - Statues

Time Mysteries The Final Enigma – Statues

  • Place the Guard Plate to open the bag and take the Winder, and then return to the garden.

Garden

  • Place the Winder on the ballerina and pick the 3/3 SMALL MIRROR and 3/3 PIANO KEY. Go back one screen. Use the Piano Keys on the piano to start the mini-game.
  • To solve this game, play the correct sequence on the keys. Pick the Gen Piece and return to the showroom.

Showroom

  • Place the 3/3 Russian Doll Locks on the doll to remove its heads. Pick the Black Bishop. Place the 3/3 Small Mirrors on the device to start a mini-game.
Time Mysteries The Final Enigma - Mirrors

Time Mysteries The Final Enigma – Mirrors

  • To solve this game, move the mirrors to enable the light to reach the spot on the wall.
  • Place the Lens on the spot, pick the Fountain Heart and return to the garden. Use the Gen Piece and Fountain Heart on the fountain and time-travel to 1913.
  • On the figures, pick the Spear, Sword and Mace. Use these things on the empty slots and pick the White King. Go back one screen.
  • Use the Black Bishop, White King and the Black Rook on the chessboard. Take the Demon Seal and return to the showroom.

Showroom

  • Use the Demon Seal on the plates and the Shied in the slots.
  • Open the door, inside the garden, play the HOS. Get the Sharp Pick and use it on the Rune.
Time Mysteries The Final Enigma - Runes

Time Mysteries The Final Enigma – Runes

  • A mini-game will start. To solve it, activate all the runes in this order: 5, 1, 7, 4, 2, 4, 2, 8, 6, 8, 4, 8, 6, 1, 4, 8, 1, 5, 3, 4, 2, 8, 7, 4, 6.
  • Pick the Triskele Symbol and place it in the empty slot on the Statue of Merlin. Pick up the Ring and use it on the finger of the statue of Viviane.
  • Open the door and enter. Talk to Nimue and pick the Magic Seal. Time-travel to the bedroom, about 1812 to play the HOS.
  • You will get 3/3 Metal Plate. Go back two screens and then play another HOS.
  • Get the Candle and go to the workshop.

Workshop

  • Place the 3/3 Metal Plates on the chest, open it and take the Circular Saw and go to Uncle Sean’s Lab (1796).
  • Uncle Sean’s Lab
  • Use the Coal on the empty slot and the Circular Saw to replace the old saw. Pick the Saw Prototype, go to the meadow (487) and use the Candle on the torch.
  • Get the Burning Candle, return to the garden (1812), and use the Saw Prototype to cut the boards. Open the window, move the cloth, pick the Crystal Ball and return to Merlin’s Hut (502).

Merlin’s Hut

  • Use the Burning Candle to light up the lantern. Pick up the Earth Seal. Go back one screen. Use both the Magic Seal and Earth Seal on the plate. A mini-game will start.
Time Mysteries The Final Enigma - Seals

Time Mysteries The Final Enigma – Seals

  • To solve this puzzle, move the seals to the right location based on the symbols next to the spot. Then put the Crystal Ball on the middle area. Return to the bedroom (1913).

Bedroom

  • Zoom into the dresser and place the Merlin Crystal Ball on the glove.

Chapter Seven: The Cursed Medallion

  • Open Michael’s pocket and take his Knife. Zoom on the floor and use the Knife to break the crack. Move the rocks and take the Lodestone.
  • Place the Lodestone on the empty niche on the wall to activate the mini-game. To solve the game, click the stones on the correct order.
  • Go forward to the cut scene, to the right and play the HOS.
  • Get the Celtic Goddess Statuette and go back one screen.
  • Use the Medallion and the Celtic Goddess Statuette to open the door to the Celtic Times. Enter Merlin’s Hut.

Merlin’s Hut

  • Talk to Nimue and then play the HOS.
  • Receive the Diamond and go to the Times Museum Chamber.

Times Museum Chamber

  • On the wall, take the Celtic Dagger, go to the Celtic Times and enter the hut. Place the Celtic Dagger on the container and return to the Times Museum Chamber.
  • Here, play the HOS to receive the ALPHA.
  • On the token panel, place the Chest Token in the slot to start the mini-game.
Time Mysteries The Final Enigma - Chest Token

Time Mysteries The Final Enigma – Chest Token

  • This game has three sections. In the section, click the buttons on the right in the right order. In the second section, move the times to the right places. In the third section, rotate the parts to form the picture.
  • Pick the Omega and place it together with the Alpha in the slots.
  • Open the box on the top shelf, pick the sword and place it in the slot in the stone.
  • Pick the key and use it to open the box on the Shelf.
  • Pick the Hourglass Token and place it in the empty slot.
  • Open the panel and pick the Moscow Church Figurine. Proceed into the globe and use the Moscow Church Figurine. Proceed to Moscow (1913)

Moscow (1913)

  • Place the Diamond in the slot and pick the Magic Glove. Return to the showroom

Showroom

  • Use the Magic Glove to get the Cursed Medallion. Proceed to the Celtic Times.

Celtic Times

  • Enter the hut and place the Cursed Medallion on the table. Play the HOS to get the Prism. Use it on the table to activate the mini-game. To solve the game, click on the stones in the correct order.
  • Talk to the Nimue and return to the Museum and then to Moscow in 1913. Play the HOS and receive the Communicator. Go back to the Museum Hall and use it there. Go to the future.
  • Open the desk drawer and read the notes on the Old Book and Blueprints. Get back to the Museum and use the Old Book there.
  • Proceed forward. Read the notes on the desk; get the Shakespeare book from the bookshelf and the Gargoyle Head.
  • Click on the bookshelf to start the mini-game. To solve this game, click on the books in the correct order.
  • Zoom into the door and use the code 1984. Play HOS and correct Gargoyle Wing. Use it together with the Gargoyle Head.
  • Pick the Story Puzzle and use on the board to activate a mini-game. To solve this game, turn the cubes to recreate the story. Place the Blueprints on the diagram.
Time Mysteries The Final Enigma - Story Puzzle

Time Mysteries The Final Enigma – Story Puzzle

Congratulations! You have successfully completed Time Mysteries: The Final Enigma! These are some of the tips and tricks, hints and guide that you will need to navigate through the game.

For more great tips and tricks, visit our blog!

The Time Mysteries: The Final Enigma Walkthrough is meant as a guide and does not contain cheats, hacks, or serials.


The post Time Mysteries – The Final Enigma Walkthrough appeared first on GameHouse.
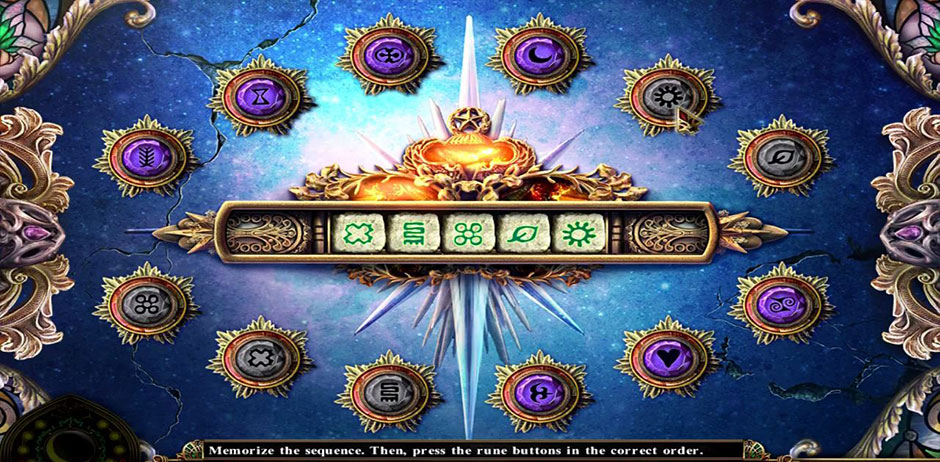
Eventide – Slavic Fable Walkthrough

$
0
0

Enter the fantastical world of Slavic creatures as you embark on a journey of rescue! Our Eventide – Slavic Fable walkthrough will guide you through each step of the game. In addition, all collectibles – Ethereal Flower and Bestiary Card locations are revealed.

Contents

General Tips & Tricks

Navigating the world of Slavic creatures can be tricky. Here’s a few useful tips and tricks to help you on your way.

  • When starting the game for the first time, you can choose between three difficulties:
    • Casual – Hint and Skip buttons recharge quickly. Active zones glimmer and Hidden Object Scenes/Areas sparkle. Available actions are indicated on the Map, and there are no click penalties in Hidden Object Scenes. A Tutorial is also available.
    • Advanced – Hint and Skip buttons have a moderate recharge time. Active zones are not indicated, but Hidden Object Scenes still sparkle. Available actions are indicated on the Map. There is a mild penalty for excessive clicking in Hidden Object Areas, and the Tutorial is still available.
    • Expert – Hint and Skip buttons recharge slowly. Active zones, Hidden Object Areas, and available actions on the Map are not indicated. Hidden Object Scenes have mistake penalties, and no Tutorial is available.
    • Tip: You will be able to choose your difficulty both when starting the Slavic Fable adventure and the Midsummer Night bonus adventure.
  • Inventory Items are written in bold and circled in yellow in the guide below. Locations are written in italics.
  • All collectible locations are revealed in our walkthrough! Ethereal Flowers are circled in pink/purple, while Bestiary Cards are circled in blue.
  • The Magnifying Glass cursor indicates you can take a closer look at an area.
  • A Hand cursor indicates you can directly interact with an item or object.
  • A ? cursor indicates you can click to learn more about an object you encounter.
  • A Speech Bubble icon indicates you can speak with a character.
  • Navigation arrows indicate you can move in a certain direction. Use this to move between locations.
  • Fast-travel between locations using the Map! The Map is located in the lower right corner.
  • A ! icon on the Map indicates there is an active scene or area in that location.
  • Are you stuck? Try using a Hint, or even a Skip during a puzzle. Both buttons are located in the lower right corner. Both Hints and Skips are unlimited, but require time to charge based upon the difficulty you’ve chosen.
  • This walkthrough covers Platinum Edition game content, too! Complete the main Slavic Fable adventure to unlock the Midsummer Night bonus chapter!


Eventide – Slavic Fable Walkthrough

Baba and the Slavic creatures are in need of your help! It’s up to you to rescue Heritage Park and the Slavic legends which reside within! Our walkthrough covers every aspect of Eventide – Slavic Fable Platinum Edition – including all Ethereal Flower and Bestiary Card locations!

Chapter 1: Baba’s House

The car swerves off the road and you find yourself in a precarious situation. Escape the car and find out where you are.

Car

  • Take a closer look at the leather bag hanging on the left. Click on the Ornamental Bracelet hanging on the left strap to add it to your inventory.
  • Click on the zipper to open the bag. Take a closer look at the Diary Afterward, it will appear in the bottom left corner of your screen.
  • Continue sifting through the items in the purse until you collect the Nail File.
  • Examine the glove compartment in the front seat. Use the Nail File to pry it open, then click on the Chest Key beneath the miscellaneous objects inside to add it to your inventory.
  • Back in the read seat, click on the coat laying on the chest in the lower left corner to remove it. Use the Chest Key on the lock to open it. A hidden object area will appear.
  • Find the objects shown at the bottom of the screen. Items marked in blue require an extra step before you can collect them. Each object is circled and shown in the screenshot below. The key to open the star box at the bottom of the screen is hidden behind the shovel at the top of the screen
Eventide - Slavic Fable Car Hidden Object Scene

Eventide – Slavic Fable Car Hidden Object Scene

  • Once you’ve located everything listed, the Pickaxe will be added to your inventory.
  • Zoom in on the windshield ahead. Use the Pickaxe to break open the glass and escape!

Gate

  • Speak with Boruta, standing to the left of the gate.
  • Ethereal Flower 1/30 is located at the bottom of the screen, in front of the booth on the left.
Eventide - Slavic Fable Ethereal Flower 1 of 30

Eventide – Slavic Fable Ethereal Flower 1 of 30

  • Examine the device on the right for a closer view. Ethereal Flower 2/30 is on the right in front of the basket and Bestiary Card 1/30 is sitting in the basket on the left side of the device.
Eventide - Slavic Fable Coin Machine Collectibles Locations

Eventide – Slavic Fable Coin Machine Collectibles Locations

  • Click on the items in the basket until you reveal the Knife, then click on it to add it to your inventory.
  • Take a closer look at the kiosk on the left. Use the Knife to cut the red Rope on the right, then click on it to add it to your inventory.
  • Back in the main area, take a closer look at the right totem. Remove the debris, then use the Rope on the frayed portion remaining. Click on the level on the right to trigger a puzzle.
  • Connect identical symbols with an uninterrupted line. The solutions are shown below.
Eventide - Slavic Fable Coin Machine Collectibles Locations

Eventide – Slavic Fable Coin Machine Collectibles Locations

Eventide - Slavic Fable Totem Puzzle Part 2

Eventide – Slavic Fable Totem Puzzle Part 2

  • Upon completing the puzzle, the main gate will open. Proceed forward into the Square.

Square

  • Ethereal Flower 3/30 is located to the left of the walkway.
Eventide - Slavic Fable Ethereal Flower 3 of 30

Eventide – Slavic Fable Ethereal Flower 3 of 30

  • Take a closer look at the house straight ahead. Ethereal Flower 4/30 is located at the bottom of the sign. Click on the case on the right to open it and retrieve the Fire Hose
Eventide - Slavic Fable Ethereal Flower 4 of 30

Eventide – Slavic Fable Ethereal Flower 4 of 30

  • Back in the main area, examine the red hydrant straight ahead. Use the Fire Hose on the hydrant. Once connected, direct the water so that it douses all the flames on the porch.
  • Once the flames are extinguished, examine the cabinet sitting on the far end of the porch. Click on the Coin 1/2 sitting in the bottom left corner to add it to your inventory.
  • Enter the house on the right.

Baba House

  • Speak with Boruta. He will offer you further instruction.
  • Take a closer look at the clippings hanging on the line in the upper left corner. Bestiary Card 2/30 is hanging on one of the pins. Click on the Picture Part on the left to add it to your inventory.
Eventide - Slavic Fable Collectible Card 2 of 30

Eventide – Slavic Fable Collectible Card 2 of 30

  • Back in the main portion of the room, examine the cabinet at the back of the room. Click the “Begin” button to trigger a puzzle.
  • Put fragments of the picture where they belong. Select one of the round tiles on the right and place it over the portion of picture it matches.
Eventide - Slavic Fable Baba House Puzzle

Eventide – Slavic Fable Baba House Puzzle

  • Once you’ve completed the matching portion of the puzzle, use the Ornamental Bracelet on the groove that appears. This will trigger a cutscene.
  • Examine the cabinet at the back of the room where you just completed the puzzle. Click on the Dried Red Clover and the Storagepart to add them to your inventory.
  • Click on the curtain at the back of the room to open it, then proceed through to the next area.

Room

  • Ethereal Flower 5/30 is in a pail beneath the desk on the left.
Eventide - Slavic Fable Ethereal Flower 5 of 30

Eventide – Slavic Fable Ethereal Flower 5 of 30

  • Take a closer look at the desk on the left. Click on the top drawers of the small cabinet on the upper right. Collect the Bestiary Card 3/30 and the Nettle
Eventide - Slavic Fable Collectible Card 3 of 30

Eventide – Slavic Fable Collectible Card 3 of 30

  • Examine the book on the left. Click on the bottom right corner of the pages until you reach one with a lace insert. Remove the items until you acquire the Marigold.
  • Back in the main area, take a closer look at the bottom of the tree on the right. Use the Knife on the pencil to sharpen it. Click on the Pencil once more to add it to your inventory.
  • Go back into the previous room.

Baba House

  • Examine the photos hanging on the left again. Use the Pencil on the notepad to reveal important secret symbols.
  • Head back to the Gate.

Gate

  • Take a closer look at the kiosk on the left. Examine the lock and input the code according to the symbols on the notepad. Once the lock is opened, a hidden object area will appear.
  • Locate the objects according to their silhouettes at the bottom of the screen. Some items will need to be collected before you can collect others. The solution to this hidden object area is as follows:
  1. Pick up the Windmill Airscrew on the upper left and place it on the windmill to find the Eye.
    • Place the Eye in the sun on the right to locate the Sun.
    • Place the Sun on top of the container at the bottom of the screen to acquire the Scroll.
    • Place the Scroll into the device above the windmills. Rotate the discs until they create one complete picture. Then, click on the Hammer.
  2. Pick up the Brush lying on the table at the bottom of the screen. Pull aside the curtain at the bottom of the cabinet beneath the windmills and use the Brush to clear the cobwebs, acquiring the Key.
    • Use the Key on the cabinet on the upper right, then click to open it and arrange the tiles until they form a complete picture. Once finished, collect the Glove.
    • Examine the broken glass at the top of the screen and use the Glove to retrieve the Metal Plate.
  3. Examine the wooden figure sitting on the table. Place the Hammer in the figure’s hands and the Metal Plate on the device in front of it. Click on the figure to create the Map Coin.
  • Upon completing the area, the Map Coin will be added to your inventory.
  • Back in the main Gate area, take a closer look at the device on the right. Place the Map Coin into the slot in the upper right corner of the machine. Click on the lever on the lower left. Collect the Map of Moorland and the Storagepart (2) from the prize slot.
  • Return to the Room.

Room

  • Take a closer look at the flat chest in front of the window. Remove the blanket covering the box, then place the Storageparts (x2) into the slots to trigger a puzzle.
  • Place the hands so that they are connected by the same color. The solution is shown below.
Eventide - Slavic Fable Storagepart Puzzle Solution

Eventide – Slavic Fable Storagepart Puzzle Solution

  • Once the puzzle is finished, click on the golden leaf to open the box. Collect the Potion and the Aesculap Button and read the note inside.
  • Exit to the Square.

Square

  • Take a closer look at the building ahead in the distance. Examine the case hanging to the left of the door. Use the Aesculap Button on the groove to open the case and collect the Bandage
  • Return to the Room.

Room

  • Take a closer look at the table on the left. Place the Marigold, the Dried Red Clover, the Nettle, and the Potion into the mortar, then use the pestle to mix it all together. Place the Bandage on the table and pour the mixture onto it to acquire the Bandage with Medicine.
  • Exit the room to Baba House.

Baba House

  • Speak with the little boy and use the Bandage with Medicine on his wound.
  • After a brief cutscene, you will find yourself back in the Square.

Square

  • Zoom in on the structure ahead and examine the cap lying in front of the door. Collect the Rainbow-hued Feathers and the Pin from the top of the hat.
  • Go back to the Room once again.

Room

  • Take a closer look at the bottom of the tree on the right. Use the Pin to retrieve the Basilisk Figurine and add it to your inventory.
  • Exit to the Square.

Square

  • Zoom in on the building in the distance again. Examine the decorative plate on the door and place the Basilisk Figurine into the groove on the right. A puzzle will appear.
  • Put the parts in the proper places. The solution is shown below.
Eventide - Slavic Fable Museum Door Puzzle Solution

Eventide – Slavic Fable Museum Door Puzzle Solution

  • Upon completing the puzzle, you will gain access to the Museum.


Chapter 2: Museum of Slavic Creatures

Follow Lilacus into the Museum of Slavic Creatures. Will you be able to locate him? What other secrets lie within the museum?

Museum

  • Take a closer look at the display cabinet to the right of the tree on the far end of the room. Collect the Bestiary Card 4/30, the Picture Part (2), and the Old Man Mask.
Eventide - Slavic Fable Collectible Card 4 of 30

Eventide – Slavic Fable Collectible Card 4 of 30

  • Zoom in on the large tree on the left. Use the Picture Parts (x2) on the slots toward the upper left to trigger a puzzle.
  • Move elements of the figure to make it look like in the picture. The solution is shown below.
Eventide - Slavic Fable Exhibit Pose Puzzle

Eventide – Slavic Fable Exhibit Pose Puzzle

  • Upon completing the puzzle, a secret passage to the Basement will be revealed.

Basement

  • Tip: Click on the cloth at the lower right corner of the stairs, but don’t zoom in yet. You’ll return to this area later.
  • Examine the purple curtain at the far end of the basement to trigger a cutscene.
  • Give the Ornamental Bracelet to Lilacus. After the cutscene, collect the Crank he gives you.
  • Collect the Bestiary Card 5/30 and the Carved Figurine from the table.
Eventide - Slavic Fable Collectible Card 5 of 30

Eventide – Slavic Fable Collectible Card 5 of 30

  • Back in the main Basement area, examine the portcullis on the upper right. Use the Crank on the mechanism to open the door to the Haven.

Haven

  • Ethereal Flower 6/30 is in front of the dock on the right.
Eventide - Slavic Fable Ethereal Flower 6 of 30

Eventide – Slavic Fable Ethereal Flower 6 of 30

  • Take a closer look at the sign on the dock. Collect the Bestiary Card 6/30 tucked away in the corner.
Eventide - Slavic Fable Collectible Card 6 of 30

Eventide – Slavic Fable Collectible Card 6 of 30

  • Speak with the creature at the far end of the dock. Use the Knife to free him from the netting. You will be rewarded with the Fishing Line.
  • Examine the window of the cabin on the left. Collect the Ethereal Flower 7/30 and the Ornate Key beneath the pot on the windowsill.
Eventide - Slavic Fable Ethereal Flower 7 of 30

Eventide – Slavic Fable Ethereal Flower 7 of 30

  • Zoom in on the cabin door on the left. Use the Ornate Key to open the lock and proceed inside.

Workshop

  • Use the Knife to cut down the suspended net containing the wood planks at the far end of the room. Click on the Planks to add them to your inventory.
  • Examine the red toolbox next to the cut netting. Click on the Coins 2/2 lying in front of it to collect.
  • Zoom in on the boat itself. Click on the life jacket to remove it, then click on the Tin sitting on the post on the right to add it to your inventory. Place the Planks over the gap in the side of the boat to trigger a puzzle.
  • Arrange the planks in a proper way to repair the hole. The solution is shown below.
Eventide - Slavic Fable Boat Repair Puzzle Solution

Eventide – Slavic Fable Boat Repair Puzzle Solution

  • Tip: You’ll come back to this later. For now, examine the mechanism holding the boat in place on the lower right. Click on the Safety Block sitting on the pegs just beneath the sign to add it to your inventory.
  • Return to the Basement.

Basement

  • Take a closer look at the mechanism to the right of the doorway leading out to the Haven. Place the Safety Block into a hole in the right gear, then click on the Crank to return it to your inventory.
  • Return to the Square.

Square

  • Zoom in on the totem pole on the left. Use the Coins 2/2 on the slot, then click on the red button.
  • Zoom in on the chopping block next to the totem pole and click on the Chopped Wood to add it to your inventory.
  • Enter the Museum.

Museum

  • Take a closer look at the lit display on the right. Place the scattered figurines into their correct slots, then use the Carved Figurine on the final slot on the left. Collect the Mask with Horns and the Fish Token from the compartment that opens.
Eventide - Slavic Fable Figurine Display

Eventide – Slavic Fable Figurine Display

  • Go back to the Workshop.

Workshop

  • Examine the red toolbox and place the Fish Token into the top groove. Collect the Bestiary Card 7/30, the Pliers, and the Reel
Eventide - Slavic Fable Collectible Card 7 of 30

Eventide – Slavic Fable Collectible Card 7 of 30

  • Take a closer look at the mechanism holding the boat again. Place the Crank into the triangular hole. Tip: Leave this for now. You’ll be returning shortly.
  • Exit the Workshop.

Haven

  • Zoom in on the window again. Use the Fishing Line, the Pin, and the Reel on the Fishing Rod to complete it and add it to your inventory.
  • Examine the end of the dock where the blue creature was previously. Use the Fishing Rod to retrieve the Broken Oar and add it to your inventory.
  • Make your way back to the Square.

Square

  • Take a closer look at the cabinet on the far end of the porch. Use the Pliers to clip the wire, then collect the Bestiary Card 8/30, the Brush, and the Rooster Token
Eventide - Slavic Fable Collectible Card 8 of 30

Eventide – Slavic Fable Collectible Card 8 of 30

  • Enter the Museum.

Museum

  • Take a closer look at the display cabinet at the far end of the room. Place the Rooster Token into the slot toward the top of the cabinet to reveal a new portion of the case. Collect the Strange Mask inside to add it to your inventory.
  • Go to the Basement.

Basement

  • Give the Broken Oar to Lilacus.
  • Examine the alcove in the wall on the left. Place the Old Man Mask, the Mask with Horns, and the Strange Mask onto the proper displays to trigger a puzzle.
  • Point to the creatures on the stage matching the shapes in the circles on the right. Some creatures may be hidden. Tip!: All creatures you will need to find have a minor shadow outline. Use this to your advantage when searching for them.
Eventide - Slavic Fable Mask Puzzle

Eventide – Slavic Fable Mask Puzzle

  • Upon completing the puzzle, use the Ornamental Bracelet on the slot that appears. Click on the Wooden Arm to add it to your inventory.
  • Take a closer look at the wooden statue toward the lower right, next to the stairs. Use the Wooden Arm on the statue and place the Chopped Wood beneath the cauldron. Click on the arm to ignite the flames, then use the Tin to collect the boiling Pitch and add it to your inventory.
  • Return to the Workshop.

Workshop

  • Take a closer look at the boat. Place the Pitch on the right post, then dip the Brush into it. Click and hold to paint over the cracks in the side of the boat, repairing the hole. Tip: Cover the entirety of the boarded area! The close-up will automatically be exited once you’re finished.
  • Click on the mechanism in the lower right corner to lower the boat into the water.
  • Exit to the Haven.

Haven

  • Collect the Oar from Lilacus, then use the Oar on the boat to travel across the lake with him.


Chapter 3: Leshy’s Forest

A quiet row across the lake is short-lived as the Moth attacks once again. Lilacus is taken hostage and the world blacks out before you find yourself washed up on the opposite shore.


Beach

  • Ethereal Flowers 8/30 and 9/30 can be found here on the Beach. Their locations are shown below. Tip: You will need to zoom in on the trap to collect the second one.
Eventide - Slavic Fable Ethereal Flower Beach Locations

Eventide – Slavic Fable Ethereal Flower Beach Locations

  • Zoom in on the trap and remove the rock in front of it. Collect the Devil Horn to add it to your inventory.
  • Speak with the creature in the water on the right. He will return the items you lost in the water: the Rainbow-hued Feathers and the Pliers.
  • Examine the wooden statues ahead. Click on the Rune perched on the right statue’s arm to collect it.
  • Enter the Village.

Village

  • Examine the window on the right. Use the Pliers to remove the loose panel on the right (you will return to this later). Collect the Ethereal Flower 10/30 and the Metal Button.
Eventide - Slavic Fable Ethereal Flower 10 of 30

Eventide – Slavic Fable Ethereal Flower 10 of 30

  • Zoom in on the round door between the left portion of the path and the waterwheel. Collect the Ethereal Flower 11/30 and the Sharpener Handle.
Eventide - Slavic Fable Ethereal Flower 11 of 30

Eventide – Slavic Fable Ethereal Flower 11 of 30

  • Proceed down the path to the Swamp.

Swamp

  • Ethereal Flower 12/30 is on the right side of the path.
Eventide - Slavic Fable Ethereal Flower 12 of 30

Eventide – Slavic Fable Ethereal Flower 12 of 30

  • Examine the wooden post closest to you. Use the Pliers to retrieve the Nails and add them to your inventory.
  • Go back to the Beach.

Beach

  • Take a closer look at the cage near the water again. Use the Metal Button to loosen the screw holding it shut, then collect the Axe Handle and the Window Part
  • Enter the Village again.

Village

  • Examine the window on the right, then the panel on the right side of the window. Use the Window Part on the panel to trigger a puzzle.
  • Move blocks up, down, left, and right to free the way to the exit for the lighter block. The solutions are shown below.
Eventide - Slavic Fable Window Puzzle Part 1

Eventide – Slavic Fable Window Puzzle Part 1

Eventide - Slavic Fable Window Puzzle Part 2

Eventide – Slavic Fable Window Puzzle Part 2

  • Once you’ve completed the puzzle, the window will open. Collect the Wooden Hammer sitting on the sill. Attach the Sharpener Handle to the device inside.
  • Back in the main view of the Village, examine the anvil toward the lower right. Use the Axe Handle on the head sitting on top of the anvil. Zoom in on the head and place the Nails, securing them with the Wooden Hammer. Click on the Blunt Axe to add it to your inventory.
  • Examine the window on the right again. Use the Blunt Axe on the sharpening wheel to acquire the Axe.
  • Head forward into the Swamp.

Swamp

  • Use the Axe on the fallen log on the left to break the dam.
  • Ahead in the distance is a carved statue on the right side of the path. Click on it for a closer view. Collect the Ethereal Flower 13/30 and the Bestiary Card 9/30.
Eventide - Slavic Fable Swamp Statue Collectibles

Eventide – Slavic Fable Swamp Statue Collectibles

  • Follow the left fork in the path to the Outdoor area.

Outdoor

  • Examine the door on the left and collect the Ethereal Flower 14/30.
Eventide - Slavic Fable Ethereal Flower 14 of 30

Eventide – Slavic Fable Ethereal Flower 14 of 30

  • Take a closer look at the beehive hanging from the tree ahead. Collect the Ethereal Flower 15/30.
Eventide - Slavic Fable Ethereal Flower 15 of 30

Eventide – Slavic Fable Ethereal Flower 15 of 30

  • Examine the stump beneath the beehive. Use the Rainbow-hued Feathers on the feather duster handle to obtain the Feathers Whisk.
  • Zoom in on the lit alcove on the right side of the tree. Click on the Matches to add them to your inventory.
  • Examine the door on the left again and use the Feathers Whisk to clear the cobwebs. Note you cannot open this door just yet.
  • Enter the Room within the tree.

Room (Tree)

  • Upon entering the tree, you will encounter a short cutscene in which you speak with Leshy. Follow him up the steps to the next area.

Terrace

  • Ethereal Flower 16/30 is within the roots of the large bonfire tree.
Eventide - Slavic Fable Ethereal Flower 16 of 30

Eventide – Slavic Fable Ethereal Flower 16 of 30

  • Speak with Leshy, then examine the base of the tree bonfire on the left. Click on the Brushwood to add it to your inventory.
  • Head back down into the Room.

Room (Tree)

  • Examine the cabinet hanging on the right side of the main pillar in the center. Collect the Ethereal Flower 17/30.
Eventide - Slavic Fable Ethereal Flower 17 of 30

Eventide – Slavic Fable Ethereal Flower 17 of 30

  • Zoom in on the chest covered in roots beneath the paintings on the left. Collect the Ethereal Flower 18/30 and the Closet Handle.
Eventide - Slavic Fable Ethereal Flower 18 of 30

Eventide – Slavic Fable Ethereal Flower 18 of 30

  • Use the Axe to chop away the roots covering the chest, then exit for now.
  • Back in the main view of the room, you can now collect Bestiary Card 10/30 hidden in the vase on the left.
Eventide - Slavic Fable Collectible Card 10 of 30

Eventide – Slavic Fable Collectible Card 10 of 30

  • Zoom in on the cabinet on the right side of the central pillar again. Use the Closet Handle on the bottom portion of the cabinet to open it and collect the Trunk Token and Lock Token (beneath the journal) inside.
  • Examine the trunk on the floor beneath the paintings on the left again. Use the Trunk Token on the slot to open it, then collect the Tile and the Rope Tip: You will return for the sickle later.
  • Head back up to the Terrace.

Terrace

  • Examine the base of the bonfire and place the Tile into the groove. Once removed, collect the Bestiary Card 11/30 and the Telescope Part.
Eventide - Slavic Fable Collectible Card 11 of 30

Eventide – Slavic Fable Collectible Card 11 of 30

  • Zoom in on the telescope to the right of Leshy. Use the Telescope Part on it to trigger a puzzle.
  • Click within the field of view of the telescope to move it around and find all the listed sights. Adjust the depth of view with the knob on the right.
    • The first landmark is toward the mid to lower right, and requires the knob on the – sign.
    • The second landmark is to the immediate upper left of the first, and requires the knob on the middle setting.
    • The third landmark is to the left of the second and slightly up, and requires the knob on the + sign.
  • Upon completing the puzzle, you will receive a vital clue to help you navigate the Maze.
  • Exit to the Outdoor area.

Outdoor

  • Head forward into the Forest Maze.

Forest Maze

  • Click on the Lock Token (2) to the left of the baby boar on the right.
  • Go back to the Outdoor area.

Outdoor

  • Examine the door on the left. Use the Lock Token (x2) on the door to trigger a puzzle.
  • Rotate the elements so that all pieces of the picture are visible. Upper arrow rotates picture by 3 slots. Lower arrow rotates pictures by 2 slots. To solve the puzzle, click on the bottom arrow three times, the upper arrow once, and the bottom arrow twice more. The completed solution is shown below.
Eventide - Slavic Fable Lock Token Puzzle

Eventide – Slavic Fable Lock Token Puzzle

  • Upon completing the puzzle, click on the Rune (2) and the Planks to add them to your inventory.
  • Go back to the Swamp.

Swamp

  • Examine the wooden statue on the right side of the path ahead. Place the Runes (x2) into the slots on the left to trigger a puzzle.
  • Repeat the sequence in which the teeth are moving. There are three sequences you will need to complete to solve this puzzle. Using the screenshot below as reference, the sequence is as follows:
    • Sequence One: 7, 3, 2, 5
    • Sequence Two: 4, 2, 8, 1, 6
    • Sequence Three: 8, 3, 6, 7, 2, 5
Eventide - Slavic Fable Teeth Sequence Puzzle

Eventide – Slavic Fable Teeth Sequence Puzzle

  • Upon completing the puzzle, click on the Tree Token and the Machine Disk to add them to your inventory.
  • Examine the flowers on the left bank. Use the Planks to reach this area. A hidden object scene will appear.
  • Find all the Blueberries hidden throughout the area. Their locations are shown below. You will need to use the stick to clear away the spider web obstructing one of the blueberries.
Eventide - Slavic Fable Blueberry Hidden Object Area

Eventide – Slavic Fable Blueberry Hidden Object Area

  • Once completed, the Blueberries will be added to your inventory.
  • Return to the Forest Maze.

Forest Maze

  • Give the Blueberries to the adult boar to encourage them to leave the area.
  • It’s time to navigate the maze!:
  1. Click on the moss obstructing the symbols on the upper left and lower right of the tree straight ahead. Once cleared, take the Left path.
  2. Click on the branch on the right to lower it, revealing the second symbol. Collect Ethereal Flower 19/30 before proceeding down the path to the Left.
Eventide - Slavic Fable Ethereal Flower 19 of 30

Eventide – Slavic Fable Ethereal Flower 19 of 30

  1. Click on the bush on the left, then clear the moss from the bottom left and right corners of the tree ahead. Collect Ethereal Flower 20/30 before taking the Right path.
Eventide - Slavic Fable Ethereal Flower 20 of 30

Eventide – Slavic Fable Ethereal Flower 20 of 30

  • Congratulations, you made it to the end of the maze! Collect Ethereal Flower 21/30 and Bestiary Card 12/30 on the left.
Eventide - Slavic Fable Maze End Collectibles

Eventide – Slavic Fable Maze End Collectibles

  • Zoom in on the gate on the right. Use the Tree Token to open the gate lock, triggering a puzzle.
  • Connect the lines of the same color by rotating the pieces. The solution is shown below.
Eventide - Slavic Fable Maze End Gate Lock Puzzle

Eventide – Slavic Fable Maze End Gate Lock Puzzle

  • Once the puzzle is completed, the gate will open. Proceed through to the next area.

Tree

  • Ethereal Flower 22/30 is on the left.
Eventide - Slavic Fable Ethereal Flower 22 of 30

Eventide – Slavic Fable Ethereal Flower 22 of 30

  • Examine the log propped up on the right. Ethereal Flower 23/30 is in the lower right corner and Bestiary Card 13/30 is hidden beneath the log. Click on the stones on the right and lower left corner to counterbalance the log. Then use the leaf on the right to gather water, adding the Leaf with Water to your inventory.
Eventide - Slavic Fable Oldest Tree Collectible Locations

Eventide – Slavic Fable Oldest Tree Collectible Locations

  • Back in the main view of the area, examine the roots of the tree straight ahead. Use the Leaf with Water on the roots to grow a ladder, then click for a closer view.
  • To untangle the vines, move the knots until no two lines cross. The solution is shown below.
Eventide - Slavic Fable Vine Knot Puzzle Solution

Eventide – Slavic Fable Vine Knot Puzzle Solution

  • Before you can collect the prize, you will need to backtrack a bit. Head back to the Village.

Village

  • Examine the round disk between the path and the waterwheel. Use the Rope to fasten it to the disk.
  • Back in the main view of the area, click on the hook on the end of the rope to attach it to the waterwheel, causing the round door to open. Zoom in on it again.
  • Click on the Devil Horn (2) and the Horseshoe Token 1/3 to add them to your inventory.
  • Go back down to the Beach.
  • Beach
  • Examine the wooden statues here.
    • Place the Devil Horns (x2) onto the right statue.
    • Collect the round token that appears and place it into the center of the circular groove on the left statue.
    • Click on the Eye piece revealed inside and restore it to the socket of the left statue.
    • Collect the piece from the left statute’s mouth and use it on the right statue to cause the hand to open.
  • Finally, collect the Bestiary Card 14/30 and the Sickle Handle.
Eventide - Slavic Fable Collectible Card 14 of 30

Eventide – Slavic Fable Collectible Card 14 of 30

  • Make your way back to the Room (Tree).

Room (Tree)

  • Take a closer look at the chest beneath the paintings on the left again. Use the Sickle Handle on the head within the box to obtain the completed Sickle.
  • Now you can finally harvest your prize! Return to the Tree.

Tree

  • Examine the ladder straight ahead and use the Sickle to acquire the Pine Cone.
  • Return to the Terrace.

Terrace

  • Throw the Pine Cone into the bonfire on the left. After a brief cutscene, Leshy will give you the Fire Key.


Chapter 4: Tubber

The fire has spoken, and with Leshy’s help, you learn to seek out the mysterious Tubber, who can help you tame the Moth.


Terrace

  • Examine the case to the right of the telescope. Use the Fire Key on the indentation. This will trigger a hidden object scene.
  • Find the items shown at the bottom of the screen. Their locations are circled below. In order to reach the items shown in blue, you will need to open the containers which house them. The items needed, and their applicable containers, are outlined with colored squares.
Eventide - Slavic Fable Terrace Hidden Object Area

Eventide – Slavic Fable Terrace Hidden Object Area

  • Upon completing the area, the Horn will be added to your inventory.
  • Make your way down to the Swamp.

Swamp

  • Examine the end of the right fork in the path ahead. Use the Horn to open the door.
  • Enter through to the next area.

Lodge

  • Take a closer look at the round birdhouse on the left. Ethereal Flower 24/30 is on the left.
Eventide - Slavic Fable Ethereal Flower 24 of 30

Eventide – Slavic Fable Ethereal Flower 24 of 30

  • Examine the bicycle on the right. Collect the Bestiary Card 15/30 and the Gate Part.
Eventide - Slavic Fable Bicycle Items

Eventide – Slavic Fable Bicycle Items

  • Zoom in on the keg to the bottom right of the door ahead. Click on the Doorbell Part lying to the left of it to add it to your inventory.
  • Head up the path to the right.

Rocks

  • Ethereal Flower 25/30 is on the lower left. Click on the Ladder on the left to add it to your inventory.
Eventide - Slavic Fable Ethereal Flower 25 of 30

Eventide – Slavic Fable Ethereal Flower 25 of 30

  • Examine the small stand straight ahead. Collect the Wolf Token 1/3 sitting on the rock on the bottom right.
  • Head up the path to the Ward.

Ward

  • Collect the Shovel to the right of the path.
  • Head back down to the previous area.

Rocks

  • Examine the small stand straight ahead again. Use the Shovel to clear away the rocks, then collect the Bestiary Card 16/30 and the Knife.
Eventide - Slavic Fable Rocks Collectibles

Eventide – Slavic Fable Rocks Collectibles

  • Head back down to the Lodge.

Lodge

  • Examine the door straight ahead. Use the Knife to remove the plate, then place the Doorbell Part into the hole. Click to ring the doorbell.
  • Enter through the open door into the next area.

Living Room

  • Speak with Tubber. He will give you the Soap.
  • Examine the book on the stand on the left. Click on the bottom right corner of the pages to turn them. Collect the Bestiary Card 17/30 and the Chain nestled within the pages.
Eventide - Slavic Fable Spa Book Items

Eventide – Slavic Fable Spa Book Items

  • Take a closer look at the top of the shelf behind the register counter. Click on the Corkscrew in the upper left corner to add it to your inventory. Tip: You will be returning here later for a puzzle!
  • Zoom in on the counter where the cash register sits. Use the Corkscrew to remove the cork from the glass jar and collect the Nuts
  • Go outside.

Lodge

  • Use the Ladder to the left of the door and take a closer look at the vent up top. Attach the Chain to the existing links and click to pull the vent cap open.
  • Enter the Lodge again.

Living Room

  • Proceed forward into the next chamber.

Bathroom

  • Zoom in on the lantern on the upper left. Click on the charm attached to the chain to open the exhaust vent, causing the steam to drain from the room.
  • Take a closer look at the fountain on the left. Click on the Poker to add it to your inventory.
  • Place the drawer sitting next to the grinder into the device, then exit the close-up for now.
  • Examine the alcove in the upper right corner. Click on the Latex Glove sitting in front of the oven to add it to your inventory, then use the Poker to retrieve the Owl Token 1/2 and add that to your inventory as well.
  • Click on the purple sheet hanging over the wall straight ahead to remove it, then zoom in for a closer view. Click on the gold Bath Knob shaped like a hummingbird on the left to collect it.
  • Back in the main area, examine the decorative stones in the upper left corner of the round tub. Collect the Bestiary Card 18/30 and the Strainer.
Eventide - Slavic Fable Decorative Bath Stones Items

Eventide – Slavic Fable Decorative Bath Stones Items

  • Head back down into the Living Room.

Living Room

  • Take a closer look at the fish tank on the left. Use the Strainer to retrieve the Cashregister Handle from inside the tank and add it to your inventory.
  • Zoom in on the cash register on the right. Place the Cashregister Handle on the cash register and click to open it. Collect the Aquarium Token from the teller drawer.
  • Examine the fish tank on the left again. Place the Aquarium Token into the slot to open a secret compartment. Collect the Crown Token and the Grinder’s Crank from within.
  • Go back into the Bathroom.

Bathroom

  • Take a closer look at the fountain area on the left again. Restore the Grinder’s Crank to the top of the grinder again, then place the Nuts into the grinder. Click to grind them, opening the bottom drawer to collect the Grinder Nuts.
  • Backtrack to the Room (Tree).

Room (Tree)

  • Examine the cabinet on the right side of the central pillar. Place the Crown Token into the slot to open it, then collect the Owl Tokens 2/2
  • Back in the main area, examine the painting hanging on the upper left. Place the Owl Tokens 2/2 into the slots to trigger a puzzle.
  • Swap the circles in order to complete the picture. The completed solution is shown below.
Eventide - Slavic Fable Owl Token Puzzle

Eventide – Slavic Fable Owl Token Puzzle

  • Upon completing the puzzle, remove the debris and click on the Aurochs to add it to your inventory.
  • Return to the Lodge.

Lodge

  • Take a closer look at the bike on the right again. Use the Latex Glove on the horn to repair it, then click to add the Trumpet to your inventory.
  • Zoom in on the birdhouse on the left. Use the Trumpet to scare away the dove, then click on the Deer to add it to your inventory.
  • Head back to the Outdoor area.

Outdoor

  • Examine the stump beneath the bee hive. Place the Aurochs and the Deer into the slots, then click on the stump to open a secret compartment. Collect the Bestiary Card 19/30, the Tap, Horseshoe Tokens 2/3.
Eventide - Slavic Fable Stump Compartment Items

Eventide – Slavic Fable Stump Compartment Items

  • Head back to the Swamp.

Swamp

  • Click on the hidden object area over the flowers on the left. Find 12 shoots of Lavender Their locations are shown below. You will need to give the nut to the squirrel to reveal the final shoot.
Eventide - Slavic Fable Lavender Hidden Object Area

Eventide – Slavic Fable Lavender Hidden Object Area

  • Upon completing the area, the Lavender will be added to your inventory.
  • Head back to the Lodge.

Lodge

  • Take a closer look at the keg to the lower right of the door. Place the Tap on the keg and click to run the water. Collect the Soap Key from beneath the grate to add it to your inventory.
  • Enter the Lodge.

Living Room

  • Take a closer look at the cabinet straight ahead. Use the Soap Key on the lock to open it, then collect the Horseshoe Tokens 3/3, and the Bath Milk. You may also read the note about Charms.
  • Head back into the Bathroom.

Bathroom

  • Examine the decorative rocks at the top of the pool. Place the Bath Knob onto the golden spigot on the right, then click to turn on the water.
  • Backtrack to the Village.

Village

  • Examine the anvil on the lower right. Place the Horseshoe Tokens 3/3 into the slot on top of the wooden crate. Click to open it and collect the Bestiary Card 20/30 and the Bellows.
Eventide - Slavic Fable Anvil Crate Items

Eventide – Slavic Fable Anvil Crate Items

  • Return to the Outdoor area.

Outdoor

  • Take a closer look at the lit alcove on the right. Place the Brushwood into the bee smoker, then attach the Bellows and use the Matches. Click to acquire the Beesmoker.
  • Zoom in on the bee hive straight ahead. Use the Beesmoker to calm the bees, then open the front of the hive and collect the Honey
  • Make your way back to the Bathroom.

Bathroom

  • Examine the shelves straight ahead at the back of the room. Use the Bath Milk, the Honey, the Grinder Nuts, the Lavender, and the Soap on the mixture. Click on the wooden spoon on the upper right to stir them altogether and trigger a minigame.
  • In this game you need to separate the floating items from each other. Do this by clicking and holding on an item, then moving it to another location in the cauldron. Items will continue to free-float as you do this, so it may take a few attempts. Items which are colored in red are too close to another item. Upon completing the puzzle successfully, you will obtain the Mixture.
  • Back in the main area, use the Mixture on the bath.
  • Speak with Tubber. He will give you the Horse Key.
  • Make your way back to the Rocks area.

Rocks

  • Take a closer look at the tool rack beneath the Castle sign. Use the Horse Key on the lock to open it and trigger a hidden object scene.
  • Find the items displayed at the bottom of the screen. Their locations are shown below. Upon completing the area, the Magic Halter will be added to your inventory.
Eventide - Slavic Fable Rocks Hidden Object Area

Eventide – Slavic Fable Rocks Hidden Object Area

  • Proceed up the path to the next area.

Ward

  • A cutscene will occur in which Tubber distracts the Moth. Use the Magic Halter on the Moth on the left to tame him.
  • Take a closer look at the rock next to the torch straight ahead. Collect Ethereal Flower 26/30, the Bestiary Card 21/30, and the Machine Disk (2).
Eventide - Slavic Fable Ward Collectibles

Eventide – Slavic Fable Ward Collectibles

  • Examine the dummy to the right of the tower on the left. Use the Knife to cut the stitching over the eye, then collect the Wolf Tokens 2/3 and the Sea Shell to add them to your inventory.
  • Make your way back to the Living Room.

Living Room

  • Take a closer look at the top of the shelf behind the cash register. Place the Machine Disks (x2) into the empty slots to trigger a puzzle.
  • Rotate the disks so they form a picture. The solution is shown below.
Eventide - Slavic Fable Machine Disk Puzzle

Eventide – Slavic Fable Machine Disk Puzzle

  • Upon completing the puzzle, click on the Arrows to add them to your inventory.
  • Enter the Bathroom.

Bathroom

  • Examine the decorative rocks next to the pool from which the water flows. Place the Sea Shell into the indentation, then click on the Bow inside to add it to your inventory.
  • Return to the Ward.

Ward

  • Examine the rock next to the torch again. Place the Bow and the Arrows on the rock. Click on the string beneath the bottom right corner of the rock and use it on the pieces to assemble the Crossbow and add it to your inventory.
  • Zoom in on the drawbridge ahead. Use the Crossbow to trigger a puzzle.
  • Lower the drawbridge in order to get into the Castle. Click on suspended sandbags and shoot them in order to drain them of sand, lowering the bridge. The locations of the sandbags are shown below.
Eventide - Slavic Fable Drawbridge Crossbow Puzzle

Eventide – Slavic Fable Drawbridge Crossbow Puzzle

  • Once the drawbridge is lowered, proceed forward into the Courtyard.


Chapter 5: Boruta’s Castle

With the Moth defeated, you can now enter the Castle. Locate Lilacus and confront Boruta before it’s too late!

Courtyard

  • Click on the purple fabric on the left to remove it. Collect the Bestiary Card 22/30
Eventide - Slavic Fable Collectible Card 22 of 30

Eventide – Slavic Fable Collectible Card 22 of 30

  • Click on the wooden doors on the right to open them. Tip: You will return to this area soon. For now, click on the white cloth draped over the cart ahead.
  • Take a closer look at the wooden cart ahead. Collect Ethereal Flower 27/30 and the Hook. Remove the remaining fabrics stacked on top of the box, then exit the closeup for now.
Eventide - Slavic Fable Courtyard Cart Items

Eventide – Slavic Fable Courtyard Cart Items

  • Examine the far right cart wheel. Note the blocked wheel. Click on the Skewer stuck in the wheel on the upper left to add it to your inventory.
  • Zoom in on the cobblestone bridge straight ahead. Click on the Oil Lamp on the right to add it to your inventory.
  • Time to return to the wooden doors. Zoom in on the open doorway on the right. Take a closer look at the upper left portion of the stone wall. Place the Hook into the wood, then hang the Oil Lamp on it. A hidden object area will be revealed.
  • Find the items listed at the bottom of the screen. Their locations are shown below. Once an item has been collected, a puzzle piece has been left behind. Click on these puzzle pieces once you find all the items to assemble the component necessary to reveal the key item within the clock: the Flat Shovel.
Eventide - Slavic Fable Courtyard Hidden Object Scene

Eventide – Slavic Fable Courtyard Hidden Object Scene

  • Take a closer look at the gate across the cobblestone bridge ahead. Place the Flat Shovel under the door, then use the Skewer on the lock to push out the key. Click on the Flat Shovel, then use the Key to open the lock.
  • Proceed through the doors to the next area.

Ground Floor

  • Take a closer look at the sign next to the door on the right. Collect the Bestiary Card 23/30 taped to the poster.
Eventide - Slavic Fable Collectible Card 23 of 30

Eventide – Slavic Fable Collectible Card 23 of 30

  • Examine the suit of armor on the far left. Click on the Helmet to add it to your inventory.
  • Proceed up the staircase ahead into the next area.

Corridor

  • Examine the suitcase sitting on the railing on the left. Read the note, then open the left drawer. Collect the Bestiary Card 24/30 and the Fan
Eventide - Slavic Fable Corridor Suitcase Items

Eventide – Slavic Fable Corridor Suitcase Items

  • Click on the stained glass window on the right to enter a hidden object area.
  • Find all the items listed at the bottom of the screen. Their locations are shown below. Upon completing the area, a compartment will open, revealing the Rope.
Eventide - Slavic Fable Stained Glass Hidden Object Scene

Eventide – Slavic Fable Stained Glass Hidden Object Scene

  • Examine the small grated area next to the right banister. Place the Fan here, then exit for now.
  • Go back down to the Ground Floor.

Ground Floor

  • Zoom in on the door on the right. Use the Rope to open the door, then enter the Dungeon.

Dungeon

  • Collect the Bestiary Card 25/30 next to the skull on the right.
Eventide - Slavic Fable Collectible Card 25 of 30

Eventide – Slavic Fable Collectible Card 25 of 30

  • Examine the cage straight ahead. Click on the panel to open it. You will be returning here soon.
  • Proceed down the hallway to the Cell.

Cell

  • Collect the Bestiary Card 26/30 sitting on the chopping block on the left.
Eventide - Slavic Fable Collectible Card 26 of 30

Eventide – Slavic Fable Collectible Card 26 of 30

  • Zoom in on the cell straight ahead and talk with Baba. She will return your Ornamental Bracelet.
  • Go back down the hallway to the main area of the Dungeon.

Dungeon

  • Click on the hidden object area on the left.
  • Find the objects listed at the bottom of the screen. Upon finding each object, you will uncover a puzzle piece. Find all the objects, then click on each of the glowing pieces to complete the panel on top of the barrel revealing the location of the key item: the Wolf Tokens 3/3.
Eventide - Slavic Fable Dungeon Hidden Object Scene

Eventide – Slavic Fable Dungeon Hidden Object Scene

  • Make your way back to the Rocks area.

Rocks

  • Examine the rock face on the right. Use the Wolf Tokens 3/3 on the frame to trigger a puzzle.
  • Put the pieces of the jigsaw together in order to create a complete picture. The solution is shown below.
Eventide - Slavic Fable Wolf Jigsaw Puzzle

Eventide – Slavic Fable Wolf Jigsaw Puzzle

  • Upon completing the puzzle, click on the Gate Part (2) to add it to your inventory.
  • Head back down to the Lodge.

Lodge

  • Take a closer look at the gate on the left. Place the Gate Parts (x2) into the slots to trigger a puzzle.
  • Rotate circles in such a way that each of them will contain only pieces of the correct color. The solution is shown below.
Eventide - Slavic Fable Gate Orb Puzzle Solution

Eventide – Slavic Fable Gate Orb Puzzle Solution

  • Upon completing the puzzle, click on the stylized knob to open the gate and proceed through to the next area.

Tomb

  • Examine the small statuette on the lower right. Collect the Ethereal Flower 28/30 and the Leather Glove.
Eventide - Slavic Fable Tomb Statuette Items

Eventide – Slavic Fable Tomb Statuette Items

  • Zoom in on the stone pillar with the glass face ahead. Use the Leather Glove to remove the broken glass and collect the Finger on the upper shelf.
  • Examine the small statuette on the lower right again and use the Finger on the hand on the left. Click on the scroll for an important hint you’ll be using nearby.
  • Time to put that hint to good use! Zoom in on the small totem on the left. Collect the Ethereal Flower 29/30 and the Stick with Twine.
Eventide - Slavic Fable Tomb Totem Items

Eventide – Slavic Fable Tomb Totem Items

  • Click on the sections of the totem until they match the drawing on the scroll. Once matched, click on the face to open a hidden compartment and collect the Bestiary Card 27/30 and the Magic Stone
Eventide - Slavic Fable Totem Hidden Items

Eventide – Slavic Fable Totem Hidden Items

  • Take a closer look at the large stone slab straight ahead. Click on the Magic Stone (2) below the vial of blue liquid to add it to your inventory.
  • Examine the large stone face on the left. Click on the branches to move them aside, then collect the Magic Stone (3) in the lower right corner. Place all Magic Stones (x3) into the slots to trigger a puzzle.
  • Put the interactive fragments of the picture where they belong. The solution is shown below.
Eventide - Slavic Fable Stone Face Puzzle Solution

Eventide – Slavic Fable Stone Face Puzzle Solution

  • Upon completing the puzzle, use the Ornamental Bracelet on the design within the revealed compartment. A cutscene will follow, and a new passageway will open.
  • Proceed forward through the new passage to the next area.

Fern

  • Click on the branches obstructing your view, then collect the Ethereal Flower 30/30 and the Bestiary Card 28/30.
Eventide - Slavic Fable Fern Collectibles Locations

Eventide – Slavic Fable Fern Collectibles Locations

  • Examine the fern straight ahead. Collect the Bestiary Card 29/30.
Eventide - Slavic Fable Collectible Card 29 of 30

Eventide – Slavic Fable Collectible Card 29 of 30

  • Back in the main area, examine the stone on the left. Click on the Rake to add it to your inventory.
  • Take a closer look at the ferns on the right. Use the Rake to clear them away, revealing a hidden object area.
  • Find the items shown at the bottom of the screen. Their locations are shown below. Upon completing the area, the Metal Saw will be added to your inventory.
Eventide - Slavic Fable Fern Hidden Object Scene

Eventide – Slavic Fable Fern Hidden Object Scene

  • Make your way back to the Lodge.

Lodge

  • Examine the bike on the right. Use the Metal Saw to remove the Rod from the body of the bicycle and add it to your inventory.
  • Continue to the Tomb.

Tomb

  • Take a closer look at the small statuette on the bottom right again. Use the Rod to pry off the rock beneath the statuette’s head. Click on the Lens inside to add it to your inventory.
  • Zoom in on the rock with the glass ahead. Take a closer look at the Magnifier Glass and use the Lens to restore it. Click on it again to add it to your inventory.
  • Go to the Fern area.

Fern

  • Zoom in on the fern straight ahead. Use the Magnifier Glass on the fern to compile a list of necessary ingredients.
  • Go back to the Tomb.

Tomb

  • Examine the stone slab straight ahead. Now that you have directions from the fern, you will know how to use the chemistry set. Place the Matches on the slab, then exit for now. Tip: You’ll be returning here shortly!
  • Head back to the Rocks.

Rocks

  • Click on the hidden object area that appears on the left.
  • Find the objects listed at the bottom of the screen. Their locations are shown below. Upon completing the area, the Screwdriver will be added to your inventory.
Eventide - Slavic Fable Rocks Hidden Object Scene

Eventide – Slavic Fable Rocks Hidden Object Scene

  • Go to the Courtyard.

Courtyard

  • Take a closer look at the cart on the left. Use the Screwdriver to remove the screws from the top of the box. Click to open the top and reveal a puzzle inside.
  • Arrange the picture by swapping its pieces. The solution is shown below.
Eventide - Slavic Fable Package Puzzle Solution

Eventide – Slavic Fable Package Puzzle Solution

  • Once the puzzle is completed, examine the note inside the box. It contains the code 4-8-1. Collect the Burettes inside to add them to your inventory.
  • Head to the Ground Floor.

Ground Floor

  • Take a closer look at the desk ahead. Use the Stick with Twine on the Magnet to obtain the Magnet on Stick.
  • Enter the Dungeon.

Dungeon

  • Examine the cage straight ahead. Use the Magnet on Stick to acquire the Pistol Token 1/2, then click to add it to your inventory.
  • Head up to the Corridor.

Corridor

  • Zoom in on the suitcase on the left again. Take a closer look at the lock and input the code 4-8-1. Click to open the suitcase and collect the Red Elixir
  • Back in the main area, click on the stained glass window on the right to enter another hidden object area.
  • Find the objects listed at the bottom of the screen. Their locations are shown below. Upon finding all the items, a secret compartment will open, revealing the Pitchfork.
Eventide - Slavic Fable Stained Glass Hidden Object Scene RevisitedEventide - Slavic Fable Stained Glass Hidden Object Scene Revisited

Eventide – Slavic Fable Stained Glass Hidden Object Scene Revisited

  • Examine the small gated area on the right of the railing. Give the Pitchfork to the demon figurine, then click on the Yellow Elixir and the Cupboard Key to add them to your inventory.
  • Zoom in on the suitcase on the left again and use the Cupboard Key to open the drawer on the right. Collect the Relief Part
  • Return to the Tomb.

Tomb

  • Examine the large slab again and place the Burettes, the Red Elixir, and the Yellow Elixir on the stone to trigger a puzzle.
  • Create the antidote to save Fern Flower. The steps are illustrated in the screenshot below:
  1. Click on the burner to turn it on.
  2. Use the match to light the burner.
  3. Pour the red elixir into the first glass burette.
  4. Attach the swirling glass tube and add yellow elixir to the second glass burette.
  5. Click on the valve to drain the liquid elixir.
  6. Use the dropper to collect blue elixir and add it to the green vial on the right.
  7. Collect the resulting Pesticide to add it to your inventory.
Eventide - Slavic Fable Pesticide Puzzle Solution

Eventide – Slavic Fable Pesticide Puzzle Solution

  • Return to the Fern area.

Fern

  • Zoom in on the fern straight ahead. Use the Pesticide on the flower. After a brief cutscene, click on the Fern flower to add it to your inventory.
  • Click on the hidden object area that appears on the right.
  • Find all the objects shown at the bottom of the screen. Their locations are shown below. Upon finding them all, the Pickaxe will be added to your inventory.
Eventide - Slavic Fable Fern Hidden Object Area Revisited

Eventide – Slavic Fable Fern Hidden Object Area Revisited

  • Take a closer look at the stone slab on the left. Use the Pickaxe to remove the Relief Part (2) and add it to your inventory.
  • Make your way back to the Courtyard.

Courtyard

  • Examine the cart on the left. Use the Pickaxe to dislodge the Relief Part (3) from beneath the wheel.
  • It’s Lilacus! You’ll need to find a way to help him escape. But there’s nothing you can do at the moment. Not to worry, though – you’ll return shortly.
  • Take a closer look at the area at the top of the steps on the left. Click on the Firework Body lying on the ground to collect it.
  • Go to the Ground Floor.

Ground Floor

  • You’ll encounter a brief cutscene. Follow Boruta up to the Corridor.

Corridor

  • Zoom in on the door ahead for another brief cutscene.
  • Head to the Dungeon.

Dungeon

  • Click on the hidden object area on the left.
  • Find the objects shown at the bottom of the screen. Their locations are shown below. Upon completing the area, the Car Jack will be added to your inventory.
Eventide - Slavic Fable Dungeon Hidden Object Scene Revisited

Eventide – Slavic Fable Dungeon Hidden Object Scene Revisited

    • Proceed forward into the Cell.

Cell

  • Take a closer look inside the Cell and read the note left behind. Collect the Firework Cap left beneath it.
  • Examine the barrel on the right. Use the Pickaxe to break it open, then use the Helmet to collect the Oil.
  • Return to the Ground Floor.

Ground Floor

  • Examine the suit of armor on the far left. Use the Oil to loosen the right collar plate and collect the Relief Part (4).
  • Zoom in on the engraving above the desk ahead. Place the Relief Parts (x4) into the frame to trigger a puzzle.
  • Find interactive elements to progress the story. The solution is as follows:
    • Scene One: Click the tourists, then Boruta
    • Scene Two: Click on the fern, then the book, then Boruta, and finally the human sacrifice
    • Scene Three: Click on Boruta, followed by the clouds of fear and sadness
  • Upon completing the puzzle, click on the Diamond Ring and the Pistol Tokens 2/2 to add them to your inventory.
  • Enter the Dungeon.

Dungeon

  • Examine the chest on the right, beneath the archway leading to the Cell. Place the Pistol Tokens 2/2 into the slots, then collect the Gun Powder inside to add it to your inventory.
  • Head back to the Courtyard.

Courtyard

  • Take a closer look at the grate beneath which Lilacus is imprisoned. Use the Car Jack to free him. Lilacus will reward you with the Duct Tape.
  • Examine the hole in which Lilacus was imprisoned to collect the Flashlight as well.
  • Zoom in on the area at the top of the steps on the left, then examine the work table to the right of Lilacus. Place the Firework Cap, the Firework Body, and the Gun Powder on the table.
  • Return to the Corridor.

Corridor

  • Examine the small caged area on the right. Use the Duct Tape to repair the severed wire. Click on the plug to plug it in and turn on the fan, revealing the Fuse in front of it.
  • Take a look at the window on the left. Place the Flashlight on the stand and use the Diamond Ring to cut open the glass and collect the Fireworks Sticks. You’ll be returning here shortly.
  • Go back to the Courtyard.

Courtyard

  • Examine the table next to Lilacus again and add the Fuse, the Fireworks Sticks, and the Duct Tape to the mix. Click on the resulting Fireworks to add them to your inventory.
  • Place the Fireworks in the stand on the left, then give the Matches to Lilacus.
  • Back in the main area of the Courtyard, you’ll notice a hidden object area has appeared on the right.
  • Find the objects listed at the bottom of the screen. Their locations are shown below. Upon completing the area and clicking on all the secret component pieces that appear, the drawer will open, revealing the Battery.
Eventide - Slavic Fable Courtyard Hidden Object Scene Revisited

Eventide – Slavic Fable Courtyard Hidden Object Scene Revisited

  • Head back to the Corridor.

Corridor

  • Zoom in on the window on the left. Place the Battery into the flashlight.
  • Click on the flashlight to signal Lilacus.
  • Enter the Tower.

Tower

  • Take a closer look at the table at the back of the room. Collect the final Bestiary Card 30/30 and add the Fern to the mortar on the right. Use the pestle to crush it and add the mixture to the potion.
Eventide - Slavic Fable Final Collectible Card

Eventide – Slavic Fable Final Collectible Card

  • Watch the cutscene that follows!
  • Examine the stone figure of Boruta. Click on the Chain Key hanging around his neck to retrieve it.
  • Zoom in on Baba and use the Chain Key to free her.


Congratulations! You’ve completed the Slavic Fable adventure of Eventide – Slavic Fable! The Midsummer Night bonus content is now unlocked and can be accessed via the Main Menu.

Bonus Chapter: Midsummer Night

Once a year, in the heart of the forest on a Midsummer’s Night, the Fern Flower blossoms. Legend has it, if the flower is found by one pure of heart, the flower will grant any wish he or she desires.

House

  • Click on the bed on the right to remove the blankets until you acquire the Sheet.
  • Take a closer look at the window straight ahead. Untie the curtains, move the pot, and collect the Matches Open the window and tie the Sheet to the peg. But, hm, you’ll need more length..
  • Examine the chest beneath the window on the right. Click on the Stool to add it to your inventory.
  • Place the Stool in front of the shelf on the left, then take a closer look at the top. Use the Matches to light the candle. Read the top book, then collect the Trunk Token in the shape of a sun lying beneath.
  • Examine the chest beneath the window again and place the Trunk Token into the lock. Take a closer look inside the chest to trigger a puzzle.
  • Arrange the picture by swapping its pieces. The solution is shown below.
Eventide - Slavic Fable House Chest Puzzle

Eventide – Slavic Fable House Chest Puzzle

  • Upon completing the puzzle, collect the Sheet.
  • Zoom in on the window again and use the Sheet to extend the rope.
  • Proceed out the window and into the Village.

Village

  • Take a closer look at the table on the right. Collect the folded Map on the right, then collect the Lockpick and place the surrounding shapes into their appropriate slots in the lantern.
Eventide - Slavic Fable Lantern Shapes

Eventide – Slavic Fable Lantern Shapes

  • Back in the main area, examine the round glass door ahead. Use the Lockpick to open the lock and collect the Candle
  • Examine the table on the right again and place the Candle into the lantern. Use the Matches to light it, then click to add the Lantern to your inventory.
  • Proceed forward into the Swamp.

Swamp

  • Use the Lantern to illuminate the area and speak with Leshy.
  • Take a closer look at the bear cub ahead. Remove the leaf lying on top of the Block on the left and click to add it to your inventory.
  • Proceed forward to the Outdoor area.

Outdoor

  • Examine the door on the left. Insert the Block to trigger a puzzle.
  • Turn around elements of the lock so that all the symbols are visible. The solution is shown below.
Eventide - Slavic Fable Door Block Puzzle Solution

Eventide – Slavic Fable Door Block Puzzle Solution

  • Note the anchor inside the doorway. You’ll return to this later.
  • Take a closer look at the nest lying on the ground ahead. Click on the Handle and the Nest on the left to collect them.
  • A hidden object area will appear. Find the items shown at the bottom of the screen. Their locations are shown below. Upon completing the area, the Hoe will be added to your inventory.
Eventide - Slavic Fable Outdoor Hidden Object Area

Eventide – Slavic Fable Outdoor Hidden Object Area

  • Zoom in on the portion of ground where you found the Nest. Use the Hoe to acquire the Handle and the Mold.
  • Take a closer look at the lit alcove on the right side of the tree. Click to add the Watering Can to your inventory, then use the Handle on the cabinet at the top of the window to open it and acquire the Line.
  • Return to the Village.

Village

  • Take a closer look at the round glass door again. Use the Watering Can to collect the water on the left, obtaining the Full Watering Can.
  • Return to the Outdoor area.

Outdoor

  • Take a closer look at the doorway on the left and use the Line on the anchor to acquire the Line with Anchor.
  • Zoom in on the branches of the tree straight ahead, above the area where you found the Nest. Throw the Line with Anchor up into the branches, then click to bring them down. Place the Nest into the branch and collect the Snare Part the bird drops.
  • Go down to the Swamp.

Swamp

  • Zoom in on the bear cub again, then examine the trap it’s caught in. Place the Snare Part into the trap and use the Handle on the trap itself. Click on the handle on the left to trigger a puzzle.
  • Complete the mechanism by arranging the gears so that all of them move. The solution is shown below.
Eventide - Slavic Fable Trap Gear Puzzle Solution

Eventide – Slavic Fable Trap Gear Puzzle Solution

  • Upon completing the puzzle, click on the stick Handle on the right again to pry open the trap and free the cub.
  • Back in the main area, examine the foliage on the left. Place the Mold on the ground and use the Full Watering Can to grow a number of flowers – as well as a new hidden object area.
  • Find 12 shoots of Plantago. Their locations are shown below. You will need to use the stick on the left to remove the cobwebs on the upper right. Upon completing the area, the Plantago will be added to your inventory.
Eventide - Slavic Fable Plantago Hidden Object Area

Eventide – Slavic Fable Plantago Hidden Object Area

  • Leshy will appear again. Speak with him.
  • Examine the bear cub and use the Plantago on his wound.
  • Proceed forward toward the Lodge.

Lodge

  • Speak with Tubber.
  • Examine the trough on the left. Click on the Hat beneath to add it to your inventory.
  • Take a closer look at the area beneath the Lodge and use the Hat here to trigger a hidden object area.
  • Assemble the Scarecrow by locating items according to the silhouettes shown at the bottom of the screen. The solution to the area is as follows:
  1. Examine the shoes to the left of the work bench and collect the Token on the lower right.
    • Look at the hanging picnic basket on the upper left and use the Token to open it, then collect the Corn and the Cheese
    • Feed the Corn to the chicken under the bench and collect the Key and Feather from the nest.
    • Use the Key on the round box sitting on the bench to open it and collect the Pin
    • Examine the shirt draped over the barrel on the right and use the Pin to stitch it. Click to collect the Jacket.
  2. Collect the Knife in the left corner of the work bench.
    • Use the Knife on the Pumpkin on the left, then click to collect it.
  3. Take a closer look at the shoes to the left of the bench and give the Cheese to the mouse and collect the Rope
    • Use the Rope to secure the sticks propped up against the work bench.
    • Place the Feather into the Hat, then click to collect it.
  4. Apply the Jacket, the Pumpkin, and the Hat to the stick frame. Click to collect the finished Scarecrow.
  • Examine the trough on the left again and use the Scarecrow to frighten the birds. Collect the Pipe Part in the trough.
  • Take a closer look at the panel on the right side of the Lodge. Use the Pipe Part Tip: You will need one more component before you can trigger the puzzle here.
  • Head up the path on the left into the Maze.

Maze

  • Click on the red Valve lying on the ground on the right.
  • Go back to the Lodge.

Lodge

  • Examine the panel on the right side of the Lodge again and place the Valve on the upper right pipe to trigger a puzzle.
  • Arrange the pipes by rotating them so that the water can flow. The solution is shown below.
Eventide - Slavic Fable Pipe Puzzle Solution

Eventide – Slavic Fable Pipe Puzzle Solution

  • Upon completing the puzzle, the Moon Token will be added to your inventory.
  • Speak with Tubber again. He will give you the Ritual Dagger.
  • Head into the Maze.

Maze

  • Click to remove the moss from the tree on the right, and the left portion of the tree straight ahead. Two symbols will be revealed.
  • Take a closer look at the wooden carvings on the right side of the center tree. Place the Horn in the hand of the statue on the left, then the Eye from the right statue’s hand into the left statue’s eye socket. Place the round emblem from the left statue’s mouth into the groove on the front of the right statue. Place the golden tooth that appears into the mouth of the right statue. The correct symbol will be revealed.
  • Head down the Left path.
  • Click on the moss on the right single tree, and the bottom left corner of the center tree to reveal two symbols.
  • Collect the Arrow stuck in the bottom right portion of the tree ahead. Use the Arrow on the Crossbow on the right to add it to your inventory.
  • Use the Crossbow to shoot down the gold amulet hanging on the upper left. Take a closer look at the design on the amulet to reveal which path should be taken.
  • Head down the Left path.
  • Click on the patch of moss straight ahead, as well as on the tree on the right to reveal two symbols.
  • Click on the bush to the immediate right of the owl and collect the Maze Token hidden beneath.
  • Examine the box on the ground on the right and use the Maze Token on the slot to trigger a puzzle.
  • Arrange the picture by swapping its pieces. The solution is shown below.
Eventide - Slavic Fable Owl Maze Token Puzzle

Eventide – Slavic Fable Owl Maze Token Puzzle

  • Once finished, click on the completed panel to open the box, revealing a symbol.
  • Head down the Left path.

Tomb

  • Examine the statue straight ahead. Click on the Twig in the lower left corner to add it to your inventory.
  • Zoom in on the flat stone on the ground straight ahead. Use the Twig to remove the debris. Click on the gold Flower Token in the indentation on the right, then place the stone Vase lying on its side in the upper left corner into the groove where the Flower Token was. A hidden object area will be triggered.
  • Find 11 Flowers scattered throughout the area. You may have to move some debris to find them. Their locations are shown below.
Eventide - Slavic Fable Tomb Flower Hidden Object Area

Eventide – Slavic Fable Tomb Flower Hidden Object Area

  • Upon completing the area, click on the Vase with Flowers to add it to your inventory.
  • Zoom in on the statue straight ahead. Place the Vase with Flowers on the pedestal in the lower right corner, and the Ritual Dagger in the sheath to the left of the statue. Click on the Sun Token that appears in the statue’s hand to add it to your inventory.
  • Examine the stone slab to the right of the statue. Place the Moon Token, the Flower Token, and the Sun Token into their correct slots. A puzzle will be revealed.
  • Put the interactive fragments of the picture where they belong. The solution is shown below.
Eventide - Slavic Fable Interactive Token Puzzle Solution

Eventide – Slavic Fable Interactive Token Puzzle Solution

  • Upon completing the puzzle, click on the lever inside to reveal a secret passage.
  • Enter the secret passage to the left of the statue.

Fern

  • Click on the Fern Flower to collect it.
  • Return to the Tomb.

Tomb

  • Speak with Leshy. He will open up a shortcut passage back to the Village.

Village

  • Give the Fern Flower to Mom.


Congratulations! You’ve completed Eventide – Slavic Fable Platinum Edition! Be sure to visit our blog for more great tips and tricks!


The Eventide – Slavic Fable Walkthrough is meant as a guide and does not contain cheats, hacks, or serials.

The post Eventide – Slavic Fable Walkthrough appeared first on GameHouse.
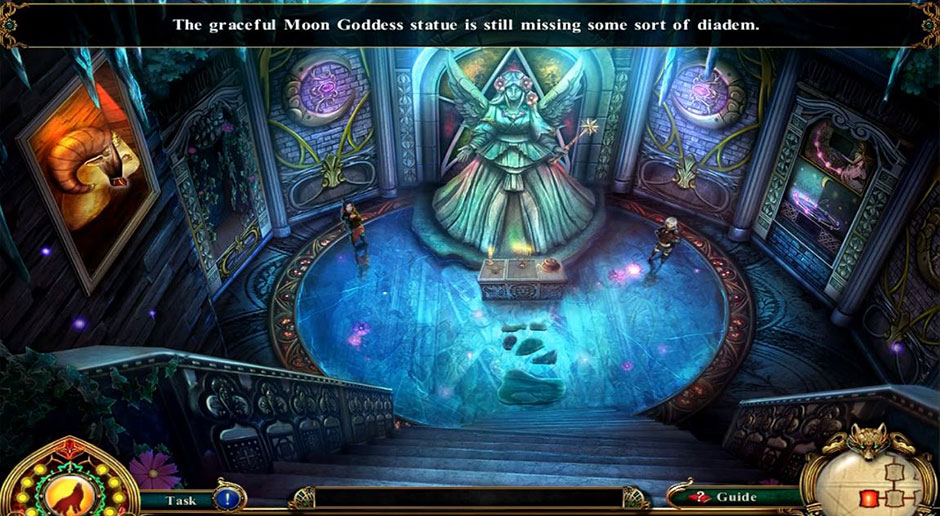
Sable Maze – Sullivan River Walkthrough

$
0
0

In Sable Maze – Sullivan River, you have been haunted in your dreams by an older friend from your childhood that you use to spend time with at camp. These dreams have been going on for over two months, and they have even caused you to experience insomnia. In an attempt to get to the bottom of these dreams, your therapist has recommended that you take a trip back to your old campground in hopes of putting your bad dreams to rest. However as you return to the campground, you find that it has changed.

Contents

General Tips & Tricks

General Tips and Tricks and Game Play
When navigating throughout the game, there are various aspects that you will need to know how to utilize to advance further in the game.

Notebook – The notebook is used to store all of the clues that are important for you to remember as you advance in the game. Tip: The notebook is the best place to go first if you cannot figure out where to go next.

Magnifying Glass Icon – The magnifying glass icon appears when there is something to investigate. This will allow you to zoom in on specific places and things that are important to your advancement in the game.

Difficulty Settings – You can choose between three different difficulty settings: casual, advanced, and hard. Tip: You cannot change difficulty after gameplay starts.

Inventory – The inventory screen is located at the bottom of your screen. This is where items you collect go.

Hidden Object Scenes – Hidden object puzzles are mini-games that often produce items needed to advance in the game. Tip: If you are looking for a yellow word when you click on the correct hidden place, this word will turn white indicating that it is now in plain view.

Hand Cursor – The hand cursor appears when you can interact with an item. It looks like a skeletal hand.

Hints – The hints icon is the lantern image in the lower right-hand corner of the screen. Tip: For people who do not like to go through the notebook over and over to find the different clues, this is a much faster way of progressing through the game content.

Gears – When the cursor turns into gears, you will need to use an item in your inventory to interact with the location.

Skip – This button is associated with the various mini-games throughout the larger game. Mini-games have to be completed in order to move to different parts of the game. If you are having a hard time with a particular one, you can merely click the ‘Skip’ button to get around it. Tip: This can also be used if you just do not feel like doing the mini-game.

Sable Maze – Sullivan River Walkthrough

Chapter 1: The River

Zoom into the bulletin board and collect the map. Get the wooden letter “A” and place it onto the tree. This opens up the first hidden object area.

Complete to get the gate key. Use the key to pick the lock and move to the next area.

Click the bike and collect the pocket knife. Then, click the sign to get the note. Use the pocket knife to collect the wooden badge. Click the nurse’s office door on the left side of the screen. Get the horse emblem and the note. Click the bear on the right, and use the wooden badge. Get the hacksaw and click on the pole. Then choose the director’s office door, and turn the key that is in the keyhole.

Enter into the office. Click on the skeleton. Then, collect the scarf and note. Click on the suitcase. Then, collect the fishing pole and click the frame to collect the picture. After clicking the safe, cut the chain using the hacksaw. Open the safe and to collect the blowtorch and note.

Click on the brambles and torch them with the blowtorch. Click the bag and open the buckle with the pocket knife. Collect the code. Click the root and collect the dry leaves. Click the grate to collect the reel. Then, click the effigy and burn the dry leaves with the blowtorch after placing them around its base. Collect the green tile. Click on the collapsed house to access the next hidden objects area.

Collect the fire emblem. Then, go to the forest boardwalk. After clicking the tree roots, collect the “3” button with the fishing rod. After clicking the mailbox, wipe it off with the scarf. Complete the puzzle.

Sable Maze – Sullivan River - Runes

Sable Maze – Sullivan River – Runes

After retrieving the package, open it with the pocket knife. Then, get the tape reel piece as well as the note from inside. After clicking on the tree, you will use the green tile for the next puzzle.

Sable Maze – Sullivan River - The Maze

Sable Maze – Sullivan River – The Maze

Collect the screwdriver and go to Mess Hall. Zoom into the pedestal and use the screwdriver on screws. Collect the life preserver emblem from the compartment. Click the statue and collect the wooden stick.

Go to director’s office and click the banner. Click safe and use the fire emblem, the horse emblem, and the life preserver emblem on the door to trigger the puzzle.

Sable Maze – Sullivan River - Emblem

Sable Maze – Sullivan River – Emblem

The solution and layout of the puzzle are random. Collect the trinket, crowbar, and note. Go to the courtyard, and click the nurse’s door. Use the crowbar to open it and go inside.

Chapter Two: Nurse’s Station

Chapter Two: Nurse’s Station
Click the top drawer and collect the tape reel. Click the window and collect the photo. Click the shelves to access a hidden objects area.

Collect the bandage and go to the fire pit. Click the tape deck and use the tape reels. Click the play button, and collect the tile with the symbols. Go to the mess hall. Click the electrical panel. Wrap the bandages around the wires to unlock a puzzle.

Sable Maze – Sullivan River - Wires

Sable Maze – Sullivan River – Wires

Go to the mess hall. Click the pots, the lid, and then the pasta. Collect the pasta ladle and click on the hatch. Use the tile with symbols to unlock the next puzzle. Complete the puzzle by moving tiles until the symbols match, and collect the broom head. Go to the mess hall exterior, and click the window. Then, clear the cobwebs with the brook to gain access to the next hidden objects area.

Sable Maze – Sullivan River - Matching Symbols Solution

Sable Maze – Sullivan River – Matching Symbols Solution

Collect the plunger and go to the mess hall. Click the sink and use the plunger on it. Collect the toy propeller. Go to the fire pit. Click the collapsed house area for another hidden object area.

Collect the wire cutters and use them on the grate to cut the bars. Get the code and go to the director’s office. Use the code on the suitcase to get the revolver. Then, go to the nurse’s office. Click on the hole in the ceiling, and then fix the blimp with the toy propeller. Then, collect the bullets. Use revolver on the door and click on shelves to access next hidden objects area.

Sable Maze – Sullivan River - Suitcase Code

Sable Maze – Sullivan River – Suitcase Code

Get the glass shard and go in the doorway to the infirmary. Click the mirror, then click the moss and use the glass shard to remove it. Click on the bed, and collect the note. Click the sheets to the get mortar. Click the cabinet. Use the “3” button to trigger puzzle. Collect the red nose and pestle. Put the mortar with the pestle and place on the lab equipment. Click the ground moss. Click the dial, the valve, the beaker, and collect tree-fighting elixir. Then, head to the nurse’s station.

Sable Maze – Sullivan River - Clowns Puzzle

Sable Maze – Sullivan River – Clowns Puzzle

Click on the clown, and use the red nose to collect the silver pendant. Then, head to the forest boardwalk, where you will use the tree-fighting elixir on the trees. Go to the tree houses, and click on the well. Collect the weight and the rope, and then go to the mess hall. Click on the pulley, and then, on the hook, place the weight there. Get the machete, and then go back to the exterior of the mess hall. Click the window to access the next hidden object area.

Complete to collect the hook. Go to the tree house. After clicking on the cage, open it by breaking the lock with the machete. Click the door to collect the mechanical bird. To get in the tree house, place the climbing tool up on the ladder. Click the teddy bear to get the note. Click the stitching 3 times and get the wind-up key. Click the cloth and then on the train, place the wind-up key on it to unlock a puzzle. Get the nut and go back to the tree house scene.

Sable Maze – Sullivan River - Train

Sable Maze – Sullivan River – Train

Click the well, and then on the handle use the nut on it. Use the handle to collect the lens. Go to the treehouse. After clicking on the telescope, you will use the on it. Click on the lens, and then use your cursor to click on the tree hole. Get the horseshoe and the dryad before going to the fire pit. Then take a right turn to the stable. To open the gate to the stable, you will use the horseshoe as a key.

Chapter 3: The Horse Stable

Click the cart and collect the half of shears. Go into the stables. Click the broken jack and get it. Go to the horse trail. Click the hobby horse, and collect the pliers. Use them on the keys, and go into the apple orchard.

Click the tree to get the half shear. Go to the exterior of the stables. Go inside. Click the spur and use the pliers to fix the spur wheel. Get the gear. Click the cabinet. Use the gear to open the lock, and use the handle on the door. Get the note, the sugar cubes, and the magnet. Go back to the apple orchard.

Click the downspout, and use the magnet to pull from inside the spout. Use the crank, and then go to the stable gate. After clicking on the cart, you will use the jack to fix it. Get the red level before going into the stable gate. After clicking on the door, place the red level on the door to trigger a puzzle.

Sable Maze – Sullivan River - Puzzle Solution Chapter 3

Sable Maze – Sullivan River – Puzzle Solution Chapter 3

After completing the puzzle, go to the blacksmith class. Click the furnace and put the silver pendant onto the plate. Use the crowbar, and collect the silver tree. Click the workbench, and collect the chisel and 2 notes. Click the fireplace to access the next hidden object area.

Collect the grinding wheel. Click the grinder and put the grinding wheel on it. After clicking the wheel, the dull shears will need to be used on it. Head back to the horse stables. Click the horse, and then use the shears on the branches. Click the empty stall, and get the wheel. Go to the apple orchard. Use the chisel on the tree, after clicking on it. Then, retrieve the wooden figure, before going back to the blacksmith class. Click the workbench. Put the wooden figure and the silver tree in the picture. Pick it up. Click the fireplace for the next hidden object area.

Complete to get the harness, and then you will head to the stable gate. Click the cart, and put the wheel on it. Give the sugar cube to the horse, and then place the harness on its back. Click the horse.

Chapter Four: Center Stage

Click the trumpet to get the boards. Use the pliers to collect the mouthpiece. Then, head to the archery range. Click on the pots and put the pasta ladle and the dryad sprout down into the pot. Then, collect the tile, the note, and the powder. Next, go to the dormitories.

Click on the tree and use the boards on it. Then, click the shutter and collect the rank. Go to the horse trail. Click the hobby horse, and then rake the grass. Take the teddy key, and go to the dormitories. Click the window, and unlock the lock with the teddy key. Then, go into the kid’s house.

Click the shelves and get the ice pick and the rocket. Click on the clock and take the matches and the note. Then go towards the boy. Click on the bed frames. Then, grab the bottle and place the bottle rocket in it. Light it with the matches. Go to Derrick’s bunk. Then, click the cabinet to reveal the next hidden object area.

Collect the rubber mallet. Click the pillow and get the rubber band. Click the pillow again to get the book. Take the note. Then, click the table for the 2nd tile. Go to the shower room. Click the tiles, and then use the ice pick and rubber mallet on them. Click the compartment for the 3rd tile. Click the valve to turn off the water. Click the shower, and place the 3 tiles in the slots, which will open a puzzle. Arrange the tiles until they are with their matching colored circles.

Sable Maze – Sullivan River - Puzzle Chapter 4

Sable Maze – Sullivan River – Puzzle Chapter 4

Collect the squirt gun, and go to the kids bunk. Click the shelves. To get the sling shot, use the squirt gun. Go to the shower room. Click the lights. Then to get the blue soldier, use the slingshot. Go to Derrick’s bunk. Click the shelves to reveal the next hidden object area.

Collect the crank, and go back to the stage. Click the pole, and then with the winch use the crank. Get the red soldier. Then, go to Derrick’s bunk. Click the table, and put the soldiers in their slots to get the apple pieces, the bow, and the arrow. Go to the archery range.

Click the gate, and collect the note. Click the targets. To unlock the next puzzle, you will need to use the arrow and the bow. Shoot the targets until the row s full of stars.

Sable Maze – Sullivan River - Arrow and Bow

Sable Maze – Sullivan River – Arrow and Bow

Get the clock winder. Then, you will head to the dormitories and up to the bunks. Click the clock. Then in the nest, place the mechanical bird. In the hole, place the clock winder. Set the clock to noon to get the key. Go to the archery range. Click the gate and use the key to unlock it. Go through the gate and into the art house.

Sable Maze – Sullivan River - Clock

Sable Maze – Sullivan River – Clock

Chapter Five: Enter the Classrooms

Click the classroom door. Click the table for the next hidden object area.

Collect the paint. Click the shelf. Get the water and the green paint. Go to the art house. Click the stove. Put the water into the kettle. Click the burner. On the spout, place the mouthpiece. Go upstairs and into the woodworking class.

Click the lamp. Click the chair to get the yellow paint. Click the workbench. Get the drill piece and apple piece. Click the board to get the note. Go to the art class. Click the table. Put the green, yellow, and red paint on the table to trigger a puzzle. Collect the blueprint and then the drill bit. Go to the woodworking class.

Click the workbench, and use the blueprint to trigger a puzzle. Collect the nesting box, and then head for the stage. Click the sign, and then, on the nail, place the nesting box. Collect the woodpecker. Go to the art house. After clicking on the door, you can place the woodpecker on the branch. Go into the dance class.

Sable Maze – Sullivan River - Nesting Box

Sable Maze – Sullivan River – Nesting Box

Click the railing. Use the drill on the screws. Collect the handrail. Click the piano to trigger a puzzle and get the tomahawk. Once you click on the door, and then, on the boards, you will use the tomahawk. Go into the orchestra class.

Sable Maze – Sullivan River - Piano Solution

Sable Maze – Sullivan River – Piano Solution

Click the stained glass for the next puzzle. Click the wall, and then on the hole, use the rubber mallet. Get the hook, the apple, and the book. Click the table. On the violin hole, you will use the hook. Get the heart key and the apple. Click the hatch. Use the handrail on the hatch. Click it for the next hidden object area.

Get the mask. Go to the art class. Click the shelf. On the piano brace, you will use the hook. Click the table for the next hidden object area.

Get a solvent. Click the easel. Get the note. To trigger a puzzle, place the solvent over the black paint. Click the ancient letters first. Spell: ATLANTA. Get the dryad name. Go to the woodworking class.

Sable Maze – Sullivan River - Atlanta

Sable Maze – Sullivan River – Atlanta

Click the chair. On the box lock, you will use the heart key on it. Get the note and the bracelet. Click the compartment door. Use the mask to trigger a puzzle. Move the masks in line with their matching items. Get the tools. Then, head into the dance class where you will then proceed to the orchestra class. Click the piano. On the piano lid, you will utilize the piano brace. Get the piano string, the apple, and the razor blade. Click the hatch to access a hidden object area.

Sable Maze – Sullivan River - Masks

Sable Maze – Sullivan River – Masks

Get the ant farm. Go to the dance class. Click the piano. Use the piano string on the piano. Click the keys as follows: 10-1-5-1-3. Click on the branch. Then, you will destroy the termites with the ant farm. Get the termites and the apple. Go to the woodworking class. Click the easel. Put the picture on the easel. Use the tools, the dryad name, 6 apples, and 4 figures on the picture. Get the heart. Go to the apple orchard. Click the ghost children. Give the heart to them. Go to the bridge that goes to the mill.

Sable Maze – Sullivan River - Piano Keys

Sable Maze – Sullivan River – Piano Keys

Chapter Six: The Watch Tower

Click on the control panel. Use the solvent on the panel. Click the panel door then the winch. Click the branches and collect the broken pump. One the branches, use the termites in your inventory. Click under the bridge to access a hidden object area.

Collect the handle. Use the air pump to pump up the boat. Go to the dock. First, click on the tree. After that, click the trunk to collect the leaf button and life buoy. Use the rope in your inventory to tie the life buoy. Click the life buoy to go across. Click the tower and collect the thorn. Click the waterfall to collect the net piece. Go to the dock.

After clicking on the package, you will open it with the thorn. Get the animal trap, and go to the watch tower. After clicking on the boat, you will use the animal trap. Click the shed to access a hidden objects area.

Get the leaf button. Go outside. Click the wharf. On the gate slots, you’ll use the leaf buttons to open the next puzzle.

Sable Maze – Sullivan River - Leaf Buttons Puzzle

Sable Maze – Sullivan River – Leaf Buttons Puzzle

Go to the campgrounds. Click the tent and get the smoke bomb and the note. Click the fire then the backpack. Get the note, the lever, and the trigger ring. Go to the bridge mill. Click the life jacket. Use the trigger ring on it. Click the trigger ring and collect the buoy ring. Click under the bridge for the next hidden objects area.

Get the lantern. Go to the campground. Click the fire. The light the lantern, use the stick on the fire. Click the lit lantern. Click under the pier and put the lit lantern there. Get the netting. Go to the watch tower. Click the buoy, where you will collect the lobster using the net. Click the tower, and you will use the lobsters to get rid of the thorns. Go to the viewing platform.

Click the plank and collect the insulated flask. Click the spotlight controls and get the picture part. Use the lever on the bracket and click. Get the broken bulb. Go to the campground. Click the fire, and use the insulated flask to get hot water. Click the tent and on the ice, use the hot water. Get the pin. Click the other tent, then its zipper. Once on the zipper, use the pin on it. Get the scraper. Go to the watch tower. Click the buoy. After this, you can use the scraper on the shells there. On the lock there, you will use the buoy key. Click the door to get the picture part. Click the shed to access a hidden object area.

Collect the hook. Go to the viewing platform. Click the nest to get the picture piece. Click the chest. Put the picture pieces on it to trigger a puzzle. Get the note, the shovel, and the empty bottle. Go to the exterior of the watch tower. Click the waterfall, and the hit the rock with the shovel. Go behind the waterfall to collect the apple piece.

Sable Maze – Sullivan River - Puzzle Solution Chapter 6

Sable Maze – Sullivan River – Puzzle Solution Chapter 6

Chapter Seven: The Maze

Click the closed off area. This is where you will use the shovel. Get the apple half. Click the mazes entrance. Use the apple on the slotto to trigger a puzzle.

Sable Maze – Sullivan River - Labyrinth

Sable Maze – Sullivan River – Labyrinth

Go into the labyrinth. Click the writing. By using the broken light bulb on the stone, you will receive a clue. Click the stairs to get the apples. Go to the waterfall cave. Click the waterfall to access a hidden objects area.

Get the kite with the string. Go to the labyrinth. Click the twisted roots. Put the kite with the string and collect it. Go inside the labyrinth. Go through the maze with these directions. Go straight ahead. Turn right. Turn left At this point, you will use the smoke bomb on the dryad before turning left again. Go through to the lit path to the Tree of Wishes.

Chapter Eight: The End

Click the pot to get the pickaxe. Click the tree trunk. Collect the tears by using the empty bottle. Get the bottle of tears. This is where you go back to the labyrinth and its steps. Click the stone. On the chipped piece, you will use the pickaxe. Get the sickle blade. Move forward 2 times. Move left 2 times. Click the skeleton to get the staff. Go to the labyrinth stairs.

Click the kite. Then, on the roots, you’ll use the staff. Get the note, the bucket piece, and the sickle handle. Go to the waterfall. Click the waterfall to access a hidden objects area.

Collect the glue. Click the bucket.. Use the glue and the bucket piece to repair it. Get the bucket. Click the waterfall. Use the bucket to collect a bucket full of water. Go to the labyrinth. Go straight forward. Turn left. Turn left. Go to the lit path to the tree of wishes.

Click the pot. Put the bucket of water, apples, and the bottle of tears down in the pot. Go into the passageway. Follow the butterfly path. Move forward twice. Click into the tree. Use the sickle to pierce the tree.

Sable Maze – Sullivan River - The Butterfly Path

Sable Maze – Sullivan River – The Butterfly Path

This completes the walkthrough of Sable Maze – Sullivan River. By following the walkthrough, you will get to experience the storyline from the beginning to the end. We hope that you enjoyed the journey!


For more great tips and tricks, visit our blog!


The Sable Maze – Sullivan River Walkthrough is meant as a guide and does not contain cheats, hacks or serials.


The post Sable Maze – Sullivan River Walkthrough appeared first on GameHouse.
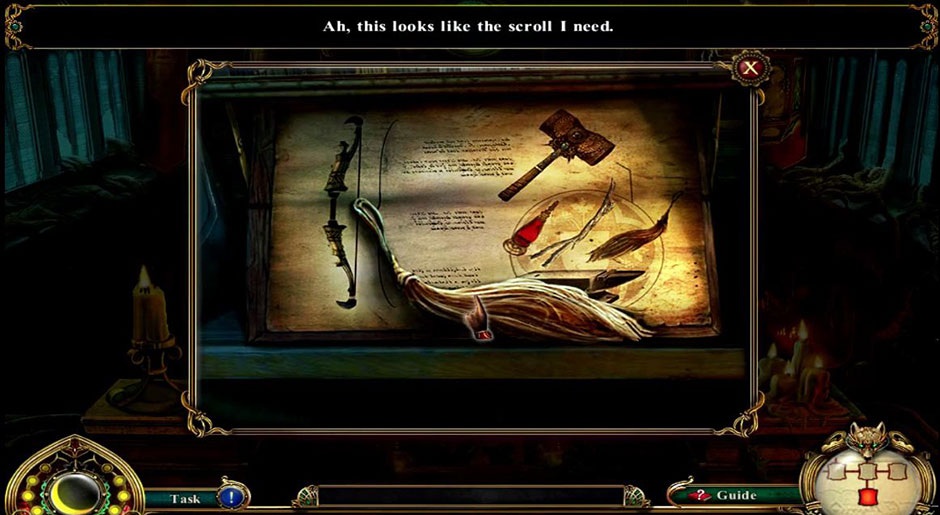
The Chronicles of Emerland Solitaire Walkthrough

$
0
0

Help unite the citizens of Emerland and help them to defeat an evil wizard who’s out to destroy the amulets that help keep balance in the four kingdoms. It’s up to us to stop him in this card/hidden object hybrid game: The Chronicles of Emerland Solitaire. You start out by choosing the name you want to use during your gameplay time as well as the difficulty level you want to use.

Contents

General Tips & Tricks

Remember to look ahead for cards that can be strung together in a set like if you have an A, 2, 3, 4 or an A, K choose the 2, 3, 4 you will earn more coins and reach your goals faster. Remember that you will find needed items under the last card in the pile, and you get bonus coins for every pile that is finished. You can save your wild cards during play time, but if you let them go until you move up a level, you will lose any wild cards you have saved up to that point.

The Chronicles of Emerland Solitaire – Gameplay 1

The Chronicles of Emerland Solitaire – Gameplay 1

HOW TO PLAY
This Walkthrough will guide the player or players through the basic mechanics of how to play The Chronicles of Emerland Solitaire, how various features are used and helpful suggestions for the challenges included in the game.

HINTS
Hints and tops pop ups will appear as you get to them in the normal Gameplay. You have the option in “options” to turn tips and hints of, sound of, etc. Depending upon your choices and level of comfort and experience you can shut these options of as you play the game, no need to decide right away.

PROFILES:
On the main screen you are given the option to create a profile for each user that wants game time of their own. You can also change to a different user/profile before each Gameplay by selecting the Profiles option on the main screen and choosing an existing profile or add a new one.

OPTIONS:
You will also be asked on the second screen to choose The level of difficulty that you want the game to be set on and you are given two options, easy and difficult. Choose accordingly. You can also use the options button to select a volume to mute all sounds here as well.

STORE, TROPHIES:
Also on the main screen you can choose to look into your store, and trophies collection, profile settings or even choose different games. You earn coins during each level to use in the store. Gold/Coins collected along The way can be used in the store to buy items listed there or upgrades.

Before beginning The Chronicles of Emerland Solitaire Walkthrough, it’s highly recommend that you watching each movie scene as it explains in detail the challenge that you have to complete.

The Chronicles of Emerland Solitaire – Map

The Chronicles of Emerland Solitaire – Map

The Chronicles of Emerland Solitaire Walkthrough

The game begins with the wizard speaking about how he is going to train you and he is asking you to find his lost cards that are scattered all over outside around a tree.

LOST CARDS CHALLENGE

You need ten cards and they are located about in these hidden spots: two cards are at the base of the right hand side of the tree one on the roots and one on the base, one card is near the right side of the tree near the Chinese lantern, just higher up on the right hand side of the tree hanging in the branches will be two cards, then move over to the left side of the tree and find more cards hanging from the branches high and low in the tree, one card is to the far left of the screen in the bushes.

Once you begin; the game starts with Gameplay cards laid out on top of the screen face out while cards to be used start face down on the bottom of the screen, except for one card face up. It does not matter if the cards are the same color or same suit only that they go up or down numerically one from the card played.

What is important to remember is that the more cards you string together during a turn the higher your points are for that Gameplay. If you run out of moves just left click on the cards on the bottom of the screen and they will pop up accordingly for you.

You move on to the next level by clearing the current board. During a challenge level after you clear a board the screen will cut to a movie scene with the wizard.

The Chronicles of Emerland Solitaire – Cards

The Chronicles of Emerland Solitaire – Cards

LANTERN CHALLENGE

For your second challenge the scene cuts to the wizard asking you to turn on all 10 of the lanterns hanging in the tree and “light them” to move on to the next game and these are very easy to spot so light away and get to your next card game as quick as you can!

You learn on this next level that the coins you earn can be used in the store to buy specific items you may need along your journey to save the kingdom. In the next challenge, you must help the wizard find the blue flowers to make a concoction to help his ailing back. The flowers are located around these hidden spots.

There is one at the right side of the base of the tree, and just a bit farther out on the ground still on the right side is a blue flower on the ground, next get the blue flower that is above the doorway. Directly above the doorway in the branches is another blue flower, high up in the branches of the tree on the right side is a blue flower. Directly left of the doorway and up into the branches will be three blue flowers all almost beside each other on the left side of the tree in the branches, and then one on the bottom left of the tree near the roots on the ground is the last blue flower.

The Chronicles of Emerland Solitaire – Lanterns

The Chronicles of Emerland Solitaire – Lanterns

Each level in The Chronicles of Emerland Solitaire game gets increasingly harder. Each level also gets increasingly harder so remember that you can use a hint at any time (lower right-hand corner, blue shining ball with numbers on it) or your collected wild cards as you uncover them during gameplay.

As you get closer to the end of The game not only do the cards being laid out increasingly get larger and harder to finish, but so do the challenges. One of the final challenges has the evil wizard Seth showing up and releasing a hungry horde of caterpillars on the tree, and if you don’t find them all, they will destroy the tree causing ruin to the whole kingdom.

CATERPILLAR CHALLENGE

To locate the caterpillars, you find the first one is to the left on The bottom branch. Then there is a caterpillar along the top of that branch, directly above and to the left in the branches are two more caterpillars; another caterpillar is under the doorway. Two more caterpillars are in the branches to the right of the doorway.

There are more than one of the little creatures that will drop down right in front of the tree so click on them quickly. Find one caterpillar there right beside The round golden circular object in the middle of the tree and then another caterpillar to the left of it almost above it is a caterpillar. Fine another caterpillar to the far left of the screen on the ground and one more caterpillar will be near the stairs while another caterpillar will be on the right side of the tree trunk just above the stairway. That should be all of them.

After collecting the caterpillars you and the wizard excitedly move on to your next adventure to save The kingdom, however, you run into the always evil and never smiling wizard Seth who is determined to earn his place of honor as the leader of the four kingdoms that are under the protection of the four amulets.

Complete the next several card games to reconstruct the bridge, once the bridge is complete you move onto your next challenge when the wizard sees the bridge covered in flies so badly you cannot cross.

The Chronicles of Emerland Solitaire – Bridge

The Chronicles of Emerland Solitaire – Bridge

CHALLENGE GATHERING FLY AGARICS

Find The first fly agaric (looks like a small red mushroom) at the base of the stump to the right of the screen. Then directly to the left of the stump is another one. Find the next one on the right-hand side of the dirt path next to the bunny rabbit. Then inside the base of the tree on the left-hand side is one and up in the branches is one hiding, and two on the stone path and that should complete the agaric fly challenge.

After you complete this challenge, you will finish the card levels to help ensure that the evil wizard Seth is stopped, and the four kingdoms are saved from him and his dastardly plans to rule them with a not so nice fist.

The Chronicles of Emerland Solitaire – Fly Agarics

The Chronicles of Emerland Solitaire – Fly Agarics

Congratulations! You’ve completed our Chronicles of Emerland Solitaire Walkthrough!


For more great tips and tricks, visit our blog!


“The Chronicles of Emerland Solitaire Walkthrough is meant as a guide and does not contain cheats, hacks, or serials.”

The post The Chronicles of Emerland Solitaire Walkthrough appeared first on GameHouse.

Viewing all 192 articles
Browse latest View live