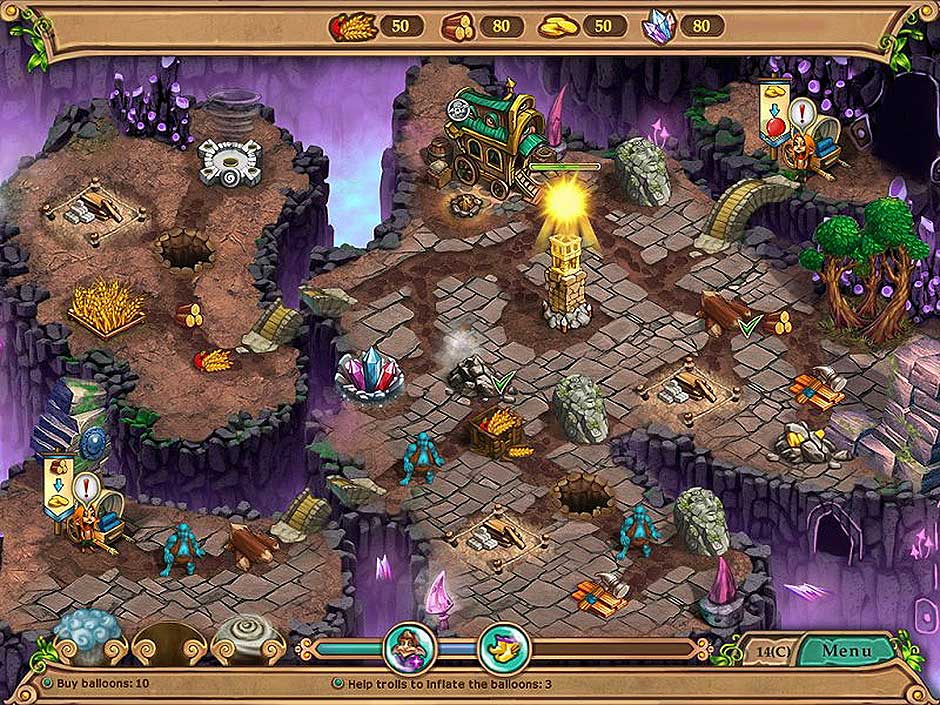
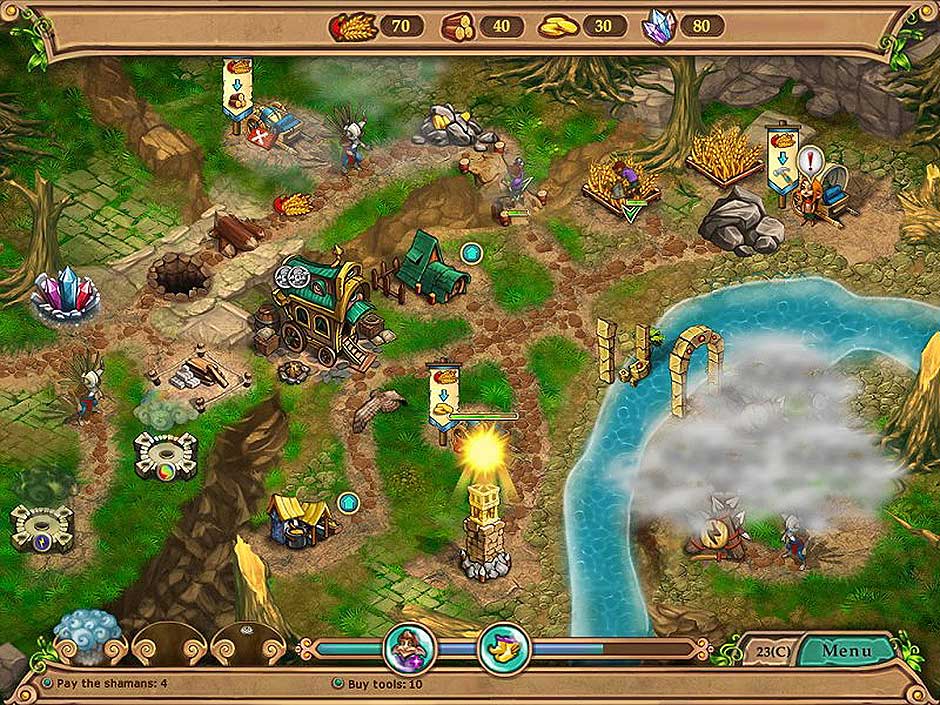
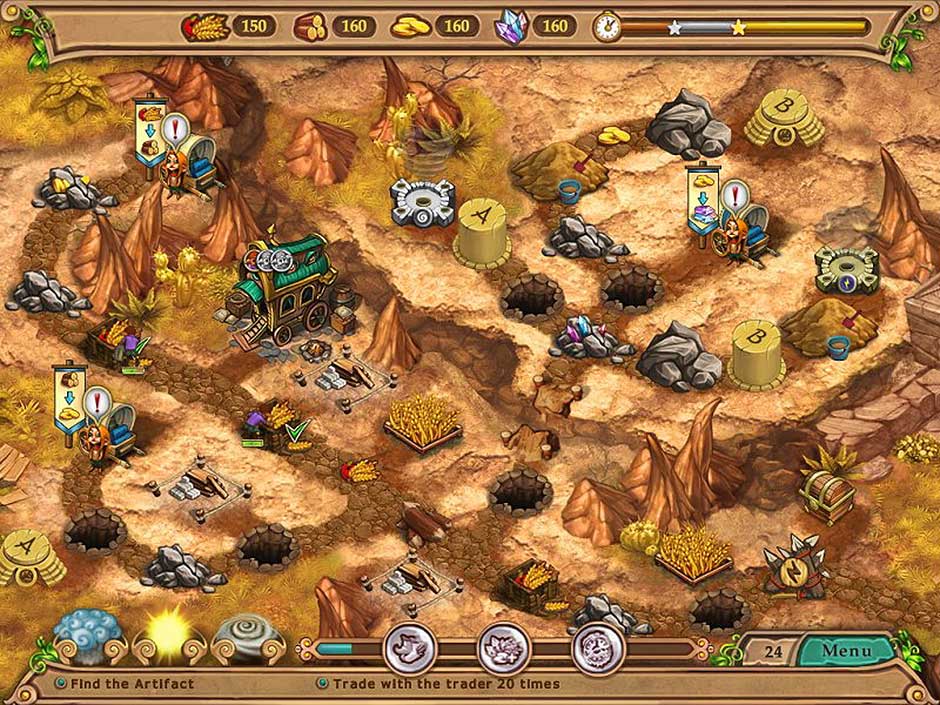
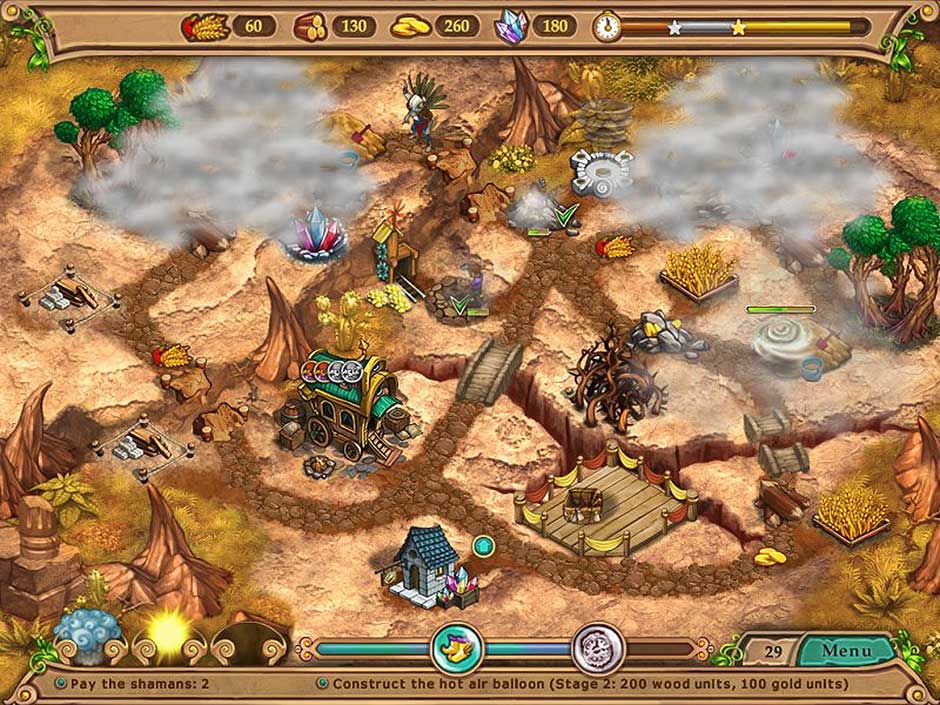
Quantcast
Channel: Guides – GameHouse
Viewing all 192 articles
Browse latest View live

Northern Tale 4 Walkthrough

$
0
0

Help King Ragnor rescue the Princesses Summer, Autumn, and Winter and defeat the army of giants, witches, and black knights that threatens the peace and prosperity of the Northern Lands. As this dark army advances through the Northern Lands they destroy everything in its path. When King Ragnor and the Princes arrive at the scenes all is black and white. As the levels are clear and the dark army defeated color is returned to the Northern Lands. One by one each of the princesses are rescued.

Northern Tale 4 is a time management/strategy electronic game and the fourth installment of the popular Northern Tale series. For other games in the series, click here. Clear levels and complete chapters with this indispensable gameplay guide. Northern Tale 4 Walkthrough Gameplay Guide is divided into four sections: (1) General Gameplay Instructions; (2) Chapter One; (3) Chapter Two; and (4) Chapter Three. Each of the game’s 3 chapters and 45 levels will be explored pointing out tips and hints to get through this odyssey.

Contents

Gameplay

Modes of Play
There are three modes of play in the Northern Tale 4: Normal, Multiclick, and No Time. No Time is untimed and contains tips throughout gameplay. The other two modes are timed. If the player is unable to complete the level in time, must replay the level to advance to the next level. In Multiclick mode, the Vikings or workers can be programmed to perform up to two tasks at a time, accumulating Resources faster.

Options
The following gameplay experiences are fully customizable: sound, volume, screen size, screen resolution, and character voices can be turned on or off during play.

The objective of gameplay is to restore the camps that were destroyed by the black army by building, repairing, clearing, or removing items according to task lists found in each level’s Quest button. When a task is complete it becomes green. To clear a level, tasks found in the Quests tab must be complete.

  • Resources – Food (Ham Leg), Wood Pile (Iron Ore), and Gold Pile (Gold) are collected and stored in Inventory and are generated every minute of game play.
  • Buildings like the Druid’s Tent, Workshop, the Player’s Camp, the Iron Ore and Gold Mines are Built and Upgraded throughout game play.
  • Once the Druid’s Tent is built Wolves, Spiders, and Magic Flowers can be banished from camp.
  • The completed Workshop can hold up to 30 Resources.
  • Player’s Camp – When the player’s camp is Upgraded a Viking or worker is gained.
  • The Mines either produce Iron Ore or Gold. Once depleted, the Mines shut down
  • Trees get chopped down; Roads and bridges are repaired.
  • The following items are destroyed or banished in each of the chapters: Evil Root, Wolves, Evil Stone, and Evil Flowers.
  • The Evil Root is a dead tree highlighted in red. When level complete and the Evil Root is selected, the scene turns to full color.
  • The Evil Stone is a rainbow stone found in the camp outskirts. Once selected water and color are restored to the camp.
  • Upgrades are purchased with Resources.
  • The Magic Stump provides free Resources that regenerate throughout level gameplay.
  • HINT: If the player clears the level ahead of time collect maximum amount of Resources before exiting level.
  • PowerUps: Rechargeable button that provides bonuses in the form of spells to boost play. Spells can add an extra Viking, cause Magic Stumps to automatically regenerate, and double production yield of Resources.

Northern Tale 4 Walkthrough

CHAPTER PLAY

There are three chapters of gameplay in Northern Lights 4. In each chapter rescue one of three princesses: Summer, Autumn, and Winter. There are 15 levels in each chapter. The princesses get rescued in the 15th level of each chapter. There are a total of 45 levels of gameplay.

Chapter One: Levels 1 – 15

In Chapter One review each quest before beginning to play. The following game guide will only provide tips and hints. Remember quests are listed in the upper right hand corner of each level and can be completed in any order. The quest is the goal of the levels. Clear all of the resources and repair all of the buildings. If time runs out before the quest is complete, the level begins again.

Tips and Tricks by Level

Level One: Repair the Main Viking House First. Once complete, a Viking is gained. Once main Viking house is complete, a Viking is gained.

Level Two: The first Workshop is unlocked in this level. It can hold up to 30 resources. Also Repair the Bridge. Bonus bar at bottom of the screen becomes visible.

Level Three: The Magic Stumps are unlocked in this level. Check back often.
Additionally, Repair the Workshop and the Farm. There are 2 Magic Stumps in this level that generate Iron Ore and Gold.

Level Four: The 2 Magic Stumps in this level generate food. Make sure to Repair the Workshop and the Farm. Upgrade Camp. Each time a Viking is gained.

Level Five: Ensure Workshop and Farm Repaired. There are 3 Magic Stumps in this level.
Level Six: Also Repair Workshop and Farm. Upgrade Camp.

Level Seven: Additionally, Repair Druid’s Tent and Farm. Upgrade Camp.

Level Eight: Make sure to Build Druid’s Tent, Run Out Wolves, and Build Farm. Upgrade Camp.

Level Nine: Also Build Farm, Workshop, Warehouse, and Mine; Clear Dirt Patches on Road. Upgrade Camp.

Level Ten: Build Workshop, Farm, and Warehouse. Upgrade Camp.

Level Eleven: Build Warehouse, Gold Mine, and Farm. Upgrade Camp.

Level Twelve: Repair Iron Ore and Gold Mines; Build Druid’s Tent. Upgrade Camp.

Level Thirteen: Build Farm, Druid Tent, Warehouse, and Gold Mine. Upgrade Camp.

Level Fourteen: Build Farm, Druid Tent, and Gold and Iron Mine. Upgrade Camp.

Level Fifteen: Build Farm, Gold Mine, Druid Tent and 2 Iron Ore Mines. SAVE PRINCESS SUMMER. Upgrade Camp. Summer is the princess trapped in the center of the scene.

Northern Tale 4 - Tips and Tricks

Northern Tale 4 – Tips and Tricks

Chapter Two: Levels 16 – 30

The purpose of Chapter Two is to rescue Princess Autumn. Gameplay continues using the tools and resources so far gained. Additionally, the following new elements are introduced: Rainmaker/Enchanted Berries, Herbalist, Dry Tree, and the White Wolf. Statutes, Ghosts, Skeletons, the Exorcist Hut, the Dark Knight, and the Hungry Trolls appear throughout the chapter. When present, they must be built, moved, or repaired using Resources. To determine the Resources needed for the task, place the cursor over the objects. HINT: To remove Ghosts, the Exorcist Hut must be complete.

Tips and Tricks by Level
Level Sixteen: Build Workshop and Farm. Select Dry Tree. The Dry Tree transforms into a bridge when knocked down and falls horizontally. In order to knock down tree must use Resources place cursor over the Dry Tree to identify needed Resources. Upgrade Camp – gain a Viking.

Level Seventeen: Build Gold Mine, Farm, and Rainmaker Idol. The Rainmaker Idol makes it rain in the Camp. Upgrade Camp. A rainbow is visible after the rain, revealing Enchanted Berries.

Level Eighteen: Build Farm, Druid Tent, Exorcist Tent. Upgrade Camp.

Level Nineteen: Build Exorcist’s Hut, Iron Ore and Gold Mines, and Farm. At this level, the player meets the Herbalist (old lady). Select all mushrooms. When complete the Herbalist grows enchanted berries. Upgrade Camp. The Herbalist only appears once in Chapter Two.

Level Twenty: Build Exorcist’s Hut, Workshop, Gold Mine. Move Dry Tree – transforms into a bride. Banish 2 Ghosts. Upgrade Camp.

Level Twenty One: Build Exorcist’s Hut, Farm, and Gold Mine. Banish 3 Ghosts. Upgrade Camp.

Level Twenty Two: Build Iron Ore and Gold Mines, Farm, and Warehouse. Remove 2 Trolls. Upgrade Camp.

Level Twenty Three: Build Exorcist’s Hut, Warehouse, Farm, and Gold Mine. Upgrade Camp.

Level Twenty Four: Build Farm, Warehouse, Iron Ore and Gold Mines. Select Dry Tree. Upgrade Camp.

Level Twenty Five: Build Exorcist’s Hut, Druid Tent, Warehouse, and Farm. Upgrade Camp.

Level Twenty Six: Build Exorcist’s Tent, Farm, Warehouse. and Gold Mine. Select Dry Tree. Upgrade Camp.

Level Twenty Seven: Build Farm, Warehouse, and Iron Ore Mine. Upgrade Camp.

Level Twenty Eight: Build Farm, Exorcist’s Tent, Gold and 2 Iron Ore Mines. Upgrade Camp. Feeding wolves takes them to another location; feeding wolves 2 times makes them fall asleep.

Level Twenty Nine: Build Exorcist’s Hut, Gold Mine, and Farm. Upgrade Camp.

Level Thirty: Build Exorcist’s Tent, Farm, Warehouse, and Gold Mine. RESCUE PRINCESS AUTUMN. Upgrade Camp. Feed the Wolves.

Northern Tale 4 - Tips and Tricks 2

Northern Tale 4 – Tips and Tricks 2

Chapter Three: Levels 31 – 45

The third and final chapter reunites the sisters with the rescue of Winter who is found frozen in ice. All game rules and tips continue to apply. The goal of every level is to complete quest, while clearing resources and repairing buildings. The Merchant offers goods for sale or trade. Also during gameplay in the chapter you will collect Broken Heart Pieces from Princess Winter. To free her the player needs all the pieces. HINTS: Upgrade Camp in every level of the chapter.

Tips and Tricks by Level

Level Thirty One: Build Workshop and Farm. Upgrade Farm.

Level Thirty Two: Build Exorcist Hut, Farm, Workshop, Druid Tent, and Gold Mine. Free 2 Vikings. Remove Snowball. Snowballs convert into snowmen.

Level Thirty Three: Build Farm, Gold and Iron Ore Mines. Sell or trade with Merchant. Upgrade Farm.

Level Thirty Four: No buildings to build in this level.

Level Thirty Five: Build Farm and Druid’s Tent. Gesta appears and causes an avalanche. Remove 3 Boulders.

Level Thirty Six: Use Merchant.

Level Thirty Seven: Use Merchant.

Level Thirty Eight: Build Farm and Move Snowball 3xs.

Level Thirty Nine: Banish Yetis. The Yetis leave if offered food and Druid Tent is built.

Level Forty: Banish Yetis.

Level Forty One: No additional tasks to complete at this level.

Level Forty Two: Build 2 Farms.

Level Forty Three: Use 2 Merchants.

Level Forty Four: Build Farm, Workshop, and Gold Mine.

Level Forty Five: Princess Winter is frozen in place and will take 3 separate blasts to be released from the ice. Make sure all Resources are full and access to all PowerUps charged to complete level and conclude game. PRINCESS WINTER IS RESCUED.

Northern Tale 4 - Tips and Tricks 3

Northern Tale 4 – Tips and Tricks 3

Congratulations! You’ve completed our Northern Tale 4 Deluxe Walkthrough! For more great tips and tricks, visit our blog!


The Northern Tale 4 Walkthrough Gameplay Guide is meant as a guide and does not contain cheats, hacks, or serials.

The post Northern Tale 4 Walkthrough appeared first on GameHouse.


Rescue Team 4 Walkthrough

$
0
0

The following Rescue Team 4 walkthrough is a level specific guide that will help you make it through all 63 levels of the game with ease. Not only will you find the goals for the different levels, but there will be tips for the harder levels to make sure that you are able to get through them with ease, even when shooting for a three star ranking.

Contents

General Tips & Tricks

Basic Gameplay
There are a few things that you need to know in order to be successful while playing this game. The first and most important thing is that this is a time management game. You will have the opportunity to receive three stars per level. In order to get these stars, you have to finish the within a certain time limit. There are four types of buildings that you can choose to build in the levels, and there are a couple that are only there at certain times. Other than building the initial buildings, you will be required to do things like clear the wood, small stone, and large stone blockages.

Burger café – This is one of the four buildings that you can build in the game. It will provide you with the food you need to advance to different levels and complete objectives.

House – Building houses in this game will provide you with money. Money is most often used to pay the doctors to heal people or to upgrade buildings.

Gas Station – On some levels, you will be required to use boats, generators, airplanes, and trains to complete some levels. The gas station building is what provides you with fuel for these types of vehicles.

Sawmill – The sawmill building provides you with the wood that you need in order to be able to build other buildings and to upgrade them.

Hospital – You will never have to build this particular building. In any level where it is needed, it will already be in place. You may have to clear a path too it and repair it before you can utilize it, but you will never have to build it.

Fireman Station – This is just like the hospital. If it is needed to complete a level, the fireman station will already be constructed. However, it may also need to be repaired before it can actually be used.

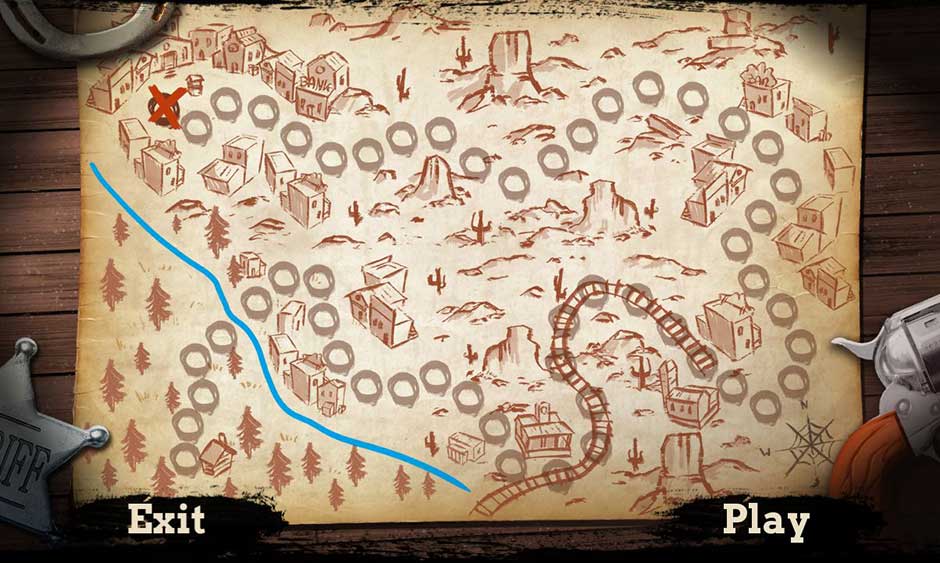
Rescue Team 4 - Map

Rescue Team 4 – Map

Tips and Tricks
When going through the levels, there are a few tricks that you can use as a general rule despite what level you are currently working on.

Tip #1 – You should never have an idle worker unless there are not enough resources to do something You should always keep moving.

Tip #2 – Always remember that to prioritize the people that you are saving. For instance, workers, doctors, and firemen can be among those who need to be saved. If any of these are, then it is important to make sure and release them first to make the rest of the level go by quickly.

Rescue Team 4 Walkthrough

Island 1

Level 1 – Objective: Save 3 people. Tip: In order to get a 3 star ranking, you merely have to make sure you constantly have something clicked in que to do next.

Rescue Team 4 - Level 1

Rescue Team 4 – Level 1

Level 2 – Objective: Build 2 burger cafes, Build 1 house, and Save 2 people. Tip: Make sure to save your worker as soon as possible in order to be able to complete in the three star time limit.

Level 3 – Objective: Save four people, Collect 400 food, and Save $400. Tip: Start clearing the roads to the left and the right. In the end, you should have 3 houses and 5 burger cafes.

Level 4 – Objective: Save 5 people. Tip: Build a house on the first available slot for money generation and then burger cafes in the next two slots. Altogether, you will want 3 houses and 2 burger cafes to be able to generate enough resources to free everyone in time for three stars.

Level 5 – Objective: Save 7 people. Tip: Be sure to repair the gas station as soon as possible in order to get enough fuel to save everyone in the water in time.

Level 6 – Objective: Save 5 people and 6 animals. Tip: Remember in order to save the animals; you have to physically click on them for their workers to save them.

Level 7 – Objective: Save 6 people. Tip: You need to remember that you do not have to clear all of the debris in order to meet your objective for 3 stars. In this level, leave the two huge blocks to the north and just clear the bridge.
Level 8 – Objective: Save 6 people and 2 animals. Tip: To meet the three star ranking, you should have 2 sawmills, 2 houses, and 1 burger café.

Rescue Team 4 - Level 8

Rescue Team 4 – Level 8

Level 9 – Objective: Save 12 people. Tip: At the end of the level, you should have three gas stations, 2 burger cafes, 1 sawmill, and 1 house.

Level 10 – Objective: Save 9 people. Tip: You will need three houses in order to get enough money to save all of the people.

Level 11 – Objective: Save 10 people and four animals. Tip: Do not click the money blue print until you have at least three houses built.

Level 12 – Objective: Save 15 people and Built 7 houses. Tip: Make sure to clear the road as fast as possible to unlock other resources.

Level 13 – Objective: Save 7 people and save $500. Tip: Remember that you have two worker stations that are not connected. You will need to have workers from both sides going out in order to reach the time limit for three stars.

Level 14 – Objective: Save 8 people.

Level 15 – Objective: Purify 2 basins and Save 3 people.


Island 2

Level 16 – Objective: Save 12 people. Tip: You will not have to build something on every slot to get a three star ranking. You just need 1 burger café, 1 sawmill, 3 houses, and the hospital.

Rescue Team 4 - Level 16

Rescue Team 4 – Level 16

Level 17 – Objective: Save 3 people and 20 animals. Tip: In order to complete this level with three stars, you will need at least four burger cafes in order to have enough food to save all of the animals.

Level 18 – Objective: Save four people and 2 animals. Tip: You will need at least 2 gas stations to get enough fuel to save everyone.

Level 19 – Objective: Save 6 people and 2 animals and Drive away 5 thieves. Tip:

Level 20 – Objective: Save 9 people and 3 animals. Tip: Remember that every 2 minutes you will have to send an airplane drop to the medical center.

Level 21 – Objective: Save 10 people and 2 animals.

Level 22 – Objective: Save 14 people and 2 animals. Tip: Make sure your workers are constantly moving when possible.

Level 23 – Objective: Save 2 people and Evacuate 12 people by train. Tip: The train will automatically run when you have enough fuel and it is unlocked.

Level 24 – Objective: Save 12 people and Drive away 5 thieves. Tip: You will need at least three houses to complete this level with a three star rating.

Level 25 – Objective: Save 10 animals.

Level 26 – Objective: Save 6 people and 1 animal.

Level 27 – Objective: Save 11 people and 7 animals. Tip: You will need three houses in order to meet the three star requirements.

Rescue Team 4 - Level 27

Rescue Team 4 – Level 27

Level 28 – Objective: Save 7 people and 3 animals.

Level 29 – Objective: Save 5 people and 18 animals. Tip: You will need six burger cafes in order to meet all of the requirements to get three stars.

Level 30 – Objective: Save 13 people and Drive away four thieves.

Level 31 – Objective: Save 10 people and Put out 3 fires.

Level 32 – Objective: Save 11 people and Build 2 houses. Tip: Make sure to keep all of your workers constantly moving in order to meet the three star time limit.

Level 33 – Objective: Save 7 people and four animals.

Level 34 – Objective: Save 9 people and 2 animals. Tip: Make your way to the Fire station as soon as possible in order to be able to clear what you need too in time.

Level 35 – Objective: Save 15 people.

Level 36 – Objective: Save 31 people.

Level 37 – Objective: Save 6 people, Drive away 3 thieves, and Save $440.

Level 38 – Objective: Save 12 people and 2 animals.

Level 39 – Objective: Stop 1 oil leak and Save 7 people.

Island 3

Level 40 – Objective: Save 25 people. Tip: In order to save all of the people in the three star time limit, you will have to build a total of six different gas stations.

Rescue Team 4 - Level 40

Rescue Team 4 – Level 40

Level 41 – Objective: Save 9 people and collet 400 food.

Level 42 – Objective: Save four people and 8 animals.

Level 43 – Objective: Save 21 people.

Level 44 – Objective: Save 5 people.

Level 45 – Objective: Upgrade 3 houses and Save 7 people. Tip: Remember you only have to upgrade the houses to one star, but you have to do it to three separate houses.

Level 46 – Objective: Save 3 people and four animals.

Level 47 – Objective: Clear the railroad.

Level 48 – Objective: Save 5 people and 1 animal.

Level 49 – Objective: Save 9 people and 3 animals.

Level 50 – Objective: Save 10 people and 3 animals. Tip: In order to meet the 3 star time limit, you will need 3 burger cafes, 2 sawmills, and 2 gas stations.

Level 51 – Objective: Save 8 people and 5 animals. Tip: Make sure to pay attention where the meteors fall and hit, because they could fall more than once during the level.

Island four

Level 52 – Objective: Save 12 people, Drive away 5 thieves, and Save 11 animals. Tip: Make sure to constantly keep moving.

Rescue Team 4 - Level 52

Rescue Team 4 – Level 52

Level 53 – Objective: Save 7 people and 2 animals.

Level 54 – Objective: Save 14 people and 2 animals.

Level 55 – Objective: Save 10 animals and four people. Collect 600 food.

Level 56 – Objective: Save 2 animals and Evacuate 15 people by plane.

Level 57 – Objective: Save 14 people and 3 animals.

Level 58 – Objective: Clear 1 railroad. Tip: In order to complete this level and receive three stars, you will need 2 sawmills, 3 burger cafes, and 2 houses.

Level 59 – Objective: Save 13 people.

Level 60 – Objective: Save 8 people and Build 5 houses. Tip: Although there is a sawmill already built, it is blocked. Therefore, you will need to build a sawmill at the very start of the level to achieve your goal.

Level 61 – Objective: Save four people and 3 animals.

Level 62 – Objective: Save 2 people and 7 animals.

Level 63 – Objective: Save 11 people and Clear the runway. Tip: The only way to complete this level in time is by building all houses except 1 burger café.

This completes our Walkthrough for the game Rescue Team 4. You have done an excellent job in helping to restore order to the four islands, and you have saved countless lives, both human and animal. You will always be remembered for your heroic efforts! Thanks for playing!

For more great tips and tricks, visit our blog!

This Rescue Team 4 Gameplay Walkthrough is meant as a guide and contains no cheat codes, hacks, or serials.

The post Rescue Team 4 Walkthrough appeared first on GameHouse.

Death Upon an Austrian Sonata – A Dana Knightstone Novel Walkthrough

$
0
0

This is the official guide for Death Upon an Austrian Sonata – A Dana Knightstone Novel. You will be helping Dana and her cousin Sabastian who is a famous musician who can see ghosts just like his cousin. How interesting, right? Once Sabastian begins hearing music in his Austrian manor he asks her to come snoop around and help him find out what in the sod is going on! That’s where you came in so come along and help us as we follow her into dangerous chases across the snowy Austrian countryside in a train, help her search the eerie manor for clues. Hurry and help her keep up with the thief before her time runs out too! Along the way you will meet the Clockmaker and his dog Bernie.

Contents

General Tips & Tricks

Tips and Tricks
Press Play or select Play to begin playing the game or Press Settings to adjust sound volume, and game mode. You have three levels of game difficulty you can choose from being casual, advanced, and hardcore mode. Press your current profile to create, edit or delete a game play profile you will use.

There will be several hidden object scenes throughout the game they will be referred to as HOS in this guide. Please keep in mind that the objects in each HOS may change or shuffle places so I will not be listing where to find the objects for you this is a general overview of the game you will have to do the heavy lifting.

Death Upon an Austrian Sonata – A Dana Knightstone Novel Walkthrough

Chapter 1: Sebastian’s Manor

Zoom into the door to activate cut scene and you find out you must find a door knocker that is hidden by the tree to the left of the mansion at the base but it is being protected by a hungry little forest creature that will exchange that door knocker for some grub so let’s go find him some and get inside that house! Play the HOS

Death Upon an Austrian Sonata - A Dana Knightstone Novel - HOS

Death Upon an Austrian Sonata – A Dana Knightstone Novel – HOS

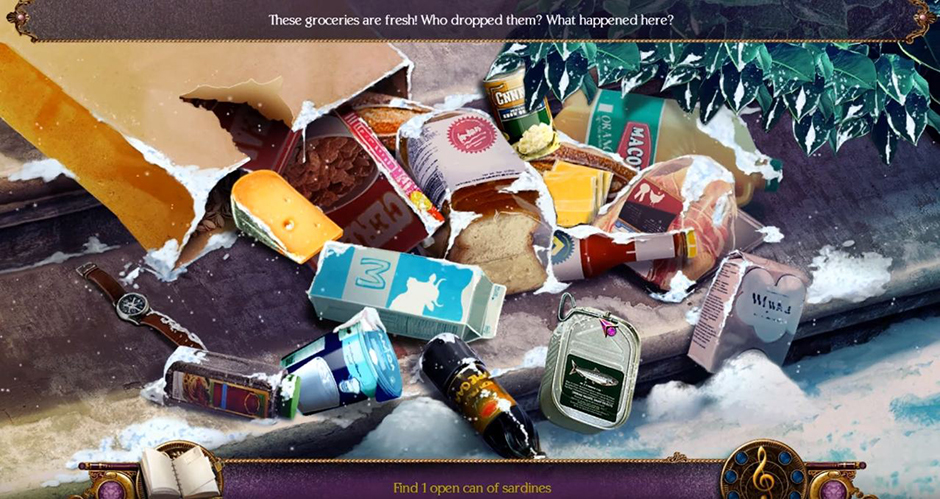
Remove the leaves and rip open the bag of groceries that were dropped there and collect six eggs there are two hidden really well, one will be inside the bag just under the rip and the other will be under the green onions while the others are plainly displayed within eyesight. Once you have collected the five fruits, three vegetables, and two cleaning tools (dish brush & scrubbing pad). Use the opener you find on the can of sardines, pull the top and open the can and then take the can into your collections.

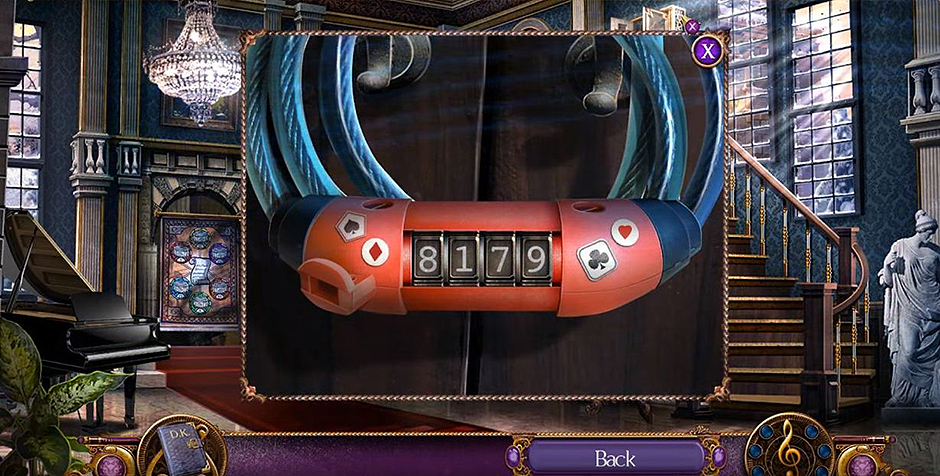
Go back to the forest creature and use the sardines as a trade for the door knocker. You begin in the foyer by finding the butler you saw attacked earlier who is now locked in a closet with a bicycle lock. You do not know the code so you begin looking around. When you cannot activate a puzzle just move on and come back to it later in the game.

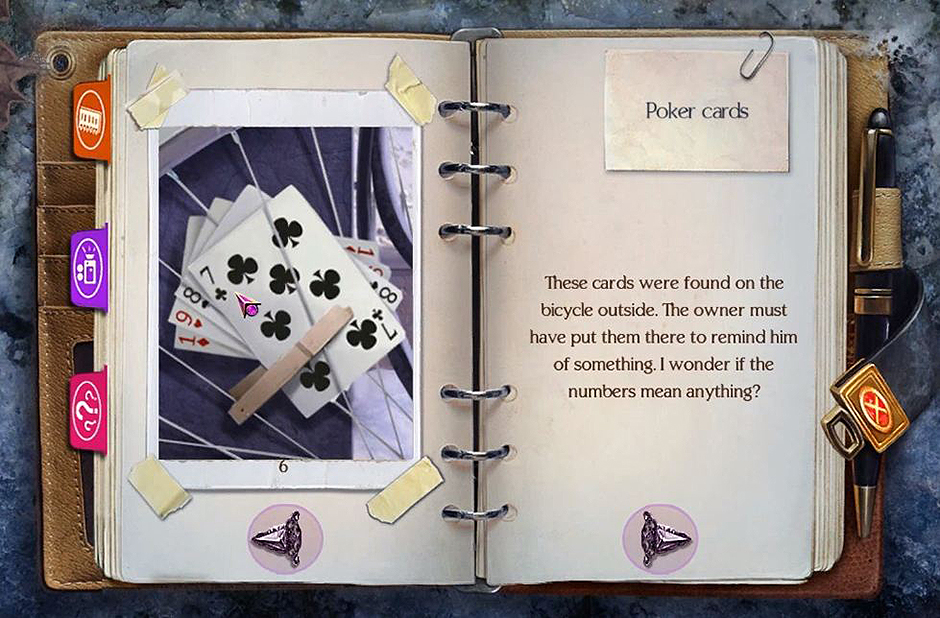
The objects you are looking for will be gears, a lighter, a newspaper and the bike lock code. Wander around completing the mini-games and puzzles until you find the bicycle outside. Zoom into the bicycle; wipe away the snow on the cards and take the four playing cards (the #s of the cards and their suit are the lock code numbers) to get the code for the bicycle lock which is 8179.

Death Upon an Austrian Sonata - A Dana Knightstone Novel - Code

Death Upon an Austrian Sonata – A Dana Knightstone Novel – Code

Death Upon an Austrian Sonata - A Dana Knightstone Novel - Lock

Death Upon an Austrian Sonata – A Dana Knightstone Novel – Lock

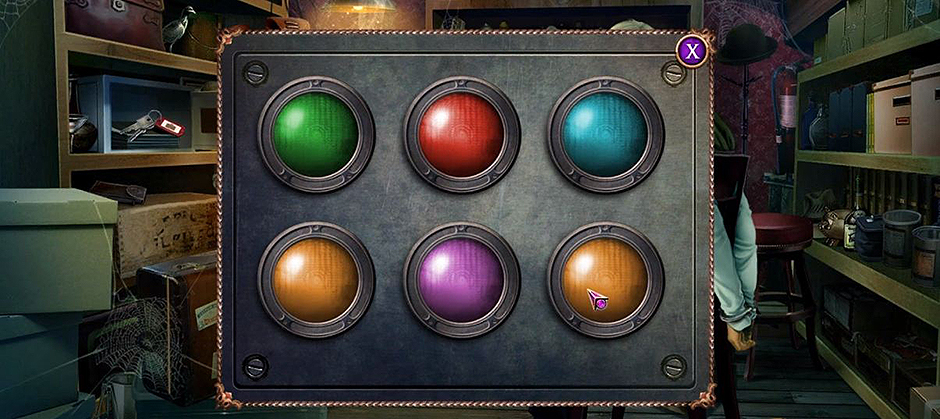
While you are playing the HOS there will be a puzzle that involves a sheet of paper with colored circles found on the shelf next to the doll that it to be used on the safe on the shelf to the left to open the safe and get the keys that opens the chest that was locked on the floor.

Death Upon an Austrian Sonata - A Dana Knightstone Novel - Safe

Death Upon an Austrian Sonata – A Dana Knightstone Novel – Safe

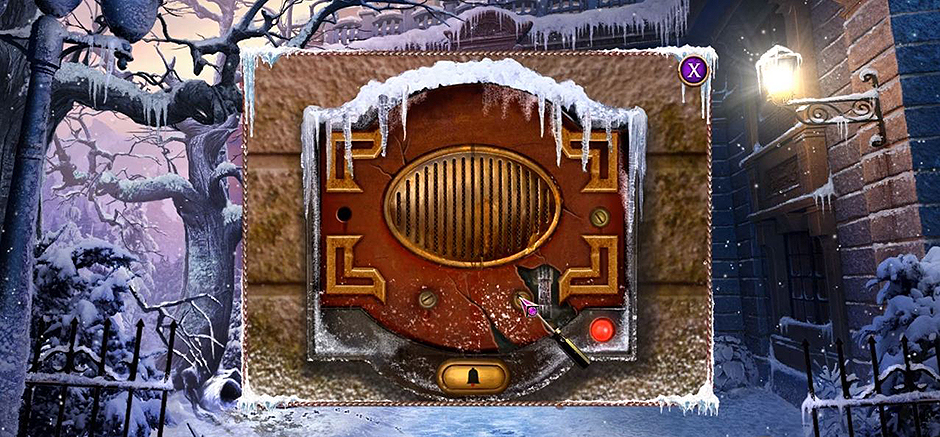
You have to leave this area go back outside because the screwdriver can be used on the intercom to remove the screws holding it up to reveal the first of five fuses you must use later for a fuse puzzle.

Death Upon an Austrian Sonata - A Dana Knightstone Novel - Screws

Death Upon an Austrian Sonata – A Dana Knightstone Novel – Screws

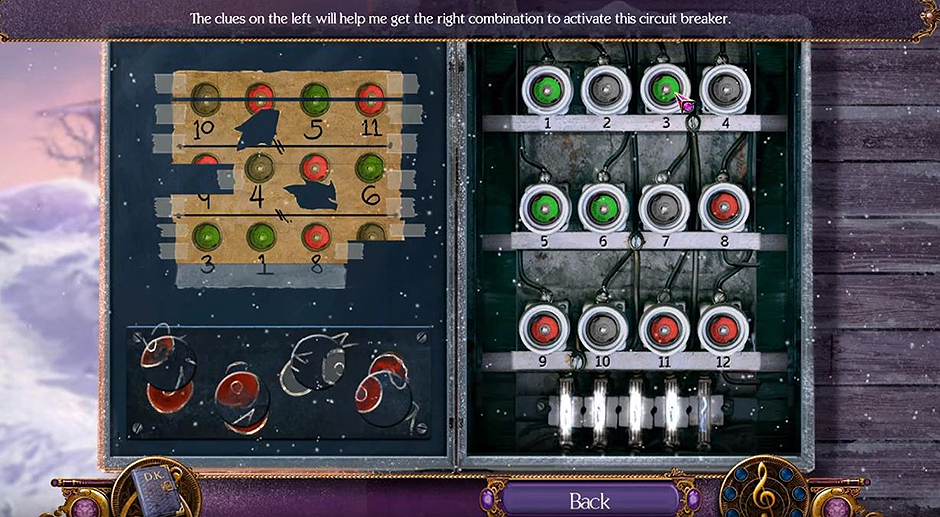
Open the crate, take the HACKSAW and the LOGS. Go back into the storage room with the butler and use the hacksaw to free him and get the key to Sabastian’s room! Talk to Sebastian and find out the ghosts name is Elise, she is a former musician and she wants us to find her music sheet. Now you need to wander around looking for fuses to power the breaker box and complete the puzzle and move on so hurry up and go find those fuses, complete the puzzles, games.

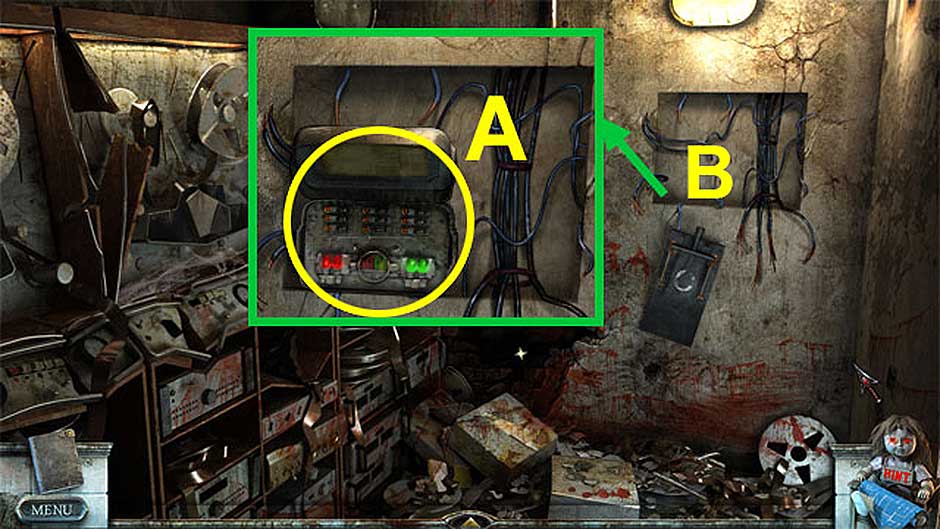
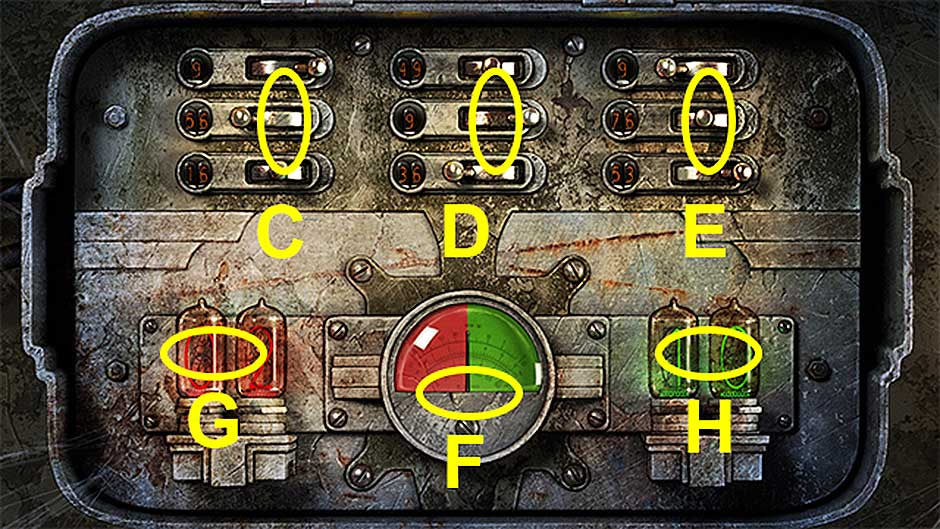
This screenshot displays the correct, completed puzzle if you have trouble figuring it out.

Death Upon an Austrian Sonata - A Dana Knightstone Novel - Fuses

Death Upon an Austrian Sonata – A Dana Knightstone Novel – Fuses

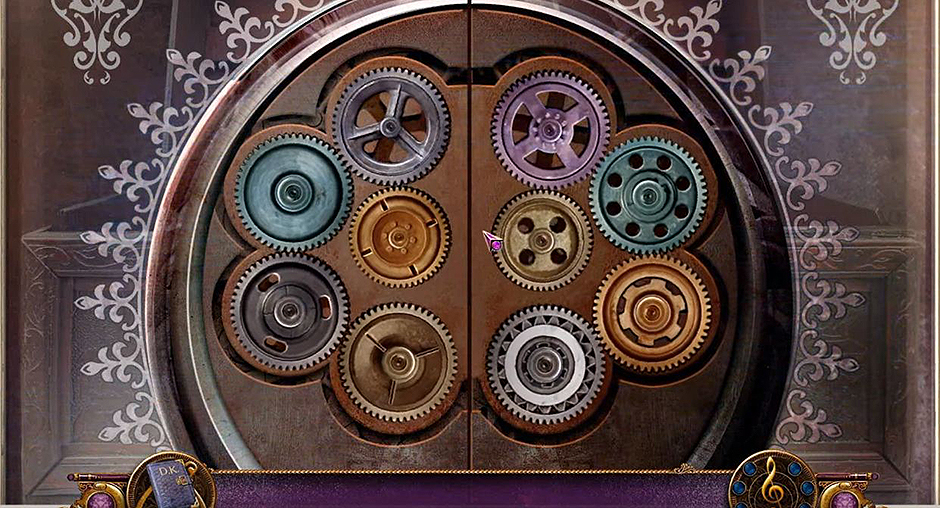
Once you get the light on inside the shed zoom inside and play the HOS. Use the flashlight to examine a dark hole where you find your 10th gear, 3 clips, 3 nails, and 3 coins. Once you complete the HOS go back into the hallway to do the gear puzzle. Right to the left of Sabastian’s room is your next puzzle.

Death Upon an Austrian Sonata - A Dana Knightstone Novel - Gears

Death Upon an Austrian Sonata – A Dana Knightstone Novel – Gears

All you do is match the gear design to the outline of corresponding gears to move on. Very simple you got this one! Once you have the emblem, look into the tapestry; put the EMBLEM into the slot and play the mini-game. Once you’re inside the Parlor try to speak to Elise (ghost) when that does not work look into the table; take the TILES and the MOON piece.

Death Upon an Austrian Sonata - A Dana Knightstone Novel - Embled

Death Upon an Austrian Sonata – A Dana Knightstone Novel – Embled

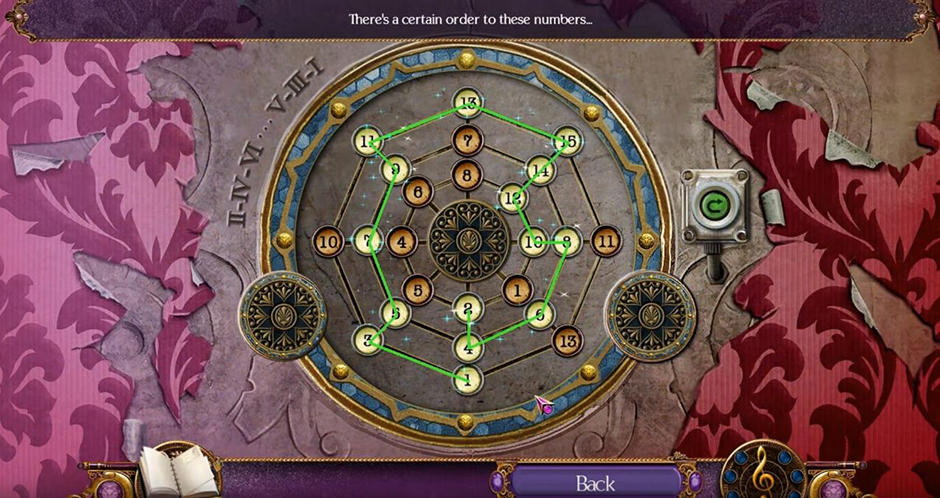
Zoom into the wall and play the mini-game. To solve this puzzle use the Roman numeral hint at the edge to begin with two and move up from there, 2, 4, 6, 8, 10 get to 15 go back down from 2, here is a screen shot of the finished puzzle.

Death Upon an Austrian Sonata - A Dana Knightstone Novel - Number Buttons

Death Upon an Austrian Sonata – A Dana Knightstone Novel – Number Buttons

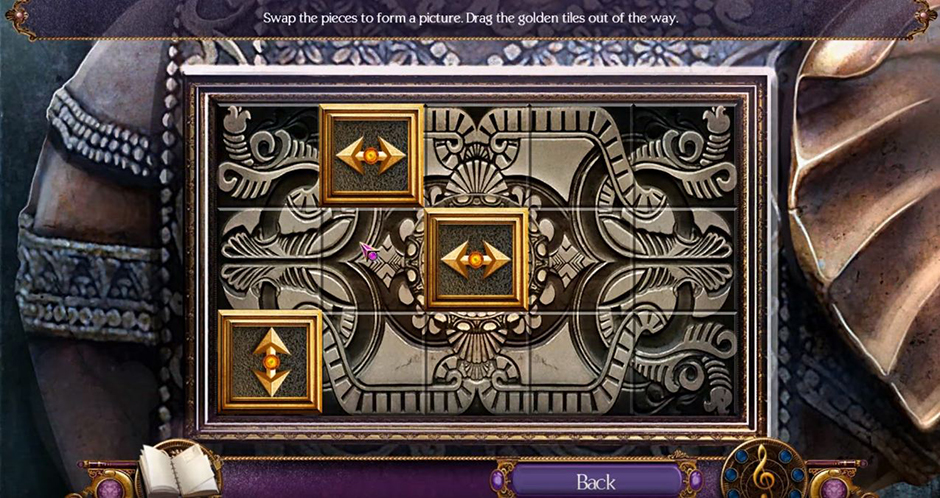
In the foyer peer into the fountain and replace the tiles on the elephant with those you found to play a mini-game. Move the pieces of the picture around to recreate it. Move the golden tiles to see the pictures they cover or leave them to lock that piece in. The screen shot is the finished product.

Death Upon an Austrian Sonata - A Dana Knightstone Novel - Elephant

Death Upon an Austrian Sonata – A Dana Knightstone Novel – Elephant

Next use the logs, newspaper and items found to the left of the fireplace, make sure to get the paper hidden in the heart of the doll to start your fire with the lighter you found earlier. Use the figurines, moon, and violin and the star to open the secret door on the right wall of the library and find an elevator.

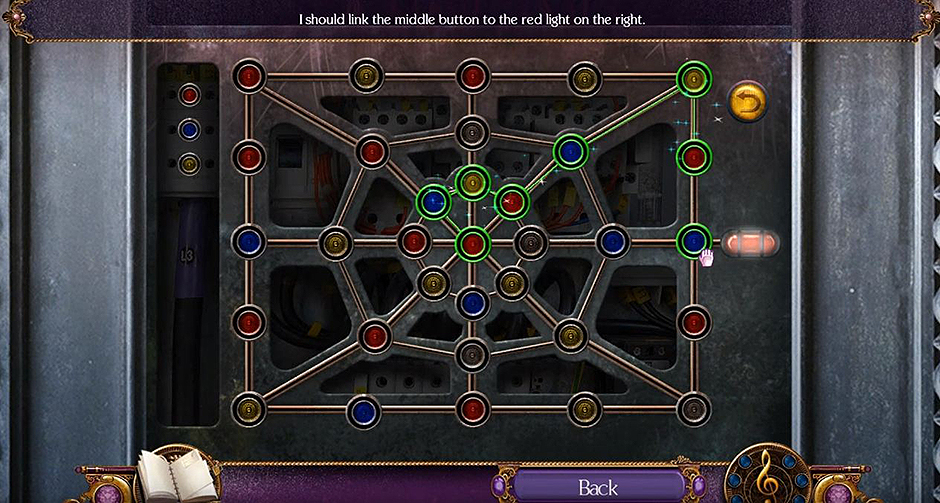
Use the elevator don’t worry it crashes but you are saved by Elise so use the screwdriver to open the door and find a mini-game to complete. The hint here is to go from red to blue then to yellow, over and over, like the dots in the left top corner suggest. Here is the completed puzzle.

Death Upon an Austrian Sonata - A Dana Knightstone Novel - Elevator

Death Upon an Austrian Sonata – A Dana Knightstone Novel – Elevator

Move forward and wander around inside the house/foyer checking every object from the ceiling to the floor and once you find all of the Wings, the broom and play the mini-games we will be able to move on and help her and Sabastian find out what happened to Elise!

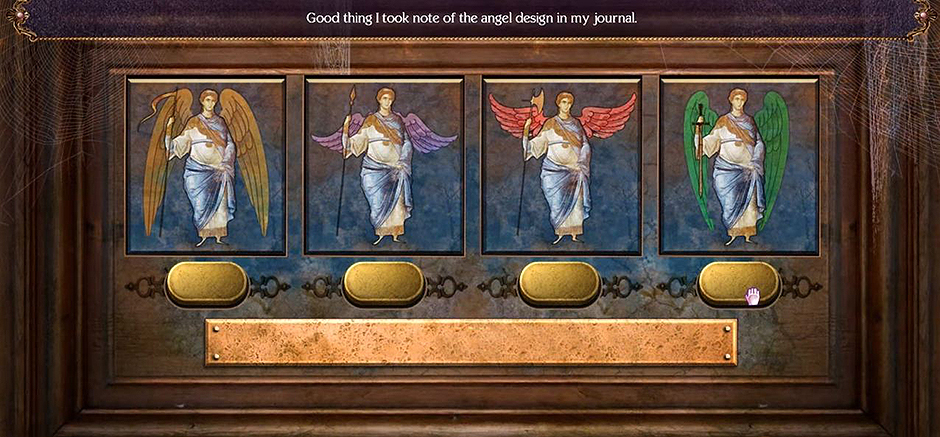
Place the Angel Wings in order to do so use the first two buttons to move all Angel’s and then use the last two buttons to only move one Angel at a time until you get them in the same order as the screenshot.

Death Upon an Austrian Sonata - A Dana Knightstone Novel - Angels

Death Upon an Austrian Sonata – A Dana Knightstone Novel – Angels

Next, zoom into the window and pull the rope 3 times, take the CROWBAR and then go upstairs and peer down into a hole, use the CROWBAR here and remove the boards, take the GLUE you find and the SALT.

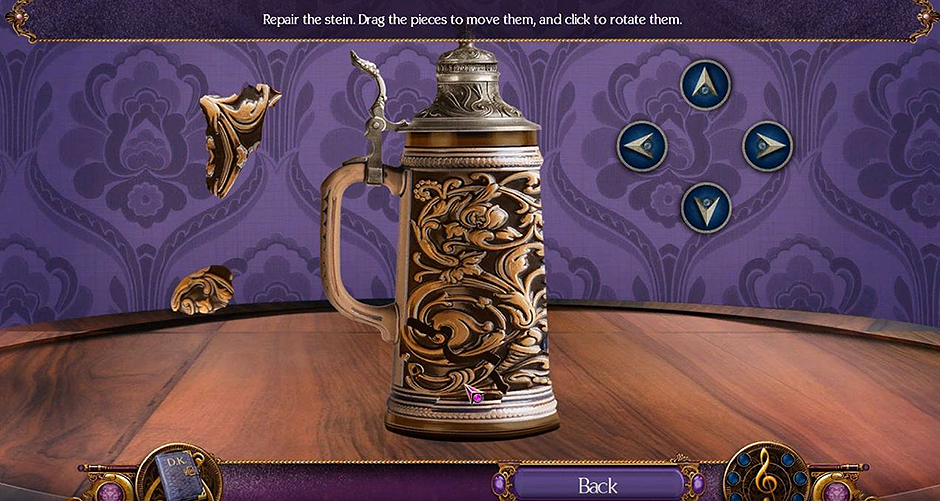
Walk down to the side table in the hallway and use the GLUE on the broken beer stein from the beginning of the game. Take the completed BEER STEIN to the now working fountain and acquire WATER.

Death Upon an Austrian Sonata - A Dana Knightstone Novel - Beer Stein

Death Upon an Austrian Sonata – A Dana Knightstone Novel – Beer Stein

Don’t forget to poke the chandelier with the BROOM 3 times to unlock a mini-game! This is just a find all the pairs puzzle and it is random so, BEST OF LUCK!

Once you do uncover all pairs you will acquire the lost MUSIC SHEET and then hurry to the table to look for something that will help it show up later under the light! Hurry because there isn’t much time! Take the newly found music sheet to Sabastian who claims you have failed because it is not readable? Now you know why you needed the solvent. Use SOLVENT on the MUSIC SHEET six times to activate a cut scene

Head outside and you see a hooded man running away! Hurry and find the hook and use the SALT on the frozen door to open it. Hurry inside, no time to waste and open the window by pulling on both latches. Then use the HOOK to acquire the KEY and open the door! Voila! Don’t forget to look around and make sure you have everything! You don’t want to have to come ALL the way back here do you?

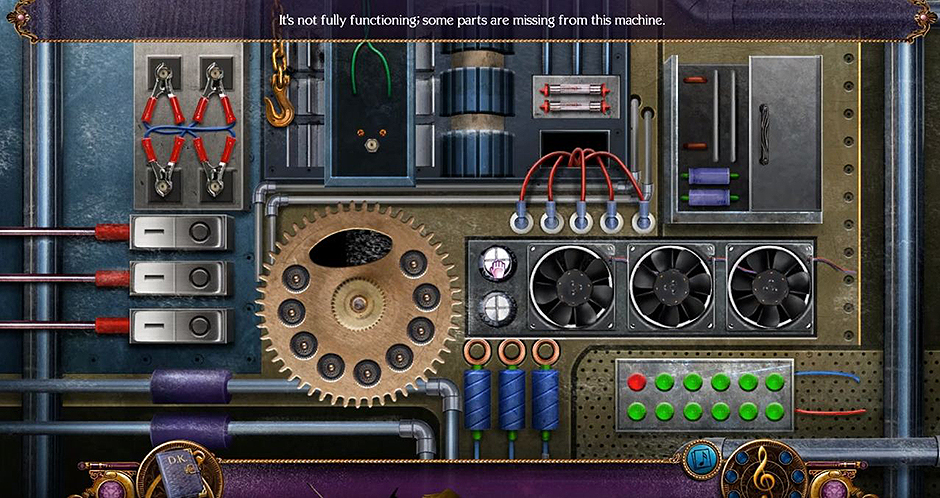
Use the SALT to clear off the control panel and open the hatch to fix the machine so you can hurry and catch that thief! Once you use the 4 valve parts to in the valve slot you will flip the 3 switches on the left and then pull the hook and put the clamp on the Rod, next put the ring from the middle into the bottom middle niche that it fits into and the power generator should be working now! Great job girlfriend! Keep moving, hurry and catch that thief!

The next mini-game will be the drawer in the left corner that when you complete you get a wrench and if you look in the jacket pocket there will be an ID card. Next go back out to the control panel for the skylift.

Death Upon an Austrian Sonata - A Dana Knightstone Novel - Machine

Death Upon an Austrian Sonata – A Dana Knightstone Novel – Machine

Use the newly acquired WRENCH on the control panel. Use gloves on the wires and make the wires so they do not overlap and that is how you win that mini-game there are multiple solutions to that game! End the chapter by using the ID Card and the lift to go on and try to capture the thief.

Chapter 2: Crash Site

The gondola crashes to the ground when the wire splits, but thankfully your only injury is a cut on your knee which you heal with items from mini-games around you. To play the next HOS zoom into the overhead bin. Use the completed DUMBELL to break the glass of the window.

Use a glass shard to cut a piece of the seat cloth and use it over the broken window to move forward. Zoom inside the gondola first and find 1/2 BULLETS, a JACKET, WHEEL, CANE. Play the mini-games to gather items and catch up to the thief, hurry before he gets to far ahead!

Move forward and add the CANE. Use the WHEELBARROW to load the crate and then unload the WHEELBARROW WITH CRATE onto the first crate, so on and so forth until you earn the GRAPPLING HOOK.

You will need to throw the GRAPPLING HOOK onto the tree stump to move forward. At the cabin open the cabinet and zoom into it use the rag on the oil can. Here you will find and take the 2/2 BULLETS, SCISSORS, one EMPTY OIL CAN. Head back to the gondola and use the leaking oil can with the empty oil can to have one FILLED OIL CAN in your inventory now!

First mini-game is to complete the shotgun to use with the 2 BULLETS here is a completed picture of the puzzle to help you. If you need the piece to move just click on it and it will rotate until it fits into the corresponding spot.

Death Upon an Austrian Sonata - A Dana Knightstone Novel - Shotgun

Death Upon an Austrian Sonata – A Dana Knightstone Novel – Shotgun

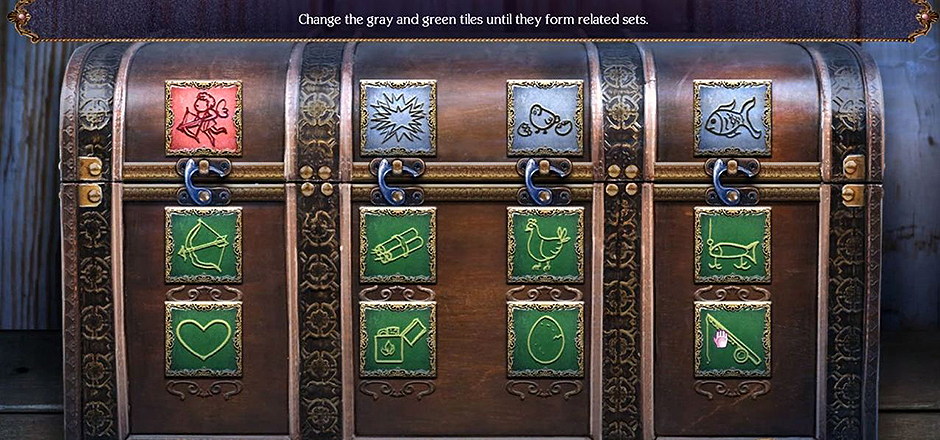
Zoom into the chest and play the next mini-game in which you change the gray and the green tiles by pressing them to create related set. Here is a screen shot of the correct choices.

Death Upon an Austrian Sonata - A Dana Knightstone Novel - Tiles Solution

Death Upon an Austrian Sonata – A Dana Knightstone Novel – Tiles Solution

Next use the SHOTGUN on the ski house door and blow that chain to smithereens! Then go and complete the HOS so you can take the SKI and the AXE. Use the FISHING ROD on the moose to take his GOGGLES.

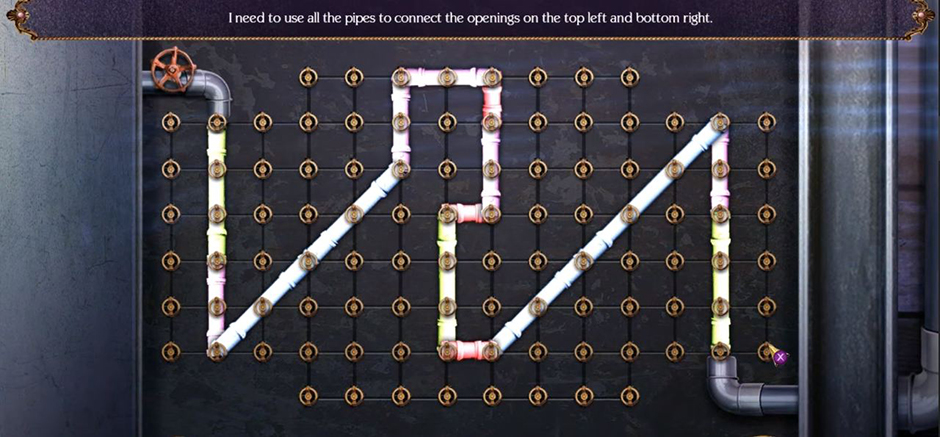
Use the SCREWDRIVER to open the circuit breaker and play a mini-game. Place the WET BOOTS in front of the radiator and then take the BOOTS.

Death Upon an Austrian Sonata - A Dana Knightstone Novel - Pipes

Death Upon an Austrian Sonata – A Dana Knightstone Novel – Pipes

Play the next HOS. Inside the safe you finish another picture swap puzzle to acquire the HEAD GEAR & THIEF’S NOTE suit up and get ready to hit the slopes on your way to catch that thief! Use the SKI SET on the slope to move on to Chapter 3!

Death Upon an Austrian Sonata - A Dana Knightstone Novel - Safe

Death Upon an Austrian Sonata – A Dana Knightstone Novel – Safe

Chapter 3: Austrian Town

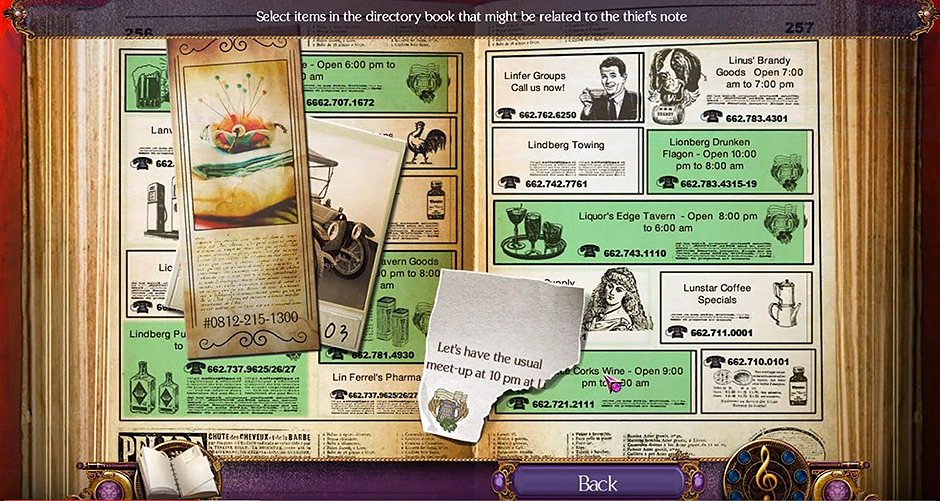
Show the THIEF’S NOTE to the clockmaker. Take the SCISSORS. Play the next mini-game by zooming into the shelf. Acquire the DIRECTORY and pup it on the desk then place the COIN inside to play a mini-game

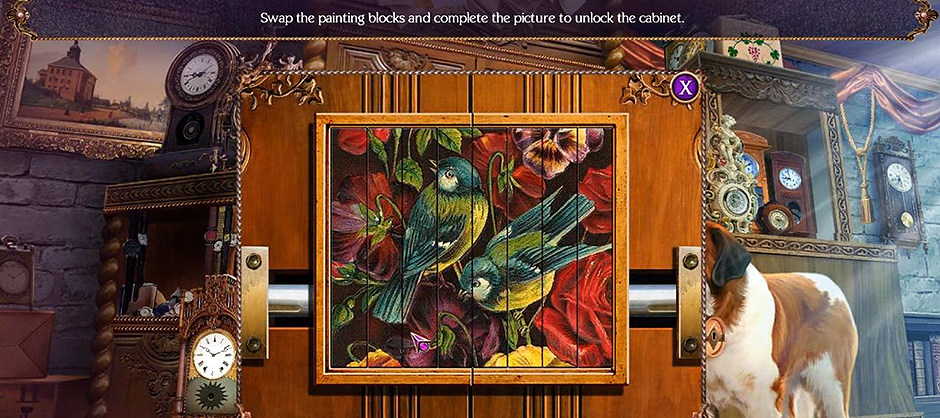
Death Upon an Austrian Sonata - A Dana Knightstone Novel - Bird Picture

Death Upon an Austrian Sonata – A Dana Knightstone Novel – Bird Picture

Death Upon an Austrian Sonata - A Dana Knightstone Novel - Thief’s Notes

Death Upon an Austrian Sonata – A Dana Knightstone Novel – Thief’s Notes

Speak to the bartender, the charming man, and the other customer and find out you need peanuts for one of them, So here you go on the search for peanuts. Take the CORKSCREW & TONGS. Play the mini-game after zooming into the box
Death Upon an Austrian Sonata - A Dana Knightstone Novel - Mini Game Chapter 3
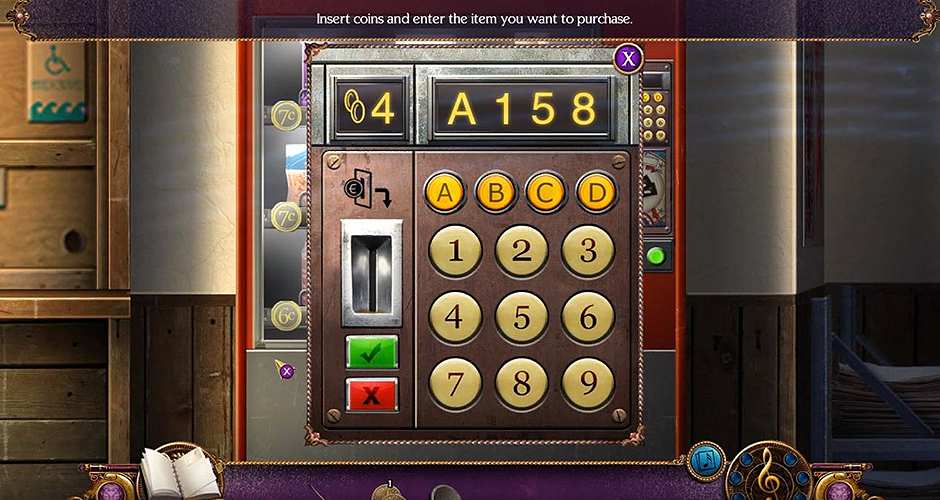
Use the objects you find around the pub to complete all the tasks and activities. Hints will pop up as you need them suggestions and tips for what actions and tricks you should be accomplishing to complete the tasks set up for you so that you can finally enter the code A158, confirm and get that man some peanuts!

Death Upon an Austrian Sonata - A Dana Knightstone Novel - Code A158

Death Upon an Austrian Sonata – A Dana Knightstone Novel – Code A158

Finish the level by completing the puzzle to match this screenshot.

ghfgh

Death Upon an Austrian Sonata - A Dana Knightstone Novel - Chest Solution

Death Upon an Austrian Sonata – A Dana Knightstone Novel – Chest Solution

Chapter 4: Train to Germany

Take the JACKET and acquire the READING GLASSES. Zoom into the table and into your bag to play the HOS. Talk To the boy to activate the mini-game. Talk to the man to activate the next mini-game and match each card to its opposite.

Dress up in the disguise listen in on the thief’s conversation, then write a NOTE FOR the THIEF. Continue on and play the next HOS after putting the CAKE in front of the hole twice to get the rat to come out of the hole. This will distract that waiter and allow you to move upstairs to the kitchen area.

Zoom into the sheets to play the next mini-game and acquire the THIEF’S ORDER SHEET. Make the coffee for the thief, and leave the NOTE for him to meet you at the cabin on his coffee tray.

Death Upon an Austrian Sonata - A Dana Knightstone Novel - Order Sheet

Death Upon an Austrian Sonata – A Dana Knightstone Novel – Order Sheet

Follow the thief back to his cabin. Find a tissue and use it on the dirty cup to create a way to hear what’s going on in his cabin. Listen at the door! Find the butter on the serving tray outside of the thief’s cabin. Use the butter on the locker to find the keycard to the thief’s cabin. Open his cabin door, and you’ll find the thief knocked out on the floor while a mysterious figure escapes through the window.

Search the knocked out thief for his cellphone that contains a code to the briefcase in his room. You will need to find the charger for the phone, which is located beneath the clothes on his bed. Move the clothes to begin a mini-game.

Death Upon an Austrian Sonata - A Dana Knightstone Novel - Charger

Death Upon an Austrian Sonata – A Dana Knightstone Novel – Charger

Plug the charger in the wall, then plug the phone in. This will start another mini-game. Beat this game to unlock the phone.

Death Upon an Austrian Sonata - A Dana Knightstone Novel - Phone

Death Upon an Austrian Sonata – A Dana Knightstone Novel – Phone

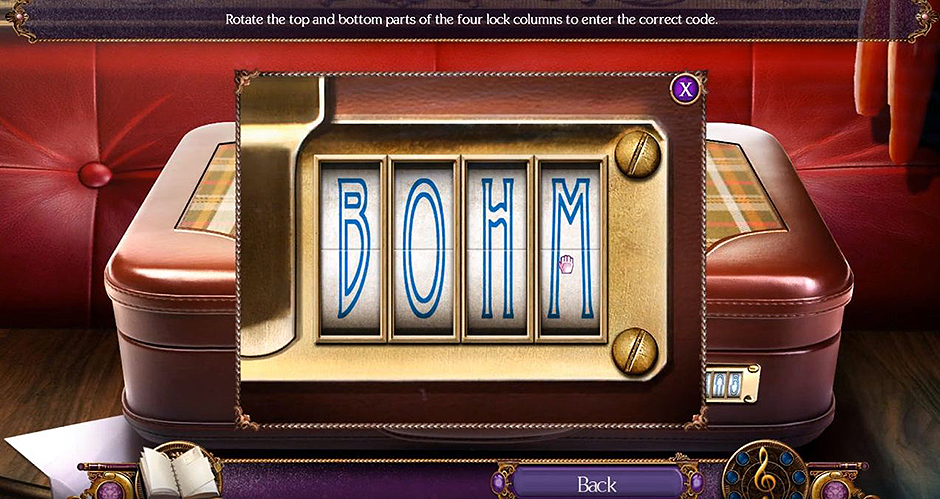
Zoom into the briefcase and switch the pieces of the lock to create the name ‘BOHM’ acquire the MUSIC SHEETS and put the MUSIC SHEET into the correct place.

Death Upon an Austrian Sonata - A Dana Knightstone Novel - BOHM

Death Upon an Austrian Sonata – A Dana Knightstone Novel – BOHM

Death Upon an Austrian Sonata - A Dana Knightstone Novel - Music Sheet

Death Upon an Austrian Sonata – A Dana Knightstone Novel – Music Sheet

Chapter 5: The Conservatory

Acquire the UMBRELLA and use it to get the KEY from the drain that you will use to unlock and open the toolbox which in turn starts your next HOS.

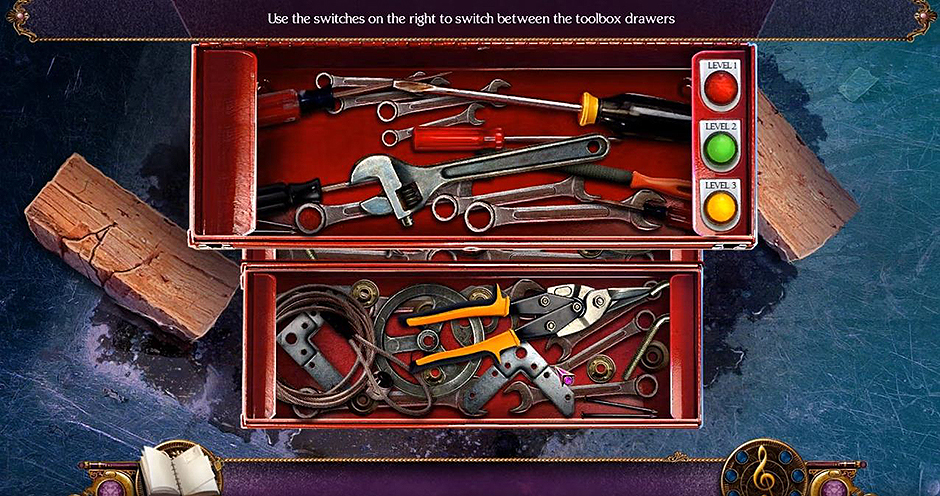
Use the buttons to switch levels to collect all 15 items to acquire the RULER. If you zoom into the door take the GLOVES. Take the RULER and open the window.

Death Upon an Austrian Sonata - A Dana Knightstone Novel - Toolbox

Death Upon an Austrian Sonata – A Dana Knightstone Novel – Toolbox

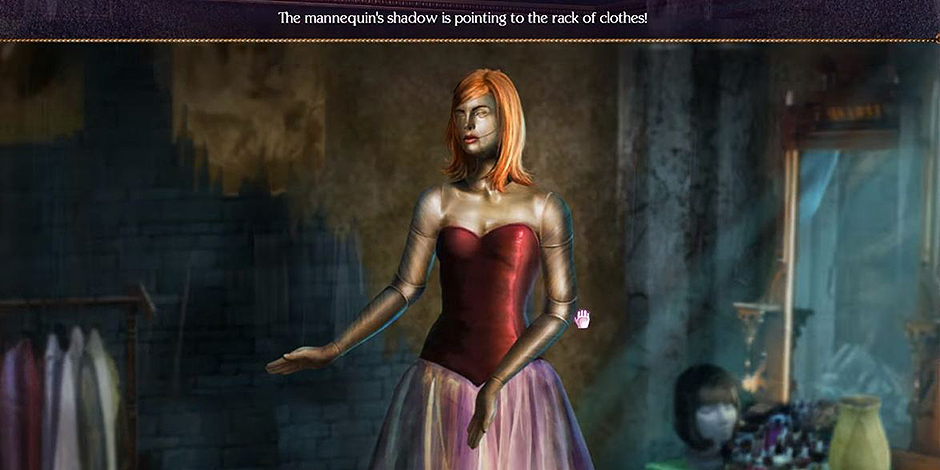
Find the 1/5 pieces of the MANNEQUIN PART in the piano. Get the LIGHTER FLUID from the chair. Here is the finished product from the control panel.

Death Upon an Austrian Sonata - A Dana Knightstone Novel - Control Panel

Death Upon an Austrian Sonata – A Dana Knightstone Novel – Control Panel

Go to the CHEST use the KEY to open the mini-game and rearrange the mannequin. Take the HANGER, MATCHES. Zoom into the angel and put the TORN CLOTH into the TORCH use the LIGHTER FLUID & light with the MATCHES. In the window use the STONE FIGUINE to break the glass and take the CHAIN WITH HOOKS use it to rip out the lid and move onto chapter 6.

Death Upon an Austrian Sonata - A Dana Knightstone Novel - Mannequin

Death Upon an Austrian Sonata – A Dana Knightstone Novel – Mannequin

Chapter 6: Under the Well

You start this chapter riding a train back to talk to the clockmaker & his beautiful fur friend, first take the POSTER to show him. Head to the train station compile all the needed objects here to walk through the smoke and gather some more objects for your adventure remember to look everywhere; you don’t want to get really far into the future of the game and realize you forgot things because you were in a hurry to finish!

Once you acquire all 6 STEEL RODS play the HOS. Climb down the well use the puzzle to control the rope to drop the chandelier on him use the ROPE to tie up and search Bohm to play the HOS, the last one of the game.

Death Upon an Austrian Sonata - A Dana Knightstone Novel - HOS Chapter 6

Death Upon an Austrian Sonata – A Dana Knightstone Novel – HOS Chapter 6

Find the missing 13 items. Shoot the LOADED CROSSBOW at the figurine. Take the STONE SLAB. Use it to play a mini-game. After winning move through the opening to the mausoleum. Use the RAFT to cross the ice pool. Finish the final simple mini-games and puzzles. Match the pieces according to the clues on the side of the screen to complete this puzzle. Take the secret photo. Take the violin.

Death Upon an Austrian Sonata - A Dana Knightstone Novel - Violin

Death Upon an Austrian Sonata – A Dana Knightstone Novel – Violin

Congratulations! You’ve completed our Death Upon an Austrian Sonata –  A Dana Knightstone Novel Walkthrough!


For more great tips and tricks, visit our blog!
This walkthrough for the action hidden object game Death Upon an Austrian Sonata –  A Dana Knightstone Novel is meant to be used as a general overview and not as a complete detailed description of each game play, this guide does not contain cheats, nor tricks, it only contains helpful clues, hints, and suggestions.

The post Death Upon an Austrian Sonata – A Dana Knightstone Novel Walkthrough appeared first on GameHouse.

Runefall Walkthrough

$
0
0

Runefall is not your classic match-3-build-items game. In fact, it is a whole new level of match3 gameplay. This innovative game offers much more than matching; it has a great dialogue and story plus the matching pairs well with discovering new places and levels, item collecting and even quests.

With each level there are treasure chests that need to be unlocked, secret sections on the map that you need to discover, runes to collect, tiles to clear, sequences of items to match for rewards and much more. In truth, the discoveries are exciting and endless.

Contents

The Plot and Objective

In the kingdom of Silverdale lies a small and meagre town. It was once a thriving community, but fell on hard times when war brought the trade routes to a quick halt. Now in debt to the kingdom, the town must pay a monthly tribute to keep it afloat.

However, valuable runes and enchantments are discovered while searching for the resources necessary to pay tribute. These great discoveries encourage the so called “heavy-eyed” town and the town begins to wake up and come back to life. Your mission is to find the resources needed to help pay tribute and save the town from a dismal and mundane existence. The ultimate goal of every level is to collect all rune-tiles. You will traverse massive surroundings, collect resources, overcome obstacles, solve mysteries, unlock treasures and help upgrade the town.

Runefall - Town

Runefall – Town

Dialogue, Cast and Story

Although there is a bit of repetitiveness in the game, the cast is quite likable with variable tones in dialogue. The story itself is genuinely engaging and filled with believable fantasy quests. The scripts dialogue even contains some light humor and immediate likable characters. Two main characters are the demanding princess and the tee-tottering old knight. The ill-mannered princess is actually very kindhearted and really does appreciate others. The old knight is thoughtful but is unable to fix much of anything. The town is rather quant and starts to build some character as you add more to it on each level. Just do not forget to pay tribute every few levels.

Runefall - Characters

Runefall – Characters

Starting the Game

There is a lot of territory to cover on each platform. Also, certain items need to be found before you can go to the next level. One of the biggest tips and tricks of Runefall is to start the game in relaxed mode instead of timed mode. That way you have a good chance of meeting your goals and getting the items you need while you get familiar with the game. You can always go to time mode once you are comfortable with the game.

Moving Around the Map

One of the main objectives of the game is to match the tiles. You need to line up 3 or more identical tiles in a row. The corresponding elements are also how you move around the board. When you match the matching icons you are moved in the direction of the match on the map. For example, if you have a match on the right hand side of the board, everything will move and shift in that direction, disclosing more boards on the right. Also, the area you need to discover (on each level) will not fit on your screen.

Tips and tricks: It is easy to lose your place while discovering new secret places and resources. In addition, every level has a new map and the areas seem to get bigger as you level up. There is a map on the lower left hand side of the screen that will display where you have been on the current level. Also, when you click the Blue Eye on the top center it will give you an aerial view of where you have been. Since treasures and needed resources such as keys are located anywhere, you will need to search most every part of the map. One of the easiest strategies is to start at the bottom and work your way up. Also, move around the level slowly, especially in areas of the map where it looks like it has ragged edges. Generally ragged edges indicate that there is something yet to be discovered before you can level up or move to another “secret” section of the map.

Runefall - Map

Runefall – Map

Tile Resources

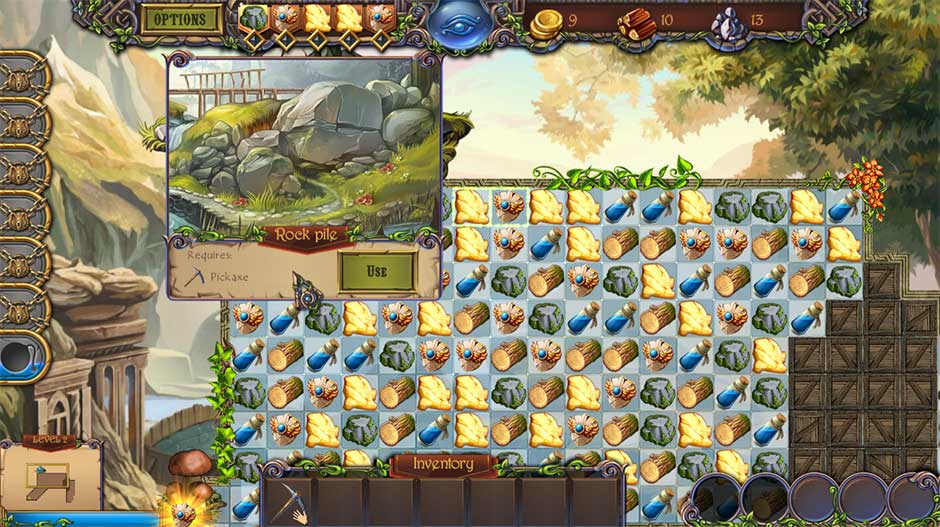
For the most part, the tiles you need to match are wood, stone, gold, shields and blue potion bottles. The wood, stone and gold are for buying upgrades for your town and to pay tribute to the king. The blue potions refill your power-ups. And if you collect enough shields then you can teleport anywhere on the map that you have already been. The transport really comes in handy from time to time. Just use the magnifying glass to aim where you want to go. Be careful, the magnifying glass is tricky to operate. If you are not careful, you will end up in an area that you did not want to go. It takes vigilant precision to aim the pointer exactly.

Other Tiles and Obstacles

There are other tiles that you need to match up such as the elements like wood inside a grass tile. Often, there are special items hiding in the grass or sand. You will also run into obstacles like crates and blocks. These barricades need to come down in order to proceed in the game. To pass through, you will need to make matches alongside the obstacles in order to shatter them.

As well, you will need special items in order to cross certain areas. For instance, you need a rock axe to cross a huge pile of rocks and also a boat to cross a river. The special items will be found throughout the map. Once you find an item then you need to return to the area to use it. Such as, in order to use a key you found on your journey, you need to return to the area on the map where the treasure chest is.

Runefall - Rock Pile

Runefall – Rock Pile

Your Cursor

Your curser is one of the most helpful tools in the game. Every time your curser gets close to a special item that you need, it will start glowing. In fact, the closer you are to an important item, the more your curser will light up and glow.

Goals and Challenges

Each level has its own set of goals that you will need to fulfill in order to get a bonus or gain extra resources. For example, one level wants you to visit all areas on the board, another requests that you clear all grass tiles and one other level goal is to collect 500 wood tiles.

There are also other challenges and special features. Let’s say you are near the mine – it will yield stone points for numerous matches you make around it. And if you play in relaxed mode; you can earn extra wood, stone, shields, blue potion or money that you may need.

Puzzles and Riddles

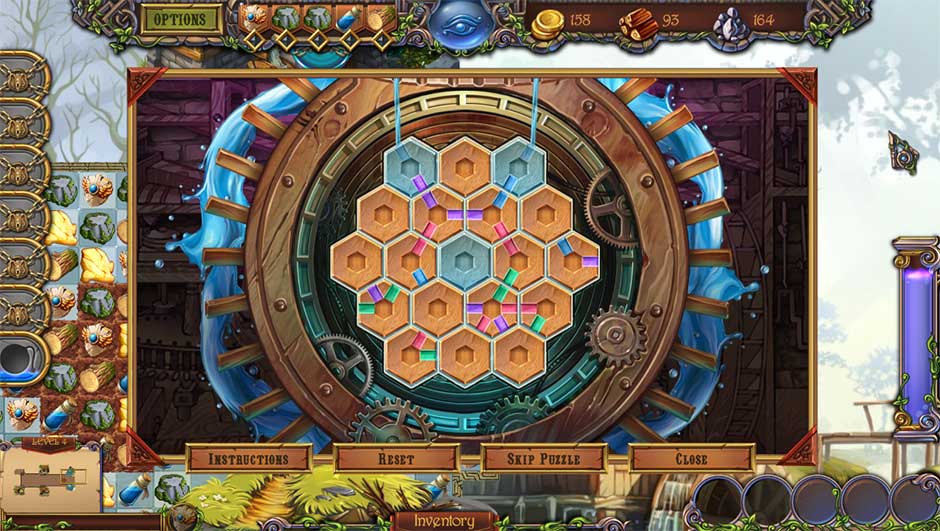
In addition, Runefall has a variety of puzzles and riddles that need solved before you can continue in the game. Although not child’s-play, the puzzles do require some ingenuity and brain power to solve. Some of the riddles and puzzles include number games, lining up the gears of the windmill and allowing the flow of water from the trough to continually flow.

One of the best features in the game is the ability to turn off time mode when you are solving a puzzle. That way you are not under a lot of pressure when trying to figure out the riddle or puzzle. Although there are no cheats for the puzzles, just remember they are fairly simple and to not give up. In honesty, it took me a few tries with some of the puzzles before I figured out that it will require a little ingenuity to solve.

Runefall - Puzzle

Runefall – Puzzle

Tips and Tricks

Even though there are not any “real” cheats, there are some guidelines that can give you an advantage in the game. Here is an outline of a few basic guides that can support you in the game:

  • Never forget to pay tribute to the king.
  • Grass tiles generally hide treasure chest keys.
  • Play in relaxed mode until you are familiar with the game
  • Watch your curser, when it glows you are near important items.
  • Most tiles should not go unturned, there are resources everywhere.
  • Re-charge or fill the transport/jumping meter by matching shield tiles.
  • When the “jump meter” is full, you can jump to any part of the map already explored.
  • You must first find the appropriate tool to venture through tough terrain like massive rocks, heavy forest and rivers.

Overall

Runefall is one of the best match-3 game produced in a very long time. It contains a wide variety of levels with countless obstacles and challenges. There are hundreds of items you collect to solve quests and help upgrade you town. In addition, enjoy the amazing graphics while you unlock 7 power-ups and numerous game play bonuses.

Congratulations! You’ve completed our Runefall Walkthrough! For more great tips and tricks, visit our blog!

The Runefall Walkthrough is meant as a guide and does not contain cheats, hacks or serials.

The post Runefall Walkthrough appeared first on GameHouse.

Country Tales Walkthrough

$
0
0

Country Tales is a time-management game. It’s finally time to leave the big city, and you have found the perfect place in a small town called Sunset Hills. You will join Ted and Catherine on their journey through 40 different and exciting levels and hundreds of different quests. While heading to your new home, you will be able to not only explore the Wild West, you will also be able to take down bad guys by putting them behind bars, where they belong.

Contents

General Tips & Tricks

General Gameplay with Tips and Tricks
There are a few things that you can do during the game to get the best score possible. Throughout this game, you will be required to know the different buildings and their purposes. You will also have to be able to manage your time in order to finish each level successfully. There are three different modes that you can choose from: Relaxed Mode, Normal Mode, and Extreme Mode.

Country Tales - Gameplay 1

Country Tales – Gameplay 1

Buildings

There are numerous buildings that you need to understand when playing this game. Each type of building will allow you to accomplish different tasks. Not all buildings are required in order to complete every level. Below, you can find a list of some of the different buildings available in the game.

Shack – This is the cheapest form of housing.
House – A house is the next upgrade to the shack in housing.
Residence – The residence homes are the next to the largest homes available.
Villa – This is the largest version of housing in the game.
Saw Mill – Build the saw mill to buy wood with money provided by housing rent.
Farm – You need a farm in order to keep your homes fed, and you can purchase food directly from the farm with cash from the housing rent.
Water Tower – The water tower will allow you to get water buckets for various level obstacles.
Market – You need to build the market in order to purchase golden nuggets.
Shaman Tent – The Shaman tent will allow you to generate Nature Power to complete different objectives.
Doctor’s Office – The Doctor’s office allows you to have a doctors to look after the residents of your town.
Blacksmith – You will need to build the blacksmith in order to be able to purchase tools to complete a variety of different objectives.

Tips and Tricks
Tip #1 – Build your farm in the middle of the map, and this is so it is quickly accessible to all of the homes.

Tip #2 – You need to earn medals to improve your ranking.

Tip #3 – In order to get diamond medals, you have to play Extreme Mode.

Tip #4 – To find the hidden treasures in every level, look for the sparkles on the map.

Tip #5 – In order to complete a level in the time limit, it may be necessary to demolish an existing building.

Country Tales Walkthrough

Sunset Hills: Level 1 – Level 4

Level 1 – Collect $1,000 and build new homes.
Level 2 – Collect $1,000, build a saw mill, collect materials, and build new homes.
Level 3 – Collect $1,500, upgrade existing home, remove blockages & debris, and build new homes.
Level 4 – Collect taxes, build new homes, build a farm, collect materials, collect food, and build up the town’s happiness.

Country Tales - Level 3

Country Tales – Level 3

Outskirts: Level 5 – Level 9

Level 5 – Collect taxes, build new homes, build a farm, collect materials, build a saw mill, remove blockages & debris, collect food, and build up the town’s happiness.

Level 6 – Collect taxes, build new homes, build a farm, build a saw mill, collect materials, remove blockages & debris, collect food, clear away the pigs, and build up the town’s happiness.
Level 7 – Collect taxes, build new homes, clear away the cows, and build up the town’s happiness.
Level 8 – Collect taxes, build new homes, repair the bridge, build a saw mill, collect material, build a farm, collect food, and build up the town’s happiness.
Level 9 – Collect taxes, build new homes, repair the bridges, build a saw mill, collect material, build up the town’s happiness, collect food, and buy books for the library.

Country Tales - Level 7

Country Tales – Level 7

Rocky Deserts: Level 10 – Level 14

Level 10 – Collect taxes, build new homes, build a saw mill, collect materials, remove the thugs, build up the town’s happiness, and collect food.

Level 11 – Build a water tower, collect taxes, build new homes, build a saw mill, remove the thugs, collect materials, build up the town’s happiness, collect food, and collect water.
Level 12 – Repair the bridges, collect taxes, build new homes, collect hidden coins, build a saw mill, remove the thugs, collect materials, build up the town’s happiness, and collect food.
Level 13 – Collect taxes, build new homes, build a saw mill, collect materials, build up the town’s happiness, collect food, and trap the bandits.
Level 14 – Collect taxes, build new homes, repair the tents, build a saw mill, collect materials, build up the town’s happiness, and collect food.

Country Tales - Level 12

Country Tales – Level 12

Red Forest: Level 15 – Level 20

Level 15 – Collect taxes, build new homes, repair the tents, build a saw mill, collect materials, build up the town’s happiness, collect food, build a market, find the hidden coins, and collect golden nuggets.

Level 16 – Collect taxes, build new homes, and clear the ruins.
Level 17 – Collect taxes, build new homes, build a Shaman tent, repair the bridge, collect nature power, fix the tents, build up the town’s happiness, and collect food.
Level 18 – Collect taxes, build new homes, remove the blockages & debris, repair the tents, prepare for the nature festival, build up the town’s happiness, and collect food.
Level 19 – Collect taxes, build new homes, build a Doctor’s office, remove the blockages & debris, build a saw mill, collect materials, build up the town’s happiness, and collect food.
Level 20 – Collect $5,000, build new homes, build a blacksmith, collect 25 tools, clear the ruins, remove blockages & debris, build a saw mill, collect materials, build up the town’s happiness, and collect food.

Country Tales - Level 17

Country Tales – Level 17

Dire Swamp: Level 21 – Level 23

Level 21 – Collect taxes, build new homes, build a saw mill, collect materials, explore the mines, build up the town’s happiness, and collect food.
Level 22 – Collect taxes, build new homes, build a saw mill, collect materials, build up the town’s happiness, collect food, and complete the steamboat.
Level 23 – Collect $8,000, build new homes, build a saw mill, collect materials, build up the town’s happiness, collect food, and repair the tents.

Country Tales - Level 22

Country Tales – Level 22

Coyote Valley: Level 24- Level 27

Level 24 – Collect taxes, build new homes, build a saw mill, collect materials, build up the town’s happiness, collect food, remove the coyotes, build a market, and collect golden nuggets.
Level 25 – Collect taxes, build new homes, build a saw mill, collect materials, build up the town’s happiness, collect food, explore the mines, and clear the ruins.
Level 26 – Collect $5,000, build new homes, build a saw mill, collect materials, build up the town’s happiness, collect food, build a water tower, collect water, and build a Shaman’s tent.
Level 27 – Collect taxes, build new homes, build a saw mill, collect materials, build up the town’s happiness, collect food, build a water tower by replacing a market, fill the carriages, and collect golden nuggets.

Country Tales - Level 25

Country Tales – Level 25

Bison Canyons: Level 28 – Level 33

Level 28 – Collect taxes, build new homes, build a saw mill, collect materials, repair the bridges, build up the town’s happiness, collect food, remove the bandits, and collect golden nuggets.
Level 29 – Collect taxes, build new homes, build a saw mill, collect materials, build up the town’s happiness, collect food, clear the bison, and construct a Shaman’s tent.
Level 30 – Collect $8,000, build new homes, build a saw mill, collect materials, build up the town’s happiness, collect food, and remove the bandits.
Level 31 – Collect taxes, build new homes, build a saw mill, collect materials, build up the town’s happiness, collect food, and collect money.
Level 32 – Collect taxes, build new homes, build a saw mill, collect materials, build up the town’s happiness, collect food, and clear the ruins.
Level 33 – Collect taxes, build new homes, build a saw mill, collect materials, build up the town’s happiness, collect food, build a chapel, and repair the tents.

Country Tales - Level 31

Country Tales – Level 31

Dry Fields: Level 34 – Level 37

Level 34 – Collect taxes, build new homes, build a saw mill, collect materials, build up the town’s happiness, collect food, and repair the tents.
Level 35 – Collect taxes, build new homes, collect materials, build up the town’s happiness, collect food, repair the tents, collect the gold coins, and collect golden nuggets.

Level 36 – Collect taxes, build new homes, build a saw mill, collect materials, build up the town’s happiness, collect food, repair the tracks, and repair the bridges.
Level 37 – Collect $5,000, build new homes, build a saw mill, collect materials, build up the town’s happiness, collect food, clear the bandits, and remove the grizzlies.

Country Tales - Level 35

Country Tales – Level 35

New Rockfort: Level 38 – Level 40

Level 38 – Collect taxes, build new homes, build a saw mill, collect materials, build up the town’s happiness, collect food, and repair the tents.
Level 39 – Collect taxes, build new homes, build a saw mill, collect materials, build up the town’s happiness, collect food, remove the grizzlies, and repair the tents.
Level 40 – Collect taxes, build new homes, build a saw mill, collect materials, build up the town’s happiness, collect food, and complete the train.

Country Tales - Level 38

Country Tales – Level 38

Achievements

Throughout the games, there are 9 different achievements that you can get for various things in the game. Below, you will be able to get a glimpse of these 9 achievements and see what you need to do in order to achieve them.

Student – Complete the tutorial
Fortune Finder – Find all hidden treasures in 1 region
Treasure Hunter – Find all 40 hidden treasures
For a Million Dollar – Gather a total score of 1,000,000
Industrial Revolution – Promote each worker at least once
Best of the Best – Promote all workers to their maximum position
Loyal Assistant – Complete all 40 Levels
Proud Mayor – Complete all 40 levels within the time limit in Normal Mode
Wild West Legend – Complete all 40 levels within the time limit in Extreme Mode

You have completed the walkthrough for Country Tales! Congratulations on completing all 40 levels of the game! If you used this walkthrough in Normal or Relaxed mode, do not forget to go back and attempt Extreme Mode. This will truly test your skills in this time management game. It will allow you to feel challenged at a game you have already completed by pushing yourself to the limits!

Be sure to visit our blog for more great tips and tricks!


The Country Tales Walkthrough is meant as a guide and does not contain cheats, hacks, or serials.

The post Country Tales Walkthrough appeared first on GameHouse.

Botanica – Into the Unknown Walkthrough

$
0
0

Welcome to the Walkthrough for Botanica – Into the Unknown.

Use your skills in plant science to make your way through a beautiful alien planet. Will you be able to get back to Earth in this exciting Hidden Object adventure?
Regardless of whether you use these tips and tricks as a lifeline when things get hard or as a compass to get you from start to finish, we believe you’ll find what you need in this walkthrough.

Contents

General Tips & Tricks

General Tips and Tricks

– The tablet journal holds all of the clues that you gather as you explore the planet.
– The game contains a task list and map for easy reference.
– If a new mini-game is in your botanist’s kit, an exclamation point will appear to let you know it’s there.
– We can’t provide a step-by-step for the mini-games and hidden object puzzles because they’re usually randomized in this game.
– If a listed hidden item is written in yellow text, the item is hidden or you need to do a few more steps to reveal the item.

Botanica – Into the Unknown Walkthrough

Chapter One: The Cliff

The game begins on a cliff. You’ll see items scattered around. Start by taking the Botanist’s Key plus the Tablet. Then pick up the Empty Vial. Take the Empty Vial from your control panel and use it on the Strange Plant. You’re a botanist, after all!

A mini-game opens. Click on the spores; the flower opens to reveal a beautiful portal. Walk through the portal. Pick up the Stick. Go over to the plants, touch the Stick to the flower blossom, then click on the Flower to take it.

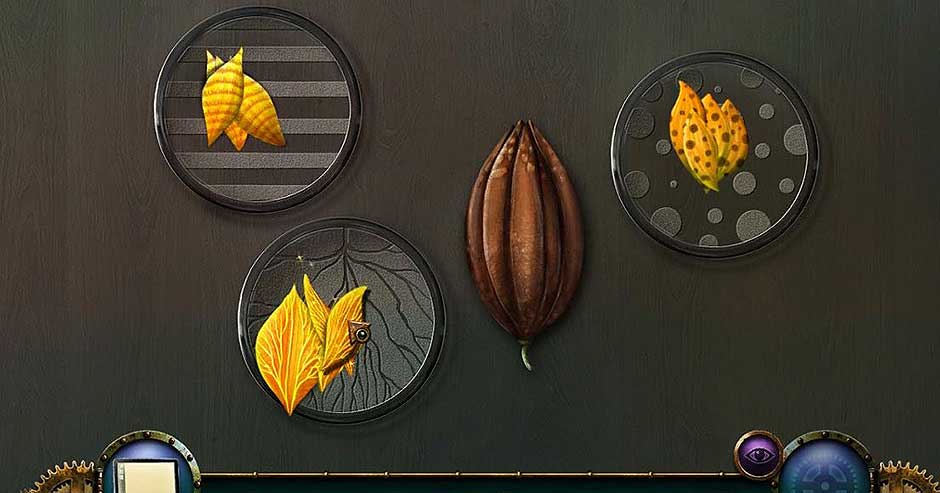
There’s now a mini-game in your botanist’s kit. Sort the petals among the matching specimen dishes. This will give you the Striped Petals.

Botanica - Into the Unknown - Petals Solution

Botanica – Into the Unknown – Petals Solution

A lizard is peering out of a cave. Give the lizard the Striped Petals.

Abandoned Outpost Building

Walk over to the old building and take the ID Card with the Poster from the front door. Go to your right. Grab the Red Shape from the door and the Yellow Shape from the chest. Then pick up the Trowel.

Go to the gate that’s made of plants. Use the Trowel on the dirt mound three times to dig up the Blue Shape. Go to the front door. Place the Red, Yellow and Blue Shapes onto the wheel. Combine the colors to make the color that’s in the center. You’re in! Go inside of the abandoned outpost.

Open the dresser drawer. Click on the Diary Pages. Then click on the Rubber Glove to take it. Use the ID Card on the control box. This gives you a Feather Duster. Look around at everything in this building, and then head back out to the yard.

Use the Feather Duster on the plant gate. It opens and leads you to the landing pad.

Landing Pad Area

Use the Rubber Gloves on the vines; pick up the Button. Click on the robot to receive a Small Key. Now go back to the abandoned outpost.

Abandoned Outpost Building

Go to the chest and use the Small Key to open it. There’s a hidden object puzzle inside. Find every item on the list. Then, match the items up logically. For example, the pencil sharpener goes with the pencil, the nuts get used on the nutcracker. Once you’ve matched up everything, you’ll receive a Coin.

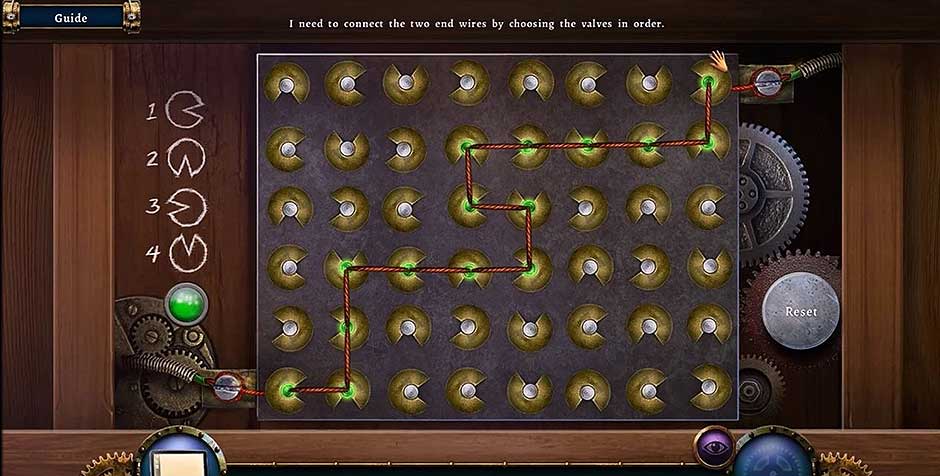
Go inside of the outpost building and use the Coin on the table in the center to remove the eight screws. Put the Button onto the telegraph machine. Click on the control panel to reveal a puzzle. Find the correct path from valve to valve to solve it. Here’s one possible solution.

Botanica - Into the Unknown - Path Solution

Botanica – Into the Unknown – Path Solution

Take the Knife and leave the outpost building.

Landing Pad Area

Use the Knife on the Backpack. Pick up the Flare. Put the Flare inside the dummy’s hand and click on the string to pull it.

Take the Tag from the giant dragonfly named Eddie. Put the Tag on the Saddle, then put the Saddle on Eddie’s back. Click to get onto Eddie. You’ve completed Chapter One!

Chapter Two: The Abandoned Village

To start this chapter, go inside the tree house.

Tree House

Talk to Ian. He gives you clues that will help to solve the puzzle at the desk. Match his bold-type words with the items. For instance, he mentions plants; select the leaf, and so on. Pick up the List of Missing Parts. Exit the tree house.

Move the leaves on the post and take 1/3 Acorn. Continue to the village.

Abandoned Village / Cooking Hut

Go inside the cooking hut. Take the 2/3 Acorn out of the basket. Click on the shelves for a hidden object game. Find the items on the list. Then use the items you’ve found where it makes sense; for example, the skewer goes with the fish, the cup will get you a cup of sugar. At the end of the puzzle, you’ll receive an Empty Pitcher. Leave the hut to go to the old plane.

Old Plane

Sam gives you a Vine Sample. Flip through the flight log to find the 3/3 Acorn.
Present the three Acorns to the raccoon-like animal called a Pandaroon. Pick up the Wooden Shape.

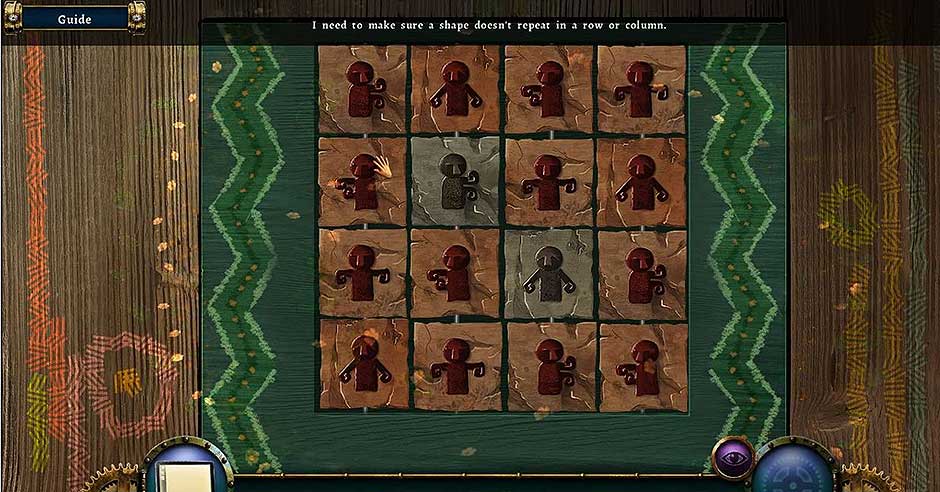
Place the Wooden Shape onto the door to enter a mini-game. Arrange the blocks so that no shapes repeat in a row or column. Once complete, you can go through the door.

Botanica - Into the Unknown - Wooden Shape Solution

Botanica – Into the Unknown – Wooden Shape Solution

Teacher’s Hut

Click on the White Cloth to take it. Use the Vine Sample on the drawing to trigger a puzzle. Flip the pieces so the drawing matches the vine. You’ll receive a Carving. Leave the hut.

Path to the West Shore

Go to the ornate gate and put the Carving on it. Open the gate and enter the path. Go to the tree and take the Key. Head down to the shore.

West Shore

Put the Empty Pitcher in the river to create a Filled Pitcher. Then use the Key on the toolbox. Pick up the Hammer.

Landing Pad

Walk back to the landing pad to the crate. Use the Hammer to open it. Pick up the Bright Red Fruit and the Lighter. Return to the village.

Cooking Hut

Put the Bright Red Fruit onto the cutting board and cut the fruit to obtain Chopped Red Fruit. Use the Lighter on the logs below the cooking pot. Pour the water in the pot from the Filled Pitcher. Add the Chopped Red Fruit and the White Cloth to the pot. You’ve now created a Bright Red Cloth! Take it and leave the hut, going left and then straight ahead.

Tree

You’ll find a loose hook on a tree near the bull. Use the Hammer on the hook. Put the Bright Red Cloth onto the hook. The bull will ram the tree, dropping Yellow Nuts. Take them. This will open a simple mini-game in your botanist’s kit. Solve the game and take the Vine Killer.

Botanica - Into the Unknown - Scales Solution

Botanica – Into the Unknown – Scales Solution

Old Plane

You’ll see four vines. Use the Vine Killer on them, and then go inside the plane. Take out the List of Missing Parts and click anywhere to trigger a hidden object puzzle. Find all of the objects listed, and then combine them logically, such as using the crowbar to open a crate. Once finished, you’ll receive Spare Parts.

West Shore

You’ll see Ian. Give him the Spare Parts to trigger a mini-game.
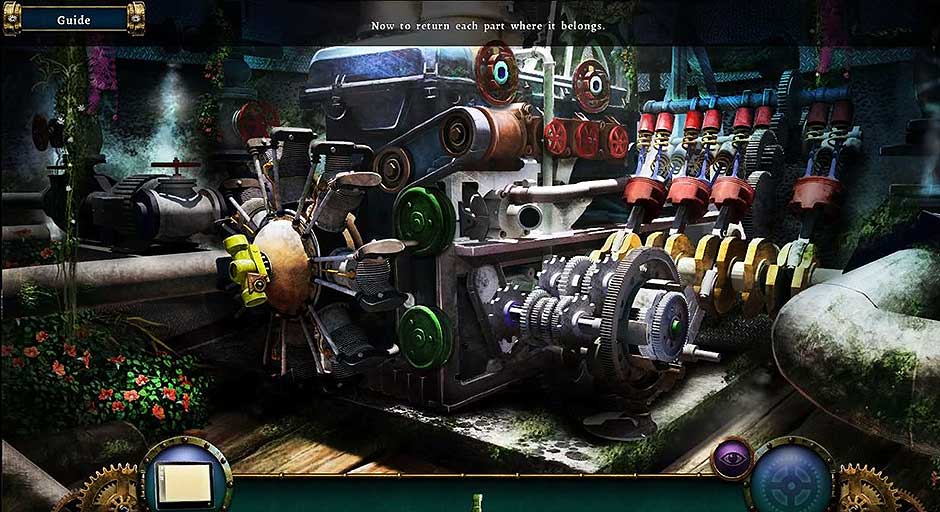
Put the parts in the machinery to finish the chapter!

Botanica - Into the Unknown - Machinery

Botanica – Into the Unknown – Machinery

Chapter Three: The Steamboat

This chapter starts inside of the steamboat with Ian. Look at the porthole and pick up the Red Cross. Put the Red Cross on the medical kit; grab the Brick. Use the Brick to break the glass case. Pick up the Hose and a Glass Shard.

Open the medical kit and use the Glass Shard to remove the wrapper from the Light Stick. Finally, remove the tarp to start a mini-game. Move the crates around to find a trapdoor.

Botanica - Into the Unknown - Crates Solution

Botanica – Into the Unknown – Crates Solution

Then tie the Hose to the trapdoor handle. Toss the Light Stick beyond the trap door.

Go to the front of the desk for another mini-game. Move the buttons to match up with the code that’s on the desk. Then slide the green panels to reveal all of the buttons. Pick up Ian’s Research and put it on the desk. Read the notes, and then walk downstairs.

Botanica - Into the Unknown - Code Solution 1

Botanica – Into the Unknown – Code Solution 1

Botanica - Into the Unknown - Code Solution 2

Botanica – Into the Unknown – Code Solution 2

Click on the cargo for a hidden object puzzle. Find all of the listed items. Then, use the items logically, such as the corkscrew on the wine bottle, to complete the puzzle. Once the puzzle is completed, you’ll receive a Steel Bar.

Pick up five Rope Rungs. Use the Rope Rungs on the rope to create a Rope Ladder. Walk to the left to go outside of the boat cabin. Put the Steel Bar on the wall and hang the Rope Ladder on it. Climb up and pick up the Compass. Climb down the ladder to put the Compass on the chest to trigger a mini-game. This game is randomized so the solution will vary. Turn the compass pieces to find the Three Lenses.

Go up the ladder again. Pull down the compartment cover and put the Three Lenses inside. Go back down and look at the periscope for another mini-game. Move the lenses using the buttons. This is another random game, so the solution varies. You’ll know you’ve gotten it right when green lights surround the lens.

Chapter Three is complete!

Chapter Four: Newstone Way

To begin the chapter, speak with Sam. Take the Leather Glove 1/2 that’s next to the stone marker. Take the Herbs 1/4 that’s near the sign. Follow Sam up the path, and then take the Ladder.

Margaret’s Hut

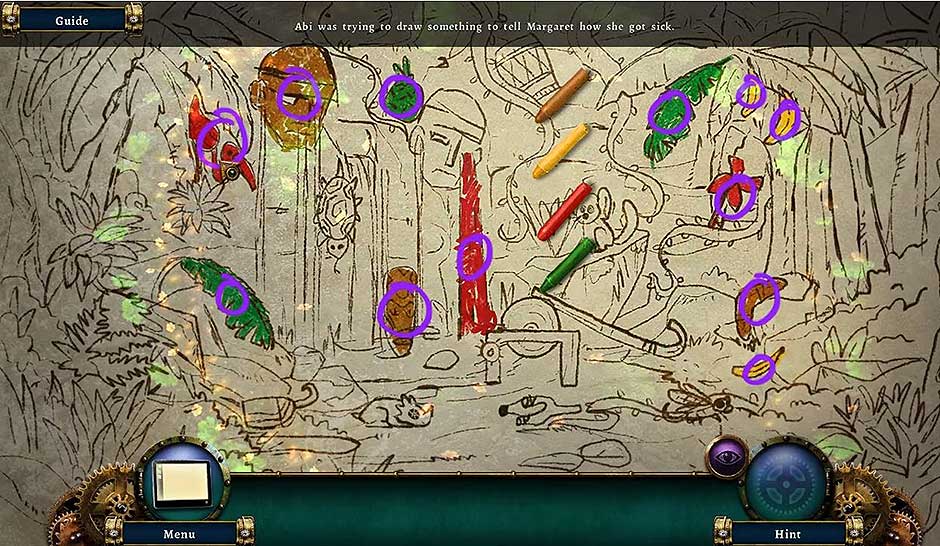
Go inside and talk to Margaret. Take the Crayon 1/4. Find Crayon 2/4 on the shelf. Also, take the Empty Jar. Pick up Crayon 3/4. Then climb the bunk beds using the Ladder. Take the Crayon 4/4 that’s on the top bunk. Put the 4 Crayons on the drawing that’s on top of the desk. This will activate a fun, coloring mini-game. Use the crayons to color in the inventory items shown.

Botanica - Into the Unknown - Coloring Mini Game

Botanica – Into the Unknown – Coloring Mini Game

Once you’ve colored the items, select them. Leave the hut, and then walk toward the rear of the village.

Pick up the Leather Glove 2/2 that’s near the pigs. Find Herbs 2/4 at the bush, and then go inside the healer’s hut.

Healer’s Hut

Pick up the Herbs 3/4, the Incense and the Gear 1/3. Click on the healer’s table for a hidden object game. Find all of the listed items, then place the items with the objects they match up with logically; for example, put the eye mask on the speak no evil monkey and the earmuffs on the hear no evil monkey. Take the Empty Vial.

Gate

Walk south towards the gate. Using the Leather Gloves, pick up the Chain. Walk to the boat and use the Leather Gloves to open the can of fuel. Go forward to the chainsaw; put the Chain on it. Take the cap off and pour the Can of Fuel inside the chainsaw. Take the Chainsaw and use it on the blocked path. Walk up the path.

To complete this level, go to the mine entrance. Take the Lever and click on the old tractor to find a hidden object puzzle. Find all of the listed items, and then use the Glue to fix the broken pot. The Handle goes onto the door. Pick up the Garden Trowel. Find the Mining Helmet. Move the petals onto the flower, creating a Sunflower. This will give you a Silver Key.

Mine

Turn on the light. Take the Wooden Handle from the hopper. Walk down. Use the Wooden Handle to make a Pickax together with the ax head. Use the Pickax three times on the rocks. Pick up the Blue Tube plus the Mechanical Heart.

Walk further inside the mine and use the Pickax on the rocks there. Pick up the Red Tube. Walk down to the Minebot and enter the combination that’s in your journal. Then click on the dial to the right until it shows the number 80 on top. Then drag it to 25, then back to 55. Put the Mechanical Heart inside the pipe hole.

Put the Key in the lock on the collection hopper. This will give you a Robot Serial Plate. Take the Spores. Walk forward three times. Place the Spores in the pack on the flutter hawk.

Chapter Five: Aqueaux

First speak with Sam. Then take the Ladder Rung from the pedestal.

Gustav’s Laboratory

Put the Ladder Rung on the ladder and then pull the ladder down. Click on the engine to activate a mini-game. Arrange the red pistons in the correct order. Speak with Gustav then give him the Robot Serial Plate for another mini-game. Find the items on the desk based on the bold-type words in Gustav’s dialog. When finished, take the Blue Key Card.

Gustav’s Study

Click on the cabinet to activate a mini-game. Find the differences between the two panels; there are 10 in total. Then grab the Two Empty Bottles. Leave the study.

East and West Gates

Use the Blue Key Card to get through the gate. Use the Empty Bottle to collect Sunlily Pollen 1/2. To obtain Sunlily Pollen 2/2, you have to go through the West Gate and then click to go to the left. Flip the switch on the light and take the Light Bulb. Use the Palette Knife to obtain the Aqua Moss Sample. Go to the bookshelf and put the Aqua Moss Sample onto the tray to open a hidden object puzzle. Find all listed items. When you’re finished, you’ll have earned a Glass Display Kit.

To finish this chapter, walk down twice, then move to your left. Select the pile for another hidden object puzzle. Find all listed items to earn the Tentacle Pieces. Click on the steering wheel to turn right. Put the Tentacles onto the design on the gate. Then click the steering wheel again to turn left. Take the Pipe Joint from the wreck. Go right to view the control panel. Move the levers then press the green button. Go to the acquisition compartment to pick up the Crystallized Spore.

Attach the Pipe Joint to the pipe network to trigger a randomized mini-game. Move the pipes by pressing the buttons.

Botanica - Into the Unknown - Pipe Solution

Botanica – Into the Unknown – Pipe Solution

Once complete, you can enter the elevator. Chapter Five is complete!

Chapter Six: The Capitol

Start out by taking the Cloth. Pick up the Piece of Wood. Then use the Piece of Wood on the thorns to create the Sharp Wood Piece. Collect Bright Red Flowers 2/6 using the Sharp Wood Piece. Search the area to find all Six Bright Red Flowers. Then click on the roof of the cage to zoom in and see a rope. Put the Sharp Wood Piece on it to earn a Lens.

Leave the cell and put the Six Bright Red Flowers in the bowl along with the Lens. Pick up the Two Vines. Set the Cloth and Vines onto the dragonfly, and then get onto the dragonfly.

When you land, click on the weapons rack to find a hidden object puzzle. Find all listed items. Once complete, you’ll receive a Spear.

Guard’s Quarters

Take the Gems off of the counter. Find a mini-game in the closet. Push the buttons in the correct order. The maze will guide you. Take the Tablet, Botanist’s Key and another Gem.

Botanica - Into the Unknown - Gems

Botanica – Into the Unknown – Gems

Use the Gems on the easel to create a brooch design. Once completed, you’ll receive a Brooch. Go to the closet and put the Brooch on a cape. Click on the Disguise to take it. Go to the mirror and put the disguise on yourself. Go down and forward to get to the next scene.

Side of the Building

Look at the statue and click on the Dagger to take it. Walk downward three times and use the Dagger on the tree bark. Pick up the Mushrooms and go back to the guard’s quarters.

Guard’s Quarters

Find a mortar on the counter. Put the Berries inside it and grind them down to a Berry Powder. Put the Mushrooms in the mortar to make Mushroom Powder. Find a new mini-game in the botanist’s kit. Put the diagram together. Then put the Powders inside the correct holders to receive the Sleeping Dart.

Side of the Building

Put the Sleeping Dart inside the pipe on the statue to get a Loaded Dart Gun. Go forward and shoot the guard with the Loaded Dart Gun by clicking on him with it. Take the Valve from the cell door. Take the Pantry Key from the guard’s pouch. Also, take the Stool.

Guard’s Quarters

Go to the pantry that’s below the bust and use the Pantry Key to open a hidden object puzzle. Find all of the items on the list to receive an Empty Jug. Click down and forward two times to get to the next scene.

To finish the game, first attempt to enter the portal. Talk to Ian and Kassandra. Pick up the Crossbow. Use the Crossbow to hit three rocks. Then hit four green spores. Finally, hit the gun that’s in Gustav’s hand.

Botanica - Into the Unknown - Crossbow

Botanica – Into the Unknown – Crossbow

Once complete, the ending cut scene plays.

Congratulations! You’ve just finished Botanica – Into the Unknown.


For more great tips and tricks, visit our blog!


This Botanica – Into the Unknown Walkthrough is meant as a guide and does not contain cheats, hacks, or serials.


The post Botanica – Into the Unknown Walkthrough appeared first on GameHouse.

Incredible Zoo Walkthrough

$
0
0

This zoo has seen better days. When a call from the boss comes in asking Natalie to start managing different departments, she will have to put her time management to the test! Our Incredible Zoo walkthrough will guide you through each day and challenge you’ll be facing. Care for the animals and work toward making this once-great zoo truly incredible again!

Contents

General Tips & Tricks

Start your shift off right with these useful tips and tricks to help you make your zoo truly incredible!


Basic Tips

  • Utilize your time management skills to run departments of Incredible Zoo! Each calendar day you will need to look after animals. The goal is to care for all the animals and help them go to sleep before the clock runs out.
  • All tasks immediately stop at the end of the day, regardless of whether or not you still have animals to feed, water, or put to sleep. If you complete all your tasks and all animals go to sleep before the day has ended, the day will end when the last animal goes to sleep.
  • Some calendar days you will need to play hidden object scenes instead of looking after animals. These days are marked with magnifying lenses on the calendar. If you don’t find all the objects in time, you can replay a scene as soon as it ends to still try for the maximum score.
  • At the end of each day, you will earn coins. Coins impact your score, and can be spent on upgrades at the beginning of each day. Upgrades will help you improve your zoo in ways that will help you manage your time more efficiently.
  • You can replay any level at any time by simply selecting that day on the calendar. Replaying levels will give you coin rewards, even if you’ve already completed that level.
  • You can stack tasks in order to more effectively manage your time. Up to ten tasks can be stacked at any given time.


Advanced Tricks

  • Click anywhere on a path to move to that location. You can use this trick to stay closer to food stations or animals which you know will need care soon.
  • If you make a mistake and grab the wrong item, you can remove all the items from your tray and start over by clicking on the recycle bin. The recycle bin is located near the trash cans on each level. Be aware that using the recycle bin can deduct your score, so if you can manage it, you may want to hold on to your mistake item until an animal requests it.
  • Listen for women’s voices saying “Hello!” or men’s voices saying “Hey!”. When you hear this, that means someone is willing to give you a donation! Look for the $ sign floating over the head of the applicable guest and click on them to receive a bonus donation. Donations help your score overall, and will also allow you to spend more money on upgrades.
  • Collecting garbage will improve your score. Dumping garbage out does not. If you’re in a hurry and it’s the end of the day, don’t worry about dashing to dump out that last bag of trash. Help any remaining animals first!
  • Be careful when accepting donations. Sometimes people who want to donate will inconveniently be standing right in front of a task you selected. Double-check a task is still selected when this happens. This is the most common way that task chains can be broken and your work flow interrupted.
  • Keep your food items stocked at all times! Whenever you see only one of any item remaining, it’s a good idea to restock right away.
  • If you need a few extra coins quickly to afford that upgrade, consider replaying a hidden object scene. Scenes are not randomized, and once you know where the items are, you can make a quick extra profit by quickly locating all items.
  • Try to attend to animals in groups, as well as collect items they may need in groups. This will help you organize more effectively when the tasks start to pile up.
  • It’s better to do task chains of 5-6 tasks than the maximum 10 tasks. Serve animals in short, efficient, dedicated spurts instead of constant running around. In the end, this tactic is much faster!
  • If it’s near the end of the day and you have to choose between putting an animal to sleep or grabbing an item for another animal, always help the sleepy animal first. This only requires one step instead of two.
  • Always upgrade your staff! Having staff who can walk to cages on their own will save you a lot of time.

Incredible Zoo Walkthrough

Natalie is a hard-working employee of Incredible Zoo. Just when she thinks her work isn’t noticed, the boss calls, informing her of an exciting opportunity. Help Natalie manage the zoo’s various departments and come out on top as truly incredible. Our walkthrough offers day-by-day solutions and strategies!

Green Forest

The competition for the best zoo in the state is on, and Incredible Zoo hasn’t won in years! All that hard work has finally paid off – Natalie is promoted to manager of the Green Forest department!

Day 1

Goal: 140 Coins

Expert Goal: 200 Coins


The first day you’ll spend at the zoo is quite simple. You will have bananas and hay to feed the resident giraffe and zebra, and water to give them as well. Simply click on the item the animals need, then take that item to the animal in a timely manner. If you run out of hay or bananas, click on the icons on the nearby tree and call station to replenish them. At the end of the day when the animals are ready to go to sleep, a Zzz icon will appear over their heads. Click on them to help them go to sleep, thus finishing out the day!

Incredible Zoo Green Forest Day 1

Incredible Zoo Green Forest Day 1

Day 2

Goal: 150 Coins

Expert Goal: 210 Coins


A new animal arrives at the zoo today! It’s an old elephant fresh out of treatment. Elephants, much like the giraffe and zebra, eat fruit and hay.

  • The elephant enclosure is located above the giraffe.
  • It’s recommended prior to starting this day that you upgrade the yellow tags of at least one enclosure. This will increase the amount of coins earned per serving the animal in said enclosure.

Day 3

Goal: 200 Coins

Expert Goal: 330 Coins


Day 3 introduces a new fruit: oranges! Oranges work the same way as bananas. Simply click on an orange and take it to the animal requesting it. Three oranges are available by default. Click on the orange icon over the tree to replenish your supply if you’re running low.

  • Tip: Keep an eye on your fruit stocks! If you’re running low, click on one of the fruit icons over the trees to replenish that fruit.
  • Continue upgrading enclosures to increase the coins earned per serving animals in those enclosures.

Day 4

Day 4 works a little differently from the previous days and features a hidden object scene. You will have a limited amount of time to find as many items listed at the bottom of the screen as possible. Luckily for you, the locations of all the day’s items are shown here!:

Incredible Zoo Exotic Tropics Day 4

Incredible Zoo Exotic Tropics Day 4

Day 5

Goal: 330 Coins

Expert Goal: 450 Coins


A new zebra arrives today! As a reminder, zebras feed on hay and fruit.

  • The new zebra will be housed next to the giraffe.
  • Keep on your toes! A new herbivore means a higher demand on fruit and hay. Try to keep all food items fully stocked as much as possible. As soon as you’re down to one of any food item, click on the applicable icon to restock it.

Day 6

Goal: 420 Coins

Expert Goal: 570 Coins


Another animal arrives at the zoo today, and it’s another elephant. Like all other herbivores in the Green Forest, the elephant likes fruit and hay. A watering can will also be added to the items you can give your animals.

  • Tip: Continue upgrading the yellow tags on the animal enclosures to increase the number of coins earned. More coins means more upgrades!
  • The new elephant is located on a new section of path on the right. This path is further out of the way, so you will need to manage your time more effectively. Place priority on the group of animals on the left, and don’t get too caught up on the new guy!
  • The watering can is a new item for today. Like the bucket of water, the watering can is unlimited in quantity, so you don’t need to worry about restocking.

Day 7

Goal: 440 Coins

Expert Goal: 640 Coins


Your zoo has a new visitor today: a bear, oh my! In addition to fruit, bears also eat fish and meat. As such, a new food item, the fish, has been added to your menu. Furthermore, a vet is now available!

  • Tip: By now you’ll want all your animal enclosures upgraded by at least one star. Two is recommended, dependent on your score.
  • The bear is located past the giraffe and zebra, and as such, he’s a little out of the way. Today you’ll need to focus on balancing the bear and the elephant on the far right. The bear’s meat source, the fish, is located next to the second elephant. Try to combine tasks so that you serve the elephant here every time you need to pick up fish for the bear.
  • Click on the lake below the fish to restock this food source. Like all others, three are available by default.
  • When an animal is sick, a + icon will appear over their head. Click on the vet, then click on the animal who needs care. Natalie will take the vet directly too them, but keep in mind that doing this takes up one slot on her cart! If you make a mistake, simply drop him back off at his tent.
Incredible Zoo Green Forest Day 7

Incredible Zoo Green Forest Day 7

Day 8

Goal: 540 Coins

Expert Goal: 790 Coins


There’s a new employee at the zoo today. The cleaner will take care of dirty cages. Like the vet, click on the cleaner, then on the animal requesting a cage cleaning (indicated by a broom). Natalie will add the cleaner to her cart. If you make a mistake, simply drop him back off at his shed. Once a cleaner is done, an icon will appear indicating the trash at that cage needs to be picked up. Click on the cage to collect the trash, then drop it off at the garage can. Trash, like the cleaner, takes up one slot of cart space.

  • Tip: If you’ve been obtaining expert scores, you should have enough coins today to upgrade Natalie’s vehicle and make her faster. Click on the red tag to improve her speed!
  • If there’s two bags of trash in front of an animal’s cage, don’t worry! Regardless of how many trash bags appear to be there, clicking on the cage will add the trash to Natalie’s cart, and this trash always takes up just one slot.

Day 9

Goal: 670 Coins

Expert Goal: 850 Coins


Doesn’t your excellent work make you want to just roar with enthusiasm? The zoo seems to think so, because a lion will be joining the exhibit today! Lions eat fish, meat, and fruit. Meat will also be added as a new menu item today!

  • Tip: It’s highly recommended you start putting upgrades toward the cleaner and the vet right away! An upgrade to these two parties means they can move to animal’s cages on their own- simply select the employee, then the animal they need to tend to. Natalie will no longer need to cart them to their destination. However, keep in mind that trash from the cleaner will still need to be collected.
  • The lion is located on the right next to the second elephant. Balancing giving meat to the lion and the bear will be your greatest challenge today.
  • The meat station is located next to the hay station. Three portions of meat are available at a time. When you need to refill, simply slick on the meat icon over the call station. A truck will show up to deliver more.

Day 10

It’s time for another hidden object scene! You’ll encounter the same scene as before, but now you have new items to find. The items are listed at the bottom of the screen. You will have a limited amount of time to find them. Today’s items are shown and circled in the screenshot below.

Incredible Zoo Green Forest Day 10

Incredible Zoo Green Forest Day 10

Day 11

Goal: 790 Coins

Expert Goal: 980 Coins


There’s nothing new today other than visitors will start to show up offering donations. But the animals will start to become more demanding. Here are a few pointers to get you through the day!

  • Tip: Both the vet and the cleaner should be upgraded by today so you no longer have to cart them to their locations.
  • Tip: Upgrade Natalie’s cart to carry an additional item! Being able to carry three items at once will be a big help today.
  • Make sure the hay, meat, bananas, oranges, and fish are always stocked! As soon as you see only one of these items remaining, be sure to restock them right away.
  • Try to combine trips of dropping off food or water with dumping trash. There’s no reason to take multiple trips. After all, it’s about time management.
  • When a visitor shows up who wants to make a donation, a $ sign will pop up over their head. Click on them to accept their money. Try to do this quickly- they won’t wait around forever!

Day 12

Goal: 800 Coins

Expert Goal: 1130 Coins


Rain storms will start to appear in the area. When it starts to rain, umbrella icons will pop up over the animals. Click on the animals to open umbrellas for them and keep them dry! Once all the animals have had their umbrellas opened, the storm will stop and you can carry on feeding and looking after them.

  • Tip: It’s recommended today you focus on upgrading any of the pink tags. The pavement will increase your overall speed, and the path restoration will make it easier to care for the animals on the right side of the exhibit.
Incredible Zoo Green Forest Day 12

Incredible Zoo Green Forest Day 12

Day 13

Goal: 830 Coins

Expert Goal: 1180 Coins


Two bears are better than one, and that’s why the zoo has invited a new one into the department. Additionally, the handyman will be joining your staff today.

  • Tip: Continue to focus on restoring the paths between enclosures to help you reach them quicker.
  • Tip: Continue upgrading your cages so that you earn more coins in serving your animals!
  • The new bear is located on the left, but not down the same path as the first. Try to serve these two in combination regardless, especially when it comes to fish!
  • The handyman will set up shop next to the cleaner. When a wrench icon appears over an animal, click on the handyman to collect him and transport him to the cage in need of fixing. Once fixed, he will walk back on his own.

Day 14

Goal: 1130 Coins

Expert Goal: 1470 Coins


There’s nothing new about today, but you’ll still need to stay on your toes!

  • Tip: It’s recommended you either upgrade Natalie’s vehicle, the paths, or the handyman’s ability to walk on his own.
  • Continue to focus on improving your chaining technique. Make sure you serve animals in groups to save on time!

Day 15

Goal: 1330 Coins

Expert Goal: 1810 Coins


Two lions are better than one! A second king of the jungle is joining your exhibit today.

  • A new lion will be added next to the bear on the left side of the exhibit. Like the bear, the lion enjoys meat, fish, and fruit.
  • Focus on upgrading your speed, and if you can, the broken paths to keep your time efficient!
  • Tip: Make sure your animal cages are all upgraded. The more coins you earn, the more upgrades you can buy!

Day 16

Goal: 1370 Coins

Expert Goal: 1960 Coins


Again, there’s nothing new at the zoo today. Focus on improving your time management!

  • Tip: If you haven’t done so already, purchase the lanterns upgrade (green tag). This upgrade will extend the opening hours of your zoo, giving you more time to improve your score!

Day 17

Today’s challenge comes in the form of a hidden object area. Find all the items listed at the bottom of the screen within the time given. Their locations are shown here!

Incredible Zoo Green Forest Day 17

Incredible Zoo Green Forest Day 17

Day 18

Goal: 1720 Coins

Expert Goal: 2160 Coins


Every animal loves having fun! The ball will be added to your zoo today. When an animal wants to play with the ball, an icon displaying the ball will appear over their head. Click on the ball and take it to the animal. When they’re done playing, an icon will appear with the ball crossed out. Take the ball back to the stone stand when they’re finished.

  • Tip: If you haven’t by now, your upgrades today should be put toward installing shortcuts to all the cages. The shortcuts are indicated by pink tags in the upgrades menu.
  • If an animal wants to play with the ball while another animal has it, wait until the first animal is done, then pick up the ball and take it directly to the second animal. There’s no need to place it back on its stand in these circumstances.
  • The stand for the ball is located in the upper right corner, between the vet and the front gate.

Day 19

Goal: 1960 Coins

Expert Goal: 2650 Coins


A new kind of fish will be added to the menu today! Pay extra close attention to which type of fish carnivorous animals request. The new orange fish work the same way as the blue fish. Click on the pond to the right of the fish to restock.

  • Tip: At this point, do not purchase any more upgrades than necessary! Any coins you earn now will automatically carry over into the next portion of the game. Save now so you can purchase valuable upgrades right away!

Day 20

Goal: 2000 Coins

Expert Goal: 2740 Coins


Today’s your last day on the calendar in this exhibit. Utilize all the tricks you’ve learned above to complete the day with top-notch performance!

  • Continue to serve animals in groups according to their locations, and most importantly, don’t panic!

Water World

The competitions don’t stop with best zoo in the state. Incredible Zoo has also been nominated for one of the top 10 aquatic animal zoos in the country! Natalie is once again promoted – this time, to the head of the Water World department!

Day 1

Goal: 430 Coins

Expert Goal: 550 Coins


Welcome to the Water World department of Incredible Zoo! Here you’ll be caring for various aquatic animals. To start off, you will be looking after two penguins, two dolphins, and a seal. Food items include bananas, mussels, and two varieties of fish. Click on the ponds to replenish fish, the tree to replenish bananas, and the call box to replenish mussels.

  • Tip: If you took our advice and saved up coins from the previous department, you should be able to purchase some extremely helpful upgrades right away. Our recommended upgrades are:
    • Water Filter (green tag, 1350 Coins)- make animals happier and increase coins gained
    • Shortcuts (pink tag, 1450 Coins each)- allows Natalie to take shorter paths to the cages
    • Vehicle (red tag, 2250 Coins)- makes Natalie move faster
    • If you have any excess coins after purchasing these upgrades, upgrade your cages to increase your coins earned! Remember, more coins means more money for upgrades.
  • The cleaner is immediately available today. Don’t forget that once a cage has been cleaned, you will need to collect the resulting trash and take it to the garbage can. The garbage can is located in the far left corner.
Incredible Zoo Water World Day 1

Incredible Zoo Water World Day 1

Day 2

Goal: 550 Coins

Expert Goal: 680 Coins


Day 2 of your managing the Water World department re-introduces the ball. When an animal wants to play, the ball icon will appear. Click on the ball, then take it to the animal. When they’re finished, click on the animal’s cage, then return the ball to its stand near the cleaner.

  • If another animal wants to play with the ball at the same time as another animal no longer wants it, instead of taking the ball back to its stand, take it directly to the animal who wants it next to save time.

Day 3

Goal: 700 Coins

Expert Goal: 850 Coins


A second seal will be joining the exhibit today! Seals eat fish, fruit, and mussels. The new seal will be located between the dolphins and the penguins.

  • Tip: If you haven’t already, upgrade the cleaner so that he can walk to cages on his own. This will save you a lot of time.
  • You will need to be more careful that items are kept in stock now. Whenever you’re down to one of an item, click on the item’s icon to replenish it.

Day 4

Goal: 860 Coins

Expert Goal: 1050 Coins


Today the vet will be returning to offer necessary care to the animals. Keep an eye out for + icons appearing over the animals’ heads indicating whether or not they may require veterinary care.

  • Tip: You can upgrade the vet right away to walk to cages on his own if you have enough coins saved up. Otherwise, you will need to transport him manually, and he will take up a slot on your cart.

Day 5

Today is all about a new hidden object scene! Find the items listed at the bottom of the screen before time runs out. Item locations are shown below.

Incredible Zoo Water World Day 5

Incredible Zoo Water World Day 5

Day 6

Goal: 930 Coins

Expert Goal: 1100 Coins


A polar bear will join the exhibit today! Polar bears eat fruit, fish, and meat. The polar bear will be added to the upper portion of the exhibit, next to the second seal. Oranges will also be added to the menu today! Oranges work the same way as bananas and will need to be replenished when empty.

  • Tip: Upgrade the vet if you haven’t done so already. Having this staff member walk to cages on his own will be a big help.
  • Try to serve animals in sections- the dolphins together, the second seal and the polar bear together, and the penguins and first seal together.
  • Try to serve fruit in pairs as well. If one animal wants a banana and another an orange, pick up the orange and the banana together.
  • Tip: Don’t forget to collect donations when they present themselves! Guests who would like to donate money to the zoo will have a $ sign over their heads.


Day 7

Goal: 1160 Coins

Expert Goal: 1400 Coins


Today you will acquire another new item- the water barrel! Water barrels work like any other item. Simply click on them, then take them to the animal that would like them. Water barrels are unlimited, so you don’t need to worry about replenishing stock!

  • The water barrel is a bit far away from other items that animals would like. Try to keep this in mind when gathering items to give to animals. Serve in pairs when you can.


Day 8

Goal: 1230 Coins

Expert Goal: 1500 Coins


The handyman will be joining you again today. When a cage needs to be fixed, a wrench icon will appear. Click on the handyman, then the cage needing repairs to repair it.

  • Tip: It’s highly recommended you upgrade the handyman right away so that he will walk to cages on his own!


Day 9

Goal: 1330 Coins

Expert Goal: 1650 Coins


There’s nothing new happening today. Utilize your skills and the tips above to practice serving animals in pairs. The better you get at this, the better you will do in later levels.

  • Tip: By now, it’s an excellent idea to upgrade Natalie’s cart tray so that she can carry three items at once.
  • Tip: Are the vet, cleaner, and handyman upgraded? Now spend your coins on upgrading cages!


Day 10

Goal: 1400 Coins

Expert Goal: 1700 Coins


Again, there’s nothing new happening today. But the animals will start to become gradually more demanding. Place emphasis on serving them in groups, and try to serve similar items together, e.g. fish, fruit, or water barrels. This will help you save time overall.


Day 11

The hidden object scene returns! Locate the items listed at the bottom of the screen before time runs out. The object locations are pictured here:

Incredible Zoo Water World Day 11

Incredible Zoo Water World Day 11

Day 12

Goal: 1450 Coins

Expert Goal: 1750 Coins


Today is just another ordinary day, however the difficulty will continue to increase. Make sure all your items remain fully stocked, and remember!: It’s better to take your time than to rush and overwhelm yourself. Take tasks in small groups to maximize your effort.


Day 13

Goal: 1750 Coins

Expert Goal: 2150 Coins


What’s green, scaly, and a little grumpy? No, it’s not your boss – it’s the zoo’s new crocodile! The crocodile’s new enclosure can be found next to the water barrel. Crocodiles eat fish, fruit, and meat.

  • Try to serve the crocodile in grouping with the dolphins to keep things quick!
  • Tip: Focus on continuing to upgrade the cages so that you will earn more coins per animal helped.


Day 14

Goal: 1930 Coins

Expert Goal: 2380 Coins


Mmm, the carnivores will be happy! There’s a new meat station in the department today. The meat can be found next to the mussels. By default, three legs of meat will be available at the start of the day. Click on the icon on the call box to order more as needed.


Day 15

Goal: 2000 Coins

Expert Goal: 2480 Coins


Back on track today, and nothing new is going on. However, the chance of rain is high, so try to make sure your animals are taken care of in a timely manner!

  • Tip: By now, all your cages should be upgraded to the maximum level. This will help you focus on additional upgrades!


Day 16

You will once again be transported to a hidden object area beneath the water. Find the items listed at the bottom of the screen before time runs out. Their locations are shown below.

Incredible Zoo Water World Day 16

Incredible Zoo Water World Day 16

Day 17

Goal: 2200 Coins

Expert Goal: 2680 Coins


What’s better than one crocodile? Why, two of course! Another crocodile has been added to the exhibit, right next to his scaly cousin. Remember: crocodiles eat fruit, fish, and meat.

  • Serve the crocodiles in pairs whenever you can. This will help you remain organized.
  • Today is also the first day you will encounter pesky visitors. Some zoo visitors will talk too loudly on their phones, irritating the animals. When you see this, click on the visitor to quiet them, calming the distressed animal.
Incredible Zoo Water World Day 17

Incredible Zoo Water World Day 17

Day 18

Goal: 2450 Coins

Expert Goal: 3020 Coins


Sardines will be added to the menu today. Now there are three types of fish you can serve the animals! It’ll be more important than ever to ensure fish remain stocked. When in doubt, click on the water next to the fish to restock even if there’s still two fish left. It’s better to be safe than sorry.


Day 19

Goal: 2600 Coins

Expert Goal: 3160 Coins


While nothing new happens today, the difficulty will be increased. Pay special attention to making sure all items remain in stock. Additionally, it’s recommended you not purchase any additional upgrades at this point unless absolutely necessary. Instead, save your coins so that you can purchase upgrades right away once you reach the next department.


Day 20

Goal: 2700 Coins

Expert Goal: 3300 Coins


The hardest day yet! If you haven’t already, you may want to upgrade Natalie’s vehicle so that she can move at maximum speed. It will be easy to fall behind today, so focus on serving the animals in groups of no more than 5-6 tasks at a time. Good luck!

Exotic Tropics

Natalie’s boss has one final request – for Natalie to take care of the Exotic Animals department. With two other departments under her belt, does she have what it takes to restore Incredible Zoo to its former fame?

Day 1

Goal: 450 Coins

Expert Goal: 550 Coins


If you followed our advice and saved your coins, immediately purchase the Hot Springs upgrade, which makes animals happier and increases coins earned, as well as all Natalie’s vehicle upgrades to boost her speed. Use any remaining funds to upgrade the cages.


The Exotic Tropics is a desert climate which starts out with two kangaroos, two koalas, and a panda. You will be able to serve sprouts and three different types of fruits. Additionally, the ball is immediately available upon starting this area. All food items available to you on Day 1 will require restocking if they run out, so pay attention and be sure to restock a food item if there is only one left. Water is also available on the lower right, however it does not need to be restocked.


Day 2

Goal: 580 Coins

Expert Goal: 700 Coins


A second type of sprout will become available today, as well as the watering can. The watering can does not need to be restocked, however the sprouts do if they run too low. Click on the garden next to the basket to harvest more as needed.

  • Animals will be especially demanding of fruit today, so be prepared to keep those baskets full!


Day 3

Goal: 700 Coins

Expert Goal: 860 Coins


A lovable new addition has arrived in the form of a docile panda. This new guy will be located next to the kangaroo and two koalas. As a reminder, pandas eat fruits and sprouts. The cleaner will also be returning to your staff today.

  • Tip: Upgrade the cleaner right away so that he can walk to animal cages on his own without taking up a slot on your serving tray.
  • Split up serving the animals into two groups: the group of four in the upper portion of the area, and the two in the lower portion.
  • Split up serving items into fruits, and sprouts and water together. Utilizing this technique will help you manage things much more efficiently.
Incredible Zoo Exotic Tropics Day 3

Incredible Zoo Exotic Tropics Day 3

Day 4

A tropical hidden object area awaits! Locate the objects listed at the bottom of your screen within the amount of time given. The item locations are shown here in the screenshot below:

Incredible Zoo Exotic Tropics Day 4

Incredible Zoo Exotic Tropics Day 4

Day 5

Goal: 860 Coins

Expert Goal: 1040 Coins


The zoo is opening up their exhibit to a new species today: tropical birds! The parrot is the first addition to this new section. Fruit, sprouts, and seeds are all favorites of this colorful new resident. Seeds will also become available for the first time today in honor of your newest guest.

  • The parrot is located at the bottom of the screen, far away from the other animals as far as exhibits go. Place emphasis on serving the larger groups first, and take advantage of caring for the parrot whenever tasks free up, or whenever you go for water.
  • The seeds are located to the left of the fruit trees. You will begin with a quantity of three. If you need more, simply click on the call box to order more.


Day 6

Goal: 990 Coins

Expert Goal: 1170 Coins


There are no new animals joining the department today, however the vet has set up shop. Using money you’ve saved for upgrades, you should purchase the upgrade for the vet right away so that he will walk to cages on his own without interrupting your work flow

  • Fruit will be in especially high demand today, so be sure to keep those baskets stocked and full.


Day 7

Goal: 1130 Coins

Expert Goal: 1350 Coins


Nothing new today, except that animals seem a bit hungrier than before! Use today to perfect the balance of serving the animals in groups according to their cage locations. Practice keeping items in stock, placing emphasis on the fruits and sprouts.


Day 8

Goal: 1230 Coins

Expert Goal: 1450 Coins


A pitcher of milk is available to give the animals today! Much like the water, the milk is unlimited in quantity, so you don’t need to worry about restocking.

  • Try to pick up orders of milk and water/watering cans together, since they’re in the same area.
  • Tip: Continue to upgrade the animals’ cages to earn additional coins!


Day 9

Goal: 1350 Coins

Expert Goal: 1530 Coins


Papayas will be added to the menu of fruits starting today. Being a new fruit, they will be in high demand, so make sure these are stocked at all times. Try to serve them in groups, too, to keep tasks aligned and easier to manage.

  • Tip: Unsure what to upgrade next? How about monkey or bunny helpers to occasionally restock your fruit or sprouts? The less you have to worry about restocking these items, the easier it will be to stay on track.
Incredible Zoo Exotic Tropics Day 9

Incredible Zoo Exotic Tropics Day 9

Day 10

It’s time to trek into the jungle once more for a hidden object scene! Find the objects listed at the bottom of the screen within the amount of time given. Their locations are pictured here.

Incredible Zoo Exotic Tropics Day 10

Incredible Zoo Exotic Tropics Day 10

Day 11

Goal: 1500 Coins

Expert Goal: 1700 Coins


The assortment of birds in the department is expanding again today, and this time the newest resident is a toucan! The toucan will be moved into an aviary next to the parrot Toucans feed on fruit, sprouts, and seeds.

  • Tip: Your first path/shortcut upgrade will be available today (pink tag for 1,600 coins). Purchase this right away to make reaching animals much quicker!
  • Now that the toucan is here, there will be a higher demand on seeds. Make sure if only one bag of seed is remaining that you use the call box to order more.
  • Try to serve the toucan and parrot as a pair to make the best use of your time and the fact they’re further away than the other animals from the food sources.


Day 12

Goal: 1700 Coins

Expert Goal: 1950 Coins


The handyman is joining the staff from this day forward to fix any broken cages. It’s recommended you purchase the upgrade for him right away so that he can walk to cages on his own once he and his destination have been selected.

  • Continue to serve the animals in groups to maximize your time.
  • Multiple animals may request the services of the cleaner, vet, or handyman at once. Be careful not to lose track, since these staff members cannot stack tasks!
Incredible Zoo Exotic Tropics Day 12

Incredible Zoo Exotic Tropics Day 12

Day 13

Goal: 1850 Coins

Expert Goal: 2150 Coins


Nothing different today, so use today as a buffer day to continue purchasing helpful upgrades and mastering your time management technique. By now, you should be able to fully upgrade all cages to give you maximum coin output. Alternatively, you can purchase upgrades for all trees, gardens, or the call station in order to reduce the number of times you will need to restock items.


Day 14

Goal: 2100 Coins

Expert Goal: 2350 Coins


Due to the wild success of the zoo’s last toucan, yet another has been added to the exhibit. This newest avian member will be housed next to the other birds, and also feeds on fruit, sprouts, and seeds.

  • Tip: If you have not purchased an additional cart item slot for Natalie yet, now is an excellent time to do so, as you will continue to want to serve all the birds in a group.
  • Don’t overwhelm yourself! Try not to exceed stacks of six tasks at any given time.
  • Pay extra close attention to the seeds and keeping them in stock, as they will be especially popular today.


Day 15

Goal: 2300 Coins

Expert Goal: 2550 Coins


There’s no new food items or zoo additions today. So, why not focus on purchasing upgrades? By now you should be able to upgrade all cages fully. Additionally, try and purchase an upgrade for each of your food stations which require restocking. Four items are better than three, and very necessary at this point if you want to stay on task!


Day 16

One last journey into the jungle to explore a hidden object area! Locate the objects listed at the bottom of the screen within the amount of time given. Their locations are pictured below.

Incredible Zoo Exotic Tropics Day 16

Incredible Zoo Exotic Tropics Day 16

Day 17

Goal: 2450 Coins

Expert Goal: 2700 Coins


A new third variety of sprout will become available to your animals today. As such, sprouts will be in especially high demand, so keep them stocked and be careful to make sure you’re grabbing the right kind! If you make a mistake, select the recycle bin between the trash can and the vet to correct your mistake and free the slot on your cart again.


Day 18

Goal: 2550 Coins

Expert Goal: 2850 Coins


Continue to upgrade your zoo so that your baskets can hold more food items. The more food items a basket can hold, the less you will have to restock. Combine this with the monkey, rabbit, and child assistants, and the amount of restocking you will need to do dramatically decreases.


Day 19

Goal: 2650 Coins

Expert Goal: 2950 Coins


No aviary is complete without another parrot! A fourth feathered resident has moved into the zoo, so demand on seeds, fruits, and sprouts will be at an all-time high. The parrot will be situated next to the other birds. But don’t let another parrot leave you with bird-brain: the other animals still need your love and attention, too!

  • Another shortcut will be available for you to purchase in the upgrades menu today. This is an essential part of keeping your tasks as fluid as possible, so place priority on acquiring this!
  • If you have extra coins to spend, continue to upgrade your baskets so that you won’t need to restock as often.


Day 20

Goal: 2800 Coins

Expert Goal: 3100 Coins


It’s the last day of the month, and effective time management has never been so important! Utilize all the tips and tricks outlined above to masterfully manage your department. Purchase any remaining upgrades you feel would be useful, especially in areas where you might be struggling. And remember, above all, don’t panic! Take your time and focus on groups, and you’ll be able to complete the day without any problems at all.

Incredible Zoo Exotic Tropics Day 20

Incredible Zoo Exotic Tropics Day 20

Congratulations! You’ve completed the Incredible Zoo walkthrough!


Be sure to visit our blog for more great tips and tricks!


The Incredible Zoo walkthrough is intended as a guide and does not contain cheats, hacks, or serials.


The post Incredible Zoo Walkthrough appeared first on GameHouse.

Delicious – Emily’s Childhood Memories Walkthrough

$
0
0

Emily’s Childhood Memories is the sixth game in the ever popular Delicious series. This game follows Emily as she returns to the house she grew up in as a child and relives memories from her youth. This walkthrough should be beneficial for anyone playing the game with the intent to receive full stars in every stage. This guide assists with tips & tricks for challenges, mouse locations, memory game locations and even finding hidden items to earn a new trophy.

Contents

Mouse Locations

Emily’s Childhood Memories Mouse Locations

The Farm Part 1
Day 1: In the bottom right above the two skillets
Day 2: Next to the tree on the left
Day 3: By the 3rd fence post in the bottom left corner
Day 4: Near the rose bush in the bottom left corner
Day 5: At the top right of the serving tray
Day 6: Above the plate with the mushrooms
Day 7: Above the beehives
Day 8: Directly above sand box
Day 9: Top right in the window
Day 10: Top left in the water barrel

Delicious - Emily's Holiday Season - Farm Part 1 Mice

Delicious – Emily’s Holiday Season – Farm Part 1 Mice

The Garden
Day 1: Between the register and the carrots
Day 2: On the top of the purple watering can
Day 3: By the base of the tree in the top right corner
Day 4: Top of vegetable stand to the left of the pumpkin
Day 5: To the right of the large sunflower by the greenhouse
Day 6: Bottom middle of screen between glass jars and pears
Day 7: Inside of green house, top right between pot and plant
Day 8: On top of the oven to the left of the steam vent
Day 9: Above the watermelons
Day10: At the back right of the greenhouse

Delicious - Emily's Holiday Season - Vegetable Garden Mice

Delicious – Emily’s Holiday Season – Vegetable Garden Mice

The Campsite
Day 1: Top of hay bale to the left of the pitchfork
Day 2: Top left of screen in the tent
Day 3: Top of fireplace
Day 4: Left middle of Ice Cream machine
Day 5: Above the box of toilet paper and lanterns at the bottom of the screen
Day 6: Bottom middle of screen above pink marshmallow
Day 7: Between the two high counters for guests
Day 8:  Right above the far left of the register counter
Day 9: To the top of the trellis
Day10: Far left center of porch

Delicious - Emily's Holiday Season - Campsite Mice

Delicious – Emily’s Holiday Season – Campsite Mice

Antonio’s Restaurant
Day 1: To the bottom right of the staircase
Day 2: To the left of the screen above coffee and hot chocolate machine
Day 3: The mouse is below the juicer
Day 4: To the right of the pasta maker
Day 5: Outside the top right window on the left side
Day 6: Between the two large pots on the stove
Day 7: Right above the pizza dough
Day 8: Directly above the serving tray
Day 9: At the bottom right of the main staircase
Day10: At the bottom of the cart near Antonio’s legs

Delicious - Emily's Holiday Season - Restaurant Mice

Delicious – Emily’s Holiday Season – Restaurant Mice

The Farm Part 2
Day 1: Left of fire pit below the stairs
Day 2: At the top right of the former sandbox
Day 3: Top left above the For Sale sign
Day 4: To the top of the cash register
Day 5: Between the beverage area and the serving tray
Day 6: Above the pan handle to the right of Antonio
Day 7: Between the rocking chair and the lavender flowers
Day 8: Behind the rock that the soup bowl rests on
Day 9: Below the register in the cabinet
Day10: On the right side of the tree trunk

Delicious - Emily's Holiday Season - Farm Part 2 Mice

Delicious – Emily’s Holiday Season – Farm Part 2 Mice

Delicious – Emily’s Childhood Memories Walkthrough

Stage 1 – The Farm

In addition to hidden Easter Egg items and hiding mice, Emily’s Childhood Memories also features a special Memory game that players can access by clicking on a certain item multiple times. There is one item in every stage. For The Farm stage, you will click on the rooster that appears in Day 6 to access the game.

Day 1

This episode starts with Emily’s memories of first moving into the house as a young child. You’ll play as Edward with little Emily tagging along behind him as he runs their restaurant.

Halfway through Day 1 you will have to cut Lambchop’s fleece while still running the restaurant. Thankfully the restaurant will not be too busy so it should not be difficult in accomplishing this task. It’s best to simply cut it in two attempts and serve customers in between.

Mouse Location
You can find the Mouse in the bottom right above the two skillets.

Delicious - Emily's Holiday Season - Day 1 The Farm

Delicious – Emily’s Holiday Season – Day 1 The Farm

Day 2

You’ll have a new product in the form of eggs. Keep an eye on the chicken and send Emily to collect any eggs it may lay.

Mouse Location
The Mouse can be found in the upper left corner of the screen at the bottom of the tree.

Day 3

Day 3 revolves around Emily’s memory of learning to ride a bike without training wheels. In addition to looking for chicken eggs and serving customers, Edward must push Emily on her bike as she learns how to ride. Whenever Emily is ready, she will mount her bike and wave to you to give her a push. Do this 5 times by the end of the day.

Mouse Location
The Mouse is located by the 3rd fence post in the bottom left corner.

Day 4

Emily’s parents receive a beehive so that they can serve fresh honey at the restaurant.

This stage features a hidden Easter Egg item. These items will be found throughout various stages and are references from other Delicious games. Collect all 10 and earn the Trophy: The Spotter. You can find the 1st item, Libby’s Videotape, on the chair near the front door.

Delicious - Emily's Holiday Season - Day 4 The Farm

Delicious – Emily’s Holiday Season – Day 4 The Farm

Mouse Location
The Mouse is located near the rose bush in the bottom left corner.

Day 5

In this stage, Emily must find 8 daisies around the restaurant so that her grandfather can teach her how to make a flower chain. The 8 locations are: above the plate with the mushrooms, above the cash register, by the middle table between the seats and table, at the bottom of the orange flowers, by the base of the tree, at the base of the pink rose bush, next to the water barrel and the final daisy is pointed out to you at the beginning of the stage.

Mouse Location
The Mouse is located at the top right of the serving tray.

Delicious - Emily's Holiday Season - Day 5 The Farm

Delicious – Emily’s Holiday Season – Day 5 The Farm

Day 6

Emily receives a pet rabbit that now can be used as entertainment for guests. In addition, the restaurant can now serve ostrich eggs from their new ostrich. Similar to the chicken, you must keep an eye on the ostrich and collect it’s eggs as she lays them.

Mouse Location
The Mouse is located above the plate with the mushrooms.

Day 7

Hunter has lost his puppy and Emily volunteers to help him find it. The game gives you step-by-step tips on how to find the dog making this challenge quite easy.

Mouse Location
The Mouse can be found above the beehives.

Day 8

Emily’s grandmother brings her home-made macaroons. This special item will make customers happy and remain happy until the day is over, thus causing them to tip more. Today also introduces another chicken to collect eggs from.

Another Easter Egg item is featured in this episode. The Toy Tea Set is located in front of the sand box and is a reference from a previous Emily game.

Mouse Location
You can find the mouse directly above the sandbox.

Day 9

Emily’s mother and father rush to the hospital as Emily’s younger sister is on her way. Emily, along with her grandmother, tend to the restaurant. During the day, Emily must help hang decorations in addition to serving customers.

Mouse Location
The Mouse is in the top right window.

Day 10

Angela will start crying throughout the day. Emily must stop what she is doing and do a little dance to quiet her down again. There is a bar above Emily’s mother’s head that will show when Angela will start getting agitated. You can assist your guests according to the bar.

Mouse Location
The mouse can be found inside the barrel with water.

Stage 2 – The Garden

To access the Memory Game for The Garden, you will click repeatedly on the watering can that appears from Day 2.

Day 1

Emily’s family is helping out a neighborhood farmer who’s not doing too well. She has to tend to customers and keep an eye on Angela. Unfortunately, she doesn’t do a very good job and Angela draws all over the house. Emily must clean up the mess before the end of the day.

Mouse Location
You can find the mouse between the register and the carrots.

Day 2

There isn’t a major challenge in this episode. However, be sure to keep your inventory of fruits up by harvesting frequently. There are a great deal of fruits and vegetables to harvest in this stage.

Mouse Location
The mouse is on the top of the purple watering can.

Day 3

Emily has to collect the bat decoration that are scattered around the restaurant. There are 10 in total. Their locations are: 1) at the base of the tree near Francois, 2)at the top of the greenhouse, 3) the back right of the green house, 4)next to the back left plant inside the greenhouse, 5)at the base of the watering can, 6)under the left table, 7) at the bottom of the scarecrow, 8) by the bottom right table, 9)above the cash register and the final bat is pointed out to you at the beginning of the episode.

Delicious - Emily's Holiday Season - Day 3 The Garden

Delicious – Emily’s Holiday Season – Day 3 The Garden

There is another Easter Egg item in this stage. Located on the counter next to the baskets of fruit is a Hidden Diary. This is an Easter egg from another GameHouse game.

Mouse Location
The mouse is by the base of the tree in the top right corner.

Day 4

The oven has been fixed so Emily can sell fruit pies now. It is incredibly important to continue to harvest fruit as you are selling more items containing them.

Mouse Location
The mouse can be found next to the pumpkins on the vegetable stand.

Day 5

Angela has let the rabbits out of their pen. You have to find them all before they start eating off the garden. There are 8 rabbits in total. You can find them: 1) in the top left corner of the screen next to the bush, 2) behind the purple watering can, 3) inside the greenhouse in the upper-right corner, 4) to the right of the white shed, in front of the fence 5) above the left chair in the upper two-seat table, 6) to the left of the oven, 7) to the right of the lettuce stand and 8) in the lower-right corner of the screen directly above the score bar.

Delicious - Emily's Holiday Season - Day 5 The Garden

Delicious – Emily’s Holiday Season – Day 5 The Garden

Mouse Location
You can find the mouse to the right of the large sunflower by the greenhouse.

Day 6

Francois has donned his first crazy costume and is starting to perform magic tricks. He’s decided to help out Emily and can now be used as entertainment for guests to keep from getting angry.

Mouse Location

Look for the mouse at the bottom of the screen between the pears and the mason jars.

Day 7

Grandma has decided it’s time to teach Emily her delicious macaroon recipe. During the day Emily must sit with her grandmother to learn the recipe. Sitting and learning the recipe is going to take time. Whenever there are guests deciding what they want to order, sit with Grandma. Even if the guests are kept waiting a little while it’s important to finish the challenge.

Mouse Location
The mouse will be inside the greenhouse in the top right between the pot and the plant.

Day 8

Grandpa arrives and takes Angela to go and play. This stage features one of the Easter Egg items. You can find the Symbol of Stillwater Asylum on the wall above where Angela used to be.

Mouse Location
The mouse is on top of the oven to the left of the steam vent.

Day 9

Angela runs off while Emily is distracted with her friends and Emily has to find her before the end of the day. This challenge is similar to searching for Hunter’s puppy in the previous stage.

Mouse Location
The mouse can be found above the watermelons.

Day 10

Emily shows Angela how to catch fireflies. As a firefly enters the screen use a jar to catch it. They come onto the stage at different times and aren’t hidden so that you have to find them. Just keep your eye out.

Mouse Location
You can find the mouse at the back right of the greenhouse.

Stage 3 – The Campsite

To enter the Memory Game, tap the bottom of the plant next to the DJ station multiple times. This plant is accessible from Day 1 of The Campsite.

Day 1

Emily’s memories of right before prom, takes us to a campsite location behind the family’s barn. In addition to serving food and selling supplies, the area also served as a venue for banquets. Throughout the day, guys will come in looking for baseballs that they lost while playing with Hunter’s dog. A baseball will appear in the stage when the guys ask for it and they’re pretty easy to spot. Find 4 baseballs to complete this challenge.

Mouse Location
The Mouse is located to the left of the bale of hay.

Day 2

The campsite gains a DJ to attract and entertain guests. There isn’t any major challenge in this episode.

Mouse Location
The mouse is located in the left side of the tent.

Day 3

Emily’s mother hires a high school student to help Emily around the campsite. She goes to work the ice cream machine but it seems like it’s on the fritz and creates a big mess all over the restaurant. Clean up the mess before the end of the day while still serving customers.

Mouse Location
You can find the mouse directly above the fire pit.

Day 4

The hire from the previous episode decides to stay away from the machinery and assists Emily with cleaning the tables instead.

This stage features a hidden Easter Egg item. You can find Angela’s sewing machine between the two bars under the window.

Mouse Location
The mouse appears next to the ice cream machine.

Day 5

Emily has lost her diary and she has to find it before the end of the day! This challenge is similar to looking for the puppy and Angela in earlier episodes.

Mouse Location
The mouse appears above the box of toilet paper and lanterns at the bottom of the screen.

Day 6

Angela will now perform ballet to entertain guests on the dance floor.

Mouse Location
You can find the mouse right behind the pink marshmallows on the counter.

Day 7

Spiders have been appearing around the restaurant and Emily must find them before a customer realizes. The spiders come out at various times throughout the game and are large and easy to spot. There are 5 in total

Mouse Location
You can find the mouse between the two high counters for guests.

Day 8

Francois has to do a practice run of Emily’s makeup before prom. She has to go and sit with him throughout the day between guests. This is similar to learning how to make cookies from Grandma. Thankfully, the bar fills faster than it did in the previous challenge.

You can find Robert’s Painting, another Easter Egg item hanging above the DJ booth.

Mouse Location
The mouse is located right above the far left of the register counter.

Day 9

After an accident you have to find the soda cans around the restaurant. There are 8 in total. 1) At the top left of the screen near the tree, 2)To the right of the top of the trellis 3)to the left of the DJ table, 4) under one of the bar stools, 5) next to the pitchfork, 6)next to the left-most spit in the fire pit, 7)to the top-right of the ice cream machine, 8)to the bottom of the screen in between the supply rack and supply box

Delicious - Emily's Holiday Season - Day 9 The Campsite

Delicious – Emily’s Holiday Season – Day 9 The Campsite

Mouse Location
The mouse appears to the top of the trellis.

Day 10

Emily’s mom has broken her leg and today is the day of the banquet. Instead of going to prom, Emily decides to work at the restaurant in place of her mother.

Mouse Location
The mouse is located at the left center of the porch.

Stage 4 – The Restaurant

The Memory Game for this stage can be reached by tapping the colored picture at the top of the screen. This is accessible after Day 2. Uncle Antonio opens a restaurant and Emily will be tending to all of his customers. They have also introduced the idea of selling Grandma’s macaroons that Emily had learned the recipe for in previous stages.

Day 1

Francois leaves to gather the ingredients to make the macaroons leaving Emily alone to run the restaurant.

Mouse Location
The mouse can be found to the bottom right of the staircase.

Day 2

Francois will now be assisting Emily with the cleaning.

You can find an Easter Egg item in this stage. Emily’s legacy painting can be found under the left-most window.

Mouse Location
The mouse is to the left of the screen above coffee and hot chocolate machine.

Day 3

Francois spilled Emily’s plate of failed macaroons all over the restaurant. Find them all before the end of the day. There are 8 in total and they are pretty difficult to spot. 1)outside the restaurant, you can see it through the middle window, 2) underneath the left-most table, 3) to the bottom right of the stand with the juicer, 4)at the top of the staircase on the left, 5) to the bottom left of Antonio on the floor, 6) to the right of the coffee/hot chocolate machine, 7) above the empty plate next to the spaghetti, 8)behind Francois’s feet.

Mouse Location

In this episode, the mouse is below the juicer.

Day 4

The Restaurant receives a pizza oven, which gives Emily different types of pizza to make and serve.

Mouse Location
The mouse can be found to the right of the pasta maker.

Day 5

Emily’s mother leaves her to talk some sense into Angela who seems to want a tattoo of her boyfriend’s name. Speak to her multiple times throughout the day before the green bar gets too low.

Mouse Location
The mouse is outside the restaurant in the top right window.

Day 6

The restaurant gains entertainment in the form of Edward tossing pizza dough in the air.

The Christmas decorations next to the front door are actually an Easter Egg item from a previous Emily game.

Delicious - Emily's Holiday Season - Day 6 The Restaurant

Delicious – Emily’s Holiday Season – Day 6 The Restaurant

Mouse Location
You can find the mouse between the two large pots on the stove.

Day 7

Emily is trying to whip up a batch of macaroons during her shift at the restaurant. This challenge is similar to the one when Emily was learning how to make them. Try and make the macaroons when customers are entering the restaurant and deciding what to order. The bar goes up slowly so use every opportunity.

Mouse Location
The mouse appears right above the pizza dough.

Day 8

Francois lost Emily’s macaroon recipe so they must search around the restaurant to find it. This is an easy challenge like the ones before it such as finding the puppy or looking for Angela.

Mouse Location
The mouse can be found directly above the serving tray.

Day 9

The committee will be coming over half-way through the day to order. Keep their table fed until their satisfied.

Mouse Location
The mouse is located at the bottom right of the main staircase.

Day 10

The last episode for the Restaurant stage comes to a close as the decision of what to do about the closing of the factory is made.

Mouse Location
You can see the mouse at the bottom of the cart near Antonio’s legs.

Stage 5 – The Farm
After realizing her parent’s financial woes, Angela, Emily and Francois decide to band together to save the farm. You can play the Memory game by clicking on the rocking chair repeatedly.

Day 1

Emily decides to tend to her mother’s rose bush while running the restaurant. This is similar to Emily creating the macaroons from the previous stage. The rose bush needs a great deal of attention so try and spend as much time on it as possible.

Mouse Location
The mouse appears to the upper left of the fire pit.

Day 2

Angela volunteers to clean up the tables for Emily.

Mouse Location
You can find the mouse at the top right of the former sandbox. It’s currently a planter.

Day 3

Uncle Antonio has made some pizzas to sell at the restaurant. Sell the four of them off to guests to keep them happy.

Mouse Location
The mouse can be found above the For Sale sign.

Day 4

There is a hidden object in this episode. Peek into the house through the front door and find a TV with The Cooking Show playing on it.

A falling branch destroyed one of the tables. Emily has to fix it during her shift at the restaurant so that she can get more customers. You can want to fix the table as early as possible so that incoming guests have more places to sit and you don’t turn anyone away.

Mouse Location
The mouse can be found to the top of the cash register.

Day 5

Emily’s childhood friends meant well when they donated plants for the yard sale. However, they also tracked in a lot of dirt around the area. There are four patches of dirt that Emily has to clean throughout the day.

Mouse Location
The Mouse can be found between the beverage area and the serving tray.

Day 6

Francois finds Emily’s old bike and joins the restaurant to give the guests entertainment by turning tricks on the bicycle.

Mouse Location
The mouse appears above the pan handle to the right of Antonio.

Delicious - Emily's Holiday Season - Day 6 The Restaurant

Delicious – Emily’s Holiday Season – Day 6 The Restaurant

Day 7

Emily has misspelled all the money that they’ve made so far. This challenge isn’t that difficult and if she doesn’t find it Francois will give her a hint upon where to look.

Mouse Location
You can find the mouse between the rocking chair and the lavender flowers.

Day 8

The factory workers from the previous stage come in to eat and purchase items from Emily. Continue to serve them until they’re satisfied similar to when the Committee came to eat at Antonio’s restaurant.

You can find Francois’s decoration catalog at the base of the tree in this stage. This is the catalog that made Francois decide that he wanted to be a decorator. It is the final Easter Egg item. Congratulations you’ve earned another trophy!

Mouse Location
The mouse is located behind the rock that the soup bowl rests on.

Day 9

The challenge for this day is to find daisies similar to how Emily did as a small child. There are 10 daisies in total. Their locations are: 1)to the right of the barrel, 2) to the left on the tree blending in with the lights, 3)at the base of the large tree, 4)to the bottom right of the house stairs, 5) at the base of the large rock that the soup bowl is resting on, 6)underneath the left most table, 7)on the upper left of the table with the mason jar, 8)next to the cabinet with the scarf, 9)in the upper left corner of the right-most table, 10)it’s pointed out to you at the beginning of the episode.

Delicious - Emily's Holiday Season - Day 9 The Farm

Delicious – Emily’s Holiday Season – Day 9 The Farm

Mouse Location
You can find the mouse below the register in the cabinet.

Day 10

In the final episode of the game, you have to search for the young girl Emily is looking after in a game of hide and seek. She peeks out from different places throughout the game. You have to find her four times to complete the challenge.

Mouse Location
The mouse is located on the right side of the tree trunk.
Congratulations! You’ve completed of Emily’s Childhood Memories Walkthrough! Emily, Angela and Francois raised enough money for their parents to keep the house, however, they still decide to sell. It’s time to move on and make other memories.


I hope this walkthrough of Emily’s Childhood Memories has been helpful to you, whether it’s finding hidden secret items, mice, or making it through every challenge. Do your best!


For more great tips and tricks, visit our blog!


This Emily’s Childhood Memories Walkthrough is meant as a guide and contains no cheat codes, hacks, or serials.

The post Delicious – Emily’s Childhood Memories Walkthrough appeared first on GameHouse.


Delicious – Emily’s Holiday Season Walkthrough

$
0
0

The holidays are a wonderful time to relax, but not for Emily! Delicious – Emily’s Holiday Season has Emily working through the winter while also juggling a complex love life. Which suitor she chooses is ultimately up to you, but there are far more important things to worry about like finding all of the Easter Eggs, Trophies and Mouse locations in the game. This walkthrough offers tips and tricks to help you obtain all achievements, extras and unlocks in every level as wells as a basic gameplay guide, hints and cheats.

Contents

General Tips & Tricks


During preparations for a family holiday party hosted by the Snuggford Hotel, Emily is talked into managing the hotel restaurant to pick up some extra cash. Emily soon becomes involved in a love triangle, and the choices you make determine who she ends up with in the end. In Delicious – Emily’s Holiday Season, your goal is to help Emily keep customers happy while completing winter themed special challenges such as making snowmen and ice-skating. Each level begins and ends with a story line segment in which you meet new characters or catch up with Emily’s old friends and family from other Delicious games.

Settings

There are three difficulty modes: beginner, normal and advanced. The default mode is normal, but you can change the difficulty at any time by accessing the settings button in the main menu. You can also adjust the volume of music and sound effects; however, because the sound effects often give clues to challenges, it is recommended to always keep the sound effects turned on.

Basic Gameplay, Tips, and Tricks

There are three difficulty modes: beginner, normal and advanced. The default mode is normal, but you can change the difficulty at any time by accessing the settings button in the main menu. You can also adjust the volume of music and sound effects; however, because the sound effects often give clues to challenges, it is recommended to always keep the sound effects turned on.


Every level consists of a day at Emily’s restaurant. There are 50 levels split across five different restaurants. Throughout Emily’s shifts, she must take customers’ orders, prepare and serve food, run the register and clean up after everyone. Customers who receive prompt service are more likely to leave larger tips, but patrons who feel neglected may walk out without even ordering. You can tell a customer’s satisfaction by whether or not they have hearts next to their heads; no hearts means someone is on the verge of walking out.

Each level has a timer, and Emily must reach a minimum score before the timer runs out to progress to the next day. Every level also has a target expert score for players who desire a greater challenge.

Bonus Points

Aside from providing prompt service, you can collect extra points by doing the following:

-Take payment from several customers at one time
-Serve a complete order on a single tray
-Serve multiple orders on one tray
-Complete the level’s special task
-Catch each level’s mouse

Preparing Food

Preparing food starts out simple and becomes more involved as the game progresses. Some items require multiple ingredients, which must be combined in a specific order and then restocked. Other items must cook for a while before they can be served. New menu options become available at the beginning of some levels. Your goal to is to best manage your time and resources to optimize your service and therefore your score, so change up your menu often to experiment with different strategies.

Cleaning

When customers leave, click their dishes to clear the table. If you don’t keep your tables clean, new customers might walk out.

Entertainment

You can increase customer satisfaction by sending out an entertainer while you work on other tasks. Happy customers leave larger tips, so employ your entertainer as often as you can.

Shopping

Emily can spend her earnings on Francois’s Decorating Catalog, which carries items that improve customer satisfaction. Don’t horde your money; reinvest your profits to earn even bigger tips! Purchase every item available in the game to win the “Decorator” trophy.

Building Your Menu

Each level begins with setting your menu for the day. Your choices are initially very limited, but your options quickly increase, so you must deploy an effective strategy to reach all of your goals. Some items have benefits over others: For example, some take less time to prepare, which allows for quicker service and bigger tips. Switch up your menu if you find yourself having difficulty beating a level.

Customer Types

Every restaurant has a different clientele. You can view a level’s customer types in the menu. Identify each customer’s type to gauge their patience levels, tipping tendencies and dietary preferences. You can use this information to help you during busy times. For instance, you should always prioritize large tippers who have low patience before serving customers who have high patience.

The Serving Tray

When serving orders, Emily can only carry a limited number of items on her tray. She gets access to larger trays as you progress. Click on items and hold down the mouse to drag them onto the tray. If you make a mistake, click on the item again to put it down.

General Gameplay Tips

– For popular items that need to be cooked on the stove or grilled, start cooking a few right away to get a head start on serving big groups.
– The number beside an item indicates the amount you currently have in stock. Every item has a maximum limit; try to never allow any item’s stock to fall below half the maximum limit so you don’t wind up in an emergency.
– In levels that require fishing, berry picking, cooking turkey or baking cookies, start on these tasks first before things get busy.
– For items that require stirring, taking your eye off the pot too long can result in a mess that you must clean up. This can set you back, so keep your eyes and ears out for pots that need to be stirred.
– Items that are cooked on the grill or stove must be taken up as soon as they are done. Click on them before they burn to a crisp and you’re forced to start over. Just like in real life, never walk too far away from a hot stove!
– During the levels that take place in the hotel, you can actually check out four customers at once thanks to hotel keys and mail. If you have two customers waiting for check out, wait a few seconds to see if other patrons come asking for their key or mail. This method can quickly and easily boost your score.

Mouse Locations

Like in previous Delicious games, every level in Emily’s Holiday Season contains a hidden Mouse. You have up to four opportunities to catch the Mouse by clicking on him when he appears. He will squeak right before he pops his head out of his hiding spot, so listen carefully. Catching the Mouse gives you 100 extra points, and catching all 50 Mice earns you the coveted “Pest Control” Trophy.

All Mice Locations

Below are maps of each restaurant indicating where every Mouse can be found. The number beside each Mouse is the day it will appear.

Snuggford Hotel
Day 1: lower left part of the screen beside the tray
Day 2: left corner of the counter
Day 3: bottom right beside the cranberry sauce
Day 4: in the small window above the turkey cooking station
Day 5: outside behind the left door panel
Day 6: Beside the register on the right part of the counter
Day 7: lower left area above the tray
Day 8: upper left area by the stairs
Day 9: lower right area beside the turkey hot plate
Day 10: upper left area to the right of the staircase

Delicious - Emily's Holiday Season - Mouse Locations Snuggford Hotel

Delicious – Emily’s Holiday Season – Mouse Locations Snuggford Hotel

Winter Fair
Day 1: center right area beside the greeting cards
Day 2: back left area by the huge tree
Day 3: middle left area atop the chestnut cart
Day 4: upper right area behind the snowman
Day 5: upper left corner by the pretzels
Day 6: right of Santa’s chair hiding behind the presents
Day 7: lower right area beside the cash register
Day 8: right side of the big tree behind Santa
Day 9: at the base of the lantern right in front of the chestnut cart
Day 10: atop the lantern in the upper right area near the top

Delicious - Emily's Holiday Season - Mouse Locations Snuggford Winter Fair

Delicious – Emily’s Holiday Season – Mouse Locations Snuggford Winter Fair

Snuggford Hotel (Renovated)
Day 1: lower left area by the plates
Day 2: atop the lamp on the right side of the main counter
Day 3: outside behind the left door panel
Day 4: center right area behind the ham plate
Day 5: between the main counter and desserts
Day 6: lower left area beneath the grill
Day 7: in the window right of Santa
Day 8: behind the desserts
Day 9: behind the table near the elevator
Day 10: atop the lamp on the left side of the main counter

Delicious - Emily's Holiday Season - Mouse Locations Snuggford Hotel Renovated

Delicious – Emily’s Holiday Season – Mouse Locations Snuggford Hotel Renovated

Ski Slope
Day 1: left of the register
Day 2: lower center area beneath the deck
Day 3: upper right corner
Day 4: lower right corner of the deck
Day 5: behind the tray in the lower left area
Day 6: lower left corner by the cutting board
Day 7: upper right corner by the fruit punch
Day 8: lower right corner
Day 9: upper left area behind the trees
Day 10: upper left area in between the brazier and the deck

Delicious - Emily's Holiday Season - Mouse Locations Ski Slope

Delicious – Emily’s Holiday Season – Mouse Locations Ski Slope

Mo’s Farm
Day 1: behind the table in the center
Day 2: right area near the pipe
Day 3: in the water by the pier
Day 4: center right area behind the table
Day 5: in the tree lights to the right of the gate entrance
Day 6: under the tree lights left of the gate entrance
Day 7: left part of the counter near the pier
Day 8: right area by the stove and Christmas cookies
Day 9: behind the scarecrow
Day 10: behind the register

Delicious - Emily's Holiday Season - Mouse Locations Mo's Farm

Delicious – Emily’s Holiday Season – Mouse Locations Mo’s Farm

Easter Egg Locations

Ten Easter Eggs are hidden throughout the game. If an object looks particularly out of place, click on it to reveal a secret. Most Easter Eggs are based off other GameHouse titles. Collect all 10 to win the “Perceptive Missile” Trophy. Here is a guide for where to find each Easter Egg.


Snuggford Hotel
(Day 2) Camera – Sitting in the window sill just right of the door
(Day 9) Coffee Cup – In the upper-right part of the screen. If you bought decorations, you may not see it, but if you drag your mouse over there during this level, the Easter Egg will reveal itself.

Winter Fair
(Day 1) Star Christmas Cookie – Front and center screen, at the base of the lantern next to the candle station
(Day 9) Ladybug – On top of the Chestnut Cart’s roof

Snuggford’s Renovated Hotel
(Day 6) Firefly – In the elevator on the right side of the doors.
(Day 10) Penguin Egg – Underneath the register

Ski Slope
(Day 3) Tea Platters – Near the lower left corner by the cutting board.
(Day 8) Crystal – Beneath the deck, front and center.

Mo’s Farm
(Day 4) Latte – In the barn beside the cow.
(Day 7) Block – To the right of the gate’s entrance.

Trophies and Fireworks

You can win 17 Trophies in total by completing certain objectives in the game. Besides a warm and fuzzy feeling inside, Trophies give you fireworks to play with during the game’s end credits. Here is the full list of Trophies and what you must do to collect them.

“Pest Control” – Find the Mouse in every level
“A Perceptive Missile” – Locate every Easter Eggs
“The Griller” – Grill 500 Items
“The Star” – Beat the expert score in every level
“The Taste Explosion” – Prepare one of each product in each restaurant
“The Master Decorator” – Purchase every available decoration
“The Queen of Clean” – Clean 500 customers’ tables
“The Great Listener” – Listen to each character talk during day 4 of Snuggford Hotel
“The Server” – Complete 2500 orders
“The Hogger” – Have items left over when everything is fully stocked.
“Quadruple Popper” – Score a quadruple payment combo.
“The Heart Blow” – Choose who Emily falls in love with at the end of the game. It doesn’t matter who she picks.
“Cash Combo Pop” – Achieve three payment combos back-to-back.
“The Special Delivery” – Receive 100 deliveries.
“Female Intuition” – Have a customer’s order fully prepared and on your tray before they actually order. The order must contain at least two items.
“The Planner” – Set 10 actions in your que.
“Santa’s Secret” – Open all of the the gifts around Santa at the Winter Fair

Delicious – Emily’s Holiday Season Walkthrough

Snuggford Hotel

Day 1

Special Task – Remove all of the spiderwebs throughout the hotel restaurant by holding down the left mouse button and dragging the cursor back and forth over them. There are six webs total circled in the pictures below.

Delicious - Emily's Holiday Season - Day 1 Snuggford Hotel

Delicious – Emily’s Holiday Season – Day 1 Snuggford Hotel

Hint – Take advantage of guests with hotel keys to achieve triple combos when checking out customers.

Day 2

Special Task – Click on the seven spiders to get rid of them.

Easter Egg #1 – Don’t forget to pick up the Camera.

Day 3

Special Task – Make 16 place cards and arrange them in the correct order at the long table.

Mail – When you see the mailman arrive, click him to receive the delivery and have it transported beneath your desk. When someone comes asking for their mail, simply click on the mail, and then click on the customer. Prompt service earns you a tip as usual.

Day 4

Special task: Many guests will come to the restaurant today, and you must speak one-on-one with each and every visitor. While this is challenging, doing so gives you bonus points and the “Great Listener” Trophy.

Newspapers – Halfway through the day, newspapers will be delivered in bundles by the front door. Click on them to set up a newspaper rack, which can help keep customers distracted and happy. There are two newspaper types: red and blue. Blue newspapers only entertain patrons for a short period of time while red ones keep them engaged throughout their entire visit.

Hint – Give newspapers to the children and the impatient woman to keep them occupied while you focus on other customers.

Delicious - Emily's Holiday Season - Day 4Snuggford Hotel

Delicious – Emily’s Holiday Season – Day 4Snuggford Hotel

Day 5

Special Task – Clear the very large table while continuing to serve other customers. It takes Emily 100 seconds to clear the whole table.

Day 6

Special Task – Give the correct keys to the customers who ask for them.

Day 7

Special Task – Chase Richard around the entire restaurant six times.

Day 8

Special Task – Simply answer all of the interview questions. There are no wrong answers.

Day 9

Special Task – When the dance competition begins, three different colored panels will show up on the floor. Follow the patterns of panels lighting up by clicking on them to assist the dancers.

Delicious - Emily's Holiday Season - Day 9 Snuggford Hotel

Delicious – Emily’s Holiday Season – Day 9 Snuggford Hotel

Day 10

Special Task – Emily must speak with Paul and Richard several times during her day. Paul and Richard each have a meter below them that will deplete if you ignore them, so take turns talking to each one to keep them from running out. Richard remains in the restaurant throughout the level, yet Paul disappears upstairs every now and then.

Snuggford Winter Fair

Day 1

Special Task – Finish building the snowman before time runs out. You must fill up the meter three times. Begin on this task early since it will take a long time to complete.

Easter Egg – Look for the Star Shaped Christmas Cookie near the base of the lantern.

Trophy – Click on all of the gifts surrounding Santa to unwrap them. Be sure to do this in every level of Winter Fair to uncover the Santa’s Secret Trophy.

Delicious - Emily's Holiday Season - Day 1 Winter Fair

Delicious – Emily’s Holiday Season – Day 1 Winter Fair

Day 2

Special Task – Continue working until the storm ceases.

Day 3

Special Task – Get Francois to put on the elf costume by chasing him around the fair six times and catching him.

Day 4

Special Task – Paul will get pelted in the face by snowballs throughout the shift. Wipe him off five times before day ends.

Day 5

Special Task – Interact with the dog six times during your shift.

Santa – When you see a child sitting on Santa’s lap, click on Francois to take a picture to earn extra points.

Day 6

Special Task – None

Day 7

Special Task – Receive eight packages as soon as they arrive.

Day 8

Special Task – Locate all of the 12 Christmas cards scattered around the restaurant.

Delicious - Emily's Holiday Season - Day 8 Winter Fair

Delicious – Emily’s Holiday Season – Day 8 Winter Fair

Day 9

Special Task – Don’t let any of the four candles go out during the shift. Listen for the tone indicating that the candle needs relighting.

Day 10

Special Task – When you hear someone singing, click on them to get everyone else to applaud. Do this for everyone who sings.

Snuggford Hotel (Renovated)

Day 1

Elevator Buttons – You are now responsible for controlling the elevator for customers. Can’t these people do anything on their own? If you take too long, potential customers could walk away and never come back.

Special Task – Answer all of the questions that get asked of Emily. There are no wrong answers.

Day 2

Hint – Today is a beef-lover’s bonanza. Customers only order beef in this level.

Firewood – Keep customers warm and happy by supplying adequate Firewood. When you see flames flickering and hear the tone, it’s time to add more wood to the fire.

Special Task – Find the four missing articles of clothing, which are circled below.

Day 3

Special Task – Set Richard free by repairing the elevator by the end of the shift.

Day 4

Special Task – Receive seven packages as they are delivered.

Day 5

Special Task – Take the phone back from Angela by following her around the restaurant and catching her nine times.

Day 6

Special Task – Clean two very dirty rugs. Hold the left mouse button down and swipe the cursor across the rugs to scrub them. Each rug takes 100 swipes to remove all of the dirt.

Easter Egg – Collect the Firefly Easter Egg from the wall near the upper-right side of the elevator door.

Delicious - Emily's Holiday Season - Day 6 Snuggford Hotel Renovated

Delicious – Emily’s Holiday Season – Day 6 Snuggford Hotel Renovated

Day 7

Special Task – Scrub all nine footprints from the floor.

Day 8

Special Task – Walk 1000 steps during the shift to break in Mom’s shoes.

Day 9

Special Task – Answer Ludwig’s questions. There are no wrong answers.

Day 10

Special Task – None

Easter Egg – Click on the Easter Egg, which is actually a Baby Penguin Egg hidden below the register.

Delicious - Emily's Holiday Season - Day 10 Snuggford Hotel Renovated

Delicious – Emily’s Holiday Season – Day 10 Snuggford Hotel Renovated

Ski Slope

Day 1

Fondue Pots – Filling the fondue pots at the end of every table is a great way to collect points. You earn 50 points for filling each pot plus an extra 10 points for pots filled before a customer sits down.

Entertainment – Starting in this level, you have Skeeter the Penguin to help you entertain guests. Skeeter is a former circus performer, so he knows how to sing and juggle. Send Skeeter over to entertain customers with low patience or keep a group occupied while you focus on the kitchen.

Special Task – When you see Paul looking upset, click on him to cheer him back up. Do this eight times.

Delicious - Emily's Holiday Season - Day 1 Ski Slope

Delicious – Emily’s Holiday Season – Day 1 Ski Slope

Day 2

Special Task – Cover up the six dirty spots with snow.

Day 3

Special Task – Find the six articles of ski equipment hidden throughout the restaurant, which are circled below.

Delicious - Emily's Holiday Season - Day 3 Ski Slope

Delicious – Emily’s Holiday Season – Day 3 Ski Slope

Easter Egg – Don’t miss the Tea Platters Easter Egg sitting in the lower right corner by the cutting board.

Day 4

Special Task – Make sure to speak with all visitors including Mom, Dad, Tashi, Paul, Angela and Francois during the day.

Day 5

Special Task – Serve all of the food to the men having a meeting within eight minutes. A meter will display your progress.

Day 6

Special Task – Receive six packages for Paul during your shift.

Day 7

Special Task – Click on each flagpole and wait for Emily to raise a flag. Do this for all five flagpoles.

Day 8

Special Task – Answer Paul’s questions. You will receive points regardless what your answers are.

Easter Egg – Click on the Crystal Easter Egg hiding below the deck near the center of the screen.
Day 9

Special Task – Find all nine of the roses scattered about the restaurant. Their locations are circled below.

Delicious - Emily's Holiday Season - Day 9 Ski Slope

Delicious – Emily’s Holiday Season – Day 9 Ski Slope

Mo’s Farm

Day 1

First Aid Kit – Skaters who fall and hurt themselves will come asking for First Aid Kits. Keep them stocked under the counter to keep everyone safe and happy.

Special Task – Hold down the left mouse button and swipe back and forth over the ice to clean off all of the dirt. There are six dirty spots, and each one requires 50 strokes to clean. Francois is blocking one dirty spot for most of the level. Save that one for last when you send Francois to clean tables.

Day 2

Special Task – Help Francois escape from the ice by repeatedly clicking the left mouse button over the ice blocks. There are six sections of ice that must be broken in total.

Day 3

Special Tasks – Talk to every friend and family member who comes in to see Emily today.

Day 4

Special Tasks – Don’t let any of braziers burn out during service. When you hear the tone and see the braziers flashing, relight them as quickly as possible.

Easter Egg – The Latte Easter Egg is right beside the cow in the barn.

Delicious - Emily's Holiday Season - Day 4 Mo’sFarm

Delicious – Emily’s Holiday Season – Day 4 Mo’sFarm

Day 5

Special Tasks – Warm up in the barn nine times during the shift. During this level, you must travel between inside and outside to keep warm while serving customers. Note the meter on the bottom left of the screen that depletes when Emily gets cold. If the meter runs out, Emily will be frozen in place for a brief while.

Day 6

Special Tasks – Successfully learn and perform the skating routine. At certain times during the day, time will stop and Emily will appear in the skating rink with Francois where there are three circles containing different skating poses. Memorize the order in which the circles light up, and then click on the circles in that order to perform the routine.

Delicious - Emily's Holiday Season - Day 6 Mo’s Farm

Delicious – Emily’s Holiday Season – Day 6 Mo’s Farm

Day 7

Special Tasks – Cover up the four patches of ice with snow.

Easter Egg – Click on the snow-covered block underneath the Christmas tree lights to the right of the gate.


Day 8

Special Tasks – Find all of the firewood. There are 12 pieces, which are circled below.

Delicious - Emily's Holiday Season - Day 8 Mo’s Farm

Delicious – Emily’s Holiday Season – Day 8 Mo’s Farm

Day 9

Special Tasks – Click on the tree to decorate it between serving your customers. Decorate the entire tree before time runs out.

Day 10

Special Tasks – Talk to all of Emily’s friends and family who come to visit during this level including Uncle Antonio, Mayor Maggie, Francois and Elvis.

Ending

You have one last choice to make. Which of the three men who have professed their love for Emily should she choose? Fortunately, this ending is totally up to you, so pick whoever you like best. You will get a fireworks show for each Trophy you collected before the credits roll. Stick around until the end to witness a funny scene.

Delicious - Emily's Holiday Season - The Ending

Delicious – Emily’s Holiday Season – The Ending

Now you can go back to collect any items you missed or complete unfinished challenges.
If you’re stuck in a level, watch this Youtube walkthrough for Delicious – Emily’s Holiday Season for more in-depth help.

Congratulations on completing Delicious – Emily’s Holiday Season!


Next, try some other titles by Gamehouse like Delicious – Emily’s Hopes and Fears and Red Riding Hood – Star-Crossed Lovers.


The Delicious – Emily’s Holiday Season Walkthrough is meant as a guide and does not contain cheats, hacks or serials.

The post Delicious – Emily’s Holiday Season Walkthrough appeared first on GameHouse.

The Agency of Anomalies – The Last Performance Walkthrough

$
0
0

Your friends from the theater cry out, “Help Us!” and the game is on. Clear hidden object scenes, solve puzzles using your detective skills or your Inventory items. For backup, open your Notebook or press the Help button. The objective of The Agency of Anomalies – The Last Performance hidden object game is to save the actors of the theater and return them to their human form. Visually stunning to play, as you clear the hidden object scenes and solve hidden object games the player helps rescue the actors and in turn receives special powers.

The Agency of Anomalies – The Last Performance Walkthrough Gameplay Guide is designed to help you reach your objectives of clearing scenes and rescuing the actors. The game is difficult. There is no map tracking the players’ progress. Trial and error will guide your gameplay until you get into the swing of the game. Organized in sections following the chapters of the game use The Agency of Anomalies – The Last Performance Walkthrough Gameplay Guide to help you solve the paranormal mystery, the third installment of the series from developer Orneon.

Contents

General Tips & Tricks

The Main Menu of the game allows the player to setup her gameplay experience by customizing certain settings. From the Main Menu the player can Start or Exit from gameplay; add or delete players by clicking on Not You? Click Here button; A Help and Strategy Guide are available to assist the player with the game’s objectives. Developed by Orneon, the Credits are also accessible in the Main Menu screen. Lastly, the Options button provides access to fully customizable gameplay settings including music and sound volume, full screen and aspect ratio, and a custom cursor. The modes of play are discussed in the next section.

General Gameplay Rules

To save the actors of the theater and return them to their human form follow the next three General Gameplay Rules. Learn to identify the symbols associated with the General Gameplay Rules to help you clear hidden object scenes and solve hidden object puzzles in The Agency of Anomalies – The Last Performance faster. These General Gameplay Rules apply to all levels of the gameplay.

1. Use the Cursor. Using the computer’s mouse or pointing device explore the scene by moving the Cursor around the scene. The Cursor changes shape to signal to the player what action she should take to clear the area being accessed in the scene. When a symbol is revealed, follow the recommended action, to advance gameplay and clear the scene.

The symbols form the contents of the toolbar and are located at the bottom of the screen. Each symbol has a specific function. The toolbar can be accessed during any level of gameplay. The symbols and their function are as follows:

  • Magnifying Glass whenever the Cursor morphs into a Magnifying Glass, the player is prompted to take a closer look at an object or item.
  • Directional Arrow Cursor whenever the Cursor becomes an arrow pointing left or right, the player should move left or right in the scene to access an area of interest or in need of further exploration.
  • 2 Hands appear when the player should touch or pickup an object. HINT: A good practice when entering a scene is to scroll the Cursor over the entire scene. When the 2 Hands symbol appears, the player should quickly pick-up the item. More often than not a clue is revealed or item to find is removed from the search list.
  • Thought Bubble with Dots when this symbol appears it means the player should talk with the character and obtain information or instructions on how to proceed from the character.
  • The Notebook is a place to collect information, documents, and clues. Reference it throughout gameplay.
  1. Activate the Astral Projection Power. The Astral Projection Power is activated when bright shiny rainbow lights start flashing from the device. Click on the device and play a mini game. At the end of the mini game the player receives a paranormal power. The goal of the mini game is to fill a black hole with stars using gravity vortexes. Easy. There are a total of four paranormal powers to acquire and use throughout gameplay. They are the Super Flexibility Power, the Underwater Power, the Electricity Power, and the Bio Transformation Power. The listed powers help the player perform the following actions:o Super Flexibility Power. The Super Flexibility Power outlines a picture. Simply move the mouse until the outline of a picture is formed.o Underwater Power. The Underwater Power fill up a spray bottle and then use to walk under water.o Electricity Power. Using (+) and (-) poles, position batteries, to generate an electric charge.o Bio Transformation Power. Assemble a grouping of related objects.3. Ask for Help when needed. There are 3 modes of gameplay: Casual, Advance, and Hardcore. Even though, the player is able to select easy play mode, the game has challenging areas. When you get stuck during gameplay the Anomalous Activity Detector can be launched to help you find the correct solution. TIPS AND TRICKS: Keep in mind that objects in yellow are not easy to find. The player may have to move the items in the scene, around the scene around, or beside the scene to access the area highlighted in yellow.

The Agency of Anomalies – The Last Performance Walkthrough

Chapter One: The Theater

The first scene in The Agency of Anomalies – The Last Performance game, takes place as in while the player is entering the theater. In this chapter, the player must accomplish 5 tasks. The chapter checklist is as follows:

1. Collect the following items: Bolt Cutter, Hammer, Cord, Scissors, 25 cent piece, Lantern, Handle, Case Key, 10 cent piece, Bell, Glue, Screwdriver, Duster, Broom Handle, Broom, and 5 cent piece.

2. Add the following items to Inventory: Tiles, Battery, and Power Cord.

3. Play 3 hidden object puzzles.

o The first hidden object puzzle involves Normal Play. This means that a list is provided at the bottom of the screen and the player clears the scene by finding the items contained in the list and selecting them for removal. Simply click on the item and it gets immediately crossed off the list. When all the items in the hidden object puzzle have been cleared, the hidden object puzzle closes and the player returns to the game. At the end of the puzzle gain Tiles.

o The second hidden object puzzle involves Reverse Play. In this type of puzzle the items shown in the list are returned to the scene. Select the item and move the Cursor until the 2 Hands appear. Place the items where the 2 Hands indicate to clear the hidden object puzzle. At the end of the puzzle receive a Battery.

o The last hidden object puzzle of the first chapter is called Outline Play. The items to find are highlighted only. As the items are found the outline is filled with a picture. The puzzle is solved when all items have been identified and placed in the correct outline frame. At the end of the puzzle, receive the Power Cord.

4. Play 3 mini games.

o Placing the Tiles on the lock activates the first mini game. Here, the objective is to rotate tiles to form a picture. TIPS AND TRICKS: Once the tile is in the correct position it will light up and lock. Also, the corner tiles do not affect the direction of the other tiles being moved around them.

The Agency of Anomalies – The Last Performance - Mini Game 1

The Agency of Anomalies – The Last Performance – Mini Game 1

o The second mini game is activated when the Screwdriver is used to place screws on the floor. Repair the battery until charge is restored. Press the red button to exit.

The Agency of Anomalies – The Last Performance - Mini Game 2

The Agency of Anomalies – The Last Performance – Mini Game 2

o The third mini game is activated when the Duster is used on the panel. Rotate the tubes until all of the light bulbs turn on and light up.

The Agency of Anomalies – The Last Performance - Tube

The Agency of Anomalies – The Last Performance – Tube

5. Use the Astral Protection Power once. Use the Astral Protection Power on the mirror. Before that, the Scissors should be used on the flag to make a Rag. Using the Rag to clean the mirror activates the Astral Protection Power. Play the mini game successfully by rearranging gravity vortexes to fill in the black hole.

The Agency of Anomalies – The Last Performance - Black Hole

The Agency of Anomalies – The Last Performance – Black Hole

Chapter Two: The Stage

The player must accomplish 6 tasks in the next scene of the game – The Stage. The chapter task list is as follows:

1. Collect the following items: Tulip Shaped Key, Diary Page, Recipe Book, Pliers, Wrench, Mask, Hypnotic Mask, Strap, Chain Hook, Locker Key, Heavy Gloves, 2 Mirror Shards, Handle, Hacksaw, and Net.

2. Add the following items to Inventory: Pruner and Glass Cutter.

3. Play 3 hidden object puzzles.

o The first and second hidden object puzzles involve Normal Play. Once solved, receive a Pruner and Crowbar.

o The third object puzzle of the first chapter is called Outline Play. At the end of the puzzle, receive the Glass Cutter.

4. Play 5 mini games.

o Zooming into the Diary Page launches the first mini game. Rearrange picture until an image forms.

The Agency of Anomalies – The Last Performance - Image

The Agency of Anomalies – The Last Performance – Image

o In the second mini game, move the cursor to change the direction of the outline to form a complete picture of the outlined object.

The Agency of Anomalies – The Last Performance - Outlines

The Agency of Anomalies – The Last Performance – Outlines

o The third and fifth mini games ask the player to rearrange the gravity vortexes to fill the black hole.

o The fourth mini game is activated when the Wires are used on the panel. Place the sparklers next to the button with the number on it.

The Agency of Anomalies – The Last Performance - Sparkles

The Agency of Anomalies – The Last Performance – Sparkles

5. Use the Astral Protection Power twice. Use the Astral Protection Power on the mirror when you press the handle connected to the chain and chain hook. The second time you will need to use the Astral Protection Power on the mirror is when you Use Glue to repair the Mirror Shards.

6. Use the Super Flexibility Power once. You will receive the Super Flexibility Power when you use the Hypnotic Mask on Hubert. This Super Flexibility Power should be used to reach the rope.

Chapter Three: The Balcony

The mystery continues to unfold in the next chapter of the game. In The Balcony scene, the player must accomplish the following 6 tasks to clear the level.

1. Collect the following items: Star, Planks, Colored Tiles, Telescope Leg, Plank, Solvent, Buttons, Handkerchief, Lever, Hammer Handle, Carved Legs, and Sledgehammer.

2. Add the following items to Inventory: Sponge Filter, Plank, Hose Part, Jar, and Rope.

3. Play 3 hidden object puzzles.

o The first hidden object puzzle involves Outline Play. When cleared, the Buttons go into your Inventory.

o Reverse Play is modus operandi for the second hidden object puzzle of the game. The Winch Handle is added to Inventory when the puzzle is solved.

o Receive a Rope in your Inventory when the third hidden object puzzle is played.

4. Play 5 mini games.

o Placing the Colored Tiles on the statute launches the first mini game of the chapter. To solve the mini game, match 3 like tiles to eliminate them from play.

o Rotate outline until the picture is formed in the second mini game activated after using the Super Flexibility Power. When finished solving the mini game, the Plank goes into your Inventory.

The Agency of Anomalies – The Last Performance - Bird

The Agency of Anomalies – The Last Performance – Bird

o In the third and fourth mini games, the player is asked to fill a sign up with bubbles found inside a spray can. Fill up the sign. At the end of the exercise, receive 2 Underwater Powers.

o In the fifth and final mini game of The Balcony chapter, the player must solve mathematical problems. HINT: The numbers may only be used one time in the solution.

The Agency of Anomalies – The Last Performance - Numbers

The Agency of Anomalies – The Last Performance – Numbers

5. Use the Super Flexibility Power once. Use the Super Flexibility Power on the bird’s nest.

6. Gain Underwater Power and use Underwater Power twice. When you use the Jar With Fish on the tank you will receive the Underwater Power. Use the Underwater Powers received during the chapter on the pond and tank.

Chapter Four: Offstage Area

The area above the stage, or Offstage Area, is where all the action unfolds in the fourth chapter of The Agency of Anomalies – The Last Performance game. The list to accomplish is as follows:

1. Collect the following items: Telescope Handle, Key, Hex Wrench, Bulb, Gear, Wooden Circle, Generator Wire, Oil, Gas, Metal Strip, Hat, Cleaner, Valve, Solid Fuel, Star, and Lockpick.

2. Add the following items to Inventory: Big Gear, Radio Key, Metal Cutter, Pin, and Small Handle.

3. Play 5 hidden object puzzles.

o The first and third hidden object puzzles involves Outline Play. At the end of the round one Big Gear is added to Inventory; after round three a Metal Cutter is added.

o The second hidden object puzzle involves Normal Play. Receive a Radio Key in Inventory.

o The fourth and last hidden object puzzle is played in Reverse Play mode. Add a Pin and Small Handle to Inventory.

4. Play 2 mini games.

o There are 2 mini games to play in this chapter. Solve the puzzles and move back into the main action of the scene.

The Agency of Anomalies – The Last Performance - Door

The Agency of Anomalies – The Last Performance – Door

5. Use the Super Flexibility Power once on the hook.

Chapter Five: The Dressing Room

The fifth chapter unfolds in the dressing room. Here the player must check off the following to do items to move onto the sixth chapter.

1. Collect the following items: Star, Whetstone, Telescope Key, Star Map, Lake Stone, Metal Belt, Axe, Wood Chips, Bucket, Cauldron Handle, Trowel, Fishing Line, Moss, the Big Net, Binoculars, Seaweed, and Helmet.

2. Add the following items to Inventory: Fuse, Skirt, Tongs, and Strange Old Key.

3. Play 5 hidden object puzzles. To receive all of the items contained in the Inventory list, play all 5 hidden object puzzles. The fifth puzzle does not contain an item to add to Inventory. Puzzle 1 and 5 involve Normal Play. Puzzle 2 and 4 involve Outline Play. Puzzle 3 is Reverse Play.

4. Play 5 mini games.
By now the player should notice a patter. The mini games are activated when the player engages in a certain action.

o The first and second mini games are activated when the player tries to use electric power. Connect the positive and negative charges, by rotating the images appropriately until power is generated.

The Agency of Anomalies – The Last Performance - Electric Power

The Agency of Anomalies – The Last Performance – Electric Power

o In the third mini game the goal is to move the big stars out of the way in order to permit the little stars to light up.

o Obtain another Underwater Power in the fourth mini game of the chapter. Fill up the sign with bubbles from the spray can.

o The final mini game has the player rearranging the gravity vortexes in order to receive an Astral Protection Power.

5. Use the Astral Protection Power once.
Use the Binoculars on the mirror to launch the Astral Protection Power.

6. Use Underwater Power once on the pond.
Soon after using the Underwater Power you will be tasked with collecting another one for later use. Remember to fill up the sign with bubbles from the spray can.

Chapter Six: The Picnic

Play action leaves the theater and its surrounds and takes the player outside for a picnic. To clear the chapter, knock out the following tasks:

1. Collect the following items: Leaves, Key Parts, Dolls, Corkscrew, Lab Key, Nail Puller, Joystick, Acorn, Lock Parts, and Matches.

2. Add the following items to Inventory: Dress and Green Lamps.

3. Play 2 hidden object puzzles.
There are two hidden object puzzles in this chapter. They involve Normal Play and only the first puzzle awards an Inventory item, the Green Lamps.

4. Play 5 mini games.

o The first mini game is launched when the Super Flexibility Power is used on the branch. Move the cursor until the outline of the object is visible.

The Agency of Anomalies – The Last Performance - Outlines Puzzle

The Agency of Anomalies – The Last Performance – Outlines Puzzle

o The second mini game is launched when the Hat, Skirt, Helmet, and Dress are placed inside the desk. In this game 6 dolls have to be dressed in clothing used during their era.

The Agency of Anomalies – The Last Performance - Dolls

The Agency of Anomalies – The Last Performance – Dolls

o When the Bio Transformation Power is used on the mold and acorn the third and fourth mini games are activated. The player must select like items and place them together to form a connected group. At the end of each of the games, the player receives another Bio Transformation Power.

o The last mini game is included for challenging fun. Make the lights turn green on the board by moving the balls into the correct slots. You have 13 tries before having to start the puzzle over.

6. Gain Bio Transformation Power and use the Bio Transformation Power twice.
Mixing Leaves, Seaweed, and Moss in a cauldron creates the Bio Transformation Power. Use the Bio Transformation Power on the mold and acorn.

The Agency of Anomalies – The Last Performance - Elements

The Agency of Anomalies – The Last Performance – Elements

Chapter Seven: The Backyard

The final chapter of the game The Agency of Anomalies – The Last Performance concludes in The Backyard scene. Here the player must complete 6 actions to return the actors to their human form and end the game. Bonus super tips are included to round out gameplay fun. The actions are as follows:

1. Collect the following items: Cheese, Gold, Diamond, Circle Part, Brick, and Bulb.

2. Add the following items to Inventory: Hatchet, Office Key, Wheel, Sleeping Gas, and Acid.

3. Play 1 hidden object puzzle to receive the Wheel in inventory using Normal Play rules.

4. Play 2 mini games. The first involves collecting like items to form a group and the last, which also happens to be the last action of the game is to recreate a picture by rearranging tiles.

The Agency of Anomalies – The Last Performance - Patricia

The Agency of Anomalies – The Last Performance – Patricia

5. Take the Astral Protection Power available once the Acorn, Gold, and Diamond, are added to the jewelry box.

6. Use the Bio Transformation Power on the liquid to break through the device you used Solid Fuel and Matches on prior to playing the first mini game.

7. Super Tips and Tricks. As you approach the end of the game the Circle Part of the dream catcher will generate a code that you need to use later on. The code is 59473317. Similarly, when prompted you must crack the code on the safe. The code is heart-9-4-club-diamond-diamond-spade-club.

Congratulations! You’ve completed our Agency of Anomalies – The Last Performance Walkthrough!
For more great tips and tricks, visit our blog!


The Agency of Anomalies – The Last Performance Walkthrough is meant as a guide and does not contain cheats, hacks, or serials.

The post The Agency of Anomalies – The Last Performance Walkthrough appeared first on GameHouse.

Rainforest Adventure Gameplay Walkthrough

$
0
0

The forest is thick. Everything about it is thick: the leaves, the bugs, the stinking air, clouded with the stench of rotting flesh. You wipe the sweat from your brow and resist the urge to pick at one of your many bug bites, but you don’t know why you bother, because they’re definitely already infected. You nibble on the last of your former tour guide for sustenance, because everything else is poisonous, and look for a nice soft place to lie down and wait for one of the handful of terrifying predators that have been following you for the past ten miles to tear out your throat.
That is what you might be experiencing if you were to go on vacation to the rain forest. Instead of embarking upon that terrifying and lethal journey, enjoy all the beauty of the rain forest and none of the deadly with Rainforest Adventure, a match-3 puzzler!


This gameplay walkthrough of Rainforest Adventure will cover the many different items in the game, a walkthrough of a typical level, and some tips and tricks to help guide you to the highest score. Don’t worry about sunscreen, plane tickets, or updating your will: Just kick back with a few levels of Rain Forest Adventure!

Contents

Rainforest Adventure Gameplay Walkthrough

Gameplay Breakdown

Rainforest Adventure is a match-3 puzzle game. The core gameplay concept is to match pieces on a board in groups of three or more. This is done by swapping two adjacent tiles at a time. Making matches of three or more will result in points being awarded to you, with more points being given for higher matches. In addition to getting extra points for larger matches, causing subsequent matches by falling pieces will give a cascade bonus, with additional points granted. Goals outside of the main one include such requirements as changing the color of the entire board, or getting a certain score.

Rainforest Adventure - Map

Rainforest Adventure – Map

Item Descriptions

Butterfly: Native to the rain forest, the Morpho Butterfly is a beautiful creature, covered in dazzling iridescent colors. It’s poisonous to consume, and it has been known to feed on fermenting fruit and occasionally, the bodily fluids of the deceased, which means this butterfly parties hard. These butterflies can be matched in groups of three or more, giving points and changing the color of the board when matched.

Mushroom: As a rule of thumb, you should never eat anything you find on the ground, and mushrooms are no exception. Poisonous mushrooms have the appearance of edible, nonpoisonous mushrooms in many cases, and have been known to trick unsuspecting tourists into ingesting them and then dying. A better use for these deadly death caps of death is to match them in groupings of three or more on the game board. Doing so will earn points, with more points being given for larger matches.

Puma: Even the common domestic housecat is a frighteningly effective natural predator, wiping out entire species of local birds and squirrels. A puma is very similar to a common housecat, but the difference is they’re as big as you. It is recommended to avoid directly interacting with pumas, face to face, but matching them in groups of three or more has been known to reap rewards such as points and colorization on the game board.

Swapping the Mushroom and Puma on top will cause two matches of three, granting 60 points.

Leaf: Dendrocnide moroides is the scientific term for the gympie, or suicide plant. Found commonly in the Australian rain forests, its leaves are covered in tiny hairs. The stinging hairs contain a potent neurotoxin that deliver agonizing pain, and has been known to kill humans. It’s been called the suicide plant because the extreme pain from coming into contact with the gympie has caused people to shoot themselves and horses to run off cliffs to their deaths in order to escape the agony. Do not touch any leaves in the rain forest! The ideal method of disposal for these horrible plants are to match them in groups of three or more. This will turn them into safe, nontoxic points, and change the color of the board.

Dragonfly: What many people don’t know about the dragonfly is that it is quite possibly the deadliest hunter on Earth, with studies showing that they successfully capture and consume 95% of the prey they hunt. This makes them four times more effective killing machines than lions, previously thought to be a big deal. Dragonflies take the form of other objects and can be identified by their beating wings. Forming a match with a dragonfly will cause it to take flight on a murderous rampage, granting extra points and turning more tiles to gold.

Level Walkthrough

This is a walkthrough of a typical level in Rain Forest Adventure. At the beginning of the level, several objects will fall from the top and fill the game board. The goal in this level is to change all the tiles on the game board into gold by matching objects on them. To complete this goal, you have to create matches on every space available on the board. Start by matching three Pumas on the right side of the screen to get 30 points. Then, swap the Leaf and the Butterfly toward the top-right. This causes a match with four Butterflies, giving 40 points. Near that Leaf we swapped is a Mushroom, which when swapped will create another 40 point match with four Mushrooms.
Now a Dragonfly has fallen onto the board, having cleverly taken the guise of a Leaf. However, it is betrayed by its flapping wings: find it on the board, and swap it with the Puma to unleash its violent crusade. After the dragonfly has done its thing, most of the top-right should be gold. Now you can focus on some of the other areas of the map: conveniently, another Dragonfly is taking the form of a Puma in the lower right. Swapping a Leaf with a Mushroom will give a match of three as well as set up a match of Pumas that will let you unleash the second Dragonfly, which takes care of the rest of the right side.

The Dragonfly can change the color of most of the board, and gives lots of points!

Rainforest Adventure - Dragonfly

Rainforest Adventure – Dragonfly

Now, all that’s left of the board that needs to be colored is on the left side. No Dragonflies yet: you’ll have to brute force this one. Match the Butterflies in the top-left by swapping one with a Leaf, yielding 40 points for four Butterflies. After that, the pieces that fall in place will create another match by themselves, giving you 30 points for doing nothing and highlighting the rest of the top of the board gold. Score! Now, all that’s left to match are the pieces at the bottom-left.

While a Dragonfly would definitely come in handy right about now, there doesn’t seem to be any on the board. In that case, making matches on the bottom is your only option. However, after swapping some Butterflies with some Leaves, a few more matches can be made nearby, which will set up the remaining few matches needed to clear the board. Congratulations, you’ve made it through a level in Rain Forest Adventure!

Conclusion

The rain forest is a frightening place. Putting aside the fact that over 200 species of plant life indigenous to the rain forest biome have been connected to causing cancer, it also contains some of the scariest and deadliest predators on the planet. There are those foolhardy enough to want to visit the rain forest: most of them pay with their lives. While the beauty of the rain forest may be worth the trip, the cost is just too high for some.

The solution to this conundrum is to play Rain Forest Adventure! Enjoy swapping pieces and learning interesting facts about the rain forest without placing your own life in danger. What’s better is that you can enjoy Rain Forest Adventure on a mobile device, meaning you can visit the rain forest wherever you are. You can enjoy a few levels on the subway, on the beach, or by the pool: no need to get expensive plane tickets to a forest of death.

With the aid of this walkthrough, you should be able to identify the various flora and fauna you will encounter, as well as some tips and tricks to help you get the most points out of them. Hopefully you won’t feel cheated out of the Adventure of a lifetime, because that same Adventure would quite possibly be the end of your life. Enjoy the things you have before you: fresh air, a nonlethal climate, and a PC or mobile device you can use to play Rain Forest Adventure. Happy travels!

Rainforest Adventure - Gameplay

Rainforest Adventure – Gameplay

Congratulations! You’ve completed our Rainforest Adventure Walkthrough! For more great tips and tricks, visit our blog!
The Rain Forest Adventure Gameplay Walkthrough is meant as a guide and does not contain any cheats, hacks or serials.

The post Rainforest Adventure Gameplay Walkthrough appeared first on GameHouse.

Clutter IV – Minigame Madness Tour Walkthrough

$
0
0

Clutter IV – Minigame Madness Tour is a celebration of the mini game genre. Enjoy hours of mind bending entertainment with 525 levels of matching, memory, card, slider and other picture puzzles. Clutter IV-Minigame Madness Tour take puzzles from its previous games and twists and warps them to create the most extreme collection of picture puzzles yet. This guide offers you strategies to guide you along the path of brilliantly challenging puzzles paired with inspiring quotes.

Contents

Basic Gameplay, Tips and Tricks

Clutter IV-Minigame Madness Tour is a charming yet challenging puzzle game containing 25 main quest puzzles and 500 minigames. When you think you are done, be sure to check the Extras box.

This installment in the series is like a ‘best of’ from previous titles, but on steroids. While there is no story line, the friendly conversation offering hints and the series of inspirational quotes is more than enough to compel you forward through the quest and receive greater achievements.

While the games in Clutter IV-Minigame Madness Tour are improved and developed to even greater difficulty, do not fear. You can adjust the difficulty in the Options menu with a simple click of the mouse. The Options menu offers tons of variations to tailor your game play to suite your tastes.

Clutter IV - Minigame Madness - Game Options

Clutter IV – Minigame Madness – Game Options

Matching

The premise of a Matching game is to find pairs of identical items in a pile of, well, clutter. These piles may include toys, food, butterflies, billiards balls, playing cards, figurines, plates and other dishes, luggage, hats, and more. You have a limited amount of time to find all the matches.

Mini games

During The Quest, when you collecting puzzle pieces unlocks a mini game. Mini games are a good way to earn extra hints. If you just want all Matching, all the time, you can turn off mini games in the Options menu.

Tips & Tricks

  • You can earn Hints in The Quest games and mini games. Letters, Coins, and square Puzzle Pieces will help you earn hints.
  • In addition to helping you gain hints, removing the Letters, Coins, and square Puzzle Pieces quickly gives you a clearer picture of the objects in the puzzle.
  • The timer does not start until your first click. Give yourself time to examine the board and plan your first few matches before you start.
  • Try and try again. Do not be discouraged if you cannot clear a level on your first try. The more you play, the more you learn to identify an object when you can only see a small bit of it.
  • If you find you do not like a particular kind of mini game, you can turn that style of game off in the Options menu. Or you can turn off all mini games if you wish.

Clutter IV – Minigame Madness Tour Walkthrough

This guide will help you get the most enjoyment from Clutter IV-Minigame Madness Tour. It does not contain spoilers or cheats, but instead gives hints and tips to help you figure out the puzzles on your own.

Getting Started

The opening scene is a projector room with three screens. In front of you is a table with a projector and several sets of cards. To begin, click on the “The Quest” card.

Clutter IV - Minigame Madness - Main Menu

Clutter IV – Minigame Madness – Main Menu

When you click on a card, the game drops the card in the projector. The far left screen displays the progress of that particular card, the middle screen is a pictorial representation of what you will encounter during gameplay, and the far right screen has a message from Joe.

The Quest

The main quest of Clutter IV-Minigame Madness Tour consists of five groups of five puzzles. Click on matched objects to clear them from the board. Letters, coins, and square puzzle pieces can all be removed with a single click and do not need to be matched.

Original Version

The first puzzle is the original style of this type of game. You start with 10 hints. You will have opportunities to earn more hints later in the game.

Brick Style

Brick Blockers cannot be removed by matching. To remove, make matches of the five objects shown at the top of the screen. Although you can remove an object that is blocked by a brick, these blockers can make it extremely difficult or impossible to identify all the items in the puzzle.

Shadow Boxing

In this style of game, a shadow image of an object appears near the bottom of the screen. To clear items from the board, make a single click on an item that matches a shadow. In the first few levels of shadow boxing, you can see a fair amount of detail in the shadow image. As you progress, you are provided less and less detail until you see only a silhouette of the object.
Black and White

In your fist Black and White game, 1 of the set of matching items will be in color, and the other will be black and white. All of the Letters and Coins will be in color, which helps you clear the board.

Consecutive puzzles lose color until you go totally color blind. In this phase, both items in the match are in black and white, and even the Letters and Coins are in black and white.

Split Decision

For the Split Decision games, all of the items are cut in half. You must match the two parts of the items. Fortunately, the Letters, Coins and Puzzle Pieces are still in one piece.

Treadmill

In this variation, shapes will by going by on the treadmill below the main puzzle board. As an item is visible on the treadmill, you must find and click on its match.

Three on a Match

As the name implies, this type of game requires matching three of the same object. To begin, you simply find and click on all three objects.

As you move into higher levels, you will have to click on two of the three and leave the third item on the board. Be strategic so you are not left with large areas of your board blocked.

Extreme

This game grows as you play. For the first half of each game, after every match you make a new pair of objects is added to the board. Just when you think the game will go on forever, you meet the halfway mark and make progress towards actually clearing the board.

Mini Games

When you collect enough puzzle pieces during The Quest, your first mini game automatically unlocks. The colored boxes on the board are where you place tiles. Some tiles are placed individually, but most are placed in groups. You can usually match pieces with the same colored sides in a group, then place the group in the corresponding colored space on the board.

Clutter IV - Minigame Madness - Mini Games

Clutter IV – Minigame Madness – Mini Games

From the Projector Room, you can access the 500 mini games included in Clutter IV-Minigame Madness Tour. Following are the various forms of mini games.

Wallpaper

In Wallpaper mini games, you swap pieces to match flowers. You cannot have a half flower on any edge. Variations of the Wallpaper mini game include Filler Up, which features a variety of items of which you must match the inside borders, and Slider Style where instead of swapping tiles you slide them either horizontally or vertically

Memory

In Variation One of the Memory game, you will find a grid of 25 blank tiles. On the right is a grid with space for six tiles. You are shown a single row of items for a brief moment. When those five items disappear, the block of six tile appear with items. You must find three items in that block that had been in the row of five tiles. You must complete each row before progressing to the next. You are allowed three wrong answers before you lose the mini game.

Clutter IV - Minigame Madness - Memory

Clutter IV – Minigame Madness – Memory

Clutter IV - Minigame Madness - Tiles

Clutter IV – Minigame Madness – Tiles

For Version Two of this mini game, you are shown all 25 items in the grid at once. The items remain visible while the block of six tiles appear. Pick three tiles in the block that are present in the larger grid. Choose carefully, because three strikes and you are out.

Clutter IV - Minigame Madness - Version2

Clutter IV – Minigame Madness – Version2

Sliders

You will find 50 different pictures used for Sliders puzzles, and an additional 50 in the Extras box. In these mini games, you slide vertical strips of the picture side to side until the picture forms. Advanced forms use mirror and kaleidoscope effects.

Clutter IV - Minigame Madness - Sliders

Clutter IV – Minigame Madness – Sliders

Stretch It Out

These are swap style puzzles with a twist. You can swap any piece with any other piece, but not all pieces are the same size. The image on the piece expands or contracts to fill the spot you place it in. Having a distorted view of life may be an asset in this style of game. As with most of these mini games, you will find mirror and kaleidoscope effects pictures.

Clutter IV - Minigame Madness - Stretch It Out

Clutter IV – Minigame Madness – Stretch It Out

Square Jigsaw

Your main clue in this style puzzle is the border color of the pieces. The border color will match the color of the square on the puzzle board. Of course, the old fashioned way of using the picture to guide you works here too. The pieces are compressed while on the side of the board but will expand to their full size when you drag them onto the board.

Clutter IV - Minigame Madness - Square Jigsaw

Clutter IV – Minigame Madness – Square Jigsaw

One Jack

One jack, and the advanced forms of Two Queens and Four Kings, are very unusual styles of games. In this game, playing cards appear on the board. With each card, use the direction arrows on the keyboard to slide the cards to the top, bottom, or either side.

In One Jack, you only have a single suit. Every time you slide two cards of the same number into each other, they combine and turn into the next higher number. Continue sliding and combining until a single Jack is left on the board

Clutter IV - Minigame Madness - One Jack

Clutter IV – Minigame Madness – One Jack

In Two Queens, you have two suits. Every combination will increase the card number by two. For a supreme challenge, Four Kings gives you four suites. Each card smash increases the card’s number by one, and when two 10s of opposite suites collide they cancel each other out.

Quotes Box

In both versions of Quotes Box you work to decipher a quote. In Version One, you swap letters within a vertical column. When you get a correct word, it will lock into place, which decreases the number you have to choose from. A general tip is to start with short words like “the” and “a” to lock in a few tiles.

Clutter IV - Minigame Madness - Boxed Quotes

Clutter IV – Minigame Madness – Boxed Quotes

For the advanced cryptogram, you must complete the cypher code that appears on the top of the screen. Click on a letter box in the quote, then click on a letter of the alphabet below that you think is the correct one. When you choose the correct letter, the puzzle lock and fill in all other squares that have that letter and fill in the cypher code at the top.

Clutter IV - Minigame Madness - Song Lyrics

Clutter IV – Minigame Madness – Song Lyrics

Congratulate yourself on your great achievements in the Clutter IV – Minigame Madness game! If you complete all 525 puzzles without your brain exploding you are indeed an elite puzzler.

For more great tips and tricks, visit our blog!


Clutter IV-Minigame Madness Tour Walkthrough is meant as a guide and does not contain cheats, hacks or serials.

The post Clutter IV – Minigame Madness Tour Walkthrough appeared first on GameHouse.

True Fear – Forsaken Souls Walkthrough

$
0
0

Do you know what it truly means to be afraid? What if everything you ever knew turned out not to be true? Fear not! The True Fear – Forsaken Souls walkthrough contains all the tips and tricks you need to uncover the truth behind a mysterious past.

Contents

General Tips and Tricks

  • – If the mouse cursor turns into an Arrow, this indicates that you can travel to another location. Simply press the Arrow to travel in that direction (Z).
  • – Press the GUIDE button to access the Strategy Guide at any moment in the game (A).
  • – The MENU button allows you to exit to the Main Menu or change the game Options, while also pausing the game (C).
  • – The Doll can help you by highlighting areas of interest for you (F).
  • – Observe the Doll – she will only help you when her eyes glow red and she is animated. If the Doll has her head down, she is not ready to help yet.

true-fear-one241

  • – All the important information you uncover will be written down in the Diary. Touch the book to open it (B).
  • – Inside the Diary you can view both information important to gameplay and the storyline.
  • – If you move the mouse cursor to the bottom of the screen, the Inventory bar will open up (D).
  • – You can lock the Inventory bar by pressing on the arrow in the middle of the Inventory bar.
  • – This will ensure that the Inventory bar remains always open. Press the arrow again to unlock the Inventory bar (E).
  • – Please note that on some monitors the Inventory bar will always remain locked and thus the arrow will not be present.
  • – The Sound slider allows you to change the sound effects volume (G).
  • – The Music slider allows to change the Music volume (H).
  • – Use the arrows to change the difficulty level (I).
  • – Drag the Brightness slider to adjust the overall brightness of the game (J).
  • – The game was designed to be quite dark and we encourage you to play it this way, but we understand that it sometimes can be frustrating and tiresome to watch dark graphics.
  • – If you are having troubles seeing the mouse cursor or having performance issues, try un-checking the Custom Cursor check box (K).
  • – If you are playing on a non-wide monitor, uncheck the Wide Screen check box (L).

true-fear-one242

  • – If it seems that the graphics are being stretched and objects don’t look natural, try changing the Wide Screen setting.
  • – Checking the Figurines Notification check box will hide or show the notification panel that appears every time you find a Collector Figurine (M).
  • – The Achievements button will take you to the list of Achievements, where you can see the Trophies you have earned and the Trophies still to earn (N).
  • – Press CREDITS to view the list of men and women who have worked on the game and all those who have helped us in the process (O).

True Fear - Forsaken Souls (1)

  • – The following actions are only available if you choose to play the Tutorial.
  • – Flip the switch (A).
  • – Touch the lampshade to take it off (B).
  • – Touch the light bulb to unscrew it (B).
  • – Touch the drawer to open it (C).
  • – Take the LIGHT BULB (C).
  • – Touch the LIGHT BULB in the inventory and then touch the lamp to screw it in (B).
  • – Touch the lampshade to put it back on (D).
  • – Flip the switch to turn on the light (A).
  • – Move left.

True Fear - Forsaken Souls (2)

  • – Look into the peephole (Z).
  • – Put the chain on (E).
  • – Open the lock (F).
  • – Push the door handle to open the door (G).

True Fear – Forsaken Souls Walkthrough

Chapter 1: Bolts and candles

True Fear - Forsaken Souls (3)

  • – Open the crate and take the CROWBAR (H).
  • – Move forward.

True Fear - Forsaken Souls (4)

  • – Use the CROWBAR to tear off the plank (I).
  • – Use the CROWBAR to tear off the plank (J).
  • – Use the CROWBAR to tear off the plank (K).
  • – Use the CROWBAR to tear off the plank (L).

True Fear - Forsaken Souls (5)

  • – Collect the mosaic pieces (yellow) to receive the PUZZLE PIECES.

True Fear - Forsaken Souls (6)

  • – Use the PUZZLE PIECES on the mailbox and assemble the logo as shown.

True Fear - Forsaken Souls (7)

  • – Push the letters aside to find the GATE KEY.

True Fear - Forsaken Souls (8)

  • – Use the GATE KEY to unlock the gate (M).
  • – Move forward.

True Fear - Forsaken Souls (9)

  • – Pick up the doll (N).
  • – Take the GARDEN GLOVES (N).
  • – Move forward three times.

True Fear - Forsaken Souls (10)

  • – Take a closer look at the window; break it with the CROWBAR (A).
  • – Use the GARDEN GLOVES to unlock the door (A).
  • – Move forward.

True Fear - Forsaken Souls (13)

  • – Turn on the light (A).
  • – Take the EYE EMBLEM (B).
  • – Take the PIECE OF DRAWING (C).
  • – Move right; move forward.

True Fear - Forsaken Souls (14)

  • – Pick up the map from the wall (G).
  • – Flip the switch (G).
  • – Open the fuse box cover (I).
  • – Move back.

True Fear - Forsaken Souls (15)

  • – Take a closer look at the picture on the wall (D).
  • – Take the LIVING ROOM KEY (E).
  • – Insert the LIVING ROOM KEY (F).
  • – Turn the key (F).
  • – Enter the living room (Z).

True Fear - Forsaken Souls (16)

  • – Pick up the Collector Figurine (CF).
  • – Take the PLANK (N).
  • – Take a look at the broken aquarium to play a HOP (A).

True Fear - Forsaken Souls (17)

  • – Play the HOP to obtain the RULER.
  • – Use the magnet to obtain the coin (H1).
  • – Use the watering can to water the flowers; pick up the flower (H2).
  • – Cut a piece of the watermelon with the knife (H3).
  • – Use the key to unlock the chest (H4).

True Fear - Forsaken Souls (16)

  • – Use the RULER to open the cupboard (O).
  • – Take the BOX CUTTER (P).
  • – Take the FUSE (Q).
  • – Move back; move forward.

True Fear - Forsaken Souls (18)

  • – Insert the FUSE in the fuse box.
  • – Flip the switch (4), then the switch (3).

True Fear - Forsaken Souls (19)

  • – Flip the switch to turn the lights on (R).
  • – Take the PLANK (S).
  • – Move forward.

True Fear - Forsaken Souls (20)

  • – Take the PENCIL (A).

True Fear - Forsaken Souls (21)

  • – Take the PLANK (B).
  • – Open the drawer and take the SNAKE EMBLEM (C).
  • – Open the door and take the RUBBER GLOVES (D).

True Fear - Forsaken Souls (22)

  • – Use the BOX CUTTER to free the handle (E).
  • – Open the fridge (E).
  • – Open the box of eggs (F).
  • – Take the BLACK LIGHT BULB (F).
  • – Move forward.

True Fear - Forsaken Souls (23)

  • – Take the PLANK (G).
  • – Take the NAILS (H).
  • – Move back three times; move left.

True Fear - Forsaken Souls (24)

  • – Use the RUBBER GLOVES to obtain the HAMMER (J).
  • – Move back.

True Fear - Forsaken Souls (25)

  • – Put the PLANKS on the broken stairs (K).
  • – Insert the NAILS (K).
  • – Nail the planks with the HAMMER (K).
  • – Move up the stairs.

True Fear - Forsaken Souls (26)

  • – Take the SNAKE EMBLEM (L).
  • – Move left.

True Fear - Forsaken Souls (27)

  • – Insert the EYE EMBLEM (U).
  • – Open the chest (U).
  • – Take the FLASHLIGHT (U).
  • – Move right.

True Fear - Forsaken Souls (28)

  • – Take the red cloth off the case (M).
  • – Take a closer look at the case (M).

True Fear - Forsaken Souls (29)

  • – Place the SNAKE EMBLEMS in the holes (A).

True Fear - Forsaken Souls (30)

  • – Rotate and swap the emblems to complete the picture.

True Fear - Forsaken Souls (31)

  • – Take the BATTERY (N).
  • – Take a closer look at the windows; take the NIPPERS (O).
  • – Move back three times; move forward.

True Fear - Forsaken Souls (32)

  • – Insert the BLACK LIGHT BULB in the construction lamp (P).
  • – Add the BATTERY to the lamp (Q).
  • – Take a look at the drawings on the wall (R).
  • – Move back, then up the stairs; move left.

True Fear - Forsaken Souls (27)

  • – Touch the painting to drop it (S).
  • – Look at the desk; enter the combination (1-5).
  • – Look at the desk to play the HOP (A).

True Fear - Forsaken Souls (33)

  • – Play the HOP to obtain the ROPE.
  • – Catch the butterfly with the net (H1).
  • – Close and open the table to reveal more objects (H2).
  • – Open the drawer (H3).
  • – Move back three times.

True Fear - Forsaken Souls (34)

  • – Use the ROPE on the straw.
  • – Take the BROOM (V).
  • – Use the NIPPERS to remove the nails (T).
  • – Take the DRY SPONGE (T).
  • – Move right; move forward twice.

True Fear - Forsaken Souls (35)

  • – Put the DRY SPONGE under the water (W).

True Fear - Forsaken Souls (36)

  • – Use the BROOM to clean the spider web off (X).
  • – Take the SCREWDRIVER (X).
  • – Move forward.

True Fear - Forsaken Souls (37)

  • – Use the WET SPONGE to clean the dirty glass (Z).
  • – Move right.

True Fear - Forsaken Souls (38)

  • – Enter the combination 1723 (B).

True Fear - Forsaken Souls (39)

  • – Open the closet doors (C).

True Fear - Forsaken Souls (40)

  • – Take the CLOCK HAND (D).

True Fear - Forsaken Souls (41)

  • – Use the SCREWDRIVER four times to remove the screws (E).
  • – Open the vacuum cleaner (E).
  • – Take the CARRIAGE (F).

True Fear - Forsaken Souls (38)

  • – Use the SCREWDRIVER four times to remove the screws (A).
  • – Move right.

Chapter 2: Heather

True Fear - Forsaken Souls (42)

  • – Take the SHEARS (G).
  • – Touch the pillows four times to move them all (H).
  • – Take the LIGHTER FLUID (H).
  • – Look at the table (A).

True Fear - Forsaken Souls (43)

  • – Place the PIECE OF DRAWING among the other pieces (F).

True Fear - Forsaken Souls (44)

  • – Assemble the drawing as indicated.
  • – Move left.

True Fear - Forsaken Souls (45)

  • – Put the FLASHLIGHT on the ground (I).
  • – Take the CLOCK KEY (J).

True Fear - Forsaken Souls (46)

  • – Take the BINOCULARS (K).
  • – Move back six times, up the stairs, left, then right.

True Fear - Forsaken Souls (47)

  • – Use the BINOCULARS to see the stone in the forest (Q).
  • – Move back three times; move left.

True Fear - Forsaken Souls (48)

  • – Insert the CLOCK KEY (L).
  • – Turn the key (L).
  • – Take the WRENCH (M).
  • – Place the CLOCK HAND (N).
  • – Set out the correct time 6:46 (N).
  • – Take the SKULL (O).
  • – Move back; move up the stairs and forward.

True Fear - Forsaken Souls (49)

  • – Use the SHEARS on the vines twice (P).
  • – Take the WELL HANDLE (P).
  • – Pick up the Collector Figurine (CF).
  • – Move right.

True Fear - Forsaken Souls (50)

  • – Use the WRENCH to take the rails off (R).
  • – Move right.

True Fear - Forsaken Souls (51)

  • – Take the STAIN REMOVER (S).
  • – The cabinets under the sink contain a HOP (F).

True Fear - Forsaken Souls (52)

  • – Play the HOP to get the TWEEZERS.
  • – Use the fan to move the balloon (H1).
  • – Brush the teeth with the toothbrush (H2).
  • – Use the broom to clean the spider web off (H3).
  • – Brush the stain off the floor (H4).

True Fear - Forsaken Souls (53)

  • – Touch the lighter to open it (W).
  • – Put the LIGHTER FLUID in the lighter to obtain the LIGHTER (W).
  • – Insert the CARRIAGE in the scene (V).

True Fear - Forsaken Souls (54)

  • – Move the shapes to copy the image from the torn drawing.

True Fear - Forsaken Souls (55)

  • – Take the SCARY MEDALLION (A).
  • – Move right.

True Fear - Forsaken Souls (56)

  • – Take the ANTI-RUST SPRAY (X).
  • – Pull the blanket (Y).
  • – Take the SAFE KEY (Y).
  • – Pick up the Collector Figurine (CF).
  • – Move back three times.

True Fear - Forsaken Souls (57)

  • – Insert the SAFE KEY (Z).
  • – Turn the key (Z).
  • – Turn the handle (Z).
  • – Take the SKULL (Z).
  • – Use the PENCIL on the notebook (Z).

True Fear - Forsaken Souls (58)

  • – Apply pressure over the page to uncover the hidden figure.
  • – Move back twice; Move forward three times.

True Fear - Forsaken Souls (59)

  • – Insert the SCARY MEDALLION (A).
  • – Turn the handle (A).
  • – Move left.

True Fear - Forsaken Souls (60)

  • – Pull the curtain (B).
  • – Take the CAN OPENER (B).
  • – Use the LIGHTER to light the big candle (C).
  • – Take the CLUBS EMBLEM (C).
  • – Move back.

True Fear - Forsaken Souls (61)

  • – Use the ANTI-RUST SPRAY to open the lock (D).
  • – Open the door (E).
  • – Take the HAIRDRYER MANUAL (E).
  • – Move right.

True Fear - Forsaken Souls (62)

  • – Use the STAIN REMOVER to dissolve the stain (F).
  • – Take the TOOTH (F).
  • – Move back twice.

True Fear - Forsaken Souls (63)

  • – Open the can with the CAN OPENER (G).
  • – Take the PLASTIC BAGS (G).
  • – Move forward, right twice, then forward.

True Fear - Forsaken Souls (64)

  • – Use the TWEEZERS to pull the RING out of the crack (H).
  • – Move back six times; move left.

True Fear - Forsaken Souls (65)

  • – Insert the CLUBS EMBLEM (I).
  • – Lift the cover (I).
  • – Take the RAKE (I).
  • – Move back, up the stairs, left, then right twice.

True Fear - Forsaken Souls (51)

  • – Pull the electric plug out (T).
  • – Take a look inside the bath (A).

True Fear - Forsaken Souls (66)

  • – Set the HAIRDRYER MANUAL by the hairdryer (A).
  • – Put the parts in their correct places (A1)(A2)(A3).
  • – Switch the lights as indicated on the image (B).
  • – Set the slider to the third position (C).
  • – Set the switches to the indicated positons (S1) (S2)
  • – Move right.

True Fear - Forsaken Souls (67)

  • – Use the PLASTIC BAGS to take the LOCK OF HAIR (J).
  • – Move back five times, forward three times, then right.

True Fear - Forsaken Souls (68)

  • – Use the HAIRDRYER to melt the ice on the control panel (K).
  • – Press the button (K).
  • – Take the BUCKET (L).
  • – Move right.

True Fear - Forsaken Souls (69)

  • – Use the RAKE to clean the leaves (M).
  • – Take the FIGURINE HAND (M).
  • – Move forward.

True Fear - Forsaken Souls (70)

  • – Insert the WELL HANDLE (N).
  • – Set the BUCKET on the side (O).
  • – Touch the rope to attach it to the bucket (O).
  • – Touch to lower the bucket (O).
  • – Touch to raise the bucket back (N).
  • – Take the JEWEL (O).
  • – Move back four times.

True Fear - Forsaken Souls (20)

  • – Replace the FIGURINE HAND (Z).

true-fear-one071

  • – Touch the arms to rotate them to match the puzzle’s solution.

true-fear-one072

  • – Take the GLASSES (P).
  • – Move forward; move left.

true-fear-one073

  • – Put down the JEWEL (U).
  • – Put down the LOCK OF HAIR (R).
  • – Put down the GLASSES (S).
  • – Put down the TOOTH (T).
  • – Put down the RING (Q).

true-fear-one074

  • – Pick up all the KEYS.
  • – Move back three times.

true-fear-one075

  • – Use the KEYS four times to unlock the locks (V).
  • – Open the door (V).
  • – Move forward twice.

true-fear-one076

  • – Light candles with the LIGHTER (W).
  • – Move forward and use the LIGHTER to light the darkness.

Chapter 3: Coming home

true-fear-one077

  • – Move forward, left, then forward twice.
  • – Take the WEIGHT (A).
  • – Move forward.

true-fear-one078

  • – Take the RAILROAD PIECE (B).
  • – Move back twice.

true-fear-one079

  • – Take the SHEARS (C).
  • – Move back twice.

true-fear-one080

  • – Use the SHEARS to cut the rose bush (D).
  • – Take the CAR KEYS (E).
  • – Take the ROSE (E).
  • – Move left.

true-fear-one081

  • – Pick up the Collector Figurine (CF).
  • – Use the CAR KEYS to open the trunk (F).
  • – Use the CAR KEYS to open the car door (G).
  • – Look in the trunk to play the HOP (F).

true-fear-one082

  • – Complete the HOP to obtain the SHOTGUN SHELLS.
  • – Use the scissors to cut the bell off (H1).
  • – Touch the handcuffs to unlock them (H2).
  • – Carve the pumpkin with the knife (H3).
  • – Put the candle inside the carved pumpkin (H3).
  • – Replace the tip on the trumpet (H4).
  • – Light the gas lamp with the matches (H5).
  • – Move back; move forward.

true-fear-one083

  • – Use the SHOTGUN SHELLS to obtain LOADED SHOTGUN (I).
  • – Move back, left, then forward.

true-fear-one084

  • – Use the LOADED SHOTGUN to blow holes in the barrels (J).
  • – Touch the barrels to move them (J).
  • – Open the door; move right.

true-fear-one085

  • – Touch the oven to open it (L).

true-fear-one086

  • – Touch the cupboard doors to open them (M).

true-fear-one087

  • – Touch the boxes to move them around until you can take the MAILBOX EMBLEM (M).
  • – Move right; move left twice.
  • – Touch the junk pile on the floor.

true-fear-one088

  • – Touch the junk to move it around until you can take the CROWBAR (N).

true-fear-one089

  • – Take the MOSAIC PIECE (A).
  • – Take the NUTS (O).
  • – Move back.

true-fear-one090

  • – Take the GAS KNOB (P).
  • – Move forward.

true-fear-one091

  • – Open the cage (Q).
  • – Take the SPATULA (S).

true-fear-one092

  • – Touch the key to turn it (T).
  • – Take the GRANDMOTHER’S KEY (T).
  • – Touch the handle to open the door (U).
  • – Move forward.

true-fear-one093

  • – Look in the closet to play the HOP (V).

true-fear-one094

  • – Play the HOP to obtain the ROPE LADDER.
  • – Put the flowers in the vase (H1).
  • – Use the lipstick to write the answer to the equation (H2).
  • – Use the xylophone to play the music note (H3).

true-fear-one093

  • – Take the GREEN PAINT (W).
  • – Move right.

true-fear-one095

  • – Take a closer look at the shelves (X).

true-fear-one096

  • – Select matching pairs until only one bottle is left; take the OIL (X).
  • – Move back.

true-fear-one097

  • – Use the OIL on the nutcracker’s mouth to open it (Y).
  • – Put the NUTS into the nutcracker’s mouth (Y).
  • – Take the HEART LOCKET (Z).
  • – Move back; move right.

true-fear-one098

  • – Put the ROSE in the vase (A).
  • – Use the LIGHTER to light the candle (B).
  • – Take the SHOVEL (C).
  • – Move back four times.

true-fear-one099

  • – Use the CROWBAR to break the padlock (H).
  • – Touch the chain to remove it (H).
  • – Touch the cupboard doors to open them (I).
  • – Touch the cupboard doors to open them (J).
  • – Take the GAS BURNER (K).
  • – Pick up the Collector Figurine (CF).
  • – Move back.

true-fear-one100

  • – Use the SHOVEL to dig up the grave (L).
  • – Take the BOWL (L).
  • – Move forward twice.

true-fear-one101

  • – Use the GRANDMOTHER’S KEY to unlock the door (M).
  • – Move right.

true-fear-one102

  • – Put the GREEN PAINT on the easel to activate a puzzle (A).

true-fear-one103

  • – Touch a color and then an area on the painting to color it.
  • – Color the painting by following the example.
  • – You will receive the PAINTING.

true-fear-one104

  • – Use the PAINTING on the empty frame (N).
  • – Touch the frame pieces to re-assemble them.
  • – Take the OVEN MITTS (O).
  • – Insert the missing MOSAIC PIECE (P).

true-fear-one105

  • – Assemble the mosaic to open the chest.

true-fear-one104

  • – Take the VALVE (P).
  • – Pick up the Collector Figurine (CF).
  • – Move back three times; move right.

true-fear-one106

  • – Use the OVEN MITTS to take the pan out of the oven (Q).
  • – Touch the cover to take it off (R).
  • – Use the SPATULA to obtain NAILS (R).
  • – Touch the HANDLE to take it (S).
  • – Move right; move left.

true-fear-one107

  • – Drop the HEART LOCKET in the top opening (D).
  • – Take the REMOTE CONTROL (E).
  • – Move back.

true-fear-one108

  • – Use the REMOTE CONTROL on the TV (F).

Chapter 4: Something is different

true-fear-one109

  • – Take the KNIFE (G).

true-fear-one110

  • – Insert the HANDLE (T).
  • – Touch the lid to remove it (U).
  • – Take the CERAMIC EYE (V).
  • – Move back four times.

true-fear-one111

  • – Use the CROWBAR to remove the stone (A).
  • – Insert the VALVE (B).
  • – Touch the valve to open the water (B).
  • – Take the HAMMER (C).
  • – Move back.

true-fear-one112

  • – Insert the MAILBOX EMBLEM to open the mailbox (D).
  • – Touch the mailbox to open it (D).
  • – Take the MUSIC BOX KEY (D).
  • – Move forward twice.

true-fear-one113

  • – Use the GAS BURNER to heat the chain (E).
  • – Use the CROWBAR to break the heated chain (E).
  • – Use the ROPE LADDER to obtain the LADDER ON HOOK (F).
  • – Move back, left, forward, then right.

true-fear-one114

  • – Use the BOWL to obtain the BOWL WITH WATER (G).
  • – Set the BOWL WITH WATER on the cat mat (H).
  • – Move back; move forward.

true-fear-one115

  • – Insert the LADDER ON HOOK to pick it up (I).
  • – Take the WIRE CUTTERS (J).
  • – Move back.

true-fear-one116

  • – Use the WIRE CUTTERS to cut the wire (K).
  • – Take the CAT EMBLEM (K).
  • – Move forward twice; move right.

true-fear-one117

  • – Set the NAILS in the frame (L).
  • – Use the HAMMER on the nails to repair the frame (L).
  • – Take the REPAIRED FRAME (L).
  • – Move back three times, right twice, left, forward, then right.

true-fear-one118

  • – Zoom into the music box on the table (N).

true-fear-one119

  • – Use the MUSIC BOX KEY to activate the music box (A).
  • – Repeat the sequence in which the knights stand up by touching them in the same order.
  • – The final knights poses will be written down in the Diary.
  • – Move back five times, forward twice, then right.

true-fear-one120

  • – Put the REPAIRED FRAME on the wall (O).

true-fear-one121

  • – Swap the paintings by touching one and then another to achieve the shown order.

true-fear-one120

  • – Take the LETTERS (P).
  • – Move back three times, right twice, left, forward, then right.

true-fear-one122

  • – Put the LETTERS on the shelf (Q).
  • – Look in the suitcase to play the HOP (R).

true-fear-one123

  • – Play the HOP to obtain the GLOVE COMPARTMENT KEY.
  • – Paint the airplane (H1).
  • – Use the knife to open the can (H2).
  • – Move back six times.

true-fear-one124

  • – Use the GLOVE COMPARTMENT KEY to open the glove compartment (S).
  • – Take the PUTTY (S).
  • – Move forward, right twice, left, forward twice, then right.

true-fear-one125

  • – Use the PUTTY to close the crack in the bathtub (T).
  • – Touch the tap to turn on the water (U).
  • – Take the FISH EMBLEM (V).
  • – Move back three times; move up the stairs.

true-fear-one126

  • – Use the KNIFE to obtain the BIRD EMBLEM (W).
  • – Insert the BIRD EMBLEM (X).
  • – Insert the CAT EMBLEM (Y).
  • – Insert the FISH EMBLEM (Z).

Chapter 5: Mother’s world

true-fear-one127

  • – Touch the carved door to open it (X).
  • – Move forward.

true-fear-one128

  • – Take the BISHOP PIECE (Y).
  • – Take the RAKE (Z).
  • – Move left.

true-fear-one129

  • – Take the BROKEN ELEPHANT (A).
  • – Use the RAILROAD PIECE to activate the railroad puzzle (B).

true-fear-one130

  • – Place the railroad tracks to complete the track as shown.

true-fear-one129

  • – Touch the tape to tear it off (C).
  • – Touch the cover to take it off (C).
  • – Take the ADHESIVE TAPE (D).
  • – Take the BATTERY (C).
  • – Take the BOLT (E).
  • – Move back six times, forward twice, then right.

true-fear-one131

  • – Use the ADHESIVE TAPE to repair the wires (F).
  • – Touch the button to turn the machine on (B).
  • – Use the KNIFE to obtain the SHARPENED KNIFE (H).
  • – Move back four times.

true-fear-one132

  • – Look in the trunk to play the HOP (J).

true-fear-one082

  • – Play the HOP to obtain the WINCH.
  • – Use the scissors to cut the bell off (H1).
  • – Touch the handcuffs to unlock them (H2).
  • – Carve the pumpkin with the knife (H3).
  • – Put the candle inside the carved pumpkin (H3).
  • – Replace the tip on the trumpet (H4).
  • – Light the gas lamp with the matches (H5).

true-fear-one132

  • – Use the SHARPENED KNIFE to cut the seat open (K).
  • – Take the BATTERY (K).
  • – Move back twice.

true-fear-one133

  • – Use the RAKE to clear the leaves (L).
  • – Take the SKULL (M).
  • – Move forward, left, forward, right twice, left, then forward twice.

true-fear-one134

  • – Look in the closet to play the HOP (N).

true-fear-one094

  • – Play the HOP to obtain the FAUCET STEM.
  • – Put the flowers in the vase (H1).
  • – Use the lipstick to write the answer to the equation (H2).
  • – Use the xylophone to play the music note (H3).

true-fear-one134

  • – Insert the BATTERY (O).
  • – Insert the BATTERY (O).
  • – Take the TRAIN ENGINEER (P).
  • – Move back twice, up the stairs, right, then left.

true-fear-one135

  • – Put the TRAIN ENGINEER in the locomotive (Q).
  • – Touch the doll to remove it from the train (R).
  • – Touch the doll to lift her dress (S).
  • – Use the SHARPENED KNIFE to open the doll (S).
  • – Touch the photo to see it (S).
  • – Move back; move forward.

true-fear-one136

  • – Take the DRIED MILK (T).
  • – Take the WEIGHT (U).
  • – Take the DAGGER (D).
  • – Touch the painting to reveal the safe (E).
  • – Move back five times.

true-fear-one137

  • – Use the DRIED MILK on the bowl with water (X).

true-fear-one085

  • – Take the YELLOW BIRD (K).
  • – Move right, left, then forward.

true-fear-one091

  • – Set the YELLOW BIRD on the perch (Q).
  • – Touch the door to close it (Q).
  • – Take the GAME HANDLE (R).
  • – Move back, up the stairs, right then forward.

true-fear-one136

  • – Take a closer look at the object on the bed (A).

true-fear-one138

  • – Insert the GAME HANDLE (A).

true-fear-one139

  • – Touch the GAME HANDLE to wind up the game (B).
  • – Eliminate pairs of cards by touching them (C).
  • – The solution is random.
  • – Touch the carnival ticket to add it to the journal.

true-fear-one136

  • – Unlock the safe by entering the code 1984 (V).
  • – Take the FIRST TAPES (V).
  • – Take the FISH HOOK (V).
  • – Move back six times, forward twice, then right.

true-fear-one104

  • – Put the FIRST TAPES in the tape player (B).
  • – Touch the tape case to open it; take the TREE HOUSE KEY (O).
  • – Move back twice.

true-fear-one140

  • – Use the TREE HOUSE KEY to unlock the trapdoor (Y).
  • – Enter the tree house (Y).

true-fear-one141

  • – Push the rope to drop it to the ground (A).
  • – Enter the tree house to play the HOP (B).

true-fear-one142

  • – Play the HOP to obtain the SHELL EMBLEM.
  • – Throw the dart at the dart board (H1).
  • – Oil the knight armor (H2).
  • – Put the necklace on the doll (H3).
  • – Clean the shoe with the brush (H4).
  • – Close the chest to reveal more objects (H5).

true-fear-one141

  • – Use the WIRE CUTTERS on the nails to receive the FIRE EMBLEM (C).
  • – Insert the WEIGHT (D).
  • – Insert the WEIGHT (D).
  • – Take the MONKEY WRENCH (E).

true-fear-one143

  • – Touch the rope to attach it to the cistern (F).
  • – Move back twice.

true-fear-one144

  • – Use the MONKEY WRENCH on the pipe to turn it (G).
  • – Take the SKULL (G).
  • – Move forward; move right.

true-fear-one145

  • – Insert the FIRE EMBLEM to unlock the fire box (H).
  • – Touch the fire box to open it (H).
  • – Take the FIRE HOSE (I).
  • – Move right, left, forward twice, then right.

true-fear-one146

  • – Insert the SHELL EMBLEM to unlock the closet (J).
  • – Touch the doors to open them (J).
  • – Take the SOLVENT (J).
  • – Pick up the Collector Figurine (CF).
  • – Move back twice.

true-fear-one147

  • – Use the SOLVENT on the glued weight (K).
  • – Take the WEIGHT (K).
  • – Move back four times; move forward.

true-fear-one148

  • – Insert the WEIGHT (L).
  • – Push the weights off the edge (L).

true-fear-one149

  • – Enter the basement (B).

Chapter 6: Into another age

true-fear-one150

  • – Attach the FIRE HOSE (M).
  • – Place the FAUCET STEM (M).
  • – Touch the tap to fill the cistern with water (M).
  • – Set the BROKEN ELEPHANT on the table (N).
  • – Insert the GAS KNOB (O).
  • – Take the FISHING LINE (P).
  • – Take the HACKSAW (Q).
  • – Move back twice, right twice, left, then forward.

true-fear-one151

  • – Attach the FISHING LINE (R).
  • – Attach the FISH HOOK (R).
  • – Take the FISHING ROD (R).
  • – Move back four times; move forward twice.

true-fear-one152

  • – Use the FISHING ROD to obtain the CISTERN WHEEL (S).
  • – Move back; move right.

true-fear-one153

  • – Put the CISTERN WHEEL back on the cistern (T).
  • – Touch the block to let the cistern roll (U).
  • – Move forward.

true-fear-one154

  • – Insert the BOLT into the cracked statue’s head (V).
  • – Use the HAMMER on the bolt to crack the head (V).
  • – Take the SCOOP (W).
  • – Take the SKULL (V).
  • – Pick up the Collector Figurine (CF).
  • – Take the LIGHT BULB (X).
  • – Move forward.

true-fear-one155

  • – Use the WINCH to turn the stone around (Y).
  • – Take the CORK SCREW (Z).
  • – Move back; move left.

true-fear-one156

  • – Use the LIGHTER to light the candle (A).
  • – Insert the CERAMIC EYE to obtain the CHEST KEY (B).
  • – Move back three times.

true-fear-one157

  • – Use the CORK SCREW to obtain the CORK (C).
  • – Take the SKULL (C).
  • – Insert the LIGHT BULB (D).
  • – Pick up the Collector Figurine (CF).
  • – Move right.

true-fear-one158

  • – Place the CORK on the table (E).
  • – Move back twice, right twice, then left.

true-fear-one159

  • – Use the CHEST KEY to open the chest (F).
  • – Take the SIEVE (F).
  • – Move forward.

true-fear-one160

  • – Use the SCOOP to obtain the GLUE POWDER (G).
  • – Move back four times, forward, then right.

true-fear-one161

  • – Pour the GLUE POWDER into the bowl (H).
  • – Use the LIGHTER to light the burner (I).
  • – Take the LIQUID GLUE (H).
  • – Use the LIQUID GLUE to obtain the GLUED ELEPHANT (J).
  • – Insert the GLUED ELEPHANT into the vise (K).
  • – Touch the vise handle to obtain the REPAIRED ELEPHANT (L).
  • – Move forward.

true-fear-one162

  • – Use the SIEVE to obtain the SKULL (M).
  • – Move back three times; move right twice.

true-fear-one163

  • – Set the REPAIRED ELEPHANT on the shelf (N).
  • – Take the DICTIONARY (O).
  • – Move back twice, forward, right, then forward twice.

true-fear-one164

  • – Use the DICTIONARY on the stone (P).
  • – Use the DICTIONARY on the other stone (Q).

Chapter 7: Follow the breadcrumbs

true-fear-one165

  • – Use the SKULLS on the stone.
  • – Touch the skulls in the order indicated on the image.
true-fear-one235

true-fear-one235

  • – Turn the cross following the indications you have found on the pillars.
  • – LEFT, LEFT.
  • – RIGHT, RIGHT.
  • – LEFT, LEFT.
  • – RIGHT.
  • – Move forward.

true-fear-one166

  • – Take the GRANDFATHER’S KEY (A).

true-fear-one167

  • – Touch the lock cover three times to remove it (S).
  • – Move left.

true-fear-one168

  • – Enter the passage to the left to play the HOP (T).

true-fear-one169

  • – Play the HOP to obtain the ARCHAEOLOGICAL BRUSH.
  • – Use the feather on the blank paper (H1).
  • – Move back.

true-fear-one170

  • – Take the WRENCH (U).
  • – Move back four times.

true-fear-one149

  • – Use the ARCHAEOLOGICAL BRUSH to unearth the CABINET KNOB (V).
  • – Take the CABINET KNOB (V).
  • – Move forward; move right.

true-fear-one131

  • – Open the door with the GRANDFATHER’S KEY (G).
  • – Take the GLASS (G).
  • – Pick up the Collector Figurine (CF).
  • – Move back three times; move right.

true-fear-one171

  • – Use the GLASS to obtain the GLASS OF WATER (W).
  • – Move right, left, forward, then right.

true-fear-one172

  • – Look under the bed to play the HOP (A).

true-fear-one123

  • – Play the HOP to obtain the DUMBBELL.
  • – Paint the airplane (H1).
  • – Use the knife to open the can (H2).

true-fear-one172

  • – Use the WRENCH to unscrew the CROSS (B).
  • – Take the CROSS (B).
  • – Insert the CABINET KNOB (C).
  • – Touch the drawer to open it (C).
  • – Take the FUSE (C).
  • – Move back five times; move forward.

true-fear-one173

  • – Look inside the tree house to play the HOP (D).

true-fear-one142

  • – Play the HOP to obtain the METALLIC ARROW.
  • – Throw the dart at the dart board (H1).
  • – Oil the knight armor (H2).
  • – Put the necklace on the doll (H3).
  • – Clean the show with the brush (H4).
  • – Close the chest to reveal more objects (H5).
  • – Move forward.

true-fear-one174

  • – Insert the FUSE (E).
  • – Touch the switch to turn the electricity on (F).
  • – Throw the DUMBBELL down the well (G).
  • – Move right.

true-fear-one175

  • – Use the METALLIC ARROW on the magnet to obtain the MAGNETIZED ARROW (H).
  • – Move back twice.

true-fear-one176

  • – Touch the shapes on the lamp to write down their order (I).
  • – Move right.

true-fear-one177

  • – Set the GLASS OF WATER on the workbench (J).
  • – Put the MAGNETIZED ARROW on the workbench (J).
  • – Touch the compass parts to assemble them and obtain the COMPASS (J).
  • – Move forward three times; move left.

true-fear-one178

  • – Enter the passage to the left to play the HOP (K).

true-fear-one169

  • – Play the HOP to obtain the LOCK BITS.
  • – Use the feather on the blank paper (H1).

true-fear-one178

  • – Put in the CROSS in the statue’s hand (L).
  • – Use the DICTIONARY on the runes (M).
  • – Use the HACKSAW on the sword handle to obtain the KING PIECE (N).
  • – Move back.

true-fear-one179

  • – Use the LOCK BITS to repair the lock (O).
  • – Move the parts around to move the latch (O).
true-fear-one200

true-fear-one200

  • – Slide each element in the indicated direction. Right(R), Left(L), Up(U), Down(D).
  • – 2(R), 1(R), 6(U), 7(L), 9(U), 10(R-U-R), 13(U-U-U-R), 18(R), 21(U-U-U-U-U), 20(R), 14(L-L-U-U), 12(D), 11(L-L), 5(D-D-L-D), 15(U-U-U), 5(R-D-D).
  • – Finally slide the element 23 all the way to the right.
  • – Take the QUEEN PIECE (P).

true-fear-one180

  • – Rotate the disks until the image matches the shapes in the Diary (Q).

true-fear-one166

  • – Take the MACE (R).
  • – Move back twice; move left.

true-fear-one181

  • – Use the MACE on the iron mask to take it off (S).
  • – Take the KNIGHT PIECE (S).
  • – Move back; move forward twice.

true-fear-one182

  • – Place the COMPASS next to the pillar (A).
  • – Insert the KING PIECE (B).
  • – Touch the arrow until it faces southeast in relation to the compass (C).
  • – Insert the QUEEN PIECE (D).
  • – Touch the arrow until it faces west (E).
  • – Insert the BISHOP PIECE (F).
  • – Touch the arrow until it faces east (G).
  • – Pick up the Collector Figurine (CF).
  • – Insert the KNIGHT PIECE (H).
  • – Touch the arrow until is faces north (I).
  • – Insert the KNIGHT PIECE (H).
  • – Touch the arrow until it faces NORTH (I).
true-fear-one236

true-fear-one236

  • – Collect the THIRD TAPE (A).
  • – Pick up the Collector Figurine (CF).
  • – Move back four times, forward, then right.

true-fear-one104

  • – Put the THIRD TAPE in the tape player (B).

Bonus Chapter: Dagger’s home

true-fear-one183

  • – Take a closer look at the reception to play the HOP (A).

true-fear-one184

  • – Play the HOP to get the TWEEZERS.
  • – Move left.

true-fear-one185

  • – Take the DIODE (A).
  • – Take the GLASS (B).
  • – Move back; move forward.

true-fear-one186

  • – Set in the GLASS at the cooler (C).
  • – Touch the cooler to fill out the glass (C).
  • – Take the GLASS OF WATER (C).
  • – Move back; move right.

true-fear-one187

  • – Take the CUPBOARD DOOR (D).
  • – Use the DAGGER to remove the lock cover (E).

true-fear-one188

  • – Pick up all the SPRINGS.
  • – Use the TWEEZERS to pick up the SPRINGS (F).

true-fear-one187

  • – Place the SPRINGS back into the lock (E).

true-fear-one189

  • – Set all the springs in the central position (G).
  • – Move each slider in the following order:
  • – 1-G3; 1-G1; 1-G2; 4-G3; 4-G1; 4-G2
  • – Move left.

true-fear-one190

  • – Use the GLASS OF WATER to water the rose (H).
  • – Use the DAGGER to collect the ROSEBUD (H).
  • – Touch the papers on the table until you see the whole message (I).
  • – Take the LIGHT BULB (J).
  • – Move back.

true-fear-one191

  • – Place the ROSEBUD in the statue’s hands (K).
  • – Take the DIAMOND RING (L).
  • – Move back, forward, then right.

true-fear-one192

  • – Use the DAGGER to take the brick out of the wall (M).
  • – Take the LOCKER DIAL (M).
  • – Insert the LIGHT BULB (N).
  • – Use the DAGGER to open the doors (O).
  • – Insert the DIODE (P).
  • – Take the TAPE (R).
  • – Move forward.

true-fear-one199

  • – Set the CUPBOARD DOOR on the bricks (C).
  • – Move left.

true-fear-one200

  • – Take a closer look at the table to play the HOP (A).

true-fear-one201

  • – Play the HOP to obtain the MASTER KEY.
  • – Move back four times.

true-fear-one183

  • – Repair the BROOM with the TAPE (J).
  • – Move left.

true-fear-one193

  • – Using the DIAMOND RING cut a hole in the mirror (T).
  • – Through the hole use the BROOM to pull the door handle (T).
  • – Move back, forward, then left.

true-fear-one194

  • – Take the SECURITY ENVELOPE (U).
  • – Use the DAGGER to remove the lock (V).
  • – Take the BATTERY (W).
  • – Take the ELECTRICITY EMBLEM (X).
  • – Pick up the Collector Figurine (CF).
  • – Move back twice; move left.

true-fear-one195

  • – Insert the ELECTRICITY EMBLEM in the case cover (Y).
  • – Open the case (Y).
  • – Take the DIODE (Z).
  • – Move back, forward, then right.

true-fear-one196

  • – Insert the DIODE (A).

true-fear-one197

  • – Connect the entry and exit points by touching the diodes and rotating them.

true-fear-one198

  • – Pull the switch to turn the lights off (B).
  • – Move back twice; move left.

true-fear-one202

  • – Place the SECURITY ENVELOPE on the table (D).
  • – Press on the cutter to cut the envelope (D).
  • – Take the SECURITY CARD (D).
  • – Move back, right, then left.

true-fear-one203

  • – Unlock the cabinet with the SECURITY CARD (E).
  • – Take the BATTERY (F).
  • – Take the FILM REEL (G).

true-fear-one204

  • – Insert the two BATTERIES (H).
  • – Touch the flashlight pieces to assemble them (H).
  • – Take the FLASHLIGHT (H).
  • – Move back twice, forward, right, then forward.

true-fear-one206

  • – Use the FLASHLIGHT on the darkness.
  • – Take the AXE (I).
  • – Move back three times.

true-fear-one207

  • – Use the AXE to break the lock (L).
  • – Touch the broken lock to open the box (L).
  • – Take the MATCHES (M).

true-fear-one183

  • – Take a closer look at the reception to play the HOP (A).

true-fear-one208

  • – Play the HOP to get the FIRE IRON.
  • – Move right; move left.

true-fear-one209

  • – Cut the vines with the AXE (N).
  • – Take the FIREWOOD (O).
  • – Unlock the door with the MASTER KEY (N).
  • – Move right.

true-fear-one210

  • – Take the FAUCET STEM (P).
  • – Use the tweezers to pull out the RUBY (Q).
  • – Take the OIL (R).
  • – Put the FIREWOOD in place (S).
  • – Use MATCHES to light a fire (S).
  • – Pull the switch (T).
  • – Move back three times, forward, right, forward, then left.

true-fear-one200

  • – Place the FAUCET STEM (U).
  • – Turn the water off (U).
  • – Move back four times; move right.

true-fear-one211

  • – Use the OIL to open the first aid kit (V).
  • – Take the WRENCH (W).
  • – Move back, forward, right, then forward.

true-fear-one212

  • – Use the FIRE IRON to turn the box over (A).
  • – Use the TAPE to repair the cable (C).
  • – Move back.
  • – Push the switch to turn the lights back on (D).
  • – Move forward.
  • – Open the box (A).
  • – Take the LOCKER DIAL (A).
  • – Open the pocket (J).
  • – Take the PURSE (J).
  • – Take a look at the note (B).
  • – Move back three times, right, left, then right.

true-fear-one213

  • – Throw the PURSE in the fire (F).
  • – Use the FIRE IRON to poke the EMERALD out of the fire (F).
  • – Insert the EMERALD (H).
  • – Insert the RUBY (G).
  • – Take the PROJECTOR KEY (I).
  • – Move back three times; move left.

true-fear-one214

  • – Open the projector over with the PROJECTOR KEY (J).
  • – Insert the FILM REEL (K).
  • – Move back, right, left, then right.

true-fear-one215

  • – Touch the computer to turn it on (L).

true-fear-one216

  • – Touch the Email icon.

true-fear-one239

  • – Enter the name Christopher Smith.
  • – Read the unread email to add it to your journal.
  • – Touch back, then logout.

true-fear-one238

  • – Enter the name James Wilson.
  • – Read the unread email to add it to your journal.
  • – Move back three times, forward, then left.

true-fear-one218

  • – Rotate the wheels to enter the combination 321.
  • – Touch the safe to open it (N).

true-fear-one219

  • – Take the FLOPPY DISK (N).
  • – Move back, right, then forward.

true-fear-one220

  • – Pick up the Collector Figurine (CF).
  • – Insert the two LOCKER DIALS (E).

true-fear-one221

  • – Touch the wheels to turn them to the right position.

true-fear-one222

  • – Open the locker (O).
  • – Take the PLIERS (O).
  • – Move left.

true-fear-one223

  • – Use the PLIERS (P).
  • – Open the cabinet (Q).
  • – Take the SAFE DIAL (Q).

true-fear-one200

  • – Take a closer look at the table to play the HOP (A).

true-fear-one201

  • – Play the HOP to obtain the BILLIARDS BALL.
  • – Move back four times, right, left, the right.

true-fear-one224

  • – Insert the FLOPPY DISK in the computer (R).
  • – Touch the Zip Drive icon (C).

true-fear-one217

  • – Touch the camera icon (A).

true-fear-one205

  • – Find the differences between the two pictures.

true-fear-one225

  • – Find the differences between the two pictures.

true-fear-one226

  • – Find the differences between the two pictures.

true-fear-one227

  • – Find the differences between the two pictures.

true-fear-one228

  • – Find the differences between the two pictures.
  • – Move back three times, forward, right, then forward.

true-fear-one237

  • – Take a closer look at the keypad: enter the combinations 5153.
  • – Move forward.

true-fear-one229

  • – Drop the BILLIARDS BALL in the pipe (T).
  • – Turn the pipe (U).
  • – Take the SAFE DIAL (V).
  • – Use the WRENCH to unscrew a bolt (W).
  • – Use the WRENCH to unscrew a bolt (W).
  • – Take the SWITCH HANDLE (W).
  • – Pick up the Collector Figurine (CF).
  • – Move back three times; move left.

true-fear-one230

  • – Put back the SWITCH HANDLE (X).
  • – Pull the switch (X).
  • – Move back twice, right, left, then right.

true-fear-one224

  • – Put the SAFE DIAL in place (S).
  • – Put the second SAFE DIAL in place (S).

true-fear-one231

  • – Enter the code 5246.
  • – Open the drawer (Y).
  • – Take the HAND (Y).
  • – Move back.

true-fear-one232

  • – Use the HAND to open the safe (Z).
  • – Take the P-2501 module (Z).
  • – Move back twice, forward, right, then forward twice.

true-fear-one233

  • – Connect the P-2051 module to the wires (B).
  • – Touch the module to open it, then take a closer look (A).

true-fear-one234

  • – Flip the switches (C, D, and E) to change the red and green totals.
  • – Flip them until both totals (G, H) are equal.
  • – The solution is random.
  • – Move back.

Congratulations, you have completed True Fear – Forsaken Souls Platinum Edition!


For more great tips and tricks, visit our blog!


The True Fear – Forsaken Souls Platinum Edition Walkthrough is meant as a guide and does not contain cheats, hacks, or serials.

The post True Fear – Forsaken Souls Walkthrough appeared first on GameHouse.

12 Labours of Hercules II – The Cretan Bull Walkthrough

$
0
0

Hera has angered the Cretan Bull, causing it to go on a rampage. The kingdom is in shambles. Amidst the ruined roads and buildings, a hero emerges: Hercules. As the titular hero, your task is to restore the great kingdom to its former glory, expand with new wonders and explore by solving perplexing puzzles. A daunting task, even for an Olympian, but this game play Walkthrough of 12 Labours of Hercules II: The Cretan Bull will assist with tricks, ensuring your success in all endeavors.

Contents

General Tips & Tricks

~ Any Prisoners should be freed as soon as possible. Prisoners turn into Workers, capable of clearing paths by collecting resources such as Food or Wood, and repairing Cracks and Broken Bridges. The sooner you have multiple workers, the faster you can complete the level, raising your final score.

~ It is important to have every Worker performing a task at any given moment. Idle Workers are a sign of failure. There are many respawning food resources that need harvesting at any given moment, and there should always be progress towards the end of the level, so make sure all your Workers are occupied.

~ When calling upon the aid of Hercules, Cerberus, Medusa, or other Heros encountered along your journey, save their actions for last. Make sure to gather whatever Gold, Food, or Wood can be found around the map before committing to Hero actions, because this often triggers a level endstate. Waiting until everything on the map is cleared results in a higher score.

12 Labours of Hercules II – The Cretan Bull Walkthrough

Gameplay Overview

12 Labors of Hercules II: The Cretan Bull is an action game with heavy emphasis on Time Management in its game play. Levels are a map, presented in an isometric view, with your cursor controlling your workers and Hercules. Workers can collect supplies such as Wood and Food, and can construct Farms to generate resources as well. Hercules is used most effectively for feats of strength, such as moving massive boulders or taming the savage Cerberus. The faster levels are completed, the higher your total score raises. Completion of levels with higher scores grant pieces of Marvels, which can eventually be constructed near endgame.

Level 1

Your journey starts with a simple task: Clear the road. A mighty boulder has fallen, and you must get rid of it somehow in order to unblock the path. There is Food toward the bottom of the path: take it. This will give you the strength to clear the Blocked road in front of you, granting access to additional Supplies and Food. Your newfound bounty would best be used to construct a farm on the plot of land toward the bottom-right. This should allow you to gather the remaining Food needed to command Hercules to kick the Boulder blocking the road, completing your quest. But you must continue, to the next level.

12 Labours of Hercules II - The Cretan Bull - 1-3

12 Labours of Hercules II – The Cretan Bull – 1-3

Level 2

The Outpost is your next priority. There is another Boulder needing to be cleared, but that is the least of your worries. For now, clear the Food and Blocked Road on the path along the bottom of the map. Continue clearing the Blocked Roads in the middle to gain access to further Food stores. After collecting the Food and Wood stockpiles nearby, it is advised that you construct Farms on the plots of land near the left side. The additional Food generated by your efforts should allow you to finish clearing the path of Wood and Food, leaving room for Hercules to kick away the remaining three Boulders. Beyond is where events will transpire that test the soul…

12 Labours of Hercules II - The Cretan Bull - 2-6

12 Labours of Hercules II – The Cretan Bull – 2-6

Cheat #1:

There is an infinitely spawning Food source at the bottom of the map. It would be good to take advantage of this bounty by checking it periodically.

Level 3

Here, the objective is to collect a bone in order to chase away a ghost. Progress can be made by collecting the Food and Wood that obstruct the paths below your starting point, as well as to the right. The Bones you seek can be found near the top and along the left side of the map. Kicking the boulder near the middle will allow your Workers to construct a Workshop, which will surely come of use later. Once the three Bones are collected, and the supplies gathered, the Bone Bridge can be constructed over the lava on the path toward the top-middle, by the volcano. Hercules can then tame the mighty Cerberus, found on the path to the far right, who can be used finally to scare away the ghost on the bottom of the map. After kicking over a boulder, use Cerberus one more time to scare away the ghost and continue to the next challenge.

12 Labours of Hercules II - The Cretan Bull - 3-4

12 Labours of Hercules II – The Cretan Bull – 3-4

Level 4

It is at this time Hercules deduces that Medusa may be of use, so he resolves to find her and seek her aid. To do this, you’ll have to pick up her trail with the aid of loyal Cerberus. Start by clearing away the Food and Wood in the path. Be sure to free the prisoner blocked by the pit by the start of the level; three heads are better than two, after all.

Building an Outpost on the plot toward the upper-middle and continuing to gather resources will allow you to gather enough materials to unleash Cerberus. Use Cerberus to track the trail left by Medusa after clearing the roads of supplies, and Hercules can be used to demolish a boulder located near the upper-right of the map, and another boulder slightly below that. This will complete the level, and not a moment too soon, for there is much to do.

12 Labours of Hercules II - The Cretan Bull - 4-6

12 Labours of Hercules II – The Cretan Bull – 4-6

Cheat #2

Careful, not so loud. There is no telling who can hear us, but heed this: there are thieves about! Some of the respawning food sources on this map are prone to pilfering by wandering thieves. Keep your eye out, and snatch that food before someone else can. Your final score will reflect your diligence.

12 Labours of Hercules II - The Cretan Bull - 4-8

12 Labours of Hercules II – The Cretan Bull – 4-8

Level 5

A simple task: Read the note. This task, though appearing easy enough, is obstructed with resources needing collection by your Workers. On top of all that, Hera is scaring Workers, so you’ll have to be on your guard. A pit, cleared near the bottom-left of the map, leads to a prisoner that can be rescued, and a plot of land that can be easily made to house an Outpost.

Further pits, cleared in locations near the far right and middle of the map, can be cleared to make room for more Outposts and pickups for Food, Wood and Gold. These resources will all be necessary in order to command Cerberus to clear Tracks, as well as accomplishing the more important task of helping Hercules to crush the Boulder standing in the way of the note that must be read in order to finish this level and move on to the next one.

Cheat #3
Hera has been known to fly around the map and harass Workers. Be careful, and click on Hera whenever she appears to prevent her from causing a nuisance for your Workers. Disregarding women has been known to follow in the acquisition of currency, so expect a boost in points if you stay on your guard, as well as an Achievement for stopping three attacks.

Level 6

With Medusa’s location now discerned, Hercules has decided to visit her on the Island. To accomplish this task, the construction of a Boat is required, the logistics of which fall to you. Start by using your Workers to collect resources on the path, using the Horn of Plenty for an additional boost. There is a Prisoner needing rescue near the bottom of the map, on the island near the construction point for the Boat.

Two Bridges can be repaired as well, granting access to smaller islands rich with resources. Once enough resources are gathered to complete the three stage construction process for the Boat, Hercules can embark upon his journey to seek the aid of Medusa. Should you be following this game play walkthrough to this point you should also receive a plethora of achievements for your progress thus far.

Level 7

The task at hand after reaching the island is to collect the Pearl resting at the top of the map. Workers can be put to use immediately by collecting resources such as Food and Wood to clear the paths. The speed at which the Workers move between objects of interest can be increased with a power up, once the bar on the right side of the screen fills up.

There are plots of land suitable for Farms along the shore of the island, once room has been made. A boulder, removed with the assistance of Hercules, protects a store of Gold near the top-left of the map, while the path above, impeded by a Crack and Broken Bridge, reveal a store of Food and Gold. Finally, Medusa can be called upon to frighten the two Minotaurs guarding the Pearl at the top of the map, leaving it open for the taking. Job well done.


The labors of Hercules are many, and 12 Labours of Hercules II The Cretan Bull is only one game of many following the adventures of Hercules. This game play walkthrough should have acquainted you with the nature of gameplay in 12 Labours of Hercules II The Cretan Bull, provided instructions for the completion of several levels, and provided additional tips and tricks to ensure continued success in this game.


For more great tips and tricks, visit our blog!


The 12 Labours of Hercules II – The Cretan Bull Walkthrough is meant as a guide and does not contain cheats, hacks or serials.


The post 12 Labours of Hercules II – The Cretan Bull Walkthrough appeared first on GameHouse.

Haunted Legends – The Undertaker Walkthrough

$
0
0

Take on the role of a detective and discover the truth behind the mysterious invasion of zombies in Haunted Legends – The Undertaker. This guide will walk you through all the levels and puzzles. There are many valuable tips on how to play, as well as solutions to the all of the mini-games.

Contents

General Tips & Tricks

– From the Main Menu you will be able choose your player profile or create a new player profile and start the game. The Options button is also found here and by clicking it you will open a menu that allows you to adjust various game settings, such as sound, cursor type and window size.

– Since you are investigating what is going on in the town, you will be collecting clues along the way. All of these clues and notes are written down and saved in your Diary. If you are not sure of what to do, always open the Diary and read it as it often provides the information you need.

– There are three different difficulty levels for you to choose from.
– Casual is the easiest mode. If you choose this setting there will be sparkles highlighting an active area. Also, it will take less time for the hint and skip buttons to recharge.
– If you choose the advanced mode, active areas will not sparkle and it will take longer for the hint and skip buttons to recharge.
– The most difficult mode is the hard one. In this mode the hint and skip buttons recharge take a long time to recharge, no active areas will sparkle and the tips are disabled.

– As you play, your cursor will change according to the scene. If your cursor changes to a Magnifying Glass, you will be able to zoom in on an area. If you have the Hand Cursor, you will be able to pick up something and have it placed into your inventory. An  Arrow means you can navigate to the next screen.
– All important items collected can be found in the Inventory. You can access your Inventory by just holding the cursor over the tab at the bottom of the screen. Once you use an item and it is no longer needed, it will automatically be removed from the Inventory.
– The Hint button is in the lower right corner of the screen. You can click on it for some help if you are not sure what to do. There is a recharge time before you can use it again.
– The Skip button shows up during games. You can use it if you are having trouble solving one or just don’t want to solve it at that time.
– During the game you will encounter Hidden Object Scenes. Sparkles indicate where a scene can be accessed. The Hidden Objects in the list are written in white or orange. Objects written in white can be clicked on when found and the ones in orange require an extra step to uncover. Keep in mind that the items in your list can differ from those in the guide since the list is randomly generated.
– In addition to solving the puzzles, 30 fish scales must also be found in order to complete the game.

Haunted Legends – The Undertaker Walkthrough

Chapter 1: Mrs. Fisher

– First, go over the door and take a closer look at the Newspaper that lands on the doorstep.
– Pick up the Handle that was underneath the Newspaper and attach it to the door.
– Knock and then enter the building.

– Speak with Mrs. Fisher.
– Examine the mirror with the monkey and get the Notes.
– Go over to the window and zoom in on it to get the Brush.

– Speak with Mrs. Fisher first.
– Examine the painting and take the Key.
– Zoom in on the flowers and take the Note by them. Move the plant’s leaves out of the way to reveal a Lens. Pick that up.
– Finally, zoom in on the window with the telescope in front of it. Take both the Coffin Handle and the Note.

– Zoom in on the window and take the Lens Socket found there.
– Go to the coffin and zoom in on it to be able to attach the Coffin Handle. Now you can open it.
– Inside the coffin you will find a Pirate Hook and Bone. Take those items.
– Zoom in on the lock. Unlock it using the Key. Take the Medallion Half.

– The first thing you will have to do here is put the Lens Socket and Lens into the Telescope in front of the window. Once you click on the Lens, you will receive a clue.
– Go and examine the Chest. It can be unlocked by rotating the disks until the code 712 is entered. Take the Iron Fish.
– The Iron Fish has to be open and closed so that the other Medallion Half you need is revealed.

– Zoom in on the pedestal and insert both halves of the Medallion. This triggers the appearance of a puzzle. Solve it by placing the pieces in their correct spots. The solution is shown in the screenshot.
– Enter the hatch.

Haunted Legends - The Undertaker - Statue

Haunted Legends – The Undertaker – Statue

– Zoom in on the sink in the corner. Turn on the spigot two times by clicking it and take the Shovel.
– Next, examine the picture of skeletons on the wall. Insert the Bone into the picture and start a puzzle in which you have to correctly position bones. The solution is shown in the screenshot.
– Take the Bottle Filled With Powder from the mouth of the left skeleton.

Haunted Legends - The Undertaker - Bones

Haunted Legends – The Undertaker – Bones

– Zoom in on the tub of water. You will need to get the Long Hook. You can acquire it by putting the Pirate Hook you collected onto the mop’s Handle.
– Next, zoom in on the skull and grab the Wheel with the Long Hook.
– Go to the gurney and insert the Wheel to start a hidden object scene.
– Find all of the Hidden Objects.
– The grapes are found in the skull, the bell has to be clicked on to obtain the note, the fish is cut with the file to get the pouch and the snail has to be clicked on to get the moon.
– You will receive a Corkscrew.

Chapter 2: The Underground Crypt

– Examine the table and pick up the Bottle.
– Go to the sink and zoom in on it. Fill the Bottle with water using the spigot.
– Return to the table and zoom in on it once again. Now place both the Bottle With Water and the Bottle With Powder on top of it.
– Using the Corkscrew, open the Green Bottle. Pour the powder into the Green Bottle. You now have a Cleaning Solution that you can take.
– Return to the tub and pour the Cleaning Solution into the water. Once that is done, you have to drain the water by removing the Drain Plug.
– Enter the underground crypt.

– Go to the coffin and zoom in on it. Clear it off using the Brush. Take all the Buttons. Examine the images on the coffin.
– Go to the Gear and pick it up.
– Next, zoom in on the ceiling where the hole is and then examine the bottom of the ladder. The dirt can be dug up with the Shovel. Take the Shears you find there.
– Finally, go to the puzzle on the right side of the screen and trigger a mini-game by inserting the Buttons.

– Solve the puzzle as shown in the screenshot.

Haunted Legends - The Undertaker - Chest Key

Haunted Legends – The Undertaker – Chest Key

– Once it is solved, take the Chest Key and continue to the next scene.

– Find all of the Hidden Objects.
– The note is obtained by clicking on the pitcher. The foam is obtained by moving the cone over to the test tube.
– Get the Red Fish.

– Unlock the chest with the Chest Key.
– Take the NoteLobster Scale and Skull.
– Return to the underground crypt.

– Zoom in on the hole in the ceiling.
– Place the Skull in the opening and start a puzzle.

– Position the skulls in the puzzle as shown in the screenshot.

Haunted Legends - The Undertaker - Skull Disk

Haunted Legends – The Undertaker – Skull Disk

– Go into the hatch.

– Click on the owl.
– Zoom in on the cart and take the Note and Spring.
– Zoom in on the hole in the tree. Remove the boards and take the Screwdriver.

– Take a close look at the Undertaker and the hat.
– Go to the amulet and click on it and then the notes.
– Pick up the Torch.

– Zoom in on the bridge.
– Use the Torch to make the zombie’s hand go away.
– Pull the bridge handle above the railing and then pick up the fallen Handle.
– Place the Spring into the bridge gears and then pull the handle.
– Cross the bridge.

– First, zoom in on the plaque on the right side of the bridge. Use the Screwdriver to remove the screws holding it in place. Once you can take it off, you will find a Note and Skull to collect.
– Zoom in on the second lamppost on the left side of the bridge. Pick up the Angel.
– Zoom in on the gravestone and take the Owl Scale.
– Remove the vines on the grave by cutting them away with the Shears. Take the Green Fish.

– Zoom in on the door and insert the Skull into its lock. This triggers a puzzle.
– Solve as seen in the screenshot and then enter through the door.

Haunted Legends - The Undertaker - Skull Disk

Haunted Legends – The Undertaker – Skull Disk

– Enter the Hidden Objects Scene after it is activated by putting the Torch into the holder.

– Find all of the Hidden Objects.
– The hammer is acquired by attaching the head to the handle. Use the hammer on the hook to get the key. Get the bolt by using the wrench. Get the acid by using the bolt on the lid and then pour the acid over the chain to obtain the bas-relief. Place the bas-relief into the opening on the side of the casket.
– Get the Decorative Insert.

– Zoom in on the angel statue.
– Put the Decorative Insert into the opening to trigger a puzzle.
– Place the feathers as shown in the screenshot.

Haunted Legends - The Undertaker - Feathers

Haunted Legends – The Undertaker – Feathers

– Zoom in on the casket on the right side of the screen.
– Put the Angels on it and continue on down the stairs.

– Zoom in on the beacon. Get the Fishing Line using the Hook.
– Zoom in on the boat and take the Peg Leg. Attach the Hook and Fishing Line to the Rod and then take the complete Rod.
– Zoom in on the tent. Get the Pliers by using the Peg Leg on the seashell.
– Go down and enter the Hidden Object Scene.

– Find all of the Hidden Objects.
– Use glue on the book in order to acquire the fly. Place the fly near the spider web and you will be able to get the spade. Use that on the dirt and light the oil lamp with the matches. You now have the lamp and that is used on the wax seal.
– Get the Bike Horn.

– Zoom in to look over the ledge and then use your Rod to obtain the Lamp Handle.
– Proceed down the steps.

– Go to the beacon and insert the Lamp Handle into the opening. Click the handle to pull it.
– Zoom in on the cave and scare away the bats with the Bike Horn.
– Get the Sun Scale and Water Bucket.
– Zoom in on the tent and pour the water from the Bucket over the Pan. Take the Pan and the Yellow Fish.
– Move down twice and then go to the left.

Chapter 3: The Hospital

– Take the Note.
– Zoom in on the gate lock. Place the Red, Green and Yellow Fish into the slots to open the gate.

– Zoom in on the door’s lock.
– Remove the pin with the Pliers.
– Enter the building.

– Take the Poker near the furnace.
– Zoom in on the far wall and take the Note.
– Zoom in on the furnace and put the Pan in it. Use the Poker to get the Key.

– Zoom in on the hospital door to activate a puzzle.
– Create the three stained glass patterns shown in the screenshot using the panels.

Haunted Legends - The Undertaker - Glass Pattern

Haunted Legends – The Undertaker – Glass Pattern

– Unlock the door with the Key and enter the Hidden Object Scene.

– Find all of the Hidden Objects.
– The tweezers are inside of the box. The screwdriver is found by zooming in on the cage. Zoom in on the clock and remove the cover with the screwdriver. Take the clock hand.
– Zoom in on the mannequin and use the clock hand on the chest area. Take the heart using the tweezers and put it into the jar. Take the oiler and use it to oil the hinges, which reveals a key. Open the lock with the key.
– Take the Scalpel.

– Zoom in on the pot and move the boot to get the Deer Scale.
– Use the Poker to move the papers out of the way and take the Magnet.
– Zoom in on the package. Open it and use the Magnet to acquire the Tweezers.
– Take the Note.
– Go through the door on the left.

– Zoom in on the far wall. Remove the Saw Blade with the Tweezers.
– Zoom in on the book and cut the straps holding it closed with the Scalpel.
– Now open that book and take the Eraser found inside.
– Continue on to the hospital.

– Zoom in on the desk. Put the Saw Blade onto the Handle. Pick up the Hacksaw and the Note.
– Zoom in on the poster and clean it up with the Eraser. Take note of the clue found there.
– Go to the safe on the right wall and zoom in on it. Unlock it with the following code: 4-2-7. Take the Syringe.

– In the watch house, first zoom in on the bottle. Use the Syringe on it.
– Take the Fish Oil.
– Go back to the hospital.

– Zoom in on the table and put the Fish Oil on the teeth with the Syringe.
– Get the Handle.
– Enter the Hidden Object Scene.

– Find all of the Hidden Objects.
– First, get the bottle opener found on the shelf and use it to open the bottle. Take the cheese.
– Zoom in on the cage and open it. Put the cheese inside of it and then get the matches.
– On the shelf, click on the mortar, get the eye and click the mortar a second time.
– Zoom in on the head and put the eye into the right socket.
– Take the gypsum.
– Zoom in on the shelf and click on the three test tubes.
– Light the burner with the matches and click on the knob.
– Fill the mortar with gypsum and use the acid bottle with it. Use the pestle and take the gypsum.
– Zoom in on the cage. Fill the mold with the gypsum and take the ear.
– Attach the ear to the head.
– Get the Bandage.

– Put the Bandage onto the stool and take it. Place it in front of the cabinet.
– Zoom in on the top of the cabinet and attach the Handle to the door.
– Click the right side three times and the left side two times.
– Take away the rope and pick up the Tarp.

– Zoom in on the fire and put the Tarp on top of it.
– Continue on to the town square.

– Get the Bucket and Handkerchief.
– Zoom in on the fence. Take the Note and Horse Scale.
– Use the Bucket on the barrel and get the Cement.

– Zoom in on the bag in front of the building. Take the Note and Spiral Button.
– Zoom in on the grid in the alley. Cut it with the Hacksaw and enter the Hidden Object Scene.

– Find all of the Hidden Objects.
– Get the Shovel.

– Zoom in on the ground behind the fence. Dig up the dirt using the Shovel.
– Take the Paver Stones.

– Zoom in on the grid. Get the Rope.
– Zoom in on the Venus flytrap. Take the Watering Can.

Chapter 4: The Fort

– Enter the Hidden Object Scene.

– Find all of the Hidden Objects.
– Move the hat to get the card. Click the ant and get the acorn. Use the file with the rod and take the wire. Click the bat to find the clover.
– Get the Trowel.

– Zoom in on the pavement on the right side of the building. Take the Rose Scale.
– Pour the Cement into the Bucket and use the Trowel.
– Put the Paver Stones on the cement.

– Zoom in on the figure. Take the Note.
– Use the Watering Can on the seeds and keep the empty Watering Can.
– Go up the stairs.

– Zoom in on the cannon and take the Fuse.
– Click on the lid of the cannon.

– Zoom in on the cart and take the Sieve.
– Open the chest and take the Iron Glove.
– Zoom in on the door and clear away the debris. Take the Tobacco and the Sea Dragon Scale.
– Zoom in on the guard house. Take the Awl.
– Enter the tower and go up the stairs.

– Use the Iron Glove to pick up the Barbed Wire.
– Zoom in on the sack. Use the Awl on it and get the Brass Knuckles.

– Examine the right door. Unlock it by putting the Wire into the lock.
– Enter the building.

– Zoom in on the man and give him the Tobacco.
– Zoom in on the gun rack and take the Crow Scale.
– Zoom in on the window and take the Leaf.
– Examine the lantern and use the Brass Knuckles to break the glass.
– Take the Glass Shard.
– Use the Handkerchief to take the File.

– Examine the guard hut and use the File on the chain. Take the Chain.

– Go back to the town square. Zoom in on the right building’s door.

Chapter 5: Bell Tower View

– Trigger a puzzle by putting the Leaf into the lock.
– The solution is shown in the screenshot. Put the Spiral Button into the opening.
– Enter the bakery.

Haunted Legends - The Undertaker - Leaf

Haunted Legends – The Undertaker – Leaf

Haunted Legends - The Undertaker - Pins

Haunted Legends – The Undertaker – Pins

– Speak with the Baker.
– Take the Ring on top of the table.
– Click on the bread once and then take the Poisoned Bread.
– Take the Oven Fork.
– Zoom in on the barrel. Use the Sieve and get the Bullet.
– Zoom in on the cabinet in the back and open the door. Take the Handle.

– Zoom in on the balcony and get the Curtain by using the Oven Fork.
– Zoom in on the Venus flytrap and give the Poisoned Bread to it.
– Use the Shovel in the plant pot to get the Conch Shell and Worm.

– Zoom in on the door lock. Activate the puzzle.

Haunted Legends - The Undertaker - Hexagon

Haunted Legends – The Undertaker – Hexagon

– Solve as shown in the screenshot.
– Insert the Ring into the slot.
– Enter the bell tower.

– Zoom in on the bag hanging from the landing. Open it and take the Hammer and Matches.
– Zoom in on the gears by the ceiling. Attach the Rope and click on it.
– Zoom in on the bell and study the clue.
– Return to the bakery.

– Zoom in on the hatch and use the lock combination 3-2-1.
– Cut the rope with the Glass Shard.
– Take the Ladder.
– Now go down twice, turn left and go along the right path until you get to the tower. Go up and enter through the right door.

– Zoom in on the gun rack. Open the rifle and put in the Bullet. Take the Loaded Rifle.
– Zoom in on the window and put the Curtain on it. Click and go through it.

– Zoom in on the vine on the wall. Take the Lock Part.

– Zoom in on the left door. Shoot the lock with the Loaded Rifle and enter the Hidden Objects Scene.

– Find all of the Hidden Objects.
– Zoom in on the wheel and unscrew the nut with the wrench. Take off the cover and get the bullet.
– Take the rapier and use it to open the barrel lid.
– Zoom in on the barrel and get the Jack.
– Zoom in on the mechanism and put in the bullet to activate a puzzle. Solve as shown in the screenshot.

Haunted Legends - The Undertaker - Mechanism

Haunted Legends – The Undertaker – Mechanism

– Use the Jack with the cannon. Take the Lighter.
– Put the Dynamite on the chest and light it with the Lighter.
– Get the Lock.
– Zoom in on the device and put the lock onto it. This will activate a puzzle. The code to enter is 7-5-8. Take the Rocket Casing.
– Go down three times and go to the right.

Haunted Legends - The Undertaker - Code

Haunted Legends – The Undertaker – Code

– Zoom in on the front of the store and focus on the window.
– Put the Lock Part into the lock and activate the puzzle.
– Mix the ingredients according to the recipe.
– Get the Gun Powder.

Haunted Legends - The Undertaker - Ingredients

Haunted Legends – The Undertaker – Ingredients

Chapter 6: The Market

– Zoom in on the platform. Use Rocket Casing with the MatchesFuse and Gunpowder. This will activate a puzzle.
– Solve according to the screenshot.

Haunted Legends - The Undertaker - Rocket

Haunted Legends – The Undertaker – Rocket

– Take the Light Bulb.
– Get the Glove and Flagpole.
– Feed the Worm to the crow and take the Weathervane.

– Zoom in on the grate. Remove it with the Flagpole.
– Dip the Watering Can into the water and fill it.
– Go to the right.
– Zoom in on the lantern and put the Light Bulb into it.

– Zoom in on the floor below the first landing and use the lantern.
– Zoom in on the nest. Use the Oven Fork to retrieve the Nail.

– Place the ladder in front of the wall on the right.
– Zoom in on the window and put the Weathervane on the hook.
– Enter through the window.

– Zoom in on the window and remove the paint with the Nail.
– Shatter the window and get the Handle.
– Zoom in on the winch. Put the Handle on it. Take the Handle.

– Pick up the wooden lid and place in onto the bridge.
– Go to the market.

– Zoom in on the cutting board.
– Zoom in on the nets. Move the one on the right and get the Sawfish.
– Place the Handle on the well and click.
– Zoom in on the bucket to activate a puzzle.

Haunted Legends - The Undertaker - Crabs

Haunted Legends – The Undertaker – Crabs

– Match the pairs of crabs.
– Solve according to the screenshot.
– Get the Gear Wheel.

– Take the Note.
– Zoom in on the girl hiding behind the crates. When she comes out speak with her.
– Get the Oar.
– Zoom in on the barrel. Take the Wheel.
– Zoom in on the barrel again and place the cutting board inside of it. Take the tar covered Board.
– Go down three times.

– Zoom in on the ground at the bottom of the stairs. Take the Tree Scale and Spoon.

– Put the Wheel on the car. Click on it.
– Zoom in on the broken barrel.
– Put the Spoon into the salt and take the Potassium Chlorate Crystal.
– Go down five times, turn left, take the right path and go up the tower.

– Open the cannon lid, if it is still closed.
– Pour the water onto the plants. Wait for the bees to swarm it.
– Zoom in on the cannon and take the Stone.

– Zoom in on the boards.
– Use the Sawfish on those boards and enter the Hidden Object Scene.

– Find all of the Hidden Objects.
– Get the Knife.

– Zoom in on the drain pipe and put the Stone into the hole.
– Take the Chimney Brush.
– Go in and enter the Hidden Object Scene.

Chapter 7: The Lighthouse

– Find all of the Hidden Objects.
– Solve as seen in the screenshot.
– Get the Oil.

– Zoom in on the well. Attach the Chimney Brush to the Chain and lower it down the well.
– Get the Jetton Commandant.

– Zoom in on the man. Give him the Jetton Commandant. Take the Scroll he gives you.
– Zoom in on the safe and put the Handle on it. Click.
– Zoom in on the hatch. Pour Oil on it to activate a puzzle.
– Solve the puzzle as seen in the screenshot.

Haunted Legends - The Undertaker - Pipes

Haunted Legends – The Undertaker – Pipes

– Zoom in on the table. Use the grinding stone to sharpen the Knife.
– Zoom in on the Net. Take the one on the left by cutting it free with the Sharp Knife.

– Zoom in the post. Cut the rope with the Sharp Knife.
– Zoom in on the trap in the water and open it.
– Take the Note out of the bottle and the Handle.

– Zoom in on the table. Use the Sharp Knife to cut the net. Move the fish.
– Take the Key and Shell Scale.

– Zoom in on the lock found on the side of the boat. Insert the Key and open it.
– Take the Scoop and Harpoon.
– Return to the Commandant’s house and enter through the window.
– Enter the Hidden Object Scene.

– Find all of the Hidden Objects.
– Get the Flint.

– Remove the manhole cover with the Harpoon.
– Zoom in on the manhole. Take the Handle and Fish Scale.
– Zoom in on the mechanism and insert the Gear Wheel and Handle.
– Pick up the boat and zoom in on it.
– Use the tar covered board on the boat.
– Use the Scoop on the water inside the boat.
– Use the Oar with the boat to cross the water.

– Zoom in on the shipwreck.
– Take the NoteRum and Firewood.
– Zoom in on the fire pit. Take the Boulder.
– Put the Firewood into the fire pit and use the Flint to light it.
– Scare away the wolves by putting the Potassium Chlorate Crystal into the fire.
– Zoom in on the lighthouse. Get the broken Shovel.

– Zoom in on the wall on the left side. Take the Fresco Piece.
– Place the broken Shovel under the rails.
– Put the Boulder on the Shovel.
– Take the Lighthouse Key.

– Zoom in on the lighthouse’s door.
– Insert the Lighthouse Key and choose the numbers 4 and 7.
– Go inside.

– Zoom in on the cage and open it to take the Form.
– Click on the bar and get the Hook.
– Open the hatch and zoom in.
– Use the Hook on the lever to access the stairs.

– Zoom in on the telescope. Take the Lens.
– Zoom in on the railing and take the Pin.
– Light the candle with the Flint. Take the Wick.
– Zoom in on the crate and remove the Nails with the Hammer. Take the Lever and Tulip Scale.

– Attach the Lever to the switch and pull it.
– Take the Nugget.
– Go inside.

Chapter 8: The Hotel

– Zoom in on the table. Put the Form on it.
– Put the Nugget in the device.
– Turn the knob and use the Flint on the burner.
– Click the beaker and get the Key.

– Zoom in on the lock and put in the Key. Open the cage and get the second Fresco Piece.
– Pour Rum into the funnel. Put the Wick on it and light with the Flint.
– Zoom in on the safe. Attach the Handle and open it. Click on the lever.

– Zoom in on the area where the light shines. Wait for the fog to clear and continue.

– Take the Antenna.
– Open the door of the cable car. Take the Keys.
– Use the Sharp Knife to cut the deflated ball. Take the Rubber Strip.
– Zoom in on the hoist and take the Ice Axe.
– Zoom in on the ladder. Place the antenna on it.
– Zoom in on the chain over the ladder and put the Pin in it.

– Zoom in on the door and put the Lens over the lock.
– Zoom in on the lock and put in the Keys to open a puzzle.
– Solve and take the Starter and Crown Scale.

– Zoom in on the ground and put the two Fresco Pieces down.
– Place the pieces as shown to open the grid.
– Zoom in on the hatch and get the Chain and triangle Key.

– Zoom in on the hoist. Put the Chain and Rubber Strip on it.
– Zoom in on the cable car. Insert the Starter and activate the puzzle.
– Solve the puzzle as shown.

Haunted Legends - The Undertaker - Strings

Haunted Legends – The Undertaker – Strings

Haunted Legends - The Undertaker - Route

Haunted Legends – The Undertaker – Route

– Zoom in on the panel and put the triangle Key into the opening.
– Get the Tube.
– Zoom in on the door and remove the ice with the Ice Axe. Enter the Hidden Object Scene.

– Find all of the Hidden Objects.
– Get the Dolphin.

– Zoom in on the door of the hotel. Put the Dolphin on the rope.
– Ring the bells in this order: 2-4-3-1.
– Go inside.

Haunted Legends - The Undertaker - Bells

Haunted Legends – The Undertaker – Bells

Chapter 9: The End

– Zoom in on the cubby and get the Note, as well as any others that will show up.
– Take the Lever.
– Zoom in on the chimney and put the Tube inside.

– Zoom in on the gramophone. Take the Snail Eye.
– Zoom in on the snail and take the Rag.
– Get the Ruler on the window sill.
– Enter the Hidden Object Scene.

– Find all of the Hidden Objects.
– Get the Can Opener.

– Zoom in on the panel and clear the oil away with the Rag. Take the Shell.

– Zoom in on the painting. Put the Shell into the slot and activate the puzzle.
– Enter the following pattern: A-7, H-4, D-4, J-6.
– Get the Fan.
– Zoom in on the gramophone.
– Use the Can Opener on the nut and take the Horn.

Haunted Legends - The Undertaker - Painting

Haunted Legends – The Undertaker – Painting

– Zoom in on the chimney. Put the Horn into the opening.
– Melt ice on the stairs by using the Fan on the Horn.
– Zoom in on the left fish and click twice.
– Zoom in on the right fish and click twice.
– Zoom in on the stairs. Take Lock Pick and Eagle Scale.

– Zoom in on the cabinet. Open the door with the Ruler.
– Take the Fish Scale and Hose.
– Zoom in on the far door and use the Lock Pick on the lock.

– Zoom in on the wall. Take the Valve. Put the Hose into the opening.
– Look out the window.
– Get the Sea Horse and Starfish Scale.
– Zoom in on the armoire and put the Sea Horse into the opening to start a puzzle.

Haunted Legends - The Undertaker - Shoes

Haunted Legends – The Undertaker – Shoes

– Solve as shown.
– Trigger another puzzle by putting the two handles into the slots.

– Get the Pocket Knife.

– Zoom in on the painting and cut it with the Pocket Knife.
– Get the second Snail Eye.
– Examine the door on the left. Put the Valve in the lock and click twice.

– Take the Lever.
– Click on the hose.

– Zoom in on the snail and insert both Snail Eyes. Also insert both Levers.
– Click on the middle lever and take the Horse. Click on the left one for the Crab Scale.

– Zoom in on the window sill. Put the Horse on the box. Get the Note and Salt.

– Sprinkle Salt on the iced path.
– Zoom in on the bottom of the bridge. Get the Torch.

– Zoom in on the horse.
– Put the Torch onto the oil.

– Zoom in on the chimney.
– Place the Oiled Torch into it and take it again.

– Zoom in on the fireplace and use the torch in it.
– Enter the Hidden Object Scene.
– Find all of the Hidden Objects.
– Get the Wind Up Key.

– Zoom in on the suitcase. Give the drum to the toy bunny and put the Wind Up Key in the opening on its back.
– Get the Lock Piece.
– Zoom in on the panel and insert that to activate a puzzle.

Haunted Legends - The Undertaker - Lock

Haunted Legends – The Undertaker – Lock

– Solve as shown.

– Repair the balloon with the FabricNeedle and Thread.
– Take the repaired Balloon.

– Zoom in on the broken bridge and attach the Balloon to the hose.
– Get the Glove.

– Take the Ladder and Notes.
– Zoom in on the ground. Get the Hammer and Dragon Scale.

– Place the Ladder against the pole on the left.
– Zoom in on the icicle. Use the Hammer to break it off. Pick up the Icicle.
– Take the Turtle Scale.

– Zoom in on the mechanical fish. Put the Icicle on the nose once it has been assembled.

Haunted Legends - The Undertaker - Mechanical Fish

Haunted Legends – The Undertaker – Mechanical Fish

– Zoom in on the window and wipe it with the Glove.
– Use the Hammer to break the window.

– Zoom in on the cage and get the Notes. Insert the Amulet into the opening.
– Enter the hatch.

– Zoom in on the man.
– Take the first Lock Piece.
– Get the Notes.
– Leave and then go to the structure in the center. Zoom in on it and get the second Lock Piece.
– Zoom in on the door.

– Insert all pieces of the lock and activate the final puzzle.
– The solution pictured is one of the solutions. They are random.

Haunted Legends - The Undertaker - Pieces

Haunted Legends – The Undertaker – Pieces

Congratulations! You have now reached the end of Haunted Legends – The Undertaker and successfully completed all levels. Our blog has many more valuable gaming guides and you are welcome to check them all out.


For more great tips and tricks, visit our blog!


The Haunted Legends – The Undertaker Walkthrough is meant as a guide and does not contain cheats, hacks or serials.

The post Haunted Legends – The Undertaker Walkthrough appeared first on GameHouse.


Wild West Chase Walkthrough

$
0
0

Go an an adventure full of mystery, suspense and puzzles in Wild West Chase. You will have to uncover hidden objects, clear boards by matching objects and even fight off bandits! This walkthrough will take you through every level of the game and help you to successfully complete it.

Contents

General Tips & Tricks

– Using the Options you can adjust the volume of the music and sound effects. You can also decide if you want to play in windowed or full screen mode, use the custom cursor or regular cursor or stretch the game screen or not.
– On the map you can see your progress. It will show which levels you have completed and which are left. The spot with the large red X on it marks the level you are currently on.

Wild West Chase - Tips Map

Wild West Chase – Tips Map

– If you have trouble finding a hidden object, you can get hints by clicking on the Sheriff Badge button next to the tray that contains the list of objects to search for. A hint will point you to an object that you have not yet found. Once you have used a hint, the button will recharge over time. The badge will fill up as it recharges and after it is completely silver again, you can use it to receive another hint.
– In a Hidden Object Scene you can return to the Main Menu by clicking on the Menu button at the top of the screen. Choose the option you want or continue the scene by resuming.

– Some levels require you to form Chains of the same object. In order to make a chain, you will need to link at least three chips. The goal of these levels is to remove the chips with the wood-colored background from the board by using the object pictured on that chip as part of a chain. Chains are completed by clicking on a chip and holding it while you add more. Once the chain is done, release the mouse button to finish it.
– Most levels limit the number of moves you have to clear the board of the chips with the wood-colored background. The number of moves left can be seen at the top of the screen.
– When forming a Chain, try to use as many chips as you can in it. The more chips used, the more points you will earn and if long enough, these will eventually reward you with Power-Ups. These can be used to remove several chips from an area at once by adding it to the end of the chain.
– By completing levels you will earn funds. The points earn equal the amount of Money you will have available to purchase items from the Shop. The Shop is accessed from the map.
– In the Shop, helpful items are for sale. You can purchase and upgrade Power-Ups that will help you complete the levels.
– The Tomahawk power-up will remove an entire row of chips from the board. Use it by clicking on any tile you want.
– The Lamp destroys a random 3 x 3 area of chips.
– The Rifle removes 10 random chips from the board.
– The TNT destroys half the chips on the board.

Wild West Chase - Tips Shop

Wild West Chase – Tips Shop

Wild West Chase Walkthrough

Level 1 – 10

Level 1

– Find the 12 or more Hidden Objects in this scene to complete the level. If there is a number in parentheses next to an object in the list, you will have to find that many of it.

Wild West Chase - Level 1

Wild West Chase – Level 1

Level 2

– Remove the chips with the wooden background by forming Chains.

Wild West Chase - Level 2

Wild West Chase – Level 2

Level 3

– Remove the chips with the wooden background by forming Chains and using less than 45 moves.

Wild West Chase - Level 3

Wild West Chase – Level 3

Level 4

– Remove the chips with the wooden background by forming Chains and using less than 65 moves.

Wild West Chase - Level 4

Wild West Chase – Level 4

Level 5

– Find the 12 or more Hidden Objects in this scene to complete the level. If there is a number in parentheses next to an object in the list, you will have to find that many of it.

Wild West Chase - Level 5

Wild West Chase – Level 5

Level 6

– Remove the chips with the wooden background by forming Chains and using less than 80 moves. The chips in the center are blocked by a boards. To remove those you will have to make matches next to those blocked chips in order to free the chips underneath.

Wild West Chase - Level 6

Wild West Chase – Level 6

Level 7

– Remove the chips with the wooden background by forming Chains and using less than 65 moves. Free the chips blocked by boards by making matches next to them.

Wild West Chase - Level 7

Wild West Chase – Level 7

Level 8

– Remove the chips with the wooden background by forming Chains and using less than 65 moves. Free the chips blocked by boards by making matches next to them.

Wild West Chase - Level 8

Wild West Chase – Level 8

Level 9

– Remove the chips with the wooden background by forming Chains and using less than 75 moves. Some chips are blocked by chains. Remove the chains by matching them.

Wild West Chase - Level 9

Wild West Chase – Level 9

Level 10

– Remove the chips with the wooden background by forming Chains and using less than 55 moves. Some chips are blocked by chains. Remove the chains by matching them.

Wild West Chase - Level 10

Wild West Chase – Level 10

Level 11 – 20

Level 11

– This level requires you to shoot at the Bandits attacking you. The bandits will appear randomly on the screen. Shoot by clicking on a bandit whenever you see one.

Wild West Chase - Level 11

Wild West Chase – Level 11

Level 12

– Remove the chips with the wooden background by forming Chains and using less than 100 moves. Free the chips blocked by boards by making matches next to them.

Wild West Chase - Level 12

Wild West Chase – Level 12

Level 13

– Remove the chips with the wooden background by forming Chains and using less than 100 moves.

Wild West Chase - Level 13

Wild West Chase – Level 13

Level 14

– Remove the chips with the wooden background by forming Chains and using less than 100 moves. This level also has darker tiles. To remove these you will have to make a match with them two times.

Wild West Chase - Level 14

Wild West Chase – Level 14

Level 15

– Remove the chips with the wooden background by forming Chains and using less than 100 moves. This level also has darker tiles. To remove these you will have to make a match with them two times.

Wild West Chase - Level 15

Wild West Chase – Level 15

Level 16

– Remove the chips with the wooden background by forming Chains and using less than 100 moves. This level also has darker tiles. To remove these you will have to make a match with them two times. Some of the chains are also doubled and have to be matched twice to remove.

Wild West Chase - Level 16

Wild West Chase – Level 16

Level 17

– Find the 12 or more Hidden Objects in this scene to complete the level. If there is a number in parentheses next to an object in the list, you will have to find that many of it.

Wild West Chase - Level 17

Wild West Chase – Level 17

Level 18

– Remove the chips with the wooden background by forming Chains and using less than 100 moves. This level also has darker tiles. To remove these you will have to make a match with them two times. Remove the chains by making a match with them.

Wild West Chase - Level 18

Wild West Chase – Level 18

Level 19

– Remove the chips with the wooden background by forming Chains and using less than 100 moves. This level also has darker tiles and double chains. To remove these you will have to make a match with them two times. Remove the chains and boards by making one match with them.

Wild West Chase - Level 19

Wild West Chase – Level 19

Level 20

– Remove the chips with the wooden background by forming Chains and using less than 100 moves. This level also has darker tiles. To remove these you will have to make a match with them two times. Remove the chains by making one match with them. Boards are removed by making matches next to them.

Wild West Chase - Level 20

Wild West Chase – Level 20

Level 21 – 30

Level 21

– Remove the chips with the wooden background by forming Chains and using less than 100 moves. This level also has boards on some tiles. Remove these by making a match next to them.

Wild West Chase - Level 21

Wild West Chase – Level 21

Level 22

– This level requires you to shoot at the Bandits attacking you. The bandits will appear randomly on the screen. Shoot by clicking on a bandit whenever you see one.

Wild West Chase - Level 22

Wild West Chase – Level 22

Level 23

– Remove the chips with the wooden background by forming Chains and using less than 100 moves. This level also has darker tiles. To remove these you will have to make a match with them two times. Remove the chains by making one match with them. Boards are removed by making matches next to them.

Wild West Chase - Level 23

Wild West Chase – Level 23

Level 24

– Remove the chips with the wooden background by forming Chains and using less than 100 moves. This level also has darker tiles. To remove these you will have to make a match with them two times.

Wild West Chase - Level 24

Wild West Chase – Level 24

Level 25

– Remove the chips with the wooden background by forming Chains and using less than 100 moves. This level also has darker tiles and double chains. To remove these you will have to make a match with them two times. Remove the chains by making one match with them. Boards are removed by making matches next to them.

Wild West Chase - Level 25

Wild West Chase – Level 25

Level 26

– Remove the chips with the wooden background by forming Chains and using less than 100 moves. This level also has darker tiles. To remove these you will have to make a match with them two times.

Wild West Chase - Level 26

Wild West Chase – Level 26

Level 27

– Find the 12 Hidden Objects in this scene to complete the level.

Wild West Chase - Level 27

Wild West Chase – Level 27

Level 28

– Remove the chips with the wooden background by forming Chains and using less than 100 moves. This level also has darker tiles. To remove these you will have to make a match with them two times. Boards are removed by making matches next to them.

Wild West Chase - Level 28

Wild West Chase – Level 28

Level 29

– Remove the chips with the wooden background by forming Chains and using less than 100 moves. This level also has darker tiles and double chains. To remove these you will have to make a match with them two times.

Wild West Chase - Level 29

Wild West Chase – Level 29

Level 30

– Remove the chips with the wooden background by forming Chains and using less than 100 moves. This level also has darker tiles and double chains. To remove these you will have to make a match with them two times. Single chains can be removed by making a match with them one time.

Wild West Chase - Level 30

Wild West Chase – Level 30

Level 31 – 40

Level 31

– Remove the chips with the wooden background by forming Chains and using less than 100 moves. This level also has darker tiles and double chains. To remove these you will have to make a match with them two times. Boards are removed by making matches next to them.

Wild West Chase - Level-31

Wild West Chase – Level-31

Level 32

– This level requires you to shoot at the Bandits attacking you. The bandits will appear randomly on the screen. Shoot by clicking on a bandit whenever you see one.

Wild West Chase - Level 32

Wild West Chase – Level 32

Level 33

– Remove the chips with the wooden background by forming Chains and using less than 100 moves. This level also has darker tiles and double chains. To remove these you will have to make a match with them two times. Boards are removed by making matches next to them.

Wild West Chase - Level 33

Wild West Chase – Level 33

Level 34

– Remove the chips with the wooden background by forming Chains and using less than 100 moves. This level also has darker tiles and double chains. To remove these you will have to make a match with them two times. Boards are removed by making matches next to them.

Wild West Chase - Level 34

Wild West Chase – Level 34

Level 35

– Remove the chips with the wooden background by forming Chains and using less than 100 moves. This level also has darker tiles. To remove these you will have to make a match with them two times. Boards are removed by making matches next to them.

Wild West Chase - Level 35

Wild West Chase – Level 35

Level 36

– Remove the chips with the wooden background by forming Chains and using less than 100 moves. This level also has darker tiles and double chains. To remove these you will have to make a match with them two times. Boards are removed by making matches next to them.

Wild West Chase - Level 36

Wild West Chase – Level 36

Level 37

– Find the 12 or more Hidden Objects in this scene to complete the level. If there is a number in parentheses next to an object in the list, you will have to find that many of it.

Wild West Chase - Level 37

Wild West Chase – Level 37

Level 38

– Remove the chips with the wooden background by forming Chains and using less than 100 moves. This level also has darker tiles and double chains. To remove these you will have to make a match with them two times. Boards are removed by making matches next to them.

Wild West Chase - Level 38

Wild West Chase – Level 38

Level 39

– Remove the chips with the wooden background by forming Chains and using less than 100 moves. This level also has darker tiles. To remove these you will have to make a match with them two times. Boards are removed by making matches next to them.

Wild West Chase - Level 39

Wild West Chase – Level 39

Level 40

– Remove the chips with the wooden background by forming Chains and using less than 100 moves. This level also has darker tiles. To remove these you will have to make a match with them two times. Boards are removed by making matches next to them.

Wild West Chase - Level 40

Wild West Chase – Level 40

Level 41 – 50

Level 41

– Remove the chips with the wooden background by forming Chains and using less than 100 moves. This level also has darker tiles. To remove these you will have to make a match with them two times. Boards are removed by making matches next to them.

Wild West Chase - Level 41

Wild West Chase – Level 41

Level 42

– Find the 12 Hidden Objects in this scene to complete the level.

Wild West Chase - Level 42

Wild West Chase – Level 42

Level 43

– Remove the chips with the wooden background by forming Chains and using less than 100 moves. This level also has darker tiles and double chains. To remove these you will have to make a match with them two times. Boards are removed by making matches next to them.

Wild West Chase - Level 43

Wild West Chase – Level 43

Level 44

– Remove the chips with the wooden background by forming Chains and using less than 100 moves. This level also has darker tiles and double chains. To remove these you will have to make a match with them two times. Boards are removed by making matches next to them.

Wild West Chase - Level 44

Wild West Chase – Level 44

Level 45

– Remove the chips with the wooden background by forming Chains and using less than 100 moves. This level also has darker tiles. To remove these you will have to make a match with them two times. Boards are removed by making matches next to them.

Wild West Chase - Level 45

Wild West Chase – Level 45

Level 46

– Remove the chips with the wooden background by forming Chains and using less than 100 moves. This level also has darker tiles. To remove these you will have to make a match with them two times. Boards are removed by making matches next to them.

Wild West Chase - Level 46

Wild West Chase – Level 46

Level 47

– Find the 12 or more Hidden Objects in this scene to complete the level. If there is a number in parentheses next to an object in the list, you will have to find that many of it.

Wild West Chase - Level 47

Wild West Chase – Level 47

Level 48

– Remove the chips with the wooden background by forming Chains and using less than 100 moves. This level also has darker tiles. To remove these you will have to make a match with them two times.

Wild West Chase - Level 48

Wild West Chase – Level 48

Level 49

– Remove the chips with the wooden background by forming Chains and using less than 100 moves. This level also has darker tiles and double chains. To remove these you will have to make a match with them two times.

Wild West Chase - Level 49

Wild West Chase – Level 49

Level 50

– Remove the chips with the wooden background by forming Chains and using less than 100 moves. This level also has darker tiles. To remove these you will have to make a match with them two times. Boards are removed by making matches next to them.

Wild West Chase - Level 50

Wild West Chase – Level 50

Level 51

– Remove the chips with the wooden background by forming Chains and using less than 100 moves. This level also has darker tiles and double chains. To remove these you will have to make a match with them two times. Boards are removed by making matches next to them.

Wild West Chase - Level 51

Wild West Chase – Level 51

Level 52

– Find the 12 Hidden Objects in this scene to complete the final level.

Wild West Chase - Level 52

Wild West Chase – Level 52

Congratulations! You have reached the end of the Wild West Chase Walkthrough. If you found this gaming guide to be helpful, go to our blog and check out some more.


For more great tips and tricks, visit our blog!


The Wild West Chase Walkthrough is meant as a guide and does not contain cheats, hacks or serials.

The post Wild West Chase Walkthrough appeared first on GameHouse.
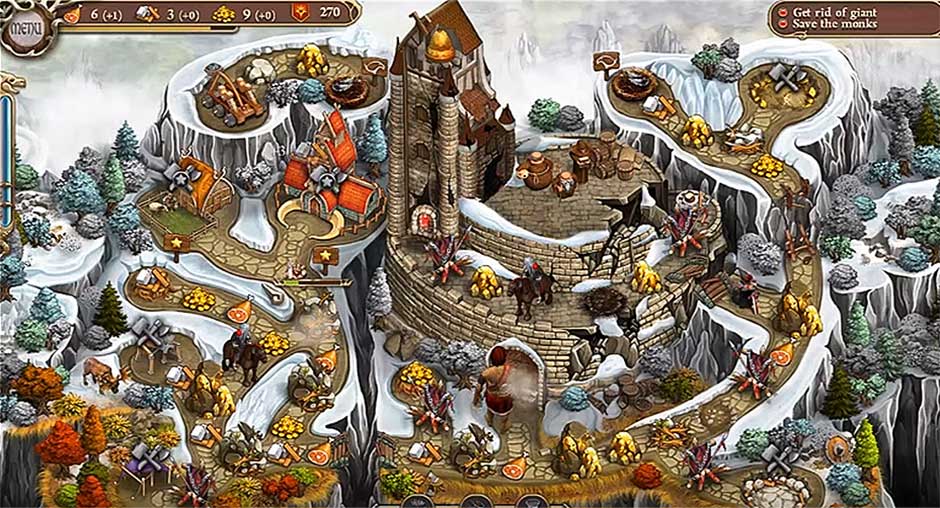
Game of Stones Walkthrough

$
0
0

The ever popular bubble shooter game is back with a punny new name – Game of Stones. This guide explains the basics and provides some tips and tricks for completing the game.

Contents

Game of Stones Walkthrough

Basic gameplay guide

As explained by the opening cartoon, you are an apprentice wizard that accidentally got teleported to a dangerous location instead of the simple exam site. Now, you must fend off approaching creatures by connecting three or more blocks of the same creature.

Game of Stones - Connecting Blocks

Game of Stones – Connecting Blocks

The game has eighty levels of block smashing fun, divided into groups of ten levels. These groups are laid out on a board similar to Candy Crush Saga and games like it.
Completion of each level in the game results in the awarding of one of the eighty crystals needed to return home, along with a rating of one, two, or three stars. The exact star count depends on the number of moves made, not the time taken to complete it.
Completion also rewards a player with a score based on the number of blocks destroyed, with a multiplier based on the star rating. Gold equal to about 15% of the final score is then awarded to the player. The only apparent purpose of gold is to complete an achievement.

Game of Stones - Map

Game of Stones – Map

The blocks are color coded for ease of play. Jack-o-Lanterns are orange, skeletons light blue, etc. Each of the block types are drawn with a cute, goofy little face. On most levels, once a block type has been cleared off the board, that block type won’t appear for the rest of the game.

There are always two blocks available to the player- one the hands on the game board, and one in the center at the bottom. Moving the mouse moves the hands across the screen, and left clicking releases the block into the column it is on. Right clicking swaps the block in the hands for the block shown at the bottom.

Each block fired that does not break any blocks will remove a block from the counter at the top left until the skull starts glowing. When the counter runs out, a new row of blocks will be added in spots that start glowing when the skull does. Some levels have solid stones that don’t allow a new row of blocks to be added in parts of the board.

There are some alternate block types used in the game. Ice blocks won’t break unless the block above them does, while chalices “pop” if the block beneath them is broken (and will pop if they are added to a new row with no block below them). There are also stones on some levels that prevent new blocks from appearing in those columns

Game of Stones - Chalices

Game of Stones – Chalices

The other slots across the bottom are the spells, which function like cheats and transform a block into a useful effect. The Fireball is unlocked when reaching level 11, and blasts away a group of blocks. The Vine is unlocked at 21 and eliminates the targeted block in spite of any obstacles.

Game of Stones - Fireball

Game of Stones – Fireball

The game also includes a number of achievements. Many of these fall into the usual categories- complete this many levels, use that spell so many times, etc. A majority of the achievements will be completed by playing through the game normally.

Game of Stones - Achievements

Game of Stones – Achievements

Tips and Tricks

There are some tricks that make the game easier to complete, as well as making it easier to achieve that perfect score.

The Usual Bubble Shooter/Match 3 Tips
* Keep in mind the next block that will be available, and try to clear a path for it.
* Blocks don’t have to land directly on top of a matching block- they can land next to a block as well. Aiming between separated sets of matching blocks is especially effective.
* Blocks “fall” up, and a new match will also break, so try to create combos when breaking blocks.

* Eliminate specific block types whenever possible. This reduce the chances of getting a useless block.
* When trying to finish a level for the first time, focus on the blocks closest to the bottom of the screen when possible to avoid a loss.

Game of Stones Specific Tips
* There is no timer. The addition of a new row and the star rating depend entirely on the number of blocks fired. Take your time and think about your moves.
* Because you can switch freely between the two block shown, it is sometimes best to fire blocks out of order. Sometimes the “next” block will set up the block currently available.
*When working around ice blocks, it’s best to eliminate blocks in the columns next to them, then place a matching block next to the block above the ice block.

Game of Stones - Ice Blocks

Game of Stones – Ice Blocks

* The score multiplier is x6 for a three star rating and x3 for a two star rating. You’ll get more points and more gold finishing a level quickly than you would extending the game. The scroll at the bottom right will list the maximum number of moves for each rating, and the wand at the top right functions as a rating bar for tracking the rating in-game.
* It is not necessary to complete the entire game at once, as the game saves your progress every time you complete a level.

Spell Use
Spells recharge over time, so don’t be afraid to use them. Because of the no-break counter, it’s best to use them when you have a pair of blocks that won’t create a match.
Aim for blocks sitting by themselves with the Vine or groups of jumbled block types with the Fireball. Those groups tend to reduce the counter quickly by requiring multiple no-break shots to clear, but spells eliminate these blocks and don’t reduce the counter.

Notable Early Levels
Level 5 introduces the counter and adding new rows. It intentionally adds new rows quickly, but the blue skeletons can be eliminated quickly. Once they’re eliminated the pumpkins are very easy to clear.

Levels 9 and 10 are the first to have ice blocks, but leave plenty of space to eliminate blocks. Just remember to match sideways. Level 11 completely blocks off the board with ice blocks, but also introduces the Fireball. Aim for the middle to eliminate almost all the ice blocks.

Level 14 is the only one in the first 25 to have chalices. The goal is to break 20 chalices, not clear the screen, and clearing a block type won’t eliminate that type on this level. Focus on breaking the blocks below the chalices as quickly as possible and eliminating the tallest columns. This will usually eliminate the ice blocks.

Level 16 fills almost an entire row in the center of the board with ice blocks. Break through the opening in the middle of that row as soon as possible.

Levels 17 and 18 introduces column blocking stones. There’s a layer of ice blocks between the bottom of the board and the breakable blocks on each level, and the spells aren’t charged yet. Be sure to place the first blocks in the columns with the blocking stones, and in places where they’ll be touching matching blocks once the new rows are added so they’ll be easier to break.

Special Achievements
While most of the achievements will be completed through normal gameplay, some will require special effort.

Earn three stars on eighty levels- that’s a three star rating on every level in the game. This will require patience, repetitive completion of levels, and use of every trick listed here and learned by playing through the game. In the same vein is “earn two hundred stars,” which would require earning forty 3 star ratings and forty 2 star ratings, and “earn fifty 2 star ratings.”

Collected five chalices with a single shot- combos are key. Firing a shot that properly re-positions a series of blocks should complete this achievement.

Earn a total of 25,000 gold- playing one level very well generally earns about 200 gold, but to earn 25,000 gold you need to earn 300+ gold per level. It will take more than just one playthrough to earn this achievement, but should occur naturally when chasing other completion achievements.

Used four spells in a single level- this achievement is poorly worded, and not to be confused with “use five spells in a single level.” This is awarded four using four different spells in one level, while the other one is awarded for using a spell five times in one level. Using all four types of spell should happen during normal gameplay.

Game of Stones - Gameplay

Game of Stones – Gameplay

Destroyed a total of 300 stones with magic- this one should be completed through normal play, but it depends on your playstyle.

With this guide, you are well on your way to solving the puzzles contained in Game of Stones without using cheats. Be sure to check out more of our walkthroughs here at GameHouse!


For more great tips and tricks, visit our blog!


The Game of Stones Walkthrough is meant as a guide and does not contain cheats, hacks or serials.

The post Game of Stones Walkthrough appeared first on GameHouse.
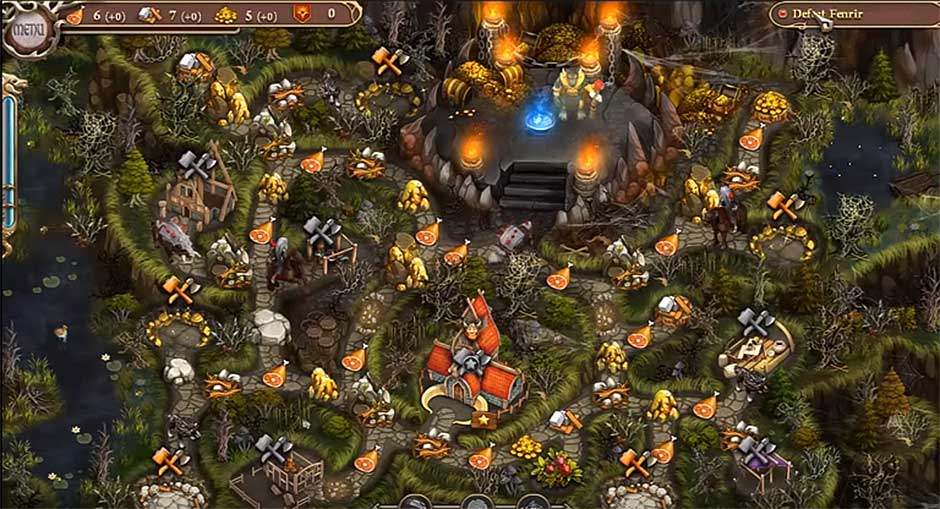
Mystika 2 – The Sanctuary Walkthrough

$
0
0

In Mystika 2 – The Sanctuary, the village of Lumina is in trouble. Rikou, the magic tree, has been struck by lightning and can no longer protect the village. The world is falling into darkness and it’s up to you to help Alrik the mage save it. Play through 200 match-3 levels and over 10 hidden object puzzles to save up enough money to restore the sanctuary to its former glory. These tips and tricks will help you defeat challenging puzzles to move forward and save the day.

Contents

Mystika 2 – The Sanctuary Walkthrough

Getting Started

  • Upon starting the game, it will ask for your name and present a brief tutorial explaining how to navigate throughout the game.
  • Choose between Time and Relax modes. In Time mode you must race against the clock to complete your objective, such as clearing all the tiles from the screen. In Relax mode you can complete the levels with unlimited time. After starting a game, choose Options on the main menu to switch between Time and Relax modes.
  • When playing a match-3 level you will see your instructions and any special objectives listed at the top of the screen. In Time mode the timer will be represented by a slowly draining potion vial on the right side. For hidden object puzzles, the list of hidden items along with the Hint button will appear at the bottom of the screen.
  • The Options menu, located in the bottom left corner, allows you to turn tutorial mode on and off, exit or enter full-screen play mode, and turn Time mode on and off.
Mystika 2 The Sanctuary

Mystika 2 The Sanctuary

How to Play

Match-3

  • Create a match of three or more of the same item by dragging the first item onto the second to swap them. You can also click the first item and then the second. Items must be adjacent to each other and cannot move diagonally.
  • Look for chances to make chains longer than three, such as four items as a row. This clears the board faster and earns more points.
  • Focus on yellow tiles first as these must all be cleared to finish the level. Some items may be trapped in ice or chains and you will want to focus on those items at the beginning of the level since they are the hardest to clear.
  • If you have trouble clearing an area, try focusing on combos at the bottom of the screen. Clearing these allows the entire puzzle to shift downward and may open up new combos in the area where you’re stuck.
  • Special items such as bombs, rockets, and exploding vials appearing from time to time. Double-click the item to activate its special power and clear extra tiles.
  • As you progress through the levels, you will encounter different tile types that require special moves to break. Yellow tile levels require you clear all yellow tiles by creating a match on top of them to complete the level. Chained tiles and ice tiles require making a match using that item to break the block, but the chained or iced item cannot be moved. You must move the items around it to form a combo. The top of the screen will tell you the objective for each level.
Mystika 2 The Sanctuary - Match

Mystika 2 The Sanctuary – Match

Counter Challenge

  • Counter challenge levels work the same as match-3 levels but you have a limited number of moves. You can see how many moves you have left at the top of the screen.
  • At first you will have several extra moves and can clear the puzzles easily, but as the game continues the counter challenge levels will have fewer moves and require strategy to complete.
  • When you find yourself stuck on a level, note what areas take the most moves to clear or if a certain area is often uncleared at the end of the level. Focus on these areas first before clearing the rest of the board. It can help to write down various combinations of moves you have tried so you can make sure you are trying different combinations to defeat tricky levels.
Mystika 2 The Sanctuary - ClearTheBoard

Mystika 2 The Sanctuary – ClearTheBoard

Hidden Object
Hidden object puzzles allow you to collect extra money to spend restoring your Sanctuary.

  • The list of items you’re searching for appears at the bottom of the screen. Each item will be crossed off once it has been collected.
  • Certain objects, such as “Fruits”, may require you to find more than one of that item. If after selecting an item it disappears from the screen but is not crossed off the item list, look for an additional item that fits this category. The items likely won’t be identical.
  • On the bottom left hand side of the screen is the Hint button. After using a hint it will refill over a period of 30 to 45 seconds. Save your hints for the end of the level when you simply cannot find the last object, or when you have a word on your object list that you don’t recognize.
Mystika 2 The Sanctuary - HiddenObject

Mystika 2 The Sanctuary – HiddenObject

Restoring the Sanctuary
Between levels you’ll return to the home screen where you can use your coins to restore parts of the Sanctuary. At the bottom of the screen you’ll find items that can be restored. Hover over an item to see its cost and click to purchase it if you have enough money. After all four items are restored a new set of four items will appear.

Trophies

Trophies are earned by completing certain objectives throughout the game. View your trophies from the main screen by clicking Trophies at the top of the screen.

  • The first category of trophies is awarded for earning money. Reaching different amounts of money in the game unlocks these trophies.
  • Using special items, like Rockets and spells, unlocks certain trophies. Be sure to use as many special items as possible in the level, even if you don’t need them all to complete it.
  • Satisfaction trophies are unlocked as you restore various parts of the Sanctuary. The satisfaction meter can be viewed at the top of the main screen between levels.
Mystika 2 The Sanctuary - Rocket

Mystika 2 The Sanctuary – Rocket

Tips & Tricks

  • Creating matches with the coin objects on a match-3 level will earn you bonus coins to use toward restoring the Sanctuary.
  • Avoid clicking too rapidly on Hidden Object levels. Several wrong clicks in a row will cause you to lose money. If you click an object and it wasn’t on the list, wait a few seconds before clicking another object to ensure you aren’t penalized for rapid clicking.
  • If you find yourself stumped on a difficult level, you can select the Skip button to continue on to the next puzzle and return to your current puzzle later.
  • When using the Rocket special item, aim it toward other special items. The Rocket hitting them will cause a chain reaction and they will also trigger.
  • Creating two matches at the same time on a match-3 level will cause a special item to appear. The most common way to achieve this is by searching for an “L” shaped match where there are two identical items stacked vertically and two horizontally with the corner of the “L” missing. Move your item into the corner piece to complete the “L” shape.
  • In Time mode keep an eye on the timer on the right side of the screen. It will begin to make a ticking noise when you are almost out of time.


Congratulations, you’ve completed the Mystika 2 – The Sanctuary walkthrough!


If you enjoyed this game, you may also like Jewel Match Twilight. View our Jewel Match Twilight walkthrough to learn more about this game.


The Mystika 2 – The Sanctuary Walkthrough is meant as a guide and does not contain cheats, hacks, or serials.

The post Mystika 2 – The Sanctuary Walkthrough appeared first on GameHouse.
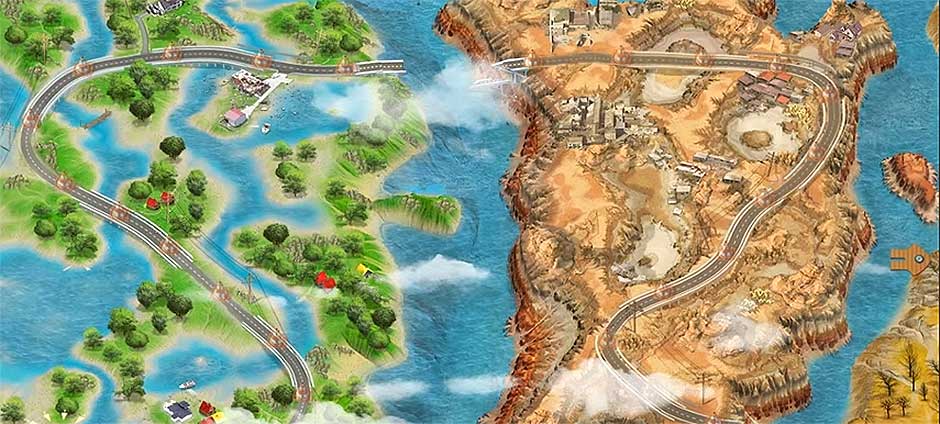
Around the World in 80 Days Walkthrough

$
0
0

Phileas Fogg was a man with a dream: to see the World. He was confident that he could, with the power of aerial balloon flight, but was met only with derision when he shared his dream with others. Determined to prove himself, Fogg made a wager: if he could travel Around the entire World in only 80 Days, he would win the post of Mr. Stuart, the Chairman.

So begins Around the World in80 Days, a match-3 puzzler that has you join Fogg in his quest to circumnavigate the globe by air. Visit exotic locales and collect trinkets from your destinations, all the while matching colored gems in groups of three or more. This Around the World in 80 Days Gameplay Walkthrough will contain information on the story and characters of the game, a guide to the rules, a level Walkthrough, and some tips and tricks to help you get the most out of your trip around the World!

Contents

Gameplay Breakdown

Around the World in80 Days is a match-3 puzzle game. This means the object of the game is to match colored gems in groups of three or more to earn points. Matches can be made horizontally or vertically, and can only be made by swapping the positions of two touching gems. When gems are matched, points are earned, with more points being given for higher numbers of matched gems. Gems also disappear from the board when matched, causing more gems to fall from the top of the screen and take their place.

In some missions there will be additional goals, like obtaining certain objects. Matching gems below the objects will cause them to fall down the board, automatically adding them to your inventory. in addition, making matches quickly will increase the amount of points received with a multiplier, and making matches that result in subsequent extra matches from gems falling to take the place of previously matched gems will grant even more extra points.

Around the World in 80 Days - China

Around the World in 80 Days – China

Characters

-Phileas Fogg: A man of science, the young Fogg was often ridiculed for his obsessions, and in the thirty-odd years he’s spent tinkering and inventing, little has changed. Now, seeing an opportunity to obtain the coveted title of Chairman and redeem himself in the eyes of his peers, Fogg is prepared to embark on a journey no other soul has made.

-Jean Passepartout: A gentleman since birth, the squirmy Frenchman is most comfortable on the ground, preferably Ina nice overstuffed chair. Consequently, it comes as some surprise to him when his first task as Fogg’s new assistant is to gather supplies for a hot air balloon flight! Some suspect that there is more to Passe-partout than he lets on. It may not be coincidence that he ended up assisting Fogg: he may have delicate business in another country…

Around the World in 80 Days - Characters

Around the World in 80 Days – Characters

-Mr Stuart: For as long as humans have had legs, they have needed chairs for which to rest them. And as long as there have been chairs, there has been a Chairman. Mr Stuart has been the Chairman for a very long time. He has seen much, and his eyes are weary from the job. Though he has absolutely no faith flogging’s absurd journey, a part of him desperately wants him to succeed, for the role of Chairman has become a burden, and Mr. Stuart’s soul is crying to be relieved of it.

-Jules Verne: A French novelist from the 19th century, Jules Verne is most well known for writing Around the World in80 Days, Journey to the Center of the Earth and 20,000 Leagues Under the Sea, but he’s written several more novels, a few of them sharing the theme of hot air balloon rides. Considered the father of science fiction, a recently uncovered lost novel of his called Paris in the Twentieth Century accurately predicted what the modern World would look like. He certainly was a character!

Level Walkthrough

This is a Walkthrough of a typical level in Around the World in80 Days. in this level, the goal is to match gems until two items, the two parts of Fogg’s journal, are brought to the bottom of the screen and collected. At the start of the match, swap the yellow gem near the top-right of the board with the green gem directly to the right. This will cause a four-gem match. Next, swapping a blue gem near the bottom with the green gem above it will cause a three-gem match, making one of the two necessary items drop further down the board and closer to your inventory. More gems fall in place, but they end up matching quite a few times, causing a torrent of matching gems and a plethora of points.

Around the World in 80 Days - France

Around the World in 80 Days – France

To the right of the first item, towards the bottom-right of the board, is a green gem that when swapped with the yellow gem below it will cause a four-gem match, dropping the item into your inventory. One down, one to go! Swapping a green tile with a blue tile below it on the left side caused another four-gem match, and the second item drops a little further down. Then, swapping a blue and green gem pair a bit more to the left causes an innocuous three-gem match, followed by a massive T-shaped match of green gems, granting more points and dropping the second item closer to the bottom.

A pairing of yellow and green gems toward the center of the bottom of the board need only be switched vertically to cause a double three-gem match, as well as some extra bonus matches from the falling gems coming from the top of the board. Swapping a red gem with a blue gem near the right of the second item causes another series of three-gem matches, and opens up another potential four-gem match of yellow gems on the bottom. Finally, swapping the item with a red gem below it places it at the bottom of the map, adding it to your inventory and completing the level with a bonus three-gem match from the red gem.

Around the World in 80 Days - Egypt

Around the World in 80 Days – Egypt

Tips and Tricks

~ Try to get matches of greater than three whenever you can. The more gems you match in one swap, the more points you earn!

~ You should also plan out subsequent turns in advance so you can make multiple matches in quick succession. This increases your multiplier, giving you more points.

~ All rounds are timed. You can see how much time is remaining Ina level by checking the stopwatch in the top-left corner of the game screen. Completing the level with more time left on the clock will give you bonus points, so try and hurry through the level!

~ Though it may be difficult to set up, chaining multiple matches with one swap is a great way to earn a bunch of extra points. At the end of every level it will show you how many subsequent matches you were able to make off of one gem swap: keep it high, and try and get it higher!

~ When traveling by hot-air balloon, it is advised to pack light. While it helps to have some weighted objects to throw over incase extra altitude needs to be gained, that role can usually be delegated to sandbags.

Around the World in 80 Days - Journey

Around the World in 80 Days – Journey

Hot air balloons have fallen out of favor in recent years. The spectacle and scientific marvel has been overshadowed by the blimp and the zeppelin, and the convenience has been overshadowed by the common commercial airliner. This means hot air balloons have been deemed luxuries, or the pursuits of silly people with too much free time. However, some of the most impressive, the most awe-inspiring, and the most important discoveries were made by silly people with too much free time, and the hot air balloon enthusiast Phileas Fogg is no exception.

The journey he makes, the one you must aid him in if he wants to of complete it, is not done for honor or glory. It’s not done for status, for wealth or for power, even if completing this journey will bring about all those things. No, the reason Fogg pursues this epic task is for science: to push the limits of human ability, and to learn from the natural World by harnessing its power. Matching gems way up there in the cold stratosphere may be lonely, thankless work, but time will redeem you when your names are placed in the history books as the mavericks who dared to do the impossible. Now go! Fogg needs you.


Congratulations! You’ve completed our Around the World in 80 Days Gameplay Walkthrough! For more great tips and tricks, visit our blog!


The Around the World in 80 Days Gameplay Walkthrough is meant as a guide and does not contain any cheats, codes or serials.


The post Around the World in 80 Days Walkthrough appeared first on GameHouse.

Weather Lord – Following The Princess Walkthrough

$
0
0

Use your control of the weather elements to save the Princess and her kingdom with the assistance of this Walkthrough for Weather Lord – Following the Princess. You are the hero in this story as you battle your way through strange lands; completing tasks, helping villagers, growing crops, and rebuilding structures.

Contents

General Tips & Tricks

Game Overview
As you progress through the different levels of gameplay, you can look back to these tips and tricks to help you earn specific awards of achievement for completing all of the requirements to advance. Use your weather resources to grow crops, gather items, and help to advance the ravaged villages. At the end of each level, an achievement seal will appear announcing the results of your play. This includes such statistics as:

  • Level completed
  • Medal earned
  • Time taken
  • Resources collected
  • Buildings constructed
  • Enemies eliminated
  • Option to restart or continue


Basic Gameplay
The basic play for this game can be done with just the mouse of your computer or tap of your finger on your touchpad. Each individual level has requirements or Goals that must be met in order to advance. The concept is to select the item that you would like to activate, and then either collect the item or utilize it where it is needed. An example of this is when Wood is requested. It is necessary to Chop Down the Trees to create the Wood for the project. Collect the items on the screen and Deposit them in the Wagon for use later. In the event that you are stuck during the game, you can refer back to this guide of hints to help you anywhere along your way.

General Tips
The Goals for each level are displayed on the bottom of the screen. When a Green Check Mark appears on the screen, it is an indication of that item being ready for interaction by building, collecting, or tending. The Items Collected are displayed at the top of the screen as well as the Timer for the items. Earning achievements and extras can be done by following the on-screen instructions for each level. Many actions are needed to complete some tasks, so planning is essential for quick unlocks to new levels of gameplay. It is a good idea to always have at least 50 Gemstones on hand for needed recharging.

Playing Tips and Tricks
There are additional extra tips that may help guide you through some tough situations with information such as:

  • Earn Extra Workers when you build Houses.
  • The Rainbow or the Thunderstorm can be used when the path is clear and theAltar is charged with 50 Gems.
  • Extra Resources are not transferred to the next level of gameplay.
  • Complete levels faster by earning Bonuses. Completed levels are awarded Gold Medals for speedy gameplay.

Image Color Key

  • Orange blocks = repairing or building
  • Blue circles = items to collect
  • Yellow blocks = use weather power
  • Green circles = renewable resources

Weather Lord – Following The Princess Walkthrough

Level 1 – 10

Level 1: Wagon Worries

The goal of this level is to Repair the Wagon so that you can reach the Tower faster. Collect the Food to open the Crate. Use your Rain power to water the Crop. Build a House and gain a helping hand. This will require the collection of Food and will award more Wood. Continue on the path and advance to the Wagon where you can use your collected resources to repair it.

Level 2: Feed The People

The goal is to use the Sun to dry the Swamps and the Rain to Water the Crops to feed the residents. Travel around the pathway to collect Wood, fill Holes, and pick up Coins. After collecting items, deliver them to the Wagon. You can utilize them when the need arises.

Level 3: The Grumpy Ghosts
Battle the angry Ghosts on this level. Use your Sun power to disable the Ghosts and Wind to blow away the Webs. The task here is to Rebuild the Ghost Houses, construct a Sawmill, and collect an Artifact. This will require WoodFood, filling Holes, harvesting Crops, collecting Coins, and repairing Bridges. Repairing these items will allow you to reach the Treasure Chest and receive the Axe Artifact.

Level 4: Forlorn Fairies

Using the Rainbow will heal the sad Fairies. The Goals here include giving Gold to the Frogs and Charging the Portal with Gems. Repair the Bridge and clear the Pathway to collect FoodWood, and Coins. Your power over the RainSun, and Wind will come in handy here.

Weather Lord - Following The Princess - 4

Weather Lord – Following The Princess – 4

Level 5: Taming The Thunderstorm

Utilize the SunRainWindRainbow and Thunderstorm powers to continue on your quest. Find an Artifact, destroy the Barricades, and activate the Buttons to remove the Columns blocking the Pathway by Stepping On Them. Once you have control of the Thunderstorm, you can destroy the Barricades. The Treasure Chest contains the Wind Staff Artifact, which makes your Wind power restore 40% faster.

Level 6: Swampy Sadness

On this level the Princess is locked in a Tower and more Sad Fairies need your Rainbow powers. To complete this area, Drain the Great Swamp by repairing the Weather Booster. On this level you will need to build a Grain Mill, a Sawmill, and a Forge. Continuing construction upgrades on the House will gain you more Workers to reach your Goals in record time.

Level 7: Chasing Goblins

The Goblin Enemies have taken over and it is up to your Wind power to Demolish their Lairs. Use your WindSun, and Rain powers to collect the necessary WoodGrainCoins and Gems. Construct and update a House for Additional Workers. Build a Grain Mill, Sawmill, and a Forge on this level.

Weather Lord - Following The Princess - 7

Weather Lord – Following The Princess – 7

Level 8: Super Sizzling Sunlight

Collect the Rake Artifact, drain the Swamp, and destroy the Enemies and their Enemy Forts to advance. Call on your weather powers of the SunWindRainbow, and Rain to be rewarded the Sun Staff. This Sun Staff will restore your Sun powers 40% faster. Use the Wind to destroy the Enemies that appear.
Level 9: Sanctuary Stones

On this level, your power of the Sun will be your secret weapon against the Frogs that have created a mess in the Swamp. Collect GrainWoodCoins, and Gems to construct a HouseGrain MillsSawmillsForges, and Jewelry Shops. Clear the Swamp and Open the Portal to travel to your next adventure.

Level 10: Family Feuding

Rely on your command of the Rainbow for healing the Fairies and fix the Springs here. Collect, create, and build with your supply of WoodCoinsGems, and Grain. Your Rake, Axe, and power of the Sun will have a 40% increase in power and speed in recharging. Your power over Thunderstorms will destroy the Barricades. Using your Rainbow on the Fairies will result in the defeat of your Evil Uncle. Follow the strategic hints in this walkthrough to collect resources, build three buildings, and kill six enemies on this level before moving on.

Weather Lord - Following The Princess - 10

Weather Lord – Following The Princess – 10

Level 11 – 20

Level 11: Well Wishes

Repair and Fill the Well With Water. Your power of the Sun and Wind Staff will replenish 40% faster when on this level. Use your Axe and Rake to increase your workers speed. WoodGrainCoins, and Gems are valuable collectables. Use the Wind on enemies. Topple the Barricades with Thunderstorms. Construct a HouseGrain MillsSawmills, Forges, and Jewelry Shops.

Weather Lord - Following The Princess - 11

Weather Lord – Following The Princess – 11

Level 12: Frightening Fixes

The Ghosts are not happy with their broken Homes. Use the WindSun, and Rain to quickly repair the damaged sites; provide Wood, Grain, Water, and secure your passage onward to save the Kingdom of Lorraine and the Princess. Use your power of the Sun to Charge the Tower to destroy Enemies as they appear. Faster level times equal a higher end ranking (gold, silver, or bronze), and more Bonus Points. With the aid of these hints in this walkthrough, you will earn a Shovel on this level.

Level 13: The Foggy Face-off

Enlist in the help of Shamans to defeat the Evil Demon Ifrite and Princess Olivia’s Uncle. They are hiding within a thick and mysterious Fog. Command the Wind to send the strange Fog far away. Collect GrainWoodCoins, and Gems on this level. Use your forces of the SunWindThunderstorms, and Rain to power your way through this level.

Level 14: Troll Trouble

The Tower Staff is your Goal on this level. Use the Thunderstorm to defeat the Troll and break the Thickets for hidden items. A strong Wind will defeat the Troll. Collect Food, WoodCoins, and Gems on this level.

Weather Lord - Following The Princess - 14

Weather Lord – Following The Princess – 14

Level 15: Water Woes

Fill the Well and rescue the Residents as you repair Houses on this level. Use the Sun, WindThunderstorms, and Workers to repair the Well and the Houses to complete this level. As you restore the Houses, the land becomes increasingly healthy as you collect your WoodGrainCoins, and Gems.

Level 16: Undercover Trolls

Use your Thunderstorm resources to topple the Trolls and recover the Artifact. ThunderstormsRainSun, and Wind will ensure that nothing stops you from earning the Rain Staff. Clear yourself a pathway to the Treasure Chest and earn passage to the next level.

Level 17: Troll Overload

There are a multitude of nasty Trolls to defeat here. Use the Thunderstorm power to eliminate them and reach your supplies. It is best to work quickly, as these pesky Trolls are eating your Grain! Use the SunWindRain, and collectables to defeat these menacing monsters.

Level 18: Talking Troll

Eliminate the Trolls, Find the Artifact, and destroy the Enemies Homes. Use the Sun, Wind, and Thunderstorms to keep this level under control. Mastering this level will give you a reward of a Pickaxe.

Level 19: Buried Buttons

Open the Gate and operate the Buttons to complete this level. Sounds easy, however, there are a number of obstacles including FogTrolls, and repairs to take care of first. Use the WindSunThunderstorms, and Rain to prosper here.

Level 20: Gluttonous Goblin King

This level is overflowing with GrainWood, and Coins. However, the greedy Troll is not willing to share this bounty with his subjects. It is up to you to collect as much of the supplies as you can before the patrolling Trolls eat all of the bounty and steal all of your supplies! Use a combination of WindSunRainTwisters, and Thunderstorms to overcome this treacherous level.

Level 21 – 30

Level 21: Welling Up

Quickly fill the Well with Rain and demolish the Enemies Lair in this level. Use the powers of the SunRainWind, and Thunderstorms to overcome the obstacles in your way.

Level 22: Saving Spooky Shacks

On this mission you are to repair the damaged Houses and collect the Artifact. The Weather Scroll is the reward for fighting your way through these perils. Use all of your element powers and collect the supplies to repair the Ghost Houses to make short work of this level.

Level 23: Gravish Golems

It is battle time with the Golems as you work on filling the Well with Rain water. Keep the enemy at bay by demolishing their Lairs. Use your RainSunWind, and Thunderstorms to pass this area. Repair the Well and beware of the awaiting Enemies.

Weather Lord - Following The Princess - 23

Weather Lord – Following The Princess – 23

Level 24: Buttons and Bargains

Trading abilities are a valuable tool on this level. To complete this area it is necessary to Trade with a Merchant 20 times and uncover the Artifact. Use your wits and your natural weather powers to advance from here. You are awarded a Clover for overcoming this level.

Weather Lord - Following The Princess - 24

Weather Lord – Following The Princess – 24

Level 25: Turbulent Tower

Rely on the Rain and your Workers to demolish the Enemies Lairs and fill the Well. Enlist in extra Workers to help you keep up with the frantic speed of the available resources and materials on this level. The power of Wind is effective with the Tower here.

Level 26: Golem Grief

Fast Workers will make short work of the repairs to the houses on this level. Repair all of the Houses to advance. Thunderstorms and Rain are especially important on this level. Use all of your skills, including the SunRain, and Wind to defeat this area. This will allow you to freely travel out of the courtyard with your newly acquired Luggage.

Level 27: Golem Showdown

Inching ever closer to the ultimate fight, this showdown with the Commander of the Golems requires your command of all of your natural elements. To prevail, it will require the demise of twelve Golems and their Commander. Finish them off by destroying their Lairs.

Level 28: Clobbering Golems

Search this area for the Magic Lamp to aid your quest on this level. Use your power of the Sun and your inventory of supplies to take over the land from the enemy. The Shovel will prove to be particularly useful here. You will have to climb the Mountain to retrieve the Magic Lamp and trap the evil entity inside.

Level 29: Taking To The Skies

If fighting on solid ground weren’t enough, the battle is now taken to the skies. In this level you will construct a Hot Air Balloon with a supply of Food and Wood. Finish off the quest by paying the Shamans for their assistance. Use all of your available elements to get your bag of hot air off of the ground and past this level.

Weather Lord - Following The Princess - 29

Weather Lord – Following The Princess – 29

Level 30: Licked By A Lantern

Hurry through this level as Irite watches on eerily. Stay on your toes as he works up a ball of fire to destroy your Grain and slow your progress. Enlist more Workers as he continues his wrath on your buildings and the Kingdom. Great timing and an adventurous soul is necessary to coax this demon back into the Magic Lantern once and for all.

Congratulations! You’ve completed our Weather Lord – Following the Princess Walkthrough!


For more great tips and tricks, visit our blog!


“The Weather Lord – Following the Princess Walkthrough is meant as a guide and does not contain cheats, hacks or serials.’


The post Weather Lord – Following The Princess Walkthrough appeared first on GameHouse.
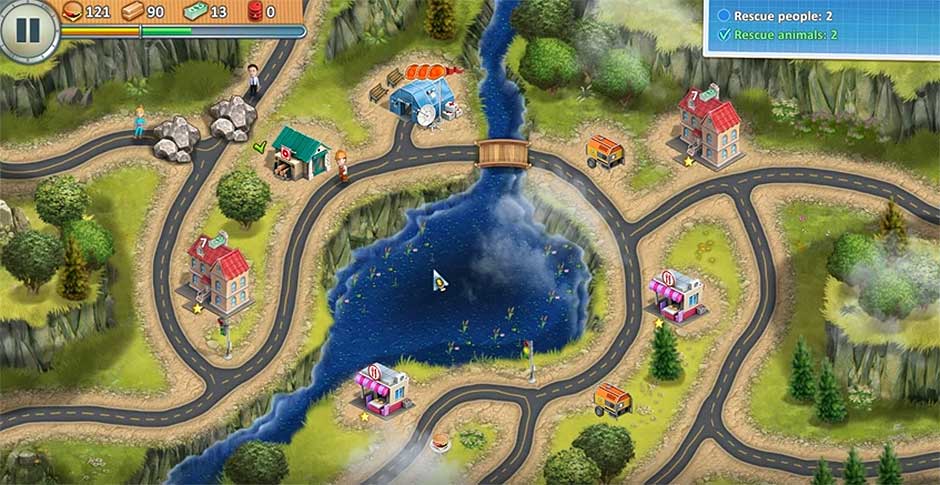
Viewing all 192 articles
Browse latest View live